Skip to content
DisclaimerTerms Of UseGDPR PolicyCookie Policy

easycookingbite

  • Home
  • Drinks
  • Appetizers
  • Dinner
  • Dessert
  • About
  • Contact
  • Privacy Policy
DisclaimerTerms Of UseGDPR PolicyCookie Policy

NO-ING-IMG

- 4 salmon fillets (6 ounces each) - 3 tablespoons soy sauce (low sodium) - 2 tablespoons honey or maple syrup - 1 tablespoon fresh ginger, grated - 2 cloves garlic, minced - 1 tablespoon sesame oil - 1 tablespoon rice vinegar - 1 tablespoon green onions, chopped (for garnish) - Sesame seeds (for garnish) You can swap honey for maple syrup if you want a vegan touch. Fresh ginger adds a bright taste, but you can use ground ginger if you have it. Just use less, as ground ginger is stronger. If you want lower sodium, look for low-sodium soy sauce. This keeps your dish tasty without too much salt. These swaps help you make this dish fit your needs while keeping it yummy. {{ingredient_image_1}} To make the perfect marinade, you need to mix some key ingredients. Start with 3 tablespoons of low-sodium soy sauce, then add 2 tablespoons of honey or maple syrup. Next, grate 1 tablespoon of fresh ginger and mince 2 cloves of garlic. Include 1 tablespoon of sesame oil and 1 tablespoon of rice vinegar. Whisk these together in a medium bowl until well combined. Now, it's time to coat the salmon. Take 4 salmon fillets, about 6 ounces each, and place them in a shallow dish. Pour the marinade over the fillets, making sure each piece is covered. Cover the dish and refrigerate for 30 minutes. This step lets all the flavors soak into the salmon. Preheat your oven to 400°F (200°C). This high heat helps the salmon cook evenly and keep it moist. While the oven heats, line a baking sheet with parchment paper. This makes cleanup a breeze! Once ready, place the marinated salmon fillets on the baking sheet, skin side down. Don’t forget to save the leftover marinade for later! Bake the salmon for 15-18 minutes. The fillets should flake easily with a fork when done. While the salmon bakes, take the reserved marinade and pour it into a small saucepan. Heat it over medium heat until it simmers. Let it cook for about 5-7 minutes until it thickens slightly. This reduces the marinade into a flavorful glaze. When the salmon is done, remove it from the oven. Drizzle the thickened glaze over the top of each fillet. For a lovely finish, garnish with chopped green onions and a sprinkle of sesame seeds. Your Ginger Soy Glazed Salmon is now ready to impress! To cook salmon just right, aim for a tender texture. The key is to bake it at 400°F (200°C). This heat cooks the fish evenly. For the best results, check for doneness by looking for flakes. Use a fork to gently pull apart the salmon. If it flakes easily, it's ready. Want to boost the flavor? Try adding spices like black pepper or a touch of red pepper flakes. Fresh herbs, such as cilantro or basil, can also add a nice twist. You can change the marinade too. Swap honey for maple syrup or try using orange juice for a citrus kick. Pair your salmon with fluffy jasmine rice or steamed veggies. This combo makes for a colorful plate. For a beautiful presentation, place the salmon on the rice. Drizzle extra glaze around the plate for flair. Top with green onions and sesame seeds for a tasty finish. Pro Tips Marinate Time: Allow the salmon to marinate for at least 30 minutes, but up to 2 hours for deeper flavor absorption. Check for Doneness: Use a fork to test the salmon; it should flake easily and appear opaque in the center. Glaze It Right: Drizzle the thickened glaze over the salmon just before serving to keep it shiny and flavorful. Serve with Sides: Pair the salmon with steamed broccoli or bok choy for a balanced and colorful plate. {{image_2}} Gluten-free options If you need a gluten-free dish, use tamari instead of soy sauce. Tamari is a great choice for those who avoid gluten but still want a rich flavor. It keeps the dish tasty without missing out on the soy sauce experience. Low-carb variations For a low-carb approach, skip the honey or maple syrup. Instead, use a sugar-free sweetener. This change keeps the glaze sweet without adding carbs. You can still enjoy all the great flavors of this dish. Adding citrus elements Want to brighten the dish? Add some citrus! Squeeze fresh lemon or lime juice into the marinade. You can even add orange zest for a sweet twist. This fresh flavor pairs well with salmon. Alternative sauces (teriyaki, miso) You can switch up the sauce for more variety. Try teriyaki sauce for a richer, sweeter taste. Miso paste also works well, giving a unique umami flavor. Just mix it into the marinade for a delicious change. After enjoying your Ginger Soy Glazed Salmon, store any leftovers in the fridge. Place the salmon in an airtight container. This keeps it fresh and tasty. Make sure to eat the leftovers within three days. The flavors will still be great, but the texture may change a bit. If you want to save the salmon for later, freezing is an option. Wrap each salmon fillet tightly in plastic wrap. Then, put the wrapped fillets in a freezer bag. Be sure to squeeze out as much air as you can. This helps prevent freezer burn. You can freeze the salmon for up to three months. When you're ready to enjoy your salmon again, safe reheating methods are key. One good way is to reheat it in the oven. Preheat the oven to 350°F (175°C). Place the salmon on a baking sheet and cover it with foil. Heat for about 10-15 minutes, or until warmed through. You can also use a microwave, but be careful. Heat it in short bursts to avoid drying it out. Enjoy your delicious salmon! The best way to cook salmon is by baking it. Baking keeps the fish moist and allows flavors to blend well. Preheat your oven to 400°F (200°C). Place marinated salmon on a lined baking sheet. Bake for 15 to 18 minutes until it flakes easily. You can also grill or pan-sear salmon for a different taste and texture. Yes, you can use frozen salmon. Just make sure to thaw it first. The easiest way is to leave it in the fridge overnight. If you're short on time, place the sealed salmon under cold water for 30 minutes. Once thawed, pat the salmon dry before marinating. You can tell salmon is done when it easily flakes with a fork. The inside should be opaque and not transparent. The ideal internal temperature is 145°F (62.8°C). If you have a meat thermometer, use it for accuracy. Ginger Soy Glazed Salmon pairs well with many sides. Here are some tasty options: - Fluffy jasmine rice - Steamed broccoli or green beans - Sautéed spinach with garlic - A fresh salad with a light vinaigrette These sides complement the sweet and savory flavors of the salmon. Enjoy your meal! This blog post covered how to make Ginger Soy Glazed Salmon from start to finish. We explored each ingredient, sharing substitutes and cooking tips. You learned how to marinate, bake, and present the dish. Remember, you can adjust the flavors and serve with various sides to suit your taste. Whether you’re a beginner or a pro, this recipe is simple and delicious. Enjoy making this dish, and don’t hesitate to experiment with flavors. Cooking should be fun and tasty!

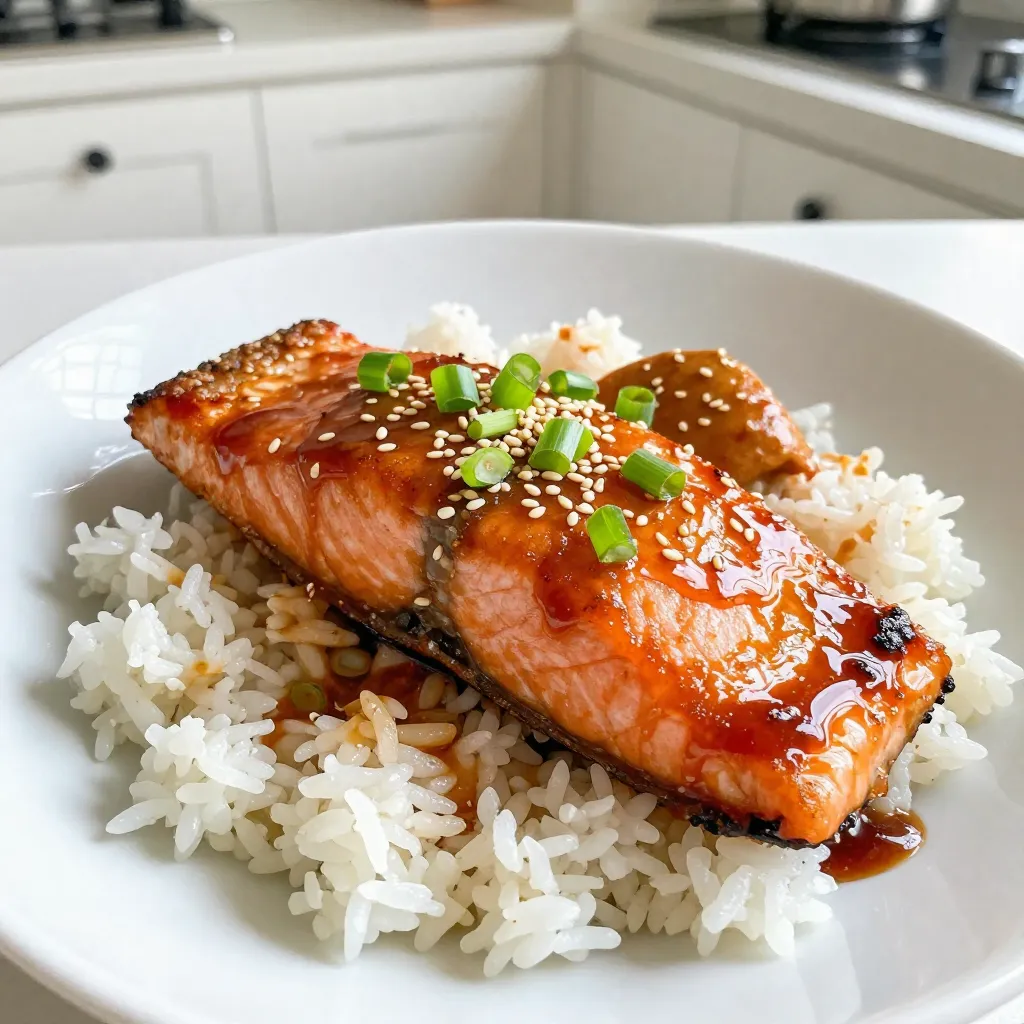
Ginger Soy Glazed Salmon Flavorful and Simple Dish

If you want a meal bursting with flavor yet easy to make, you’ve found it! This Ginger Soy Glazed Salmon

- 2 pounds beef chuck roast - 1 tablespoon olive oil - 1 onion, quartered - 4 cloves garlic, minced - 2 teaspoons ground cumin - 1 teaspoon dried oregano - 1 teaspoon smoked paprika - 1 teaspoon chipotle powder - 1 cup beef broth - 1/4 cup apple cider vinegar - 2 bay leaves - Salt and pepper to taste - Fresh cilantro and lime wedges for serving - Corn tortillas for serving For making beef barbacoa, you need quality ingredients. Start with the beef chuck roast. This cut is juicy and tender, perfect for shredding. Olive oil helps to sear the beef, which adds flavor. The onion and garlic give a base of taste that is hard to beat. Now, let’s talk about spices. Ground cumin brings warmth. Dried oregano offers a hint of earthiness. Smoked paprika adds depth. Adjust the chipotle powder for heat based on your taste. For liquid, beef broth gives richness. Apple cider vinegar adds tang and helps tenderize the meat. The bay leaves enhance the overall flavor. Don't forget salt and pepper to make everything pop. To serve, use fresh cilantro and lime wedges. They add brightness to the dish. Corn tortillas are a must; they help wrap up all that delicious barbacoa! Enjoy every bite! {{ingredient_image_1}} - Searing the beef: First, set your Instant Pot to sauté mode. Add one tablespoon of olive oil once it's hot. Place the beef chunks in the pot. Sear them until they turn brown on all sides. This takes about 5-7 minutes. Remove the beef and set it aside. - Sautéing the onions and garlic: Next, put the quartered onion into the pot. Sauté it for about 3 minutes until it looks clear. Then, add the minced garlic and cook for 1 more minute. You want the garlic to smell good but not burn. - Adding spices and deglazing the pot: After that, add the spices. Sprinkle in 2 teaspoons of ground cumin, 1 teaspoon of dried oregano, 1 teaspoon of smoked paprika, and 1 teaspoon of chipotle powder. Stir this mix for about 30 seconds. Then pour in 1 cup of beef broth and 1/4 cup of apple cider vinegar. Scrape the bottom of the pot with a spoon. This lifts the tasty bits stuck to the pot. - Pressure cooking the beef: Now, return the seared beef to the pot. Add in 2 bay leaves as well. Close the lid securely. Set the Instant Pot to cook on high pressure for 65 minutes. - Natural and quick release of pressure: When the cooking time ends, let the pot sit for 20 minutes to release pressure naturally. After that, you can do a quick release for any remaining pressure. - Shredding the beef: Open the lid and take out the bay leaves. Use two forks to shred the beef in the pot. Mix the beef with the juices. This step makes it juicier and tastier. - Adjusting seasoning: Finally, taste your barbacoa. Add salt and pepper if needed. This small step can make a big difference in flavor. Serve your beef barbacoa in warm corn tortillas. Top it with fresh cilantro and lime juice for a burst of freshness. Enjoy your delicious creation! How to properly deglaze the pot After you sear the beef, you need to deglaze the pot. Pour the beef broth and apple cider vinegar into the pot. Use a wooden spoon to scrape any brown bits. This adds great flavor to your dish. Don't skip this step; it makes a difference! Importance of natural pressure release After cooking, let the Instant Pot release pressure naturally for 20 minutes. This helps keep the beef tender and juicy. If you quick release too soon, your beef may end up tough. Give it time to relax! Tips for balancing spices To balance the spices, taste as you go. If it feels too spicy, add a bit more beef broth. A sprinkle of sugar can also help tone down the heat. Adjusting flavors is key to a perfect dish. Suggestions for serving with toppings Serve your beef barbacoa in warm corn tortillas. Top with fresh cilantro and a squeeze of lime. Diced onions and salsa add a nice crunch. These toppings bring out the best in your meal. Searing mistakes When searing beef, do not overcrowd the pot. Cook in batches to get a good brown color. This enhances the flavor. If you add too much at once, the beef will steam instead of sear. Overly tough beef issues If your beef is tough, it may not have cooked long enough. Make sure to follow the cooking time closely. If you use lean cuts, they can also turn out dry. Always stick with chuck roast for the best results. Pro Tips Choose the Right Cut: Opt for beef chuck roast for its marbling and tenderness, which will yield juicy, flavorful barbacoa. Adjust the Spice Level: Feel free to modify the amount of chipotle powder based on your spice preference, or substitute with smoked paprika for a milder flavor. Let it Rest: After shredding the beef, allow it to sit in the juices for a few minutes to absorb flavor and moisture before serving. Serve with Fresh Ingredients: Enhance the dish with fresh toppings like diced onions, cilantro, and lime wedges to elevate the overall flavor profile. {{image_2}} You can use different cuts of meat for barbacoa. Brisket is a great option. It has a rich flavor and becomes tender when cooked. Flank steak also works well. It has a nice texture and absorbs spices well. If you're looking for a vegetarian option, try jackfruit. It shreds like beef and soaks up flavors. Mushrooms are another tasty choice. They add a nice umami flavor and are easy to cook. You can adjust the spice levels based on your taste. If you like it hot, add more chipotle powder. You can also try other spices. Cumin adds warmth, while smoked paprika gives a nice depth. For a unique twist, add cinnamon or allspice. These spices can enhance the flavor and make it more interesting. There are many fun ways to serve barbacoa. You can make tacos with warm corn tortillas. Add fresh cilantro and a squeeze of lime for brightness. You can also serve it over rice or in a salad. Pair it with sides like black beans or grilled corn for a full meal. Don't forget to add toppings like diced onions, salsa, or avocado for extra flavor and texture. To store leftover beef barbacoa, let it cool first. Place it in an airtight container. This keeps the beef moist and tasty. You can store it in the fridge for up to four days. If you notice any off smells or changes in color, it’s best to toss it. To freeze barbacoa, make sure it is completely cool. Use freezer-safe bags or containers. Remove as much air as possible to avoid freezer burn. Barbacoa can last for up to three months in the freezer. When you want to eat it, thaw it in the fridge overnight. For reheating, you can use the microwave or stovetop. Just add a splash of broth to keep it juicy. You can use barbacoa in various dishes. Try it in tacos, burritos, or salads. It makes for a great filling for quesadillas too. You can store barbacoa in portion sizes. This makes it easy to grab a quick meal. Just reheat what you need, and enjoy! Barbacoa is a traditional Mexican dish. It usually features beef, lamb, or goat. The meat is slow-cooked until tender. The origin comes from the Taino people of the Caribbean. They used a wooden frame over an open fire to cook meat. Today, barbacoa is popular in many Latin American countries. Each area has its own twist on the dish. Yes, you can make barbacoa using a slow cooker or a Dutch oven. For a slow cooker, follow these steps: - Sear the beef in a pan first. - Transfer the beef and other ingredients to the slow cooker. - Cook on low for 8 hours or high for 4 hours. If you use a Dutch oven, sear the beef and sauté the aromatics as before. Then, cover and cook on low heat for about 3 to 4 hours. Check the meat until it is fork-tender. Reheating is easy! You can use the stovetop or microwave. For the stovetop, place the barbacoa in a pan. Add a splash of beef broth or water to keep it moist. Heat over low until warm. Stir occasionally to avoid sticking. If you use a microwave, place the barbacoa in a microwave-safe dish. Add a little broth and cover it with a lid. Heat in short bursts, stirring in between, until warmed through. This method helps keep it juicy and tasty. In this post, we explored making delicious barbacoa. We covered main ingredients, spices, and steps from prep to serving. You learned tips to avoid common mistakes and how to store leftovers. Finally, we discussed variations in meat and spice levels. Remember, this dish is more than just food; it’s about sharing and enjoying with others. With these steps, you can make barbacoa that impresses everyone around your table. Enjoy your cooking adventure!

Instant Pot Beef Barbacoa Flavorful and Simple Recipe

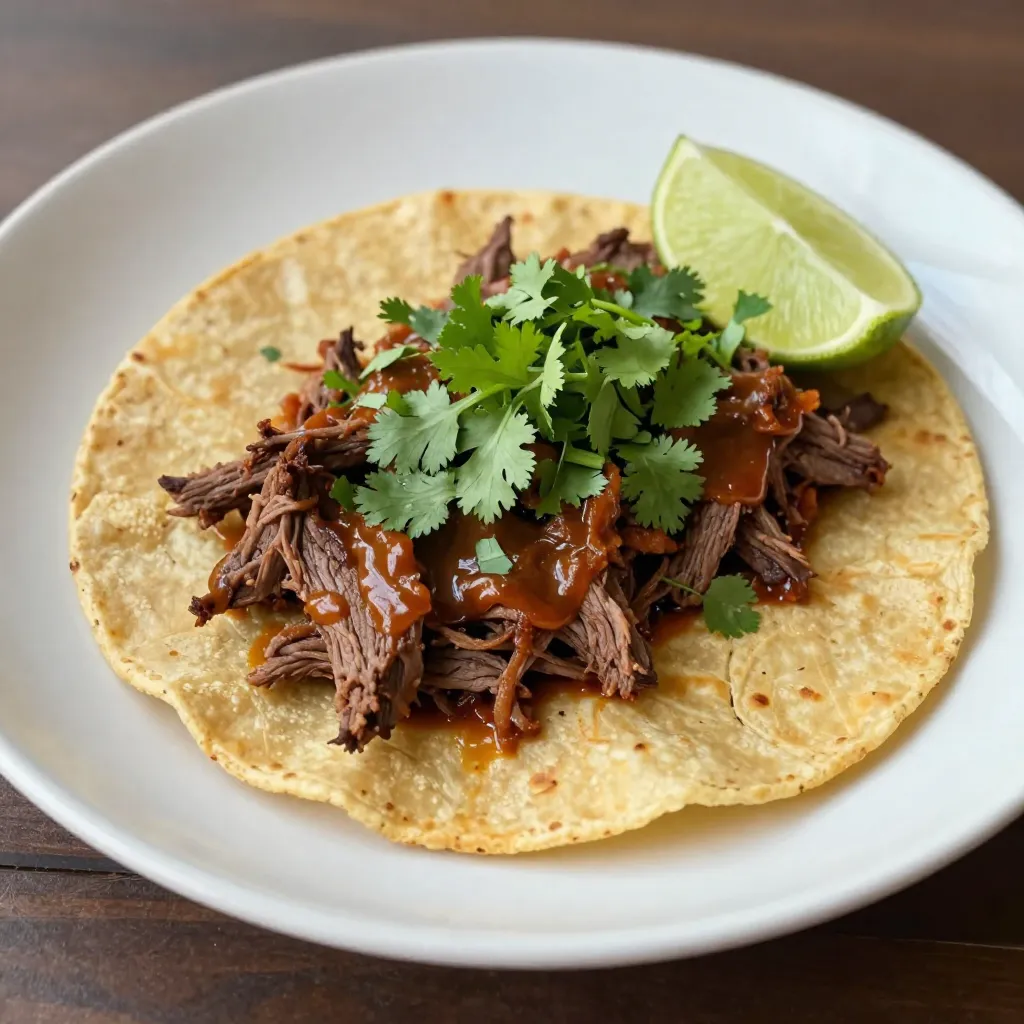
Are you ready to spice up your dinner routine? My Instant Pot Beef Barbacoa recipe is simple, flavorful, and perfect

- 1 cup orzo pasta - 1 cup cherry tomatoes, halved - 1 cucumber, diced - 1/2 red onion, finely chopped - 1/2 cup Kalamata olives, pitted and sliced - 1/2 cup feta cheese, crumbled - 1/4 cup fresh parsley, chopped - 3 tablespoons extra virgin olive oil - 2 tablespoons red wine vinegar (or lemon juice) - 1 teaspoon dried oregano - Salt and pepper to taste You can swap orzo with any small pasta. Use quinoa for a gluten-free option. If you want a lighter taste, replace red onion with green onion. For a creamier touch, try goat cheese instead of feta. If you don’t have Kalamata olives, black olives work well too. Vinegar adds a nice zing, but lemon juice is just as good. Use fresh parsley for the best flavor, yet dried can work in a pinch. Fresh ingredients make a big difference. They bring bright flavors and vibrant colors to your dish. Fresh vegetables like cherry tomatoes and cucumbers add crunch and taste. Good-quality olives and feta cheese enhance the salad's richness. When you use fresh herbs, you elevate the overall flavor. Always choose the best ingredients you can find. They will make your Greek Orzo Pasta Salad taste amazing. {{ingredient_image_1}} To start, fill a large pot with water. Bring it to a boil and add a pinch of salt. This step helps flavor the orzo. Once boiling, add 1 cup of orzo pasta. Cook it for about 8-10 minutes. You want it al dente, so check the package for exact times. After cooking, drain the orzo and rinse it under cold water. This cools it down and stops the cooking process. In a large mixing bowl, combine the cooled orzo with the salad ingredients. Add 1 cup of halved cherry tomatoes, 1 diced cucumber, and 1/2 finely chopped red onion. Next, fold in 1/2 cup of pitted and sliced Kalamata olives. Finally, sprinkle in 1/2 cup of crumbled feta cheese and mix gently. This creates a colorful, fresh base for your salad. Now, let’s make the dressing. In a small bowl, whisk together 3 tablespoons of extra virgin olive oil and 2 tablespoons of red wine vinegar or lemon juice. Add 1 teaspoon of dried oregano, along with salt and pepper to taste. Whisk until well combined. This dressing adds a zesty punch to the salad. Pour the dressing over the orzo mixture. Gently toss everything together. Make sure all ingredients are well coated in the dressing. Next, fold in 1/4 cup of chopped fresh parsley. This adds a bright flavor and a pop of color. Taste the salad and adjust seasoning with more salt and pepper if needed. Once combined, chill the salad in the refrigerator for at least 30 minutes. This waiting time lets the flavors blend together. When ready, serve the salad in a large, shallow bowl. For a beautiful presentation, garnish with extra parsley and crumbled feta on top. Enjoy this refreshing Greek orzo pasta salad! To cook orzo pasta perfectly, start with boiling water. Add a pinch of salt to enhance flavor. Cook the orzo for 8 to 10 minutes until it is al dente. This means it should be firm but not hard. Drain the pasta and rinse it with cold water. This step stops the cooking process and cools it down quickly. To boost the flavor of your salad, consider these tips: - Use fresh herbs like basil or mint for a bright taste. - Add a squeeze of lemon juice for extra zest. - Mix in roasted red peppers for a smoky note. - A sprinkle of red pepper flakes can add a nice kick. These small changes can make your salad pop with new flavors. A beautiful salad is more appealing. Here are some easy ways to present your orzo salad: - Serve it in a large, shallow bowl to show off the colors. - Garnish with extra parsley and crumbled feta on top. - Use a mix of colorful cherry tomatoes for a vibrant look. - For an elegant touch, drizzle a bit of olive oil on top just before serving. These simple tips make your dish look as good as it tastes! Pro Tips Cook the Orzo Perfectly: To prevent orzo from becoming mushy, cook it just until al dente, and rinse it under cold water to stop the cooking process. Customize Your Veggies: Feel free to add or substitute your favorite vegetables like bell peppers or spinach for extra color and nutrition. Make Ahead: Prepare the salad a few hours in advance or even the night before. This allows the flavors to develop and intensify. Fresh Herbs Matter: Use fresh parsley instead of dried for a brighter and more vibrant flavor in your salad. {{image_2}} You can easily boost your Greek orzo pasta salad with protein. Adding grilled chicken makes the dish filling. I love using rotisserie chicken for quick prep. Shrimp is another great choice. Just sauté it with garlic and olive oil. It adds a nice flavor and texture. For a unique twist, consider using chickpeas. They are tasty and add a nice crunch. If you want a vegetarian salad, skip the meat and focus on veggies. Roasted bell peppers bring a sweet, smoky flavor. You can also use artichoke hearts for a tangy touch. Adding more olives or using different types can enhance the taste. Sun-dried tomatoes add a rich, umami flavor to the dish as well. Seasonal swaps can keep your salad fresh and exciting. In spring, add fresh asparagus or peas for a pop of green. Summer is perfect for sweet corn, which adds crunch. In fall, roasted butternut squash gives a warm flavor. Winter calls for hearty greens like kale or spinach. This way, you can enjoy your Greek orzo salad all year. To keep your Greek orzo pasta salad fresh, store it in an airtight container. This helps prevent the salad from drying out and keeps the flavors intact. Make sure to cool the salad to room temperature before sealing it. If you plan to eat it later, separate any toppings, like feta cheese or parsley, to avoid sogginess. Your Greek orzo pasta salad stays good in the fridge for about 3 to 5 days. Always check for any signs of spoilage, like off smells or changes in color. If you see any of these, it’s best to toss it out. While I don’t recommend freezing this salad, you can freeze the orzo alone. To do this, cook the orzo as directed, drain it, and let it cool. Place the cooled orzo in a freezer-safe bag and squeeze out the air. It can last up to 2 months in the freezer. When you are ready to use it, thaw it in the fridge overnight before mixing it back into your salad. Yes, you can make Greek Orzo Pasta Salad ahead of time. It tastes even better after sitting. The flavors blend together, making it taste great. Store it in the fridge for up to two days. Just remember to add fresh parsley right before serving. If you need a substitute for feta cheese, try goat cheese or ricotta. Both add creaminess. You can also use vegan cheese for a dairy-free option. Choose a cheese that fits your taste. Orzo pasta can be part of a healthy diet. It is made from durum wheat, which is rich in protein. It also contains some fiber, especially if you choose whole grain orzo. Enjoy it in moderation with lots of veggies for a balanced meal. To make Greek Orzo Pasta Salad gluten-free, use gluten-free orzo. Many brands offer it made from rice or quinoa. You can also try other gluten-free pasta shapes. Just cook them according to package instructions. Absolutely! You can add other vegetables to your Greek Orzo Pasta Salad. Bell peppers, spinach, or artichokes work well. Use what you have on hand or what you love. This salad is very versatile and allows for your creativity. This blog covers how to make a tasty Greek Orzo Pasta Salad. We explored key ingredients, cooking steps, and tips for perfect results. I shared ideas for variations and storage tips to keep your salad fresh. Remember, using fresh ingredients and following these steps will help you create a delicious dish. Feel free to experiment with flavors and proteins. With these guidelines, you’ll impress everyone with your cooking skills!

Greek Orzo Pasta Salad Flavorful and Easy Recipe

Are you ready to delight your taste buds? This Greek Orzo Pasta Salad is both flavorful and easy to make.

For maple glazed carrots, you'll need a few simple items that pack a lot of flavor. Here’s the list: - 1 lb baby carrots, peeled - 3 tablespoons pure maple syrup - 2 tablespoons unsalted butter - 1 teaspoon fresh thyme leaves - Salt and pepper, to taste - 1 tablespoon lemon juice - Sesame seeds, for garnish (optional) These ingredients work together to create a sweet and savory dish. The baby carrots bring a natural sweetness. Pure maple syrup adds depth and richness. Butter gives it a smooth texture. Fresh thyme adds a nice herbal note. Lemon juice brightens the overall flavor. You can use sesame seeds for a crunchy finish if you like. Each ingredient plays a part in making this dish delightful and fun to eat. {{ingredient_image_1}} - Boil the carrots until tender - Drain and set aside Start by boiling a medium pot of water. Add the peeled baby carrots. Cook them for about 5-7 minutes until they are just tender. You want them soft but not mushy. Once cooked, drain the carrots and set them aside. - Melt butter in the saucepan - Add carrots and coat with butter In the same saucepan, melt 2 tablespoons of unsalted butter over medium heat. Once the butter is melted, add the cooked carrots back into the pot. Stir them gently to coat the carrots evenly with the melted butter. This step gives the carrots a rich flavor. - Add maple syrup and seasonings - Toss until glazed and heated through - Serve with optional garnishing Now, pour in 3 tablespoons of pure maple syrup. Add 1 teaspoon of fresh thyme leaves, salt, and pepper to taste. Also, squeeze in 1 tablespoon of lemon juice for a bright touch. Toss the carrots gently in the glaze. Heat them through for about 3-5 minutes until they are nicely glazed. When serving, transfer the glazed carrots to a dish. For an extra crunch, sprinkle sesame seeds on top if you like. Enjoy your sweet and savory maple glazed carrots! To get tender carrots, cook them for about 5-7 minutes. They should be soft but not mushy. Drain them right after cooking so they hold their shape. When you add the carrots to the butter, mix them well. This helps each piece get a nice coat of glaze. You can adjust the sweetness by adding more or less maple syrup. If you want a savory touch, try adding a pinch of garlic powder. If you don’t have thyme, fresh parsley or dill works well too. Each herb brings its own flavor to the dish. Serve the glazed carrots in a nice bowl to show off their color. You can sprinkle sesame seeds on top for a crunchy look. Adding a few sprigs of fresh thyme can also make it more appealing. A squeeze of lemon juice right before serving adds a fresh touch. Pro Tips Choose Fresh Carrots: Opt for firm, bright orange baby carrots for the best flavor and texture. Adjust Sweetness: Feel free to modify the amount of maple syrup based on your preference for sweetness. Herb Variations: Experiment with other herbs like rosemary or parsley for a different flavor profile. Serve Warm: For the best taste, serve the glazed carrots warm right after cooking. {{image_2}} You can make maple glazed carrots without butter. Use olive oil instead. It keeps the dish vegan and still tasty. Just swap the butter for the same amount of oil. This way, you enjoy the same great flavor. For gluten-free variations, you are in luck! All the main ingredients in this recipe are gluten-free. Just ensure your maple syrup is pure and free from additives. Enjoy this dish worry-free! Want to spice things up? Add a pinch of cinnamon or nutmeg. These spices bring warmth and depth to the dish. Just sprinkle a little in while you mix the glaze. You’ll be amazed at the flavor boost! You can also mix in other veggies. Try parsnips or sweet potatoes for a new twist. These veggies add sweetness and texture. Just chop them to match the size of the carrots for even cooking. Roasting brings out rich flavor. Toss the carrots in the glaze and roast them in the oven. Bake at 400°F for about 20 minutes. This method gives you a nice caramelization. If you prefer boiling, follow the original recipe. Boil the carrots until tender, then glaze. This method is quicker but won't have as much depth in flavor. For a hands-off method, use a slow cooker. After boiling, place the carrots in the slow cooker. Add the glaze and cook on low for 4 hours. This method makes the carrots very tender and infused with flavor. To keep your maple glazed carrots fresh, store them in the fridge. Place leftovers in an airtight container. This helps to lock in flavor. They will last for about three days. When you reheat them, use the microwave or a stovetop. If using the microwave, heat in short bursts. Stir after each burst to ensure even heating. On the stovetop, add a bit of water. This keeps them moist and prevents sticking. Cook over low heat until warm. You can freeze cooked carrots if you have extras. First, let them cool completely. Next, place them in a freezer-safe bag. Try to remove as much air as possible. This prevents freezer burn. Label the bag with the date for easy tracking. To thaw frozen carrots, place them in the fridge overnight. This gives them time to defrost slowly. You can also use the microwave for a quick option. Just be careful not to overcook them. After thawing, reheat as mentioned before. Enjoy your sweet and tender carrots even after freezing! Maple glazed carrots will last about 4 to 5 days in the fridge. Store them in an airtight container. This helps keep them fresh and tasty. Always check for any signs of spoilage before enjoying them again. Yes, you can make maple glazed carrots ahead of time. Simply prepare them as normal and cool them down. Once cooled, store them in the fridge. When you are ready to serve, just reheat them on the stove or in the microwave. Maple glazed carrots pair well with many dishes. Here are some ideas: - Roast chicken or turkey - Grilled steak or pork - Quinoa or rice dishes - A fresh salad with nuts and cheese These sides complement the sweet and savory flavor of the carrots well. Enjoy mixing and matching to create your perfect meal! In this post, we covered how to make delicious maple glazed carrots. We explored key ingredients, step-by-step instructions, and helpful tips. You can easily adjust flavors and cooking methods to suit your taste. Don't hesitate to try new variations or storage tips. Remember, these sweet carrots can be a great side for any meal. Enjoy your cooking and savor each bite of this tasty dish!

Maple Glazed Carrots Simple and Flavorful Dish

Looking for a simple yet flavorful side dish? Maple glazed carrots are a perfect choice! They combine sweetness and warmth,

- 1 cup fresh pineapple chunks, frozen for a colder smoothie - 1 ripe banana - 1/2 cup coconut milk - 1/2 cup plain Greek yogurt - 1 tablespoon honey (or maple syrup for vegan option) - 1 tablespoon chia seeds - 1/2 teaspoon vanilla extract - A sprinkle of toasted coconut flakes (for garnish) - Ice cubes (optional, for thicker texture) This smoothie packs a punch of nutrition. Pineapple is rich in vitamin C. It boosts your immune system. Bananas provide potassium and fiber. They help with digestion. Coconut milk adds healthy fats, which can fuel your body. Greek yogurt is full of protein, aiding in muscle repair. Chia seeds are tiny but mighty. They offer omega-3 fatty acids and keep you full longer. Honey or maple syrup gives natural sweetness without refined sugar. You can easily switch out ingredients. If you have no fresh pineapple, use frozen chunks. They will give a nice chill. Don’t have Greek yogurt? Try regular yogurt or a dairy-free option. For a vegan sweetener, use maple syrup instead of honey. You can also add a scoop of your favorite protein powder. This way, you can tailor the smoothie to your taste and needs. {{ingredient_image_1}} Start with fresh ingredients. Use one cup of frozen pineapple chunks. This gives a cool touch. Next, grab one ripe banana. The banana adds creaminess to the mix. Measure half a cup of coconut milk. This brings a rich flavor. Then, take half a cup of plain Greek yogurt. It makes the smoothie thick and smooth. Add one tablespoon of honey. You can swap it with maple syrup if you want it vegan. For extra nutrients, include one tablespoon of chia seeds. Lastly, measure half a teaspoon of vanilla extract for warmth. Put all your ingredients in the blender. Blend on high until it looks smooth and creamy. If it’s too thick, add a bit more coconut milk. For a thicker smoothie, add ice cubes and blend again. Make sure to scrape the sides of the blender. This helps everything mix evenly. Taste your smoothie before serving. If you want it sweeter, add more honey or syrup. Blend again to mix. Pour the smoothie into chilled glasses to keep it cool. For a fun touch, sprinkle toasted coconut flakes on top. This adds crunch and makes it look pretty. Enjoy your smoothie right away. The tropical flavors will take you to paradise! To get a smooth and creamy drink, start with frozen pineapple chunks. Frozen fruit gives a nice chill and thick texture. If you want it even thicker, add ice cubes. Blend until all lumps are gone. Scrape the sides of the blender if needed. This helps mix everything well. Taste your smoothie after blending. If it’s not sweet enough, add more honey or maple syrup. A ripe banana already adds sweetness, so adjust based on your taste. For extra flavor, try adding a dash of cinnamon or a squeeze of lime juice. These can brighten the taste and make it fun! A good blender makes all the difference. A high-speed blender will give you the best results. It can mix frozen fruit and ice without any trouble. If you have a personal blender, that works too. Just blend in smaller batches for a smooth finish. Pro Tips Use Frozen Fruit: Using frozen pineapple not only makes your smoothie colder but also creates a thicker texture without needing extra ice. Choose Ripe Bananas: The riper the banana, the sweeter your smoothie will be. Look for bananas with brown spots for maximum sweetness. Experiment with Sweeteners: If you're avoiding honey, try maple syrup or agave syrup. You can also skip sweeteners altogether if your fruit is sweet enough! Add Greens for Extra Nutrition: Toss in a handful of spinach or kale for added vitamins without altering the tropical flavor of your smoothie. {{image_2}} You can make your pineapple coconut smoothie even better by adding more fruit. Mango, papaya, or kiwi all work well. Each fruit brings its own flavor and nutrition. Try a mix of tropical fruits for a fun twist. For instance, add half a cup of frozen mango. This will make your smoothie sweeter and creamier. You can also blend in some berries for a pop of color and taste. If you want a dairy-free option, just swap out the Greek yogurt. Use coconut yogurt instead. This keeps the creamy texture while adding more coconut flavor. You can also skip the yogurt and add more coconut milk. For a thicker smoothie, blend in a banana. The banana will help maintain that smooth consistency without the dairy. Need more protein? You can easily add it to your smoothie. Try adding a scoop of protein powder. Choose a flavor that you enjoy, like vanilla or chocolate. Another great option is to mix in a tablespoon of nut butter. Almond or peanut butter both taste great and boost protein. You can also add more chia seeds for extra protein and fiber. If you have leftover smoothie, pour it into a sealed container. Keep it in the fridge. It stays fresh for up to one day. Before you drink it, shake or stir well. This helps mix the ingredients again. The smoothie may separate after sitting. Freezing is a great option for meal prep. Pour leftover smoothie into ice cube trays. Once frozen, pop the cubes into a bag. You can blend these frozen cubes later for a quick snack. Just add a bit of coconut milk or water when blending. This makes a refreshing drink anytime! Check for signs of spoilage before consuming. If the smoothie smells sour, it is not safe to drink. Also, look for any changes in color or texture. If it seems off, toss it out. Always trust your senses; they help keep you safe! Yes, you can use frozen fruit in this smoothie. Frozen pineapple adds a nice chill and thick texture. It also makes the smoothie more refreshing. Just blend the frozen fruit with the other ingredients. If you want a colder drink, frozen fruit is a great choice. This smoothie can be made vegan-friendly. Simply swap the Greek yogurt with a plant-based yogurt. You can also replace honey with maple syrup. These changes keep the taste great while making it suitable for a vegan diet. To make this smoothie more filling, add protein-rich ingredients. You can use a scoop of protein powder or more chia seeds. Adding nut butter is another option. These ingredients will boost the protein and keep you full longer. This blog covered how to make a great smoothie from start to finish. We looked at key ingredients, their benefits, and fun substitutions. The steps included preparing and blending for the best texture. I shared tips to enhance flavor and suggested yummy variations. We also discussed storage and answered common questions. Smoothies can be a fun way to eat healthier. I hope you feel ready to mix your own! Enjoy experimenting with all the different flavors and ingredients!

Pineapple Coconut Smoothie Refreshing and Nourishing Drink

Looking for a tasty and healthy drink? The Pineapple Coconut Smoothie is both refreshing and nourishing! With just a few

- 1 cup unsalted butter - 3/4 cup packed brown sugar - 1/2 cup granulated sugar - 1 large egg - 1 teaspoon vanilla extract - 2 cups all-purpose flour - 1 teaspoon baking soda - 1/2 teaspoon salt - 1 cup white chocolate chips - 1 cup dried cranberries - Zest of 1 orange (optional) To make these white chocolate cranberry cookies, gather these simple ingredients. You'll need butter, sugars, and an egg to create a rich base. The vanilla extract adds warmth and flavor. The flour, baking soda, and salt are key to the cookie's structure. White chocolate chips bring creaminess, while dried cranberries add a tart punch. Don't forget the orange zest! It adds a bright citrus note that makes these cookies shine. - Orange zest - Additional white chocolate for garnish Using extra orange zest will enhance the flavor. You can also add more white chocolate for a lovely finish. This will make your cookies even tastier and more appealing. - Butter substitutions (e.g., margarine) - Sugar alternatives (e.g., coconut sugar) - Gluten-free flour options If you need to substitute, consider margarine for butter. Coconut sugar works well instead of brown or white sugar. For gluten-free cookies, use a gluten-free flour blend. These swaps will keep your cookies delicious and enjoyable! {{ingredient_image_1}} - Preheat your oven to 350°F (175°C). Line a baking sheet with parchment paper. - In a large bowl, cream together 1 cup of softened unsalted butter, 3/4 cup of packed brown sugar, and 1/2 cup of granulated sugar. Do this until it looks light and fluffy. - Add 1 large egg and 1 teaspoon of vanilla extract to the mixture. Beat well until combined. - In another bowl, whisk together 2 cups of all-purpose flour, 1 teaspoon of baking soda, and 1/2 teaspoon of salt. - Gradually mix the dry ingredients into the wet ingredients. Stir until just combined; do not over-mix. - Gently fold in 1 cup of white chocolate chips and 1 cup of dried cranberries. If you want a citrus twist, add the zest of 1 orange. - Use a cookie scoop or tablespoon to drop balls of dough onto your prepared baking sheet. Space them about 2 inches apart. - Bake the cookies in the preheated oven for 10-12 minutes. Look for lightly golden edges while the centers remain soft. - The cookies will continue to cook a bit after you take them out of the oven. - Allow the cookies to cool on the baking sheet for about 5 minutes. This helps them set before moving. - Carefully transfer the cookies to a wire rack to cool completely. - For a lovely presentation, arrange the cookies on a decorative plate. Add some extra cranberries and white chocolate shavings around them. Enjoy these cookies with a glass of milk! To get the perfect cookie texture, start with softened butter. It helps create a light, fluffy mix. Measure your flour correctly by spooning it into the cup, then leveling it off. Too much flour leads to dry cookies. Don't over-mix your dough; mix until just combined. This keeps the cookies soft and chewy. For even baking, space your cookie dough balls about 2 inches apart. This allows hot air to flow around each cookie. Rotate your baking sheet halfway through the baking time. This ensures each cookie bakes evenly. Want richer flavor? Add the zest of one orange for a fresh twist. You can also add a pinch of cinnamon for warmth. It pairs nicely with the cranberries and white chocolate. Consider incorporating nuts like pecans or walnuts. They will add a nice crunch and make the cookies more filling. Mix in about half a cup for great texture. Display your cookies on a decorative plate for a charming look. Sprinkle a few extra cranberries and white chocolate shavings around for flair. Pair these cookies with a glass of cold milk or a warm cup of tea. For an extra touch, garnish with fresh cranberries or a light dusting of powdered sugar. This adds a pop of color and makes them look even more inviting. Pro Tips Chill the Dough: For thicker cookies, refrigerate the dough for at least 30 minutes before baking. This helps prevent them from spreading too much in the oven. Use Fresh Ingredients: Ensure your baking soda is fresh for the best rise and texture. Old baking soda can result in flat cookies. Perfect Baking Time: Keep an eye on the cookies as they bake. The edges should be golden, while the centers remain soft; they will continue to cook on the baking sheet after being removed from the oven. Storage Tip: Store cookies in an airtight container at room temperature for up to a week. For longer freshness, freeze them in a single layer and transfer to a freezer bag. {{image_2}} You can change up the flavor of your cookies in fun ways. Adding nuts like pecans or walnuts gives a nice crunch. These nuts pair well with the sweet white chocolate and tart cranberries. Want something richer? Make it double chocolate! Just mix in some cocoa powder. This twist adds a deep, chocolatey flavor that pairs perfectly with the white chocolate. You can also swap out the cranberries for other dried fruits. Dried cherries or blueberries work great. They add a nice touch and change the taste a bit. If you're looking for vegan options, you can use plant-based butter and a flax egg instead of regular egg. This keeps the cookies soft and tasty while being dairy-free. For gluten-free cookies, substitute the all-purpose flour with a gluten-free blend. Make sure it has xanthan gum to help with texture. If you're watching your sugar intake, try using a sugar substitute. Erythritol or stevia can lower the sugar content without losing sweetness. These options can help make low-sugar or keto-friendly cookies. You can also change your cookies for the seasons. For the holidays, add peppermint extract for a festive flavor. Peppermint and white chocolate are a perfect match. In the summer, think about adding citrus fruits. Lemon or lime zest can bring a fresh burst of flavor. This twist makes the cookies light and refreshing, perfect for warm days. To keep your white chocolate cranberry cookies fresh, follow these tips: - Room Temperature: Store cookies in a cool, dry place. Use a plate or a container with a lid. - Airtight Containers: An airtight container helps prevent cookies from drying out. This keeps them soft and tasty. - Freezing Cookies: For longer storage, freeze cookies. Place them in a single layer on a baking sheet. Once frozen, transfer them to a freezer bag. How long do these cookies last? When stored well, they last about one week at room temperature. If frozen, they can last up to three months. Look for these signs of freshness: - Color: A bright color shows they are fresh. - Smell: A sweet and fruity scent indicates they are still good. To enjoy cookies warm and soft, reheating works wonders. Here are some tips: - Microwave: Heat one cookie for about 10 seconds. Check if it’s warm enough. - Oven: Preheat the oven to 350°F (175°C). Place cookies on a baking sheet and heat for 5 minutes. This keeps them soft and delicious. To stop cookies from spreading, chill your dough for at least 30 minutes. This helps keep the shape. Use good-quality butter and measure flour correctly. Too much sugar can also cause spreading. Yes, you can make the dough ahead of time. Store it in the fridge for up to three days. For longer storage, freeze the dough. Just scoop the dough into balls before freezing. When ready, bake straight from the freezer, adding a minute or two to the baking time. Your cookies are done when the edges turn lightly golden. The centers should look soft and puffy. They will firm up as they cool. Keep an eye on them during the last few minutes of baking. Absolutely! You can use dark chocolate in place of white chocolate. It gives a richer taste. Just remember, dark chocolate can be bitter, so adjust your sugar if needed. Yes, these cookies freeze well! Allow them to cool completely. Place them in an airtight container or a zip-top bag. They can last up to three months in the freezer. For chewier cookies, try these tips: - Use more brown sugar than white sugar. - Add an extra egg yolk. - Bake for a minute less than recommended. These tweaks will give your cookies a soft, chewy texture. You now have all the tools to make delicious cookies. Remember the key ingredients and techniques. Choosing the right flavors and options can make a big difference. Try mixing in nuts, spices, or even fruit for fun twists. Store your cookies properly to keep them fresh. With practice, you will perfect your baking skills. Enjoy the process and share your treats with others. Happy baking!

White Chocolate Cranberry Cookies Delightful Treat

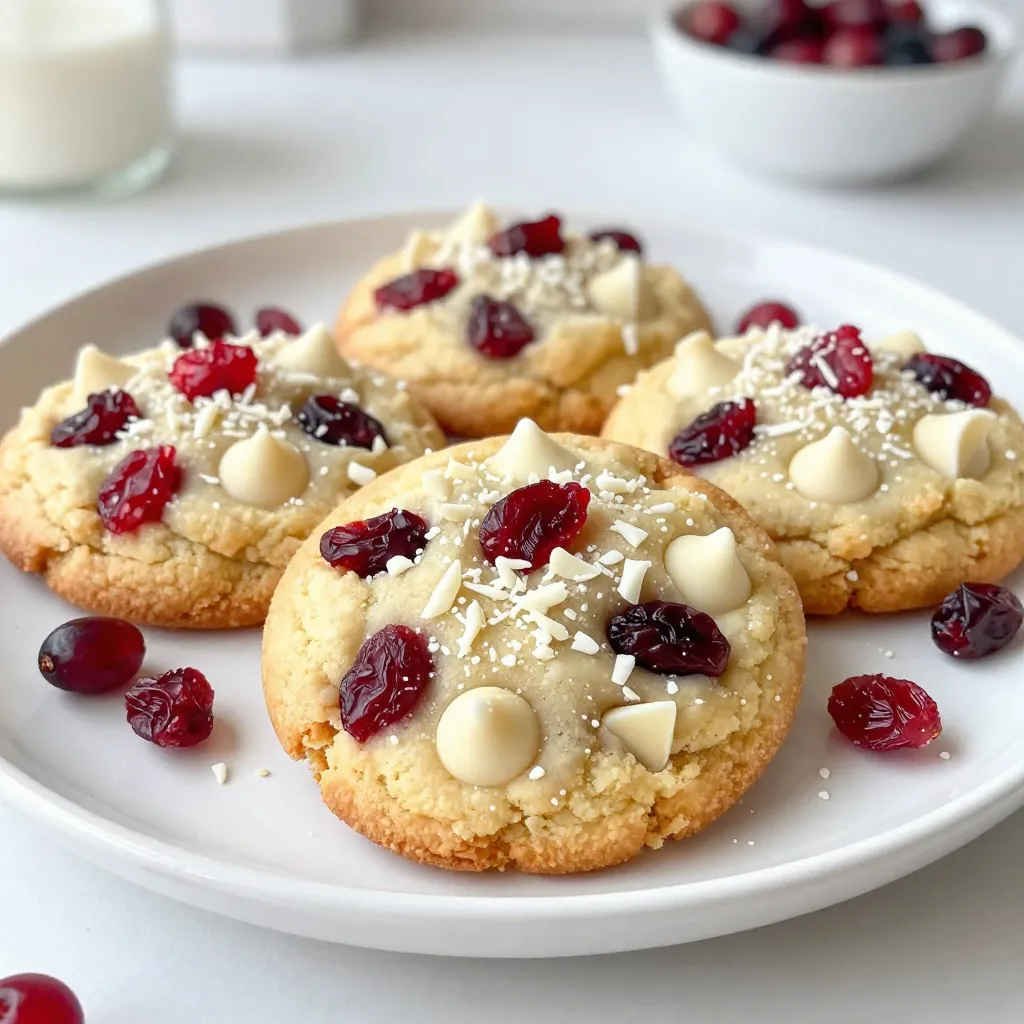
If you love cookies that blend sweet and tart, you’re in for a treat! My White Chocolate Cranberry Cookies are

To make creamy coconut horchata, you need these simple ingredients: - 1 cup long-grain white rice - 4 cups water - 1 cup coconut milk - 1/2 cup sweetened condensed milk - 1 teaspoon vanilla extract - 1/2 teaspoon ground cinnamon - Ice cubes, for serving - Toasted coconut flakes, for garnish You can add these optional ingredients to make your horchata unique: - A pinch of sea salt for balance - A splash of coconut extract for extra coconut flavor - A dash of nutmeg for warmth Accurate measuring helps create the best flavor. Here are some tips: - Use a dry measuring cup for the rice. - For liquids, use a liquid measuring cup. - When measuring condensed milk, use a sticky spatula to scrape it out. - Level off dry ingredients with a straight edge for precision. These tips ensure your creamy coconut horchata shines. Enjoy making this refreshing drink! {{ingredient_image_1}} First, rinse the rice under cold water. This step is key. You want the water to run clear. Rinsing helps remove extra starch. This keeps your drink smooth. Use a fine mesh sieve or bowl for this. It takes just a few minutes. Next, place the rinsed rice in a blender. Add 2 cups of water to the blender. Blend on high for about 1 to 2 minutes. You want the rice to be finely ground. This step helps release the rice's flavor. Make sure there are no large pieces left. Now, strain the rice mixture into a large pitcher. Use a fine mesh sieve or cheesecloth. Discard the solid rice left in the sieve. Add the remaining 2 cups of water, coconut milk, sweetened condensed milk, vanilla extract, and ground cinnamon to the pitcher. Stir everything well. It should blend nicely. Taste your horchata and adjust the sweetness if needed. Add more condensed milk for extra sweetness. Refrigerate for at least 2 hours. This chill time makes a big difference. Serve over ice cubes in tall glasses. Top with toasted coconut flakes for a lovely look. Enjoy your creamy coconut horchata! To make your horchata just right, start with the sweetened condensed milk. This adds a rich, sweet flavor. If you want it sweeter, add more condensed milk. You can also sprinkle in extra cinnamon. This will enhance the taste and aroma. Taste it as you mix. This way, you can find your favorite level of sweetness and spice. Chilling your horchata is key for a refreshing drink. After mixing, place it in the fridge for at least two hours. This allows the flavors to blend. For quicker chilling, pour it into smaller containers. They cool down faster. Serve it over ice to keep it cold longer. Always use fresh ice cubes for the best taste. Serve your horchata in tall glasses. This makes it look fancy. Top each glass with toasted coconut flakes. This adds a crunchy texture. If you want a visual pop, add a sprinkle of cinnamon on top. You can also add a slice of lime for a zesty twist. Enjoy this drink with friends or family on a hot day. It’s perfect for summer! Pro Tips Rinsing the Rice: Rinse the rice thoroughly to eliminate excess starch, which can make the horchata too thick. Blending Technique: Blend the rice and water until finely ground, ensuring a smooth and creamy texture for your horchata. Chill Time: Allow the horchata to chill for at least 2 hours; this helps the flavors meld beautifully and enhances the taste. Garnishing: For added flavor and presentation, garnish with toasted coconut flakes just before serving. {{image_2}} You can easily make this drink dairy-free. Just swap out the sweetened condensed milk. Use coconut cream or a dairy-free sweetener instead. Almond milk is another good choice. It adds a nutty flavor. This keeps the drink light and tasty. Want to mix it up? Add different flavors! Chocolate is a fun twist. Just blend in cocoa powder with the rice. Almond flavor is also nice. Use almond extract instead of vanilla. Both options give your horchata a new vibe. Cold brew coffee lovers will enjoy this! Start by making cold brew coffee. Use a strong blend for rich flavor. Then, mix the cold brew with your coconut horchata. This gives you a refreshing boost. Serve it over ice for a perfect summer drink. To keep your creamy coconut horchata fresh, store it in a glass pitcher. Make sure the pitcher is tightly sealed. This prevents any strange smells from getting in. Always keep it in the fridge. The cold helps maintain its flavor and texture. If stored properly, your horchata lasts about three to five days. The flavors will deepen as it sits. However, it’s best enjoyed fresh. If you notice any changes in smell or texture, it’s time to toss it out. You can use leftover horchata in many fun ways. Try it as a base for smoothies. Blend it with fruits like bananas or berries for a tasty drink. You can also use it in baking. It adds moisture to cakes or pancakes. Get creative and enjoy every drop! Horchata is a sweet, creamy drink made from rice. It has roots in Mexico and Spain. The drink usually includes water, sugar, and spices. In this recipe, we add coconut milk and sweetened condensed milk for rich flavor. The result is a refreshing drink perfect for summer. Yes, you can use different types of milk. Almond milk or oat milk works well. For a richer taste, try using whole milk. Each milk gives a unique flavor to the drink. Just keep in mind that the texture and taste may change slightly. You can make horchata without a blender by soaking rice. Start by rinsing the rice well. Then, soak it in water for at least 4 hours. After soaking, mash the rice with a spoon or your hands. Strain the rice like before, then mix in the other ingredients. This method takes a bit longer but works just fine. This post shared how to make delicious horchata. We covered key ingredients and optional add-ins. I provided tips for measuring and preparing rice. You learned how to blend, strain, and mix the drink well. We also explored ways to adjust sweetness and served it right. Remember, you can customize your horchata in many ways. Use dairy-free milk or infuse flavors. Proper storage helps your drink last longer and stay fresh. Try different methods, and enjoy your unique creations!

Creamy Coconut Horchata Refreshing Summer Drink

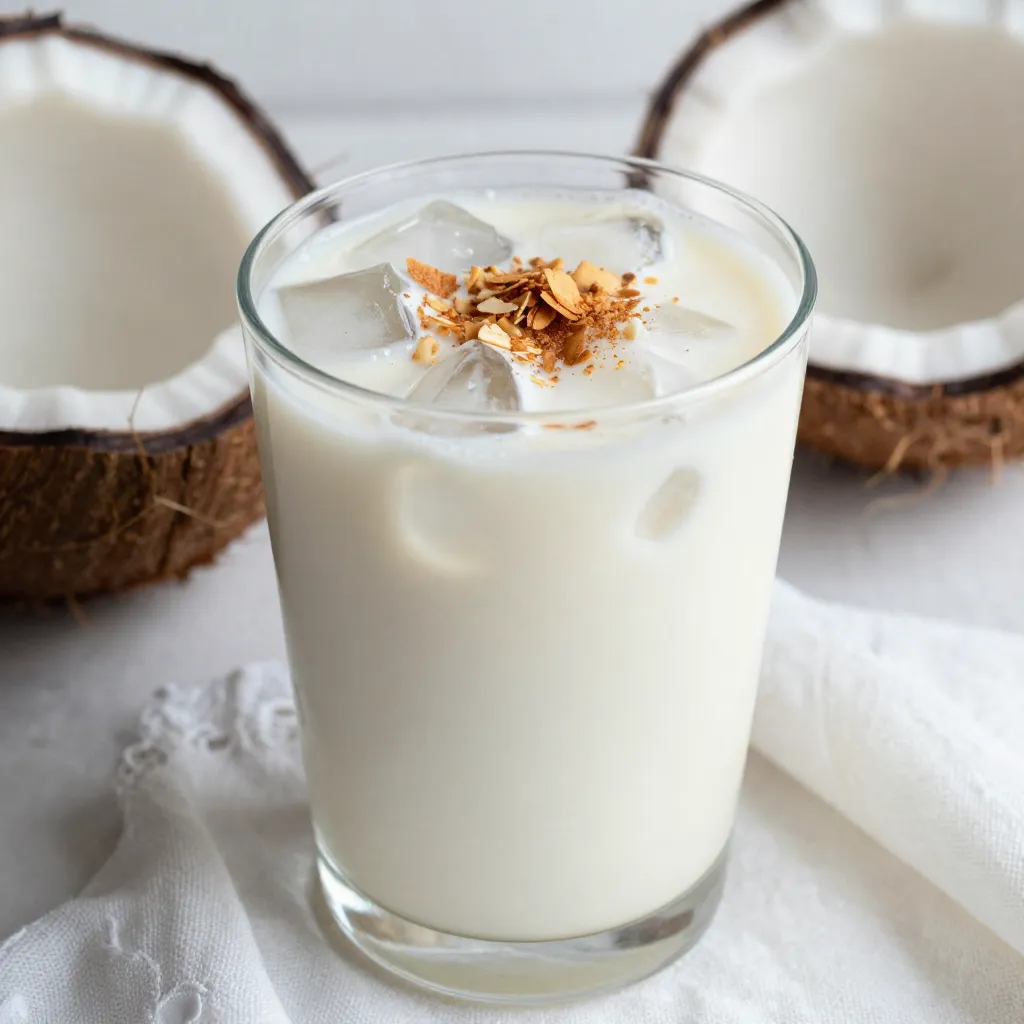
Hot summer days call for a refreshing drink, and creamy coconut horchata fits the bill! This tasty treat combines rich

To make Loaded Taco Potato Skins, you need simple and fresh ingredients. Here’s what you’ll need: - 4 large russet potatoes - 1 cup ground turkey or beef - 1 packet taco seasoning - 1 cup shredded cheddar cheese - 1 cup black beans - 1 cup diced tomatoes - ½ cup sour cream - ½ cup sliced jalapeños - ¼ cup chopped green onions - Olive oil - Salt and pepper Each ingredient plays a key role in creating rich flavors. The russet potatoes form the base, offering a sturdy and crispy shell. Ground turkey or beef adds protein and heartiness. Taco seasoning brings that classic taste, tying everything together. Next, the shredded cheddar cheese melts beautifully, creating a rich topping. Black beans and diced tomatoes boost texture and flavor. Sour cream adds a creamy finish, while jalapeños kick up the heat. Finally, green onions provide a fresh crunch and a pop of color. These ingredients work together to create a fun and tasty meal. Feel free to mix and match based on your taste! {{ingredient_image_1}} 1. Preheat your oven to 400°F (200°C). This helps cook the potatoes evenly. 2. Scrub the potatoes under cold water. Dry them well with a towel. 3. Pierce each potato several times with a fork. This lets steam escape while cooking. 4. Rub each potato with olive oil, salt, and pepper. This adds flavor to the skin. 1. Heat a skillet over medium heat. This ensures the meat cooks well. 2. Add the ground turkey or beef to the skillet. Cook until it is browned. 3. Use a spatula to break the meat apart as it cooks. This helps it brown evenly. 4. Stir in the taco seasoning. Follow the package instructions for best results. 1. When the potatoes are tender, take them out of the oven. Let them cool slightly. 2. Cut each potato in half lengthwise. Be careful, as they will be hot. 3. Scoop out some of the flesh, leaving a thin layer on the skin. This makes a bowl for the filling. 4. Brush the insides of the potato skins with olive oil. This keeps them crisp. 5. Place them cut side down on a baking sheet. Bake for 10-15 minutes until crispy. 1. Remove the potato skins from the oven and flip them over. 2. Spoon the cooked taco meat into each skin. Be generous with the filling! 3. Top each with black beans and diced tomatoes. Then sprinkle cheddar cheese on top. 4. Return the skins to the oven for 5-10 minutes. Watch for the cheese to melt and bubble. 5. Once out of the oven, drizzle sour cream over each skin. Top with jalapeños and green onions. To get crispy potato skins, oven temperature is key. Set your oven to 400°F (200°C) before baking. This high heat helps the skins crisp up nicely. Once you prepare the potatoes, rub them with olive oil. This adds flavor and aids in crisping. Don’t skip the salt and pepper; they make a big difference! You can take these loaded skins to the next level. Add creamy avocado or zesty salsa for extra flavor. If you like heat, toss in more jalapeños or a splash of hot sauce. Adjust the taco seasoning to your taste. You can even mix in some cumin or chili powder for a unique twist! These loaded potato skins shine as a main dish, but they pair well with sides. Serve them with a fresh side salad or tortilla chips. You can also place them on a colorful platter for a fun touch. Consider adding a few lime wedges for a burst of freshness. Enjoying them with friends makes them even better! Pro Tips Choose the Right Potatoes: For the best texture, use large russet potatoes as they have a fluffy interior and crispy skin when baked. Season Generously: Don't skimp on seasoning the potato skins; a good rub of olive oil, salt, and pepper enhances their flavor. Customize Your Toppings: Feel free to get creative with toppings! Add avocado, corn, or your favorite salsa for a personal touch. Serve Immediately: These potato skins are best enjoyed fresh out of the oven while the cheese is melty and the skins are crispy. {{image_2}} You can easily make this dish meat-free. Swap the ground turkey or beef for vegetables or tofu. Use a mix of bell peppers, zucchini, or mushrooms. Tofu can add a nice texture. Season your veggies with taco seasoning for flavor. If you like heat, add jalapeños or hot sauce. You can mix in fresh jalapeños with the toppings. For extra spice, try a spicy taco seasoning. This will give your skins a nice kick. Always adjust to your taste. Cheese can change the whole dish! While cheddar is great, try pepper jack for heat. You can also use Monterey Jack or even crumbled feta. Each cheese gives a unique flavor. Mix and match to find your favorite combination. To store your Loaded Taco Potato Skins, let them cool first. Place them in an airtight container. You can keep them in the fridge for up to three days. If you want to enjoy them later, freeze them. They can last for up to three months in the freezer. Just remember to wrap them well to prevent freezer burn. When reheating, I recommend using the oven. Preheat it to 350°F (175°C). Place the potato skins on a baking sheet. Heat them for about 10-15 minutes. This keeps the skins crispy and warm. If you use a microwave, they may get soggy. If you must use the microwave, heat them in short bursts. This helps keep some crispness. Yes, you can use other potatoes. Yukon golds work well for a creamier texture. Red potatoes add a nice color and hold their shape. Just remember to adjust baking time for smaller or larger potatoes. You can use ground chicken or pork for a different taste. If you want a meatless option, try black beans or lentils. Both options give you that hearty feel. Yes, you can prepare them ahead. Bake the potatoes and cool them. Store the cooked potatoes in the fridge for up to two days. When you’re ready, assemble and bake them before serving. Yes, this recipe is naturally gluten-free. Just check the taco seasoning packet to ensure it is gluten-free. You can also make your own seasoning to be safe. Loaded Taco Potato Skins are fun to make and tasty to eat. You learned how to prepare the potatoes, cook the meat, and assemble the skins. We also covered tips for crispy skins and tasty variations. You can swap ingredients or adjust spice levels to fit your taste. These skins are perfect for parties or a family meal. Enjoy your cooking adventure and share these delicious bites with friends. I can't wait to hear how yours turn out!

Loaded Taco Potato Skins Tasty and Easy Recipe

If you’re craving a tasty snack that’s both fun and easy to make, you’re in luck! Loaded Taco Potato Skins

- 8 oz rice noodles - 1/2 cup creamy peanut butter - 3 tablespoons soy sauce - 2 tablespoons lime juice - 2 tablespoons honey or maple syrup - 1 tablespoon sesame oil - 1-2 teaspoons sriracha - 1 cup shredded carrots - 1 red bell pepper, thinly sliced - 1 cup cucumber, julienned - 3 green onions, chopped - 1/4 cup chopped cilantro - Crushed peanuts for garnish To make Spicy Thai Peanut Noodles, gather your main ingredients first. Start with rice noodles, creamy peanut butter, soy sauce, lime juice, and honey. These five items are key to a rich flavor. Next, consider the optional ingredients. Adding sesame oil gives a nutty touch. Sriracha adds heat, while carrots, bell pepper, and cucumber bring crunch. Green onions and cilantro add freshness. Finally, crushed peanuts on top give a nice texture. These ingredients create a great balance of flavors. The peanut butter is creamy, while the soy sauce adds saltiness. Lime juice brings brightness, and honey adds sweetness. Together, they make a delightful sauce. {{ingredient_image_1}} To cook rice noodles, start by boiling water in a pot. Once the water is boiling, add the noodles. Cook them for about 4 to 6 minutes, or until they are soft. Stir them gently to prevent sticking. After cooking, drain the noodles in a colander. Rinse them under cold water to stop cooking. This helps keep the noodles firm and chewy. Set the rinsed noodles aside; they will mix well later. Next, it’s time to make the peanut sauce. In a medium bowl, combine 1/2 cup of creamy peanut butter with 3 tablespoons of soy sauce. Add 2 tablespoons of lime juice and 2 tablespoons of honey or maple syrup. Then, pour in 1 tablespoon of sesame oil. For the spice, add 1 to 2 teaspoons of sriracha. Mix everything together until it’s smooth and creamy. If you like it spicy, add more sriracha to taste. Now, let’s bring everything together. In a large bowl, combine the cooked rice noodles, 1 cup of shredded carrots, 1 sliced red bell pepper, and 1 cup of julienned cucumber. Pour the peanut sauce over this mixture. Toss everything gently so that the noodles and veggies are well coated in the sauce. This step is key to getting all those flavors to blend together. For the final touch, add in 3 chopped green onions and 1/4 cup of chopped cilantro. Toss lightly again to mix. This adds a fresh taste that brightens up the dish. To serve, place the noodle mixture into bowls. Finish with a sprinkle of crushed peanuts on top for crunch. You can also add a wedge of lime on the side for an extra zing! To avoid mushy noodles, cook them just until tender. Follow the package time closely. Rinse the noodles under cold water to stop cooking. This keeps them firm and springy. For storage, keep the noodles in an airtight container. Add a splash of oil to prevent sticking. This simple step makes serving easier later. Spice it up by adding garlic powder or red pepper flakes. This gives the noodles a nice kick. You can also mix in some chopped peanuts for a crunchy surprise. Pair the dish with lime wedges for a fresh twist. Squeezing lime juice over your noodles brightens the flavors. Prepare the veggies ahead of time. Slice the bell pepper and julienne the cucumber. Store them in the fridge until you’re ready to cook. For leftovers, place them in a container with a tight seal. Enjoy them within three days for the best taste. You can also reheat them on the stovetop. This keeps the noodles from getting too sticky. Pro Tips Adjust the Spice Level: Start with 1 teaspoon of sriracha and increase according to your taste. This ensures the dish is flavorful without being overpowering. Perfectly Cooked Noodles: Rinse the cooked noodles under cold water to stop the cooking process and prevent them from becoming mushy. Use Fresh Vegetables: Opt for fresh, crunchy vegetables for added texture and flavor. This enhances the overall taste and presentation of the dish. Garnish Creatively: Garnish with lime wedges and extra cilantro for a vibrant look. This not only adds visual appeal but also enhances the flavor when squeezed over the noodles. {{image_2}} You can boost your Spicy Thai Peanut Noodles with protein. Tofu is a great choice for a plant-based option. Use firm tofu for the best texture. Simply press it to remove extra water, then cube and pan-fry until golden. Toss it in with the noodles for added crunch. If you prefer meat, chicken and shrimp work well too. For chicken, use thin slices and cook until no longer pink. For shrimp, cook until they turn pink and curl up. Both options add great flavor and protein. Making this dish plant-based is easy. Just stick with tofu or add more veggies. Try edamame or chickpeas for protein. If you want a different sauce, use almond butter or sunflower seed butter. These substitutes keep the creamy texture you love. For toppings, consider sesame seeds or crushed nuts. They add more crunch and flavor. You can replace honey with maple syrup to keep it vegan-friendly. Adding regional vegetables can change the dish's flavor. Try bok choy, snap peas, or bell peppers for a fresh twist. Each vegetable brings a unique taste and texture. You can also switch up the noodles. Instead of rice noodles, use whole wheat noodles or even zucchini noodles. Each type gives a different feel to the dish while keeping it tasty and fun. To keep your Spicy Thai Peanut Noodles tasty, store them in an airtight container. Place the noodles and sauce together for the best flavor. Refrigerate them for up to four days. If you want to keep them longer, freeze the noodles and sauce separately. This method keeps the texture nice. Thaw frozen noodles in the fridge overnight before reheating. To reheat without losing texture, use the stovetop. Heat a pan over low heat and add a splash of water. Stir the noodles gently until warm. This keeps them from drying out. If you’re in a hurry, use the microwave. Heat in 30-second bursts, stirring in between. This way, you won’t overcook the noodles. If you have a peanut allergy, you can use sun butter or almond butter. These nut butters work well in the sauce. You might also try tahini, made from sesame seeds. Each option will give a different flavor, but they all taste great in the dish. The spice level can change based on your taste. The recipe calls for 1-2 teaspoons of sriracha. If you like it hot, add more sriracha. If you want it mild, use just a bit or skip it. You control the heat, so make it your way! Yes, you can make this dish ahead and enjoy it later. Cook the noodles and make the sauce in advance. Store them in the fridge separately. Mix them together when you're ready to eat. This dish tastes great even after a day or two! This blog post explored the tasty world of Spicy Thai Peanut Noodles. You learned about key ingredients like rice noodles and peanut butter. I shared step-by-step instructions for cooking and combining everything. I also gave tips for perfect noodles and ways to switch up the recipe. Remember, you can adjust flavors and add your favorite proteins. Whether you love cooking or just want a quick meal, these noodles are a great choice. Enjoy your cooking journey and make it your own!

Spicy Thai Peanut Noodles Flavorful and Easy Recipe

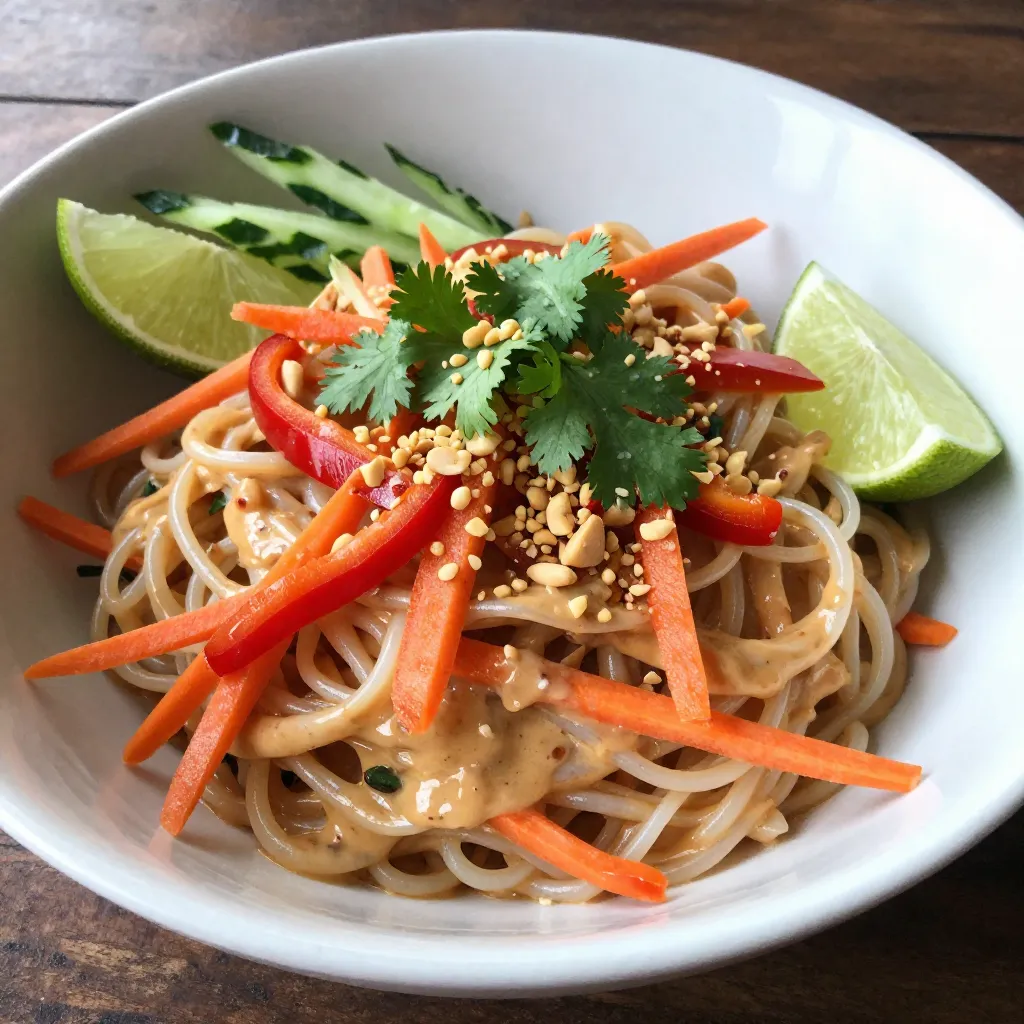
Craving a quick and tasty meal? Let me introduce you to Spicy Thai Peanut Noodles! This dish packs a punch

- 8 oz rice noodles - 1 cup shredded purple cabbage - 1 cup shredded carrots - 1 red bell pepper, thinly sliced - 1/2 cup cucumber, julienned - 1/4 cup green onions, sliced - 1/4 cup fresh cilantro, chopped - 1/4 cup roasted peanuts, chopped Thai Peanut Noodle Salad starts with rice noodles. They are light and soak up flavors well. You can find them in most grocery stores. Fresh vegetables add crunch and color. Shredded cabbage and carrots bring a nice bite. Sliced bell pepper and cucumber keep it refreshing. Green onions and cilantro give it a bright taste. Chopped roasted peanuts add a tasty crunch on top. - 1/3 cup creamy peanut butter - 2 tablespoons soy sauce - 1 tablespoon maple syrup - 1 tablespoon rice vinegar - 1 teaspoon sesame oil - 1-2 teaspoons Sriracha (to taste) - Water (to thin the sauce) The peanut sauce is the star of this dish. Creamy peanut butter gives it richness. Soy sauce adds a salty, umami flavor. Maple syrup brings sweetness that balances the salt. Rice vinegar adds tang, while sesame oil gives depth. Sriracha can bring a kick, so adjust it to your taste. If the sauce is too thick, add water until it’s just right. - Additional veggies - Extra spices - Protein add-ins Feel free to customize your salad! You can add more veggies like snap peas or broccoli. Extra spices can enhance the flavor, such as garlic or ginger. If you want protein, consider adding grilled chicken, shrimp, or tofu. This makes the salad more filling and satisfying. Personalize it to suit your taste! {{ingredient_image_1}} 1. Start by boiling water in a large pot. Make sure it bubbles well. 2. Add 8 oz of rice noodles to the boiling water. Cook them according to the package instructions. 3. Once they are al dente, drain the noodles in a colander. Rinse them under cold water. This stops the cooking and cools them down. Set the noodles aside for later. 1. Grab a large mixing bowl. Add 1 cup of shredded purple cabbage, 1 cup of shredded carrots, 1 thinly sliced red bell pepper, 1/2 cup of julienned cucumber, 1/4 cup of sliced green onions, and 1/4 cup of chopped fresh cilantro. 2. Use a large spoon to toss the veggies together. Make sure they mix evenly. This step adds color and crunch to your salad. 1. In a small bowl, whisk together 1/3 cup of creamy peanut butter, 2 tablespoons of soy sauce, 1 tablespoon of maple syrup, 1 tablespoon of rice vinegar, and 1 teaspoon of sesame oil. 2. Add 1-2 teaspoons of Sriracha for some heat. If the sauce is too thick, add a teaspoon of water at a time until it reaches the right consistency. You want it smooth, not runny. 1. Now, add the cooled rice noodles to the bowl with the veggies. 2. Pour the peanut sauce over the noodle and vegetable mix. Toss everything gently until the noodles and veggies are well coated. 3. For serving, transfer the salad to large bowls or a platter. 4. Sprinkle chopped roasted peanuts on top for added crunch. You can also garnish with extra cilantro and lime wedges for a fresh touch. To adjust the flavor, start with the basics. You can add more soy sauce for saltiness or maple syrup for sweetness. If you want a kick, increase the Sriracha. Taste your sauce as you mix. This helps you find the right balance. For thickening or thinning, if your sauce is too thick, add water. Do this one teaspoon at a time. Stir well after each addition. If it’s too thin, add more peanut butter. This will give it a nice creamy texture. For the right texture, cook rice noodles until they are al dente. This means they should still have a little bite. Overcooking can make them mushy. Rinse them under cold water right after draining. This stops the cooking and helps them stay firm. Common mistakes include not watching the cooking time and skipping the rinse. Always follow the package instructions. If you forget to rinse, the noodles can stick together. To keep your salad fresh, store it in an airtight container. This helps keep the veggies crisp. You can separate the peanut sauce and noodles if you want to keep them fresh longer. For reheating, avoid microwaving the salad as it can make the veggies soggy. Instead, heat the noodles with a little water in a pan. This will warm them without losing crunch. Pro Tips Perfectly Cooked Noodles: To avoid mushy noodles, make sure to cook the rice noodles until just al dente and rinse them in cold water immediately after draining. This stops the cooking process and keeps them firm. Customize Your Veggies: Feel free to swap or add any vegetables you like! Bell peppers, snap peas, or even edamame can add great flavor and texture to your salad. Make It Ahead: This salad can be prepared in advance! Just keep the peanut sauce separate until you're ready to serve to prevent the noodles from soaking up too much moisture. Extra Crunch: For an added crunch, try topping the salad with toasted sesame seeds or additional chopped peanuts before serving. {{image_2}} You can easily make this dish vegetarian or vegan. - Substitutions for non-vegan ingredients: Use maple syrup in place of honey. This keeps the sweetness without animal products. - Adding plant-based proteins: Try chickpeas or tofu for protein. They blend well with the noodles and veggies. If you need a gluten-free dish, there are great options. - Alternative noodles: Use rice noodles, which are already gluten-free. You can also try quinoa noodles for a different taste. - Gluten-free condiments: Choose gluten-free soy sauce or tamari. This keeps the flavors strong without gluten. You can change up the taste to suit your mood. - Spicy version ideas: Add more Sriracha or red pepper flakes for heat. This gives the salad a nice kick. - Alternative sauces to try: Experiment with almond butter or sunflower seed butter instead of peanut butter. Each will give a unique flavor twist. To keep your Thai Peanut Noodle Salad fresh, use an airtight container. This helps lock in moisture and flavor. You can store it in the fridge for up to three days. Always check for any signs of spoilage before eating. Can you freeze the salad? Yes, but it’s best to freeze just the noodles and sauce separately. Freezing the veggies can make them mushy. For freezing, place the noodles and sauce in freezer bags. Squeeze out as much air as possible. When you are ready to eat, thaw them in the fridge overnight. Now that you have leftovers, let’s get creative! You can mix the salad into a stir-fry for a new dish. Add some protein like chicken or tofu for a hearty meal. You can also use it as a filling for wraps or lettuce cups. This way, you can enjoy the flavors in different ways. You can use several alternatives for rice noodles. Here are a few options: - Soba noodles: Made from buckwheat, these give a nice flavor. - Whole wheat spaghetti: This is a good pantry-friendly choice. - Zucchini noodles: Great for a low-carb option; use a spiralizer. - Shirataki noodles: These are very low in calories and carbs. These substitutes can work well, but adjust the cooking time as needed. Thai Peanut Noodle Salad can last in the fridge for about 3 to 5 days. Store it in an airtight container. Over time, the veggies may get softer, so enjoy it fresh for the best taste. Yes, you can make this salad ahead of time. Here are some tips: - Prep the noodles and veggies: Cook and chop them a day before. - Make the peanut sauce: It keeps well in the fridge. Just mix it in before serving. - Store separately: Keep noodles, veggies, and sauce apart until you are ready to eat. This keeps everything fresh and crunchy. In this article, I covered how to make a tasty Thai Peanut Noodle Salad. We explored key ingredients like rice noodles, fresh veggies, and a creamy peanut sauce. I shared step-by-step instructions and helpful tips for perfecting your dish. You can customize it with extra ingredients or try unique variations. Remember, you can store leftovers or use them in new ways. Enjoy crafting your salad, and don’t be afraid to experiment with flavors. Your kitchen is a great place for creativity!

Thai Peanut Noodle Salad Flavorful and Nutritious Dish

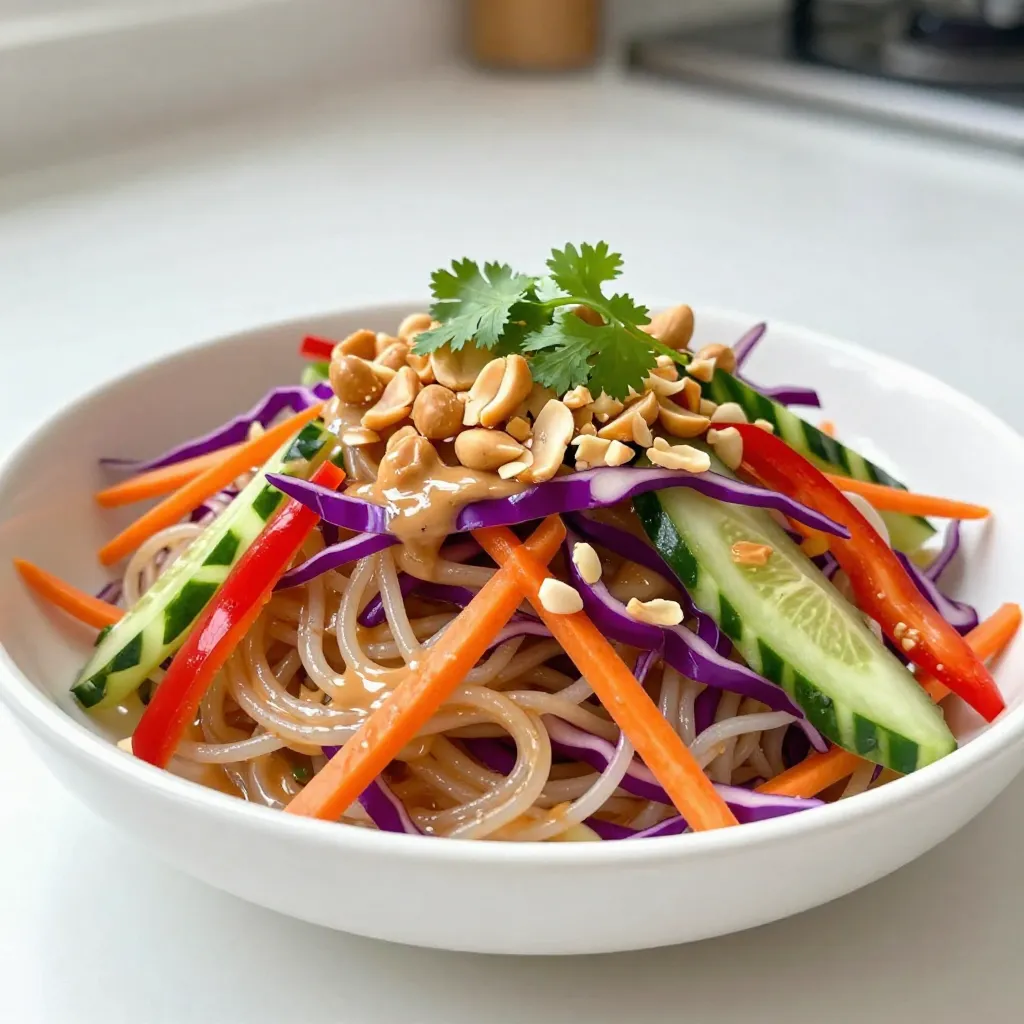
Welcome to flavor town! Today, I’m excited to share my recipe for Thai Peanut Noodle Salad, a dish that’s both

Older posts
Newer posts
← Previous Page1 Page2 Page3 … Page84 Next →

dsad

© 2026 easycookingbite • Built with GeneratePress

Our Policies

  • Copyright Policy
  • Cookie Policy
  • GDPR Policy
  • Privacy Policy
  • Disclaimer
  • Terms Of Use

More Information

  • Home
  • About
  • Contact
  • Appetizers
  • Dessert
  • Dinner
  • Drinks
©2026, easycookingbite About Back To Top