Skip to content
DisclaimerTerms Of UseGDPR PolicyCookie Policy

easycookingbite

  • Home
  • Drinks
  • Appetizers
  • Dinner
  • Dessert
  • About
  • Contact
  • Privacy Policy
DisclaimerTerms Of UseGDPR PolicyCookie Policy

NO-ING-IMG

- 1 cup apple cider - 1/2 cup unsalted butter, softened - 1 cup granulated sugar - 2 large eggs - 1 teaspoon vanilla extract - 2 cups all-purpose flour - 1 teaspoon baking powder - 1 teaspoon baking soda - 1 teaspoon ground cinnamon - 1/2 teaspoon ground nutmeg - 1/2 teaspoon salt - 3/4 cup buttermilk When it comes to apple cider, I suggest using fresh, unfiltered cider. It adds great flavor. If you can’t find apple cider, you can use apple juice. Just know the taste will change slightly. For the butter, unsalted is best. It lets you control the saltiness. You can swap buttermilk for regular milk. Just add a teaspoon of lemon juice to make it sour. You can find most of these ingredients at any grocery store. If you want organic options, look for them at health food stores. Accurate measuring is key for baking. Here are some tips: - Use a dry measuring cup for flour and sugar. Spoon it in lightly, then level it off with a knife. - For liquids, use a clear liquid measuring cup. Check the measurement at eye level. - When measuring butter, use the markings on the wrapper. Cut off the needed amount. - For sticky ingredients like honey or molasses, spray your measuring cup with cooking spray first. This helps them slide out easily. These tips will help you get the perfect texture and flavor in your cake. Following them closely will lead to a delicious pound cake! First, set your oven to 350°F (175°C). While it heats, grease and flour a 9x5-inch loaf pan. This step helps the cake slide out easily after baking. Next, take a small saucepan. Pour in 1 cup of apple cider. Heat it over medium heat until it simmers. Let it cook until it reduces to about 1/2 cup. This process concentrates the apple flavor. Once done, set it aside to cool. In a large mixing bowl, add 1/2 cup of softened unsalted butter and 1 cup of granulated sugar. Use a mixer to cream them together until light and fluffy. This should take around 3 to 4 minutes. Add in 2 large eggs, one at a time. Mix well after each addition. Then, add 1 teaspoon of vanilla extract and the reduced apple cider. Stir until smooth. In another bowl, whisk together 2 cups of all-purpose flour, 1 teaspoon of baking powder, 1 teaspoon of baking soda, and 1 teaspoon of ground cinnamon. Also, add 1/2 teaspoon of ground nutmeg and 1/2 teaspoon of salt. This mix is key for flavor and texture. Now, slowly add the dry mix to the wet mix. Do this in parts, alternating with 3/4 cup of buttermilk. Start and end with the flour mix. Stir gently until just combined. Be careful not to overmix; this keeps the cake tender. Pour the batter into your prepared loaf pan. Smooth the top with a spatula. Place the pan in the oven and bake for 55 to 65 minutes. Check if it's done by inserting a toothpick into the center. If it comes out clean, your cake is ready! After baking, let the pound cake cool in the pan for about 10 minutes. Then, carefully transfer it to a wire rack to cool completely. This step ensures a nice texture. You can dust it with powdered sugar for a lovely finish. Enjoy your delicious creation! To keep your pound cake moist, use fresh apple cider. Reducing it adds great flavor. Make sure to cool the cider before mixing it in. This helps your cake mix well. Use buttermilk for a rich taste and tender texture. It enhances moisture and gives a light crumb. Avoid over-mixing the batter. This can lead to a dense cake. Mix just until the ingredients come together. Also, make sure you measure your flour correctly. Too much flour can dry out the cake. Use a spoon to aerate the flour, then scoop it into your measuring cup. Store your pound cake in an airtight container. This keeps it fresh for up to five days. You can also wrap it in plastic wrap before placing it in the container. If you want to keep it longer, freeze it. Slice it first for easy thawing. Just wrap slices in plastic wrap, then place them in a freezer bag. {{image_2}} You can make this cake gluten-free. Simply substitute the all-purpose flour with a gluten-free blend. Many brands work well, so choose one you like. You may need to add a bit more moisture to the batter, as gluten-free flours absorb more liquid. Always check the package for specific instructions. Your cake will still be delicious and have the same great apple flavor. Want to jazz up your pound cake? Adding mix-ins is a great idea! You can stir in chopped nuts like walnuts or pecans for crunch. Chocolate chips can add a sweet twist. Aim for about 1/2 cup of your choice. Just fold them in gently after mixing the batter. This gives each slice a fun surprise! You can enhance flavor with different spices. Consider adding ginger for warmth or cloves for depth. A teaspoon of orange zest can brighten the taste, too. Feel free to play around with amounts until you find your perfect mix. These changes can make your cake unique and exciting every time you bake it! After you bake your apple cider donut pound cake, let it cool. Wrap it in plastic wrap or place it in an airtight container. This keeps it moist. Store it at room temperature for up to three days. If you want it to last longer, consider refrigeration. In the fridge, it can stay fresh for about a week. Want to save some for later? Freezing is a great option. First, cool the cake completely. Then, wrap it tightly in plastic wrap, followed by aluminum foil. This double wrap helps prevent freezer burn. You can freeze it for up to three months. When you’re ready to enjoy, thaw it overnight in the fridge. To heat up leftover pound cake, slice it first. You can use the microwave for quick warming. Just heat each slice for about 15-20 seconds. For a crisp outer layer, use an oven. Preheat it to 350°F (175°C) and warm the slices for about 10 minutes. This brings back its fresh taste and texture. Yes, you can use apple juice. However, apple cider has a richer flavor. This gives the cake a deeper taste. If you want that classic taste, use cider. The pound cake lasts about 3 to 5 days. Store it in an airtight container. This keeps it moist and fresh. If you notice any mold, throw it away. Yes, you can make it ahead! Bake the pound cake and let it cool. Wrap it well in plastic wrap. It stays fresh for a few days. You can also freeze it for up to 3 months. Serve the pound cake with powdered sugar on top. You can also add warm apple slices. For a sweet touch, drizzle a simple glaze made from powdered sugar and apple cider. Yes, you can reduce the sugar. Try cutting it by 1/4 cup. The cake may be less sweet, but it will still taste great. Adjust to your taste while keeping the cake moist. This blog post guided you through making a delicious apple cider donut pound cake. We covered key ingredients and important measuring tips. You learned step-by-step instructions for perfect baking, and I shared tips for keeping your cake moist. Variations allow you to personalize the cake as you like. Finally, storage tips ensure your leftovers stay fresh. Baking is fun! Try this recipe and enjoy the results. Happy baking!

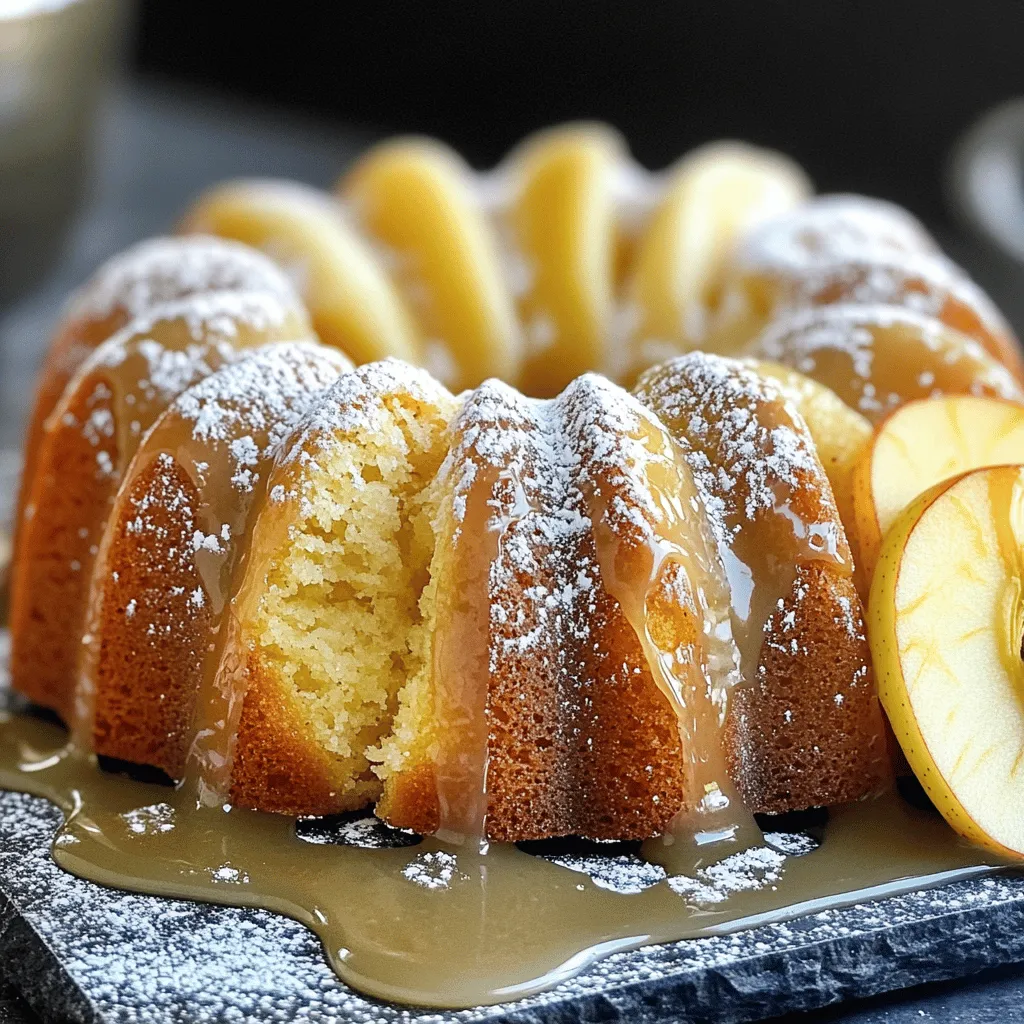
Irresistible Apple Cider Donut Pound Cake Recipe

If you love the warm, cozy flavors of fall, you’ll adore my Irresistible Apple Cider Donut Pound Cake. This cake

Here’s what you need to make delicious spinach ricotta stuffed shells: - 20 jumbo pasta shells - 2 cups ricotta cheese - 1 cup fresh spinach, chopped - 1 cup grated mozzarella cheese - 1/2 cup grated Parmesan cheese - 1 egg, lightly beaten - 1 teaspoon garlic powder - 1 teaspoon dried Italian herbs (oregano, basil) - Salt and pepper to taste - 2 cups marinara sauce - Fresh basil leaves for garnish Each ingredient plays a key role in making this dish rich and tasty. The jumbo pasta shells hold the creamy filling well. Ricotta cheese gives a smooth texture, while spinach adds color and nutrition. The mix of mozzarella and Parmesan cheeses adds depth and a cheesy crust. Don’t forget the egg! It helps bind the filling together. Garlic powder and Italian herbs bring out great flavors. Salt and pepper add just the right amount of seasoning. Marinara sauce gives the dish a tangy finish, and fresh basil leaves make it look pretty. Gather these ingredients, and you’re ready to create a comforting meal! To start, you need to boil the pasta shells. Fill a big pot with water and add salt. Bring it to a boil. Then, add 20 jumbo pasta shells to the pot. Cook them for about 9 minutes, or until they are al dente. After that, drain the shells in a colander. Let them cool for a few minutes. Next, it’s time to make the filling. In a mixing bowl, combine 2 cups of ricotta cheese and 1 cup of chopped fresh spinach. Then, add 1/2 cup of grated mozzarella cheese and 1/4 cup of grated Parmesan cheese. Crack in 1 lightly beaten egg. Season the mixture with 1 teaspoon of garlic powder, 1 teaspoon of dried Italian herbs, and a pinch of salt and pepper. Mix everything well until it’s all combined and creamy. Now, let’s put it all together. First, spread about 1/2 cup of marinara sauce on the bottom of a large baking dish. Take each cooked shell and stuff it with your cheese and spinach mixture. Place the stuffed shells in the dish with the seam side up. Once all shells are in, pour the rest of the marinara sauce on top. Make sure the shells are well coated. Now, sprinkle the remaining mozzarella and Parmesan cheese on top. Cover the dish with aluminum foil and bake it in a preheated oven at 375°F (190°C) for 25 minutes. After that, remove the foil and bake for another 10 minutes. You want the cheese to be bubbly and golden. Once it's done, let it cool for a few minutes and enjoy! - Al dente pasta tips: Cook the jumbo pasta shells for about 9 minutes. You want them firm but not hard. This keeps them from tearing when you stuff them. A quick rinse in cold water helps stop the cooking. - Baking without overcrowding: When you place the shells in the dish, keep space between them. This allows the heat to reach all sides. It helps the cheese melt evenly and turns golden. - Additional spices and ingredients: Feel free to add some red pepper flakes for heat. A bit of lemon zest brightens the filling too. Fresh herbs like parsley or thyme can also add depth. - Cheese variations: If you want to mix things up, try goat cheese or feta. These options add a tangy note that works well with spinach. You can also use a mix of cheeses for a richer flavor. - Techniques for stuffing shells: Use a small spoon or piping bag for easy filling. This keeps your hands clean and makes it simple. Fill the shells completely but avoid overstuffing. - Avoiding fillings leakage: Be sure the shells are tightly sealed. If they are too loose, the filling may spill out during baking. Press the edges gently to help them stay closed. {{image_2}} You can make spinach ricotta stuffed shells even more colorful. Using different leafy greens adds great taste. Try kale or Swiss chard for a twist. They both mix well with ricotta. You can also add other vegetables like mushrooms or bell peppers. Sauté them first to bring out their flavors. This makes your dish rich in nutrients. If you want more protein, ground meat or sausage works great. Cook the meat before mixing it with the cheese. Chicken or turkey is another option. Shred cooked chicken and add it to the filling. This gives your dish a hearty feel, perfect for meat lovers. For those avoiding gluten, you can substitute the pasta shells. Look for gluten-free pasta brands. They are often made from rice or corn. You can also use zucchini slices as a shell alternative. Just bake them until soft. Some people also prefer alternative cheese options like dairy-free cheese. This keeps the dish creamy while meeting dietary needs. To store your leftover spinach ricotta stuffed shells, let them cool first. Place them in an airtight container. This keeps them fresh and moist. You can also use a glass dish with a lid. Make sure to seal it well. This helps prevent any odors from your fridge. If you want to freeze your stuffed shells, first let them cool. Then wrap them tightly in plastic wrap. Place them in a freezer-safe bag or container. When you’re ready to eat, thaw them in the fridge overnight. To reheat, place them in a preheated oven at 350°F (175°C) for about 30 minutes. Cover with foil to keep them moist. In the fridge, stuffed shells last about 3 to 5 days. Keep an eye on them. If you see any mold or an odd smell, throw them away. Fresh food is key to good meals. If they look dry or hard, it’s best to discard them too. Enjoy your leftovers safely! Yes, you can change the cheese to suit your taste. If you love a sharper flavor, try using feta cheese instead of ricotta. For a creamier touch, you can add cream cheese. Goat cheese gives a tangy kick that works well too. Mixing different cheeses can create a unique flavor profile. Just remember, the key is to balance the cheese with the spinach. Making these shells ahead is easy. You can prepare the filling and stuff the shells a day in advance. Just cover them with plastic wrap and store them in the fridge. You can also bake them later. If you want to freeze them, do so before baking. Just make sure to wrap them well. When you’re ready to cook, bake from frozen but add a bit more time. These stuffed shells pair well with many sides. A simple green salad adds freshness. Garlic bread is a classic choice that complements the sauce. You could also serve steamed vegetables for a healthy touch. Roasted asparagus or zucchini works well too. If you want something warm, a light soup can be a great start. In this blog post, we explored how to make delicious spinach ricotta stuffed shells. You learned about the key ingredients, preparation steps, and helpful tips for cooking. I shared variations for different diets, along with storage guidelines. Remember, you can get creative with flavors and ingredients. This dish is flexible and fun to make. With practice, you will impress your family and friends with this tasty meal. Happy cooking!

Spinach Ricotta Stuffed Shells Flavorful and Easy Dish

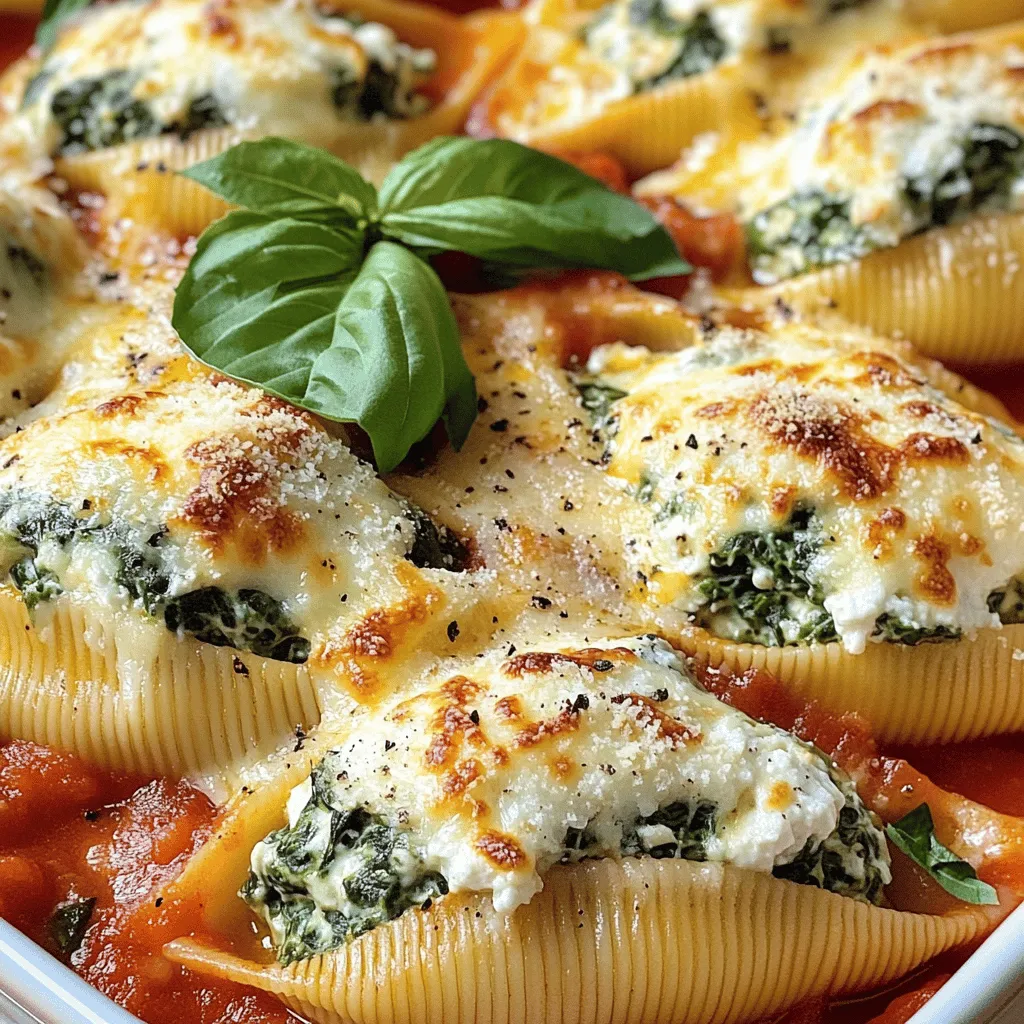
Looking for a quick, tasty dish that everyone will love? Spinach Ricotta Stuffed Shells might be your answer. These jumbo

- 1 lb large shrimp, peeled and deveined - 2 cups broccoli florets - 1 bell pepper, sliced (red or yellow) - 1/4 cup honey - 3 tablespoons soy sauce (low sodium preferred) - 3 cloves garlic, minced - 1 tablespoon fresh ginger, grated - 2 tablespoons olive oil - 1 teaspoon sesame oil - 1 teaspoon red pepper flakes (optional, for heat) - Salt and pepper to taste - Sesame seeds for garnish - Chopped green onions for garnish When measuring ingredients, use a kitchen scale for accuracy. For liquids, use a clear measuring cup. Make sure to level off dry ingredients to avoid over-measuring. For sticky ingredients like honey, coat your measuring cup with oil first for easy pouring. Use fresh shrimp for the best taste. Look for shrimp that is firm and has a mild scent. Fresh broccoli should be bright green and firm, not wilted. Choose honey that is raw or locally sourced for better flavor. Quality soy sauce enhances the overall taste, so opt for low sodium if you can. - Preheat the oven: Start by preheating your oven to 400°F (200°C). This step is key for proper cooking. Line a large sheet pan with parchment paper. This makes cleanup easy. - Prepare the sauce: In a small bowl, mix together 1/4 cup honey, 3 tablespoons soy sauce, 3 cloves minced garlic, and 1 tablespoon grated fresh ginger. Add 2 tablespoons olive oil and 1 teaspoon sesame oil. If you like heat, add 1 teaspoon red pepper flakes. Whisk until well blended. - Toss the shrimp: In a mixing bowl, add 1 pound of peeled and deveined shrimp. Pour half of the honey garlic sauce over the shrimp. Add salt and pepper to taste. Mix well so the shrimp are coated evenly. - Prepare the vegetables: In another bowl, take 2 cups of broccoli florets and 1 sliced bell pepper. Pour the rest of the honey garlic sauce over the veggies. Add a pinch of salt and pepper, then toss to coat. - Arrange on sheet pan: Spread the shrimp and vegetables on the prepared sheet pan. Make sure they are in a single layer and not crowded. This helps them cook evenly. - Bake and stir: Place the sheet pan in the oven. Bake for 15 to 20 minutes. The shrimp should be pink and opaque, and the broccoli should be tender yet crisp. Stir halfway through cooking for even results. Once cooked, take the pan out of the oven. Let it cool for a minute. Garnish with sesame seeds and chopped green onions for a fresh touch. Serve it warm and enjoy this tasty meal! To cook shrimp well, start with fresh, large shrimp. They should be pink and firm. When you mix the shrimp with the honey garlic sauce, make sure each piece gets coated. This sauce adds flavor and helps keep the shrimp moist. Cook the shrimp until they turn pink and opaque. This usually takes about 15-20 minutes in the oven. Avoid overcooking them. Overcooked shrimp can become rubbery and tough. For crispy broccoli, you need to choose the right cooking method. Toss the broccoli with olive oil and a bit of salt. Spread it out evenly on the sheet pan. Make sure the pieces are not crowded. If they touch, they will steam instead of roast. Bake the broccoli until it turns bright green and tender, but still has a slight crunch. This usually takes about 15-20 minutes. Stir halfway through to help them cook evenly. You can prepare parts of this dish ahead of time. Chop the broccoli and bell pepper the night before. Store them in the fridge in a sealed container. You can also mix the honey garlic sauce a day ahead. Just keep it in the fridge in a jar. When you are ready to cook, toss everything together and bake. This saves time on busy nights and keeps dinner stress-free. {{image_2}} You can switch shrimp for chicken or tofu. Chicken thighs or breasts work well. Cut them into bite-sized pieces. Marinate them in the same honey garlic sauce. Tofu is great for a plant-based meal. Use firm tofu, drain it, and cut it into cubes. Marinate the tofu like you would with shrimp. Bake until golden and crispy. Each option brings a new taste and texture. Feel free to add more veggies. Carrots, snap peas, or zucchini can enhance the dish. Just chop them into similar sizes as the broccoli. Toss them in the remaining honey garlic sauce. You can mix and match based on what you have at home. This adds color and nutrition to your meal. Try different flavors in your sauce. You can use teriyaki sauce for a sweeter, thicker glaze. A splash of lime juice adds a bright twist. For a spicy kick, add more red pepper flakes, or use sriracha. You can even mix in some orange juice for a citrus touch. These changes can help keep the dish exciting every time you make it. After cooking, let the shrimp and broccoli cool down. Store them in an airtight container. This helps keep the flavors fresh. Place the container in the fridge. The dish will stay good for about 3 days. Be sure to check for any signs of spoilage before eating. If you want to keep it longer, freezing is a great option. First, let the dish cool completely. Then, transfer it to a freezer-safe bag. Remove as much air as possible before sealing. This helps prevent freezer burn. You can freeze it for up to three months. Label the bag with the date for easy tracking. To reheat, take the shrimp and broccoli out of the fridge or freezer. If frozen, let it thaw in the fridge overnight. You can warm it in the oven at 350°F (175°C) for about 15 minutes. Alternatively, use a microwave. Heat it in short bursts to avoid overcooking the shrimp. Make sure everything is heated through before serving. Enjoy your meal again! It takes about 15 to 20 minutes to cook honey garlic shrimp. You want the shrimp to turn pink and opaque. The broccoli should be tender but still crisp. Stir the mixture halfway to ensure even cooking. Yes, you can use frozen shrimp. Just make sure to thaw them first. Place the shrimp in cold water for about 15 minutes. Pat them dry before cooking. This helps the sauce stick better and keeps the shrimp juicy. Honey garlic shrimp and broccoli pair well with rice or quinoa. You can also serve it with noodles for a different twist. A light salad or steamed vegetables make good sides too. Enjoy your meal with a refreshing drink for a complete dinner! This blog post covered a tasty honey garlic shrimp recipe with broccoli. We explored the needed ingredients, step-by-step cooking instructions, and useful tips for success. Remember, quality ingredients make a big difference. You can also customize the dish with different proteins or vegetables. Don't forget about storage tips for leftovers. This simple recipe is perfect for quick meals. Experiment and enjoy the flavors while impressing your family or friends!

Honey Garlic Shrimp & Broccoli Sheet Pan Delight

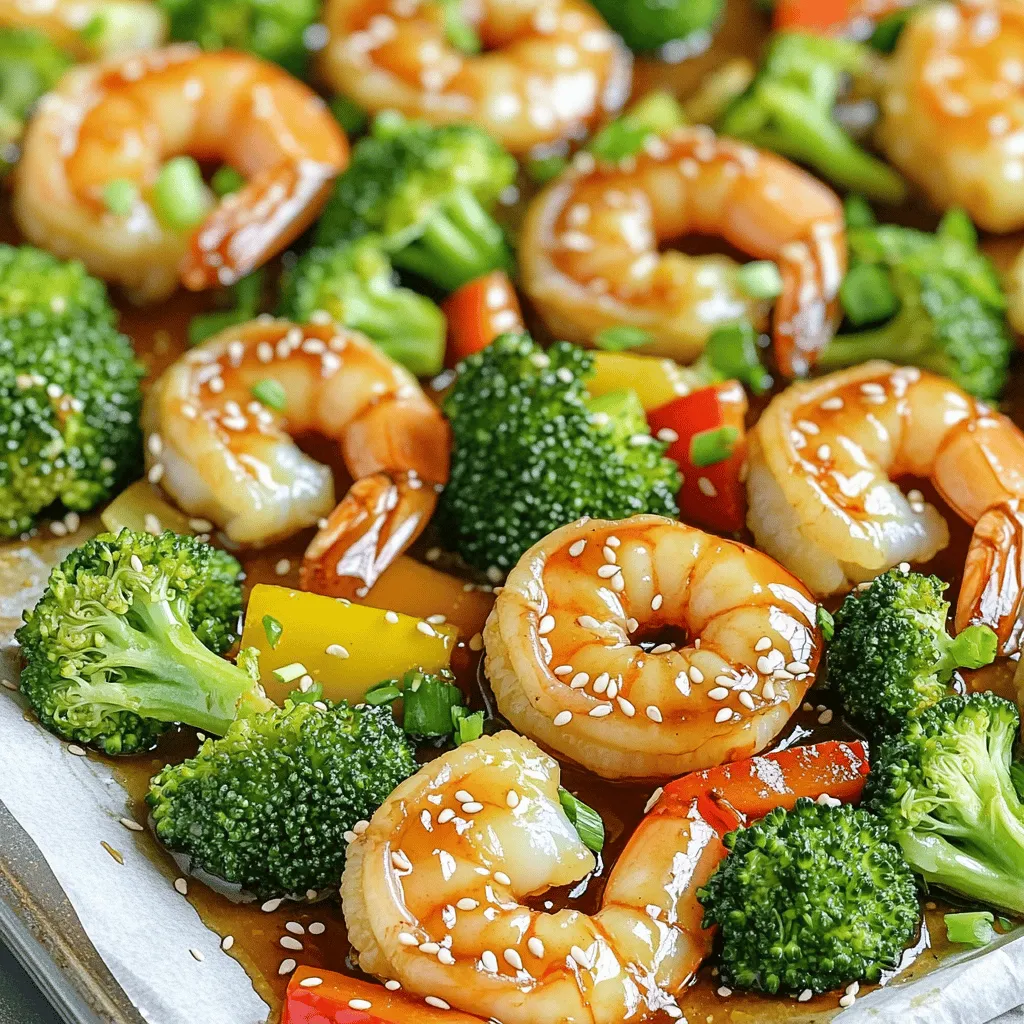
Are you ready to transform your dinner routine? In this Honey Garlic Shrimp & Broccoli Sheet Pan Delight, I’ll guide

These bars are simple to make and taste great. Here’s what you need: - 2 cups rolled oats - 1 cup canned pumpkin puree - 1/2 cup almond butter (or peanut butter) - 1/3 cup honey or maple syrup - 1 teaspoon vanilla extract - 1 teaspoon ground cinnamon - 1/2 teaspoon ground nutmeg - 1/4 teaspoon ground ginger - 1/4 teaspoon salt Each ingredient plays a big role. The rolled oats give a nice texture. Pumpkin puree adds moisture and flavor. Almond butter or peanut butter binds everything together. Honey or maple syrup adds sweetness. You can make your bars even better with these add-ins: - 1/2 cup chopped walnuts or pecans - 1/2 cup dried cranberries or raisins - 1/4 cup mini chocolate chips Add these for extra crunch and flavor. Nuts bring healthy fats, while dried fruits add natural sweetness. Chocolate chips can make them more fun, too! Feel free to mix and match, based on what you like. - Preheat your oven to 350°F (175°C). - Line an 8x8 inch baking dish with parchment paper. - In a large bowl, mix 2 cups of rolled oats, 1/2 cup chopped nuts, and 1/2 cup dried fruits. You can use cranberries or raisins. - In another bowl, blend 1 cup of pumpkin puree, 1/2 cup almond butter, 1/3 cup honey, 1 teaspoon vanilla extract, 1 teaspoon ground cinnamon, 1/2 teaspoon ground nutmeg, 1/4 teaspoon ground ginger, and 1/4 teaspoon salt. Make sure this mixture is smooth. - Pour the wet mixture into the dry ingredients. Stir until everything is well coated. - Transfer this mixture into the prepared baking dish. Press it down firmly with a spatula or your hands. - Bake in the preheated oven for 20-25 minutes or until the edges are golden brown. - Let the granola bars cool in the pan for 10 minutes. Then, lift them out using the parchment paper. - Place them on a wire rack to cool completely. Once cooled, cut them into bars or squares. To pack the mixture tightly, use a spatula or your hands. Press down firmly until it feels compact. This step helps the bars hold together well. If the mixture is loose, your bars may crumble. To prevent burning edges, keep an eye on the bars as they bake. Check them around 20 minutes. If the edges look golden brown, take them out. If they need more time, bake for just a few more minutes. For the best freshness, store your granola bars in an airtight container. This keeps them soft and tasty. You can also wrap each bar in plastic wrap for extra protection. Use glass or plastic containers with a tight seal. These containers help maintain the bars' moisture and flavor. Avoid metal containers since they can change the taste. Enjoy the granola bars as a snack or for breakfast. They are great on the go or at home. Pair them with yogurt or milk for a yummy treat. A dollop of yogurt adds creaminess and flavor. You can also add fresh fruit for extra nutrition. {{image_2}} You can switch up flavors in your pumpkin spice granola bars. Try different spices like allspice, cloves, or cardamom. Each spice adds a unique taste and aroma. You can also use different sweeteners. Instead of honey, try agave syrup or brown rice syrup. Both add sweetness and a special flavor. Feel free to mix in various nuts and seeds as well. Almonds, sunflower seeds, or pumpkin seeds work great. Each nut brings its own crunch and health benefits. You can also try different dried fruits. Instead of cranberries or raisins, use chopped dates or apricots for a twist. Making these bars vegan is easy. Just replace honey with maple syrup. This keeps the sweetness while making it plant-based. For gluten-free options, use certified gluten-free oats. This way, those with gluten sensitivities can enjoy the bars too. If you need nut-free options, swap almond butter for sunflower seed butter. This keeps the creaminess without using nuts. You can also skip nuts entirely and boost the bars with more seeds or dried fruits. In fall, add seasonal fruits like apples or pears. Diced apples mixed in will give a fresh crunch. You can also fold in cooked sweet potato for extra flavor and nutrients. Another idea is to sprinkle in some crushed candy corn for a fun touch. For decorations, consider drizzling melted chocolate on top. This gives a sweet finish and looks nice. You can also sprinkle cinnamon sugar over the bars before baking for added flavor. These small touches make your granola bars festive and fun to eat. Each serving of these pumpkin spice granola bars has about 150 calories. They contain 6 grams of fat, 24 grams of carbohydrates, and 4 grams of protein. This balance makes them a great snack or breakfast option. The ingredients in these bars offer many health benefits. The rolled oats provide fiber, which helps with digestion. The pumpkin puree is rich in vitamins and antioxidants. Almond butter adds healthy fats and protein. Using honey or maple syrup gives natural sweetness without refined sugars. - Fiber helps you feel full longer. - Vitamins from pumpkin support your immune system. - Healthy fats from nuts contribute to heart health. Homemade granola bars are often healthier than store-bought ones. Many brands add extra sugars and preservatives. For example, a popular brand can have around 200 calories per bar. They may also lack fiber and healthy fats. Making these bars lets you control what goes in. You can avoid unwanted additives and adjust sweetness. Plus, you can pack them with your favorite nuts or fruits. This makes them both tasty and nutritious! To make these granola bars gluten-free, use certified gluten-free rolled oats. This ensures that no gluten crosses into your mix. Many brands offer gluten-free oats. Always check labels to be safe. Yes, you can use applesauce as a substitute for pumpkin puree. It adds moisture and sweetness. Other options include mashed banana or sweet potato puree. Each will give your bars a unique flavor. Homemade granola bars last about one week when stored in an airtight container. For longer storage, keep them in the fridge. You can also freeze them for up to three months. Just thaw before eating. If you need a different nut butter, peanut butter works well. Sunflower seed butter is a great nut-free option. Cashew butter and tahini are also tasty alternatives. Choose what fits your taste and diet. Yes, these granola bars are great for kids. They are tasty and packed with nutrition. You can adjust the sweetness by using less honey or maple syrup. Make them fun by adding mini chocolate chips. Pumpkin spice granola bars are simple to make and very tasty. You need basic ingredients like oats, pumpkin, and nut butter. Optional add-ins give you room to be creative, too. Follow the steps to mix and bake them perfectly. Remember, storing them well keeps them fresh longer. You can tweak flavors and make them fit your diet. These bars are a healthier choice than store-bought options. Enjoy them as snacks, breakfast, or with yogurt. Making these bars brings warmth to your kitchen and joy to your taste buds.

Pumpkin Spice Granola Bars Nourishing Fall Treat

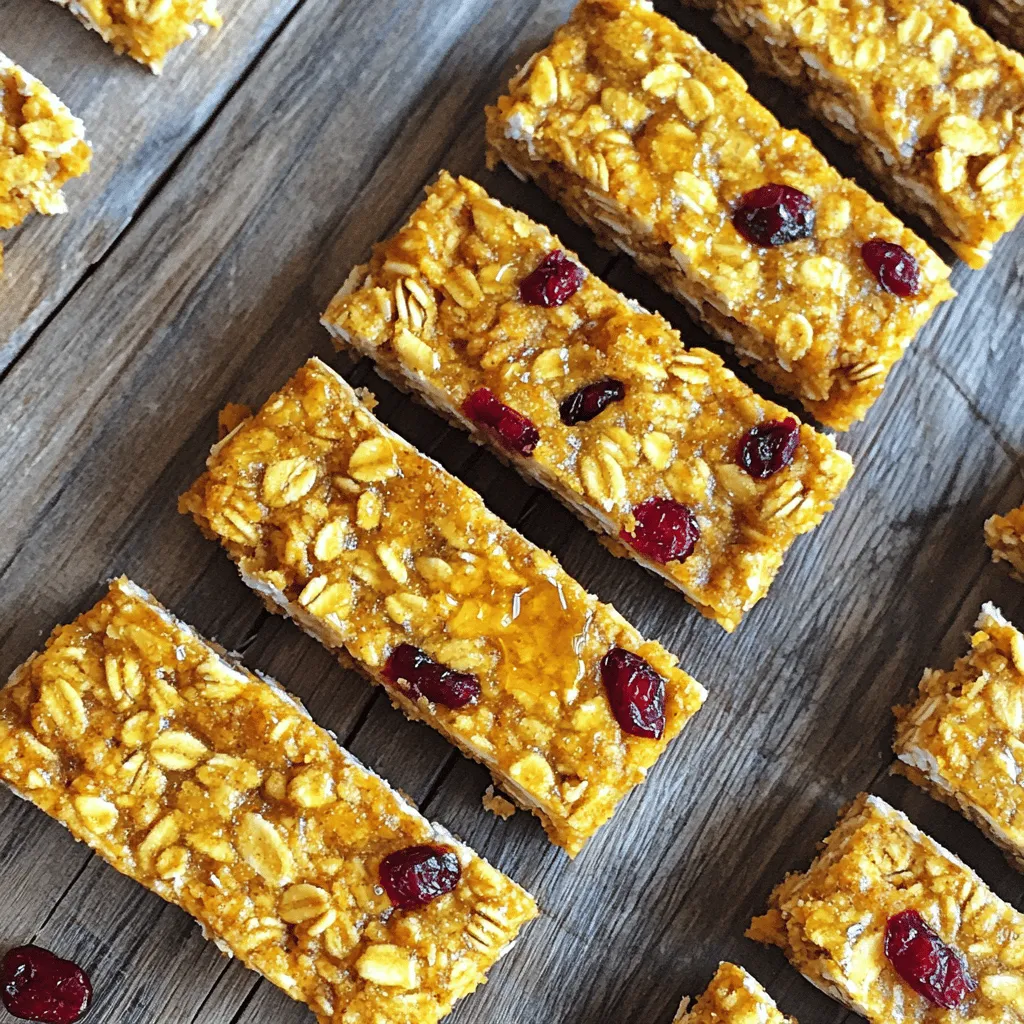
As the fall chill sets in, nothing feels cozier than a delicious treat that captures the season’s spirit. Pumpkin Spice

For this cozy soup, you will need: - 1.5 lbs boneless, skinless chicken thighs - 4 cups chicken broth - 2 cups water - 2 medium carrots, sliced - 2 celery stalks, chopped - 1 medium onion, diced - 3 cloves garlic, minced - 8 oz egg noodles - Salt and black pepper to taste These main ingredients create a rich base for your soup. The chicken adds protein, while the vegetables give it great flavor. To make the soup truly special, use these seasonings: - 1 teaspoon dried thyme - 1 teaspoon dried rosemary - 1 bay leaf These herbs and spices bring warmth and depth to the soup. Garlic adds a nice kick and makes the aroma inviting. To finish your soup, consider these garnishes: - Fresh parsley, chopped Adding fresh parsley not only brightens the dish but also adds a pop of color. It makes your soup look and taste even better. By using these ingredients, you create a dish that warms the heart and fills the belly. Enjoy cooking this simple yet comforting meal! To start, gather your ingredients. You will need 1.5 pounds of boneless, skinless chicken thighs, four cups of chicken broth, and two cups of water. Next, slice two medium carrots and chop two celery stalks. Dice one medium onion and mince three cloves of garlic. For herbs, grab one teaspoon each of dried thyme and rosemary. Don't forget the bay leaf! Add salt and black pepper to taste. Now, place all the prepared ingredients into your slow cooker. This includes the chicken, broth, water, carrots, celery, onion, garlic, thyme, rosemary, bay leaf, and seasonings. Give everything a good stir to mix it nicely. Cover the slow cooker with its lid. You can choose to cook on low for 6-8 hours or on high for 3-4 hours. The chicken should be fully cooked and tender when done. Check it after the time is up. If it's easy to shred, you are ready for the next step! Once your chicken is cooked, carefully take it out. Use two forks to shred the chicken into bite-sized pieces. Make sure to discard the bay leaf at this point. Now it’s time to add the egg noodles! Add 8 ounces of noodles to the slow cooker. Stir them in well with the other ingredients. Cover the slow cooker again and cook on high for an additional 30 minutes. This will make the noodles tender. After the time is up, taste your soup. You may want to add more salt and pepper for flavor. When serving, ladle the warm soup into bowls. Garnish with freshly chopped parsley for a pop of color and taste. Enjoy your cozy meal! To make a great broth, start with good chicken broth. I use four cups of chicken broth combined with two cups of water. This mix gives a rich flavor. Add fresh veggies like carrots, celery, and onion. Use garlic for depth. Thyme and rosemary add nice herbal notes. Let it cook for 6-8 hours on low. This slow cooking pulls out all the flavors. Always taste before serving. Adjust with salt and pepper as needed. When the chicken is done, take it out to shred. Use two forks to pull it apart. This method works well because the chicken is tender. Make sure to shred it into bite-sized pieces. Return the shredded chicken back to the soup. Discard the bay leaf at this point. This step adds heartiness to your soup, making it more filling. Add the egg noodles towards the end of cooking. This keeps them from getting too soft. Cook them for about 30 minutes on high. Stir them in well so they mix with the broth. Check them for doneness after 25 minutes. If they need more time, give them a few extra minutes. Perfect noodles make the soup even better. {{image_2}} You can boost flavor by adding more veggies. Try adding peas, green beans, or corn. These vegetables bring a nice crunch and color. You can also add spinach or kale for a health kick. Just toss them in during the last 30 minutes of cooking. This way, they stay bright and fresh. Egg noodles are classic, but you can mix it up. Try using wide noodles or even whole wheat options. If you like a twist, use rice noodles or gluten-free pasta. Each type adds a unique taste and texture. Remember to adjust the cooking time based on the noodle type. Chicken is great, but you can use other proteins too. Turkey is a leaner choice and works well. If you want a vegetarian option, use chickpeas or lentils. They add protein and fiber, making the soup filling. Just adjust the cooking time to ensure everything is tender. To store your chicken noodle soup, let it cool first. Use an airtight container. Fill the container, leaving some space at the top. This gives the soup room to expand if it freezes. You can keep it in the fridge for up to three days. When you are ready to enjoy the soup again, heat it on the stove. Pour it into a pot over medium heat. Stir occasionally until it is hot. You can also microwave it. Place it in a microwave-safe bowl, cover with a lid, and heat for 2-3 minutes. Stir halfway through. Make sure to check the temperature before serving. If you want to freeze the soup, use freezer-safe containers or bags. Leave some space at the top, as the soup will expand when frozen. Label the containers with the date. You can store the soup in the freezer for up to three months. When ready to eat, thaw it overnight in the fridge. Reheat it on the stove or in the microwave for a quick meal. Yes, you can use frozen chicken thighs in this soup. Just add them directly to the slow cooker. Adjust the cooking time to about 8-10 hours on low or 4-5 hours on high. The chicken will still become tender and easy to shred. This option saves you time and makes meal prep easy. To make this soup gluten-free, simply swap out the egg noodles for gluten-free noodles. You can find many options like rice noodles or gluten-free pasta. Always check the package for gluten-free labels. This small change keeps the soup tasty without gluten. Chicken noodle soup goes great with many sides. Here are some ideas: - Crusty bread or rolls - A fresh green salad - Simple crackers - Grilled cheese sandwiches These sides add flavor and give you a complete meal. Enjoy your cozy soup with these tasty additions! This chicken noodle soup is a cozy meal you can make easily. We've covered the main ingredients, cooking steps, and helpful tips to get it just right. I shared fun variations to keep it fresh and ideas for storing leftovers. You can even find answers to common questions. Enjoy your warm, tasty soup. It’s simple, comforting, and less work than you think. Dive in and make it your own!

Slow Cooker Chicken Noodle Soup Comforting and Easy

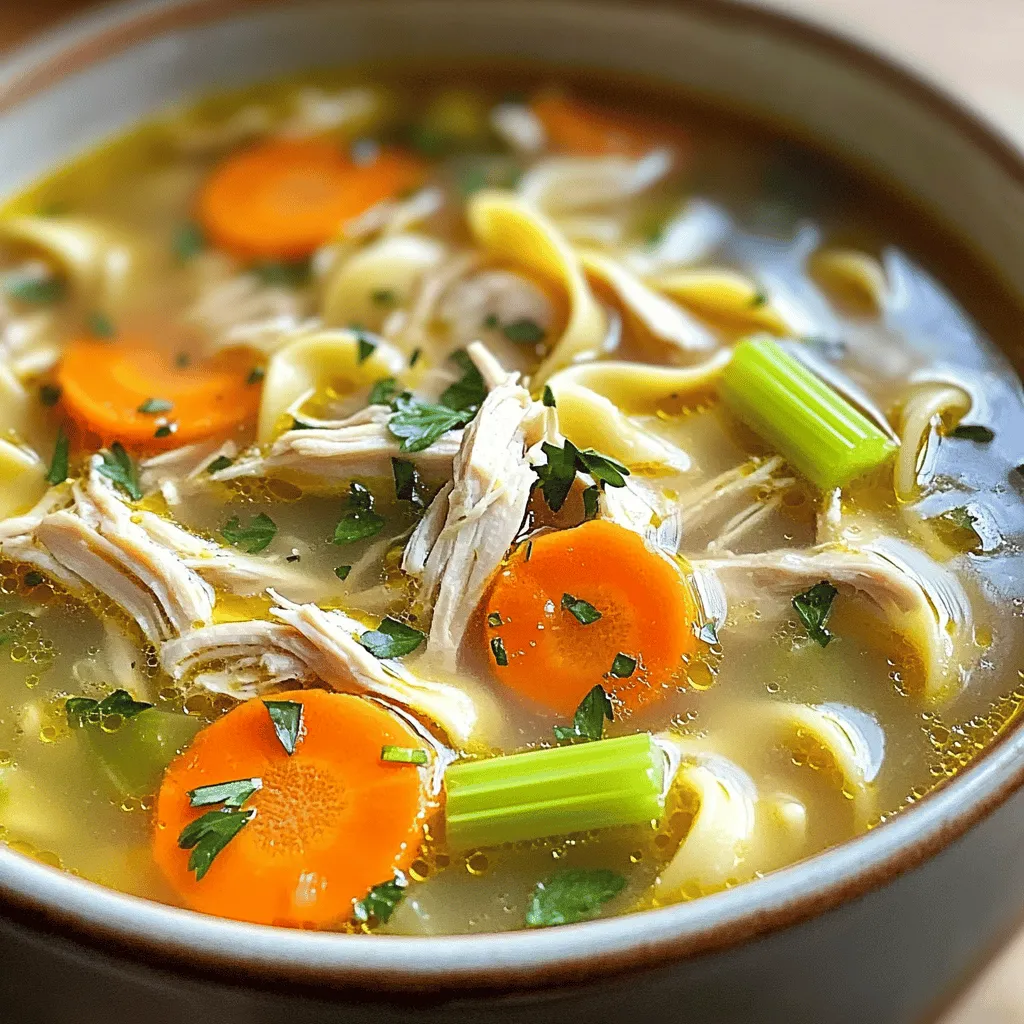
When you want a warm hug in a bowl, slow cooker chicken noodle soup is the answer. This easy recipe

To make the best Brown Butter Salted Caramel Blondies, you need some key ingredients. Here’s what you will need: - 1 cup unsalted butter (2 sticks) - 1 cup brown sugar, packed - 1/2 cup granulated sugar - 2 large eggs - 2 teaspoons vanilla extract - 2 cups all-purpose flour - 1 teaspoon baking powder - 1/2 teaspoon baking soda - 1/2 teaspoon salt - 1 cup salted caramel sauce (store-bought or homemade) - Flaky sea salt, for topping Each ingredient plays a special role. The unsalted butter gives a rich flavor. Brown sugar adds moisture and a deep sweetness. The eggs bind the mix together, while vanilla extract brings warmth. Flour forms the base, and baking powder and soda help it rise. Salt balances the sweetness, making every bite perfect. The salted caramel sauce adds a gooey, sweet layer that makes these blondies a treat. Finally, the flaky sea salt on top gives a lovely finish. Using high-quality ingredients always pays off. Fresh eggs and quality butter make a big difference. You can even make your own salted caramel for extra flair. Remember, each ingredient counts, so choose wisely! - Preheat the oven to 350°F (175°C). - Grease and line a 9x13 inch baking pan with parchment paper. Leave some overhang for easy removal. - Melt the butter in a medium saucepan over medium heat. - Stir frequently until it foams and turns a golden brown, about 5-7 minutes. - Remove from heat and let it cool slightly. - In a large mixing bowl, combine the brown sugar and granulated sugar. - Pour the warm browned butter into the sugar and mix well until combined. - Add the eggs one at a time, then mix in the vanilla extract. - In a separate bowl, whisk together the flour, baking powder, baking soda, and salt. - Gradually add this dry mix to the wet ingredients. Stir carefully until just combined. - Pour half of the blondie batter into the prepared pan. Spread it evenly. - Drizzle half of the salted caramel sauce over this layer. - Pour the remaining batter on top and drizzle with the rest of the caramel. - Use a knife to swirl the caramel slightly into the batter. - Bake in the preheated oven for 20-25 minutes. - The edges should be golden brown, and a toothpick should come out with a few moist crumbs. - After baking, let the blondies cool in the pan for about 10 minutes. - While still warm, sprinkle flaky sea salt on top for that perfect finish. - Once the blondies have cooled completely, lift them out of the pan using the parchment paper. - Slice into squares or rectangles. Enjoy these delicious treats! To make perfect blondies, avoid overmixing the batter. Stir just until the flour disappears. This keeps your blondies chewy and soft. Next, ensure the right baking time. Bake at 350°F for 20-25 minutes. Look for golden edges and a toothpick that comes out with a few moist crumbs. If you don’t have unsalted butter, use salted butter. Just skip adding the extra salt. For homemade salted caramel, you can melt sugar until golden. Add heavy cream and salt for a quick version. When serving, cut the blondies into squares. You can add a scoop of ice cream on the side for fun. Garnish your blondies with a caramel drizzle. This makes them look fancy and taste even better. {{image_2}} Adding nuts gives your blondies a nice crunch. I love using walnuts or pecans. These nuts pair well with the sweet caramel. You can chop them coarsely and mix them into the batter. Aim for about 1 cup of nuts. If you like a stronger nut flavor, toast them lightly before adding. This boosts their taste and aroma. The added texture makes each bite more enjoyable. You can play with flavors by adding chocolate chips. Semisweet or dark chocolate chips work well. They add richness to the blondies. You can use about 1 cup of chips. Feel free to mix in other things, too! Try dried fruit like cranberries or cherries. They add a tangy contrast to the sweet caramel. You can even use butterscotch chips for a new twist. The options are endless! If you need gluten-free blondies, you can substitute all-purpose flour with gluten-free flour blends. Look for ones with a good mix of flours. This keeps the texture nice and chewy. For vegan blondies, replace the eggs with flax eggs. Mix 1 tablespoon of ground flaxseed with 2.5 tablespoons of water for each egg. Use vegan butter instead of regular butter. These swaps keep all the flavor while meeting your needs. To keep your Brown Butter Salted Caramel Blondies fresh, store them in an airtight container. Place a layer of parchment paper between layers if you stack them. This helps avoid sticking. Blondies stay fresh at room temperature for up to three days. If you want them to last longer, keep them in the fridge. They can stay good for up to a week when chilled. Freezing blondies is simple. First, let them cool completely. Then, wrap each blondie in plastic wrap. Make sure they are tight and secure. Place the wrapped blondies in a freezer-safe bag or container. They can last in the freezer for up to three months. When you want to enjoy them, take them out and thaw at room temperature. If you're in a hurry, a quick microwave blast for 10-15 seconds works too. Enjoy your sweet treat any time! How do I know when the blondies are done baking? You can check by inserting a toothpick into the center. If it comes out with a few moist crumbs, your blondies are ready. They should have golden edges but still look soft in the middle. Can I make these blondies ahead of time? Yes, you can make these blondies a day before. Just let them cool completely and store them in an airtight container. They taste even better the next day as flavors develop. What can I substitute for salted caramel sauce? If you don’t have salted caramel sauce, you can use regular caramel sauce. You can also make a quick homemade version by melting sugar and mixing it with cream and a pinch of salt. How should I reheat leftovers? To reheat, place a blondie in the microwave for about 10 to 15 seconds. This warms it up without drying it out. You can also enjoy them cold if you prefer! Are these blondies customizable for allergies? Absolutely! You can use dairy-free butter for a vegan option. For gluten-free blondies, substitute regular flour with a gluten-free blend. Why did my blondies turn out dry? Dry blondies can happen if you overbake them. Make sure to check for doneness a few minutes early. It’s better to underbake slightly than overbake. What to do if the blondies are too gooey? If your blondies are too gooey, they might need more time in the oven. Return them to the oven for a few more minutes. Make sure to check often to avoid overcooking. This blog post covered how to make delicious salted caramel blondies. You learned about the simple ingredients and steps needed to create them. I shared tips to perfect your recipe and ideas for variations. Remember to store them properly for lasting freshness. Enjoy your baking journey with these blondies. Your friends and family will love them!

Brown Butter Salted Caramel Blondies Delightful Treat

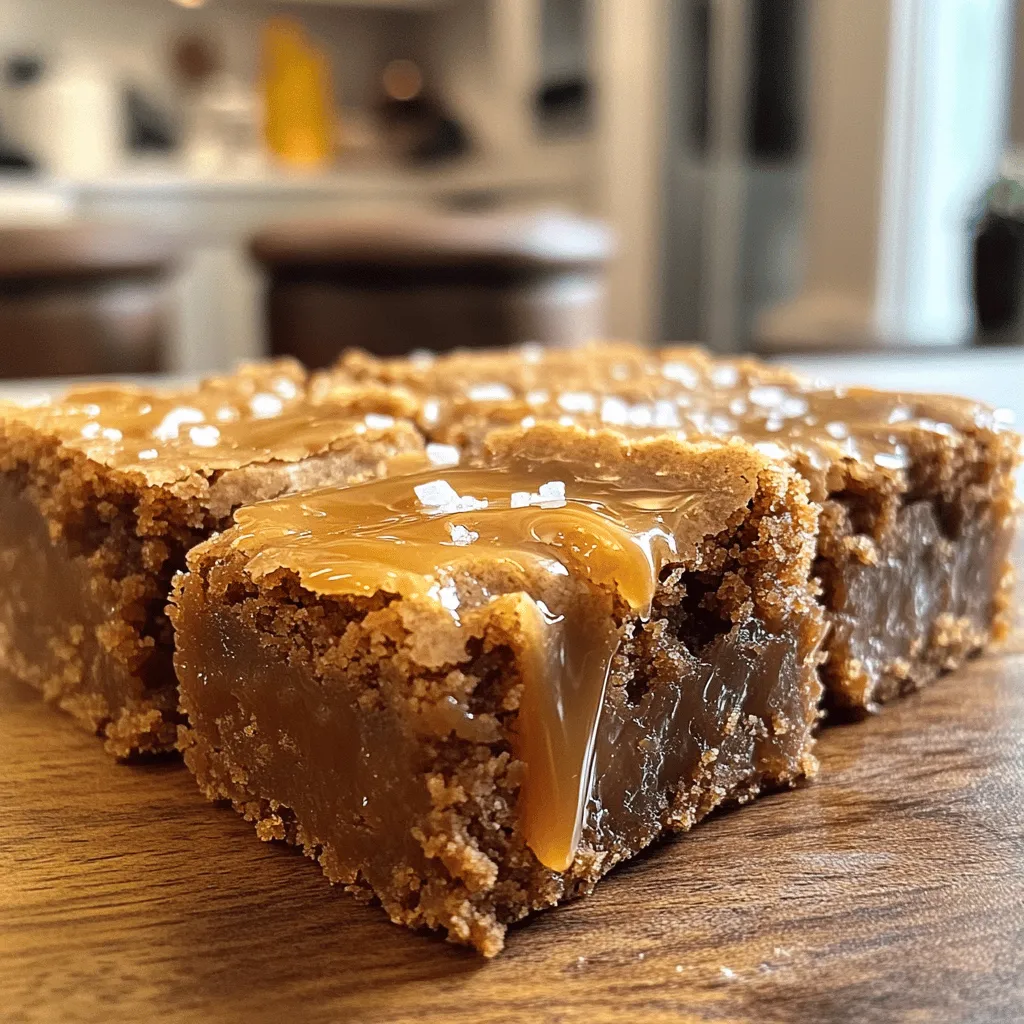
If you crave a sweet treat that’s both rich and easy to make, you’re in luck! These Brown Butter Salted

- 1 block (14 oz) firm tofu, pressed and cubed - 1/4 cup cornstarch - 1/2 teaspoon garlic powder - 1/2 teaspoon onion powder - Salt and pepper to taste - 1/4 cup honey (or agave syrup for vegan option) - 2 tablespoons soy sauce - 1 tablespoon rice vinegar - 2 cloves garlic, minced - 1 teaspoon freshly grated ginger - 1 tablespoon sesame oil - Green onions and sesame seeds for garnish I love using firm tofu for this recipe. It holds its shape well and has a nice texture. Pressing the tofu helps remove excess water, making it crispier. Cornstarch is key for that golden crunch. Garlic powder and onion powder add depth to the flavor. You can easily make this dish vegan by swapping honey for agave syrup. This change keeps the sweetness while staying plant-based. If you want a different flavor, try maple syrup instead. Garnishing makes the dish pop! I like to use chopped green onions and a sprinkle of sesame seeds. It adds color and crunch. Serve the nuggets on a platter with a small bowl of extra sauce for dipping. This makes for a fun and interactive meal! Start by preheating your oven to 400°F (200°C). This step is key for making crispy tofu. Line a baking sheet with parchment paper. This helps with easy cleanup and prevents sticking. Take your pressed and cubed tofu and place it in a medium bowl. Add 1/4 cup of cornstarch, 1/2 teaspoon of garlic powder, 1/2 teaspoon of onion powder, and salt and pepper to taste. Toss everything until the tofu is evenly coated. This coating gives the tofu a nice crunch. While the tofu bakes, let’s make the honey garlic sauce. In a saucepan, combine 1/4 cup of honey (or agave syrup), 2 tablespoons of soy sauce, 1 tablespoon of rice vinegar, 2 cloves of minced garlic, 1 teaspoon of grated ginger, and 1 tablespoon of sesame oil. Stir it all together. Heat the saucepan over medium heat until it starts to simmer. Lower the heat and let it simmer for about 3-4 minutes. This thickens the sauce just right for coating your nuggets. Once thickened, remove from heat and set aside. Next, once your tofu is golden and crispy, transfer it to a mixing bowl. Pour the honey garlic sauce over the tofu and toss gently. Return the coated nuggets to the baking sheet and bake for an extra 5 minutes. This caramelizes the sauce and makes it extra tasty. Let the nuggets cool slightly before serving, and enjoy your delicious dish! To get crispy tofu, start with firm tofu. Press it well to remove extra water. This step makes a big difference. Next, toss the tofu cubes with cornstarch. This coating gives a nice crunch when baked. Bake the tofu at 400°F (200°C) for 25-30 minutes. Flip halfway to ensure even crisping. You want a golden color on all sides. One common mistake is not pressing the tofu enough. If it’s too wet, it won't crisp up. Another mistake is overcrowding the baking sheet. Leave space between the cubes. This allows hot air to circulate. Lastly, don’t skip the baking step after adding the sauce. That final bake helps the sauce stick and caramelize. To boost the flavor, try adding spices. A pinch of cayenne can add heat. You can also mix in some chopped herbs like cilantro or basil. For a tangy twist, add lime juice to the sauce. If you like a smokier taste, use smoked soy sauce. These little changes can make your nuggets even tastier. {{image_2}} To add heat to your honey garlic tofu nuggets, mix in some chili flakes or sriracha. You can start with 1 teaspoon of chili flakes and adjust to your taste. This gives a nice kick to the sweet sauce. You can also add chopped fresh chili when you cook the sauce. The spice balances the sweetness of the honey and creates a bold flavor. To make these nuggets gluten-free, use tamari instead of soy sauce. Tamari is a great swap and tastes just as good. Be sure to check your cornstarch as well. Most brands are gluten-free, but it’s always smart to read the label. This way, you can enjoy the dish without any gluten worries. If you want to change the sweetener, consider using maple syrup or agave syrup. Both options work well in this recipe. Maple syrup gives a unique flavor that pairs nicely with garlic. Agave syrup is a good choice for vegans. It keeps the sweetness but is plant-based. Adjust the amount to fit your taste; start with the same amount as honey. After you enjoy your meal, you can store the tofu nuggets. Place any leftovers in an airtight container. Keep them in the fridge. They stay fresh for about 3 to 4 days. Make sure they cool down before storing. This helps them stay crispy longer. When you are ready to eat the leftovers, reheating is simple. Preheat your oven to 375°F (190°C). Place the tofu nuggets on a baking sheet. Bake them for about 10 to 15 minutes. This method keeps them crispy. You can also use a microwave, but they might get soft. If you want to save some nuggets for later, freezing works well. First, let them cool completely. Then, arrange them in a single layer on a baking sheet. Freeze until solid, then transfer them to a freezer-safe bag. They can last up to 3 months in the freezer. When you are ready to cook them, thaw overnight in the fridge before reheating. To make honey garlic tofu nuggets gluten-free, swap soy sauce for tamari. Tamari is a gluten-free option with a similar taste. Always check labels for hidden gluten in sauces. Using cornstarch is already gluten-free, so stick with that for the coating. Yes, you can use different types of tofu. Firm tofu gives a nice texture. You could also try extra-firm tofu for crunchier bites. Silken tofu is too soft for nuggets, but great in sauces. Adjust cooking time if you change tofu types. The best dipping sauces include sweet chili sauce and peanut sauce. Both add a tasty twist. Soy sauce mixed with lime juice also works well. You can try a spicy sriracha sauce for heat. Experiment with your favorites to find the best combo. - How long do leftovers last? Leftovers last about 3-4 days in the fridge. Store them in an airtight container. Reheat in the oven for the best taste. Microwaving is quick but may make them soggy. - Can I bake the tofu instead of frying it? Yes, baking is a great option! Bake the tofu to make it healthier. Follow the recipe's baking instructions for a crispy result. Baking keeps the nuggets light and allows the flavors to shine. In this post, we explored making honey garlic tofu nuggets. We covered main ingredients and options for vegan substitutes. I shared step-by-step instructions for preparation, coating, and baking. You learned tips for crispy tofu and mistakes to avoid. We discussed exciting variations, storage advice, and answered common questions. These nuggets are easy to customize and fun to make. I hope you enjoy trying these tasty recipes!

Honey Garlic Tofu Nuggets Flavorful and Easy Recipe

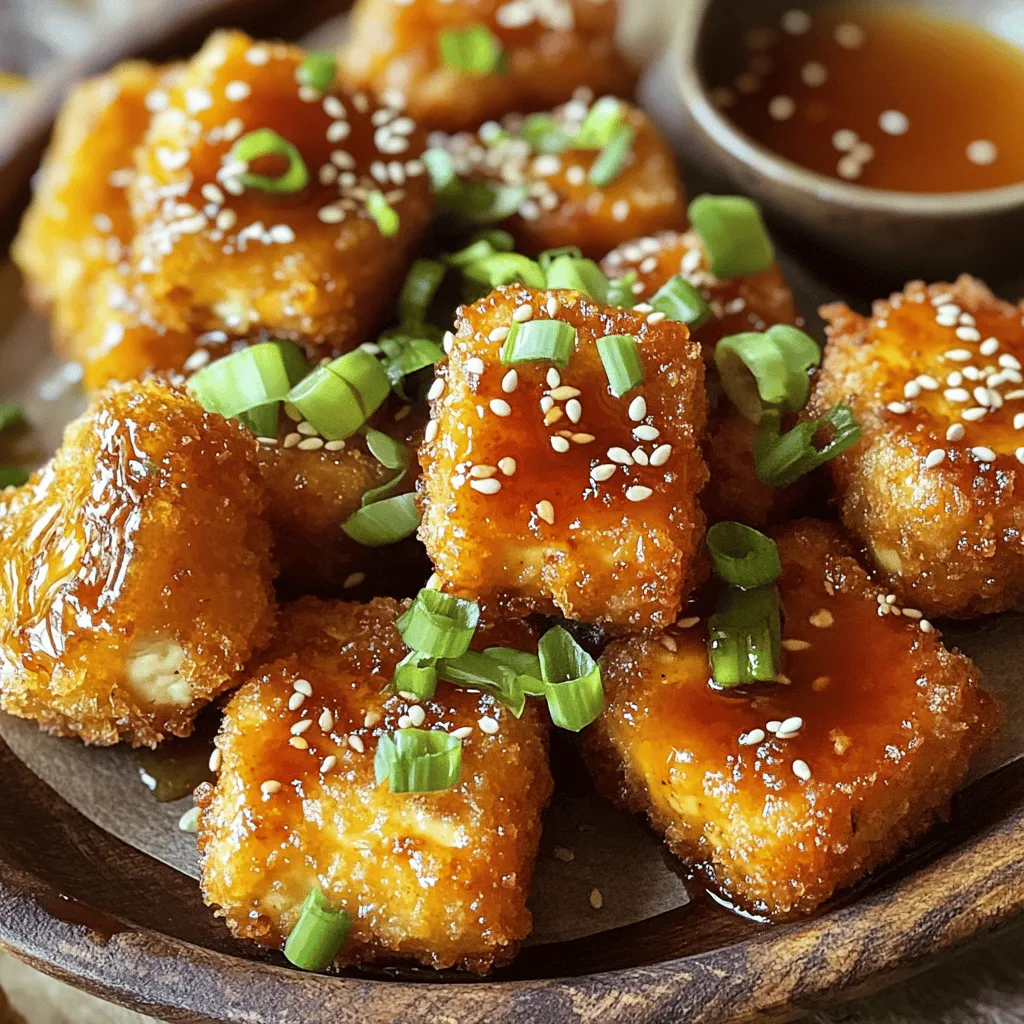
If you crave a tasty yet easy meal, you’ll love these Honey Garlic Tofu Nuggets! This simple recipe packs sweet

To make pumpkin spice coffee cake muffins, gather these key ingredients: - 1 cup all-purpose flour - 1/2 cup brown sugar - 1/2 teaspoon baking powder - 1/2 teaspoon baking soda - 1 teaspoon ground cinnamon - 1/2 teaspoon ground nutmeg - 1/4 teaspoon ground ginger - 1/4 teaspoon ground cloves - 1/4 teaspoon salt - 1/2 cup canned pumpkin puree - 1/4 cup unsweetened applesauce - 1/4 cup vegetable oil - 2 large eggs - 1 teaspoon vanilla extract - 1/2 cup chopped walnuts or pecans (optional) - 1/4 cup powdered sugar (for dusting) You can add nuts for crunch. Walnuts or pecans work great. If you want a sweeter muffin, add chocolate chips. For a dairy-free option, replace eggs with flax eggs. Applesauce can be swapped for yogurt or mashed banana. Use almond flour for a gluten-free twist. These muffins have warm, spicy notes from cinnamon, nutmeg, and ginger. The pumpkin adds moisture and a subtle sweetness. The brown sugar gives a rich, caramel flavor. If you use nuts, they add a delightful crunch. Dusting with powdered sugar makes them look lovely and adds a sweet finish. Enjoy these with coffee to balance the flavors! First, set your oven to 350°F (175°C). This step is key for baking. While it heats, line a muffin tin with liners or spray it with non-stick spray. This helps the muffins pop out easily when they're done. Next, grab a large bowl. In this bowl, whisk together the dry ingredients. Combine 1 cup of flour, 1/2 cup of brown sugar, and the baking powder and soda. Add in 1 teaspoon of cinnamon, 1/2 teaspoon of nutmeg, 1/4 teaspoon each of ginger, cloves, and salt. Mix these until they are well combined. This blend gives your muffins that warm fall flavor. Now, take another bowl for the wet ingredients. Mix together 1/2 cup of pumpkin puree, 1/4 cup of applesauce, and 1/4 cup of vegetable oil. Crack in 2 large eggs and add 1 teaspoon of vanilla extract. Stir this mixture until it's smooth. This step adds moisture and richness to your muffins. Pour the wet mixture into the dry bowl. Gently fold them together until just combined. A few lumps are fine. If you like, fold in 1/2 cup of chopped nuts for extra crunch. Then, fill each muffin cup about 2/3 full with batter. This way, they have room to rise. Place the muffin tin in your preheated oven. Bake for 18-20 minutes. To check if they’re done, insert a toothpick into the center. If it comes out clean, they are ready. After baking, let the muffins cool in the tin for 5 minutes. Then, move them to a wire rack. Once cool, dust the tops with powdered sugar for a sweet finish. Enjoy the lovely smell while they cool! To get that soft, fluffy muffin texture, remember these tips. First, mix your dry and wet ingredients separately before combining. This keeps the flour from clumping and helps the muffins rise. Do not overmix the batter. A few lumps are okay. They help create a light texture. Also, fill each muffin cup about two-thirds full. This gives them room to rise without spilling over. Avoid these common mistakes for the best muffins. Do not skip the baking powder and baking soda. They are key for the right rise. Check your oven temperature with a thermometer. An oven that is too hot can burn the muffins, while one that is too cool can leave them dense. Lastly, do not open the oven door too early. This can cause the muffins to sink. Serve your muffins warm for the best taste. A dusting of powdered sugar adds sweetness. Pair them with a hot cup of coffee or tea. You can also serve them with a dollop of whipped cream for a treat. For a fun twist, try adding some maple syrup on top. The flavors mix perfectly with the pumpkin spice. Enjoy your muffins on a cozy morning or as a snack! {{image_2}} You can make these muffins gluten-free easily. Use a gluten-free flour blend instead of all-purpose flour. Brands like Bob's Red Mill work great. Just make sure it has xanthan gum for better texture. This swap keeps your muffins light and fluffy. To make these muffins vegan, replace eggs with flax eggs. Mix one tablespoon of flaxseed meal with three tablespoons of water. Let it sit for five minutes. Use almond milk or any plant milk instead of dairy. Also, replace the vegetable oil with melted coconut oil. These changes will keep the muffins moist and tasty. Want to mix things up? Add chocolate chips for a sweet twist. You can also fold in dried cranberries or raisins for a fruity touch. If you love nuts, use pecans or walnuts. Each option brings a unique flavor to your muffins. You can even try a swirl of cream cheese for a rich bite. To keep your pumpkin spice coffee cake muffins fresh, use an airtight container. Place the muffins in a single layer. If you stack them, add parchment paper between layers to prevent sticking. Store them at room temperature for up to three days. For longer storage, consider the fridge. You can freeze these muffins for up to three months. Wrap each muffin tightly in plastic wrap. Then, place them in a freezer bag. Label the bag with the date. When you're ready to eat, remove a muffin and thaw it at room temperature. You can also heat it in the microwave for about 15 seconds. These muffins stay fresh for about three days at room temperature. In the fridge, they last up to a week. If you freeze them, they maintain quality for three months. Always check for changes in smell or texture before eating. Enjoy your muffins while they're still tasty! To make pumpkin spice coffee cake muffins from scratch, gather your ingredients first. You need flour, brown sugar, baking powder, baking soda, spices, salt, pumpkin puree, applesauce, oil, eggs, and vanilla. Mix the dry ingredients in one bowl. In another bowl, mix the wet ingredients until smooth. Then, combine both mixtures carefully. Fill muffin cups and bake for 18-20 minutes. Yes, you can use fresh pumpkin instead of canned. Just cook and mash the pumpkin first. Make sure it is smooth and not too watery. Fresh pumpkin gives a nice taste. If you need a substitute for applesauce, try using mashed banana or yogurt. Both options will keep the muffins moist. You can also use pureed pears if you have them. These muffins last about 3-5 days when stored at room temperature. Keep them in an airtight container to maintain freshness. You can also refrigerate them to extend their shelf life a bit longer. Serve these muffins warm or at room temperature for the best taste. Pair them with coffee or tea for a cozy treat. Dust them with powdered sugar for a sweet touch. Add a sprinkle of cinnamon on top for extra flavor. Enjoy! This blog post covered making delicious pumpkin spice coffee cake muffins. We explored the key ingredients and optional add-ins that boost flavor. The step-by-step instructions ensure you mix and bake them perfectly. I shared tips for the best texture and common mistakes to avoid. You also learned about gluten-free and vegan options. Finally, I detailed storage methods to keep your muffins fresh. Enjoy your baking journey! You'll love these muffins warm or cooled.

Pumpkin Spice Coffee Cake Muffins Simple and Delicious

Get ready to savor the cozy flavors of fall with my Pumpkin Spice Coffee Cake Muffins! These muffins blend the

To make Cottage Cheese Cookie Dough Dip, you need these items: - 1 cup cottage cheese (low-fat or full-fat) - 1/4 cup almond butter (or peanut butter) - 1/4 cup maple syrup - 1 teaspoon vanilla extract - 1/2 cup mini chocolate chips - 1/4 cup chopped walnuts (optional) - Pinch of salt If you can’t find almond butter, you can easily swap it for peanut butter. Both give a nice nutty flavor. Maple syrup can be replaced with honey or agave syrup for a different taste. You can also leave out the walnuts if you want a smoother dip. Each serving of this dip has about 150 calories. Here is the macronutrient breakdown: - Protein: 6 grams - Fat: 9 grams - Carbohydrates: 15 grams This dip is a great way to enjoy a tasty treat while still getting some protein from the cottage cheese. The chocolate chips add a nice sweetness, too! To make Cottage Cheese Cookie Dough Dip, start by gathering your ingredients. You will need: - 1 cup cottage cheese - 1/4 cup almond butter or peanut butter - 1/4 cup maple syrup - 1 teaspoon vanilla extract - 1/2 cup mini chocolate chips - 1/4 cup chopped walnuts (optional) - Pinch of salt First, take a mixing bowl. Add the cottage cheese, almond butter, maple syrup, vanilla extract, and salt. Use a hand mixer or food processor to blend everything. Blend until it is smooth and creamy. This step is key for a great texture. Next, once the mixture is smooth, add in the mini chocolate chips and chopped walnuts. Use a spatula to gently fold them in. This adds fun texture and flavor. Taste your dip. If it needs more sweetness, add a bit more maple syrup. Chill your dip in the fridge for about 30 minutes. Chilling helps the dip firm up slightly. It also makes the flavors blend better. For serving, scoop the dip into a nice bowl. You can serve it with fresh apple slices, pretzels, or graham crackers. These dippable treats make it fun to enjoy. For a pretty presentation, sprinkle some extra mini chocolate chips on top. This will make your dip look as good as it tastes! - Achieving Consistency: Blend the cottage cheese and almond butter until creamy. A hand mixer works well here. If you want it smoother, use a food processor. This gives a nice base for your dip. - Maximizing Flavor: Add a pinch of salt to bring out the sweetness. Adjust the maple syrup to your taste. This way, you can make it just right for you. - Errors to Avoid: One big mistake is not blending enough. If it's chunky, it won’t taste as good. Also, don’t skip chilling time. This helps the dip firm up and taste better. - Fixing Runny or Overly Sweet Dip: If your dip is runny, add more cottage cheese or almond butter. For a dip that is too sweet, simply add a pinch of salt. This balances the flavors and makes it tasty again. {{image_2}} You can make this dip even more fun by adding new flavors. Try mixing in a teaspoon of cinnamon for a warm touch. If you love chocolate, add a tablespoon of cocoa powder. This makes it even richer. You can also change the mix-ins in your dip. Dried fruits like raisins or cranberries add a nice chew. Chia seeds or sunflower seeds can give a crunch. These add more texture and flavor to your dip. If you want to make the dip vegan, swap the cottage cheese with a plant-based option. You can use silken tofu for a creamy base. Look for vegan nut butter to keep it dairy-free. For a nut-free version, skip the almond butter. Use sunflower seed butter instead. If you want a low-sugar dip, reduce the maple syrup. Use a sugar substitute if you like. For a low-carb option, skip the chocolate chips. Instead, use unsweetened cocoa nibs or carob chips. To keep your Cottage Cheese Cookie Dough Dip fresh, store it in an airtight container in the fridge. This helps prevent it from absorbing other smells. It stays good for about 3 to 5 days. If you notice any change in color or smell, it’s best to toss it out. Always trust your senses! You can freeze this dip if you want to save some for later. First, transfer it to a freezer-safe container, leaving some space at the top for expansion. It can last up to 3 months in the freezer. When you’re ready to enjoy it again, thaw it in the fridge overnight. After thawing, stir it well to restore its creamy texture. To make this dip vegan, I swap out the dairy ingredients. Use plant-based cottage cheese made from nuts or soy. For the almond butter, ensure it is without added dairy. Maple syrup is already vegan, so it works perfectly. If you want a creamier dip, try using coconut yogurt instead of plant-based cottage cheese. You still get that rich taste! You can dip a lot of tasty treats in this dip! Some of my favorites include fresh apple slices, which add a nice crunch. Pretzels give a salty bite that pairs well. Graham crackers are sweet and fun to use, too. You can even try banana slices or strawberries for a fruity twist. Feel free to get creative! Yes, you can use regular yogurt! However, the dip will taste a bit different. Yogurt is smoother and has a tangy flavor. Cottage cheese has lumps that add texture. If you want a creamier dip, yogurt is a great choice. Just remember, the flavor may not be as rich or nutty. This blog post covered the key parts of making a tasty Cottage Cheese Cookie Dough Dip. We explored the essential ingredients, including substitutes. I shared how to prepare this dish for the best texture and flavor. We examined common mistakes and tips for a perfect dip. Plus, I offered yummy variations and storage solutions for leftovers. Keep experimenting with flavors and enjoy your dip creations! Remember to store it well and have fun dipping.

Cottage Cheese Cookie Dough Dip Tasty and Simple Treat

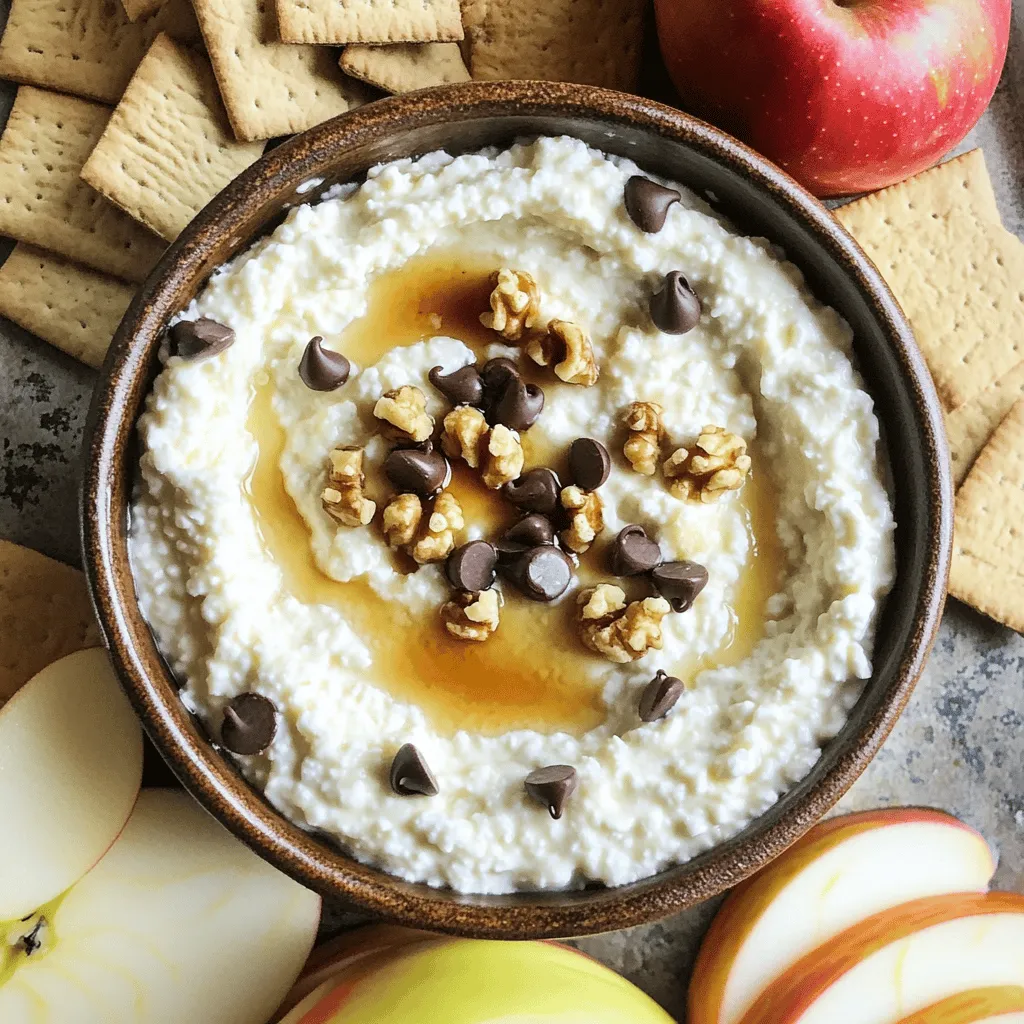
If you’re looking for a fun and tasty way to enjoy cottage cheese, you’ve come to the right place! This

- 4 cups Rice Krispies cereal - 1 cup creamy peanut butter - 1 cup semi-sweet chocolate chips - 1/2 cup unsalted butter - 1 cup mini marshmallows - 1 teaspoon vanilla extract - Pinch of salt Can you swap ingredients? Yes, you can. Here are some great options: - Alternative nut butters: If you have a nut allergy, use sun butter or soy nut butter. They work well with the recipe. - Types of chocolate chips: Dark chocolate or white chocolate chips add fun flavors. You can choose what you like best. - Marshmallow substitutes: If you want a vegan option, try vegan marshmallows. They taste great and keep the treats sweet. Using these swaps can help you find the perfect flavor for your treats. Enjoy mixing and matching! How to prepare the baking dish First, take your 9x13 inch baking dish. You can grease it with butter. Alternatively, use parchment paper for easy removal later. Melting the butter and chocolate In a medium saucepan, add the unsalted butter and the semi-sweet chocolate chips. Heat them on low. Stir often until the mixture becomes smooth and glossy. This step is key for a rich flavor. Incorporating peanut butter and marshmallows After the chocolate mixture melts, remove the saucepan from heat. Stir in the creamy peanut butter. Mix well until it's fully blended. Then, add the mini marshmallows. Stir gently until they start to soften. They should not fully melt yet. Combining with Rice Krispies In a large bowl, place the Rice Krispies cereal. Pour the warm chocolate-peanut butter-marshmallow mixture over the cereal. Use a spatula to fold gently. Ensure every piece of cereal gets coated with the gooey mixture. Pressing the mixture into the pan Transfer the mixture into your prepared baking dish. With a spatula or your clean hands, press it down firmly into an even layer. This helps the treats hold together. Cooling and cutting the treats Let the treats cool at room temperature for about 30 minutes. Once they are set, cut them into squares or rectangles. Now your delicious chocolate peanut butter rice krispie treats are ready to enjoy! To get the best texture in your treats, focus on marshmallow use. You need one cup of mini marshmallows. This amount helps the mixture hold together. If you add too few, your treats can fall apart. If you add too many, they may become too sticky. Pressing the mixture firmly into the pan is very important. Use a spatula or your hands to make it even. This step helps the treats set well. If you skip it, they may not hold their shape. This makes serving your treats easier and more fun. You can add a pinch of cinnamon or sea salt to boost flavor. This small step makes a big difference in taste. It adds depth and balances the sweetness. You can also try optional toppings. Consider crushed nuts or colorful sprinkles for a fun twist. If your treats become too sticky, try these tips. First, make sure to grease your pan well. You can also use parchment paper. This helps with removal and keeps them from sticking. If they are still sticky, you can chill them in the fridge for a short time. If your treats turn out too dry, don’t worry. You can fix this by adding a bit of melted butter or peanut butter. This extra moisture can help bring them back to life. Just mix it in gently to avoid breaking them apart. {{image_2}} You can boost the taste of your treats in fun ways. Try adding shredded coconut or dried fruit. These will add new flavors and textures. You can also use flavored marshmallows, like strawberry or caramel. This simple swap can make your treats special and exciting. Many people have different diets. You can make gluten-free treats by using gluten-free Rice Krispies. This is an easy way to keep everyone happy. If you want vegan options, use coconut oil instead of butter. Substitute regular marshmallows with vegan ones to keep it tasty and plant-based. Get creative for special events! For holidays, use colored chocolate to match the theme. For example, red and green for Christmas or orange and black for Halloween. You can also make mini versions for parties. These bite-sized treats are perfect for sharing and fun to eat. To keep your Chocolate Peanut Butter Rice Krispie Treats fresh, store them properly. I recommend placing them in an airtight container. This helps keep them soft and tasty. You can also wrap them tightly in plastic wrap before putting them in the container. - Use a glass or plastic container with a lid. - Make sure the container is completely sealed to avoid air exposure. When stored at room temperature, these treats last about a week. Keep them in a cool place, away from direct sunlight. If you want to save them longer, you can freeze them. Just wrap each treat individually in plastic wrap, then place them in a freezer bag. - At room temperature: last about 7 days. - In the freezer: can last up to 3 months. When it's time to enjoy your treats again, you might want them soft. To reheat, place them in the microwave for about 10-15 seconds. This warms them up without making them hard. For a fun twist, consider adding toppings after reheating. - Drizzle melted chocolate on top for extra taste. - Sprinkle some sea salt or crushed nuts for a crunchy finish. Yes, you can make these treats ahead of time. To do this, let them cool completely. Once cool, cut them into squares. Place them in an airtight container. Store them at room temperature for up to 3 days. If you want them fresh, you can freeze them. Just wrap each square in plastic wrap and put them in a freezer-safe bag. When you're ready to enjoy, let them thaw at room temperature. If you need nut-free options, you can use sun butter or soy nut butter. Both have a similar texture to peanut butter. They add great flavor without nuts. Make sure to check labels to avoid any cross-contamination. You can also use seed butters like pumpkin seed butter for a fun twist. Yes, you can! If you want to switch cereals, try using Corn Pops or Cheerios. Both will give you a different taste and texture. You can even mix cereals for added fun. Just keep the same amount to ensure the treats hold together. This allows for a new experience every time you make them! This blog post provided a clear guide on making delicious Rice Krispies treats. We covered essential ingredients, substitutions, and step-by-step instructions for prep. You learned tips for perfect texture and flavor, along with creative variations and proper storage. Remember, making these treats should be fun and easy. Experiment with flavors and enjoy the process. With a little practice, you'll master this classic recipe and impress friends and family. Enjoy making your treats!

Chocolate Peanut Butter Rice Krispie Treats Delight

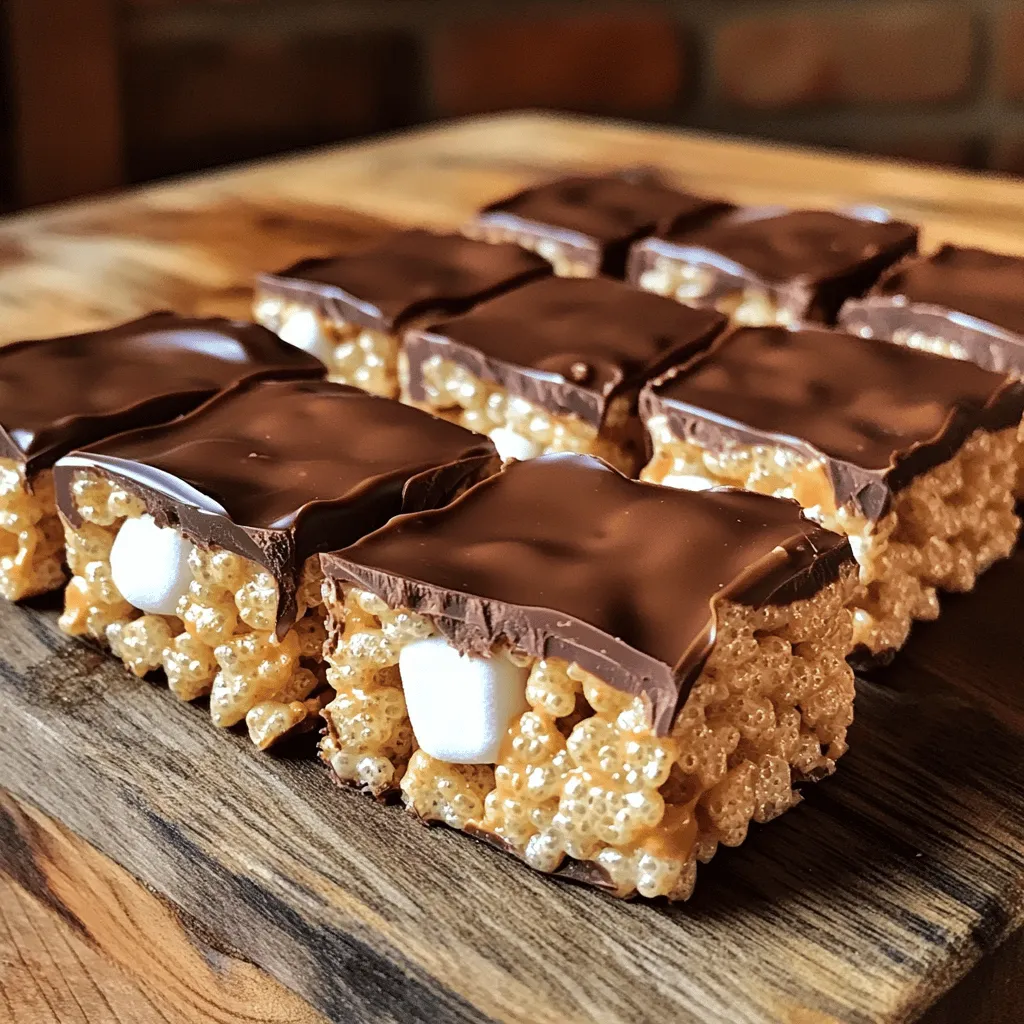
Get ready for a sweet treat that’s easy to make and hard to resist! My Chocolate Peanut Butter Rice Krispie

Older posts
Newer posts
← Previous Page1 … Page20 Page21 Page22 … Page84 Next →

dsad

© 2026 easycookingbite • Built with GeneratePress

Our Policies

  • Copyright Policy
  • Cookie Policy
  • GDPR Policy
  • Privacy Policy
  • Disclaimer
  • Terms Of Use

More Information

  • Home
  • About
  • Contact
  • Appetizers
  • Dessert
  • Dinner
  • Drinks
©2026, easycookingbite About Back To Top