Skip to content
DisclaimerTerms Of UseGDPR PolicyCookie Policy

easycookingbite

  • Home
  • Drinks
  • Appetizers
  • Dinner
  • Dessert
  • About
  • Contact
  • Privacy Policy
DisclaimerTerms Of UseGDPR PolicyCookie Policy

NO-ING-IMG

- 1 medium head of cauliflower, cut into bite-sized florets - 1 cup all-purpose flour - 1 teaspoon garlic powder - 1 teaspoon onion powder - 1 teaspoon smoked paprika - 1/2 teaspoon cayenne pepper (adjust to taste) - 1 cup water - 1/2 teaspoon salt - 1 cup buffalo sauce (store-bought or homemade) - 2 tablespoons melted butter (for tossing) - Fresh parsley, chopped (for garnish) The cauliflower is the star of this dish. It gives a nice texture. Flour helps create a crispy coating. Garlic powder adds flavor. Onion powder brings sweetness. Smoked paprika gives a warm, smoky taste. Cayenne pepper brings heat, but you can adjust it. Water combines with flour to create the batter. Buffalo sauce adds the classic spicy flavor. Finally, melted butter helps the sauce stick. You can use fresh parsley to add a pop of color and freshness. Other garnishes may include green onions or even a drizzle of ranch dressing. These options can enhance the look and taste of your bites. Feel free to mix and match the garnishes to your liking. Start by preheating your air fryer to 400°F (200°C). While it heats up, wash the cauliflower head. Cut it into small, bite-sized florets. Make sure the pieces are even in size. This helps them cook evenly. In a large mixing bowl, add the flour, garlic powder, onion powder, smoked paprika, cayenne pepper, and salt. Whisk these dry ingredients together. Gradually pour in the water while mixing. Keep mixing until you form a smooth batter. It should be thick enough to coat the florets but still pourable. Dip each cauliflower floret into the batter. Make sure to coat each piece fully. Let any extra batter drip off before placing them in the air fryer basket. Lightly spray the basket with cooking spray. Arrange the coated florets in a single layer. You may need to cook them in batches. Air fry for 10-12 minutes until they turn golden brown and crispy. Don’t forget to shake the basket halfway through for even cooking. After cooking, toss the bites in a bowl with melted butter and buffalo sauce. Coat each piece well. Finally, return them to the air fryer for another 2-3 minutes. This step gives them a nice crispy glaze. Once done, remove them from the air fryer and garnish with chopped parsley. Enjoy your tasty snack! To get that amazing crunch, follow these tips. First, make sure your air fryer is preheated. A hot fryer helps the batter cook fast and crisp up. Use a light coat of cooking spray on the basket. This step keeps the bites from sticking and helps them brown. When you place the cauliflower florets in the air fryer, give them space. This helps air flow and cooks them evenly. Shake the basket halfway through cooking. This motion helps all sides get that nice golden color. If you don’t have an air fryer, you can still enjoy these bites. Try baking them in the oven. Preheat the oven to 425°F (220°C). Spread the coated florets on a baking sheet lined with parchment paper. Bake for about 20 to 25 minutes. Flip them halfway to get that crispiness. You can also try frying them in hot oil. Heat oil in a deep pot to 350°F (175°C). Fry the bites in small batches for 3 to 4 minutes. Drain them on paper towels to remove extra oil. Buffalo sauce can be spicy, so adjust it to fit your taste. If you want less heat, reduce the cayenne pepper in the batter. You can also mix in some honey or maple syrup for a sweet touch. For a spicier kick, use a hotter buffalo sauce. You can even add fresh jalapeños to the batter for extra heat. Always taste before tossing the bites in sauce. This way, you can find the perfect balance for your palate. {{image_2}} You can easily change the taste of your cauliflower bites. Try adding spices like cumin or chili powder for a different kick. For a sweeter taste, mix in some honey or maple syrup with the buffalo sauce. You can even use different sauces. Teriyaki or barbecue sauce makes a fun twist. Experiment with flavors to find your favorite! To make this dish vegan, swap the butter for a plant-based option. You can use olive oil or vegan butter. For a gluten-free version, replace all-purpose flour with gluten-free flour. You can also use chickpea flour for a nutty flavor. Always check the sauce for gluten-free labels, as some brands may contain gluten. Buffalo cauliflower bites are great as a snack or appetizer. Serve them with a side of ranch or blue cheese dressing. You can also add fresh veggies like carrots and celery for crunch. Pair them with a cold drink for a fun game day treat. If you want to elevate your dish, sprinkle some chopped green onions or cilantro on top before serving. To store your leftover Air Fryer Buffalo Cauliflower Bites, let them cool first. Place them in an airtight container. They stay fresh for about 3 to 5 days in the fridge. I often use parchment paper between layers. This prevents sticking and keeps them crispy for longer. To reheat, I suggest using the air fryer again. Set it to 350°F (175°C). Cook for about 5-7 minutes. This helps restore their crispiness. You may also use an oven at the same temperature. Just spread them out on a baking sheet. Avoid using the microwave; it makes them soggy. If you want to freeze these bites, do it before tossing them in sauce. Place the uncooked coated cauliflower on a baking sheet. Freeze them until solid, then transfer to a freezer bag. They can last up to 3 months in the freezer. When ready to cook, just air fry them straight from the freezer. Cook for a few extra minutes to ensure they are hot and crispy. Air Fryer Buffalo Cauliflower Bites can last up to 3 days in the fridge. Just keep them in an airtight container. The bites may lose some crispness when stored, but they will still taste great. Reheat them in the air fryer to bring back their crunch. Yes, you can make these buffalo cauliflower bites ahead of time. You can prepare the batter and coat the cauliflower florets. Store the coated florets in the fridge for up to 24 hours. When ready to cook, just air fry them. This saves time during busy days. These bites pair well with various dips and sides. Here are some great options: - Ranch dressing - Blue cheese dressing - Celery sticks - Carrot sticks - A fresh salad Feel free to mix and match your favorites! This blog post covers everything you need to make tasty Air Fryer Buffalo Cauliflower Bites. We started with a full list of ingredients and their roles, including optional garnishes. Then, I provided step-by-step instructions on preparing the cauliflower and making the batter. Next, I shared tips to achieve the perfect crispiness and variations for extra flavor. Finally, we reviewed storage info and answered key FAQs. Try these bites today, and enjoy delicious flavors without the fuss!

Air Fryer Buffalo Cauliflower Bites Delicious Snack

Looking for a tasty snack that’s full of flavor and easy to make? These Air Fryer Buffalo Cauliflower Bites are

To make the Tomato Basil Gnocchi Skillet, gather these items: - 1 package (16 oz) gnocchi (store-bought or homemade) - 2 tablespoons olive oil - 3 cloves garlic, minced - 1 can (14 oz) diced tomatoes (preferably fire-roasted) - 1 cup cherry tomatoes, halved - 1 teaspoon dried oregano - 1/2 teaspoon red pepper flakes (optional) - Salt and pepper to taste - 1 cup fresh basil leaves, torn - 1 cup mozzarella cheese, shredded - Grated Parmesan cheese for serving You can choose fresh or store-bought gnocchi. Fresh gnocchi tastes light and fluffy. It cooks quickly and adds a homemade feel. Store-bought gnocchi is quick and easy. It saves time and still tastes great. Both options work well in this dish. If you pick fresh gnocchi, make sure to cook it within a few days. You can adjust some ingredients based on what you have. Here are a few ideas: - Use any pasta type if you don’t have gnocchi. - Swap olive oil with butter or avocado oil for a different flavor. - Fresh basil can be replaced with dried basil. Use less since dried herbs are stronger. - If you don’t like mozzarella, try cheddar or feta cheese. - For a bit of heat, use jalapeños instead of red pepper flakes. These swaps can help you create a dish that fits your taste or what you have on hand. Enjoy making this meal your own! To start, heat 2 tablespoons of olive oil in a large skillet over medium heat. Once the oil is hot, add 3 cloves of minced garlic. Sauté the garlic for 30 seconds until it smells great. Be careful not to let it burn. Next, add a can of diced tomatoes (14 oz), along with halved cherry tomatoes. Stir in 1 teaspoon of dried oregano and, if you like heat, 1/2 teaspoon of red pepper flakes. Season this mixture with salt and pepper to taste. Let it simmer for 5 to 7 minutes. Stir occasionally, so the tomatoes break down and become saucy. While the tomato mixture simmers, it's time to cook the gnocchi. Boil water in a pot and add the gnocchi. If you're using a package, follow the instructions on it. Fresh gnocchi cooks fast, usually in just a few minutes. When they float to the top, they’re ready! Drain the gnocchi and set them aside. Once the tomato mixture has thickened slightly, gently add the cooked gnocchi to the skillet. Stir carefully to mix everything well. Tear 1 cup of fresh basil leaves and fold them into the gnocchi mixture. Next, sprinkle 1 cup of shredded mozzarella cheese on top. Cover the skillet with a lid and cook for another 2-3 minutes until the cheese melts. Remove the skillet from heat and serve hot. Finish with grated Parmesan cheese for a yummy touch. To make perfect gnocchi, start with the right dough. If you make it from scratch, use light potatoes. Avoid adding too much flour. This keeps the gnocchi soft. If using store-bought, check for quality. Look for gnocchi that feels light and fluffy. Cook them in boiling water until they float. This means they are done. Drain them gently to keep their shape. Fresh herbs elevate the taste of your dish. Basil is key in this recipe. Tear the leaves instead of chopping them. This keeps their flavor strong. You can also add other herbs like thyme or parsley for depth. Just a sprinkle of fresh oregano boosts the taste. Use herbs right before serving for the best flavor. Avoid overcooking the gnocchi. This makes them mushy and less tasty. Don’t skip the step of simmering the tomatoes. It helps blend the flavors well. Keep an eye on the garlic; it can burn fast. A burned taste ruins the dish. Lastly, always taste for salt and pepper. Adjusting these can make a big difference in flavor. {{image_2}} You can easily make this dish vegan. Use plant-based gnocchi or make your own. Skip the cheese and try nutritional yeast for a cheesy flavor. Add more veggies like spinach or bell peppers. These will add color and nutrition. You won’t miss the cheese, trust me! Want to make this dish heartier? Add protein! Cook chicken or sausage before adding the tomatoes. Use diced chicken breast for a mild flavor. For spice, try Italian sausage. Cook it in the skillet first, then follow the recipe. You’ll have a filling meal in no time! Not a fan of mozzarella? Swap it for other cheeses! Try ricotta for creaminess or goat cheese for tang. You can even mix cheeses for a unique taste. Just remember to adjust the amount to keep it balanced. Cheese adds richness, so pick what you love! To store leftovers, let the skillet cool down first. Then, scoop the gnocchi into an airtight container. Make sure to cover it tightly. You can keep it in the fridge for up to three days. When it's time to eat again, reheat the gnocchi in a skillet. Add a splash of water or olive oil to help it warm up. Heat it over medium-low heat. Stir gently to avoid sticking. You can also use the microwave. Put it in a bowl with a lid and heat in short bursts. If you want to freeze the dish, it's best to do it before you add the cheese. Let the skillet cool and place it in a freezer-safe container. Make sure to seal it well. It can stay in the freezer for up to three months. When you're ready to eat, thaw it in the fridge overnight. Then, heat it up and add fresh cheese before serving. Yes, you can use other types of pasta. Some great options are penne, fusilli, or even spaghetti. Each pasta will bring its own texture and taste. Just remember to cook them according to the package instructions. Gnocchi has a unique, soft bite, while other pastas may offer a firmer feel. Adjust the cooking time as needed for the pasta you choose. This dish pairs well with a simple salad or garlic bread. A fresh green salad adds a nice crunch. You can mix greens, tomatoes, and a light vinaigrette. Garlic bread complements the meal, adding a delicious crunch. You can also serve it with grilled vegetables for extra flavor and color. Making this dish takes about 20 minutes from start to finish. You will spend around 10 minutes prepping and another 10 minutes cooking. It’s a quick meal that fits perfectly into a busy day. The speedy process makes it great for a weeknight dinner. You get a warm, hearty meal in no time! The blog outlined how to make a tasty Tomato Basil Gnocchi Skillet. We covered essential ingredients, from using fresh gnocchi to possible substitutions. You learned step-by-step instructions for preparing and cooking the dish. Tips and tricks helped perfect your gnocchi and avoid common mistakes. Variations allow you to add proteins or go vegan. Lastly, we discussed storage, reheating, and frequently asked questions. Keep this guide handy for cooking delicious meals with ease. Enjoy your culinary journey!

Tomato Basil Gnocchi Skillet Easy Savory Comfort Meal

Looking for a cozy, easy meal that warms your heart? You’ve found it! My Tomato Basil Gnocchi Skillet is a

For the best Creamy Parmesan Spinach Dip, you need fresh spinach. Use one cup of chopped spinach. Fresh spinach gives the dip a bright taste. It adds a nice color too. Make sure to wash the spinach well before chopping. Next, gather your dairy products. You will need: - 1 cup cream cheese, softened - 1/2 cup sour cream - 1/2 cup mayonnaise - 1 cup grated Parmesan cheese - 1/4 cup grated mozzarella cheese These creamy ingredients create the dip's rich texture. Softened cream cheese blends well and makes it smooth. Sour cream and mayonnaise add tanginess. The Parmesan and mozzarella cheeses give it a tasty, cheesy flavor. Don't forget the spices! You will need: - 2 cloves garlic, minced - 1 teaspoon onion powder - 1/2 teaspoon crushed red pepper flakes (optional) - Salt and pepper to taste Garlic adds a savory kick. Onion powder brings depth to the flavor. If you like heat, add crushed red pepper flakes. Salt and pepper help to balance the flavors. Adjust them to suit your taste for the perfect dip. Start by preheating your oven to 350°F (175°C). This warms up the oven for baking. In a medium bowl, mix the softened cream cheese, sour cream, and mayonnaise. You want this to be smooth. Use a spatula or a whisk to combine well. Next, stir in the chopped fresh spinach. Add the grated Parmesan cheese and the mozzarella cheese. Mince two cloves of garlic and toss that in too. Sprinkle in the onion powder and crushed red pepper flakes if you like some spice. Mix everything well until it's all blended. Don’t forget to add salt and pepper to taste. Once you combine all the ingredients, transfer the dip to a baking dish. Spread it evenly. Bake in your preheated oven for about 20-25 minutes. Look for a bubbly and slightly golden top. When it’s ready, take it out and let it cool for a few minutes. Serve it warm with tortilla chips or sliced bread. For a nice touch, sprinkle extra Parmesan on top and drizzle some olive oil over it. Enjoy the creamy goodness! To get the right dip texture, mix the cream cheese, sour cream, and mayonnaise well. Make sure they are soft and smooth. This base keeps the dip creamy. If it's too thick, add a bit of milk. If it's too runny, add more cheese. The right mix makes it easy to dip. I love adding a bit of garlic for a strong taste. Minced garlic gives a nice kick. You can also add crushed red pepper flakes if you want heat. The onion powder adds depth. Adjust salt and pepper to fit your taste. Experiment with spices to find your perfect mix. Serve the dip warm in a nice dish. Add extra Parmesan on top for a great look. A drizzle of olive oil adds flavor and shine. Pair it with tortilla chips or slices of bread. You can also serve fresh vegetables for a colorful platter. This dip is perfect for parties or gatherings! {{image_2}} You can easily add some heat to your spinach dip. Just include 1/2 teaspoon of crushed red pepper flakes in your mix. This small change gives the dip a nice kick. If you like it even spicier, add more red pepper flakes. You can also use jalapeños. Fresh or pickled, they add bold flavor and crunch. Cheese lovers will enjoy these tasty extras. Try mixing in some feta cheese for a tangy twist. You can also add cream cheese for a richer texture. Another option is to use a blend of cheeses. Mixing mozzarella, cheddar, and Parmesan creates a creamy and cheesy delight. This combination makes each bite extra satisfying. If you're looking for a lighter version, swap out sour cream and mayo for Greek yogurt. This option keeps the dip creamy while reducing calories. You can also use low-fat cream cheese. Fresh herbs, like parsley or basil, add flavor without extra calories. Lastly, serve the dip with veggie sticks instead of chips. Carrots, cucumbers, and bell peppers are great choices. After your gathering, let the dip cool down. Store it in an airtight container. It stays fresh in the fridge for about 3-4 days. Make sure to keep it covered to avoid drying out. If you see any change in color or smell, it’s best to toss it. You can freeze this dip if you have leftovers. Use a freezer-safe container. Leave some space at the top, as it expands when frozen. It will stay good for about 2-3 months. When you’re ready to enjoy it again, thaw it in the fridge overnight before reheating. To reheat, place the dip in an oven-safe dish. Preheat your oven to 350°F (175°C). Heat for about 15-20 minutes, or until warm and bubbly. You can also use a microwave. Heat it in short bursts, stirring in between. Enjoy it warm with your favorite tortilla chips or bread! Creamy Parmesan Spinach Dip lasts about 3 to 5 days in the fridge. Make sure to store it in an airtight container. When kept cold, the flavors stay fresh. If you notice any changes in smell or texture, it’s best to toss it. Yes, you can make this dip ahead of time. Prepare the dip and place it in a baking dish. Cover it tightly with plastic wrap. Store it in the fridge for up to two days. When ready to serve, bake it as usual. This saves time on busy days. You can serve this dip with various items. Here are some great options: - Tortilla chips - Sliced bread - Pita chips - Veggie sticks, like carrots or celery - Crackers These pair well and add fun to your gathering. Enjoy mixing and matching! This blog post covered how to create a tasty creamy parmesan spinach dip. Start with fresh ingredients, dairy, and spices. Follow the step-by-step guide for the best results. I shared tips to get the perfect dip and suggested fun variations. Storing your dip is easy with my fridge and freezer tips. Lastly, I answered common questions about the dip’s shelf life and serving ideas. Enjoy making this dip and impress your friends and family with your skills!

Creamy Parmesan Spinach Dip Delight for Any Gathering

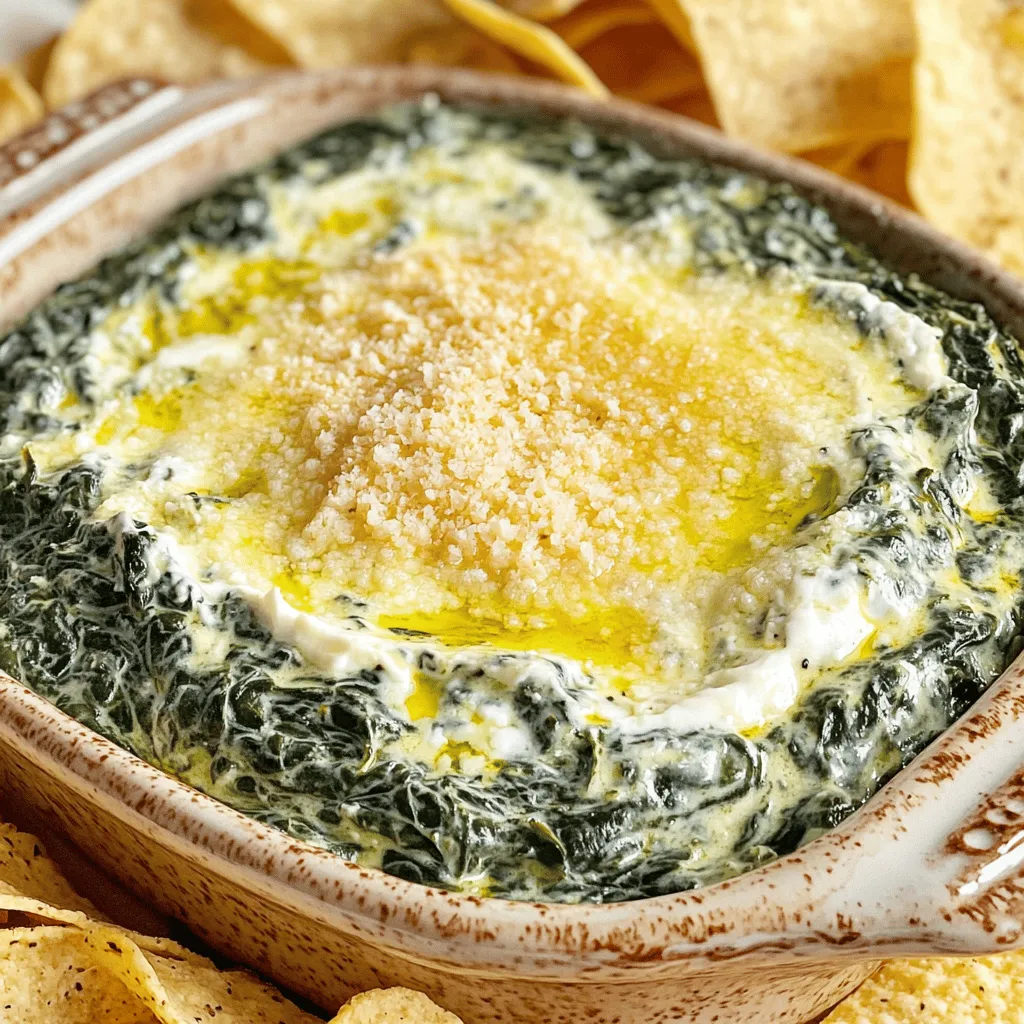
Craving a dip that wows your guests? Look no further! My Creamy Parmesan Spinach Dip is a hit at any

- 1 cup unsalted butter, softened - 3/4 cup brown sugar, packed - 1/2 cup granulated sugar - 2 large eggs - 1 teaspoon vanilla extract - 2 1/4 cups all-purpose flour - 1 teaspoon baking soda - 1/2 teaspoon salt - 1/2 cup dark chocolate chips - 1/2 cup milk chocolate chips - 1/2 cup white chocolate chips - Flaky sea salt, for topping When baking, precise measurements matter. Use dry measuring cups for flour and sugar. For butter, use a scale or the markings on the wrapper. Always level off your measuring cups with a knife. This keeps your cookie from being too dry or too wet. No brown sugar? Use white sugar mixed with molasses for a similar taste. You can swap all-purpose flour for a gluten-free blend if needed. If you want a dairy-free option, use vegan butter. Egg substitutes like flaxseed meal or applesauce work well, too. First, set your oven to 350°F (175°C). This step is key for even baking. While it heats, grab a 10-inch cast-iron skillet. Grease it with butter or non-stick spray. This will help the cookie come out easily. In a large bowl, mix 1 cup of softened butter with 3/4 cup of brown sugar and 1/2 cup of granulated sugar. Beat this until it’s light and fluffy. Next, add 2 large eggs one at a time, mixing well after each egg. Stir in 1 teaspoon of vanilla extract for great flavor. In another bowl, whisk together 2 1/4 cups of all-purpose flour, 1 teaspoon of baking soda, and 1/2 teaspoon of salt. This mix helps the cookie rise and adds taste. Make sure it’s well combined. Gradually mix the dry ingredients into the wet mixture. Do this until just combined; don’t overmix. Now, fold in 1/2 cup of dark chocolate chips, 1/2 cup of milk chocolate chips, and 1/2 cup of white chocolate chips. This adds a rich flavor and texture. Pour the cookie dough into the greased skillet. Spread it evenly using a spatula. Sprinkle a pinch of flaky sea salt over the top. Now, bake it for 25-30 minutes. Look for golden edges and a soft center. Let it cool for about 10 minutes before serving. This will keep it gooey and delicious! To get the perfect texture for your Triple Chocolate Chip Skillet Cookie, focus on mixing. Cream the butter and sugars well. This step adds air and makes it light. Make sure to not overmix after adding the flour. Mix until just combined. This keeps the cookie soft and chewy. Baking time is key too. Aim for a golden edge with a soft center. If you see the edges are brown but the middle is still soft, it’s likely done. This will create a gooey center, which is the best part! One common mistake is skipping the cooling time. Let the cookie cool for about 10 minutes before serving. This helps it set and keeps it from falling apart. Another mistake is using cold butter. Always use softened butter for the best results. Cold butter does not blend well, leading to a dense cookie. Don’t forget to check your oven temperature. An oven that’s too hot can burn the edges while leaving the center raw. You can add more flavor to your cookie. Try mixing in nuts like walnuts or pecans for crunch. A sprinkle of cinnamon can also add warmth. For a fun twist, swap out the chocolate chips. Use butterscotch or peanut butter chips instead. You can even add a hint of almond extract for a unique flavor. Don’t be afraid to experiment! Each change can bring a new delight to your skillet cookie. {{image_2}} You can make this cookie even better by adding nuts. I love using chopped walnuts or pecans. They add a nice crunch and flavor. Just mix in about 1/2 cup of your favorite nuts when you add the chocolate chips. This extra texture makes every bite fun! Want to change the flavor a bit? Use different extracts! Instead of vanilla, try almond extract. Just a teaspoon can change the whole cookie. You can also use orange or mint extracts for a unique twist. Start with a small amount, taste, and adjust as needed. It’s a great way to personalize your cookie. You can also adapt this recipe for special diets. Use coconut oil instead of butter for a dairy-free option. For a gluten-free version, swap the all-purpose flour with a gluten-free blend. Make sure your chocolate chips are dairy-free if needed. These changes let everyone enjoy this delicious treat! Store any leftover skillet cookie in an airtight container. This keeps moisture in and crust crispy. If you leave it open, it can dry out. Place it at room temperature for up to three days. You can also refrigerate it for up to a week. If you want to keep it longer, consider freezing. To freeze your skillet cookie, first, let it cool completely. Cut it into slices to make serving easy. Wrap each slice in plastic wrap. Then, place the wrapped slices in a freezer-safe bag. This keeps them fresh for up to three months. When you crave a sweet treat, just thaw at room temperature. For the best taste, reheat slices in the oven. Preheat your oven to 350°F (175°C). Place the slice on a baking sheet. Warm it for about 5-10 minutes. You can also microwave a slice for about 15-20 seconds. This makes the chocolate chips melty again. Don’t forget to add a scoop of ice cream on top! Yes, you can make this skillet cookie gluten-free. Use a gluten-free all-purpose flour blend instead of regular flour. Check the blend for xanthan gum, as it helps with texture. This change makes the cookie safe for those with gluten allergies. You can tell the skillet cookie is done by checking the edges. They should be golden brown. The center can look slightly underbaked for a gooey texture. A toothpick inserted in the center should come out with a few moist crumbs. Absolutely! Doubling the recipe is easy. Just use a larger skillet or two skillets. Keep an eye on the baking time, as it may need a bit longer. Make sure the cookie is baked all the way through. Many toppings work well with this cookie! Here are some tasty ideas: - Vanilla ice cream - Whipped cream - Chocolate sauce - Fresh berries - Chopped nuts These toppings add flavor and make your dessert extra special! This guide covered all you need for the perfect skillet cookie. We talked about ingredients, measuring tips, and how to mix and bake. I shared essential tips to avoid mistakes and enhance your flavors. Plus, you learned about variations and storage for your treats. Remember, baking is fun! Customize your cookie to fit your taste. Follow these steps, and you'll impress everyone with your skills. Enjoy your baking adventure!

Triple Chocolate Chip Skillet Cookie Decadent Delight

Are you ready for a sweet adventure? The Triple Chocolate Chip Skillet Cookie is a treat you won’t forget! This

- 1 ½ cups graham cracker crumbs - ½ cup unsalted butter, melted - 1 cup fresh raspberries (plus extra for garnish) - 2 tablespoons sugar (for raspberries) - 16 oz cream cheese, softened - 1 cup sugar - 3 large eggs - 1 teaspoon vanilla extract - 2 tablespoons all-purpose flour - ½ cup sour cream The ingredients for raspberry swirl cheesecake are simple yet flavorful. You need graham cracker crumbs for the crust. The butter helps bind them together. Fresh raspberries add a bright, tart flavor. Sugar sweetens both the raspberries and the cheesecake itself. Cream cheese gives the cheesecake its rich texture. Eggs help set the filling. Vanilla extract enhances the flavors. All-purpose flour adds structure, while sour cream keeps it creamy. - For gluten-free options, use gluten-free graham crackers for the crust. - If you want to cut sugar, try using honey or maple syrup. - For a dairy-free version, opt for vegan cream cheese and coconut yogurt. These substitutions let you enjoy this cheesecake, no matter your diet. Use gluten-free crackers if you need to avoid gluten. Choose natural sweeteners if you prefer less refined sugar. Dairy-free options ensure everyone can enjoy this dessert. {{ingredient_image_1}} To make the raspberry swirl, start with fresh raspberries. Place them in a small saucepan over medium heat. Add 2 tablespoons of sugar. Cook this mixture gently for about 5-7 minutes. You want the raspberries to break down and form a thick sauce. Once ready, remove it from the heat and let it cool slightly. This cooling helps keep the flavor fresh when you add it to the cheesecake. First, preheat your oven to 325°F (160°C). In a mixing bowl, combine 1 ½ cups of graham cracker crumbs and ½ cup of melted unsalted butter. Mix well until the crumbs are fully coated. Next, press the mixture firmly into the bottom of a 9-inch springform pan. Bake this crust for 10 minutes. After baking, let it cool before adding the cheesecake filling. In a large bowl, take 16 oz of softened cream cheese. Beat it with a hand mixer until smooth. Gradually add in 1 cup of sugar, mixing until well combined. Then, add 3 large eggs, one at a time. Mix well after each egg. Next, add 1 teaspoon of vanilla extract and ½ cup of sour cream. Mix until fully combined. Finally, sprinkle in 2 tablespoons of flour and mix carefully. Be sure not to overmix, as this can make the cheesecake dense. Now it's time to combine the cheesecake batter with your raspberry sauce. Pour half of the cheesecake batter over the cooled crust. Drizzle half of the raspberry sauce over this layer. Use a knife to swirl the sauce gently into the batter. Repeat this step with the remaining batter and raspberry sauce. This layering creates a beautiful swirl pattern on top. Bake the cheesecake in your preheated oven for 55-60 minutes. The center should look slightly set but have a slight jiggle. Once done, turn off the oven and crack the door slightly. Let the cheesecake cool inside for about 1 hour. This helps prevent cracking as it cools down. After the cheesecake cools, remove it from the oven. Let it cool to room temperature. Once it’s cool, cover it with plastic wrap. Refrigerate for at least 4 hours or overnight for the best flavor. When ready to serve, garnish the top with fresh raspberries. Slice and enjoy the delightful mix of creaminess and tangy raspberry flavor! To avoid cracks on your cheesecake, cool it slowly. After baking, turn off the oven. Crack the door open and let it cool for about an hour. This step helps prevent sudden temperature changes that cause cracks. Using room temperature ingredients is key for a smooth filling. When your cream cheese is warm, it mixes better. Eggs should also be at room temperature. This creates a creamy texture without lumps. One common mistake is overmixing the batter. Mix just until combined, especially after adding eggs. Overmixing can introduce air, leading to cracks during baking. Another issue is incorrect baking times. Each oven is different. Start checking your cheesecake at 55 minutes. The center should look set but still jiggle slightly. For the best results, use a 9-inch springform pan. This allows you to remove the cheesecake easily after baking. Make sure your pan has a tight seal to prevent leaks. Essential kitchen gadgets include a hand mixer for smooth batter. A rubber spatula helps in folding in raspberry sauce without overmixing. A knife or skewer is great for creating those beautiful swirls! Pro Tips Use Room Temperature Ingredients: Ensure that your cream cheese, eggs, and sour cream are at room temperature before mixing. This helps achieve a smoother batter and prevents lumps. Prevent Cracking: Cooling the cheesecake gradually in the oven after baking can help prevent cracks. Avoid sudden temperature changes, which can cause the surface to crack. Swirl Gently: When adding the raspberry sauce, use a skewer or a knife to gently swirl it into the batter. Be careful not to over-mix, as you want to maintain a beautiful swirl pattern. Garnish for Presentation: For an elegant touch, garnish the cheesecake with additional fresh raspberries and a dusting of powdered sugar just before serving. This adds visual appeal and enhances the flavor. {{image_2}} You can swap raspberries for other fruits. Strawberries work great. Just mash them like raspberries. Blueberries also add a nice touch. You can even make a mixed berry version. Combine raspberries, strawberries, and blueberries for a fruity delight. The colors will pop and the taste will be amazing! Want to get fancy? Try adding chocolate or caramel to your cheesecake. Drizzle some melted chocolate on top before serving. For caramel, mix it into the batter. You can also use flavored extracts. Almond or lemon extracts can add a unique twist to your cheesecake. Just be careful not to add too much. A teaspoon usually does the trick! If you follow a vegan diet, you can still enjoy this cheesecake. Use vegan cream cheese and a nut-based crust instead of graham crackers. For a keto-friendly version, swap sugar for a low-carb sweetener. Also, use almond flour instead of graham cracker crumbs. These options keep the taste while fitting your diet. Enjoy your cheesecake without worry! To keep your raspberry swirl cheesecake fresh, refrigerate it right after it cools. Wrap it tightly in plastic wrap. This helps prevent it from drying out. Place the cheesecake in an airtight container for extra protection. If you want to store it for a long time, freezing is a great option. Slice the cheesecake first, then wrap each piece in plastic wrap. After that, place the wrapped slices in a freezer bag. This way, you can enjoy a slice anytime! In the fridge, your cheesecake will last about 4 to 5 days. If you freeze it, it can last up to 2 months. Always check for signs of spoilage. If you see any mold or if it smells off, it’s best to throw it away. When cheesecake goes bad, it can become dry or change color. You don’t really need to reheat cheesecake. It’s best served chilled. If you want to bring it to room temperature, let it sit out for about 30 minutes. This helps enhance the flavors. Avoid using a microwave as it can change the texture. Enjoy your cheesecake as it is, cold and creamy! You can skip baking by using a no-bake method. For the crust, use crushed graham crackers mixed with melted butter. Press this mixture into your pan. For the filling, beat cream cheese with sugar until smooth. Add sour cream and vanilla extract for flavor. Mix until smooth. Then, fold in your raspberry sauce. Pour this into the crust and chill it in the fridge for at least four hours. This gives you a creamy cheesecake without baking! Yes, you can use frozen raspberries! They work well, but you may need to adjust the recipe. Thaw the raspberries first and drain excess liquid. Cook them just like fresh raspberries to make the sauce. The cooking time may be a bit longer since they are frozen. Keep an eye on the sauce to ensure it thickens nicely. To cut cheesecake neatly, use a sharp knife. Dip the knife in hot water and wipe it dry before each cut. This helps create cleaner slices. You can also use a cake wire or a thin spatula for precise cutting. Always cut straight down and avoid sawing back and forth. Yes, you can! While graham crackers are classic, you can try other crust options. Use crushed cookies like Oreos or vanilla wafers for a different flavor. You can even make a nut crust using ground almonds or pecans for a gluten-free option. Just make sure to mix with butter for the right texture! To check if your cheesecake is done, look for a slight jiggle in the center. The edges should be set, but the middle can still wobble a bit. You can also insert a toothpick. If it comes out clean or with just a few crumbs, it’s ready. Let it cool in the oven with the door slightly open to prevent cracks. This blog post covered how to make a delicious raspberry swirl cheesecake. I explained the ingredients, including possible substitutes for special diets. You learned step-by-step how to prepare, bake, and cool your cheesecake to perfection. I shared helpful tips to avoid common mistakes and introduced fun variations to try. Remember, storage matters to keep your cheesecake fresh. With these insights, you are now ready to impress with your cheesecake skills. Enjoy making this treat and share it with loved ones!

Raspberry Swirl Cheesecake Delightful and Creamy Recipe

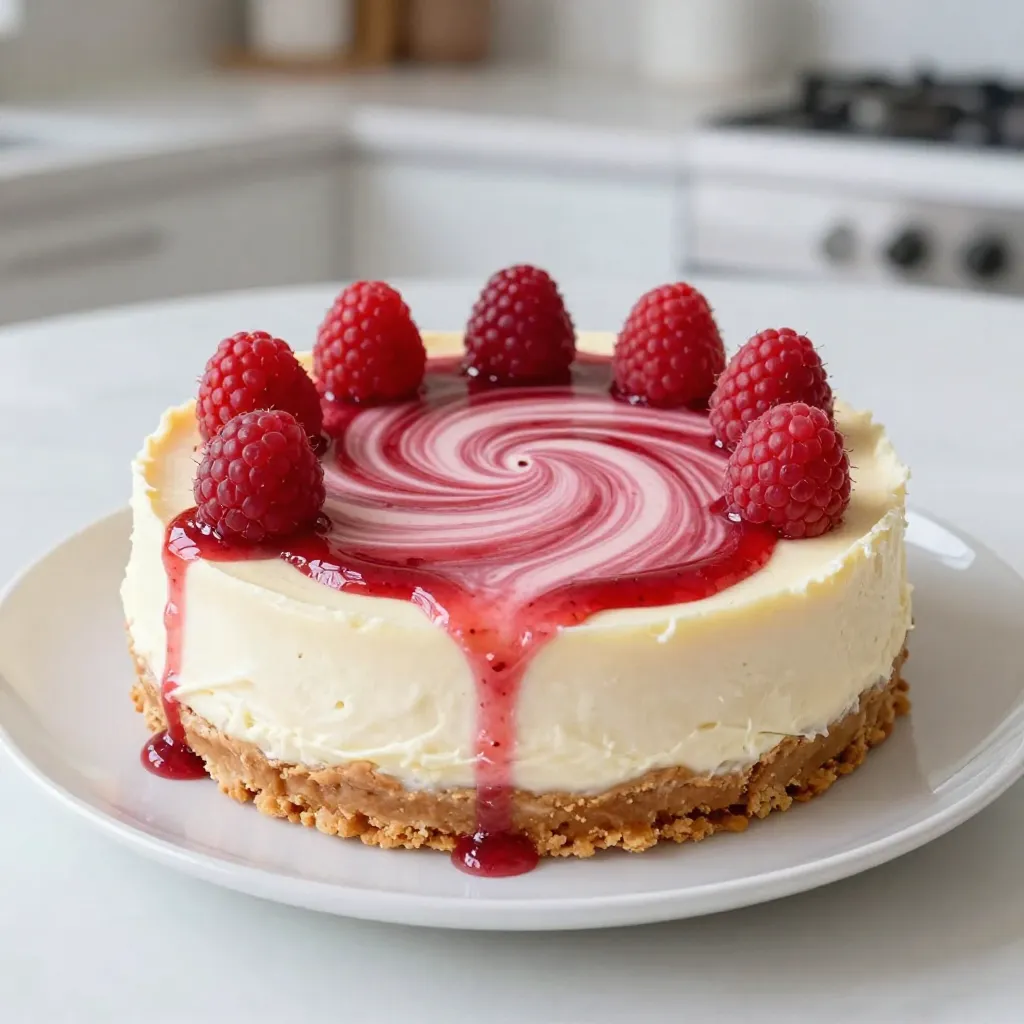
If you’re craving a dessert that’s both rich and refreshing, you’re in for a treat! This Raspberry Swirl Cheesecake combines

- 2 cups graham cracker crumbs - 1/2 cup unsalted butter, melted - 1/4 cup granulated sugar - 1 (8 oz) package cream cheese, softened - 1/2 cup powdered sugar - 1 teaspoon vanilla extract - 1 cup sour cream - 2 cups apples, peeled, cored, and thinly sliced - 1 teaspoon cinnamon - 1/4 teaspoon nutmeg - 1/2 cup brown sugar - Optional toppings: walnuts or pecans These simple ingredients create a delightful treat. Start with graham cracker crumbs for a tasty crust. The melted butter binds the crumbs well, giving you a rich base. Granulated sugar adds a hint of sweetness to the crust. Next, the cream cheese forms the base of our filling. It should be soft for easy mixing. Powdered sugar makes it sweet and smooth. Vanilla extract adds a warm flavor that mixes perfectly with the other ingredients. Sour cream gives the filling a creamy texture. It balances the sweetness and adds tang. The thinly sliced apples are the star of this dish. They bring freshness and flavor, especially when spiced with cinnamon and nutmeg. Brown sugar adds depth and sweetness to the apples. If you want crunch, add walnuts or pecans on top. This recipe lets you mix flavors and textures for a delicious dessert. Enjoy each bite of these apple cinnamon cheesecake bars! First, preheat your oven to 350°F (175°C). While the oven warms up, grease a 9x13 inch baking dish. This step helps the bars come out easily after baking. In a bowl, mix 2 cups of graham cracker crumbs, 1/2 cup melted unsalted butter, and 1/4 cup granulated sugar. Stir until everything blends well. Press this mixture firmly into the bottom of the greased dish. Bake it for 10 minutes. Once done, take it out and let it cool slightly. In another bowl, beat together 1 (8 oz) package of softened cream cheese, 1/2 cup powdered sugar, and 1 teaspoon vanilla extract. Mix until it turns smooth and creamy. Then, add 1 cup of sour cream and mix until fully blended. In a separate bowl, toss 2 cups of thinly sliced apples with 1 teaspoon cinnamon, 1/4 teaspoon nutmeg, and 1/2 cup brown sugar. Ensure the apples are well coated. Spread this apple mixture evenly over the cream cheese layer. Press them down slightly to help them stick. Bake your dish in the oven for 35-40 minutes. Look for golden edges and ensure the center is set. After baking, let it cool to room temperature. Refrigerate the bars for at least 4 hours or overnight. This chilling time makes the bars easier to cut and enhances the flavors. Enjoy your tasty treat! To keep the crust crunchy, you need to bake it first. Bake the graham cracker crust for 10 minutes. This helps it set and stay firm. After baking, let it cool slightly before adding the cream cheese filling. You can also try adding a layer of melted chocolate on the crust. This will create a barrier and help keep moisture out. Baking time can vary based on your oven. Start checking the bars at 35 minutes. If the edges are golden brown but the center is still wobbly, that’s okay. The bars will firm up as they cool. For a firmer texture, you may bake for an extra 5 minutes. Always use the toothpick test. Insert it in the center; it should come out clean when done. To make your cheesecake bars look beautiful, chill them well before serving. Use a sharp knife to cut clean slices. This helps maintain neat edges. Dust with powdered sugar for a sweet touch. Garnish each slice with a fresh apple slice and a sprig of mint. This adds color and freshness to your dessert. Serve them on a decorative plate for an eye-catching display. {{image_2}} You can switch up the apples for other fruits. Pears work great, too. They bring a soft, sweet taste. Peaches add a summer vibe with their juicy flavor. Just slice them thin. Toss them with cinnamon, nutmeg, and sugar like you would with apples. This keeps the flavor rich and warm. You can also try berries for a tart twist. Each fruit choice will give you a new dessert experience! To make this recipe vegan, use plant-based cream cheese. Brands like Tofutti or Daiya are good options. Replace sour cream with coconut yogurt for a creamy touch. For the crust, use coconut oil in place of butter. You can also use maple syrup instead of granulated sugar. This keeps the bars sweet without animal products. Vegan options can be just as tasty, and they let everyone enjoy dessert! If you need a gluten-free crust, use gluten-free graham crackers. You can also make a crust with almond flour or oats. Mix the flour with melted coconut oil and a bit of sugar. Press it down just like the original crust. This adds a nutty flavor that pairs well with the cheesecake. With these simple swaps, everyone can enjoy the deliciousness of apple cinnamon cheesecake bars! To keep your cheesecake bars fresh, store them in the fridge. Place the bars in an airtight container. This helps maintain their flavor and texture. I recommend using parchment paper between layers to avoid sticking. Leftover bars will stay good for up to five days. You can also freeze these delicious bars! Start by cutting them into slices. Wrap each slice in plastic wrap. Then, place them in a freezer-safe container or bag. They can last up to three months in the freezer. Just remember to label the container with the date! When you're ready to enjoy frozen bars, let them thaw in the fridge overnight. If you're short on time, you can use the microwave. Heat them for 10 to 15 seconds until warm. Be careful not to overheat, or they will lose their creamy texture. Enjoy your tasty treat! Yes, you can make these cheesecake bars a day in advance. This lets the flavors blend well. Just ensure you chill them for at least four hours before serving. This helps them set properly. Serve these bars chilled on a nice plate. A dusting of powdered sugar adds a sweet touch. A slice of fresh apple and a sprig of mint can make it look fancy. You can swap cream cheese for a dairy-free version if needed. Use gluten-free graham crackers for a gluten-free option. Always check labels to avoid allergens. These bars can last up to five days in the fridge. Store them in an airtight container to keep them fresh. Yes, you can easily double the recipe. Just use a larger baking dish. Keep an eye on the baking time, as it may vary with a bigger batch. You learned how to make tasty apple cinnamon cheesecake bars. We covered each ingredient and shared simple steps to bake them perfectly. I offered tips to avoid a soggy crust and ways to store leftovers. You can even try different fruits or make them vegan. Baking these bars is fun and easy. Enjoy sharing them with family and friends. Try your own variations, and let your creativity shine!

Apple Cinnamon Cheesecake Bars Delightful Dessert Recipe

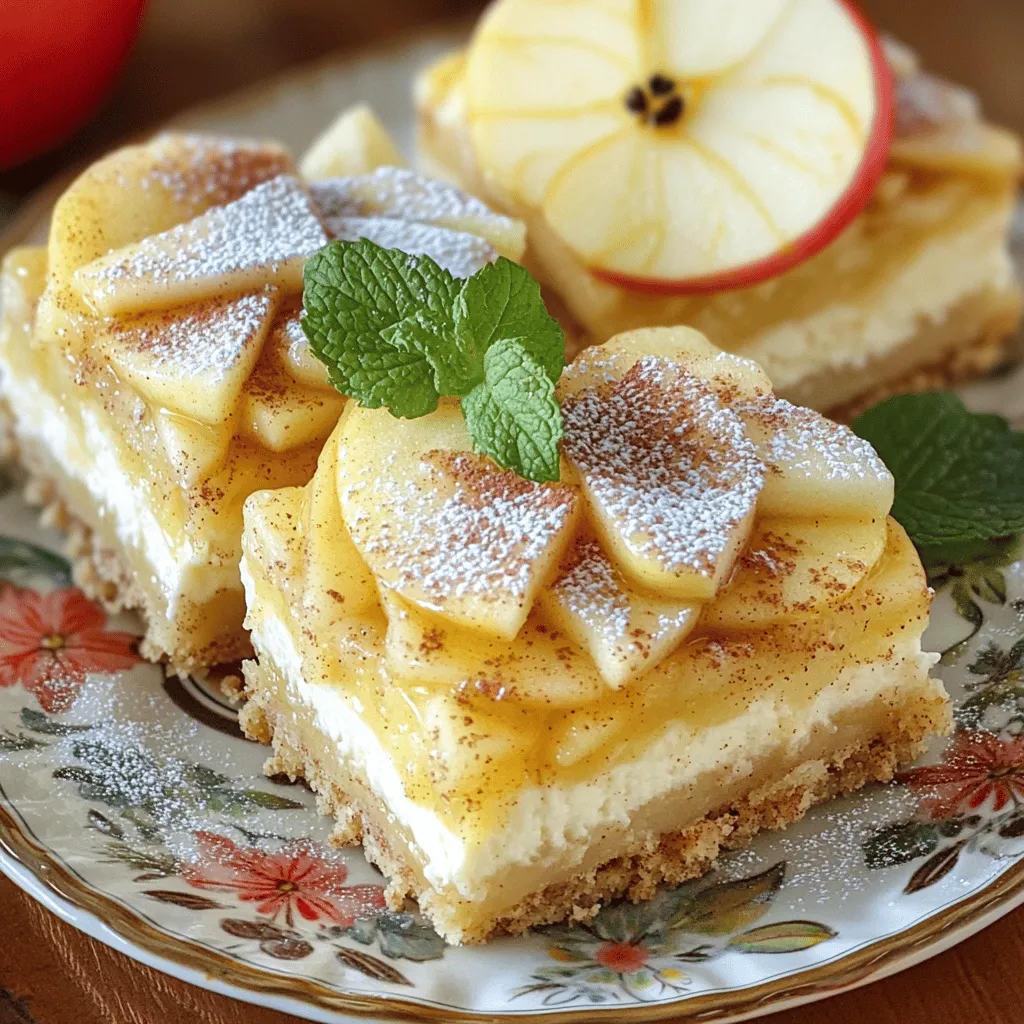
Craving a sweet treat that’s easy to make? You’re in the right place! My Apple Cinnamon Cheesecake Bars are the

- 2 pounds chicken wings - 1/4 cup honey - 1/4 cup Dijon mustard - 2 tablespoons low-sodium soy sauce - 1 tablespoon apple cider vinegar - 1 teaspoon garlic powder - 1 teaspoon onion powder - 1/2 teaspoon paprika - Salt and pepper to taste - Fresh parsley, chopped I love how simple and tasty these Air Fryer Honey Mustard Chicken Wings are. First, you need the chicken wings. I use 2 pounds. Rinse them well and dry them with a paper towel. This step helps the wings get crispy. Next, let’s talk about the honey and Dijon mustard. I use 1/4 cup of each. The honey gives sweetness, while the mustard adds a nice kick. Then, we add other flavors. I mix in 2 tablespoons of low-sodium soy sauce. It adds depth without too much salt. One tablespoon of apple cider vinegar gives it a little tang. Now, we need some spices. I like to add 1 teaspoon each of garlic powder and onion powder. These spices boost the flavor. A little paprika adds color and warmth. Don’t forget salt and pepper to taste! To finish, I chop fresh parsley for a bright garnish. It makes the dish look pretty and adds freshness. These ingredients combine to make a delicious marinade. Trust me, once you try these wings, you’ll want to make them again and again! To make the marinade, grab a mixing bowl. Add 1/4 cup of honey and 1/4 cup of Dijon mustard. Then, pour in 2 tablespoons of low-sodium soy sauce and 1 tablespoon of apple cider vinegar. Lastly, sprinkle in 1 teaspoon of garlic powder, 1 teaspoon of onion powder, and 1/2 teaspoon of paprika. Mix everything well until it's smooth and combined. Take 2 pounds of chicken wings, rinsed and patted dry. Place the wings in a large resealable plastic bag or a bowl. Pour the honey mustard marinade over the wings. Make sure each wing is coated well. Seal the bag or cover the bowl. Let the wings marinate in the fridge for at least 30 minutes. You can marinate them for up to 2 hours for more flavor. Preheat your air fryer to 375°F (190°C) for about 5 minutes. Take the wings out of the marinade and shake off any extra sauce. Place the wings in the air fryer basket in a single layer. Do not overcrowd them; you may need to work in batches. Air fry the wings for 25-30 minutes. Shake the basket halfway through to ensure even cooking. Check that they are crispy and golden brown before serving. The best temperature for crispy wings is 375°F (190°C). This heat cooks the wings evenly. It gives you a nice, crunchy outside while keeping the meat juicy. Preheat your air fryer for about five minutes. This step helps create that perfect crisp. For the best taste, marinate your wings for at least 30 minutes. If you have time, try marinating them for up to 2 hours. This longer soak allows the flavors to soak in deeply. The honey and mustard blend will seep into the meat, making every bite delicious. These wings pair well with various sides. You can serve them with fresh veggies or a simple salad. For dipping sauces, consider ranch or blue cheese. They complement the honey mustard flavor nicely. You can also drizzle extra honey mustard sauce over the wings for added taste. {{image_2}} You can add heat to your wings with hot sauce. Start by mixing in your favorite hot sauce into the marinade. A tablespoon of hot sauce boosts flavor without overpowering the honey mustard. This gives wings a sweet, spicy kick. You can adjust the heat level based on your taste. If you love spice, go for a hot sauce with more heat. For a milder option, choose a sauce with less kick. Fresh herbs can make your wings even better. Try adding chopped rosemary, thyme, or parsley to the marinade. These herbs bring bright flavors that pair well with honey mustard. Use about one tablespoon of fresh herbs. If you want a stronger flavor, use more. You can also mix and match herbs to find your favorite combo. If you need a gluten-free option, don’t worry! You can replace soy sauce with tamari. Tamari is a great substitute that tastes similar. It works well in the marinade, too. Just use the same amount as soy sauce. You can enjoy tasty wings without gluten. To keep your wings fresh, place them in a container. Use an airtight container for best results. You can keep them in the fridge for up to four days. Make sure they cool down before storing. This helps prevent sogginess. Reheat your wings in the air fryer for crispiness. Set the air fryer to 350°F (175°C). Heat them for about 5-7 minutes, shaking halfway. This keeps the skin crunchy. You can also use an oven. Bake them at 375°F (190°C) for 10-15 minutes. To freeze, place cooled wings in a freezer bag. Remove as much air as you can before sealing. They can last in the freezer for up to three months. When you're ready to eat, thaw them in the fridge overnight. Reheat as mentioned above for the best taste. Yes, you can use frozen chicken wings. Here are some tips for cooking them from frozen: - Increase cook time: Add about 5-10 minutes to the cooking time. - Don’t overcrowd: Make sure the wings are in a single layer. - Preheat first: Always preheat your air fryer before adding the wings. - Check for doneness: Use a meat thermometer. The wings should reach 165°F (74°C) internally. To make your wings extra crispy, follow these techniques: - Dry the wings: Pat them dry with paper towels before marinating. - Use baking powder: Toss the wings in a little baking powder before cooking. - Spread them out: Ensure the wings do not touch in the air fryer. - Shake mid-cook: Shake the basket halfway through to promote even cooking. Several dipping sauces complement honey mustard wings: - Blue cheese dressing: Its rich flavor balances the sweetness. - Ranch dressing: A classic choice that many love. - Hot sauce: Adds a spicy kick to the sweet wings. - BBQ sauce: Offers a smoky taste that pairs nicely. This blog post covered a simple method for making honey mustard chicken wings. You learned about the key ingredients and how to marinate them for maximum taste. We discussed cooking in an air fryer for crispy results and shared tips for flavor and storage. When you try these wings, remember you can customize them. Make them spicy or use fresh herbs. Enjoy your tasty creation and share it with friends! Simple recipes can bring joy to any meal.

Air Fryer Honey Mustard Chicken Wings Delight

If you love crispy chicken wings, you’re in for a treat! My Air Fryer Honey Mustard Chicken Wings will make

- 8 oz spaghetti or fettuccine - 1 lb large shrimp, peeled and deveined - 4 cloves garlic, minced - 1/2 cup unsalted butter - 1/2 cup grated Parmesan cheese - 1/2 teaspoon red pepper flakes - Salt and pepper to taste - 2 tablespoons fresh parsley, chopped - Juice of 1/2 lemon For this dish, the main ingredients make all the difference. The shrimp bring a tasty protein that pairs well with pasta. I prefer spaghetti or fettuccine for its texture. Both types soak up the sauce nicely. Garlic is the star flavor in this recipe. Minced garlic gives your dish that rich taste. I use unsalted butter to keep the flavors balanced. The Parmesan cheese adds a creamy finish, making every bite a delight. If you want a bit of heat, add red pepper flakes. It gives a nice kick without overpowering the dish. Salt and pepper enhance the flavors, so adjust to your taste. Fresh parsley brightens the meal and adds color. A squeeze of lemon juice lifts the flavors and adds freshness. This simple dish is full of flavor and easy to make! Step 1: Boiling the water Start by filling a large pot with water. Add a good pinch of salt. Turn the heat to high and wait for it to boil. This step is key for tasty pasta. Step 2: Cooking spaghetti or fettuccine Once the water is boiling, add 8 oz of spaghetti or fettuccine. Cook it according to the package directions. Aim for al dente, firm but not hard. Before draining, save 1/2 cup of pasta water. This will help later. Step 3: Sautéing garlic in butter In a large skillet, melt 1/2 cup of unsalted butter over medium heat. Add 4 cloves of minced garlic. Sauté for about 1 minute. The garlic should smell great, but don’t let it burn. Step 4: Cooking shrimp until pink Add 1 lb of peeled and deveined shrimp to the skillet. Season with salt, pepper, and optional red pepper flakes. Cook for 2-3 minutes on each side. The shrimp will turn pink and opaque when done. Step 5: Mixing in pasta water and drained pasta Pour the reserved pasta water into the skillet. Then, add the drained pasta. Toss everything together. This helps mix the flavors well. Step 6: Adding Parmesan and lemon juice Next, sprinkle in 1/2 cup of grated Parmesan cheese and the juice of 1/2 lemon. Stir until the cheese melts. This creates a creamy sauce that coats the pasta and shrimp nicely. Taste and adjust the seasoning if needed. Enjoy your meal! - Prepping ingredients in advance: Before you start cooking, gather all your ingredients. Chop the garlic, measure the cheese, and peel the shrimp. This makes the cooking quick and easy. - Multi-tasking while cooking: While your pasta cooks, focus on the sauce. Melt the butter and sauté the garlic. This way, you use your time wisely and finish faster. - Adjusting seasoning: After mixing in the cheese and lemon juice, taste your dish. If it needs more flavor, add salt, pepper, or even more cheese. This step lets you make it just right for your taste. - Ensuring creamy sauce consistency: If your sauce feels too thick, add a little pasta water. This helps keep the sauce smooth and coats the pasta well. - Best ways to present the dish: Serve the pasta in large bowls. This makes it look inviting and allows easy sharing. - Garnishing ideas for flavor and appearance: Top your dish with extra Parmesan and a sprinkle of fresh parsley. You can also add a lemon wedge on the side. It adds color and a fresh taste. {{image_2}} You can swap the pasta to fit your needs. Try gluten-free pasta like rice noodles. It works great with this recipe. You can also change the cheese. Pecorino Romano gives a different taste than Parmesan. It adds a nice, salty flavor that many enjoy. Adding vegetables can boost the dish. Spinach wilts nicely in the sauce, adding color and nutrients. Cherry tomatoes can add sweetness and a pop of color. You can also try new spices. A pinch of oregano or basil can change the flavor. Experiment with what you love! If you want a change from shrimp, try chicken. Cook it until it’s golden and tender. Scallops are another great choice. They cook quickly and taste amazing. For a vegetarian option, use tofu or chickpeas. Both are hearty and soak up the sauce well. To keep your Garlic Parmesan Shrimp Pasta fresh, store it in the fridge. Place it in an airtight container. This keeps the pasta moist and safe to eat later. Try to eat it within three days for the best taste. To reheat in the microwave, place the pasta in a bowl. Add a splash of water to help it steam. Cover the bowl with a lid or a microwave-safe wrap. Heat it for one minute, then stir. If it's not warm enough, heat it for another 30 seconds. For stovetop reheating, use a skillet over low heat. Add a little butter or olive oil to the pan. Toss in the pasta and stir gently for a few minutes. Keep an eye on it so it doesn’t stick or burn. Yes, you can freeze this dish. First, let the pasta cool completely. Then, place it in a freezer-safe container or bag. Remove as much air as possible to prevent freezer burn. It can stay good for up to three months. To thaw, move the pasta from the freezer to the fridge a day before you want to eat it. This way, it thaws slowly and safely. You can also reheat it straight from the freezer. Just add a little extra time in the microwave or skillet. It takes just 15 minutes to make this dish. You spend about 5 minutes prepping. Cooking the pasta and shrimp takes the remaining 10 minutes. This quick meal is perfect for busy nights. Yes, you can use frozen shrimp! Just make sure to thaw them first. You can run them under cool water for 10-15 minutes. Once thawed, follow the same cooking steps as fresh shrimp. This pasta pairs well with many sides. A light salad with lemon dressing works great. Garlic bread is also a nice touch. You could serve veggies, like steamed broccoli or asparagus, for a healthy option. Yes, it is great for meal prep! You can cook the pasta and shrimp ahead of time. Store them in separate containers. When ready to eat, just reheat and combine them. This dish stays tasty for a few days in the fridge. To make Garlic Parmesan Shrimp Pasta, you need easy steps and key ingredients. Start with pasta and fresh shrimp, then enhance flavors with garlic and butter. With tips for quick cooking and ingredient swaps, this dish is simple and tasty. You can even store leftovers for later. Enjoy experimenting with variations to suit your taste. This dish brings comfort and flavor to your table, making it a win for any meal. Now it’s your turn to cook and enjoy!

Garlic Parmesan Shrimp Pasta 15-Minute Delight

Craving a quick, tasty meal? Let’s make Garlic Parmesan Shrimp Pasta in just 15 minutes! This dish combines tender shrimp,

To make a hearty loaded baked potato soup, you need simple ingredients. Here is the list: - 4 large russet potatoes, peeled and diced - 1 medium onion, chopped - 3 garlic cloves, minced - 4 cups low-sodium chicken broth - 1 cup heavy cream - 1 cup sharp cheddar cheese, grated - 1/2 cup sour cream - 1/2 teaspoon smoked paprika - 1/2 teaspoon black pepper - Salt to taste - 6 strips of cooked turkey bacon, crumbled (optional for topping) - 2 green onions, sliced (for garnish) - Fresh parsley, chopped (for garnish) Each ingredient plays a key role. The russet potatoes give a creamy texture. The onion and garlic bring depth of flavor. Low-sodium chicken broth adds a savory base while keeping it light. Heavy cream makes it rich and smooth. Sharp cheddar cheese delivers a bold taste. Spices like smoked paprika and black pepper enhance the overall flavor. Sour cream adds a tangy touch, making it even more delicious. For extra flair, you can top the soup with crumbled turkey bacon, green onions, and parsley. These toppings add color and crunch. Gathering these ingredients will set you up for a cozy dish. Each bite will warm you up and leave you wanting more. - Start by peeling and dicing 4 large russet potatoes. - Chop 1 medium onion into small pieces. - Mince 3 garlic cloves until fine. These steps set the stage for a creamy and delicious soup. Dicing the potatoes gives them a nice size for cooking. The onion and garlic add great flavor to the broth. - In your slow cooker, mix the diced potatoes, chopped onion, minced garlic, and 4 cups of low-sodium chicken broth. Stir it well to combine. - Cover the slow cooker and set it to low. Cook for 6 to 7 hours, or until the potatoes are tender. This method allows the flavors to blend and the potatoes to soften. Cooking on low makes it easy to have a warm meal ready when you are. - After cooking, use a potato masher to mash some of the potatoes. Leave some chunks for texture. - Stir in 1 cup of heavy cream, 1 cup of grated sharp cheddar cheese, and 1/2 cup of sour cream. Add 1/2 teaspoon of smoked paprika, 1/2 teaspoon of black pepper, and salt to taste. Mix until the cheese melts and everything blends together. - Let the soup cook for another 30 minutes on low for a nice heat. - Taste your soup and adjust the seasoning if needed. These final touches enhance the flavor and creaminess. You can then serve it hot, topped with crumbled turkey bacon, sliced green onions, and fresh parsley for that extra flair. Enjoy your cozy delight! To get the right texture, start by mashing your potatoes. Use a potato masher and mash about half of the potatoes. This way, you keep some chunks for a hearty bite. For the best results, check the potatoes after cooking for 6 hours. They should be soft enough to easily mash, but not mushy. Spices can make a big difference. I recommend adding smoked paprika and black pepper for a kick. If you like it cheesy, try using different cheese types. Gouda or Monterey Jack can give a unique twist. Garnishing is key for a beautiful soup. Top your bowls with crumbled turkey bacon and sliced green onions. Fresh parsley will add a pop of color. For sides, consider serving with warm bread or a fresh salad. It makes for a great meal! {{image_2}} You can change the heavy cream and sour cream. Use plain yogurt or coconut cream instead. These options keep the soup rich but lighter. For a vegetarian version, skip the chicken broth. Use vegetable broth instead. This gives great flavor without meat. If you want more protein, add cooked bacon, chicken, or sausage. Crumbled turkey bacon works well for a tasty topping. For a heartier meal, mix in shredded rotisserie chicken. This makes the soup filling and satisfying. You can use seasonal vegetables in your soup. Try adding corn in summer or kale in winter. These choices add color and nutrients. Also, if someone has dietary needs, swap in dairy-free options. This way, everyone can enjoy the soup. To store leftovers, let the soup cool first. Then, place it in an airtight container. I recommend using glass containers for easy heating. Make sure to leave some space at the top, as the soup may expand when frozen. If you want to freeze the soup, use freezer-safe containers. Portion the soup into smaller amounts for easy use. When you are ready to eat, thaw it overnight in the fridge. To reheat, pour the soup into a pot over medium heat. Stir it often until hot. You can also use the microwave, but stir every minute for even heating. In the fridge, the soup lasts about 3 to 4 days. If you freeze it, it can last for up to 3 months. Just make sure it is sealed well to avoid freezer burn. Always check for any off smells or changes in color before eating. Can I use frozen potatoes? Yes, you can use frozen potatoes. They will cook well in the slow cooker. Just add them straight in. Keep in mind, frozen potatoes may take a little longer to cook. How do I thicken the soup? To thicken the soup, mash some of the potatoes in the slow cooker. This gives a creamy texture. You can also add a little more cheese or cream. What can I substitute for chicken broth? You can use vegetable broth for a vegetarian option. Water is another choice, but it may lack flavor. You can also use beef broth for a different taste. Can I make this in a regular pot? Yes, you can use a regular pot on the stove. Just cook on medium heat until the potatoes are tender. Stir often and keep an eye on it. What’s the difference between low and high settings? The low setting cooks food slowly for a longer time. The high setting cooks food faster. Use low for about 6-7 hours and high for 3-4 hours. Can I add additional toppings? Absolutely! You can add crumbled bacon, extra cheese, or even jalapeños. Sliced green onions and fresh parsley also add great flavor and color. Can I make this soup spicy? Yes, you can add spices like cayenne pepper or crushed red pepper. Adjust the amount based on your spice level preference. Enjoy experimenting! This blog post covers how to make loaded baked potato soup. You learned about key ingredients like russet potatoes, cream, and cheese. I shared step-by-step instructions for prepping, cooking, and enhancing flavors. You found tips for texture and creative variations to suit your taste. Proper storage and common questions were also answered. Now, you can enjoy this warm, hearty soup anytime. Try your own twists, and don’t forget those tasty toppings!

Loaded Baked Potato Soup (Slow Cooker) Cozy Delight

Nothing warms the soul like a warm bowl of Loaded Baked Potato Soup. With your slow cooker, you can create

- 1 cup vanilla ice cream - ½ cup cream cheese, softened - 1 cup milk - 1 cup apple pie filling - 2 tablespoons caramel sauce, plus extra for drizzling - 1 teaspoon ground cinnamon - Whipped cream for topping - Crushed graham crackers for garnish - Fresh apple slices for garnish To make a great Caramel Apple Cheesecake Milkshake, you need simple ingredients. First, the vanilla ice cream adds a sweet base. It gives the shake a rich and creamy texture. Next, the cream cheese adds a cheesecake flavor. Be sure it is softened for easy blending. Milk helps combine all the ingredients smoothly. The apple pie filling brings a fruity taste and sweetness. For a special touch, use caramel sauce. It adds a nice, sweet drizzle on top and in the shake. Ground cinnamon gives a warm spice. It makes the flavor more complex and cozy. Whipped cream is the perfect topping to make it look fancy. Don't forget the crushed graham crackers. They add a crunchy texture, just like a cheesecake crust. Finally, fresh apple slices are great for garnish. They give a nice color and extra crunch. With these ingredients, your milkshake will taste yummy and look beautiful! - First, combine 1 cup of vanilla ice cream, ½ cup of softened cream cheese, and 1 cup of milk in a blender. - Blend the mixture until it is smooth and creamy. - Next, add 1 cup of apple pie filling, 2 tablespoons of caramel sauce, and 1 teaspoon of cinnamon to the blender. - Blend all the ingredients again until smooth. - Taste your milkshake. If you want it sweeter, add more caramel sauce. Blend briefly to mix. - Pour the milkshake into chilled glasses. Leave some space at the top for whipped cream. - Top each milkshake with a generous amount of whipped cream. - Drizzle caramel sauce over the whipped cream for extra sweetness. - Sprinkle crushed graham crackers on top for a cheesecake crust effect. - Finally, garnish with fresh apple slices on the rim of the glass for a nice touch. Softened cream cheese is key for a creamy milkshake. Cold cream cheese can cause lumps. Make sure to set it out for about 30 minutes before use. A strong blender is also important. Choose one that blends smoothly and quickly. This will help mix all the ingredients well. Adjust the amount of caramel and cinnamon to fit your taste. If you love sweet, add more caramel sauce. For a warm spice, sprinkle in extra cinnamon. Using quality apple pie filling is a must. Choose the filling that tastes fresh and has real apple pieces. This will make your milkshake burst with flavor. Chill your glasses before serving. This keeps your milkshake cold longer. You can chill them in the freezer for about 10 minutes. For garnishing, get creative! Use whipped cream, a drizzle of caramel, and crushed graham crackers. Fresh apple slices on the rim add a nice touch and look great too. {{image_2}} You can change the flavor of your milkshake easily. Adding pumpkin spice gives it a fall vibe. Just mix in a teaspoon of pumpkin spice while blending. You can also add chocolate syrup for a sweet twist. Drizzle it in before blending for a rich chocolate flavor. If you want a dairy-free version, use dairy-free ice cream. Many brands offer great flavors that fit this need. You can also reduce sugar in the recipe. Try using a sugar substitute or less caramel sauce for a healthier milkshake. Using fresh apples instead of pie filling is a delicious choice. Slice them thin and mix them in for crunch. Adding seasonal spices like nutmeg can enhance the flavor too. Just a pinch can make your milkshake even more special. To store leftover milkshake, pour it in a sealed container. Keep it in the fridge. It can last up to two days. Stir well before serving again. The milkshake may thicken in the fridge. To keep the garnishes fresh, store them separately in airtight bags. This helps prevent sogginess and keeps them crunchy. You can reuse some ingredients in other recipes. The apple pie filling adds flavor to pancakes or oatmeal. Cream cheese works great in frostings or dips. For the best flavor, always taste your ingredients. If they lose freshness, add more spices or sweeteners. This can revive their taste in new dishes. You can use Greek yogurt or mascarpone cheese. Both create a creamy texture. Greek yogurt adds protein and tang. Mascarpone gives a rich flavor. Adjust the amount to keep the milkshake thick. Yes, you can prepare the milkshake and store it in the fridge. Keep it in a sealed container. Stir it well before serving to restore the smooth texture. I recommend drinking it within a few hours for the best flavor. To reduce sweetness, cut back on caramel sauce. You can also add more milk or ice cream. Using unsweetened apple pie filling helps too. Taste as you go to find the right balance. You can use chocolate chips, nuts, or sprinkles. Crushed cookies also add a fun crunch. Fresh berries or a drizzle of chocolate syrup can enhance flavor and look. Get creative with your toppings! Absolutely! This milkshake makes a great party treat. Serve it in fun glasses with colorful straws. You can set up a toppings bar for guests to customize their milkshakes. It’s a sure hit at any gathering! This milkshake combines vanilla ice cream, cream cheese, and apple pie filling. You blend it all for a creamy treat. Add whipped cream and a caramel drizzle on top. Adjust flavors to fit your taste and use fresh apples for a crisp bite. Remember to chill your glasses for the best experience. You can also experiment with different flavors and toppings. With easy steps and fun variations, this recipe will impress everyone. Enjoy creating your delicious apple pie milkshake today!

Caramel Apple Cheesecake Milkshake Flavorful Delight

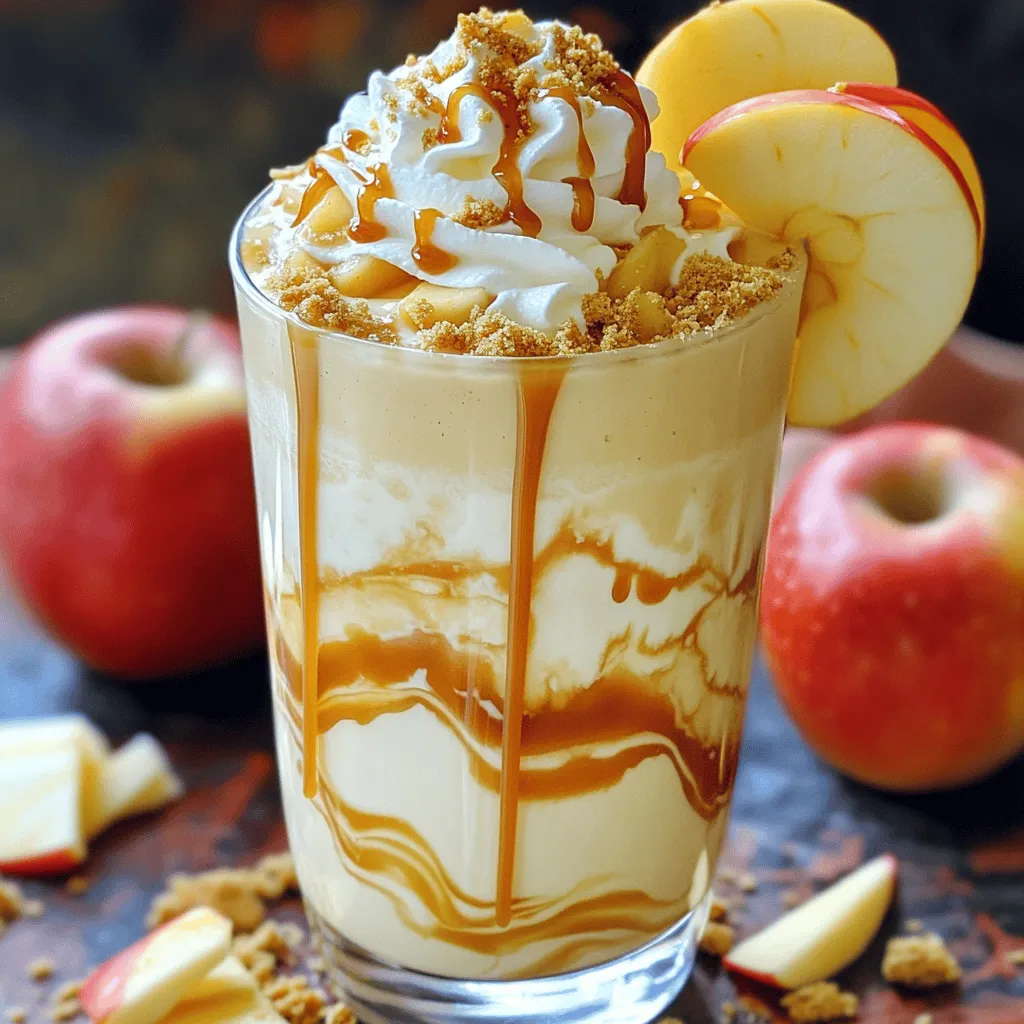
Get ready for a sweet treat! This Caramel Apple Cheesecake Milkshake is a perfect blend of flavors. Imagine creamy vanilla

Older posts
Newer posts
← Previous Page1 … Page21 Page22 Page23 … Page84 Next →

dsad

© 2026 easycookingbite • Built with GeneratePress

Our Policies

  • Copyright Policy
  • Cookie Policy
  • GDPR Policy
  • Privacy Policy
  • Disclaimer
  • Terms Of Use

More Information

  • Home
  • About
  • Contact
  • Appetizers
  • Dessert
  • Dinner
  • Drinks
©2026, easycookingbite About Back To Top