Skip to content
DisclaimerTerms Of UseGDPR PolicyCookie Policy

easycookingbite

  • Home
  • Drinks
  • Appetizers
  • Dinner
  • Dessert
  • About
  • Contact
  • Privacy Policy
DisclaimerTerms Of UseGDPR PolicyCookie Policy

NO-ING-IMG

Here are the ingredients you need for Air Fryer Cajun Potato Wedges: - 4 medium russet potatoes - 2 tablespoons olive oil - 1 tablespoon Cajun seasoning - 1 teaspoon garlic powder - 1 teaspoon smoked paprika - ½ teaspoon salt - ½ teaspoon black pepper - Optional: Fresh parsley for garnish These ingredients create a tasty, crisp dish that will wow anyone. The russet potatoes give a great texture. The olive oil helps the spices stick while adding flavor. Cajun seasoning brings a warm, spicy kick to the wedges. Garlic powder and smoked paprika add depth. The salt and black pepper make everything pop. If you want, sprinkle some fresh parsley on top for color and freshness. Start with 4 medium russet potatoes. Wash and scrub them well to remove any dirt. Clean potatoes help make better wedges. Cut each potato into evenly sized wedges. This step ensures they cook at the same time. Soaking the wedges in cold water is key. It helps remove excess starch, which makes the wedges crispier. Soak them for 30 minutes. This simple step can make a big difference in texture. In a large bowl, mix together 2 tablespoons of olive oil, 1 tablespoon of Cajun seasoning, 1 teaspoon of garlic powder, 1 teaspoon of smoked paprika, ½ teaspoon of salt, and ½ teaspoon of black pepper. Toss the potato wedges in the mixture until they are coated evenly. You want every wedge to be flavorful. Preheat your air fryer to 400°F (200°C) before cooking. Arrange the seasoned potato wedges in a single layer in the air fryer basket. If you have many wedges, cook them in batches. Cook for 15 to 20 minutes, flipping them halfway through. They are ready when they are golden and crispy. Adjust the time if needed for your desired crispiness. To make your potato wedges extra crispy, start by soaking them in cold water. Soak them for about 30 minutes. This helps remove extra starch. Next, dry the wedges well with a clean towel. Moisture makes them soggy, so this step is key. When you place the wedges in the air fryer, arrange them in a single layer. Do not overcrowd the basket. This allows hot air to circulate around each wedge, ensuring even cooking. If you have too many wedges, cook in batches. If you don't have Cajun seasoning, you can make your own. Combine paprika, cayenne pepper, garlic powder, and onion powder. Adjust the amount of cayenne to control the heat level. Feel free to customize the spice levels to suit your taste. If you like it mild, use less seasoning. For a spicier kick, add more cayenne or even crushed red pepper flakes. Pair your Cajun potato wedges with tasty dipping sauces. Ketchup, ranch dressing, or a spicy aioli work well. They add flavor and moisture to each bite. For a nice touch, present the wedges in a fun way. Arrange them in a cone shape on a plate. Add a sprinkle of fresh parsley for color. This makes your dish look as good as it tastes! {{image_2}} You can change the flavor of your potato wedges with different seasonings. Try using taco seasoning for a zesty twist. You can also mix in onion powder or chili powder for added taste. Herbs can make a big difference too. Fresh rosemary or thyme adds a nice touch. You can sprinkle these herbs on top before serving them for extra flavor. Sweet potatoes are a great alternative to regular potatoes. They need a bit more time to cook. Adjust the cooking time to about 20-25 minutes for perfect crispiness. Sweet potatoes are also packed with vitamins. They provide more fiber and are rich in antioxidants. This makes them a healthy choice for your wedges. If you love cheese, try adding it to your wedges. After seasoning the potatoes, sprinkle cheese on top before cooking. Cheddar cheese works well for a sharp flavor. You can also use mozzarella for a milder taste. Parmesan cheese adds a nice crunch when it melts. To keep your leftover wedges fresh, place them in an airtight container. This helps prevent moisture loss. You can also wrap them in plastic wrap before placing them in the container. Store them in the fridge for up to 3 days. After that, they may lose their flavor and texture. To reheat your air fryer wedges, use the air fryer again. Set the temperature to 350°F (175°C). Cook for about 5-7 minutes. This method helps keep them crispy. If you don’t have an air fryer, you can use a conventional oven. Preheat the oven to 375°F (190°C) and bake for 10-15 minutes. Always check them to avoid burning. To make your potato wedges crispier, try a few simple techniques: - Soak the Wedges: Soak them in cold water for 30 minutes. This removes starch and helps achieve a crispy texture. - Dry Thoroughly: After soaking, drain and pat the wedges dry. Any moisture can make them less crisp. - Single Layer: Arrange the wedges in a single layer in the air fryer. Overcrowding leads to steaming, not crisping. - Use Oil Sparingly: Just enough oil helps with browning. Too much can make them soggy. - Adjust Temperature: Cooking at 400°F (200°C) is ideal. Higher temperatures can enhance crispiness. Yes, you can prepare Cajun potato wedges ahead of time. Here are some tips: - Prepping: Cut the potatoes and soak them in water. You can store them in the fridge for up to 24 hours. - Seasoning: Mix the seasonings and toss the wedges right before cooking. This keeps the flavors fresh. - Storing: If you have leftovers, store them in an airtight container. They last about 3 days in the fridge. Cajun potato wedges taste great with various dips. Here are popular choices: - Ranch Dressing: Cool and creamy, it balances the spicy flavor. - Spicy Mayo: Mix mayonnaise with hot sauce for a zesty kick. - Garlic Aioli: A rich dip that adds a gourmet touch. - Ketchup: A classic choice that never goes out of style. - Honey Mustard: Sweet and tangy, it complements the spice well. Yes, air fryer wedges are generally healthier than deep-fried wedges. Here's a quick comparison: - Less Oil: Air frying uses much less oil. This cuts calories and fat. - Lower Calories: A serving of air-fried wedges has fewer calories than deep-fried ones. - Nutrients: Air frying can preserve more nutrients, as it cooks faster and uses less heat. - Crispiness without Guilt: You can enjoy crispy wedges without the heaviness of frying. In this post, we covered how to make delicious Cajun potato wedges. We looked at key ingredients, preparation steps, and air frying tips. You can achieve crispy, flavorful wedges by soaking potatoes and using the right seasonings. Don’t forget to try variations like sweet potato or cheese-crusted wedges. These adjustments can elevate your dish. Enjoy experimenting with different dips and spices for the perfect meal. With a few simple steps, you can create a tasty side that satisfies everyone. Now, go ahead and enjoy your cooking adventure!

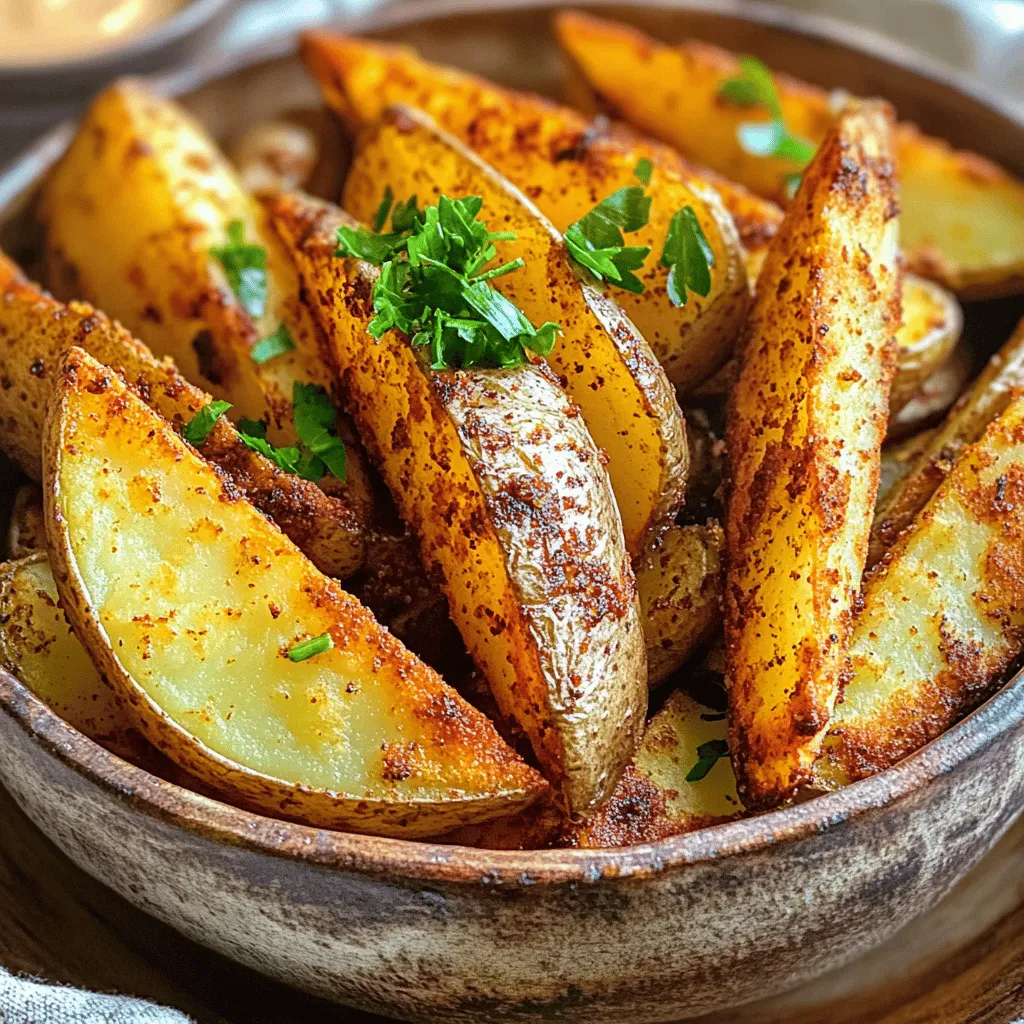
Air Fryer Cajun Potato Wedges Crisp and Flavorful Dish

Get ready to spice up your meals with Air Fryer Cajun Potato Wedges! These crispy, flavorful bites are easy to

- 8 cups apple juice or cider - 1 orange, sliced - 1 lemon, sliced I love using fresh apple juice or cider for this recipe. It gives the cider a rich and sweet base. The orange and lemon slices add a bright, zesty touch. They balance the sweetness and give a lovely aroma. - 4-5 whole cloves - 2-3 cinnamon sticks - 1 teaspoon allspice berries - 1/4 teaspoon nutmeg The spices are what make this cider special. Whole cloves bring warmth, while cinnamon sticks add a comforting flavor. Allspice berries add depth and nutmeg gives it a cozy finish. I suggest using fresh nutmeg if you can find it. It makes a big difference! - 1 tablespoon brown sugar - 1 teaspoon vanilla extract If you like sweeter cider, brown sugar is a great choice. Just add it to taste. Vanilla extract is not a must, but it adds a lovely warmth and aroma. It makes the cider feel even more festive and inviting. To prepare the slow cooker, start by making sure it is clean and dry. This helps prevent any unwanted flavors. Next, pour in 8 cups of apple juice or cider. You can use fresh apple cider for a deeper flavor. Now, it’s time to add the ingredients to the slow cooker. Slice one orange and one lemon, then drop them into the juice. The citrus adds a bright taste. Toss in 4-5 whole cloves, 2-3 cinnamon sticks, and a teaspoon of allspice berries. For a warm finish, grate in a bit of nutmeg. If you want a sweeter cider, stir in 1 tablespoon of brown sugar. Finally, add 1 teaspoon of vanilla extract for that cozy touch. Cover the slow cooker and set it on low. Let it cook for 4-6 hours. This slow cooking helps the flavors mix well. You can check it halfway through. If you want a stronger taste, you can let it cook longer. Once the cooking time is up, taste the cider. Adjust sweetness if needed. Then, you’ll need to strain the cider. Use a fine sieve to remove the spices and fruit slices. This step gives you a smooth drink. For serving, pour the warm cider into mugs. You can garnish it with a cinnamon stick or a thin apple slice. This adds a lovely touch and makes it look pretty. Enjoy your spiced apple cider with friends and family! Using fresh spices gives a bright taste. I love fresh cloves and cinnamon sticks. They pack a punch! Dried spices work, too, but they may taste less vibrant. Adjusting sweetness is key. Start with the brown sugar in the recipe. Taste after cooking. If it’s too tart, add more sugar. If it’s too sweet, add more juice or lemon. I choose a slow cooker for its ease. It lets spices blend slowly. This gives a rich, warm flavor. You can set it and forget it! Cooking time matters. Four hours gives a good taste. Six hours gives more depth. Test it at four hours, then decide if you want more time. Use fun mugs to serve the cider. A cinnamon stick makes a great stirrer. You can also add a thin slice of apple on top. This cider goes well with snacks. Try it with popcorn or cheese. It also pairs nicely with sweet treats like cookies. {{image_2}} You can change the taste of your spiced apple cider by adding new spices. Ginger adds a warm zing. Star anise gives a sweet, licorice-like flavor. Both spices can brighten your drink. Feel free to mix in different fruits too. You can use chopped apples or ripe pears. Their natural sweetness will blend well with the spices. This way, you create a unique cider each time. If you want less sugar, consider using substitutes. Honey or maple syrup can add sweetness without refined sugar. These options give a nice flavor twist too. For a sugar-free version, skip the brown sugar entirely. The natural sweetness from the fruits will still shine. You might find that you love it without added sugar. To make your cider festive, think about adding alcohol. Bourbon or rum can bring warmth and depth. Just a splash can make your drink feel special for holiday gatherings. You can also turn it into a fun cocktail. Mix your spiced cider with ginger beer for a fizzy twist. This creates a delightful drink that everyone will enjoy at your parties. To store leftover cider, let it cool to room temperature. Then, pour it into an airtight container. Place the container in the fridge. It will stay fresh for up to one week. Make sure to label it with the date so you remember when you made it. When you want to enjoy your cider again, pour it into a pot. Heat it slowly over medium heat. Stir often to keep the flavors mixed. Avoid boiling, as this can change the taste. If you want to keep the spice flavor strong, reheat gently. You can freeze spiced cider if you have a lot left over. First, pour it into freezer-safe containers. Leave some space at the top for expansion. Seal the containers tightly and label them. When you’re ready to enjoy it, take a container out of the freezer. Let it thaw in the fridge overnight. Once thawed, reheat it gently on the stove. Can I use store-bought apple cider? Yes, you can use store-bought apple cider. It saves time and still tastes great. Just make sure it is 100% juice without added sugars or preservatives for the best flavor. What spices can I substitute? If you want to change the spices, you can use ginger or star anise. You might also try cardamom for a unique twist. Just remember to adjust the amounts to match your taste. Can I use a stovetop instead of a slow cooker? You can use a stovetop, but the slow cooker makes it easier. On the stovetop, cook it on low heat for about 2-3 hours. Stir it often to check on the flavors. How do I adapt this recipe for larger servings? To make more cider, simply double or triple the ingredients. Make sure your slow cooker is big enough. If you change the amount, adjust the cooking time slightly to ensure the spices infuse well. What snacks pair well with spiced apple cider? Snacks like popcorn, caramel apples, or cheese and crackers go well with spiced apple cider. You can also serve it with cookies or pastries for a sweet touch. How can I serve it for a party? For a party, use a large slow cooker to keep the cider warm. Offer mugs and let guests add their own garnishes like cinnamon sticks or apple slices. This makes it fun and interactive! Making spiced apple cider is simple and fun. We explored the key ingredients, from apple juice to spices like cinnamon and cloves. I shared step-by-step instructions for using a slow cooker, ensuring rich flavors develop. You learned essential tips to enhance taste and ideas for variations, including alcohol options. Remember, making cider allows for creativity, so try different spices and fruits. Enjoy your cider warm or cold, perfect for any occasion. Your adventure in cider-making is just beginning. Dive in and experiment!

Slow Cooker Spiced Apple Cider Flavorful Holiday Treat

As the holiday season approaches, the cozy aroma of spiced apple cider can turn any gathering into a festive celebration.

To make Air Fryer Garlic Herb Chicken Wings, you need fresh ingredients. Here’s what you need: - 2 pounds chicken wings - 4 tablespoons olive oil - 4 cloves garlic, minced - 2 teaspoons dried oregano - 2 teaspoons dried thyme - 1 teaspoon smoked paprika - 1 teaspoon onion powder - 1 teaspoon salt - 1/2 teaspoon black pepper - Fresh parsley, chopped (for garnish) - Lemon wedges (for serving) Each ingredient plays a key role in flavor. The chicken wings are the star. They soak up the garlic and herbs. Olive oil helps the wings crisp up in the air fryer. Garlic adds a strong taste, while oregano and thyme bring earthy notes. Smoked paprika gives a nice depth. Onion powder adds sweetness. Salt and pepper enhance all the flavors. Garnishing with fresh parsley makes the dish pop. Lemon wedges add a zesty kick when served. This combination creates a tasty meal that everyone will love. First, you should preheat the air fryer to 375°F (190°C). This takes about 5 minutes. Preheating is key. It helps the wings cook evenly and get crispy. Next, it's time to make the marinade. In a large bowl, combine 4 tablespoons of olive oil with 4 minced garlic cloves, 2 teaspoons of dried oregano, 2 teaspoons of dried thyme, 1 teaspoon of smoked paprika, 1 teaspoon of onion powder, 1 teaspoon of salt, and 1/2 teaspoon of black pepper. This mix gives the wings great flavor. Toss the chicken wings into the bowl. Coat them well in the marinade. For the best taste, let them marinate for at least 30 minutes. If you have time, refrigerate them for up to 2 hours. Now, arrange the marinated chicken wings in the air fryer basket. Place them in a single layer. Do not overcrowd the basket; this ensures they cook well. Cook the wings for 25 to 30 minutes. Flip them halfway through cooking. This helps them brown nicely. Once they are golden and crispy, remove them from the air fryer. Let them rest for a few minutes before serving. To get those wings really crispy, start with dry chicken. Pat them with paper towels. This helps remove excess moisture. Use a little baking powder in your marinade. It makes the skin super crispy. Cook your wings in a single layer in the air fryer. This lets the hot air flow around them. Flip them halfway for even cooking. If you like them extra crispy, add a few extra minutes to your cook time. For deeper flavor, marinate the wings longer. Aim for at least 30 minutes, but 2 hours is better. The key is to coat them well with the olive oil and spices. You can switch up the herbs too. Try adding rosemary or basil for a different taste. A pinch of cayenne pepper can give your wings a nice kick. Experiment with flavors to find your favorite mix! Serve your wings hot with dips like ranch or blue cheese. Fresh veggies like carrots and celery also pair well. For a fun twist, add lemon wedges on the side. This gives a fresh burst of flavor. You can also arrange them on a platter with fresh parsley for a nice look. This makes them great for parties or game day! {{image_2}} You can turn up the heat with spicy garlic herb wings. To do this, add hot sauce or cayenne pepper to your marinade. This extra kick will make your wings exciting and bold. You can adjust the spice levels to fit your taste. If you like it mild, start with a little hot sauce. If you want it fiery, add more. Experiment until you find your perfect heat balance. Another tasty option is honey garlic chicken wings. Adding honey brings a sweet touch to your dish. Mix honey into the marinade with the garlic and herbs. This sweetness pairs well with the savory flavors. If you want a complex taste, try adding soy sauce or ginger. These ingredients will help balance the sweet and savory notes. For a fresh twist, try lemon garlic wings. Use fresh lemon juice in your marinade for a bright flavor. The acidity helps cut through the richness of the wings. After cooking, you can garnish them with lemon wedges. This will enhance the taste and add a colorful touch to your plate. Fresh herbs like cilantro or basil can also make great garnishes, adding a pop of flavor and color. To keep your chicken wings fresh, use airtight containers. Glass or plastic containers work well. Make sure the wings cool to room temperature before sealing. Store the wings in the fridge for up to three days. For the best texture, reheat in the air fryer. Set it to 375°F (190°C) and heat for about 5-10 minutes. This method keeps the wings crispy. You can also use an oven, but the air fryer gives better results. If you want to store wings longer, freezing is a great option. Place them in freezer bags. Remove as much air as possible before sealing. You can freeze them for up to three months. To thaw, place the wings in the fridge overnight. This method keeps them safe and tasty. Once thawed, reheat as mentioned above for crispy wings. Cook chicken wings in your air fryer for 25-30 minutes. Flip them halfway during cooking. This time helps the wings get crispy and golden brown. If you like them extra crispy, you can add a few more minutes. Just keep an eye on them to avoid burning. Yes, you can use frozen chicken wings! Just add a few extra minutes to the cooking time. Cook them at 375°F (190°C) for about 30-35 minutes. Flip them halfway for even cooking. Make sure they are cooked all the way through, reaching an internal temperature of 165°F (75°C). These wings pair well with many tasty sides. Here are some suggestions: - Celery sticks - Carrot sticks - Ranch dressing - Blue cheese dressing - Crispy potato wedges - Fresh salad - Garlic bread Feel free to mix and match these sides for a fun meal! You now know how to make tasty air fryer chicken wings. Start with the right ingredients and a good marinade. Preheat your air fryer for crispy results. Remember to flip the wings for even cooking. Experiment with flavors, like spicy, honey garlic, or lemon. Store any leftovers properly and reheat to keep them crunchy. Cooking wings can be easy and fun. Enjoy your delicious creation with your favorite dips and sides!

Air Fryer Garlic Herb Chicken Wings Flavorful Delight

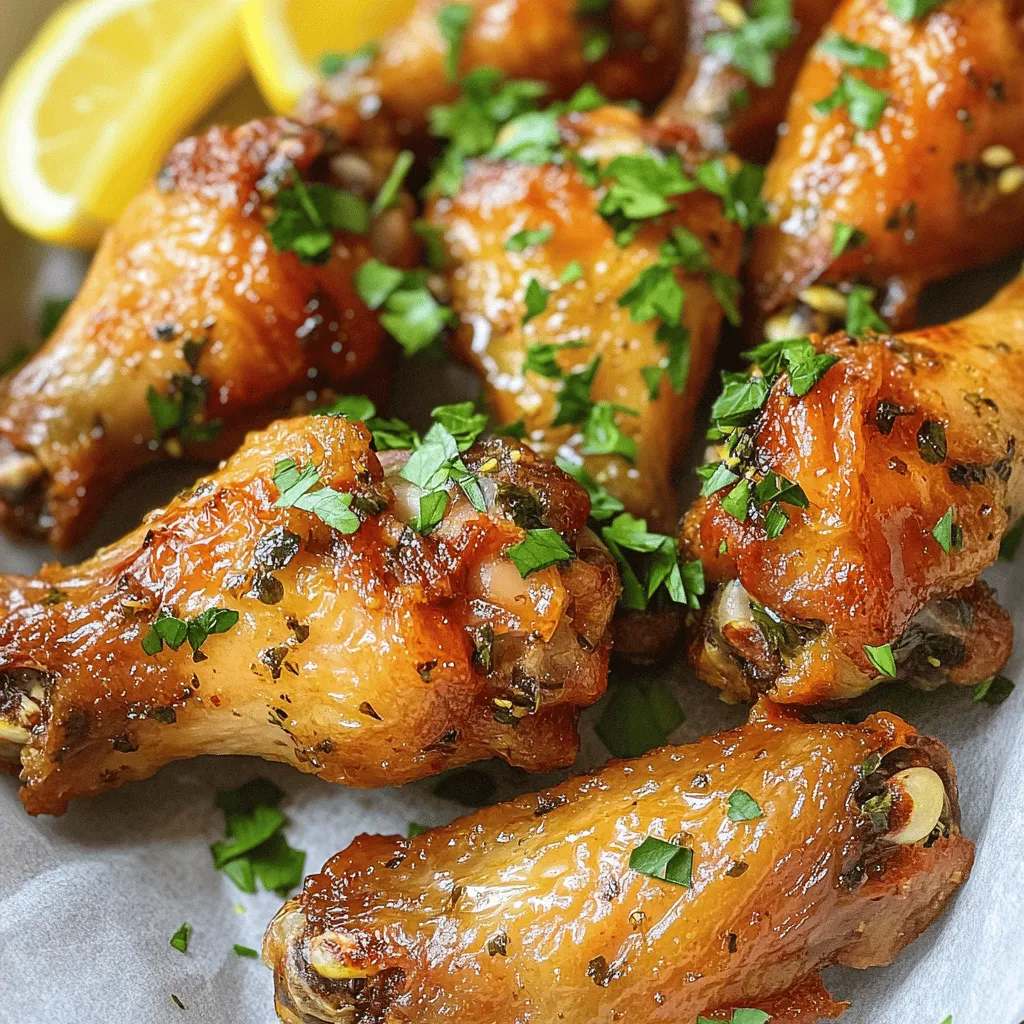
If you’re craving a tasty snack, look no further! Air Fryer Garlic Herb Chicken Wings are the perfect blend of

To make roasted veggie couscous bowls, gather the following ingredients: - Couscous and Vegetable Details - 1 cup couscous - 1 ¾ cups vegetable broth - 1 zucchini, diced - 1 red bell pepper, diced - 1 cup cherry tomatoes, halved - 1 small red onion, diced - 1 cup chickpeas, drained and rinsed - Seasonings and Oils - 2 tablespoons olive oil - 1 teaspoon smoked paprika - 1 teaspoon garlic powder - Salt and pepper to taste - Optional Garnishes - Fresh parsley, chopped - Feta cheese, crumbled Each ingredient plays a role in building flavor and texture. The couscous serves as a light base, while roasted veggies bring depth and a sweet taste. The olive oil helps to crisp the vegetables, and the spices add a warm kick. Fresh herbs and optional feta cheese elevate the dish, making it vibrant and satisfying. Preheating the Oven Start by preheating your oven to 400°F (200°C). This step is key for perfect veggies. A hot oven helps them caramelize nicely. Veggie Preparation and Tossing Next, grab a large mixing bowl. Add the diced zucchini, red bell pepper, halved cherry tomatoes, diced red onion, and drained chickpeas. Drizzle 2 tablespoons of olive oil over the veggies. Sprinkle in 1 teaspoon of smoked paprika, 1 teaspoon of garlic powder, and salt and pepper to taste. Toss it all together until evenly coated. Roasting Process Spread the veggie mix onto a baking sheet in a single layer. Roast them in the oven for 25-30 minutes. Stir the veggies halfway through. Look for a tender texture and a slight caramelization for the best flavor. Boiling Vegetable Broth While your veggies roast, it’s time to cook the couscous. In a medium saucepan, bring 1 ¾ cups of vegetable broth to a boil. This broth adds great flavor to the couscous. Soaking Couscous Once the broth is boiling, remove the saucepan from heat. Stir in 1 cup of couscous. Cover the pan and let it sit for 5 minutes. This allows the couscous to soak up the broth. Fluffing and Preparing for Serving After 5 minutes, fluff the couscous with a fork. Set it aside while you finish the veggies. Portioning the Couscous Now it’s time to build your bowls. Divide the fluffy couscous among your serving bowls. Adding Roasted Vegetables Next, top each bowl with the roasted veggie mix. Make sure to get a bit of everything on each bowl for a colorful look. Garnishing and Serving Finally, garnish with chopped fresh parsley. If you like cheese, sprinkle some crumbled feta on top. Serve warm and enjoy this tasty dish! Ensuring Perfectly Roasted Vegetables To get great roasted veggies, cut them into even pieces. This helps them cook at the same time. Use high heat, around 400°F (200°C). Toss them with olive oil, salt, and spices for great flavor. Stir halfway through to ensure even cooking. Look for a nice golden color as a sign they are done. Fluffy Couscous Tips For fluffy couscous, use the right water-to-couscous ratio. I use 1 cup of couscous to 1 ¾ cups of vegetable broth. Once the broth boils, remove it from heat. Add the couscous and cover it for 5 minutes. After that, fluff it gently with a fork. This makes it light and airy. Using Fresh Ingredients Fresh ingredients make a big difference in flavor. Choose vibrant, firm vegetables. Look for seasonal produce for the best taste. Fresh herbs like parsley add brightness. Always rinse canned chickpeas to reduce sodium and improve texture. Make Ahead Options You can roast the veggies a day ahead. Store them in the fridge in an airtight container. You can also cook the couscous ahead. Just keep it sealed to avoid drying out. When ready to eat, reassemble the bowls quickly. Storage and Reheating Suggestions Store leftovers in a sealed container in the fridge. They last for about 3 days. Reheat in the microwave for a quick meal. Add a splash of broth to keep couscous moist. You can also heat it on the stove over low heat. Suggested Seasonings To boost flavor, try adding different seasonings. I love smoked paprika and garlic powder, but you can mix in cumin or chili powder for a kick. Lemon zest or juice adds brightness too. Experiment with flavors to find what you like best. Pairing Options with Proteins Pair this dish with proteins for a fuller meal. Grilled chicken, shrimp, or tofu work well. You can also add chickpeas for extra protein. This makes the bowl more filling and satisfying. {{image_2}} You can easily change the veggies in your couscous bowl. Try adding any of these: - Carrots, diced - Broccoli florets - Cauliflower, chopped - Sweet potatoes, cubed Using seasonal vegetables adds freshness. For spring, use asparagus or peas. In summer, try colorful bell peppers and corn. Fall brings squash and root veggies. Winter is great for hearty greens like kale. Couscous is tasty, but you can switch it up! Quinoa is a great choice. It cooks the same way and adds protein. Farro offers a chewy texture and nutty flavor. Both give your bowls a fun twist. If you're gluten-free, use quinoa or rice instead. They blend well with the roasted veggies. You can change the flavor of your couscous bowls easily. For a Mediterranean twist, add olives and sun-dried tomatoes. A sprinkle of oregano or basil brightens the dish. For an Asian-inspired version, use soy sauce or sesame oil. Add bok choy or snap peas for crunch. Top with sesame seeds for extra flavor. This opens a whole new world of tastes! - How to Store Leftovers: Place the leftover couscous bowls in an airtight container. Seal it well to keep air out. This helps keep it fresh. - Best Practices for Freshness: Store the bowls in the fridge within two hours of cooking. If you let them sit out too long, bacteria can grow. Try to eat leftovers within three days. - Can You Freeze Couscous Bowls? Yes, you can freeze couscous bowls. However, the texture of the couscous can change. Freezing works best for the roasted veggies. - Thawing and Reheating: To thaw, place bowls in the fridge overnight. For reheating, pop them in the microwave or oven until warm. Add a splash of broth or water if the couscous seems dry. - How Long It Lasts in the Fridge: Couscous bowls last for about three days in the fridge. After that, the taste and texture may decline. - Signs of Spoilage: Look for off smells or mold. If the veggies look slimy or the couscous has a funky smell, it’s best to toss it. Trust your senses! What Can I Add to Roasted Veggie Couscous Bowls? You can add many tasty things to these bowls! Try adding fresh spinach or kale for more greens. You might like roasted sweet potatoes or butternut squash for sweetness. Avocado slices will add creaminess. You can also use nuts or seeds for crunch. If you want protein, add grilled chicken or tofu. Mix and match what you love! How Do I Make Couscous Without Broth? If you don’t have broth, just use water. Boil water in a saucepan instead of vegetable broth. Then, follow the same steps. The couscous will still turn out fluffy and delicious! Can I Prepare This Recipe Vegan? Yes, this recipe is already vegan-friendly! Just skip the feta cheese if you want a pure vegan dish. The roasted veggies and chickpeas provide lots of flavor and protein. Enjoy it guilt-free! Calories and Macronutrient Breakdown One serving has about 300 calories. It offers around 10g of protein, 12g of fat, and 40g of carbs. The chickpeas and veggies provide fiber, making it filling and nutritious. Health Benefits of the Ingredients Couscous is low in fat and high in carbs. Zucchini is great for hydration. Red bell peppers give you vitamin C for immunity. Chickpeas boost protein and fiber, which help with digestion. Olive oil adds healthy fats. Together, they make a balanced meal! Best Sides to Pair with It This dish is good on its own, but you can add a side salad. A simple green salad will work well. You might also serve it with roasted bread or pita chips. Ideal Occasions for Serving Serve these bowls at casual dinners or meal prep for the week. They are great for lunch or a quick dinner. You can even bring them to potlucks or gatherings. Everyone will enjoy it! This blog post covered how to create delicious roasted vegetable couscous bowls. We explored the ingredients, step-by-step preparation, cooking methods, and tips for perfect results. You can try various vegetables and grains to change flavors. Don't forget to follow proper storage tips for leftovers. Enjoy experimenting with this dish, and feel free to make it your own! With simple techniques and fresh ingredients, you’ll craft a meal that is both satisfying and healthy.

Roasted Veggie Couscous Bowls Simple and Flavorful Meal

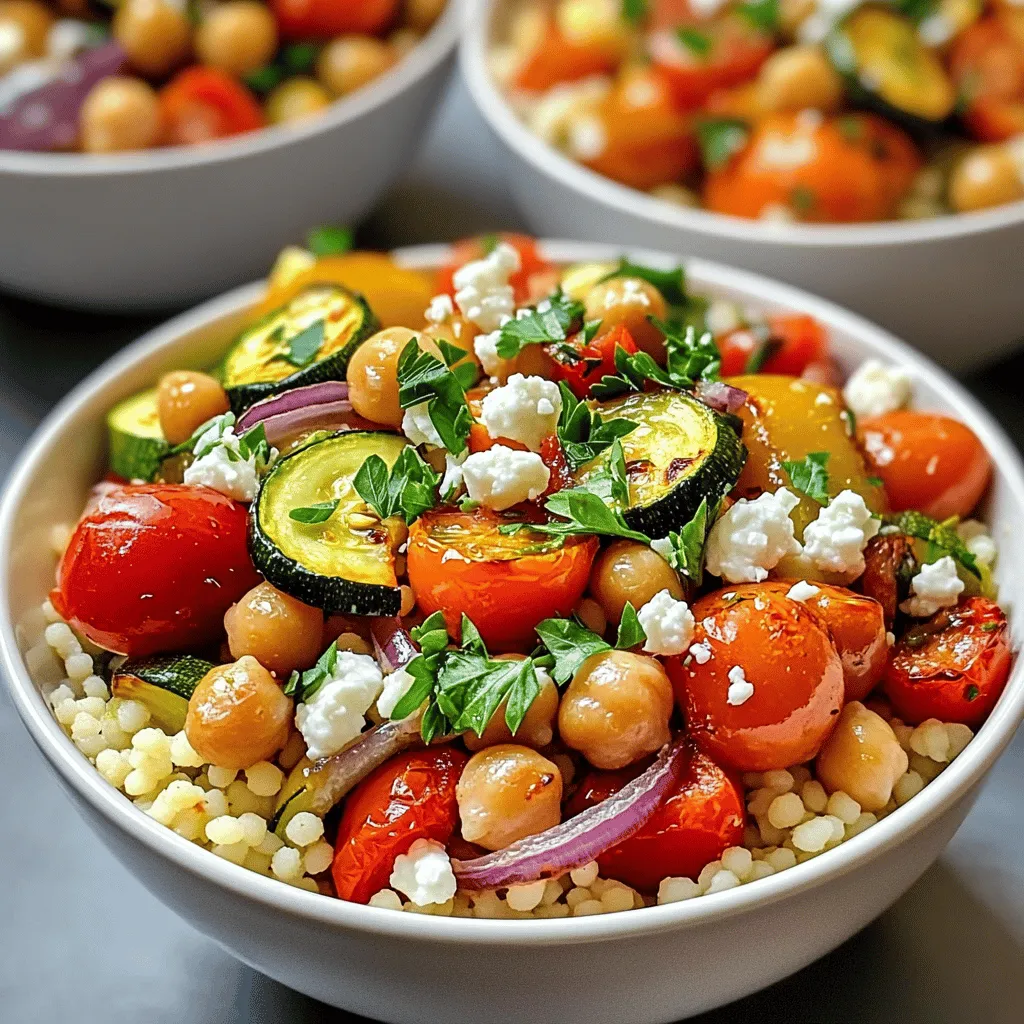
If you’re looking for a simple and tasty meal, roasted veggie couscous bowls are perfect! In this post, I’ll guide

For a delicious Caramel Apple Monkey Bread, you need these key ingredients: - 2 cans (16 oz each) refrigerated biscuit dough - 2 medium apples, peeled, cored, and diced (Granny Smith or Honeycrisp work well) - 1 cup brown sugar, packed - 1/2 cup granulated sugar - 1 teaspoon cinnamon - 1/2 cup unsalted butter, melted - 1/2 cup caramel sauce (store-bought or homemade) - 1/2 cup chopped pecans or walnuts (optional) - 1 teaspoon vanilla extract These ingredients come together to create a warm and gooey treat. The biscuit dough forms the base, giving a fluffy texture. Apples add a sweet and tart flavor, while cinnamon brings warmth. Brown sugar and caramel sauce create that irresistible gooeyness. Nuts, if used, give a nice crunch. You can make this recipe your own by swapping out ingredients. Try using pears or peaches instead of apples. Feel free to mix different nuts, like almonds or hazelnuts, for new flavors. If you need to adjust for dietary needs, consider using gluten-free biscuit dough. This keeps the yummy taste while making it suitable for gluten-free diets. You can also replace butter with a plant-based option for a dairy-free version. First, we need to get our bundt pan ready. Preheat your oven to 350°F (175°C). Grease your bundt pan well with non-stick spray or butter. This will help the monkey bread come out easily later. Next, let’s prepare the biscuit dough. Open the two cans of refrigerated biscuit dough. Using kitchen scissors or a knife, cut each biscuit into quarters. This step is fun and easy! Now, grab a large bowl and mix the granulated sugar with the cinnamon. Toss the biscuit pieces in the cinnamon-sugar mixture until they are well coated. This adds a sweet and spicy flavor that makes the bread special. Now we will start layering the ingredients in the bundt pan. Place half of the coated biscuit pieces in the bottom of the pan. Spread them out evenly. Next, sprinkle half of the diced apples over the biscuit layer. If you want some crunch, add half of the chopped nuts now. Pour half of the melted butter and half of the caramel sauce over this layer. This will add moisture and sweetness. Repeat this process with the remaining biscuit pieces, apples, and nuts. Finally, drizzle the rest of the melted butter and caramel sauce on top. Bake the monkey bread in the oven for 30-35 minutes. Look for a golden brown color on top. The biscuits should be cooked through. After baking, let it cool for 10 minutes. Then, invert the pan onto a serving plate. Drizzle with more caramel sauce for a sweet finish. Enjoy your delicious treat! To get the best texture and flavor for your Caramel Apple Monkey Bread, start with fresh biscuit dough. It puffs up nicely when baked. Make sure to coat each piece in the cinnamon-sugar mix well. This adds flavor all around. Use Granny Smith or Honeycrisp apples for their tartness. They balance the sweetness of caramel. If you want a nutty crunch, add chopped pecans or walnuts. Let the monkey bread cool for 10 minutes after baking. This helps it hold its shape when you flip it. For storage, keep leftovers in an airtight container. They last up to 3 days in the fridge. If you want to enjoy it later, freeze it for up to a month. To reheat, place it in the oven at 350°F for about 10 minutes. This warms it through without making it dry. You can also microwave a piece for about 30 seconds. Just add a drizzle of caramel sauce to keep it gooey. When serving, present it on a nice plate. Pour extra caramel sauce on top for a sweet touch. You can also sprinkle some nuts for color and crunch. Pair this monkey bread with vanilla ice cream. The cold ice cream melts into the warm bread, creating a perfect bite. Whipped cream is another great option. It adds a light and airy texture that complements the dense bread. Feel free to get creative! Add a sprinkle of cinnamon on top for extra flavor. This treat is perfect for gatherings or a cozy night at home. {{image_2}} You can have fun with flavor in your Caramel Apple Monkey Bread. Here are some ideas: - Add spices: Try mixing in nutmeg or allspice with the cinnamon. A hint of ginger can also give it warmth. - Use different toppings: Instead of only caramel sauce, you can add a cream cheese glaze. A drizzle of chocolate sauce can also provide a tasty twist. These options let you create a dish that matches your taste. Feel free to experiment and discover new flavors! Seasonal fruits can give your monkey bread a fresh twist. Here are some ideas: - Fruits: In the fall, add pears or figs. In summer, swap apples for fresh berries like blueberries or strawberries for a light flavor. - Holiday adaptations: For Thanksgiving, mix in pumpkin spice with the apples. During the winter holidays, use cranberries for a festive touch. These variations keep your monkey bread exciting all year long! Enjoy the chance to celebrate the seasons in your baking. To keep your caramel apple monkey bread fresh, store it in an airtight container. This helps prevent it from drying out. If you don’t have a container, wrap it tightly in plastic wrap. You can store leftovers in the fridge for up to three days. If you want to keep it longer, freeze the monkey bread. It can last in the freezer for about two months. To reheat your monkey bread, use an oven or microwave. For the oven, preheat it to 350°F (175°C). Place the bread on a baking sheet and cover it with foil. Heat for about 10-15 minutes until warm. If using a microwave, place a slice on a microwave-safe plate. Heat for about 20-30 seconds. When serving, warm bread tastes best. You can drizzle more caramel sauce or serve it with a scoop of vanilla ice cream. This adds a nice touch and makes it even more delicious. Enjoy your sweet treat! Can I make Caramel Apple Monkey Bread ahead of time? Yes, you can prepare it the night before. Just assemble the layers in the pan, cover it tightly, and place it in the fridge. Bake it the next day. This saves time and makes it easy for gatherings. What type of apples are best for this recipe? I recommend Granny Smith or Honeycrisp apples. Both offer a great balance of sweet and tart. Their firm texture holds up well during baking, adding a nice bite to every piece. What to do if the monkey bread is too sticky or undercooked? If the monkey bread is sticky, it might need more baking time. Check every few minutes after the initial 30 minutes. If it is undercooked, continue baking until the top is golden brown and the dough is fully cooked. Can I use homemade biscuit dough instead of store-bought? Absolutely! Homemade biscuit dough can work well. Just ensure it is not too wet. This allows the bread to hold its shape and gives a fresh taste. Caramel Apple Monkey Bread is a fun and tasty treat. We covered key ingredients, tips for perfect texture, and serving ideas. You can even try variations with fruits or nuts to fit your taste. Remember to store leftovers properly for later enjoyment. I hope you feel inspired to bake this delightful dish. Enjoy creating a warm, sweet experience for family and friends!

Caramel Apple Monkey Bread Irresistible Sweet Treat

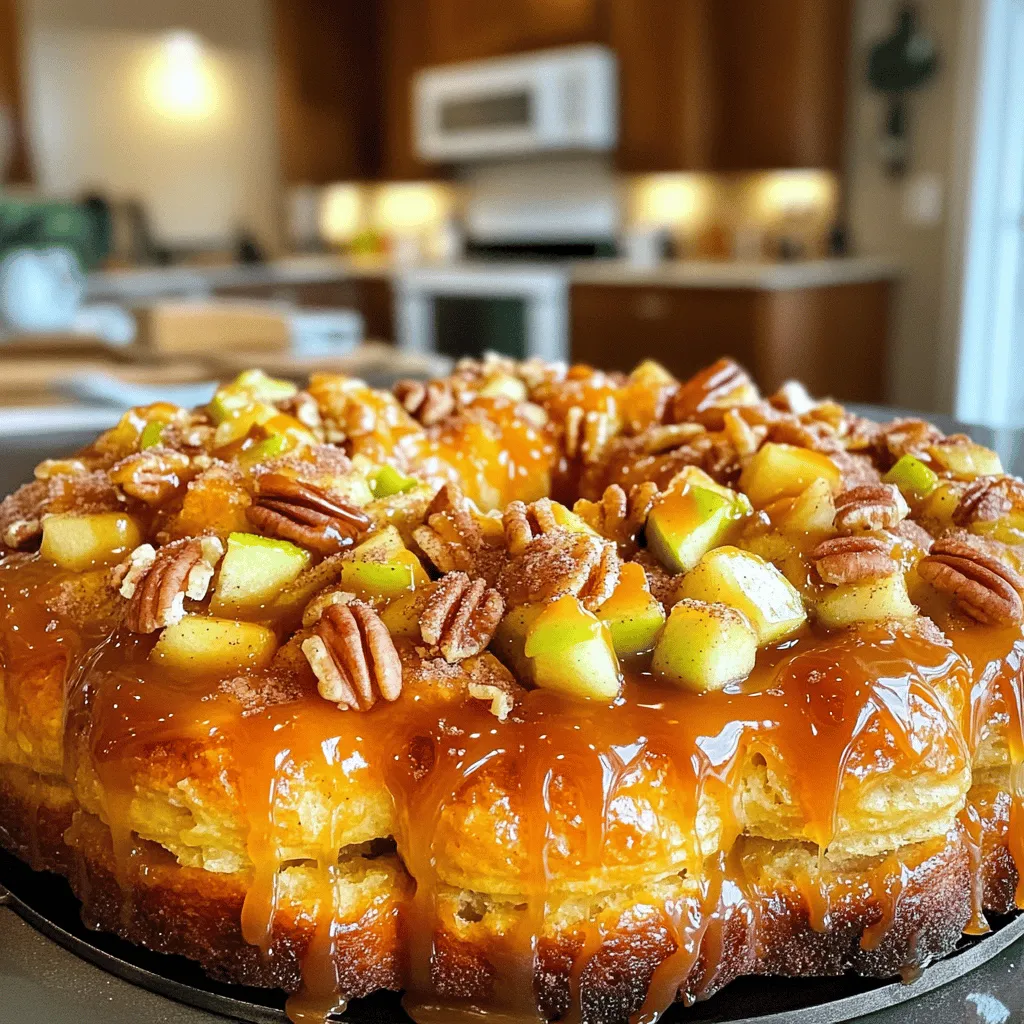
Are you ready to indulge in a sweet treat that’s perfect for any occasion? Caramel Apple Monkey Bread combines warm,

- 200g ramen noodles - 2 tablespoons peanut butter (smooth or crunchy) - 2 tablespoons chili crisp oil - 2 tablespoons soy sauce - 1 tablespoon sesame oil - 1 teaspoon rice vinegar To start, you need the right main ingredients for this tasty meal. Ramen noodles are the base of the dish. They are quick to cook and absorb flavors well. Peanut butter adds creaminess and richness. Chili crisp oil brings heat and crunch. Soy sauce adds depth, while sesame oil and rice vinegar give a nice balance to the flavors. - 1-2 scallions, finely chopped - 1 carrot, julienned - ½ cup snap peas, trimmed - 1 boiled egg, halved (optional) - Toasted sesame seeds for garnish - Fresh cilantro, for garnish Next, I love to add some vegetables to my ramen. Scallions give a fresh taste. Carrots add a sweet crunch. Snap peas bring a nice green element and keep things bright. The boiled egg is optional but adds protein and a creamy texture. Finally, sesame seeds and fresh cilantro make great garnishes. They elevate the dish and add more flavor. To cook the ramen, start with a large pot. Fill it with water and bring it to a boil. Once the water is bubbling, add 200g of ramen noodles. Cook them for about 3-4 minutes, following the package instructions. When the noodles are tender, drain them and set them aside. This step is easy, but timing is key to avoid mushy noodles. Next, you will prepare the sauce. In a mixing bowl, add 2 tablespoons of peanut butter, 2 tablespoons of chili crisp oil, 2 tablespoons of soy sauce, 1 tablespoon of sesame oil, and 1 teaspoon of rice vinegar. Use a whisk or fork to mix these ingredients together until the sauce is smooth. This sauce is the star of the dish, so make sure it's well combined. Now, it's time to sauté the vegetables. Heat a pan over medium heat and add a drizzle of sesame oil. Once the oil is warm, toss in the chopped scallions, julienned carrot, and snap peas. Sauté these for about 2-3 minutes. The goal is to make them tender but still crisp. Keep an eye on them to avoid overcooking. For the final assembly, add the cooked ramen noodles to the pan with the sautéed vegetables. Pour the peanut butter sauce over the noodles. Toss everything together gently until the noodles are fully coated in sauce. This step combines all the flavors into one delicious dish. Once mixed well, divide the ramen into bowls. If you like, top each bowl with a halved boiled egg, a sprinkle of toasted sesame seeds, and some fresh cilantro. Enjoy your tasty and quick meal! To make the sauce just right, taste as you go. Start with the basic mix of peanut butter, chili crisp oil, soy sauce, sesame oil, and rice vinegar. If you like it sweeter, add a bit more peanut butter. If you want it spicier, add more chili crisp oil. You can also add a splash of lime juice for a bright flavor. Experiment until it fits your taste. When cooking ramen noodles, timing is key. Follow the package instructions carefully. Usually, 3-4 minutes is enough. Keep an eye on them. Test a noodle to check if it is al dente—firm but not hard. Drain them quickly to stop the cooking process. Rinse them briefly under cold water to keep them from sticking together. Garnishes add fun and flavor. You can use halved boiled eggs for richness. Toasted sesame seeds add a nice crunch. Fresh cilantro gives a fresh taste. You can also add chili flakes for extra heat or diced avocado for creaminess. Feel free to mix and match based on what you love! {{image_2}} You can add protein to your Chili Crisp Peanut Butter Ramen. Here are some tasty choices: - Chicken: Cook bite-sized pieces in a pan until golden. - Tofu: Use firm tofu, cut into cubes, and sauté until crispy. - Shrimp: Sauté shrimp until pink and tender. Adding protein makes the meal more filling and adds flavor. Want more heat? You can easily boost the spice level. Here’s how: - Add an extra tablespoon of chili crisp oil for more flavor. - Toss in sliced fresh chili peppers, like jalapeños or Thai chilis. - If you like it very hot, use a hot sauce of your choice. This will give your ramen a fiery kick that pairs well with the creamy peanut butter. If you want to keep it vegetarian or vegan, here are some swaps: - Replace chicken with tofu or tempeh for protein. - Use vegetable broth instead of chicken broth if you need a base. - Ensure your chili crisp and soy sauce are vegan-friendly. These changes keep your dish delicious without any animal products. Store leftovers in an airtight container. This helps keep the ramen fresh. You can keep it in the fridge for up to three days. Make sure to cool the ramen completely before sealing it. This step prevents moisture build-up that can make the noodles soggy. To reheat ramen, place it in a pot over medium heat. Add a splash of water or broth to keep it moist. Stir gently as it heats up. You can also use the microwave. Place the ramen in a bowl and cover it with a damp paper towel. Heat for one to two minutes, stirring halfway through. You can freeze this dish for later. Divide the ramen into portions and place them in freezer-safe bags. Squeeze out the air before sealing. This helps prevent freezer burn. The ramen can last for about a month in the freezer. To eat, thaw it overnight in the fridge and reheat as usual. Chili crisp is a spicy oil blend. It contains chili flakes, garlic, and onions. People use it to add flavor and heat. It works well in many dishes, like ramen or rice. Yes, you can use other noodles. Try udon, soba, or even egg noodles. Rice noodles are a great gluten-free option. Just cook them according to package directions. To make this dish gluten-free, use gluten-free ramen noodles. Check labels on soy sauce and chili crisp. Choose gluten-free versions to ensure safety. To reduce heat, use less chili crisp oil. You can also add more peanut butter. Mix in coconut milk for creaminess. Adding more veggies can help balance the spice, too. In this blog post, we explored how to make a tasty ramen dish. We covered key ingredients like ramen noodles, peanut butter, and chili crisp oil. You learned step-by-step instructions for cooking perfect noodles and making a flavorful sauce. We shared tips to customize your ramen with vegetables and toppings. My final thoughts: Experiment with flavors and ingredients. Enjoy this easy dish any way you like!

Chili Crisp Peanut Butter Ramen Tasty and Quick Meal

If you’re craving a meal that’s quick, tasty, and a little different, you’ve come to the right place! Today, I’m

- 4 boneless, skinless chicken thighs - 2 medium zucchinis, sliced into rounds - 1 red bell pepper, sliced - 1 yellow bell pepper, sliced - 1/4 cup honey - 4 cloves garlic, minced - 2 tablespoons soy sauce - 2 tablespoons olive oil - 1 teaspoon ground ginger - 1 teaspoon paprika - Salt and pepper to taste When I make this dish, I love using boneless, skinless chicken thighs. They stay juicy and tender. The zucchinis and bell peppers add color and crunch. For the marinade, honey and garlic create a sweet and savory mix. Soy sauce adds depth, while olive oil keeps everything moist. Seasonings like ground ginger and paprika bring warmth. A little salt and pepper balance the flavors. These simple ingredients combine to create a dish full of taste. Start by preheating your oven to 400°F (200°C). This ensures everything cooks evenly and perfectly. Next, prepare the marinade. In a small bowl, whisk together: - 1/4 cup honey - 4 cloves garlic, minced - 2 tablespoons soy sauce - 1 teaspoon ground ginger - 1 teaspoon paprika - Salt and pepper to taste Mix until smooth. This mix will add flavor to your chicken and veggies. Now it's time to marinate the chicken. Take 4 boneless, skinless chicken thighs and place them in a large bowl. Pour half of the honey garlic marinade over the chicken. Toss the chicken thighs to coat them evenly. Let them rest while you prepare the vegetables. This helps the flavors soak in. Grab a large sheet pan and arrange your sliced vegetables. You need: - 2 medium zucchinis, sliced into rounds - 1 red bell pepper, sliced - 1 yellow bell pepper, sliced Place the veggies in a single layer on the pan. Drizzle with 2 tablespoons of olive oil, and season with salt and pepper. Toss the veggies to combine. Next, remove the chicken from the marinade and place it in the center of the sheet pan. Surround the chicken with the veggies. Brush the remaining marinade over the chicken for extra flavor. Now it's time to bake! Place the sheet pan in your preheated oven. Bake for 25-30 minutes. The chicken should cook until it reaches an internal temperature of 165°F (75°C). The veggies should be tender and slightly caramelized. After baking, take the pan out and let it rest for a few minutes. This helps the juices settle. Finally, garnish with chopped fresh parsley for a pop of color and flavor. Enjoy your meal! - To keep chicken juicy, marinate for at least 30 minutes. This allows the flavors to soak in well. - Use a meat thermometer to check doneness. Chicken should reach 165°F (75°C). - For perfectly cooked vegetables, cut them evenly. This helps them cook at the same rate. - Toss veggies in olive oil, salt, and pepper. This enhances their natural sweetness. - Serve directly from the sheet pan for a fun, rustic look. - For a fancier touch, plate chicken and veggies separately. Drizzle extra marinade for added flavor. - Pair this dish with rice or quinoa for a hearty meal. A side salad adds a fresh crunch. - Use a rimmed sheet pan. It holds juices and prevents spills. - A good set of tongs helps with flipping and serving. - A meat thermometer ensures your chicken is cooked just right. {{image_2}} You can swap out chicken for other proteins. Try using shrimp or tofu for a fun twist. Both options soak up flavors well and cook quickly. For the veggies, zucchini shines, but you can use other greens. Consider broccoli, asparagus, or carrots. These add crunch and color to your dish. Boost the taste by adding spices or herbs. Try thyme or rosemary for a fresh kick. A dash of cayenne pepper can add some heat if you like spice. To change the marinade, add orange juice or sesame oil. These can give a sweet or nutty flavor. Play around with the amounts for your perfect blend. This dish makes meal prep easy. You can marinate the chicken a day ahead. Chop the veggies and store them in the fridge. For freezing, place the cooked meal in an airtight container. It stays good for about three months. To reheat, just warm it in the oven or microwave. Enjoy your tasty meal anytime! To store leftovers, let them cool down first. Place the chicken and veggies in an airtight container. This keeps them fresh and tasty. You can refrigerate leftovers for up to three days. Make sure to label the container with the date. To freeze this dish, follow these easy steps: - Allow the chicken and vegetables to cool completely. - Portion them into freezer-safe bags or containers. - Remove as much air as possible before sealing. You can freeze it for up to three months. For best quality, try to eat it sooner. To thaw, move the container to the fridge overnight. This keeps the food safe and tasty. If you need it faster, you can use the microwave's defrost setting. When reheating, the best methods are the oven or microwave. For the oven, preheat to 350°F (175°C). Place the chicken and veggies in a baking dish, cover with foil, and heat for about 15-20 minutes. This keeps the meal juicy and flavorful. If using the microwave, heat in short bursts. Start with one minute, then check. Stir to avoid hot spots. This way, you won't overcook the chicken or veggies. Enjoy your delicious Honey Garlic Chicken Zucchini Sheet Pan again! Cooking honey garlic chicken takes about 25-30 minutes. The chicken should reach an internal temperature of 165°F (75°C). This ensures the chicken is safe to eat and stays juicy. Yes, you can use other proteins. Try boneless pork chops or tofu for a tasty twist. Both options work well with the honey garlic marinade. Just adjust the cooking time based on the protein you choose. You can serve this dish with rice or quinoa. A simple salad also pairs nicely. Try roasted potatoes or a side of steamed broccoli for extra veggies. Each option balances the sweet and savory flavors of the chicken. Yes, this recipe is great for meal prepping. You can cook it in advance and store it in the fridge. It stays fresh for 3-4 days. Just reheat in the oven or microwave before serving. This blog post showed you how to make a tasty honey garlic chicken dish in a sheet pan. You learned about the main ingredients: chicken thighs, zucchini, and bell peppers. You know how to make the marinade and properly cook the chicken. I've shared tips for juicy meat and veggie perfection, plus fun variations. Don't forget to store leftovers right and reheat them well! This dish is easy and perfect for any meal. Enjoy your cooking adventure and make it your own!

Honey Garlic Chicken Zucchini Sheet Pan Delight

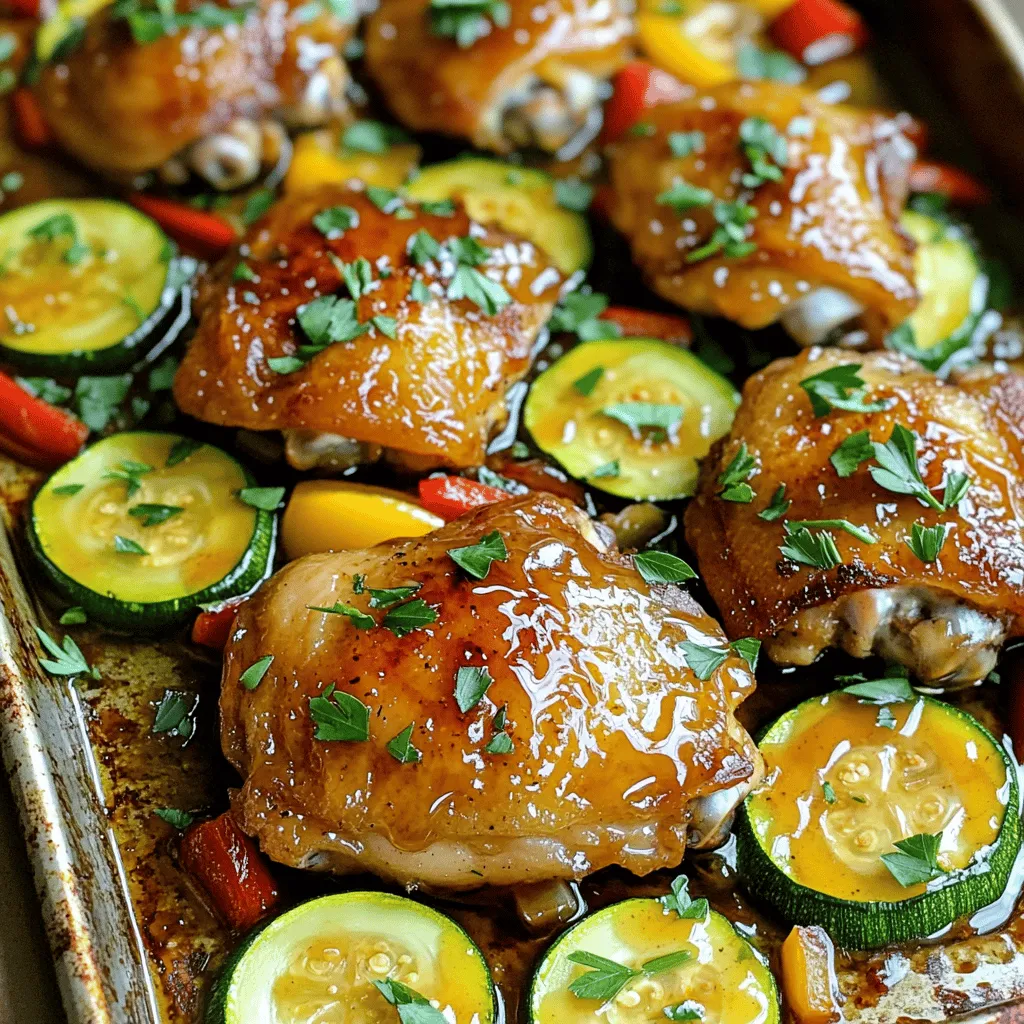
Looking for a quick, tasty dinner idea? Try my Honey Garlic Chicken Zucchini Sheet Pan Delight! This easy recipe features

- 8 oz fettuccine pasta - 2 boneless, skinless chicken breasts - 2 tablespoons olive oil - 4 cloves garlic To start, you need fettuccine pasta. This pasta is thick and holds the sauce well. Next, grab two boneless, skinless chicken breasts. Slice them into strips for even cooking. You’ll also need olive oil for sautéing and garlic for that rich flavor. - 1 cup heavy cream - 1 cup grated Parmesan cheese Heavy cream is key for a rich sauce. It adds a smooth texture you will love. Parmesan cheese gives the dish a salty and nutty taste. Grate it fresh for the best flavor. - Salt and pepper - 1 teaspoon Italian seasoning - Fresh parsley Seasoning is important. Use salt and pepper to taste. Italian seasoning adds herbs that deepen the flavor. Finally, fresh parsley makes a bright garnish. It adds color and a hint of freshness to your dish. To start, fill a large pot with water. Bring the water to a boil over high heat. Once boiling, add a pinch of salt and the fettuccine pasta. Cook the pasta according to the package instructions, usually around 8-10 minutes. Stir occasionally to prevent sticking. Al dente pasta should be firm but not hard. To test, taste a piece a minute or two before the timer goes off. Drain the pasta in a colander and set it aside. While the pasta cooks, heat two tablespoons of olive oil in a large skillet over medium heat. Slice the chicken breasts into strips and season them with salt and pepper. This will enhance the flavor. Add the chicken to the skillet. Cook for about 5-7 minutes, turning occasionally until the chicken is golden brown and cooked through. You should see no pink inside. Once done, remove the chicken from the skillet and set it aside. In the same skillet, add the minced garlic. Sauté for about 1 minute until it becomes fragrant. Be careful not to burn it. Next, pour in 1 cup of heavy cream and bring it to a gentle simmer over low heat. Stir in 1 cup of grated Parmesan cheese. Mix until the cheese melts and the sauce is smooth. Add 1 cup of chopped spinach and 1 teaspoon of Italian seasoning. Cook until the spinach wilts, adding color and flavor to the sauce. Now it’s time to bring it all together. Return the cooked chicken to the skillet and stir to mix. Add the drained fettuccine pasta to the skillet as well. Toss everything together, ensuring the pasta is well coated with the creamy sauce. You can adjust the seasoning with more salt and pepper if needed. For a lovely touch, serve the pasta in bowls, garnished with fresh parsley and extra Parmesan on top. Enjoy this creamy garlic Parmesan chicken pasta! To avoid curdling cream, always use low heat. High heat can make the cream separate. Stir the sauce constantly as you add cheese. This helps it blend smoothly. For the right consistency, you want it creamy but not too thick. If it's too thick, add a little pasta water. This keeps the sauce silky. Slice chicken into even strips. This helps it cook evenly and stay juicy. Thin strips cook faster, so keep an eye on them. Use olive oil for sautéing. It adds flavor and has a high smoke point. You can also use butter for a richer taste. For garnishing, sprinkle fresh parsley on top. Extra Parmesan cheese adds flavor and makes it look nice. Pair this dish with a simple salad. A light white wine, like Pinot Grigio, goes well too. Enjoy your meal! {{image_2}} You can make this dish more fun with add-ins. Try adding vegetables like broccoli or bell peppers. They add color and crunch. You can also toss in protein options like shrimp or sausage. These choices give your pasta a new twist. Each add-in brings its own flavor and makes the dish unique. If you need gluten-free options, swap regular pasta for gluten-free pasta. There are many great brands available. For those who want a dairy-free version, use almond milk or coconut cream instead of heavy cream. Nutritional yeast can replace Parmesan cheese. These swaps make the dish fit your needs without losing taste. Want to boost the flavor? Add spices or fresh herbs like basil or thyme. A pinch of red pepper flakes can add heat. Also, try using different types of cheese. Gouda or feta can bring a new taste. Experimenting with flavors can make your meal exciting and new every time. To keep your creamy garlic parmesan chicken pasta fresh, follow these tips: - Refrigerate within two hours. This keeps bacteria away. - Use airtight containers. Glass or plastic ones work well. - Divide into portions. This makes it easy to grab and reheat later. You can reheat the pasta in two ways: 1. Microwave: - Place a serving in a bowl. - Add a splash of water or cream. This helps keep it moist. - Heat in 30-second intervals, stirring in between. 2. Stovetop: - Use a skillet with a little olive oil. - Add the pasta and a splash of water. - Heat on low, stirring until warm. To prevent the pasta from drying out, always add a bit of liquid while reheating. Freezing this dish is easy with these steps: - Cool completely before freezing. This helps keep texture. - Use freezer-safe containers. Seal tightly to avoid freezer burn. - Label with the date. This helps you keep track. For best taste, eat within three months. To thaw, place it in the fridge overnight. Reheat as mentioned earlier. You can use half-and-half as a lighter option. Milk with cornstarch also works. For a dairy-free choice, try coconut cream or cashew cream. Each option changes the flavor slightly, but they will still make a nice sauce. To spice it up, add red pepper flakes. You can also use a dash of hot sauce. For more heat, include diced jalapeños or a spicy Italian sausage. Adjust the amount based on your taste. Yes, you can prepare the chicken and sauce ahead. Cook the pasta just before serving. This keeps the pasta fresh and avoids mushiness. Store the chicken and sauce in the fridge for up to two days. Absolutely! The creamy sauce and tender chicken appeal to kids. Consider adding veggies like peas or carrots for extra nutrition. You can also serve it with a side salad for a balanced meal. In this post, you learned about the key ingredients for a creamy fettuccine dish, including pasta, chicken, and dairy. I shared step-by-step instructions for cooking the pasta, sautéing chicken, and making the sauce. You also found tips for serving and variations to customize your meal. Remember, cooking is about creativity and joy. Experiment with add-ins and flavors that you love. Enjoy your tasty fettuccine, and don't hesitate to share your own twists on this dish!

Creamy Garlic Parmesan Chicken Pasta Simple Delight

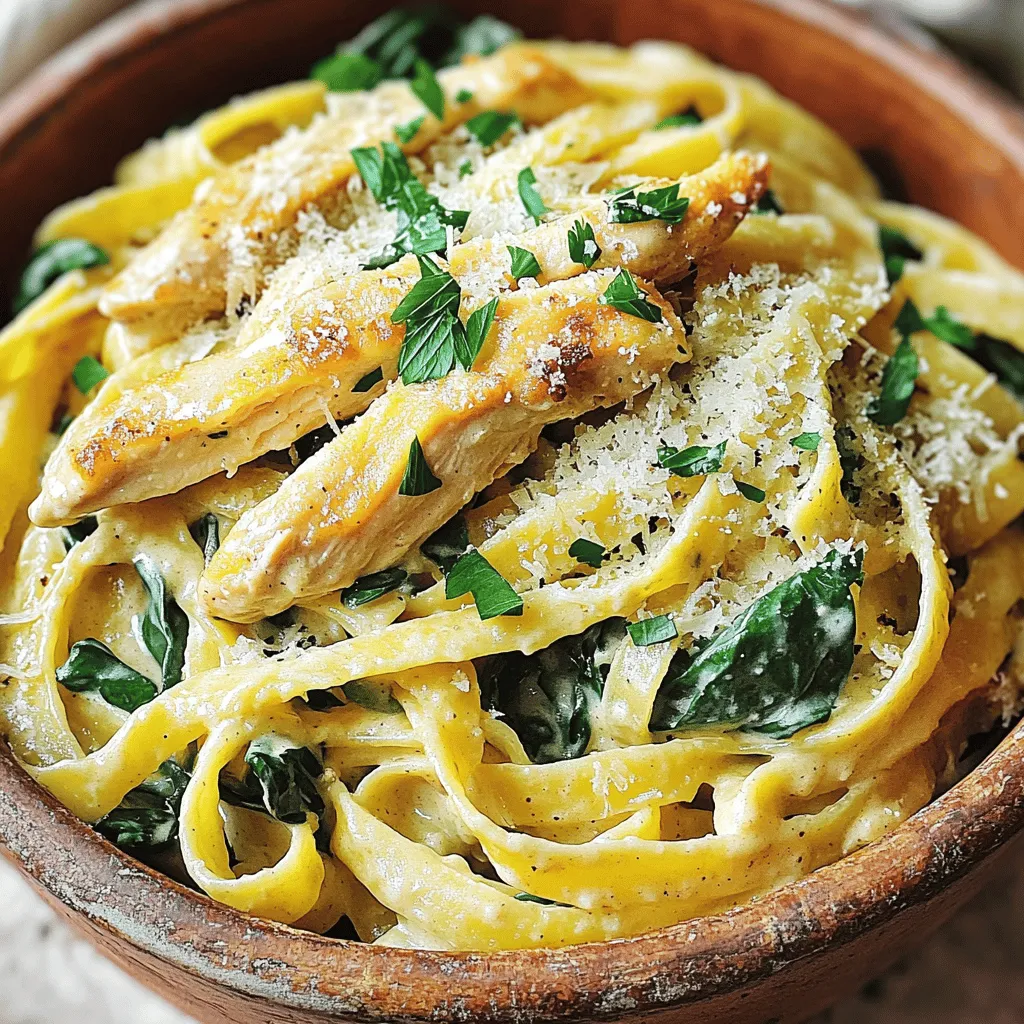
Are you ready for a meal that feels like a warm hug? Creamy Garlic Parmesan Chicken Pasta is not only

- 1 large head of cauliflower - 2 tablespoons harissa paste - 3 tablespoons olive oil - 1 teaspoon smoked paprika - 1 teaspoon garlic powder - Salt and pepper to taste - 1 tablespoon lemon juice The base of this dish is the large head of cauliflower. Choose one that feels firm and heavy. The harissa paste adds a spicy and smoky flavor. It combines well with the olive oil, smoked paprika, and garlic powder. This mix gives depth and warmth. Don't forget your salt and pepper for balance. The lemon juice brightens all the flavors nicely. - Fresh cilantro or parsley - Pomegranate seeds for added color Garnishes can elevate your dish. Fresh cilantro or parsley adds a burst of green and freshness. It pairs well with the spicy steaks. Pomegranate seeds bring a splash of color and sweetness. They add a nice crunch too. Both options enhance the look and taste of the roasted cauliflower steaks. 1. First, preheat your oven to 425°F (220°C). This hot temperature will help the cauliflower get that nice golden brown color. 2. Line a baking sheet with parchment paper. This makes cleanup easy and helps prevent sticking. 3. Next, take a large head of cauliflower. Remove the leaves carefully. 4. Slice the cauliflower into 1-inch thick steaks. Start from the center. You should get about 2-4 steaks. The thicker the slice, the better it holds up during cooking. 1. In a small bowl, mix 2 tablespoons of harissa paste with 3 tablespoons of olive oil. This will give your sauce a great base. 2. Add in 1 teaspoon smoked paprika and 1 teaspoon garlic powder. These spices add depth to the flavor. 3. Squeeze in 1 tablespoon of lemon juice. This brightens up the sauce and makes it fresh. 4. Season with salt and pepper to taste. Mix all the ingredients until smooth. To make it really smooth, you can whisk it or stir it well with a fork. 1. Place the cauliflower steaks on the prepared baking sheet. 2. Brush each side generously with the harissa sauce. Make sure every bit gets coated. 3. Roast in the preheated oven for 25-30 minutes. Halfway through, flip the steaks. This helps them cook evenly. 4. Check for doneness when they are tender and golden brown. You can use a fork to test them. 5. Once done, take them out and let them cool slightly before serving. To get the best texture, cut each cauliflower steak about 1 inch thick. This helps them cook evenly. If they are too thin, they may burn. If too thick, they might not cook all the way through. As you roast, check for tenderness with a fork. You want them soft but not mushy. To boost the flavor, think about adding spices like cumin or coriander. These spices blend well with harissa. You can also try a sprinkle of chili flakes for heat. For dipping, a yogurt sauce works great. Mix plain yogurt with lemon juice and salt for a cool dip. When plating, stack the steaks for height. This makes the dish look fancy. Use fresh herbs like cilantro or parsley to add color. Pomegranate seeds can add a nice pop and crunch. For a final touch, drizzle some olive oil around the plate for a beautiful finish. {{image_2}} You can change the flavor of your harissa roasted cauliflower steaks by trying new spice blends. For a sweet twist, use a mix of cinnamon and cumin. If you want heat, add cayenne pepper or chili flakes. You can also try a curry blend for a different taste. Adding other vegetables for roasting can create a colorful platter. Sweet potatoes or bell peppers pair well with cauliflower. Just cut them into similar sizes to ensure even cooking. This way, you get a variety of textures and flavors in one dish. Harissa roasted cauliflower steaks are great for many diets. They are naturally vegan and gluten-free. If you want a low-carb or keto-friendly option, this dish fits perfectly. Cauliflower is low in carbs and packed with nutrients. To make it more filling, serve the steaks with a side of avocado or a nut-based sauce. This way, you get a balanced meal that satisfies your cravings without the carbs. Enjoy experimenting with these variations! To store your leftovers, let the roasted cauliflower steaks cool first. Place them in an airtight container. This helps keep the flavors fresh. You can keep them in the fridge for up to four days. If you want to keep them longer, consider freezing. Frozen steaks last for up to two months. Just remember to wrap them well to avoid freezer burn. When reheating, the oven works best. Preheat it to 375°F (190°C). Place the cauliflower steaks on a baking sheet. Cover them with foil to keep them from drying out. Heat for about 10-15 minutes, checking often. This keeps them crispy and tasty. Avoid using the microwave if you can. It can make them soggy and less enjoyable. Enjoy your flavorful cauliflower steaks again! Yes, you can use fresh harissa. Fresh harissa adds a bright flavor. Just adjust the amount to match your taste. Fresh harissa can be spicier, so start small. To cut cauliflower steaks, first, remove the leaves. Then, slice the head through the center. Aim for 1-inch thick pieces. Use a sharp knife for clean cuts. Harissa roasted cauliflower steaks pair well with grains. Try serving them with quinoa or couscous. You can also add a fresh salad or yogurt sauce. Cauliflower is perfectly roasted when it’s golden brown. Check for tenderness with a fork; it should pierce easily. The edges should be crispy for the best texture. In this post, we explored how to make harissa roasted cauliflower steaks. We covered the main ingredients, from cauliflower to harissa paste, and discussed optional garnishes like cilantro and pomegranate seeds. You learned step-by-step instructions for preparing, roasting, and seasoning your steaks. Don’t forget to try the tips for perfect texture and unique flavors. Whether you want a vegan dish or something different to impress guests, there are plenty of variations. Remember, store leftovers properly to keep them fresh. Enjoy this tasty dish that brings bold flavors to your table!

Harissa Roasted Cauliflower Steaks Flavorful Delight

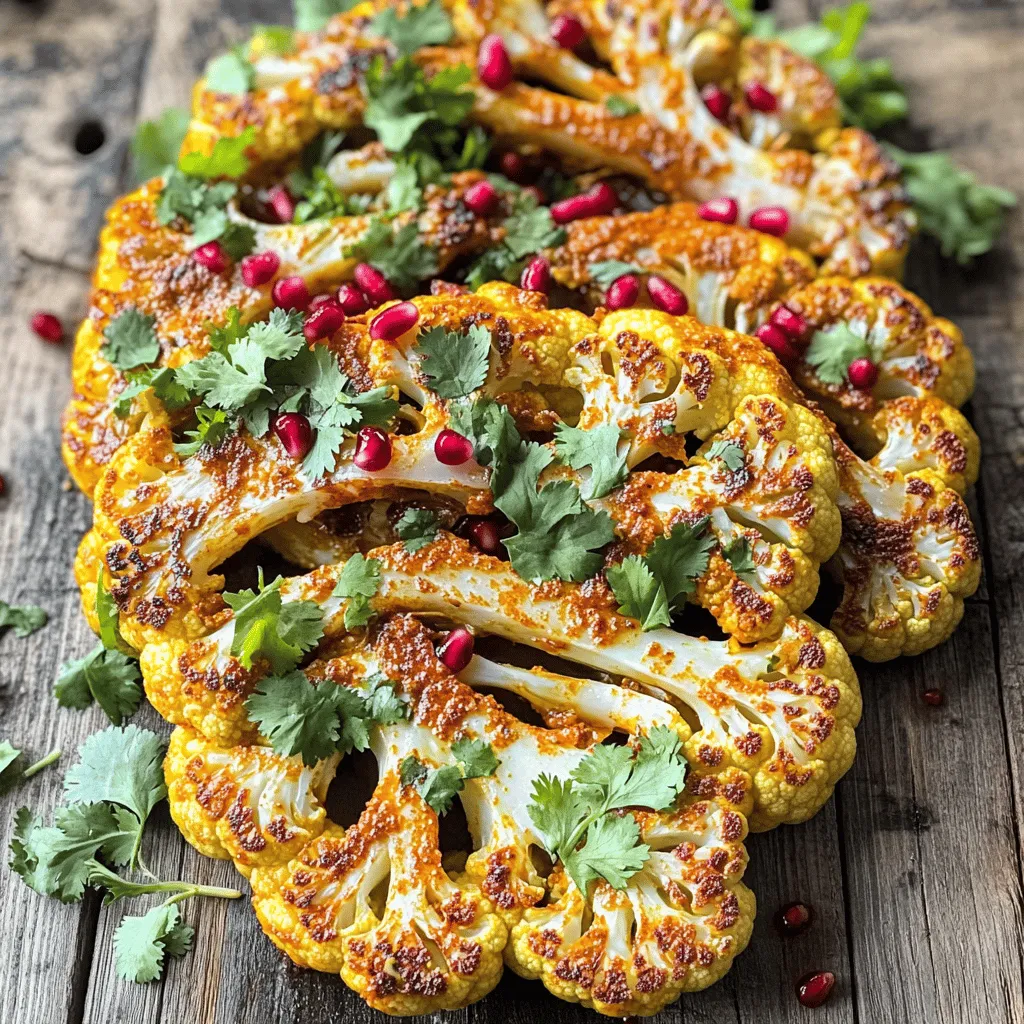
If you’re searching for a bold and tasty meal, look no further! Harissa Roasted Cauliflower Steaks are not only easy

- 4 cups fresh broccoli florets - 1 cup diced carrots - 1 cup diced potatoes - 1 onion, chopped - 3 cloves garlic, minced - 4 cups vegetable broth - 1 cup heavy cream - 2 cups shredded sharp cheddar cheese - 1 teaspoon dried thyme - Salt and pepper to taste - 2 tablespoons olive oil Gathering the right ingredients is key to making great soup. For this cozy dish, fresh broccoli is the star. I love using 4 cups of fresh broccoli florets. Their bright green color and flavor bring life to the soup. Next, I add 1 cup of diced carrots. They add sweetness and a nice crunch. I also use 1 cup of diced potatoes. Potatoes help thicken the soup and make it creamy. An onion brings depth to the flavor. I chop up one onion and add it to the pot. The aroma of onion and garlic is amazing. I use 3 cloves of minced garlic for that extra kick. Now, let’s talk about pantry staples. The base of our soup is 4 cups of vegetable broth. It adds richness and depth. I pour in 1 cup of heavy cream for a silky texture. For the cheesy goodness, I use 2 cups of shredded sharp cheddar cheese. This gives the soup its classic flavor. I also mix in 1 teaspoon of dried thyme. Thyme adds a warm, herbal note. Don’t forget salt and pepper to taste. These will balance all the flavors. Finally, I drizzle in 2 tablespoons of olive oil. It helps sauté the onion and garlic to bring out their best taste. 1. Start by chopping your onion and mincing the garlic. You want these to be small for even cooking. 2. In a large slow cooker, add the chopped onion and minced garlic. Drizzle with olive oil. 3. Sauté for 3-4 minutes until fragrant. This brings out the flavors. You can use a skillet if you prefer. 4. Next, add 4 cups of fresh broccoli florets, 1 cup of diced carrots, and 1 cup of diced potatoes to the slow cooker. 1. Pour in 4 cups of vegetable broth over the vegetables. This will be the base of your soup. 2. Add 1 teaspoon of dried thyme, along with salt and pepper to taste. Stir it all together to mix well. 3. Cover the slow cooker. Cook on low for 6-7 hours or on high for 3-4 hours. The vegetables should be tender when done. 1. Once the cooking time is up, use an immersion blender to puree the soup. Blend until you reach your desired consistency. You can make it smooth or leave it a bit chunky. 2. Stir in 1 cup of heavy cream and 2 cups of shredded sharp cheddar cheese. Mix until melted and well combined. 3. Taste your soup and adjust seasoning with more salt and pepper if needed. Let it sit for an extra 10-15 minutes to let the flavors meld together. Serve this cozy soup in bowls, and don’t forget to add extra cheese on top! Enjoy with a side of crusty bread for a complete meal. For the best results, set your slow cooker to low. This allows the flavors to blend nicely over 6-7 hours. If you are short on time, you can use the high setting for 3-4 hours. Both options will give you a tasty soup. If you want to sauté without a skillet, you can sauté right in the slow cooker. Add chopped onion and minced garlic. Drizzle with olive oil and cook for 3-4 minutes until fragrant. This step boosts the soup's flavor. To adjust creaminess, add more heavy cream, or blend the soup longer. You can also add extra vegetable broth for a lighter soup. Taste as you go, and adjust salt and pepper as needed. For garnishing, I suggest topping the soup with extra shredded cheese. A sprinkle of black pepper adds a nice touch. Serve it with crusty bread to soak up the deliciousness. {{image_2}} You can change up this soup easily. Use different veggies for a new taste. Try cauliflower or spinach instead of broccoli. These veggies cook well and add nice flavor. You can also mix in some corn for sweetness or bell peppers for crunch. If you're looking for dairy-free options, there are great choices. Use plant-based cheese for a creamy texture. Brands like Daiya or Violife offer good dairy-free cheddar. Coconut milk can replace heavy cream for added richness without dairy. Want to spice things up? Add a pinch of cayenne pepper for heat. A sprinkle of smoked paprika adds a nice twist too. You could also try Italian seasoning for a fresh herb flavor. If you want a heartier meal, think about adding protein. Cooked chicken or diced tofu works well. Just add these in during the last hour of cooking. This way, they will soak up all the tasty flavors. To keep your Slow Cooker Broccoli Cheddar Soup fresh, store it in the fridge. Use an airtight container to seal in the flavor. It will stay good for up to four days. If you want to keep it longer, consider freezing it. Pour the cooled soup into freezer-safe bags. Make sure to leave some space for expansion. The soup can last up to three months in the freezer. When you're ready to enjoy your soup again, you have a few options for reheating. The best method is to warm it on the stove over low heat. Stir it gently to keep the creaminess. You can also use a microwave. Heat it in short bursts, stirring in between, to ensure even warming. Avoid boiling the soup; this helps maintain its flavor and texture. Yes, you can make this soup ahead of time. Cook it as directed, then let it cool. Store it in the fridge for up to three days. Reheat it on the stove or in the microwave until hot. If your soup is too thin, you can add a bit more cheese. Stir in extra cheddar while the soup is warm. Another option is to mix a little cornstarch with water and add it to the soup. Let it cook for a few minutes until it thickens. Yes, frozen broccoli works well too. Just add it directly to the slow cooker. It may cook a bit faster, so check for tenderness before the time is up. This soup pairs great with crusty bread or a fresh salad. You can also serve it with grilled cheese sandwiches for a warm and cozy meal. Absolutely! This soup is already vegetarian. Just ensure the vegetable broth is vegetable-based, and you’re good to go! You can use plant-based cheese for a vegan version. This blog post covered fresh ingredients, cooking steps, and useful tips for making Slow Cooker Broccoli Cheddar Soup. You learned how to sauté, blend, and enhance flavors. Variations showed you how to customize this dish with swaps and spices. Proper storage tips help you keep leftovers fresh. As you try this recipe, experiment with flavors and ingredients. Enjoy every bowl of this creamy soup with friends and family. Cooking should be fun and delicious!

Slow Cooker Broccoli Cheddar Soup Cozy and Tasty Dish

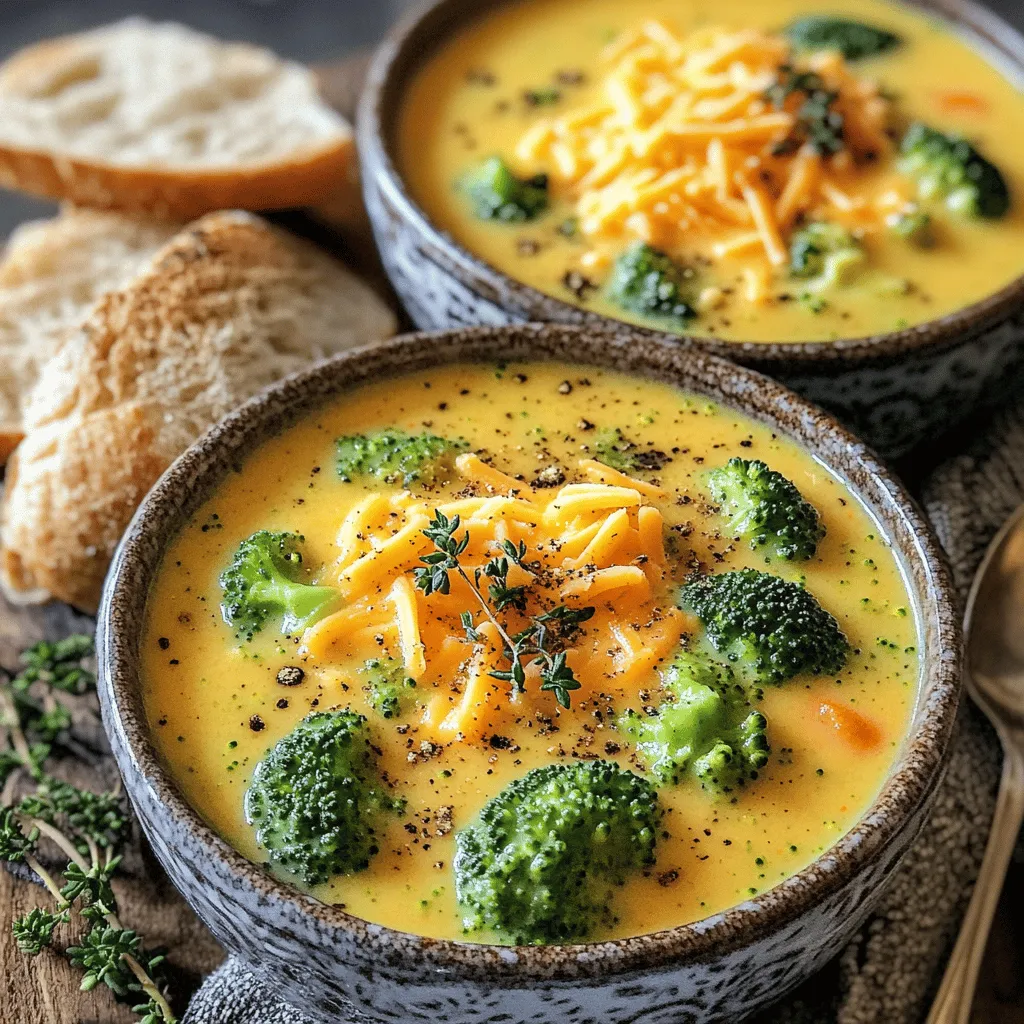
Are you ready to warm up your kitchen with a rich and creamy Slow Cooker Broccoli Cheddar Soup? This cozy

Older posts
Newer posts
← Previous Page1 … Page23 Page24 Page25 … Page84 Next →

dsad

© 2026 easycookingbite • Built with GeneratePress

Our Policies

  • Copyright Policy
  • Cookie Policy
  • GDPR Policy
  • Privacy Policy
  • Disclaimer
  • Terms Of Use

More Information

  • Home
  • About
  • Contact
  • Appetizers
  • Dessert
  • Dinner
  • Drinks
©2026, easycookingbite About Back To Top