Skip to content
DisclaimerTerms Of UseGDPR PolicyCookie Policy

easycookingbite

  • Home
  • Drinks
  • Appetizers
  • Dinner
  • Dessert
  • About
  • Contact
  • Privacy Policy
DisclaimerTerms Of UseGDPR PolicyCookie Policy

NO-ING-IMG

To make a rich and creamy avocado chocolate mousse, gather these ingredients: - 2 ripe avocados - ¼ cup unsweetened cocoa powder - ¼ cup pure maple syrup (or honey) - 2 tablespoons almond milk (or any plant-based milk) - 1 teaspoon vanilla extract - A pinch of sea salt - Fresh berries and mint leaves for garnish (optional) Ripe avocados are key for a smooth texture. Look for dark green skin that yields slightly when pressed. Unsweetened cocoa powder gives the mousse its rich chocolate flavor. Pure maple syrup or honey adds sweetness without overpowering the taste. You can use almond milk or any other plant-based milk you prefer. Vanilla extract enhances the flavor, while sea salt balances the sweetness. Finally, fresh berries and mint leaves make lovely garnishes that add color and freshness. With these ingredients, you create a dessert that feels indulgent but is made from wholesome foods. Enjoy the process of blending these simple items into a decadent treat! {{ingredient_image_1}} - Halve and pit avocados - Scoop flesh into a blender - Add cocoa powder, maple syrup, almond milk, vanilla, and salt Start by cutting the ripe avocados in half. Remove the pit carefully with a spoon or knife. Use a spoon to scoop the green flesh into your blender. Make sure to get all the creamy goodness. Next, add the unsweetened cocoa powder for that rich chocolate taste. Pour in the pure maple syrup for sweetness. If you prefer honey, that works too. Then, add two tablespoons of almond milk to make it smooth. Don’t forget one teaspoon of vanilla extract for flavor. Finally, add a pinch of sea salt to enhance the taste. - Blend until silky smooth - Taste and adjust sweetness Now, blend the mixture on high. Keep blending until it gets really smooth and creamy. You may need to stop and scrape down the sides of the blender. After blending, taste the mousse. If it needs more sweetness, add a little extra maple syrup. Blend it again quickly to mix it in. - Transfer to serving bowls - Chill before serving Once it’s blended perfectly, transfer the mousse into serving bowls or small cups. Chill them in the fridge for at least 30 minutes. This helps the flavors mix and makes the mousse set nicely. When ready to serve, you can add fresh berries and a sprig of mint on top for a lovely touch. Enjoy your creamy, rich dessert! To make a great avocado chocolate mousse, you need ripe avocados. Look for avocados that yield slightly to gentle pressure. This means they are soft enough to blend easily. If they are too hard, wait a few days for them to ripen. Next, adjust the sweetness and chocolate intensity to your taste. Start with ¼ cup of maple syrup. After blending, taste the mousse. If you want it sweeter, add a bit more syrup. You can also play with cocoa powder. More cocoa gives a richer chocolate flavor. Get creative with your garnishes. Fresh berries add a burst of color and flavor. Try strawberries, raspberries, or blueberries on top. A sprig of mint adds a nice touch too. Pair your mousse with other desserts for a fun treat. It goes well with cookies or brownies. You can also serve it with a scoop of ice cream for extra delight. Enjoy mixing flavors and textures! Pro Tips Use Ripe Avocados: Make sure your avocados are perfectly ripe for the creamiest texture and the best flavor. They should yield slightly to gentle pressure when squeezed. Sweetness Adjustment: Taste the mousse before chilling. You can easily adjust the sweetness by adding a little more maple syrup or honey if desired. Chill for Best Results: Allowing the mousse to chill for at least 30 minutes enhances the flavors and helps it set to the perfect consistency. Garnish Creatively: Elevate the presentation with fresh berries and mint leaves. Not only do they add color, but they also provide a refreshing contrast to the rich mousse. {{image_2}} You can make your avocado chocolate mousse even better. One way is to add espresso or coffee. The coffee gives the mousse a rich depth. Just a small amount can enhance the chocolate flavor. Try starting with one teaspoon of brewed coffee. Blend it in with the other ingredients. Another fun option is to use nut butter. Adding almond or peanut butter makes the mousse creamier. It adds a nice nutty taste, too. Just mix in one or two tablespoons. This will give your mousse a new twist and keep it smooth. If you want a vegan treat, you can easily swap out some ingredients. Use maple syrup instead of honey for sweetness. Stick with almond milk or any plant-based milk. This keeps the mousse vegan-friendly without losing flavor. For those looking to cut sugar, there are sugar-free options. You can use a sugar substitute like stevia or erythritol. Just remember to adjust the amount to taste. This way, you can enjoy your mousse without added sugar. To keep your avocado chocolate mousse fresh, store it in an airtight container. This method prevents air from making it brown and keeps it creamy. You can also cover the surface with plastic wrap. Make sure it touches the mousse to avoid oxidation. The mousse can last in the fridge for up to three days. You don’t need to reheat avocado chocolate mousse. It tastes best chilled. If it thickens in the fridge, just stir in a splash of almond milk to refresh it. Serve the mousse topped with fresh berries and mint again for a lovely touch. Enjoy the rich taste as you did the first time! Yes, you can make avocado chocolate mousse ahead of time. It keeps well in the fridge. Prepare it a day before serving. Just cover it with plastic wrap to prevent browning. Avocado chocolate mousse lasts about three days in the fridge. Store it in an airtight container to keep it fresh. After a couple of days, check for any changes in smell or texture. Yes, this dessert is vegan! It uses ripe avocados and plant-based ingredients. You can enjoy it without any animal products. Just make sure to use maple syrup instead of honey. You can use agave syrup or honey if not vegan. Both will add sweetness. If you like a low-calorie option, try stevia. Adjust the amount based on your taste preference. You can create a rich and creamy avocado chocolate mousse with just a few simple ingredients. We covered ripe avocados, cocoa powder, and sweeteners like maple syrup. I showed you how to prepare, blend, and serve this delightful treat. Plus, we discussed tips for perfecting your mousse and fun variations to try. Overall, this dessert is not just tasty, but also healthy and versatile. With a little creativity, you can impress anyone with this easy recipe. Enjoy making it your own!

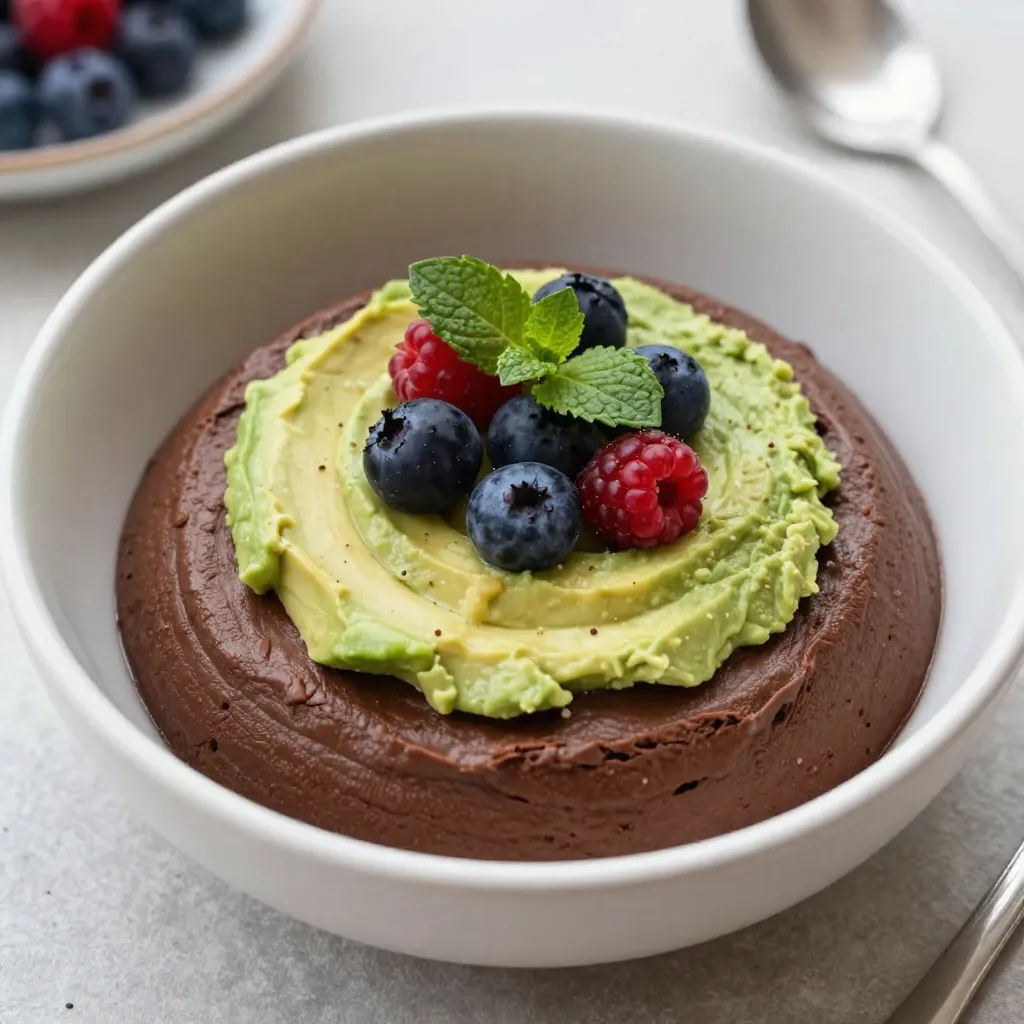
Avocado Chocolate Mousse Rich and Decadent Treat

Are you ready to indulge in a dessert that’s both rich and healthy? My Avocado Chocolate Mousse is a creamy

- 2 cups all-purpose flour - 1 ½ teaspoons baking powder - ½ teaspoon baking soda - ½ teaspoon salt - 1 teaspoon ground cinnamon - ½ teaspoon ground nutmeg - ¾ cup granulated sugar - ½ cup packed brown sugar - 1 cup plain Greek yogurt - ½ cup vegetable oil - 2 large eggs - 1 tablespoon vanilla extract - 3 large apples, peeled, cored, and diced - ½ cup chopped pecans or walnuts (optional) - 1 cup powdered sugar for glaze - 2-3 tablespoons milk for glaze - ½ teaspoon vanilla extract for glaze To make spiced apple fritter bread, you need a mix of dry and wet ingredients. Start with the dry ingredients. You will need two cups of all-purpose flour. Add one and a half teaspoons of baking powder, half a teaspoon of baking soda, and half a teaspoon of salt. For spices, include one teaspoon of ground cinnamon and half a teaspoon of ground nutmeg. Next, gather the wet ingredients. Use three-quarters of a cup of granulated sugar and half a cup of packed brown sugar. You will also need one cup of plain Greek yogurt, half a cup of vegetable oil, two large eggs, and one tablespoon of vanilla extract. Now for the fun part: the additions! Dice three large apples after peeling and coring them. You can also add half a cup of chopped pecans or walnuts if you like. For the glaze, have one cup of powdered sugar, two to three tablespoons of milk, and half a teaspoon of vanilla extract ready. This mix of ingredients creates a delicious and moist bread that truly shines. - Preheat the oven to 350°F (175°C). - Grease a 9x5 inch loaf pan with butter or non-stick spray. - In a medium bowl, whisk together: - 2 cups all-purpose flour - 1 ½ teaspoons baking powder - ½ teaspoon baking soda - ½ teaspoon salt - 1 teaspoon ground cinnamon - ½ teaspoon ground nutmeg This step helps mix the dry ingredients well. It ensures a good rise and flavor. - In a large bowl, mix: - 3 large apples, peeled, cored, and diced - ¾ cup granulated sugar - ½ cup packed brown sugar - Stir gently to coat the apples in the sugar. - Next, add: - 1 cup plain Greek yogurt - ½ cup vegetable oil - 2 large eggs - 1 tablespoon vanilla extract Combine these until smooth. This mixture brings moisture and sweetness to the bread. - Gradually mix the dry ingredients into the wet mixture. - Stir gently until just combined. - Be careful not to overmix. - If you want, fold in ½ cup chopped pecans or walnuts at this stage. This method keeps the bread light and fluffy. - Pour the batter into the prepared loaf pan. - Smooth the top gently. - Bake for 50-55 minutes, or until a toothpick inserted into the center comes out clean. The baking time allows the bread to rise and develop a golden crust. - In a small bowl, whisk together: - 1 cup powdered sugar - 2-3 tablespoons milk - ½ teaspoon vanilla extract Mix until smooth. Adjust the milk or sugar to get the right consistency. This glaze adds sweetness and a nice shine to the bread. When you mix your batter, be careful. Overmixing makes the bread dense. You want it light and fluffy. To get this texture, mix until just combined. The batter should look a bit lumpy. This way, your spiced apple fritter bread will rise nicely. For the best flavor, choose the right apples. I recommend using Granny Smith or Honeycrisp. They hold their shape well and add a nice tartness. When chopping apples, try to keep them the same size. This helps them cook evenly in the bread. A good tip is to slice them first, then chop them into smaller pieces. The glaze is easy to adjust. If you want it thicker, add more powdered sugar. If you prefer it thinner, add a bit more milk. You can also change the flavor. Try adding a pinch of cinnamon or nutmeg to the glaze for a twist. A little vanilla extract boosts the flavor, too. Your glaze can be as fun and unique as you like! {{image_2}} If you want a nut-free apple fritter bread, you can easily adjust the recipe. Simply skip the chopped pecans or walnuts. This change lets the apples shine even more. You can also add extra apples or a handful of raisins for sweetness. The result will still be delicious and moist. For those who love spices, consider adding ginger or cloves. Both of these spices give a warm taste. Use about 1 teaspoon of ground ginger or ½ teaspoon of ground cloves. These additions can really boost the flavor of your bread. You’ll enjoy a cozy taste that’s perfect for chilly days. Want to switch up the glaze? Try a cream cheese glaze for a rich touch! To make it, blend 4 ounces of softened cream cheese with 1 cup of powdered sugar and 2-3 tablespoons of milk. If you prefer a sweet twist, drizzle caramel sauce over your bread. Either option adds a fun twist to your spiced apple fritter bread! To keep your bread fresh, store it at room temperature. Place the bread in an airtight container. You can also wrap it in plastic wrap or foil. This method helps keep the moisture in. Bread will stay good for about 2 to 3 days this way. If you want to keep the bread longer, you can refrigerate it. Wrap it tightly in plastic wrap or foil. Place it in a sealed bag. This way, it can last up to one week. But remember, refrigeration may change the texture. It might not be as soft when you take it out. Freezing is a great option for long-term storage. Wrap the cooled bread tightly in plastic wrap. Then, place it in a freezer bag. Squeeze out as much air as you can. It can stay fresh for up to 3 months in the freezer. When you're ready to eat it, thaw it overnight in the fridge. You can also warm individual slices in the toaster for a quick treat. Yes, you can! Pears, peaches, or even berries work well too. Just peel and chop them like the apples. Each fruit adds a unique taste and texture to the bread. I suggest using firm fruits to keep the bread from getting too soggy. You can swap some ingredients for healthier options. Use whole wheat flour instead of all-purpose flour. For sugar, try honey or maple syrup for natural sweetness. You can also use Greek yogurt with lower fat content. These changes keep the flavor while making it a bit lighter. Absolutely! Just double each ingredient and use two loaf pans. This is perfect for gatherings or sharing with friends. Keep an eye on baking time, as it might need a few extra minutes. Always check with a toothpick to ensure it’s done. This bread pairs well with a variety of items. Serve it warm with butter or cream cheese. It also goes nicely with a cup of coffee or tea. For a sweet treat, try adding a scoop of vanilla ice cream on top. Enjoy experimenting with different sides! We covered everything you need to make spiced apple fritter bread. You learned about the key ingredients, step-by-step baking instructions, and useful tips. Remember, using quality apples makes a big difference. Don’t skip the glaze; it adds great flavor. Store your bread well to keep it fresh longer. Explore variations like nut-free or different glazes if you want a twist. Enjoy your baking and share your tasty results with friends! This recipe not only fills your home with warmth but also delights your taste buds.

Spiced Apple Fritter Bread Flavorful and Easy Recipe

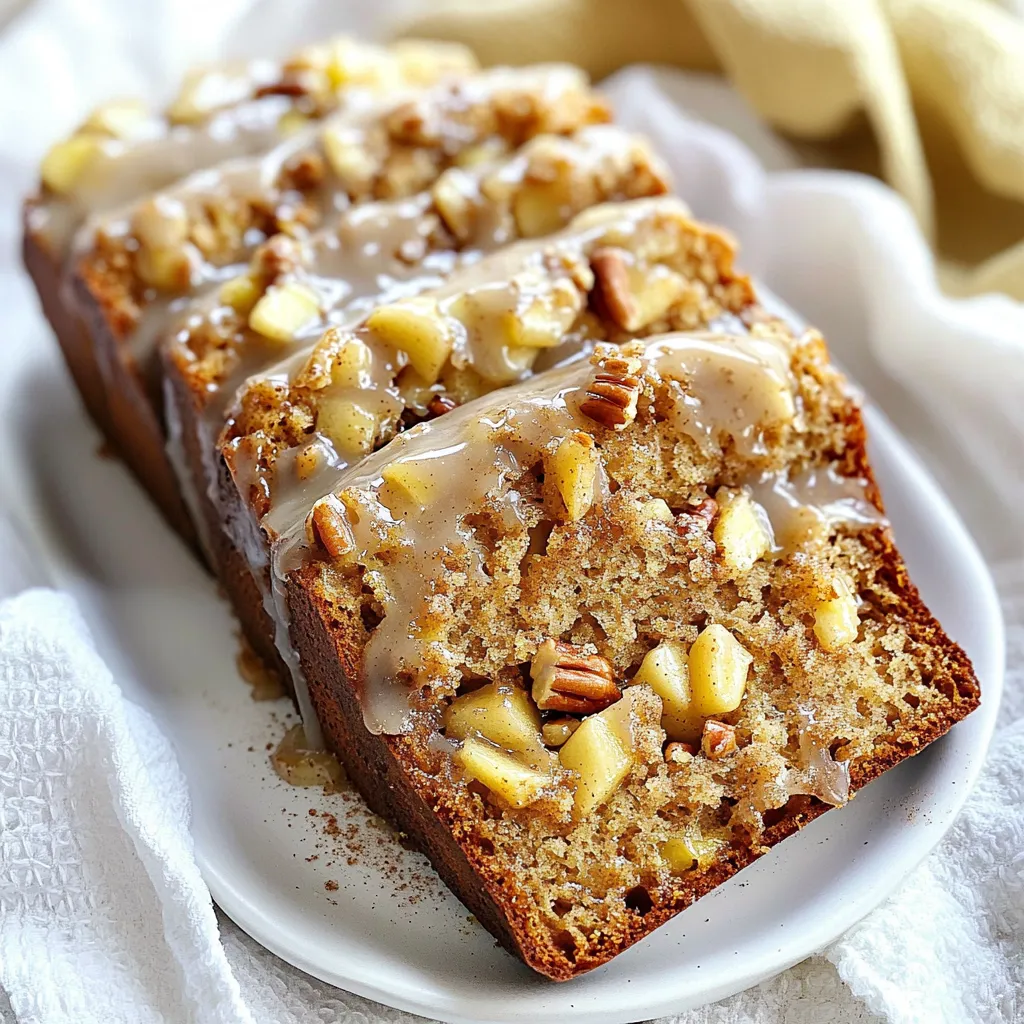
If you’re looking for a cozy treat that brings warmth and spice into your kitchen, you’ve found it! My Spiced

To make these tasty roasted thin squash chips, you will need: - 2 medium-sized yellow summer squashes - 2 teaspoons olive oil - 1 teaspoon garlic powder - 1 teaspoon smoked paprika - ½ teaspoon sea salt - ¼ teaspoon black pepper - Fresh herbs (like thyme or rosemary) for garnish (optional) You can replace yellow summer squash with zucchini for a different taste. The olive oil gives flavor, but you can use avocado oil if you prefer. Garlic powder adds depth, while smoked paprika brings a nice warmth. If you want a kick, try adding cayenne pepper instead. Choosing fresh squashes is key. Look for ones that feel firm and have bright skin. Avoid squashes with soft spots or blemishes. Fresh herbs like thyme or rosemary make a wonderful touch at the end. They add color and extra flavor. If you don’t have fresh herbs, dried ones work too, just use less. First, wash the squashes well. This step removes dirt and bacteria. Next, trim the ends of each squash. Use a mandoline slicer or a sharp knife for slicing. Aim for even pieces about 1/8 inch thick. Thin slices ensure that the chips become crispy. If you cut them too thick, they may be chewy. In a big bowl, add the sliced squashes. Drizzle in 2 teaspoons of olive oil. Then, sprinkle 1 teaspoon of garlic powder and 1 teaspoon of smoked paprika. Toss everything together to coat each slice. Add ½ teaspoon of sea salt and ¼ teaspoon of black pepper. Mix well so the flavors blend on every piece. Now, line a baking sheet with parchment paper. This makes cleaning easy later. Place the squash slices in a single layer on the sheet. Avoid overlapping the slices to get them crisp. Preheat your oven to 225°F (110°C). Bake the chips for 1 to 1.5 hours. Keep an eye on them. They are ready when golden and crispy. Once done, take them out and let them cool for a few minutes. If you want, add fresh herbs for extra flavor. Enjoy your tasty, homemade squash chips! To make your squash chips super crispy, slice them thin. Aim for about 1/8 inch. A mandoline slicer works best for this. Make sure to arrange the slices on the baking sheet in a single layer. If they overlap, they won’t crisp up well. Baking at a low temperature, like 225°F, helps them dry out without burning. Keep an eye on them during baking. Each oven varies, so check for doneness after one hour. You can add fun flavors to your squash chips. Try adding a sprinkle of chili powder for heat. For a cheesy taste, mix in some nutritional yeast before baking. Fresh herbs like thyme or rosemary also add a great touch. Feel free to experiment with different spices. Just remember, less is more. Too many flavors can overwhelm the squash's natural taste. One mistake is cutting the squash too thick. Thick slices will not get crispy. Another mistake is overcrowding the baking sheet. If you put too many slices together, they steam instead of bake. Lastly, don’t skip the olive oil. It helps with crisping and adds flavor. Following these tips will ensure you get delicious, crispy squash chips every time. {{image_2}} You can change the flavor of your squash chips easily. Here are some ideas: - Cajun Spice: Add a mix of cayenne, onion powder, and paprika. - Parmesan and Herb: Sprinkle fresh Parmesan and dried Italian herbs. - Spicy Sriracha: Mix sriracha sauce with olive oil for a spicy kick. - Sweet Cinnamon: Use cinnamon and a touch of brown sugar for a sweet treat. Each mix gives the chips a new taste. Try to match the seasoning with what you enjoy. While yellow summer squash is great, you can use other squashes too. Here are some options: - Zucchini: This is a popular choice. It tastes mild and works well. - Butternut Squash: Slice it thin for a sweet and nutty flavor. - Acorn Squash: Its unique taste adds a different twist. Experimenting with different squashes can surprise your taste buds. You don't just have to bake these chips. Here are some other ways to cook them: - Air Fryer: Cook at 375°F for 15-20 minutes for a fast and crispy snack. - Dehydrator: Set it to 125°F and let them dry for several hours. This keeps the flavor. - Pan-Frying: Use a bit of oil in a skillet for a quick fry. Just watch them closely! Each method changes the texture and taste. Choose what works best for you. To keep your roasted thin squash chips fresh, store them in an airtight container. Use a glass or plastic container with a tight seal. Make sure the chips are completely cool before sealing. This helps to avoid moisture, which can make them soft. If you have a lot, you can layer the chips with parchment paper. This keeps them from sticking together. If you want to enjoy your chips crispy again, use your oven. Preheat it to 350°F (175°C). Spread the chips on a baking sheet. Heat them for about 5 to 10 minutes. Keep an eye on them to prevent burning. You can also use an air fryer for a faster option. Just set it to a medium heat for a few minutes. This will bring back their crunch. Properly stored, roasted squash chips will stay good for about 1 week. After that, they may lose their crunch. Check for any signs of moisture or softness before eating. If they lose their crispness, reheating can help. For the best taste, try to eat them within a few days. Enjoy your tasty snack while it's fresh! Yes, you can make roasted squash chips ahead of time. Store them in an airtight container. Keep them in a cool, dry place for best results. They stay fresh for a few days. However, they may lose some crispness. To regain crispness, reheat them in the oven for a few minutes. You will know the squash chips are done when they turn golden brown. They should also feel light and crispy. Check them around the 1-hour mark. If they need more time, keep an eye on them as they can burn quickly. Remove the chips from the oven when they look just right. Yes, roasted squash chips are a healthy snack option. They are low in calories and high in nutrients. Squash is rich in vitamins A and C, which are good for your skin and eyes. Using olive oil adds healthy fats, making this snack even better! Enjoy them guilt-free! In this post, we explored how to make delicious roasted squash chips. We covered the best ingredients and measurements, along with tips for perfect seasoning and baking. You learned about storing your chips and how to avoid common mistakes. Remember, you can adapt the recipe with different squashes and seasonings. With practice, you’ll master this tasty snack. Enjoy your crunchy, healthy treat!

Roasted Thin Squash Chips Crispy and Flavorful Snack

Craving a crispy snack that’s both healthy and delicious? Look no further! Roasted thin squash chips are the perfect answer.

- 1 tablespoon olive oil - 1 medium onion, diced - 2 cloves garlic, minced - 1 pound rotisserie chicken, shredded - 4 cups chicken broth - 1 cup heavy cream - 1 cup ricotta cheese - 2 cups fresh spinach, chopped - 1 teaspoon dried basil - 1 teaspoon dried oregano - Salt and pepper, to taste - 8 ounces lasagna noodles, broken into pieces - 1 cup shredded mozzarella cheese - ½ cup grated Parmesan cheese - Fresh herbs like parsley or thyme can brighten the dish. - A pinch of red pepper flakes adds a nice kick. - You might enjoy diced tomatoes for some acidity. - You can use turkey instead of chicken for a different taste. - Cream cheese works well in place of ricotta if needed. - Vegetable broth can replace chicken broth for a vegetarian option. - Gluten-free pasta can be used for those with dietary needs. This ingredient list gives you the building blocks for a warm and tasty white lasagna soup. Each component adds flavor and texture, making every bowl a delight. Don't be afraid to mix and match based on what you have at home! First, gather all your ingredients. You will need: - 1 tablespoon olive oil - 1 medium onion, diced - 2 cloves garlic, minced - 1 pound rotisserie chicken, shredded - 4 cups chicken broth - 1 cup heavy cream - 1 cup ricotta cheese - 2 cups fresh spinach, chopped - 1 teaspoon dried basil - 1 teaspoon dried oregano - Salt and pepper, to taste - 8 ounces lasagna noodles, broken into pieces - 1 cup shredded mozzarella cheese - ½ cup grated Parmesan cheese Next, chop your onion and mince the garlic. This helps build flavor. In a large pot, heat the olive oil over medium heat. Add the diced onion and cook for 3-4 minutes until it turns soft and clear. Then, stir in the minced garlic. Cook it for just one more minute. Now it’s time to add the shredded rotisserie chicken. Mix it well with the onion and garlic. Pour in the chicken broth and bring the mix to a gentle boil. Once it boils, stir in the heavy cream and ricotta cheese. Make sure everything is mixed nicely. Then add the chopped spinach, dried basil, dried oregano, salt, and pepper. Stir to combine. Carefully add the broken lasagna noodles to the pot. Stir them from time to time to keep them from sticking together. Cook for about 10-12 minutes until the noodles are tender. After the noodles are cooked, reduce the heat to low. Stir in the shredded mozzarella and grated Parmesan cheese until they melt and make the soup creamy. Now, taste the soup and adjust the seasoning if needed. Serve it hot, and if you like, sprinkle a bit more Parmesan on top. Enjoy this comforting bowl of white lasagna soup! To make your White Lasagna Soup extra creamy, use full-fat cream. This helps create a rich, smooth texture. Stir in the heavy cream slowly to blend it well. Adding more ricotta cheese also boosts the creaminess. If you want even more flavor, try adding a splash of cream cheese. This small change makes a big difference. One common mistake is cooking the noodles too long. Overcooked noodles turn mushy and lose their charm. Always check the noodles a minute or two before the time is up. Another mistake is not seasoning enough. Taste your soup as you cook and adjust salt and pepper. Lastly, don’t skip the cheese at the end. Cheese adds flavor and helps thicken the soup. Serve your White Lasagna Soup hot and fresh. It pairs well with crusty bread or a simple salad. For an extra touch, sprinkle more Parmesan cheese on top. You can also add fresh herbs like basil or parsley for color. A glass of crisp white wine complements the soup nicely. Enjoying this meal with loved ones makes it even better. {{image_2}} To make a vegetarian version, swap the chicken for mushrooms or zucchini. You can use the same base. Start with the olive oil, onion, and garlic. Then, add your veggies in place of the chicken. Use vegetable broth instead of chicken broth. This keeps the soup rich and creamy. The spinach and ricotta cheese will still add great flavor. You can also add more cheese for extra creaminess. If you're watching carbs, there are simple swaps you can make. Instead of lasagna noodles, use zucchini noodles or shirataki noodles. These options keep the soup light and healthy. You can also skip the heavy cream. Use unsweetened almond milk instead. The soup will still be tasty and comforting. For a spicy kick, add some red pepper flakes or diced jalapeños. You can also stir in some diced tomatoes for a fresh taste. These ingredients will boost the flavor a lot. If you want more depth, add smoked paprika or cayenne pepper. This spicy twist makes the soup exciting and unique. To store your White Lasagna Soup, let it cool first. Use an airtight container to keep it fresh. Make sure to cover it tightly. You can store the soup in the fridge for up to three days. Always label the container with the date. This way, you know when to eat it. If you want to freeze the soup, use a freezer-safe container. Leave some room at the top for expansion. The soup can last up to three months in the freezer. To defrost, move it to the fridge for a day before you want to eat it. This keeps the flavor and texture great. To reheat, pour the soup into a pot. Heat it on low to medium heat. Stir often to prevent sticking. You can also use the microwave. Just heat in short bursts, stirring in between. If the soup is too thick, add a bit of chicken broth or water. Taste and adjust the seasoning if needed. You can use cooked chicken breast instead of rotisserie chicken. You can also try shredded turkey or even canned chicken. For a vegetarian option, use mushrooms or chickpeas. These options keep the soup tasty and filling. Yes, you can make this soup ahead of time. Cook it fully and let it cool. Store it in an airtight container in the fridge for up to three days. Reheat on the stove over low heat when you're ready to eat. To thicken the soup, add a bit more ricotta cheese or cream. You can also mix in a cornstarch slurry. Just combine one tablespoon of cornstarch with two tablespoons of water. Stir this mix into the soup and let it simmer. Yes, you can use no-boil lasagna noodles. Break them into pieces and add them directly to the soup. They will soften while cooking in the broth. Just be sure to add a bit more liquid to keep the soup creamy. Some great toppings include extra Parmesan cheese or fresh basil. You can also add a dollop of ricotta cheese for creaminess. A sprinkle of red pepper flakes gives a nice kick too. Feel free to get creative with your toppings! This blog post covered all you need to make White Lasagna Soup. We explored ingredients, cooking steps, and fun variations. You learned how to store leftovers and avoid common mistakes. Remember, cooking is about experimenting. Feel free to mix flavors and adjust ingredients to fit your taste. Enjoy your creamy, savory soup and share it with others!

White Lasagna Soup Comforting and Creamy Delight

Craving a comforting bowl of warmth? White Lasagna Soup is creamy, easy, and delicious. Imagine rich layers of cheese and

- 1 cup yellow split peas, rinsed - 6 cups vegetable broth - 1 medium onion, chopped - 2 carrots, diced - 2 celery stalks, diced - 2 medium potatoes, peeled and diced - 1 cup frozen corn - 3 cloves garlic, minced The base of the soup is yellow split peas. They give the dish a rich and creamy texture. Vegetable broth adds depth and flavor. Fresh vegetables like onion, carrots, and celery create a hearty mix. Diced potatoes make it filling, while frozen corn adds sweetness. - 1 teaspoon dried thyme - 1 teaspoon dried oregano - 1 bay leaf - Salt and pepper to taste - 2 tablespoons olive oil - Fresh parsley for garnish Seasoning is key to great soup. Thyme and oregano add warmth and earthiness. The bay leaf infuses the soup with a subtle herbal note. Use salt and pepper to enhance all the flavors. A drizzle of olive oil gives richness, and fresh parsley brightens the dish. To start, heat 2 tablespoons of olive oil in a large pot over medium heat. This oil adds flavor and helps cook the veggies. Next, add 1 chopped onion, 2 diced carrots, and 2 diced celery stalks. Sauté these for about 5 minutes. You want them softened but not mushy. Stir them often to prevent sticking. Now, it’s time to add the flavor. Toss in 3 minced garlic cloves. Cook this mix for 1 more minute. You will notice a lovely aroma filling your kitchen. This step builds the base of your soup. Next, let’s combine the main ingredients. Pour in 6 cups of vegetable broth and add 1 cup of rinsed yellow split peas. Include 2 diced potatoes, 1 teaspoon of dried thyme, 1 teaspoon of dried oregano, and 1 bay leaf. Stir everything well and bring it to a boil. Once boiling, reduce the heat to low. Cover the pot and let it simmer for 40 to 45 minutes. This slow cooking makes the peas and potatoes tender. Stir occasionally to ensure nothing sticks to the bottom. During the last 10 minutes of cooking, stir in 1 cup of frozen corn. This adds sweetness and texture. Season the soup with salt and pepper to taste. Before serving, don’t forget to remove the bay leaf. Ladle the soup into hearty bowls. For a nice touch, garnish with fresh parsley. This adds color and freshness. Serve your soup with crusty bread for a cozy meal. Enjoy the warmth and comfort of this delicious dish! To make the best Amish Snow Day Soup, watch your cooking time. If you undercook it, the peas will be hard. If you overcook it, the soup can get mushy. Aim for tender peas and potatoes. Adding herbs can boost the flavor. You can try fresh thyme or rosemary. They will add a nice touch. Just remember to add them during cooking so the flavors blend well. Pair the soup with crusty bread for a hearty meal. A light salad also works well to balance the dish. For a lovely presentation, use big bowls. Drizzle a bit of olive oil on top. Sprinkle fresh parsley for a burst of color. This makes the soup look inviting and delicious. {{image_2}} You can easily change ingredients in Amish Snow Day Soup. If you want a different base, try green split peas. They give a similar texture and taste. If you like meat, add cooked chicken or crispy bacon. These add great flavor and protein. Make sure to adjust cooking time if you add raw meat. Cook it fully before adding it to the pot. In summer, you can enjoy a fresh version of this soup. Use fresh vegetables like zucchini, bell peppers, or tomatoes. These ingredients bring a bright taste to your bowl. You can also make a vegan version by swapping the vegetable broth for water. Just add more herbs for flavor. This keeps the soup light but still tasty. To store leftover soup, let it cool first. Pour the soup into airtight containers. This keeps it fresh for up to 4 days in the fridge. When you’re ready to eat, reheat it on the stove. Stir it often to heat evenly. You can also use the microwave, but cover it loosely. This helps steam escape and warms it well. To freeze portions, let the soup cool down. Use freezer-safe bags or containers. Leave some space at the top as soup expands when frozen. It will stay good for about 3 months in the freezer. When you want to enjoy it again, take out the desired amount. Thaw it overnight in the fridge or use the microwave. Reheat it on the stove for the best taste. Remember to stir well and check if it needs more seasoning. Amish Snow Day Soup is a warm, comforting dish. It features yellow split peas, veggies, and herbs. This soup represents the Amish way of life: simple, wholesome, and hearty. On cold, snowy days, it warms the body and soul. The use of split peas shows resourcefulness, as they are cheap and filling. The Amish community often enjoys this soup on snowy days, making it a cultural staple. Making Amish Snow Day Soup takes about an hour. You will spend about 15 minutes preparing the ingredients. Cooking the soup takes about 40-45 minutes. This time allows the flavors to blend and the peas to soften. Overall, it is a simple recipe that fits well into a busy day. Yes, you can make this soup ahead of time. It stores well in the fridge for three to five days. To prepare, cool it completely before placing it in an airtight container. When you want to eat it, simply reheat on the stove or in the microwave. For longer storage, freeze portions for up to three months. Thaw in the fridge overnight before reheating. Amish Snow Day Soup brings warmth and comfort in every bowl. We covered its simple, wholesome ingredients, like yellow split peas and fresh veggies. I shared step-by-step instructions and tips to enhance your soup-making skills. Remember to store leftovers safely or freeze for future meals. This soup is flexible; you can swap ingredients and vary flavors. Enjoy making it for cozy days ahead. My hope is that this soup brightens your kitchen and warms your heart.

Amish Snow Day Soup Flavorful and Cozy Dish

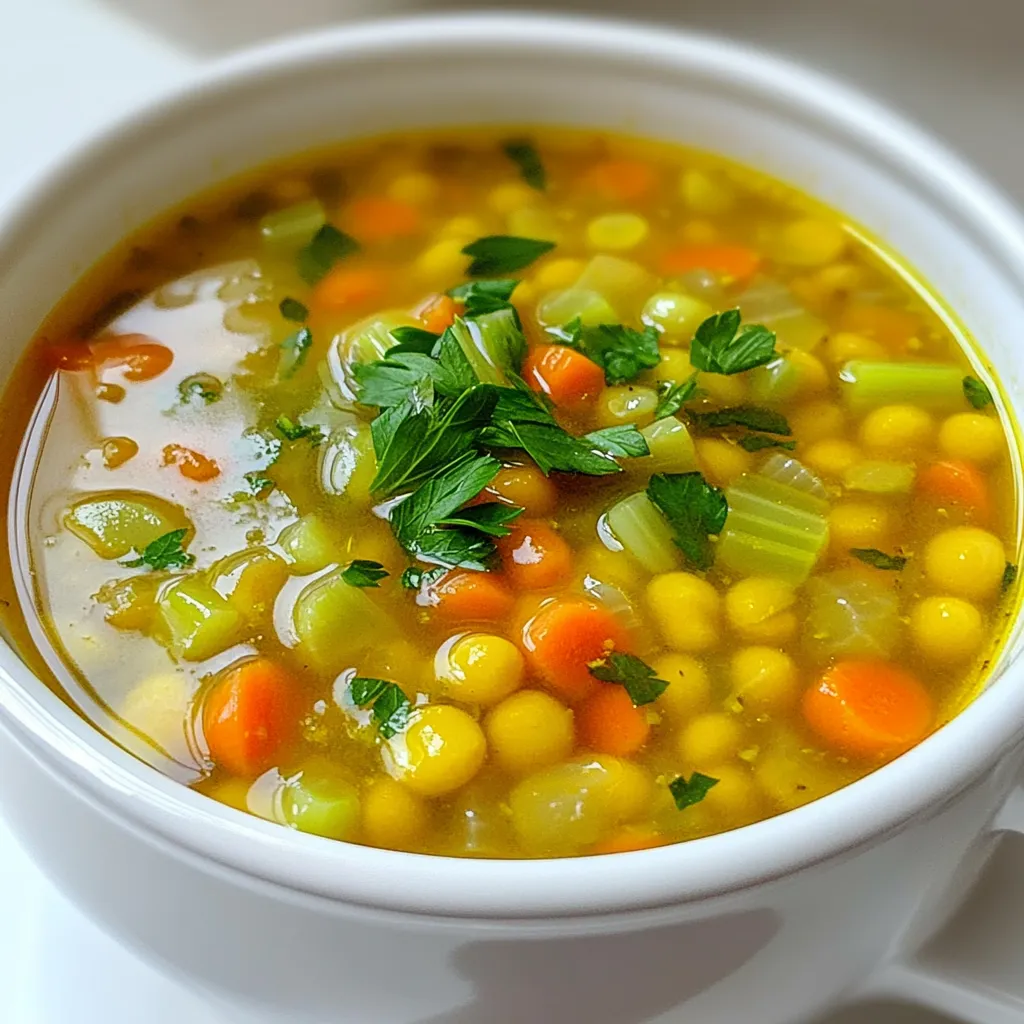
On a chilly day, nothing warms the heart like a bowl of Amish Snow Day Soup. This cozy dish blends

- 4 boneless, skinless chicken breasts - 1 cup spinach dip (store-bought or homemade) - 1 cup shredded mozzarella cheese - Fresh spinach leaves - Sliced lemons The key to this dish is its simplicity. You only need three main items to make it shine. First, choose four boneless, skinless chicken breasts. These will be the stars of our meal. Next, grab a cup of spinach dip. You can buy it or make your own. Finally, get a cup of shredded mozzarella cheese. This will melt beautifully over the chicken, adding flavor and richness. For a pop of color, consider adding fresh spinach leaves and sliced lemons as garnishes. They not only look nice but also add a fresh touch. These little extras can make your dish feel special, even with just a few ingredients. With just these items, you're ready to create a delicious meal that impresses. - Preheat the oven to 375°F (190°C). - Lightly grease a baking dish with cooking spray or olive oil. First, you want to set your oven to 375°F. This temperature ensures the chicken cooks evenly. Greasing the dish helps prevent sticking. A little spray or oil works fine. - Arrange chicken in the baking dish. - Spread spinach dip over chicken. - Top with mozzarella cheese. Next, lay the chicken breasts in the dish. Keep some space between them. This helps them cook well. Now, take the spinach dip and spread it all over the chicken. Make sure to cover each piece. Finally, sprinkle the shredded mozzarella cheese on top. This will melt into a nice, gooey layer. - Bake for 25-30 minutes. - Check for doneness (internal temperature of 165°F/74°C). Now, place the dish in the oven. Set a timer for 25 to 30 minutes. When the time is up, check the chicken. It should reach an internal temperature of 165°F. This ensures it is safe to eat. If it's not done, give it a few more minutes. Enjoy the smell as it cooks! - Ensure chicken is evenly spaced in the baking dish. This helps them cook evenly. - Use a meat thermometer for precise cooking. This tool checks if chicken hits 165°F (74°C). When I space the chicken well, I notice they cook better. It also makes sure every piece gets that yummy spinach dip flavor. Using a meat thermometer takes away the guesswork. You don’t want to serve undercooked chicken! - Best served warm. The cheese will be gooey and delicious. - Pair with a fresh salad or crusty bread. This adds crunch and freshness to your meal. I love serving this dish warm. The melted cheese and creamy dip make it so inviting. A salad or some bread on the side finishes the plate nicely, making it a complete meal! {{image_2}} You can switch up the flavor of your spinach dip. Try a garlic or artichoke dip for a twist. You can even use a spicy spinach dip for some heat. If you want a fresher taste, go for homemade dip. Making it from scratch lets you control the flavors. Plus, it’s fun to create your own mix! The cheese you use can change the whole dish. Instead of mozzarella, try cheddar for a sharper taste. Gouda adds a nice creaminess, too. If you want an extra rich texture, mix in cream cheese. This makes each bite creamy and smooth. These cheese swaps can make your dish stand out even more! After you enjoy your meal, store any extras right away. Place the leftovers in an airtight container. This keeps the chicken fresh and tasty. You can store it in the fridge. Make sure to use the leftovers within 3-4 days. This way, you can enjoy every bite of the yummy flavors. If you want to save some for later, freezing is a great option. Freeze the dish before baking. It will stay fresh for a longer time. When you’re ready to eat, simply thaw it in the fridge overnight. After that, bake it as needed. This method helps keep the taste and texture just right. Yes, you can use frozen spinach. Just make sure to thaw and drain it first. Squeeze out any excess water. This helps keep the dish from getting too watery. You want the spinach to blend well with the dip and chicken. There are many great sides to serve with this dish. Here are some ideas: - A fresh green salad - Crusty bread or garlic bread - Roasted vegetables like carrots or broccoli - Rice or quinoa for a filling meal These sides balance the flavors of the chicken and spinach. To check if your chicken is done, look for a few signs: - The chicken should be white and not pink inside. - Use a meat thermometer to check the temperature. It should reach 165°F (74°C). - Juices should run clear when you cut into the chicken. These tips ensure your meal is safe and tasty. This blog post guides you through making Spinach Dip Chicken. You learned about essential ingredients, step-by-step cooking, helpful tips, and variations. I hope you feel ready to try this tasty dish with simple steps. Enjoy it warm, paired with a salad or bread. Keep any leftovers fresh in the fridge or freeze for later. Cooking can be fun and rewarding, and this recipe shows just that. Now it’s time to get cooking!

Three Ingredient Spinach Dip Chicken Simple and Tasty

Looking for a quick and tasty dinner idea? I’ve got just the thing! This Three Ingredient Spinach Dip Chicken is

For these delightful Cotton Candy Cheesecake Bombs, you will need the following ingredients: - 1 cup cotton candy, chopped finely - 8 oz cream cheese, softened - 1/2 cup powdered sugar - 1 teaspoon vanilla extract - 1 cup graham cracker crumbs - 1/4 cup unsalted butter, melted - 1/2 cup mini chocolate chips - Pinch of salt - Extra cotton candy for garnish These ingredients work together to create a sweet and creamy treat. The cotton candy adds a fun twist, while the cream cheese gives a rich taste. The graham cracker crumbs form a nice base, and the mini chocolate chips add a fun crunch. You can choose to use different types of cotton candy for a unique flavor, too! Make sure your cream cheese is soft. This helps it mix easily. Keep your chocolate chips nearby for a tasty surprise. Having all your ingredients ready makes cooking fun and easy! Start with a mixing bowl. Add 8 ounces of softened cream cheese. Next, sprinkle in 1/2 cup of powdered sugar and 1 teaspoon of vanilla extract. Use an electric mixer to beat these ingredients until they are smooth and creamy. This step is key for a rich texture. Now, gently fold in 1 cup of finely chopped cotton candy. Make sure the cotton candy is evenly spread throughout the mixture. This gives the cheesecake its sweet and fun flavor. In a separate bowl, combine 1 cup of graham cracker crumbs with 1/4 cup of melted unsalted butter. Add a pinch of salt to enhance the flavor. Mix this well until it becomes crumbly and sticks together. This mixture will act as the sturdy base for our cheesecake bombs. Take about one tablespoon of the graham cracker mixture. Press it firmly into the bottom of a cupcake liner or silicone mold. This will form the base. Next, scoop a heaping tablespoon of the cotton candy cheesecake mixture on top of the graham cracker base. For a tasty twist, sprinkle a few mini chocolate chips on top. Now, layer another tablespoon of the graham cracker mixture on top. This seals the cheesecake filling inside. Repeat this process until all your ingredients are used. Once filled, place the molds in the freezer. Let them freeze for at least 1 hour to set. This step is crucial for the bombs to hold their shape. After they are firm, carefully remove the cheesecake bombs from the molds. Before serving, garnish each bomb with a tuft of cotton candy on the top. This adds a fun touch. Serve chilled and enjoy the delightful surprise inside! To get your cream cheese soft, take it out of the fridge first. Let it sit for about 30 minutes. This helps it mix well. You want it creamy, not lumpy. When folding in cotton candy, be gentle. Use a spatula and scoop from the bottom. This keeps the air in the mix. Don’t over-mix. You want the cotton candy to stay fluffy. For serving, use clear cups or fun molds. It shows off the layers. You can also place them on a colorful plate. This makes the dessert pop! Top each cheesecake bomb with a tuft of cotton candy. It adds a whimsical touch. You can even add sprinkles or edible glitter for fun. This makes it extra special for parties. {{image_2}} You can easily change the flavor of your cheesecake bombs. Try using different extracts, like almond or coconut. These flavors add a unique twist to the sweet treat. You can also use flavored cotton candy. Look for options like blue raspberry or strawberry for fun new tastes. When it comes to chocolate, you have choices too. Dark chocolate chips bring a rich flavor. White chocolate chips can add a sweet touch. You can even mix in some crushed candy bars for extra crunch. The key is to experiment and find what you love! If you want to make your cheesecake bombs a bit healthier, there are good substitutes. Instead of sugar, try using honey or maple syrup. These natural sweeteners can cut down on refined sugar. For butter, you can use coconut oil or applesauce. These options keep the dessert moist without the extra fat. If you need gluten-free alternatives, use gluten-free graham crackers. They work just as well for the base. You can also use almond flour as a substitute for graham crumbs. This keeps the flavor and texture similar while making it gluten-free. Enjoy making these fun swaps! Store your Cotton Candy Cheesecake Bombs in the fridge. Use an airtight container. This keeps them fresh and tasty. If you want to save them longer, freeze them. Wrap each bomb in plastic wrap. Then, place them in a freezer-safe bag. This prevents freezer burn. When you want to enjoy them, just thaw them in the fridge overnight. These cheesecake bombs last for about five days in the fridge. If you freeze them, they can last up to three months. Check for signs of spoilage before eating. Look for off smells or changes in texture. If they feel sticky or look discolored, it’s best to toss them. Always trust your senses when enjoying a sweet treat! Yes, you can make these cheesecake bombs ahead of time. They store well for up to a week in the fridge. Just keep them in an airtight container. If you need to prepare them further in advance, freeze them instead. They can last for up to three months in the freezer. Just remember to thaw them in the fridge before serving. To keep the cotton candy from melting, add it just before serving. Store the cheesecake bombs in the fridge without the cotton candy on top. If you need to store them with cotton candy, use a sealed container. This helps protect the cotton candy from moisture, which causes it to melt. Yes, you can use dairy-free cream cheese. Many brands offer great alternatives that taste good. Check the labels to find one that fits your diet. You can still follow the same recipe steps. The other ingredients remain the same, ensuring you enjoy the same sweet flavor. Absolutely! You can try different flavors of cotton candy for a fun twist. Flavors like strawberry, blue raspberry, or even grape add unique tastes. Just remember, the flavor will change the final taste of the cheesecake bombs. You can add food coloring to the cheesecake mixture. Use gel food coloring for a vibrant look. Start with a small amount and mix until you reach your desired color. This will make your cheesecake bombs even more appealing and fun to serve. While it's best to use powdered sugar for a smooth texture, you can use regular sugar. Simply blend it until fine before mixing it into the cream cheese. This helps avoid graininess in your cheesecake. You can easily make mini cheesecake bombs. Use a mini muffin tin instead of a regular one. Just adjust the filling amount to fit the smaller size. Keep an eye on the freezing time, as they will set faster than the larger ones. Yes! You can fold in small pieces of fruit like strawberries or blueberries. Make sure to chop them finely. This adds flavor and a nice texture to your cheesecake bombs. Just avoid adding too much, as it may make the mixture too wet. In this blog post, we explored making Cotton Candy Cheesecake Bombs. You learned about the ingredients needed, like cream cheese and cotton candy, and followed easy steps for preparation, assembly, and freezing. I shared tips for achieving the perfect texture and creative serving ideas. You also discovered variations and storage methods to keep your treats fresh. Now, it’s time to get creative in the kitchen. Enjoy crafting these fun desserts that bring joy to any occasion!

Cotton Candy Cheesecake Bombs Irresistible Dessert Delight

Get ready to indulge in a sweet treat like no other! Cotton Candy Cheesecake Bombs are a fun and unique

- 1 lb ground beef or turkey - 1 taco seasoning packet - 1 cup black beans, rinsed and drained - 1 cup cooked rice (preferably cilantro-lime) - 1 cup sharp cheddar cheese, shredded - 1/2 cup sour cream - 1 cup lettuce, shredded - 1 large tomato, diced - 4 large flour tortillas - 4 smaller crispy tortillas (like tostadas) - 1 tablespoon olive oil - Salt and pepper to taste Gathering these ingredients is the first step to making your Crunchwrap Supreme. Start with either ground beef or turkey. I love using turkey for a lighter option. The taco seasoning gives it that classic flavor. Rinse and drain your black beans. This adds protein and fiber to your meal. Next, cilantro-lime rice is a must. You can make it or buy it pre-made. The flavor brightens up the wrap. For the cheese, sharp cheddar gives a great taste. Don't forget the sour cream! It adds creaminess and balances the crunch. Lettuce and tomatoes add freshness. They give a nice crunch too. You need large flour tortillas to wrap all the fillings. The smaller tostadas add extra crunch inside. Finally, olive oil, salt, and pepper bring everything together. This way, you can cook your Crunchwrap until it's golden and crispy. Now you’re ready to dive into the cooking process! Start by heating a skillet over medium heat. Add 1 pound of ground beef or turkey. Cook until it turns brown and is no longer pink. This takes about 6 to 8 minutes. Drain any fat from the meat. Now, add 1 taco seasoning packet and stir it in well. Next, mix in 1 cup of rinsed and drained black beans. This adds great flavor and texture. Next, take 4 large flour tortillas. Warm them up in a pan or microwave. This makes them easier to fold. You want them soft but not too hot to touch. This step helps the crunchwrap hold its shape better. Now comes the fun part! Lay a tortilla flat on your work surface. Start with a generous spoonful of the meat and bean mixture in the center. Then, add 1 cup of cooked cilantro-lime rice on top. Sprinkle 1 cup of shredded sharp cheddar cheese next. Place one small crispy tortilla on top of the cheese. Add a dollop of sour cream, then a layer of shredded lettuce and diced tomatoes. To seal it, fold the edges of the large tortilla over the filling. Create pleats and bring them together in the center. For cooking, heat 1 tablespoon of olive oil in the skillet over medium heat. Carefully place each crunchwrap seam-side down in the pan. Cook for about 3 to 4 minutes per side. You want them toasted and golden brown. Repeat this process until all crunchwraps are ready. Cut each crunchwrap in half to show off those colorful layers inside. Enjoy your homemade Crunchwrap Supreme with extra sour cream and salsa on the side! To avoid soggy tortillas, warm the large flour tortillas first. This makes them soft and easy to fold. If you skip this step, the filling can leak and make your tortilla wet. After you fill the crunchwrap, always place the crispy tortilla inside. It creates a barrier, keeping the crunchwrap crispy. For cooking techniques, use medium heat for the skillet. This helps the tortilla toast without burning. Cook each side for about 3-4 minutes. You want a nice golden brown color. If you prefer extra crunch, cook a little longer but watch closely. The best sides to serve with your Crunchwrap Supreme are rice and beans. You can also add tortilla chips for a great crunch. A simple salad can balance the meal too. For dipping sauces, extra sour cream is a must. Salsa or guacamole are great choices as well. If you enjoy a kick, add some hot sauce. It enhances the flavors and makes each bite exciting. When cooking for a crowd, adjust the ingredient quantities easily. If you want to make eight crunchwraps, double the recipe. Use 2 pounds of meat and more beans and rice. For assembly line style, set everything up before you start. Place the tortillas, fillings, and toppings in order. This way, you can make each crunchwrap quickly. It keeps the process smooth and fun for everyone. {{image_2}} You can easily make a vegetarian Crunchwrap. Instead of meat, use more beans. You can try lentils or chickpeas too. They add good protein and flavor. Add more veggies like bell peppers, corn, or spinach. This gives your crunchwrap color and crunch. Want some heat? Add sliced jalapeños or a splash of hot sauce. You can mix in crushed red pepper flakes for extra spice. If you love heat, try chipotle powder or cayenne. These spices add depth and warmth. Cheese makes a crunchwrap creamy and rich. If you want a different taste, use pepper jack or queso fresco. Mix your cheeses for a fun flavor blend. For the best melt, shred your cheese fresh. This helps it melt smoothly and evenly. To store cooked crunchwraps, let them cool first. Place them in an airtight container. This helps keep them fresh. You can also wrap them tightly in foil or plastic wrap. Use parchment paper between layers if stacking. This prevents sticking. To keep your crunchwraps tasty, eat them within three days. Check for any signs of spoilage before eating. If they smell off or look strange, throw them out. You can freeze crunchwraps before cooking them. Wrap each one in plastic wrap, then foil. This protects them from freezer burn. You can also place them in a freezer-safe bag. To cook, thaw them in the fridge overnight. Heat on a skillet over medium heat. Cook for about 4-5 minutes on each side. This helps them stay crispy and warm. In the fridge, cooked crunchwraps last about three days. If frozen, they can last up to three months. Always check for spoilage signs like a sour smell or odd colors. If you see or smell anything strange, it’s best to discard them. Yes, you can make Crunchwraps ahead of time. Prepare all the filling first. Cook the meat and mix in the beans, rice, cheese, and veggies. Store this mix in the fridge. When you're ready to eat, warm the tortillas. Layer and fold them, then cook. This saves time and keeps everything tasty. You can bake Crunchwraps instead of frying them. Preheat your oven to 400°F (200°C). Place the folded Crunchwraps seam-side down on a baking sheet. Bake for about 15-20 minutes until golden brown. Flip them halfway through for even cooking. This method is great if you want to make several at once. If you don’t have taco seasoning, you can make your own. Use these spices for a simple blend: - 1 teaspoon chili powder - 1/2 teaspoon cumin - 1/2 teaspoon garlic powder - 1/2 teaspoon onion powder - 1/2 teaspoon paprika - Salt and pepper to taste Mix these spices to get a tasty flavor for your meat. To make Crunchwraps gluten-free, swap the flour tortillas for corn tortillas. Check the labels on all other ingredients, like beans and sauces. Use gluten-free options for any seasoning or sauces. This way, you keep the crunch and flavor while being gluten-free. This blog post covered how to make tasty Crunchwraps. We discussed key ingredients like ground beef, taco seasoning, and black beans. We went through step-by-step instructions for cooking and assembling. You also learned tips to keep tortillas crispy and serving ideas. In my view, the Crunchwrap is fun to make and yummy to eat. Feel free to try variations or cut down on ingredients. Enjoy this tasty meal with friends and family!

Copycat Crunchwrap Supreme Flavorful and Easy Recipe

Are you craving the delicious taste of Taco Bell’s Crunchwrap Supreme but don’t want to leave home? You’re in luck!

- 4 cups cranberry juice (unsweetened) - 2 cups sparkling water or soda - 1 cup pineapple juice - 1/2 cup freshly squeezed lime juice - 1/4 cup honey or agave syrup (to taste) - 1-2 cups fresh mixed berries (strawberries, raspberries, blueberries) - 1 lime, thinly sliced - Fresh mint leaves for garnish To make your Mocktail Pink Punch, gather these simple ingredients. You start with cranberry juice, which gives a nice red color and a sweet-tart taste. Next, add sparkling water or soda for fizz. Pineapple juice adds a tropical note. Fresh lime juice brightens the mix, adding a tangy kick. You can sweeten your punch with honey or agave syrup. This lets you control the sweetness. Fresh mixed berries add flavor and a pop of color. Use any berries you like: strawberries, raspberries, or blueberries all work well. Don't forget the lime slices! They look pretty and add more flavor. Finally, fresh mint leaves are perfect for a nice garnish. This gives your punch a fresh scent and a touch of elegance. These ingredients make the punch refreshing and fun. You can enjoy it at parties, picnics, or just on a hot day. The bright colors and flavors will surely impress your guests. Combining the juices First, grab a large pitcher. Pour in 4 cups of cranberry juice, 1 cup of pineapple juice, and 1/2 cup of freshly squeezed lime juice. Stir well to mix all the flavors. This mix gives a sweet and tangy taste. Dissolving the sweetener Next, add 1/4 cup of honey or agave syrup to the juice mix. Stir until the sweetener fully dissolves. Taste the mix, and if you want it sweeter, add a bit more. Adding sparkling water Slowly pour in 2 cups of sparkling water or soda. Gently stir to combine without losing the bubbles. This step adds a fun fizz to your punch. Incorporating fresh fruits Now, add 1-2 cups of fresh mixed berries. You can use strawberries, raspberries, or blueberries. Also, drop in a thinly sliced lime for more flavor and color. Chilling the punch Finally, chill your punch in the refrigerator for at least 1 hour. This allows the flavors to blend well. When you’re ready to serve, fill glasses with ice, pour the punch over the ice, and enjoy! Adjusting sweetness You can change how sweet your mocktail is. Start with a little honey or agave syrup. Mix it in and taste. If you want it sweeter, add more. Choosing different fruits Feel free to swap out the fruits. Try mango or kiwi for a twist. You can also go for a mix of your favorite berries. Each fruit adds its own fun flavor. Infusing flavors with herbs Herbs can bring your punch to life. Mint is a great choice. Just add a few leaves to the mix. You can also try basil for a unique taste. Ideal glassware Serve your pink punch in tall glasses. Clear glasses show off the colors well. You can also use fun, colorful cups for kids. Garnishing options Garnish your drinks to make them pretty. Try lime slices on the rim. Add a few berries on top or a sprig of mint. These little touches make a big difference. Pairing with appetizers This punch goes great with snacks. Serve it with chips and salsa or fresh veggies. Cheese platters also work well. The flavors of the punch match nicely with light bites. {{image_2}} You can easily change the taste of Mocktail Pink Punch. One fun idea is to add coconut water. This gives it a tropical twist. The coconut water adds a sweet and creamy taste. It also makes the drink more hydrating. Another fun option is to mix different berries. You can use strawberries, raspberries, or blueberries. Each berry adds its own flavor. You can also try blackberries or cherries. This berry blend makes the mocktail colorful and tasty. Mocktail Pink Punch is great for any season. In summer, you can serve it cold and refreshing. Add slices of fresh watermelon or cucumber for a cool twist. This will make it even more refreshing on hot days. In winter, you can spice it up for the holidays. Try adding some cinnamon or ginger. You could also use pomegranate juice instead of cranberry juice. This adds a festive look and taste. Serve it warm for a cozy holiday feel. To store leftover mocktail pink punch, pour it into a clean pitcher. Seal it with a lid or plastic wrap. Keep it in the fridge. This way, it stays fresh for up to two days. If you see any change in color or smell, it’s best to discard it. Always trust your senses. If it tastes off, throw it out. You can make mocktail pink punch a day ahead. Just follow the recipe until you add the sparkling water. Mix all the juices and sweetener. Chill it overnight. When it’s time to serve, add the sparkling water. This keeps it fizzy and fun. To maintain the bubbles, add the soda slowly. Stir gently to keep the fizz alive. Enjoy your refreshing drink! Yes, you can make this mocktail ahead of time. Mix the juices and sweetener first. Chill this mix in the fridge. Add sparkling water right before serving. This keeps the fizz fresh and bubbly. You can use any sparkling water you like. Flavored sparkling water adds a fun twist. Lemon or lime flavors work well. Club soda is also a great choice. It gives a clean taste without extra sweetness. To make it kid-friendly, skip the lime juice. Instead, add more pineapple juice for sweetness. You can also use a fruit-flavored soda as a substitute. This makes it sweeter and more appealing to kids. Absolutely! You can swap cranberry juice for grape juice or apple juice. Feel free to use any berries you have on hand. For sweetener, maple syrup can be a nice option. Just adjust to your taste. This blog post covered how to make a refreshing mocktail with easy steps. You learned about ingredients like juices, fresh fruits, and garnishes. I shared tips for customizing your drink and serving it well. With variations for different seasons, you can enjoy this punch year-round. Remember to store leftovers properly and have fun experimenting! Enjoy your tasty drinks and impress your friends with your mixology skills.

Mocktail Pink Punch Refreshing and Easy Recipe

Are you ready to impress your guests with a delightful drink? This Mocktail Pink Punch recipe is both refreshing and

- 2 slices of sourdough bread - 2 tablespoons unsalted butter - 1 ripe peach, thinly sliced - 1/2 cup white cheddar cheese, shredded - 1 tablespoon honey - Fresh basil leaves, for garnish (optional) - Sea salt, to taste Gathering the right ingredients is key to this tasty treat. I love using sourdough bread for its crisp crust and soft inside. Butter adds richness and helps the bread toast nicely. You want ripe peaches for sweetness and a juicy bite. White cheddar cheese brings a sharp flavor that pairs well with the fruit. Honey adds a touch of sweetness. If you want, fresh basil leaves can add a unique twist. A sprinkle of sea salt at the end enhances all the flavors in this dish. Each ingredient plays its part in making this grilled cheese special. Enjoy the blend of sweet, savory, and creamy in every bite! First, we need to butter our bread well. Take two slices of sourdough bread. Use 1 tablespoon of softened unsalted butter for each slice. Spread the butter on one side of each slice. Make sure to cover the whole surface. This helps create a nice, crispy crust. For even butter application, use a butter knife or a spatula. Start from the center and move outwards. This way, you avoid clumps and get a smooth coat. If you have any extra butter, save it for later. Now, let’s build our sandwich! Flip the bread over so the buttered sides are facing out. Start with half of the shredded white cheddar cheese on one slice. This cheese gives our sandwich a rich flavor. Next, take one ripe peach and slice it thinly. Arrange the peach slices evenly on top of the cheese. This will help the peach flavor mix well with the cheese. Drizzle one tablespoon of honey over the peaches. Make sure the honey spreads out for even sweetness. Finally, add the rest of the cheese on top of the peaches. This creates a cheesy barrier that holds everything together. It's time to cook! Preheat a skillet over medium heat. This is key for a perfect grilled cheese. Once the skillet is hot, place the sandwich inside. Cook for about 3 to 4 minutes on one side. Check if the bread is golden brown and the cheese is melting. Flip the sandwich carefully and cook the other side. Repeat for another 3 to 4 minutes. The goal is a crispy outside and gooey inside. When done, take the sandwich out and let it sit for one minute before cutting. Enjoy your delicious creation! To make the best grilled cheese, choose the right cheese. White cheddar is great, but you can also try Gouda or fontina. These cheeses melt well and have a rich flavor. To get that gooey texture, use low heat. High heat can burn the bread before the cheese melts. Use a lid on your skillet. This helps trap heat and steam, making the cheese melt faster. You can spice up your grilled cheese with herbs. Try adding fresh basil or thyme. These herbs pair well with the sweetness of the peach. For sides, consider a simple salad or some sweet potato fries. They add crunch and balance to the meal. A chilled glass of iced tea also makes a nice drink. It cools your palate and complements the flavors. {{image_2}} You can switch out sourdough for other breads. Whole grain or ciabatta adds a nice twist. These breads give different tastes and textures. If you need gluten-free, look for gluten-free bread. Many brands make good options that won’t lose flavor. You can swap peaches for other fruits based on the season. In summer, try ripe strawberries. In fall, use apples for a warm, sweet touch. Each fruit brings its own taste, enhancing the cheese. Consider pears in winter for a juicy option that pairs well. Want to make it a meal? Add proteins like turkey or crispy bacon. They add heartiness and flavor. You can also experiment with different honey varieties. Lavender or orange blossom honey adds unique notes to your grilled cheese. Try them and find your favorite mix! To keep your grilled cheese fresh, store it in the refrigerator. Wrap it tightly in foil or place it in an airtight container. This helps keep the bread soft and the cheese tasty. Use leftovers within two days for the best flavor. When reheating, use a skillet over low heat. This method warms the sandwich gently. Flip it often to avoid burning. You want the outside crispy and the cheese melted. Avoid the microwave, as it can make the bread soggy. Can you freeze grilled cheese? Yes, you can! Freezing is a great way to save extra sandwiches. However, they are best eaten fresh. Before freezing, assemble the sandwich but do not cook it. Wrap each sandwich in plastic wrap and then in foil. This double wrapping prevents freezer burn. Label with the date for easy tracking. When ready to eat, thaw the sandwich in the fridge overnight. Then, cook it in a skillet as you normally would. This keeps the texture and flavor just right. To make the cheese melt fast, you need heat and moisture. Use medium heat on your skillet. This heat helps the cheese melt evenly. Cover the sandwich with a lid for a few minutes. The lid traps steam, which adds moisture. This moisture makes the cheese gooey and delicious. Flipping the sandwich halfway through also helps. It ensures both sides get that perfect golden crust and melt. Yes, you can use other types of cheese. Some popular substitutes include gouda, mozzarella, or fontina. Gouda gives a rich, creamy taste. Mozzarella adds a nice stretch to your sandwich. Fontina melts beautifully and has a mild flavor. You can also mix different cheeses for a unique taste. Try combining cheddar with your favorite cheese. This way, you can create your own special blend. You can serve many tasty sides with this sandwich. A simple side salad adds freshness. Try a mixed greens salad with a light vinaigrette. Tomato soup is another classic pairing. Its warmth complements the grilled cheese well. For drinks, a chilled lemonade or iced tea works great. Both drinks balance the sweet and savory notes of the sandwich. This blog post covered how to make a Honey Peach White Cheddar Grilled Cheese. We started with the key ingredients like ripe peaches and white cheddar. Then, I showed you the steps for buttering, layering, and cooking your sandwich just right. We shared tips for melting cheese and suggested tasty variations to try. In closing, feel free to experiment with flavors and textures. Each bite can be even better with your favorite toppings. Enjoy your creations and share them with friends!

Honey Peach White Cheddar Grilled Cheese Delight

Are you ready to elevate your grilled cheese game? The Honey Peach White Cheddar Grilled Cheese Delight combines sweet, juicy

Older posts
Newer posts
← Previous Page1 Page2 Page3 Page4 … Page84 Next →

dsad

© 2026 easycookingbite • Built with GeneratePress

Our Policies

  • Copyright Policy
  • Cookie Policy
  • GDPR Policy
  • Privacy Policy
  • Disclaimer
  • Terms Of Use

More Information

  • Home
  • About
  • Contact
  • Appetizers
  • Dessert
  • Dinner
  • Drinks
©2026, easycookingbite About Back To Top