Skip to content
DisclaimerTerms Of UseGDPR PolicyCookie Policy

easycookingbite

  • Home
  • Drinks
  • Appetizers
  • Dinner
  • Dessert
  • About
  • Contact
  • Privacy Policy
DisclaimerTerms Of UseGDPR PolicyCookie Policy

NO-ING-IMG

- 1 ¾ cups all-purpose flour - ½ cup unsweetened cocoa powder - 1 cup granulated sugar - 2 large eggs - ½ cup vegetable oil - 1 cup buttermilk (or milk with vinegar) - 1 teaspoon vanilla extract - Baking powder, baking soda, salt - 1 cup semi-sweet chocolate chips - ½ cup dark chocolate chunks To make Bakery-Style Double Chocolate Muffins, gather all the ingredients. This recipe needs rich, flavorful items. First, the flour and cocoa powder form the base. Sugar adds sweetness, and eggs provide structure. For the additional ingredients, vegetable oil adds moisture. Buttermilk makes the muffins fluffy and tender. Vanilla extract boosts flavor. Baking powder and baking soda help the muffins rise. Salt balances the sweetness. The chocolate components are crucial. Semi-sweet chocolate chips give a sweet bite. Dark chocolate chunks add depth and richness. Together, these ingredients create a treat that feels like a bakery delight. Understanding these components helps you appreciate the recipe. You can swap some ingredients if needed, but keep the main ones for the best results. Enjoy gathering your ingredients and get ready to bake! - Preheat your oven to 350°F (175°C). Line a muffin tin with paper liners or grease it. - In a large bowl, mix 1 ¾ cups of all-purpose flour, ½ cup of cocoa powder, 1 teaspoon of baking powder, ½ teaspoon of baking soda, and ½ teaspoon of salt. Whisk them well until combined. - In another bowl, whisk together 1 cup of granulated sugar, 2 large eggs, ½ cup of vegetable oil, and 1 teaspoon of vanilla extract. Mix until it is smooth and creamy. - Gradually add 1 cup of buttermilk to the wet mixture. Stir it gently until it is fully incorporated. - Slowly pour the wet mixture into the dry ingredients. Stir gently until just combined. A few lumps are okay; do not overmix. - Fold in 1 cup of semi-sweet chocolate chips and ½ cup of dark chocolate chunks. Make sure they are evenly mixed throughout the batter. - Divide the batter evenly among the muffin cups. Fill each cup about ¾ full to allow for rising. - Bake in your preheated oven for 18-20 minutes. Use a toothpick to check if they are done; it should come out clean. - Let the muffins cool in the tray for about 5 minutes. Then, transfer them to a wire rack to cool completely. To get soft and fluffy muffins, do not overmix the batter. When you mix too much, you can make the muffins dense. Stir just until you see no dry flour. A few lumps are okay! It is also key to use room temperature ingredients. Cold eggs or buttermilk can affect how well the muffins rise. For a nice look, dust the cooled muffins with powdered sugar. This adds a sweet touch. You can also serve them with a scoop of ice cream. The warm muffin and cold ice cream create a great taste blend! Use a non-stick muffin tin for easy removal. Paper liners help keep the muffins neat and clean. A large mixing bowl is great for combining dry and wet ingredients. A whisk and a spatula work well to mix everything together, ensuring a smooth batter. {{image_2}} If you want to make these muffins gluten-free, use a gluten-free flour blend. This swap works well and keeps the muffins soft. For a dairy-free option, substitute the buttermilk with almond milk or oat milk. Just add a bit of vinegar to mimic the tangy taste of buttermilk. You can add nuts or dried fruits to mix things up. Walnuts or pecans give a nice crunch. Dried cherries or cranberries add a sweet twist. Feel free to play with different chocolates too. Try using milk chocolate or white chocolate chips for a fun flavor change. Flavor extracts like almond or peppermint can also add a unique touch. For a mini muffin version, simply use a mini muffin tin. This will create small bites that are great for snacks or parties. If you want a big, bakery-style muffin, fill the tins more. Just keep an eye on the baking time, as larger muffins will need a few extra minutes in the oven. Enjoy these variations to make your double chocolate muffins even more special! To keep your muffins fresh, store them at room temperature. Place them in an airtight container. This method keeps them moist. If you want to keep them longer, store them in the fridge. Wrap each muffin in plastic wrap first. For freezing, let the muffins cool completely. Then, place them in a freezer bag. Remove excess air to avoid freezer burn. You can freeze them for up to three months. Bakery-style muffins last about 2-3 days at room temperature. In the fridge, they can last about a week. If frozen, they stay fresh for up to three months. To enjoy your muffins warm, reheat them in the oven. Set the oven to 350°F (175°C). Place the muffins on a baking sheet for about 5-10 minutes. You can also use the microwave. Heat each muffin for about 15-20 seconds. This warms them but may not keep them crisp. Enjoy your muffins fresh for the best taste! Bakery-style muffins are big, fluffy, and rich in flavor. They often have a nice dome shape and a soft, tender crumb. The secret to their height is filling the muffin cups more than usual. This lets them rise high while baking. You also use a mix of cocoa powder and chocolate chips, giving them a deep, chocolatey taste. The buttermilk adds moisture and makes them extra soft. Yes, you can use regular milk. If you don't have buttermilk, just add one tablespoon of vinegar to your milk. Let it sit for about five minutes. This makes a good substitute. The acidity helps the muffins rise, keeping them light and fluffy. Absolutely! If you love chocolate, feel free to add more. You can use up to two cups of chocolate chips if you want. Just keep in mind that too many can make the muffins very rich. Balance is key to a great flavor. Check your muffins by inserting a toothpick into the center. If it comes out clean or with just a few crumbs, they are done. If the toothpick has wet batter, they need more time. Usually, they take 18 to 20 minutes to bake at 350°F. Yes, you can freeze these muffins! Let them cool completely, then wrap each muffin tightly in plastic wrap. Place them in an airtight bag or container. They will stay fresh for about three months in the freezer. To reheat frozen muffins, remove them from the freezer and unwrap them. You can warm them in the microwave for about 20-30 seconds. If you prefer, you can also heat them in the oven at 350°F for about 10-15 minutes. Enjoy them warm for the best taste! These muffins pair well with a cup of coffee or tea. They also taste great with a scoop of vanilla ice cream. For a fun twist, try serving them with fresh fruit or whipped cream. It adds a nice touch! This blog post covered how to make delicious bakery-style chocolate muffins. You learned about the key ingredients needed, and I shared step-by-step instructions. We discussed tips for the best texture and how to present your muffins. I also covered fun variations and storage tips to keep them fresh. These muffins are versatile and easy to customize. Enjoy baking and sharing your tasty treats!

Bakery-Style Double Chocolate Muffins Irresistible Treat

Who can resist a warm, gooey chocolate muffin fresh from the oven? In this post, I’ll share my recipe for

- 2 boneless, skinless chicken breasts - 8 oz penne pasta - 2 tablespoons olive oil - 3 cloves garlic, minced - 1 can crushed tomatoes (14 oz) - 1 cup heavy cream - 1/2 cup grated Parmesan cheese - 2 cups fresh spinach - 1/4 cup fresh basil, chopped - Salt and pepper to taste - Red pepper flakes (optional, for heat) These ingredients come together to create a delicious meal. The chicken provides protein, while the penne pasta gives you a hearty base. Olive oil and garlic add rich flavors that make every bite special. The sauce is creamy and smooth. The crushed tomatoes make it tangy, and the heavy cream brings richness. Parmesan cheese adds a salty punch. This mix creates a perfect balance in taste. Fresh spinach and basil brighten the dish. They add color and a fresh taste. Seasoning with salt, pepper, and red pepper flakes gives you control over the heat. You can adjust it to suit your taste. With these simple ingredients, you can make a satisfying meal in no time. They are easy to find and fun to work with. You will love how they transform into a creamy tomato basil chicken pasta feast. 1. Fill a large pot with water and add salt. 2. Bring the water to a rolling boil. 3. Add the penne pasta to the boiling water. 4. Cook according to the package instructions until al dente. 5. Drain the pasta and set it aside. 1. Season both chicken breasts with salt and pepper. 2. Heat two tablespoons of olive oil in a large skillet over medium heat. 3. Place the chicken in the skillet and cook for 6-7 minutes on each side. 4. Ensure the chicken is golden brown and cooked through. 5. Remove the chicken from the skillet and let it rest before slicing. 1. In the same skillet, add three minced garlic cloves. 2. Sauté the garlic for about one minute until it smells nice. 3. Pour in one can of crushed tomatoes and bring it to a simmer. 4. Let it cook for about five minutes to blend the flavors. 5. Lower the heat and stir in one cup of heavy cream and half a cup of grated Parmesan cheese. 6. Allow the sauce to simmer for another five minutes until creamy and smooth. 1. Add two cups of fresh spinach and a quarter cup of chopped basil to the sauce. 2. Stir until the spinach wilts down. 3. Season the sauce with salt, pepper, and red pepper flakes if you want some heat. 4. Toss the cooked penne pasta and sliced chicken in the creamy sauce. 5. Cook everything together for an additional 2-3 minutes to heat through. To make a great sauce, you need to adjust the seasoning. Taste your sauce as you cook. Adding salt and pepper can enhance the flavor. If you want a little heat, sprinkle in some red pepper flakes. This adds a nice kick! Heat levels matter too. When you add cream, lower the heat. This prevents the cream from curdling. A gentle simmer helps blend all the flavors well. Let it bubble softly for a creamy texture. To keep your chicken juicy, watch the cooking time. Cook the chicken for about 6-7 minutes on each side. Use a meat thermometer if you can. Chicken should reach 165°F (75°C) to be safe. Let the chicken rest after cooking. This helps the juices stay inside. Then slice it just before adding it to the pasta. This way, your chicken stays moist and tasty. Don’t be afraid to try different pasta types! Penne is great, but you can use fusilli or rigatoni. Each shape holds the sauce differently. If you need gluten-free options, try rice pasta or chickpea pasta. They work well in this dish. Just follow package instructions for cooking times. Enjoy your meal without worry! {{image_2}} You can swap chicken for turkey or shrimp. Both proteins work well in this dish. For a lighter touch, use turkey. It’s lean and still very tasty. Shrimp cooks fast and adds a nice texture. If you want to replace heavy cream, try using Greek yogurt. It gives creaminess with less fat. Coconut milk is another option. It adds a unique flavor while keeping it rich. To boost flavor, add mushrooms or bell peppers. Sauté mushrooms until golden for an earthy taste. Bell peppers add sweetness and color to your dish. You can also experiment with different herbs. Try thyme or oregano for a new twist. Fresh parsley or chives can brighten up the sauce too. For a vegetarian option, skip the chicken and add more veggies. Use mushrooms, zucchini, or even chickpeas for protein. This keeps the dish hearty and filling. If you want a low-carb version, swap the pasta for zucchini noodles. They soak up the sauce nicely and reduce carbs. Cauliflower rice is another great choice for a light meal. To keep your creamy tomato basil chicken pasta fresh, follow these steps: - Refrigeration: Place leftovers in an airtight container. This helps prevent air exposure and keeps flavors intact. - Duration: You can safely eat the leftovers for up to 3 days. After that, freshness may decline. When reheating, you want to keep the pasta tasty and not soggy. Here’s how: - Microwave Method: Heat in short bursts. Stir after each burst to ensure even heating. - Stovetop Method: Add a splash of water or cream in a pan. Heat over low heat, stirring often. This keeps the sauce creamy. If you want to store pasta longer, freezing is a great option. Here’s how to do it: - Packing: Use a freezer-safe container. Make sure to leave space for expansion as it freezes. - Thawing: For best results, thaw overnight in the fridge. If you’re short on time, use the microwave on the defrost setting. Feel free to keep this creamy delight for those busy nights! Yes, you can use frozen chicken. Just remember to thaw it first. The best way is to place the chicken in the fridge overnight. If you're short on time, you can put it in a sealed bag and submerge it in cold water for about an hour. Cooking frozen chicken takes longer. Make sure it reaches 165°F (74°C) inside for safety. To make this dish dairy-free, swap the heavy cream with coconut cream or cashew cream. For cheese, you can use nutritional yeast for a cheesy flavor. It gives a nice taste without using dairy. Always check your labels for dairy-free options. These swaps keep the dish creamy and delicious. Yes, this recipe works well for meal prep. You can store it in airtight containers. Keep it in the fridge for up to 4 days. For reheating, use a microwave or skillet. Add a splash of water to keep it moist. You can also freeze it for up to 3 months. Just thaw it overnight in the fridge before reheating. This blog covered a flavorful dish made with chicken, penne pasta, and a creamy sauce. You learned how to cook pasta, prepare chicken, and make a delicious sauce that brings everything together. We included tips for perfecting your dish, swapping ingredients, and storing leftovers effectively. Explore these steps and variations to find your favorite version. Cooking can be fun and rewarding, so dive in and enjoy your tasty creations!

Creamy Tomato Basil Chicken Pasta Quick and Easy Meal

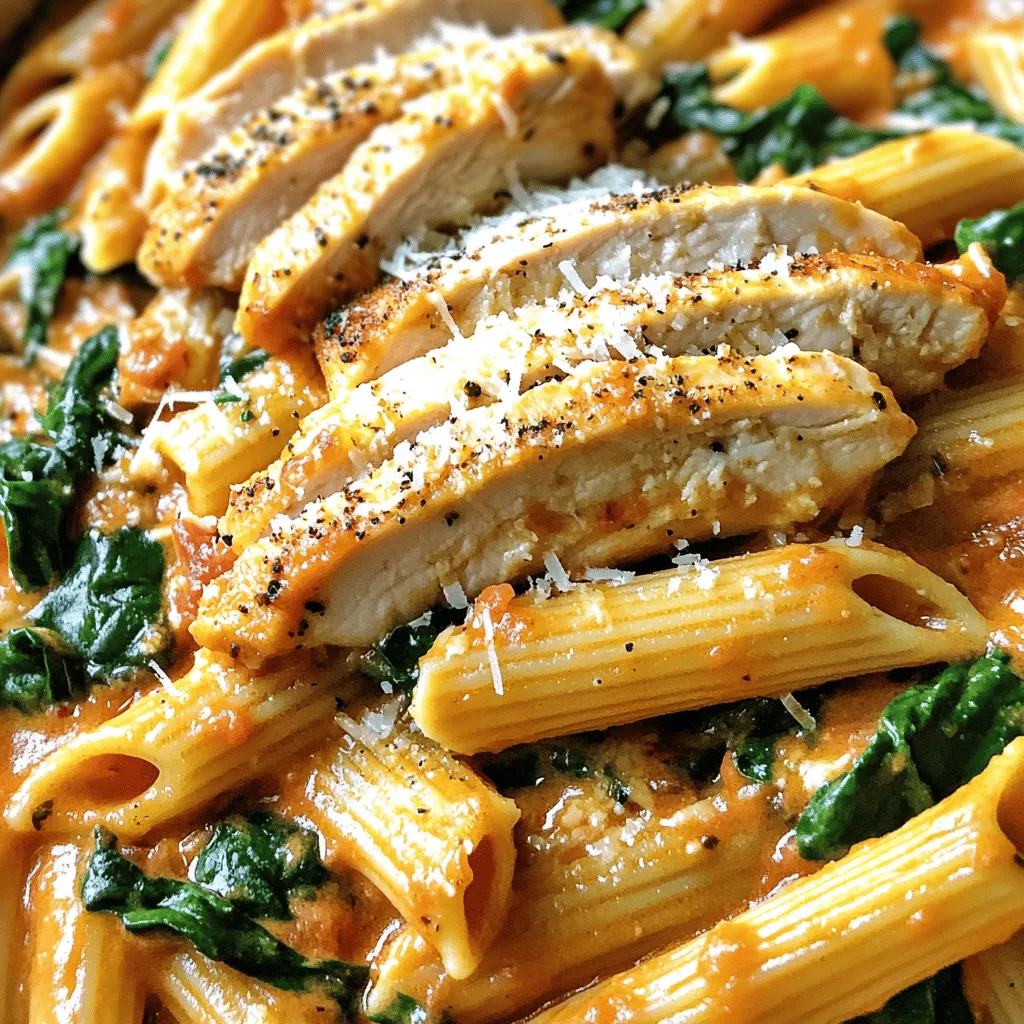
If you’re looking for a quick and easy meal that wows, this Creamy Tomato Basil Chicken Pasta is your solution.

To make these tasty treats, gather the following ingredients: - 1 cup canned pumpkin puree - 1/2 cup granulated sugar - 1/4 cup brown sugar, packed - 2 eggs - 1/3 cup milk - 1/4 cup vegetable oil - 2 teaspoons vanilla extract - 2 cups all-purpose flour - 2 teaspoons baking powder - 1 teaspoon pumpkin pie spice - 1/2 teaspoon ground cinnamon - 1/4 teaspoon salt - 1/4 cup granulated sugar (for coating) - 1 teaspoon ground cinnamon (for coating) Accurate measuring makes a big difference in baking. Here are some tips to help you: - Use dry measuring cups for flour and sugar. Fill them and level off with a knife. - For brown sugar, pack it tightly into the cup before leveling. - Use a liquid measuring cup for milk and oil. Fill it to the proper line. - Use a kitchen scale for precise measurements, especially for flour. Not every kitchen has all the ingredients. Here are some easy swaps: - You can use fresh pumpkin puree instead of canned. Just cook and mash it. - Swap vegetable oil for melted coconut oil or unsalted butter. - If you do not have eggs, use 1/4 cup of unsweetened applesauce for each egg. - Try almond milk or oat milk instead of regular milk for a dairy-free option. - For a gluten-free version, use a gluten-free flour blend in place of all-purpose flour. Start by preheating your oven to 350°F (175°C). This step is key for even baking. Next, grease a mini muffin pan or a donut hole pan with some oil or cooking spray. This helps the donut holes pop out easily. In a large mixing bowl, combine the canned pumpkin puree, granulated sugar, and brown sugar. Next, add two eggs, 1/3 cup of milk, 1/4 cup of vegetable oil, and two teaspoons of vanilla extract. Whisk everything together until it’s smooth and well mixed. The mixture should be rich and creamy. In another bowl, mix two cups of all-purpose flour with two teaspoons of baking powder, one teaspoon of pumpkin pie spice, half a teaspoon of ground cinnamon, and a quarter teaspoon of salt. Whisk these dry ingredients together. Slowly add them to your wet mixture, stirring gently. Be careful not to overmix. A few lumps are fine. Using a small cookie scoop or spoon, fill each cavity of your prepared pan about two-thirds full with the batter. This allows room for rising. Bake in the preheated oven for 10-12 minutes. To check if they’re done, insert a toothpick into the center. If it comes out clean, they’re ready. While your donut holes bake, prepare the cinnamon sugar. In a small bowl, mix together 1/4 cup of granulated sugar and one teaspoon of ground cinnamon. This mixture adds a sweet and spicy touch that you will love. Once the donut holes are baked, let them cool in the pan for about five minutes. Then, transfer them to a wire rack. While they are still warm, roll each donut hole in the cinnamon sugar mixture until they are fully coated. Serve them warm for the best taste, or let them cool completely before storing in an airtight container. Enjoy these delightful treats! To make fluffy donut holes, measure your flour carefully. Too much flour makes them dense. Use a spoon to scoop flour, then level it with a knife. Mix the wet and dry ingredients gently. Overmixing leads to tough donut holes. Bake them until a toothpick comes out clean. This will help keep them light and airy. One common mistake is not greasing the pan well. Donut holes may stick and break apart. Also, don’t skip the cooling step. If you coat them while hot, the sugar will melt away. Finally, make sure to use fresh baking powder. Old baking powder will not help them rise. Store leftover donut holes in an airtight container at room temperature. They stay fresh for about two days. For longer storage, put them in the fridge for up to a week. To reheat, place them in the microwave for 10 seconds. This warms them without making them soggy. Add a pinch of nutmeg or ginger for extra spice. You can also drizzle melted chocolate on top for a sweet touch. For a fun twist, serve with a side of maple syrup. This adds flavor and makes the dish more exciting. Use colorful sprinkles on top for a festive look. {{image_2}} You can change the flavor by swapping spices. Try nutmeg or allspice for a twist. You might also add a touch of almond or maple extract. This will give your donut holes a unique taste. Experimenting with spices can lead to fun surprises. If you need gluten-free donut holes, use a gluten-free flour blend. Make sure it has a good mix of starches and proteins. You can also add a bit of xanthan gum for better texture. These changes will help keep your donut holes soft and fluffy. Want to make your donut holes even better? Try adding chocolate chips or chopped nuts. A half cup of mini chocolate chips adds sweetness. If you love nuts, chopped pecans or walnuts add great crunch. Mix these into your batter before baking for extra flavor. To keep your pumpkin spice cinnamon sugar donut holes fresh, use an airtight container. Place a piece of parchment paper between layers to avoid sticking. This helps maintain their soft texture. Store in a cool, dry place like the kitchen counter or pantry. In an airtight container at room temperature, donut holes last about 2-3 days. If you keep them in the fridge, they can last up to 5 days. However, be aware that refrigeration might change their texture. For the best taste, enjoy them fresh! To freeze donut holes, wait until they cool completely. Place them in a single layer on a baking sheet. Once frozen, transfer them to a freezer bag or container. Label it with the date. They can last up to 3 months in the freezer. When you're ready to enjoy, thaw them in the fridge overnight or warm them in the oven. Enjoy the same delightful taste even after freezing! Yes, you can use fresh pumpkin. First, roast the pumpkin until soft. Then, scoop out the flesh and mash it. Make sure to drain any excess water. This will give the donuts a fresh taste. You can replace eggs with unsweetened applesauce. Use 1/4 cup of applesauce for each egg. This keeps the donuts moist and adds a hint of sweetness. Another option is to use a flax egg. Mix 1 tablespoon of ground flaxseed with 3 tablespoons of water. Let it sit for 5 minutes until it thickens. Check the donut holes after 10 minutes. Insert a toothpick into the center. If it comes out clean, they are done. If it's wet, bake for another 1-2 minutes. Watch closely, as overbaking can make them dry. You can find Pumpkin Spice Cinnamon Sugar Donut Holes at local bakeries, coffee shops, or supermarkets. Some places may sell them seasonally, especially in fall. You can also make them at home using this recipe for a fresh treat. In this guide, we explored how to make delicious Pumpkin Spice Cinnamon Sugar Donut Holes. We covered the key ingredients you need and tips for measuring. I walked you through step-by-step instructions for baking these treats and shared tips for fluffy results. We also looked at fun variations and how to store your leftovers. Now you can enjoy fresh, warm donut holes with your favorite flavors. Happy baking!

Pumpkin Spice Cinnamon Sugar Donut Holes Delight

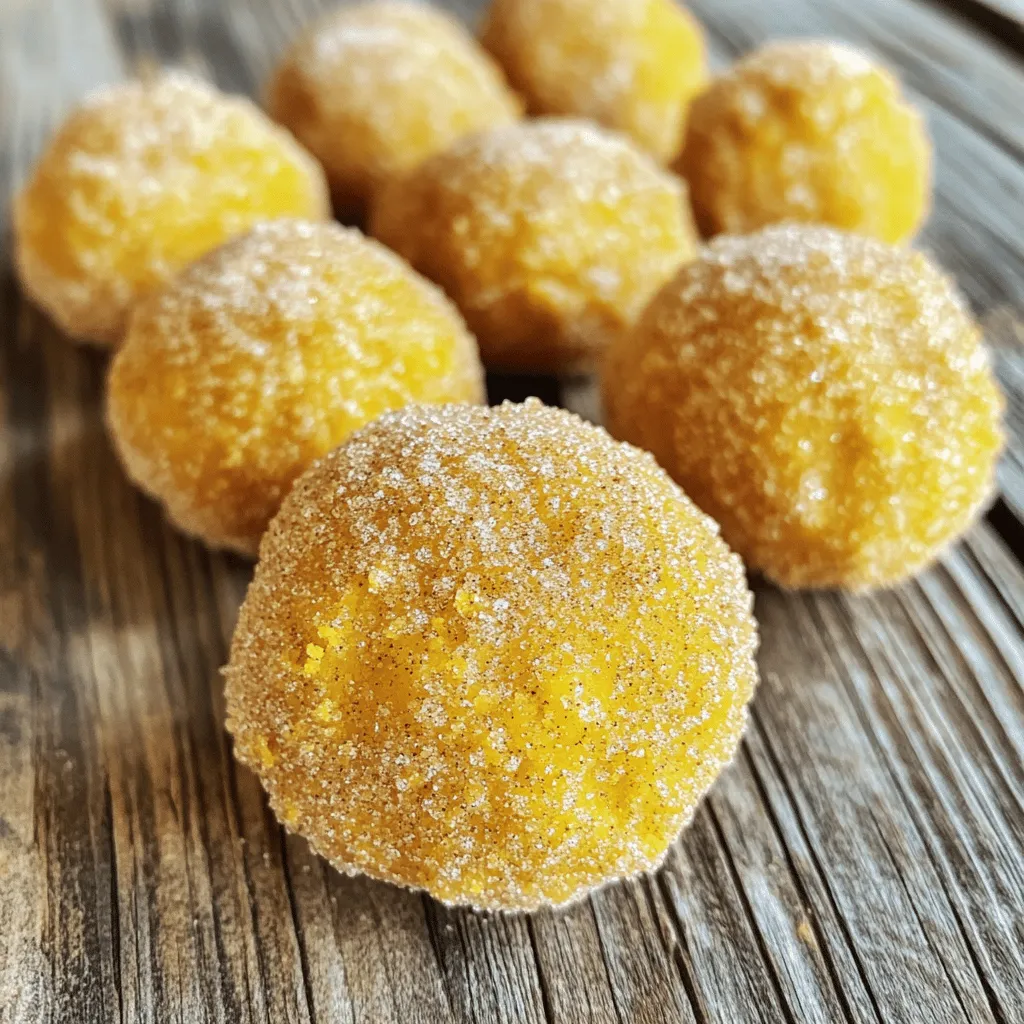
Get ready to indulge in the cozy flavors of fall with my Pumpkin Spice Cinnamon Sugar Donut Holes! These bite-sized

To make No-Bake Cookies and Cream Cheesecake Bites, you need the right ingredients. Here’s what you will need: - 1 cup Oreo cookies, crushed - 2 tablespoons unsalted butter, melted - 8 oz cream cheese, softened - 1/2 cup powdered sugar - 1/2 teaspoon vanilla extract - 1 cup whipped cream (or whipped topping) - 1/4 cup mini chocolate chips (optional) - Extra crushed Oreos for topping These ingredients come together to create a creamy, cookie-filled treat. The Oreo cookies give a rich flavor, while the cream cheese adds creaminess. The whipped cream makes it light and fluffy. I love using fresh ingredients. Make sure your cream cheese is at room temperature. This helps it mix smoothly. If you want a little crunch, toss in the mini chocolate chips. They add fun texture to each bite. Remember, you can adjust the toppings. If you want to go wild, add some extra crushed Oreos on top. They make for a great presentation and taste. Enjoy the process of gathering your ingredients; it sets the stage for your delicious creation! Start by mixing the crushed Oreo cookies with melted butter in a bowl. Make sure the crumbs are well coated. This step is key to a tasty crust. Next, take about a tablespoon of this mixture and pack it into mini muffin liners or silicone molds. Press down firmly to form a solid base. This will hold your cheesecake bites together. In a clean bowl, beat the softened cream cheese until it is smooth. This will be the creamy heart of your bites. Once smooth, add the powdered sugar and vanilla extract. Mix until everything is well combined. This creates a sweet and flavorful cheesecake mix. Now, gently fold the whipped cream into the cream cheese mixture. This makes the filling light and fluffy. If you'd like, you can also fold in mini chocolate chips at this point. They add a nice crunch! Carefully spoon the cheesecake mixture on top of the Oreo crusts. Fill each one to the top and smooth the surfaces with a spatula. For a fun touch, sprinkle extra crushed Oreos on each cheesecake bite. Place the filled molds in the refrigerator. Chill for at least 2-3 hours until they are firm. Once set, carefully remove the cheesecake bites from the molds. For a beautiful presentation, arrange them on a decorative platter. You might drizzle chocolate sauce over them and add fresh mint leaves for color. This will wow your guests! To get a smooth and creamy cheesecake, start by properly softening your cream cheese. Leave it at room temperature for about 30 minutes. This helps it blend well. After softening, beat it in a bowl until it is nice and smooth. When you add the whipped cream, fold it into the cream cheese mix. This keeps it light and fluffy. Do not mix it too hard; you want to keep all the air in. If you mix too much, the texture will be dense. Garnishing makes your cheesecake bites look amazing. Adding mint leaves gives a fresh look and taste. Place a mint leaf on top of each bite for color. You can also drizzle chocolate sauce on the bites. Melt some chocolate and use a spoon to swirl it over the cheesecake. This adds sweetness and style. The best way to serve these cheesecake bites is on a pretty platter. Arrange them neatly and drizzle with chocolate for a stunning view. Pair your cheesecake bites with cold milk or coffee. Both drinks enhance the sweet flavors and make a perfect match. Enjoy sharing these bites with friends or family! {{image_2}} You can switch up the base by using different cookies. Try Nutter Butter for a peanut butter twist or graham crackers for a classic taste. Each cookie brings a unique flavor to the bites. You can also add flavored extracts. For example, a hint of almond extract makes a nice change. Toppings can also enhance the flavor. Use crushed peppermint candies for a festive touch or drizzle with caramel sauce for extra sweetness. For gluten-free options, use gluten-free cookies. There are many brands available that taste great. For those who need dairy-free alternatives, opt for dairy-free cream cheese and whipped cream. Make sure to check the labels to find suitable products. These adjustments keep the bites delicious and safe for everyone to enjoy. You can make larger cheesecake bites for a more filling treat. Use regular muffin liners instead of mini ones. If you want to create mini cheesecakes, use small molds. Silicone molds can shape them into fun designs. No matter the size, these bites stay delightful and fun. To keep your no-bake cookies and cream cheesecake bites fresh, store them in the fridge. Use an airtight container to prevent them from drying out or absorbing other flavors. They will last for about 5 to 7 days. If you want to enjoy them later, consider freezing them. Freezing these cheesecake bites is easy. First, let them chill in the fridge until firm. Then, remove them from the molds and place them in a single layer on a baking sheet. Freeze until solid, then transfer them to a freezer-safe bag or container. When you're ready to eat, thaw them in the fridge for a few hours. Avoid thawing at room temperature to keep the texture smooth. Yes, you can make these cheesecake bites a day or two in advance. Just chill them well. This lets the flavors blend nicely. Store them in the fridge until you are ready to serve. You can use half-and-half or whole milk as a substitute. For a lighter option, try Greek yogurt. Each will change the texture a bit but will still taste great. Absolutely! You can use any cookies you like. Try chocolate chip cookies, graham crackers, or even peanut butter cookies. Each choice gives a new flavor twist. To prevent sticking, use silicone molds or line plastic ones with parchment paper. Also, lightly grease the molds with cooking spray before adding the crust. This makes it easier to pop them out later. You can now create tasty cheesecake bites using simple ingredients like Oreos and cream cheese. This recipe guides you through each step, from mixing the cookie base to chilling the bites. I've shared tips for texture and decoration to help you impress your guests. Feel free to explore different flavors and adjust for dietary needs. Remember to store any leftovers correctly or freeze them for later. Enjoy your delicious creations and share them with friends!

No-Bake Cookies and Cream Cheesecake Bites Delight

Craving a delicious treat that’s super easy to make? Look no further! These No-Bake Cookies and Cream Cheesecake Bites combine

- 1 cup pumpkin puree - 1/2 cup brown sugar - 1/2 cup granulated sugar - 1/2 cup unsalted butter, softened - 1 large egg - 1 tsp vanilla extract - 1 1/2 cups old-fashioned oats - 1 cup all-purpose flour - 1/2 tsp baking soda - 1/2 tsp baking powder - 1/2 tsp cinnamon - 1/4 tsp nutmeg - 1/4 tsp salt - 1 cup semi-sweet chocolate chips Pumpkin puree is packed with vitamins. It has vitamin A, which helps your eyes. It also has fiber, which keeps your tummy happy. Brown sugar and granulated sugar give sweetness but in moderation. Butter adds flavor and a nice texture. Oats are good for your heart and help keep you full. They also add a nice chew to the cookies. Eggs help bind everything together and add protein. You can swap pumpkin puree for applesauce if you want a different taste. For a dairy-free option, use coconut oil instead of butter. If you need gluten-free cookies, use almond flour instead of all-purpose flour. You can also try dark chocolate chips for a richer flavor. First, set your oven to 350°F (175°C). This warms it up nicely for baking. Next, take two baking sheets and line them with parchment paper. This helps the cookies not stick and makes cleanup easier. In a large bowl, add 1/2 cup of softened unsalted butter. Then, add 1/2 cup of brown sugar and 1/2 cup of granulated sugar. Use a mixer or a spoon to cream these together until light and fluffy. This takes about 2-3 minutes. Next, mix in 1 cup of pumpkin puree, 1 large egg, and 1 teaspoon of vanilla extract. Keep mixing until everything is well combined. Now, grab another bowl. In this bowl, mix together 1 1/2 cups of old-fashioned oats, 1 cup of all-purpose flour, 1/2 teaspoon of baking soda, 1/2 teaspoon of baking powder, 1/2 teaspoon of cinnamon, 1/4 teaspoon of nutmeg, and 1/4 teaspoon of salt. Stir this mixture well. Gradually add it to the wet ingredients. Stir until just combined; do not overmix. Finally, fold in 1 cup of semi-sweet chocolate chips. This adds a sweet touch to each cookie. Use a cookie scoop or tablespoon to drop rounded balls of dough on the baking sheets, leaving about 2 inches between each one. Bake for 12-15 minutes until the edges are lightly golden. The centers will look soft but will firm up as they cool. Let them sit on the sheets for about 5 minutes before moving to a wire rack. Enjoy your delightful pumpkin oatmeal chocolate chip cookies! To get the best texture, use old-fashioned oats. They add a nice chewiness. Make sure your butter is soft, but not melted. Cream the butter and sugars well to trap air. This helps the cookies rise. Avoid overmixing when you add the dry ingredients. It can make the cookies tough. When you scoop the dough, aim for about two tablespoons per cookie. This size gives you a perfect soft center. One common mistake is using too much flour. Always measure flour correctly. Scooping straight from the bag packs it down. Another mistake is baking at the wrong temperature. Always preheat the oven to 350°F (175°C). If you bake them too long, they will be hard. Check them at 12 minutes. The edges should be golden, and the centers soft. Don’t skip cooling on the baking sheet. It helps them set up nicely. For a festive touch, arrange your cookies on a pretty plate. A sprinkle of cinnamon on top looks great. You can serve the cookies with milk or a pumpkin spice latte. This adds a cozy feel to your treat. If you want to impress guests, stack the cookies and tie them with twine. It makes a lovely gift, too! {{image_2}} You can make these cookies gluten-free easily. Use gluten-free all-purpose flour instead of regular flour. Make sure it has xanthan gum in it. This will help bind the ingredients. Also, check your oats. They should be labeled gluten-free. These small changes let everyone enjoy these tasty treats. To make a vegan version, swap out the egg for a flax egg. Mix 1 tablespoon of flaxseed meal with 3 tablespoons of water. Let it sit for a few minutes to thicken. Replace the butter with coconut oil or a vegan butter spread. Choose dairy-free chocolate chips to keep it vegan. These swaps still keep the cookies soft and yummy. You can add fun flavors to the cookies. Try mixing in chopped nuts, like walnuts or pecans, for crunch. Dried fruit, such as cranberries or raisins, adds sweetness. For extra spice, add a pinch of ginger or allspice. These little twists can make the cookies even more special. Feel free to experiment and find your favorite combination! To keep your pumpkin oatmeal chocolate chip cookies fresh, store them in an airtight container. You can stack them neatly, but add parchment paper between layers. This way, they won’t stick together. Keep the container at room temperature. They will stay soft and tasty for several days. You can freeze these cookies for later. First, let them cool completely. Then, place them in a single layer on a baking sheet and freeze for about one hour. Once frozen, transfer them to a freezer bag. Seal it well to keep out air. They can last up to three months in the freezer. These cookies can last up to one week at room temperature. To enjoy them longer, freezing is best. If you notice any change in texture or smell, it’s time to toss them. Always check before you bite into a cookie! Yes, you can use canned pumpkin. It saves time and adds great flavor. Just make sure to choose pure pumpkin puree, not pumpkin pie filling. Canned pumpkin works well and gives the same taste as fresh pumpkin. You can tell the cookies are done when the edges turn light golden brown. The centers will look soft but will firm up as they cool. If you press lightly, they should spring back. Keep an eye on them around the 12-minute mark. Yes, you can replace chocolate chips with other mix-ins. You could use nuts, dried fruit, or even white chocolate. Just make sure to keep the amount the same, around one cup. This way, you still have a nice balance in flavor and texture. This blog post shared a simple recipe for delicious cookies. We explored key ingredients, their health benefits, and alternatives. Step-by-step instructions made baking easy. I offered tips to ensure you get the best texture and avoid mistakes. Variations help you customize for any diet. Lastly, storage tips will keep your cookies fresh. Baking these cookies can be fun and rewarding. Enjoy creating your tasty treats and sharing them with others!

Pumpkin Oatmeal Chocolate Chip Cookies Delightful Treat

If you love cookies and pumpkin, you’re in for a treat! My Pumpkin Oatmeal Chocolate Chip Cookies blend warm flavors

- 2 boneless, skinless chicken breasts - 1 can (15 oz) black beans, rinsed and drained - 1 can (15 oz) corn, drained - 1 can (10 oz) enchilada sauce - 1 can (14.5 oz) diced tomatoes with green chilies - 1 medium onion, diced - 2 cloves garlic, minced The main ingredients bring a mix of flavors and textures. Chicken breasts provide protein and richness. Beans and corn add heartiness and fiber. Enchilada sauce and diced tomatoes bring zest and color. - 1 teaspoon ground cumin - 1 teaspoon chili powder - 1 teaspoon smoked paprika - Salt and pepper to taste - 2 cups chicken broth The seasonings create warmth and depth. Cumin and chili powder add a kick. Smoked paprika gives a hint of smokiness. Chicken broth enhances the soup's body and flavor. - 1 cup shredded cheese (cheddar or Mexican blend) - 1 avocado, diced - Fresh cilantro, chopped - Lime wedges Garnishes add freshness and creaminess. Cheese melts into the soup, making it rich. Avocado brings creaminess, while cilantro adds a bright note. Lime wedges give a zesty finish. First, take two boneless, skinless chicken breasts. Season them well with salt and pepper. I like to rub it in to make sure the flavor sticks. Next, place the seasoned chicken at the bottom of your slow cooker. This layer is key to keep the chicken juicy. Now, grab a mixing bowl. Dice one medium onion and mince two cloves of garlic. Add these to the bowl. Then, open one can of black beans and one can of corn. Rinse and drain them, then toss them in too. Don’t forget to add one can of enchilada sauce and one can of diced tomatoes with green chilies. Next, sprinkle in one teaspoon each of ground cumin, chili powder, and smoked paprika. Mix everything well. This blend of veggies and spices adds a lot of flavor. Pour this mixture over the chicken in the slow cooker. Then, add two cups of chicken broth and stir gently. Cover your slow cooker and set it to low for 6-8 hours or high for 3-4 hours. This slow cooking lets all the flavors come together. When the chicken is fully cooked and tender, it’s ready for the next step. You can tell it’s done when it shreds easily. Once cooked, take the chicken out of the slow cooker. Use two forks to shred it into bite-sized pieces. Return the shredded chicken back into the pot. Stir it all together. Now, add one cup of shredded cheese, either cheddar or a Mexican blend. Mix until the cheese melts into the soup. Serve the soup in bowls. Top each bowl with diced avocado and chopped cilantro for a fresh touch. You can also add lime wedges on the side for an extra zing. Enjoy your delicious Slow Cooker Spicy Chicken Enchilada Soup! To make this soup just right, you can adjust the spice levels. Use mild enchilada sauce for a gentle kick. For more heat, choose the spicy version. You can also add fresh jalapeños or a dash of hot sauce. If you want to keep it mild, add a little honey or sugar to balance flavors. Toppings can elevate your soup. I love adding shredded cheese for creaminess. Diced avocado adds a fresh touch. Fresh cilantro brings a nice pop of color and flavor. You can even sprinkle some tortilla chips on top for crunch. Shredding chicken should be simple. After cooking, take the chicken out with tongs. Use two forks to pull it apart easily. It should shred with little effort. Return the shredded chicken to the soup and stir well. To ensure a thick soup, don’t skip the beans and corn. They add body and texture. If your soup is too thin, let it cook longer with the lid off. This helps reduce excess liquid. Stir occasionally to prevent sticking. Serving soup in colorful bowls makes it inviting. Choose bowls that contrast with the soup's color. A bright bowl enhances the dish's appeal. For garnishing, sprinkle extra cheese on top. Add diced avocado and chopped cilantro for a vibrant look. Lime wedges on the side give a fresh burst. You can also serve with tortilla chips for a satisfying crunch. {{image_2}} You can easily change up the protein in this soup. Turkey and beef work well too. Just remember to adjust the cooking time based on the protein you choose. For beans, you can use pinto or kidney beans if you prefer. You can also add veggies like bell peppers or zucchini for extra nutrition. If you have kids or prefer mild flavors, use a mild enchilada sauce. You can also skip the chili powder. To add extra heat, use a spicy enchilada sauce. Adding jalapeños or cayenne pepper boosts the heat. Just taste as you go to find the right level for you. For a creamy twist, add cream or coconut milk towards the end of cooking. This gives the soup a rich texture. You can also stir in Greek yogurt or sour cream just before serving. This adds creaminess and a tangy taste that brightens the flavors. After enjoying your soup, store it in a sealed container. Make sure it cools to room temperature first. Place it in the fridge. It stays fresh for about three to four days. If you want to keep it longer, consider freezing it. To freeze your soup, use freezer-safe containers or bags. Leave some space at the top for expansion. This soup can be frozen for up to three months. Be sure to label the containers with the date for easy tracking. For reheating, the stovetop is best. Pour the soup into a pot. Heat it over medium until warm. Stir often to avoid sticking. If you prefer the microwave, place soup in a bowl. Cover it loosely and heat in short bursts. Stir between each burst. This ensures even heating and helps prevent spills. Yes, you can use frozen chicken. Just add a bit more cooking time. If cooking on low, aim for 8-10 hours. If on high, cook for about 4-5 hours. The chicken will still come out tender and tasty. You can store this soup in the fridge for up to 4 days. Make sure to keep it in an airtight container. When you're ready to eat, just reheat it on the stove or in the microwave. Absolutely! To make this soup in an Instant Pot, set it to sauté first. Brown the onion and garlic, then add the other ingredients. Seal the pot and cook on high for about 15 minutes. This method saves time and gives a great flavor. This soup pairs well with many sides. Here are some ideas: - Crunchy tortilla chips - Cornbread for a sweet touch - A fresh green salad for balance - Rice to soak up the soup's flavors These sides make your meal complete and enjoyable! This blog post covered how to make Slow Cooker Spicy Chicken Enchilada Soup. We looked at the key ingredients, like chicken, beans, and spices, plus the garnishes that enhance flavor. I shared step-by-step instructions to help you prepare and cook the soup. You learned helpful tips for perfecting flavor, storage methods, and even variations to suit your taste. With these details, you can confidently create a delicious soup to enjoy. Happy cooking!

Slow Cooker Spicy Chicken Enchilada Soup Delight

Looking for a cozy, bold meal? Try my Slow Cooker Spicy Chicken Enchilada Soup Delight! This dish combines tender chicken,

- 1 cup Greek yogurt - 1 cup dark chocolate chips - 2 tablespoons honey or maple syrup - 1 teaspoon vanilla extract - A pinch of sea salt The main stars of our Greek yogurt chocolate mousse are simple yet rich. Greek yogurt gives it a creamy texture with a nice tang. I recommend using full-fat yogurt for the best taste. Dark chocolate chips add deep, rich flavor. Aim for chips that are at least 70% cacao for an intense chocolate experience. Sweeteners like honey or maple syrup bring just the right amount of sweetness. You can adjust these to suit your taste. A splash of vanilla extract adds warmth and depth. Finally, a pinch of sea salt enhances all the flavors. - Shaved chocolate - Fresh berries - Nuts You can elevate your mousse with a few toppings. Shaved chocolate adds a fancy touch and extra chocolate flavor. Fresh berries, like raspberries or strawberries, bring a fruity brightness. Nuts add crunch and texture. Feel free to mix and match these toppings to make your dessert unique. They not only look great but also taste amazing! To melt chocolate, you have two easy methods. Method using microwave: 1. Place dark chocolate chips in a microwave-safe bowl. 2. Heat in 30-second bursts. 3. Stir after each burst until the chocolate is smooth. Method using double boiler: 1. Fill a pot with a little water. 2. Place a heat-safe bowl over the pot. 3. Heat on low until the chocolate melts. In a medium bowl, combine Greek yogurt and sweeteners. I prefer honey, but maple syrup works too. Mix until it’s smooth and creamy. Next, add one teaspoon of vanilla extract and a pinch of sea salt. This step adds flavor and balances the sweetness. Now, gently fold the melted chocolate into the yogurt mixture. Use a spatula to combine them carefully. You want a uniform mousse without losing air. Taste the mousse. If you want it sweeter, add more honey or maple syrup. Mix again until you reach your desired taste. Spoon the mousse into individual serving dishes. Make sure to leave some space at the top. Cover the dishes with plastic wrap. Chill in the fridge for at least one hour. This time lets the mousse set and develop flavors. You can prepare it a day in advance for even better taste. Before serving, add your favorite toppings. Shaved chocolate, fresh berries, or nuts make it visually appealing and tasty! Using full-fat Greek yogurt is key for a rich mousse. It gives a creamy and smooth finish. Low-fat options may make it too runny. Next, let your melted chocolate cool a bit. This step stops the yogurt from curdling. Mixing warm chocolate can lead to a lumpy texture. Always fold the chocolate gently into the yogurt. This creates a light and airy mousse. Taste your mousse before serving. You may want to adjust the sweetness. If it’s too bitter, add more honey or maple syrup. Start with one tablespoon at a time. Remember, dark chocolate can vary in sweetness. If you prefer a different sweetener, try agave or stevia. Each will change the flavor slightly, so choose what you like best. Serving your mousse in small cups adds charm. You can use clear glasses to show off the layers. Top with shaved chocolate for a fancy look. Fresh berries add color and a burst of flavor. Nuts give a nice crunch and texture. Don't forget to sprinkle some sea salt on top for contrast. Each garnish adds a unique touch to your dessert. {{image_2}} You can change the taste of your mousse easily. Adding coffee or espresso gives a nice kick. Just mix in a teaspoon or two of instant coffee granules with the melted chocolate. This adds depth and richness. You can also try fruit purees. Blend berries or bananas and fold them into the mousse. This not only adds flavor but also makes it a bit healthier. If you want a vegan version, swap Greek yogurt for silken tofu. Blend it until smooth. Use dairy-free dark chocolate instead of regular chocolate. For a low-calorie option, choose low-fat Greek yogurt. You can also substitute honey with a low-calorie sweetener like stevia. This helps keep the flavor while cutting calories. You can easily change the recipe size. If you want more servings, just double the ingredients. For fewer servings, cut them in half. Use small cups for portion control. This makes it easy to enjoy without overdoing it. Each serving can be a little treat that feels special. To keep your Greek yogurt chocolate mousse fresh, follow these tips: - Place the mousse in airtight containers. - Use glass or plastic containers for best results. - Make sure the lids fit snugly to prevent air exposure. - If you plan to add toppings, store them separately. This mousse can stay tasty for up to five days in the fridge. - Look for any off smells or changes in texture. - If you see any mold, toss it immediately. - For best flavor, enjoy it within three days. Using non-fat Greek yogurt will change the mousse's texture. It may not be as rich or creamy. Full-fat yogurt adds a nice, smooth feel. The flavor will also be less bold. For best results, stick with full-fat Greek yogurt. Yes, this recipe is great for meal prep. You can make it a day ahead. Just store it in the fridge. This helps the flavors mix well. It also sets nicely, giving you a perfect mousse. To make this mousse dairy-free, use coconut yogurt instead of Greek yogurt. For the chocolate, choose dairy-free dark chocolate chips. This way, you keep the creamy texture without dairy. You can still enjoy a delicious treat! This blog post covered an easy recipe for a delicious yogurt mousse. We looked at the main ingredients, like Greek yogurt and dark chocolate, and optional toppings to enhance flavor. I shared step-by-step instructions, some helpful tips, and variations to try. You can adjust sweetness and serve it in fun ways. This mousse is not only tasty but also customizable. Experiment with flavors and toppings. Enjoy making this simple yet delightful dish. It's a treat that everyone will love!

Greek Yogurt Chocolate Mousse Rich and Creamy Delight

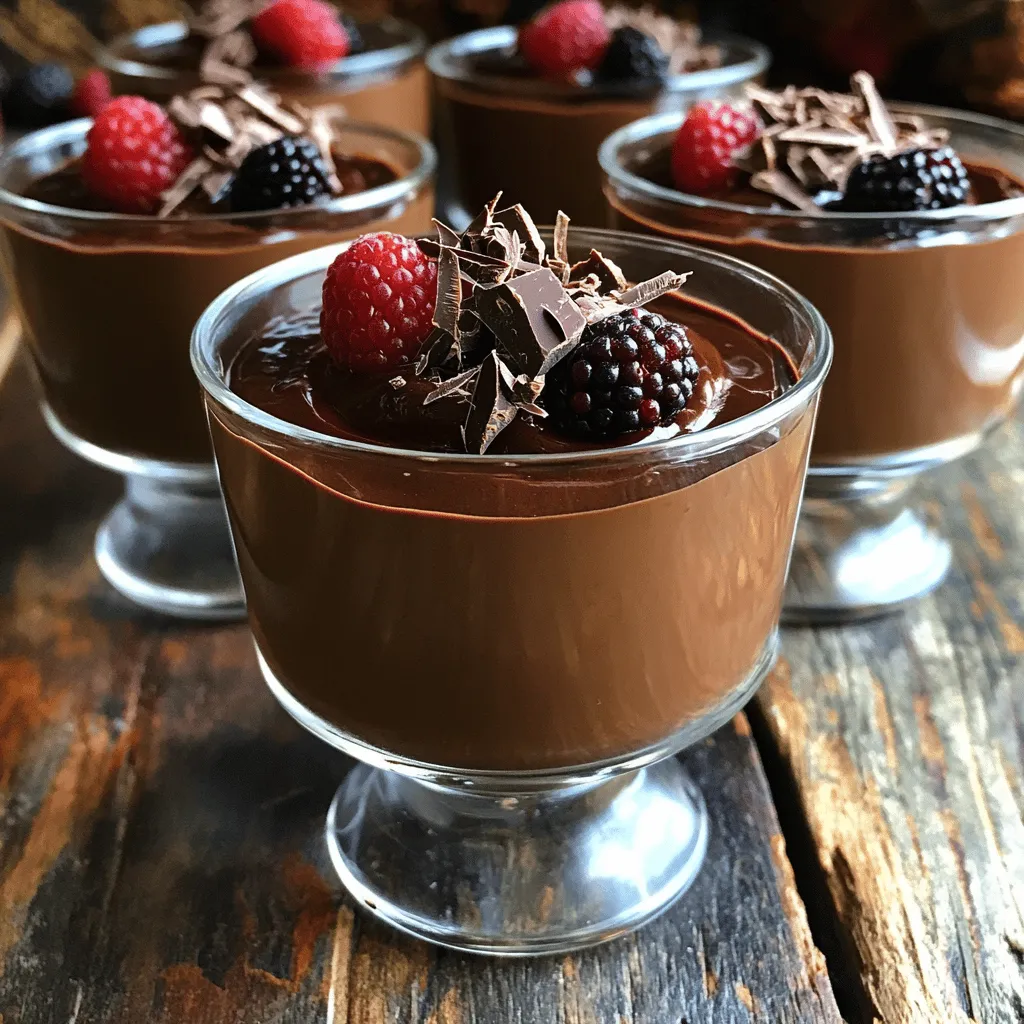
Get ready to treat yourself to a Greek Yogurt Chocolate Mousse that’s rich and creamy! This decadent dessert is simple

- 250g pasta (your choice: penne, spaghetti, or fusilli) - 2 chicken breasts, thinly sliced - 4 tablespoons unsalted butter - 4 cloves garlic, minced - 1 teaspoon dried Italian herbs (oregano, basil, thyme) - Salt and pepper to taste - 1/4 teaspoon red pepper flakes (optional, for heat) - 1/4 cup grated Parmesan cheese - Fresh parsley, chopped for garnish - Zest of 1 lemon The first step to making Minute Garlic Butter Chicken Pasta is gathering your ingredients. Pasta is the base of this dish. You can use penne, spaghetti, or fusilli. Each pasta type brings a unique texture and shape. Next, you need chicken. I prefer thinly sliced chicken breasts. This helps them cook quickly and evenly. Butter and garlic are the stars of this dish. You will use unsalted butter to control the saltiness. Fresh garlic adds a punch of flavor. - Red pepper flakes for heat - Variations using different herbs For those who like a bit of spice, add red pepper flakes. They give the dish warmth without overpowering it. You can also swap in fresh herbs. Consider using basil or parsley for a fresh twist. This adds more depth to the flavor. This simple list will set you up for a quick and tasty meal. Having everything ready makes cooking easier and more fun. First, fill a large pot with water. Add a good amount of salt to it. Bring the water to a boil. This will help flavor the pasta. Cook the pasta according to the package instructions. You want it to be al dente, which means it should still have a slight bite. This usually takes about 8 to 12 minutes, depending on the pasta type. Once the pasta is ready, drain it in a colander. Don’t forget to save some pasta water! Take about half a cup and set it aside. The starchy water can help make your sauce creamy later. While the pasta cooks, take your two chicken breasts. Slice them thinly for even cooking. Heat 2 tablespoons of unsalted butter in a large skillet over medium heat. Add the sliced chicken to the skillet. Season it with salt, pepper, and dried Italian herbs. Cook the chicken for about 5 to 7 minutes. Stir it often. Look for a golden-brown color and no pink inside. This means your chicken is done. Once cooked, take the chicken out and place it on a plate. In the same skillet, add the remaining 2 tablespoons of butter. Let it melt, then add minced garlic. Sauté the garlic for about 1 minute until it smells great. Be careful not to burn it. Now, add the drained pasta to the skillet. Toss it with the garlic butter. If it looks dry, add a little reserved pasta water. This will help mix everything well. Return the cooked chicken to the skillet. Stir in red pepper flakes if you like heat. Add lemon zest for a fresh taste. Finally, sprinkle grated Parmesan cheese on top. Toss everything to mix well. Taste it and adjust the seasoning if needed. Serve hot, garnished with fresh parsley and extra cheese if you want! To make your Minute Garlic Butter Chicken Pasta really shine, adjust the seasoning. Taste your dish as you cook. If it needs more salt or pepper, add it. You can also add more herbs to enhance the flavor. Fresh herbs like basil or parsley bring a bright taste. Dried herbs work well too. They add depth to the dish without extra work. Cooking can feel rushed, but multitasking helps. Start boiling your pasta as you prepare the chicken. This saves time and keeps things moving. You should also prepare your ingredients in advance. Chop your garlic and slice the chicken before you begin. This way, you can focus on cooking and enjoy the process. Plus, it makes everything easier when you are ready to cook! {{image_2}} If you want to switch up the protein in this dish, you have options. Shrimp or tofu work well. For shrimp, cook for about 3-5 minutes until they turn pink. Tofu needs a bit more time, around 7-10 minutes, to get golden. Make sure to cut it into small cubes. If you follow a gluten-free diet, choose gluten-free pasta. Many brands offer great options that cook just like regular pasta. For a dairy-free version, swap the butter with olive oil and use nutritional yeast instead of Parmesan. You can still enjoy the rich flavors without the dairy. To store leftovers, let the dish cool first. Transfer the pasta to an airtight container. Make sure it is sealed well to keep air out. This helps the pasta stay fresh. Store it in the fridge for up to three days. After that, the flavor may fade. To reheat, use a skillet over medium heat. Add a splash of water or broth to keep it moist. Stir gently until heated through. You can also use the microwave. Just cover it with a damp paper towel to avoid drying out. If the pasta seems dry, add a bit of olive oil or more butter. This will help revive the flavors. This dish is quick and easy. It takes about 5 minutes to prep and 15 minutes to cook. So, you can have this meal ready in just 20 minutes! Yes, you can prepare some parts in advance. Cook the pasta and chicken earlier. Once cooked, you can store them separately in the fridge. When ready to eat, just heat them up and mix with the garlic butter. Yes, you can freeze this dish. Cool it completely first. Then, store it in an airtight container. It keeps well for up to three months. To reheat, thaw it in the fridge overnight and warm in a pan. Add a splash of pasta water to help it regain its creaminess. You learned how to make Garlic Butter Chicken Pasta, from ingredients to storage. We covered different pasta choices, chicken preparation, and optional spices. Remember to reserve pasta water for the perfect texture. Adjust flavors to fit your taste and try different proteins. Store leftovers properly for later enjoyment. Cooking can be fun and rewarding. Try these tips and make it your own!

Minute Garlic Butter Chicken Pasta Quick and Tasty Meal

Craving a quick and tasty meal? You’re in the right place! This Minute Garlic Butter Chicken Pasta recipe is perfect

- 4 ripe peaches, sliced - 2 cups fresh blackberries - 1 cup granulated sugar (divided) - 1 teaspoon vanilla extract - 1 tablespoon lemon juice - 1 cup all-purpose flour - 1 tablespoon baking powder - ½ teaspoon salt - ½ cup milk - 1/3 cup unsalted butter, melted - 1 teaspoon ground cinnamon - 2 teaspoons cornstarch (optional, for thickening) For this Blackberry Peach Cobbler, I love using ripe peaches and fresh blackberries. They bring so much flavor and sweetness. The sugar helps to balance the tartness of the berries. I divide the sugar into two parts: one for the fruit and the other for the batter. This method ensures every bite is sweet and delicious. The vanilla extract adds warmth, while the lemon juice brightens the flavors. Sifting the flour, baking powder, and salt together gives the batter a nice texture. I always use unsalted butter for better control over the salt level. The milk makes the batter moist, and I add a sprinkle of cinnamon on top for that cozy, spiced flavor. If you want a thicker filling, add cornstarch. It's optional but helps bind the fruit juices. This simple list of ingredients turns into a warm, comforting dessert that is perfect for sharing. Start by slicing the ripe peaches. Add them to a large bowl with blackberries, sugar, vanilla extract, and lemon juice. Toss them gently. This helps coat the fruit evenly. Let the fruit sit for a bit. This step allows the juices to flow out. You want the fruit to get nice and juicy. In another bowl, sift the flour, baking powder, salt, and the rest of the sugar. This helps mix the dry ingredients well. Next, add the milk and melted butter. Stir until just mixed. It's fine if there are a few lumps. Do not overmix; this keeps the batter light and fluffy. Preheat your Dutch oven by placing it over medium heat. If you use an oven, set it to 350°F (175°C). Once hot, add the fruit mixture to the bottom. Spread it out evenly. If you want a thicker filling, sprinkle cornstarch over the fruit and mix gently. Now, pour the batter over the fruit. Start from the center and move outward. This way, the batter spreads evenly while cooking. For extra flavor, sprinkle ground cinnamon on top. If you cook on the stovetop, cover the pot and let it cook for 30-40 minutes. Check it now and then. If you bake in the oven, cover the pot and bake for 35-40 minutes. Look for a golden brown top. A toothpick should come out clean when done. To make a great cobbler, avoid overmixing the batter. Mix just until the dry and wet ingredients blend. A few lumps are fine. This keeps the batter light. Next, check for doneness. Look for a golden-brown top. Insert a toothpick into the center. If it comes out clean, your cobbler is ready. If not, give it a few more minutes. You can boost flavor by adding spices. Try nutmeg or ginger for a twist. Almond or coconut extract can also add depth to your cobbler. Another great idea is a crumb topping. Mix flour, sugar, and butter until crumbly. Sprinkle this on top before cooking. It adds a delicious crunch to your cobbler. {{image_2}} You can switch up the fruit in this cobbler. Apples and pears work great. They add a nice crunch. You can also use berries like raspberries or strawberries. Each fruit brings its own flavor. So, feel free to mix and match. Just keep the same ratios for best results. If you need a gluten-free version, use almond flour or coconut flour. These flours add a different taste but work well. Adjust the liquid a bit since almond flour absorbs more. You may need to add an extra splash of milk. This way, your batter stays moist and tasty. To make this cobbler vegan, swap out the butter and milk. Use coconut oil or vegan butter instead of regular butter. For milk, almond or oat milk works great. These swaps keep your cobbler creamy and rich. You won’t miss the dairy at all! After you enjoy your cobbler, let it cool down to room temperature. This helps keep its taste and texture. Once cooled, place it in a clean, airtight container. You can also use plastic wrap to cover it tightly. Store the cobbler in the fridge for up to three days. If you want to keep it longer, freeze it. Wrap individual servings in plastic wrap and place them in a freezer bag. This way, you can enjoy it later. When it's time to enjoy your cobbler again, you can reheat it to bring back its warmth. For the best texture, use an oven. Preheat your oven to 350°F (175°C). Place the cobbler in an oven-safe dish. Cover it with foil to keep it from drying out. Heat it for about 15 to 20 minutes. Check to see if it is warm all the way through. If you prefer, you can also use a microwave. Heat in short bursts, about 20 to 30 seconds each. This method is quick but may make the cobbler a bit softer. Yes, you can use frozen fruit. Frozen fruit can save time and reduce waste. However, it may release more water than fresh fruit. This extra liquid can make the filling runny. You might need to add more cornstarch for thickness. Fresh fruit offers better texture and flavor. If you use frozen fruit, let it thaw first. Drain any excess juice before mixing. The cobbler is done when the top is golden brown. A toothpick inserted in the center should come out clean. You can also look for bubbling around the edges. If the batter is firm and set, it's ready. For stovetop cooking, check at 30 minutes. In the oven, it may take about 35 to 40 minutes. Blackberry peach cobbler pairs well with vanilla ice cream. A dollop of whipped cream also adds a nice touch. You can serve it warm or cold. For a fun twist, try drizzling caramel sauce on top. Fresh mint leaves can add a pop of color and flavor. Enjoy your cobbler with a scoop of joy! This blog post shared a simple recipe for a delicious Blackberry Peach Cobbler. You learned about the ingredients, easy steps to prepare it, and tips for success. I also offered ideas for variations and storage tips. Cooking should be fun and rewarding. Don’t hesitate to try new fruits or swaps. Enjoy your cobbler warm with ice cream or whipped cream. Happy baking!

Blackberry Peach Cobbler Dutch Oven Simple Delight

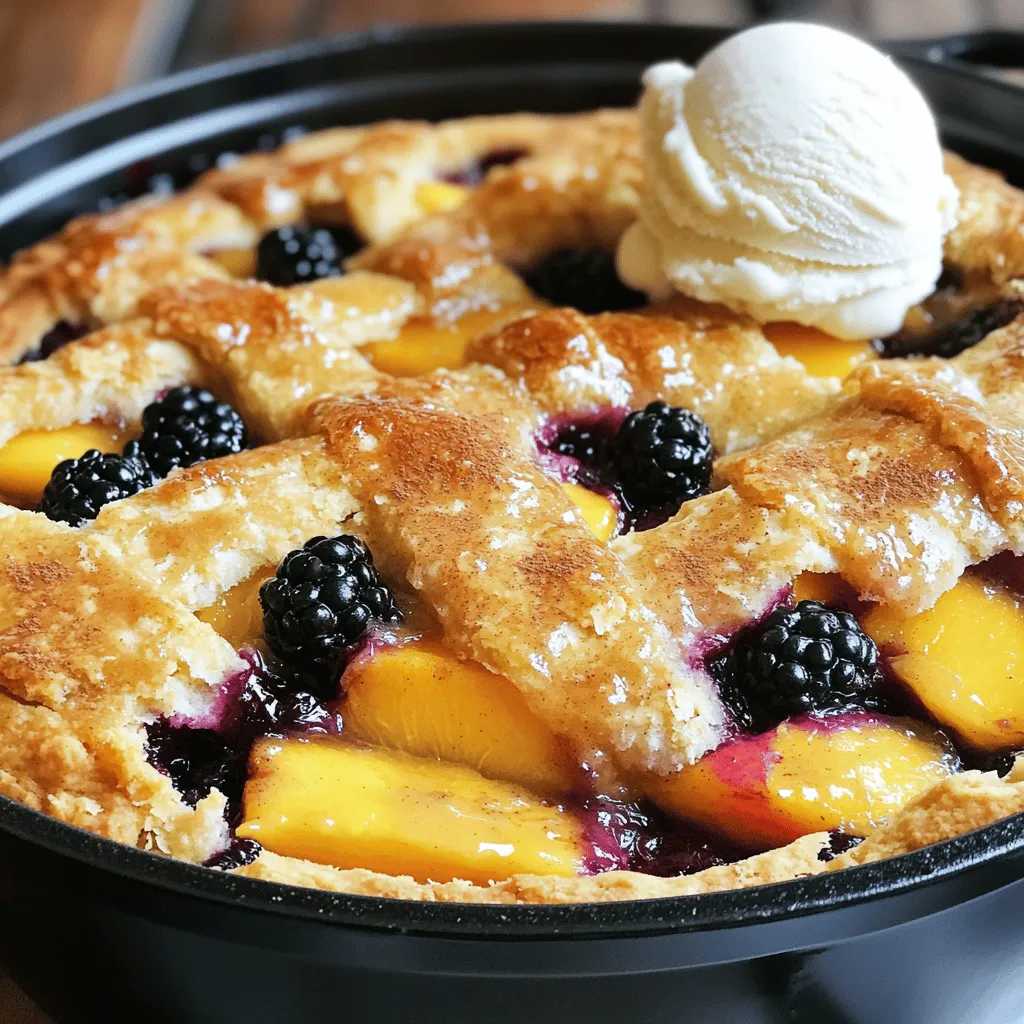
Are you ready for a sweet adventure? This Blackberry Peach Cobbler made in a Dutch oven is a simple delight

To make teriyaki glazed meatball bowls, you will need these key items: - 1 pound ground chicken (or turkey) - 1/4 cup breadcrumbs (panko for extra crunch) - 1/4 cup green onions, finely chopped - 1 clove garlic, minced - 1 teaspoon ginger, grated - 1 tablespoon cornstarch - 2 cups cooked jasmine rice - 1 cup mixed vegetables (broccoli, bell peppers, and snap peas) These main ingredients create the perfect base for your bowls. The ground chicken or turkey forms the meatballs. The breadcrumbs give them texture. The green onions, garlic, and ginger add fresh flavor. The right seasonings and sauces make a dish shine. For this recipe, you will need: - 2 tablespoons soy sauce - 1 tablespoon sesame oil - 1 tablespoon honey or maple syrup - 1/2 teaspoon black pepper - 1/2 cup teriyaki sauce The soy sauce and sesame oil bring umami. Honey or maple syrup balances the saltiness. The teriyaki sauce adds a sweet, sticky glaze that makes the meatballs irresistible. To finish your bowls, add these tasty touches: - Sesame seeds for garnish - Extra green onions for garnish These garnishes give a nice crunch and a pop of color. They make your bowls look even more appealing. Plus, they add extra flavor to each bite. Enjoy your cooking adventure with these simple yet satisfying ingredients! First, set your oven to 400°F (200°C). This step warms the oven for baking. In a large bowl, mix together these ingredients: - 1 pound ground chicken (or turkey) - 1/4 cup breadcrumbs (panko for crunch) - 1/4 cup green onions, finely chopped - 1 clove garlic, minced - 1 teaspoon ginger, grated - 2 tablespoons soy sauce - 1 tablespoon sesame oil - 1 tablespoon honey or maple syrup - 1/2 teaspoon black pepper - 1 tablespoon cornstarch Combine everything gently but don’t overmix. This helps the meatballs stay tender. Next, shape the mixture into 1-inch meatballs. Place them on a baking sheet lined with parchment paper. Bake them for 15-20 minutes. Look for a golden brown color. While the meatballs bake, prepare your veggies. Steam or stir-fry 1 cup of mixed vegetables like broccoli, bell peppers, and snap peas. Cook them until bright and tender-crisp. Set them aside for later. In a small saucepan, warm 1/2 cup of teriyaki sauce over medium heat until it simmers. Once the meatballs are done, toss them in the sauce. Make sure they are well-coated. Grab your serving bowls. Start with a scoop of 2 cups of cooked jasmine rice. Then, add a generous portion of the teriyaki-glazed meatballs. Place the sautéed mixed vegetables next to the meatballs. For the final touch, sprinkle sesame seeds and sliced green onions on top. This adds a nice crunch and flavor. Enjoy your tasty meal! To make great meatballs, you must mix just enough. Overmixing makes them tough. When you combine your ingredients, stop as soon as they blend. Use your hands to gently mix the ground chicken, breadcrumbs, and seasonings. This keeps the meatballs light and tender. Cooking rice can be simple. Use a 1:1.5 ratio of rice to water for jasmine rice. Rinse the rice first to remove extra starch. This helps keep the grains separate. Bring the water to a boil, then cover and simmer on low heat. Let it rest off the heat for 10 minutes. Fluff it with a fork before serving. Garnishes add color and flavor. Try these ideas for extra flair: - Sliced radishes for crunch - Fresh cilantro for a fresh taste - Chopped peanuts for texture - Sriracha for a spicy kick - Lime wedges for brightness Experiment with your favorites to make this dish your own! {{image_2}} You can swap the ground chicken for other proteins. Ground turkey is a great choice. It has a mild taste and absorbs flavors well. You can also use ground beef or pork. They add a rich flavor to the meatballs. If you want to try something different, use ground lamb. It gives a unique twist to the dish. For a vegetarian or vegan option, replace meat with plant-based meat. You can use lentils, chickpeas, or black beans as the base. Just mash them up and mix with breadcrumbs. For added flavor, include chopped nuts or seeds. These add a nice crunch to your meatballs. Remember to check the teriyaki sauce. Some brands use honey, so choose a vegan option. You can change the mixed vegetables to suit your taste. Try using carrots, zucchini, or cauliflower. These veggies add color and nutrients. You can also use frozen mixed veggies for quick prep. Steam or sauté them for the best results. If you want some heat, add red pepper flakes. This gives the bowls a nice kick. To keep your teriyaki glazed meatball bowls fresh, store leftovers in an airtight container. Place the meatballs, rice, and vegetables in separate sections to maintain texture. Let them cool to room temperature first. Refrigerate within two hours of cooking. This way, you can enjoy them for up to three days. When you're ready to eat, reheating is simple. Use a microwave for quick warming. Place your meatballs and rice in a microwave-safe bowl. Heat on high for 1-2 minutes. Stir halfway through for even heating. You can also warm them on the stove over low heat. Add a splash of water to keep the rice moist. Freezing is a great option for longer storage. Allow the meatballs and rice to cool completely. Then, pack them in freezer-safe bags or containers. Label with the date for easy tracking. You can freeze them for up to three months. To enjoy, thaw in the fridge overnight before reheating. Yes, you can use store-bought teriyaki sauce. It saves time and adds great flavor. Look for a brand with simple ingredients. Using a good sauce makes your meal quick and easy. You can serve teriyaki glazed meatball bowls with jasmine rice. Other good options include quinoa or noodles. A side salad with fresh greens also works well. These pairings balance the rich flavor of the teriyaki sauce. To adjust the spice level, add chili flakes or sriracha to the meatball mix. You can also mix some into the teriyaki sauce. Start small, then taste as you go. This way, you can find the perfect heat for your taste. Meatballs take about 15 to 20 minutes to bake at 400°F (200°C). Check for a golden brown color and ensure they are cooked through. Using a meat thermometer, they should reach 165°F (74°C) inside. This ensures they are safe and tasty. The blog post covered all you need for tasty teriyaki meatball bowls. We explored main ingredients, seasonings, and great accompaniments. The step-by-step guide made cooking easy and fun. Tips helped you avoid common mistakes and inspired new ideas. We also shared cool variations, storage tips, and answers to frequent questions. In the end, this dish is flexible and offers many options. Enjoy crafting your own bowl for every meal!

Teriyaki Glazed Meatball Bowls Simple and Satisfying

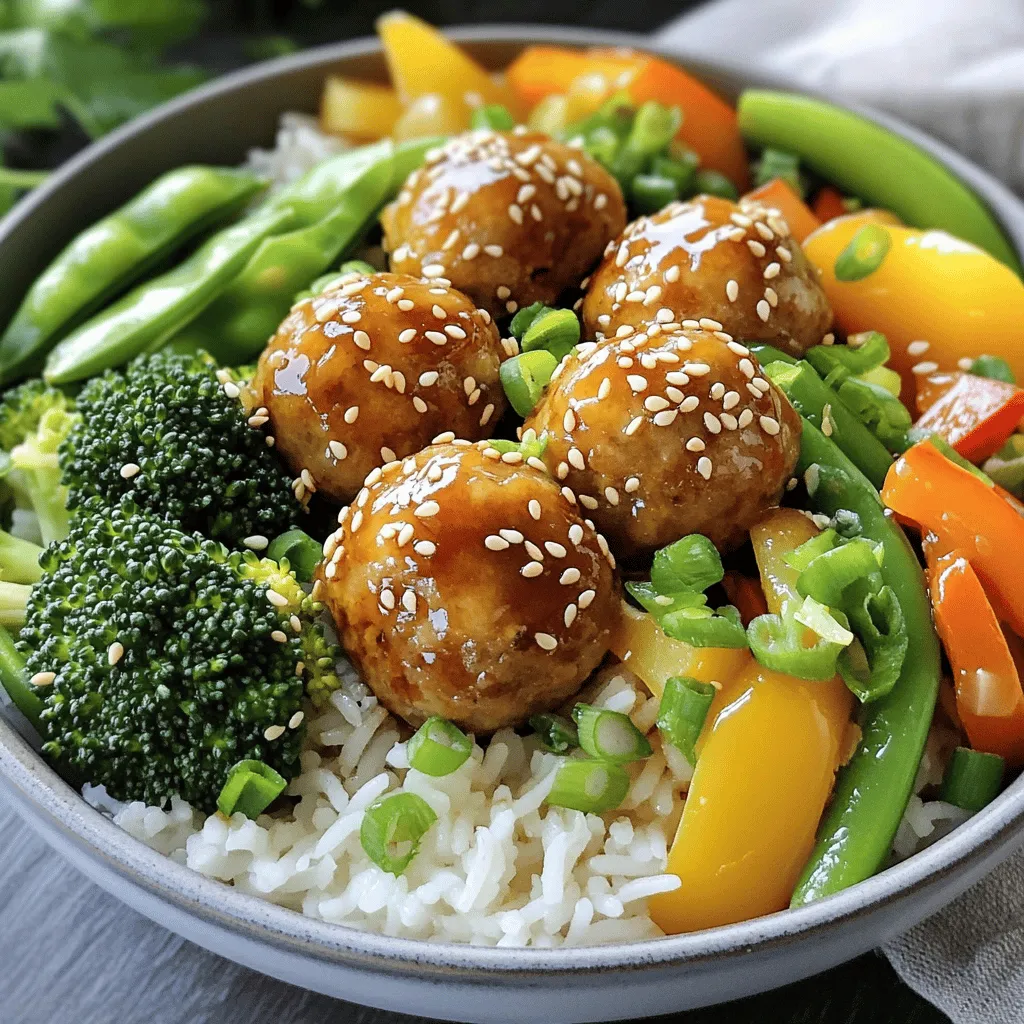
Craving a dish that’s both simple and satisfying? Teriyaki Glazed Meatball Bowls are your answer! These bowls combine juicy meatballs

Older posts
Newer posts
← Previous Page1 … Page31 Page32 Page33 … Page84 Next →

dsad

© 2026 easycookingbite • Built with GeneratePress

Our Policies

  • Copyright Policy
  • Cookie Policy
  • GDPR Policy
  • Privacy Policy
  • Disclaimer
  • Terms Of Use

More Information

  • Home
  • About
  • Contact
  • Appetizers
  • Dessert
  • Dinner
  • Drinks
©2026, easycookingbite About Back To Top