Skip to content
DisclaimerTerms Of UseGDPR PolicyCookie Policy

easycookingbite

  • Home
  • Drinks
  • Appetizers
  • Dinner
  • Dessert
  • About
  • Contact
  • Privacy Policy
DisclaimerTerms Of UseGDPR PolicyCookie Policy

NO-ING-IMG

- 1 package of wonton wrappers (about 20-30 wrappers) - 8 oz cream cheese, softened - 1 cup shredded sharp cheddar cheese - 2-3 jalapeños, finely chopped (seeds removed for less heat) - 2 tablespoons green onions, finely chopped - 1 teaspoon garlic powder - 1 teaspoon onion powder - Salt and pepper, to taste - Cooking spray or olive oil spray When I make Air Fryer Jalapeño Popper Wontons, I start with the main ingredients. Wonton wrappers are key. They are thin and crispy, perfect for holding the filling. Next, I use cream cheese. It gives a creamy base that melts in your mouth. I also add sharp cheddar cheese for a rich flavor. For the additional ingredients, I chop 2-3 jalapeños. I remove the seeds to tame the heat. Green onions add a fresh taste. I include garlic and onion powder for depth in flavor. I finish with seasoning. Salt and pepper help to enhance all the flavors. A light spray of cooking spray or olive oil spray ensures a crispy texture when air frying. These ingredients blend to create a snack that's both tasty and fun to eat. To make the filling, first, grab a large mixing bowl. Add 8 oz of softened cream cheese and 1 cup of shredded sharp cheddar cheese. Next, chop 2-3 jalapeños finely, removing the seeds if you want less heat. Add the jalapeños to your bowl, along with 2 tablespoons of finely chopped green onions. Sprinkle in 1 teaspoon each of garlic powder and onion powder, along with salt and pepper to taste. Mix everything until it is well blended and creamy. This is where the magic begins! Now, it's time to assemble the wontons. Lay one wonton wrapper on a clean surface. Spoon about 1 tablespoon of the cheese mixture onto the center of the wrapper. Moisten the edges of the wrapper with a little water using your finger or a brush. Fold the wrapper over to form a triangle, pressing the edges together to seal. Make sure to push out any air pockets. Repeat this process until you use all the filling. Your wontons should look neat and inviting! Before cooking, preheat your air fryer to 375°F (190°C) for about 3-5 minutes. While it heats up, lightly spray both sides of the wontons with cooking spray. This helps them crisp up nicely. Place the wontons in a single layer in the air fryer basket. You may need to work in batches. Air fry the wontons for 6-8 minutes or until they turn golden brown and crispy. Once you take them out, let them cool for a minute before serving. Enjoy your tasty snack! To make the best jalapeño popper wontons, focus on avoiding air pockets. When you fill the wonton wrapper, make sure to press out any air before sealing. This keeps the filling intact while cooking. A tightly sealed wonton also helps it crisp up better. Next, ensure a crispy texture by not overcrowding the air fryer basket. Place the wontons in a single layer. This allows hot air to circulate freely. Lightly spray them with cooking spray for extra crunch. When serving your wontons, think about ideal pairings for dipping sauces. Ranch dressing is a classic choice. A spicy dipping sauce can add an extra kick. You can also serve them with a sweet chili sauce for a fun contrast. For presentation, arrange the wontons on a platter. Sprinkle chopped green onions on top for color. You want them to look as good as they taste! If you want to reduce the spice level, remove all the seeds from the jalapeños. This helps make the wontons milder. You can also replace jalapeños with sweet peppers for a non-spicy version. For dietary preferences, consider substitutions. Use low-fat cream cheese for a lighter option. If you need a dairy-free choice, try a vegan cream cheese. You can mix in some nutritional yeast for added flavor! {{image_2}} You can easily change the cheese in your wontons. Try mozzarella for a milder flavor. Or use pepper jack for a spicy twist. Mixing cheeses can add depth to the taste. You can also add proteins or vegetables. Cooked chicken or bacon gives a hearty bite. For a veggie option, try corn or spinach. These swaps keep your dish fresh and fun. Spices can bring a new kick to your wontons. Adding cayenne pepper or smoked paprika gives heat and depth. Experiment with chili powder for a different flavor. You can also play with sweet and savory. Try a touch of honey in your cheese mixture. This adds a nice balance to the heat of the jalapeños. You can bake these wontons if you want a different texture. Preheat your oven to 400°F (200°C). Place the wontons on a baking sheet and bake for about 15 minutes. They will turn crispy and golden. If you don't have an air fryer, try shallow frying them in oil. Heat oil in a pan and fry until golden. This gives a traditional fried texture that many love. After enjoying your Air Fryer Jalapeño Popper Wontons, store leftovers right away. Keep them in an airtight container. They will stay fresh in the fridge for up to three days. To freeze, place the wontons in a single layer on a baking sheet. Freeze them until solid, then move them to a freezer-safe bag. This method helps prevent them from sticking together. You can keep them in the freezer for up to three months. When you're ready to enjoy leftovers, reheating them properly is key. The best way to keep them crispy is to use the air fryer. Preheat your air fryer to 350°F (175°C). Place the wontons in a single layer and heat for about 4-5 minutes. This will help them regain their crunch. You can also use an oven. Set it to 350°F (175°C) and bake for about 10 minutes. Be sure to check them often. Knowing when to discard your wontons is important. If they smell off or look discolored, it’s best to throw them away. In the fridge, they last about three days. Frozen wontons can last three months. After that, their taste and texture may decline. Always trust your senses when deciding if food is safe to eat. Making these wontons is quick and easy. It takes about 15 minutes to prep. After that, cooking them in the air fryer takes another 6 to 8 minutes. So, in total, you will need around 25 minutes from start to finish. This makes it a perfect snack or appetizer for any occasion. Yes, you can freeze the wontons before cooking. To do this, lay them out in a single layer on a baking sheet. Make sure they don’t touch each other. Freeze them for about 30 minutes. Once frozen, transfer them to a freezer bag. They can stay fresh for up to a month. When you’re ready to cook, you can air fry them straight from the freezer. Just add a couple of extra minutes to the cooking time. Dipping sauces can really enhance the flavor of these wontons. Here are some great choices: - Ranch dressing: This classic dip works well with the spicy filling. - Spicy mayo: Mix mayo with sriracha for a creamy, spicy kick. - Sweet chili sauce: The sweetness pairs nicely with the heat. - Salsa: A fresh salsa adds a zesty touch. Feel free to try different sauces to find your favorite! To wrap up, you've learned how to make Air Fryer Jalapeño Popper Wontons from start to finish. We covered the main ingredients, like wonton wrappers and cheeses, and added zest with jalapeños and spices. You now know how to mix, assemble, and cook these delicious snacks, plus tips on serving and storing them. These wontons are easy and fun to make. Experiment with variations and enjoy them fresh or stored. Dive into this tasty treat whenever you want a quick and delightful snack.

Air Fryer Jalapeño Popper Wontons Crispy and Tasty Snack

Craving a crispy and tasty snack? Let me introduce you to Air Fryer Jalapeño Popper Wontons! This simple recipe combines

When making Greek Lemon Rice Soup Avgolemono, you need fresh and simple ingredients. Each one brings a unique flavor to the dish. Here’s a list of what you will need: - 1 cup white rice - 6 cups vegetable broth - 3 large eggs - 1/3 cup fresh lemon juice - Zest of 1 lemon - 1 cup cooked chicken, shredded (optional) - 1 medium onion, finely chopped - 2 cloves garlic, minced - 2 tablespoons olive oil - 1 cup fresh spinach, chopped - Salt and pepper to taste - Fresh dill or parsley for garnish Gathering these ingredients is fun and easy. For the best taste, use fresh lemon juice and herbs. The rice adds texture and heartiness. If you want protein, you can add chicken. The spinach adds a nice color and boosts nutrition. Each ingredient plays a role in making this soup bright and comforting. Start by heating 2 tablespoons of olive oil in a large pot over medium heat. Add 1 finely chopped onion and sauté it until it turns soft and translucent, about 5 minutes. Next, stir in 2 minced garlic cloves and sauté for one more minute. The smell will fill your kitchen, making it feel warm and inviting. Now, add 6 cups of vegetable broth to the pot and bring it to a boil. Once it is boiling, add 1 cup of white rice. Let the rice cook for about 15 minutes. It should be tender and fluffy when it’s done. Stir occasionally to keep the rice from sticking to the bottom. While the rice cooks, whisk 3 large eggs in a bowl until they are frothy. Slowly mix in 1/3 cup of fresh lemon juice and the zest of 1 lemon. This mixture gives the soup its bright, tangy flavor. To prevent the eggs from scrambling, you need to temper them. Slowly ladle 1 cup of the hot broth into the egg mixture while whisking continuously. Once the rice is ready, reduce the heat to low. Gradually pour the tempered egg mixture back into the pot with the rice, stirring constantly. This step blends everything together and creates a creamy soup. If you want, add 1 cup of shredded chicken and 1 cup of chopped fresh spinach. Stir well and cook for 2 to 3 minutes until the spinach wilts. Now, season your soup with salt and pepper to taste. It’s important to taste as you go to get the flavors just right. After seasoning, remove the pot from heat and let the soup sit for a few minutes. This resting time allows it to thicken slightly, making it even more comforting. To keep the eggs from scrambling, you must temper them. This means slowly mixing hot broth into the egg mixture. First, whisk the eggs until frothy. Then, slowly add one cup of hot broth while whisking. This warms the eggs and helps them blend in smoothly. If your soup is too thick, just add more broth. Stir well and let it heat through. For a thinner soup, keep adding until you reach your desired texture. Using fresh herbs can really brighten the soup. I love adding dill or parsley for a fresh taste. Just chop them finely and stir them in before serving. You can also sprinkle them on top as a garnish. For extra seasoning, consider using a pinch of cayenne pepper or smoked paprika. These spices add depth and warmth. Taste as you go to find the best balance. Garnishing makes the soup look more appealing. A sprinkle of fresh dill or parsley on top adds a nice touch. A drizzle of olive oil can also make it shine. Serve the soup hot in shallow bowls. This allows for easy access and showcases the beautiful colors. You can pair it with crusty bread or a side salad for a complete meal. {{image_2}} If you want a vegetarian version of Greek Lemon Rice Soup Avgolemono, skip the chicken. You can use more veggies instead. Great options include carrots, peas, or zucchini. These add color and texture. You can also toss in some kale or mushrooms for extra flavor. For a gluten-free meal, choose rice that fits your needs. Brown rice or jasmine rice works well. Just keep in mind that cooking time may change slightly. Use vegetable broth that is gluten-free, too. Follow the same steps as the regular recipe. You can change the taste of your soup by adding different herbs or spices. Fresh basil, thyme, or oregano can enhance the flavor. If you like a bit of heat, try adding red pepper flakes. For the broth, you can use chicken broth for a deeper taste. This adds another layer of flavor to your Avgolemono. Greek Lemon Rice Soup Avgolemono stays fresh in the fridge for about three days. Store it in airtight containers to keep it from drying out. I recommend glass containers because they don’t retain odors and are easy to clean. Make sure to let the soup cool before sealing. You can freeze Avgolemono soup if you want to save some for later. Use freezer-safe containers, leaving some space at the top. This allows for expansion. The soup can last up to three months in the freezer. When you’re ready to eat, thaw it overnight in the fridge. For quick thawing, place the container in cold water. When reheating, do it slowly on low heat. Stir often to keep the texture smooth. Avoid boiling, as this can cause the eggs to scramble. I suggest adding a bit of broth or water if the soup seems thick. After reheating, taste and adjust the seasoning with salt or pepper. This will enhance the flavor and make it taste fresh again. Avgolemono soup is a classic Greek dish. It combines chicken broth, rice, and a creamy lemon egg mixture. The name "avgolemono" comes from the Greek words for egg (avgo) and lemon (lemono). This soup has roots in ancient Greece, where it became popular for its rich flavor and soothing qualities. Yes, you can make Avgolemono soup ahead of time. It stores well in the fridge for about 3 days. To store, let it cool and place it in an airtight container. When you're ready to enjoy it, just reheat gently on the stove. To make a dairy-free Avgolemono soup, you can skip the eggs. Instead, use silken tofu blended with lemon juice for creaminess. This gives a similar texture without dairy. Another option is to use a plant-based cream or cashew cream to add richness. Avgolemono soup pairs well with many dishes. You might serve it with a fresh Greek salad, warm pita bread, or roasted vegetables. A side of grilled fish or chicken can also complement the flavors nicely. Enjoying some olives or feta cheese on the side adds a nice touch too. This blog shared the ingredients and steps to make Avgolemono soup, a Greek classic. You learned how to create the right base, mix in lemony flavors, and enhance your dish with fresh herbs. Remember, you have options to make it vegetarian or gluten-free. Proper storage extends its life, and reheating tips keep it tasty. Enjoy experimenting with flavors to make it your own. Cooking should be fun, and Avgolemono is a great dish to start with!

Greek Lemon Rice Soup Avgolemono Tasty Comfort Dish

If you crave a warm, comforting dish packed with flavor, Greek Lemon Rice Soup, or Avgolemono, is your answer. This

- 1 lb Brussels sprouts, trimmed and halved - 2 tablespoons olive oil - 2 tablespoons honey - 1 tablespoon Sriracha sauce - 1 tablespoon soy sauce - 1 teaspoon garlic powder - Salt and pepper to taste These main ingredients create a tasty and bold flavor. The Brussels sprouts serve as the star of the dish. Their natural sweetness pairs well with the honey and Sriracha. The olive oil adds richness, while the soy sauce brings depth. Garlic powder gives a nice kick, enhancing all the flavors. - Skewers (wooden or metal) - Optional garnishes (sesame seeds, green onions) You will need skewers to hold the Brussels sprouts together. If you use wooden skewers, soak them in water for about 30 minutes. This step helps prevent burning. For garnishes, sesame seeds and green onions add a fresh and crunchy touch. They also make your dish look extra nice. First, preheat your grill or oven to 400°F (200°C). This step is key for cooking your Brussels sprouts evenly. Next, grab a mixing bowl. In this bowl, whisk together the olive oil, honey, Sriracha, soy sauce, garlic powder, salt, and pepper. Mix until it is smooth and well combined. Now, take your trimmed and halved Brussels sprouts and add them to the bowl. Toss them thoroughly in the marinade. Make sure every sprout is coated well. This will give them a delicious flavor. You can cook your skewers either on the grill or in the oven. If you choose to grill, thread the marinated Brussels sprouts onto your skewers. Pack them tightly for even cooking. Place the skewers on the grill and cook for about 10-12 minutes. Turn them occasionally. You want them browned and tender. If baking, place the skewers on a baking sheet. Roast them in the oven for about 20-25 minutes. Flip the skewers halfway through to ensure they cook evenly. After cooking, remove the skewers from the grill or oven. Drizzle any remaining marinade over the top. This adds an extra burst of flavor. You can serve them warm, and for a nice touch, sprinkle some sesame seeds or chopped green onions on top. These garnishes enhance both the look and taste of your dish. Enjoy your Honey Sriracha Brussels sprout skewers! To perfect your marinate, start with Sriracha. You can adjust the heat by adding more or less. If you want a mild flavor, add less Sriracha. If you love spice, don’t hold back! The key is to stir well until every sprout is coated. This helps each bite taste amazing. When cooking your skewers, check for doneness by piercing a sprout with a fork. It should feel tender but not mushy. If using wooden skewers, soak them in water for 30 minutes first. This step helps prevent burning. Monitor your skewers closely on the grill or in the oven for best results. Pair these skewers with grilled chicken or fish for a fun meal. You can also serve with rice or a fresh salad for balance. For a creative touch, arrange them on a platter with dipping sauces. Try adding sesame seeds or chopped green onions on top. This adds both flavor and a pop of color! {{image_2}} You can switch up the sweetness in this recipe. Instead of honey, try maple syrup or agave. Both options give a unique taste. They can add a nice twist to the dish. You can also add bacon bits or nuts for texture. Bacon adds a savory touch, while nuts give crunch. Want to try something new? Use an air fryer! It cooks the sprouts crispy and keeps them tender. Just place the skewers in the air fryer for about 10 minutes. You can also broil them in the oven. Broiling gives a nice char and quick cooking. Place them on a baking sheet under the broiler for 8-10 minutes. Flip them halfway for even cooking. If you are vegan, skip the honey. Use maple syrup or agave instead. For gluten-free options, make sure to use gluten-free soy sauce. These small changes make it easy for anyone to enjoy this dish. To keep your Honey Sriracha Brussels Sprout Skewers fresh, store them in the fridge. Place leftovers in an airtight container. They will last up to four days. If you want to keep them longer, consider freezing them. Wrap the skewers tightly in plastic wrap and then in aluminum foil. Label the package and freeze for up to three months. When it’s time to enjoy leftovers, reheating them right makes a big difference. For the best results, use the oven. Preheat your oven to 350°F (175°C). Place the skewers on a baking sheet. Heat for about 10 minutes or until they are warm. This keeps them crispy and tasty. If you need a faster option, use the microwave. Place the skewers on a microwave-safe plate. Cover them with a damp paper towel. Heat for about 1-2 minutes, checking to avoid overcooking. This method is quick but may make them a bit softer. Enjoy your tasty skewers! Grill Brussels sprout skewers for about 10 to 12 minutes. Turn them occasionally to get even cooking. You want them to be browned and tender. If you bake them, roast for 20 to 25 minutes, flipping halfway. You can use frozen Brussels sprouts, but they need some changes. Thaw them first and pat them dry. Frozen sprouts may release more water, so reduce the olive oil slightly. These skewers pair well with many dishes. Try serving them with rice or quinoa for a hearty meal. Grilled chicken or shrimp also works great. For drinks, go with iced tea or a light beer. In this blog post, we explored how to make Honey Sriracha Brussels sprout skewers. We covered key ingredients, cooking methods, and even tips to perfect your dish. These skewers offer a mix of sweet and spicy flavors that make them a hit at any meal. Remember, you can adjust spices or try different cooking techniques to suit your taste. Finally, enjoy experimenting with ways to serve and store your tasty creations.

Honey Sriracha Brussels Sprout Skewers Delicious Treat

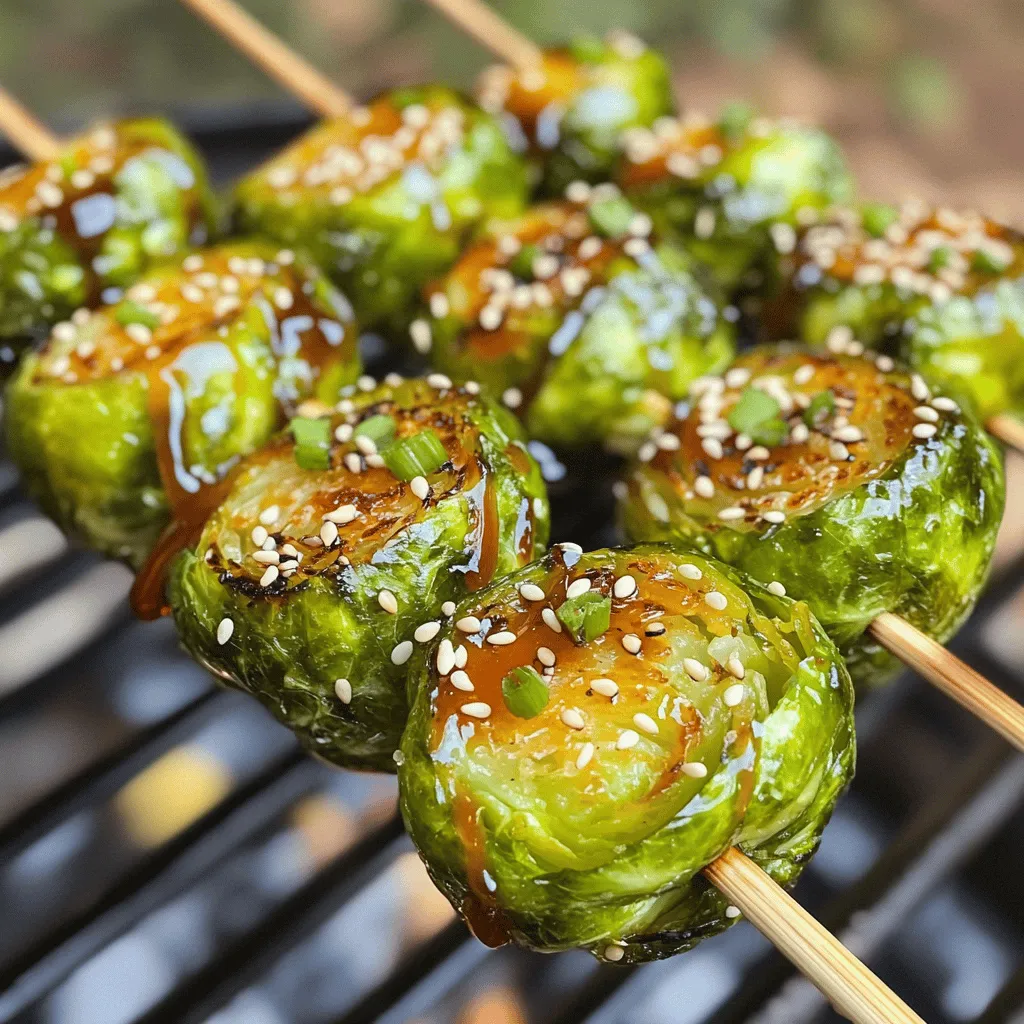
If you’re looking for a fun and tasty way to enjoy Brussels sprouts, you’ve come to the right place! Honey

- 1 cup all-purpose flour - 1/2 cup cocoa powder - 1 teaspoon baking powder - 1/2 teaspoon baking soda - 1/4 teaspoon salt In this recipe, the dry ingredients play a key role. The all-purpose flour gives structure. Cocoa powder adds rich chocolate flavor. Baking powder and baking soda help the muffins rise. Salt balances the sweetness and enhances flavor. - 1/2 cup granulated sugar - 1/2 cup brown sugar, packed - 1/2 cup unsweetened applesauce - 2 large eggs - 1/2 cup brewed espresso or strong coffee, cooled - 1 teaspoon vanilla extract The wet ingredients bring moisture and sweetness. Granulated sugar and brown sugar add depth. Applesauce keeps the muffins soft while reducing fat. Eggs bind the mixture. Brewed espresso adds a coffee kick, enhancing the chocolate. Vanilla extract rounds out the flavors. - 1/2 cup chocolate chips (dark or semi-sweet) - 1/4 cup milk chocolate chunks (optional for extra chocolatey goodness) Chocolate chips are a must for a double chocolate experience. They melt into the batter, creating pockets of gooey goodness. Milk chocolate chunks are optional but add a fun twist. They bring extra sweetness and texture. First, preheat your oven to 350°F (175°C). This step is key to getting your muffins fluffy. Next, line a 12-cup muffin tin with paper liners or give it a light coat of non-stick spray. This helps the muffins release easily. In a medium bowl, combine the dry ingredients. Whisk together 1 cup of all-purpose flour, ½ cup of cocoa powder, 1 teaspoon of baking powder, ½ teaspoon of baking soda, and ¼ teaspoon of salt. Mix until everything is well blended. This ensures even flavor throughout. Now it's time for the wet ingredients. In a large bowl, blend ½ cup of granulated sugar and ½ cup of brown sugar until smooth. Add ½ cup of unsweetened applesauce, 2 large eggs, ½ cup of cooled espresso or strong coffee, and 1 teaspoon of vanilla extract. Mix until everything is well combined. Gently add the dry ingredients to the wet mixture. Stir until just combined. A few lumps are okay; don’t overmix. Overmixing can make the muffins tough. You want them soft and fluffy! Scoop the batter into your prepared muffin tin. Fill each cup about ¾ full for the best height. Bake in the preheated oven for 18-20 minutes. To check for doneness, insert a toothpick into the center. If it comes out clean, they’re ready. Once baked, let the muffins cool in the tin for 5 minutes. This helps them firm up. After that, carefully transfer them to a wire rack to cool completely. Serve them warm for a tasty treat! To get the right texture, avoid overmixing your batter. When you mix, aim for just combined. A few lumps are okay. This keeps your muffins light and fluffy. The ideal muffin has a soft and moist crumb. If you mix too much, your muffins can turn out dense and tough. You can add nuts or dried fruit for extra texture and taste. Chopped walnuts or almonds work well. Dried cherries or cranberries can add a nice touch too. Adjust the sweetness by using less sugar or adding a bit more cocoa powder. This makes your muffins fit your taste better. For a great presentation, serve muffins warm. Dust them with powdered sugar or cocoa powder for a nice look. You can also add a dollop of whipped cream on the side. For a richer treat, drizzle some chocolate syrup over them. Pair these muffins with your favorite coffee or a glass of cold milk for a delightful experience. {{image_2}} You can make these muffins a bit healthier. First, try using applesauce instead of oil. This swap cuts down on fat. It also adds moisture and sweetness. You won’t lose any flavor. Next, consider gluten-free options. Use a gluten-free flour blend. Many blends work well. They give the muffins a nice rise. You can enjoy the same taste without the gluten. Want to mix up the taste? You can add spices like cinnamon or nutmeg. These spices bring warmth and depth. Just a dash can change the whole flavor. Another great idea is to use extracts. Mint or almond extracts add unique twists. A little goes a long way. It can surprise your taste buds in a good way. You can change these muffins with the seasons. For fall, try a pumpkin version. Use pumpkin puree in place of some applesauce. Add warm spices like cinnamon and nutmeg. It’s a cozy treat for chilly days. During the holidays, make a chocolate mint version. Add peppermint extract and some crushed candy canes. This gives a festive flair. The combination of chocolate and mint is always a hit! Keep your Double Chocolate Mocha Muffins fresh in an airtight container. This helps lock in moisture and flavor. Store them at room temperature for up to three days. If you want them to last longer, put them in the fridge. Just remember that cold can change the texture a bit. For long-term storage, freezing is your best bet. Wrap each muffin tightly in plastic wrap. Then, place them in a freezer bag or container. This prevents freezer burn and keeps them tasty. Your muffins can last up to three months in the freezer. When you're ready to enjoy, just thaw them overnight in the fridge. To reheat your muffins, use the oven for the best results. Preheat it to 350°F (175°C). Place the muffins on a baking sheet for about 10 minutes. This keeps them soft and warm. You can also use the microwave, but be careful. Heat them in short bursts of 10 to 15 seconds to avoid drying them out. Enjoy your muffins warm for the best taste! Double chocolate mocha muffins last about 3 to 4 days when stored properly. Keep them in an airtight container at room temperature. If you want them to last longer, you can freeze them. They freeze well for up to 3 months. Just thaw them at room temperature when you want to enjoy one. Yes, you can make these muffins without espresso. You can use strong brewed coffee instead. If you do not want any coffee flavor, use milk or water. However, the espresso adds a rich depth. Removing it might change the taste slightly. To make these muffins dairy-free, swap the regular milk with a non-dairy milk. Almond milk, oat milk, or soy milk work well. Ensure your chocolate chips are dairy-free too. This way, you keep all the chocolatey goodness without dairy. If you need a substitute for applesauce, try mashed bananas. They will add moisture and sweetness. You can also use yogurt or pureed pumpkin. Each option will change the flavor slightly, but they work well in muffins. Absolutely! You can use regular chocolate chips instead of dark chocolate. Semi-sweet chips are a great option too. Just know that using milk chocolate will make the muffins sweeter. Choose what you like best for a delicious treat. These Double Chocolate Mocha Muffins are easy to make and delicious. We explored the right mix of dry and wet ingredients, step-by-step instructions, and helpful tips. You can customize them with your favorite flavors or make them healthier. Remember, perfect muffins come from careful mixing and storage. Enjoy baking, sharing, and savoring these treats. You’ll impress everyone with your skills!

Double Chocolate Mocha Muffins Rich and Decadent Treat

Craving a rich and decadent treat that combines chocolate and coffee? Look no further! These Double Chocolate Mocha Muffins are

To make a tasty veggie loaded taco soup, you need these main items: - 1 can (15 oz) black beans, rinsed and drained - 1 can (15 oz) kidney beans, rinsed and drained - 1 can (15 oz) corn kernels, drained - 1 medium zucchini, diced - 1 bell pepper (any color), diced - 1 medium onion, chopped - 2 cloves garlic, minced - 1 can (14.5 oz) diced tomatoes with green chilies - 2 cups vegetable broth - 1 tablespoon taco seasoning (store-bought or homemade) - 1 teaspoon cumin - 1 teaspoon paprika - Salt and pepper to taste - Juice of 1 lime These ingredients create a hearty base for your soup and pack it with flavor. Garnishing your soup makes it more fun to eat. Here are some great ideas: - Fresh cilantro, for garnish - Avocado slices, for serving - Tortilla chips, for serving These toppings add freshness and crunch, making your meal feel special. To ensure your taco soup tastes great, choose quality products. - Use low-sodium vegetable broth to control salt. - Pick organic canned beans and corn for better taste. - Use fresh vegetables when possible for added flavor. By selecting the best ingredients, you’ll create a delicious and satisfying meal everyone will enjoy. To start, gather all your ingredients. You will need: - 1 can (15 oz) black beans, rinsed and drained - 1 can (15 oz) kidney beans, rinsed and drained - 1 can (15 oz) corn kernels, drained - 1 medium zucchini, diced - 1 bell pepper (any color), diced - 1 medium onion, chopped - 2 cloves garlic, minced - 1 can (14.5 oz) diced tomatoes with green chilies - 2 cups vegetable broth - 1 tablespoon taco seasoning - 1 teaspoon cumin - 1 teaspoon paprika - Salt and pepper to taste - Juice of 1 lime - Fresh cilantro, for garnish - Avocado slices, for serving - Tortilla chips, for serving Wash and chop the zucchini, bell pepper, and onion. Drain the beans and corn. Mince the garlic. This step makes cooking smooth. Grab your large crockpot. Start by adding the black beans, kidney beans, corn, zucchini, bell pepper, onion, and garlic. Next, pour the can of diced tomatoes on top. Do not drain the tomatoes; the juices add flavor. Now, add the vegetable broth. Sprinkle in the taco seasoning, cumin, paprika, salt, and pepper. Stir everything gently. Mixing well ensures all flavors blend. Cover your crockpot. Set it to cook. If you choose low, cook for 6-8 hours. For a quicker meal, set it to high and cook for 3-4 hours. You want the veggies to be tender and the flavors to meld. When the cooking time is up, squeeze in the lime juice for a fresh touch. Serve hot, garnished with fresh cilantro, avocado slices, and tortilla chips. Enjoy your hearty taco soup! To boost the taste of your taco soup, use fresh herbs. Fresh cilantro adds a bright flavor. You can also use fresh lime juice for a zesty kick. If you want more heat, add diced jalapeños or a dash of hot sauce. For depth, try using smoked paprika instead of regular paprika. A splash of soy sauce can add umami, too. One big mistake is not rinsing canned beans. Rinsing helps reduce sodium and improves taste. Another common error is overcooking the soup. Cooking too long can make the veggies mushy. Be sure to check the doneness of the veggies before serving. Lastly, do not skip the lime juice. It brightens up the flavors and makes the soup pop. Serve your soup in deep bowls for a cozy feel. Top each bowl with fresh cilantro and avocado slices. Crunchy tortilla chips on the side add great texture. You can also offer a dollop of sour cream or Greek yogurt for creaminess. For extra flair, set out lime wedges. Your guests will love customizing their bowls! {{image_2}} You can change the veggies in your taco soup to fit your taste. Try adding carrots, spinach, or sweet potatoes. Each option brings a new flavor and texture. You can also use what you have at home. Just keep the balance of beans and broth the same to keep it hearty. If you love heat, add some diced jalapeños or a dash of hot sauce. You can also swap regular taco seasoning for a spicy blend. For a mild version, stick to the basic taco seasoning. Taste as you cook. Adjust the spice to suit your family’s taste buds. To make the soup heartier, add proteins like diced chicken, turkey, or beef. You can also use tofu or tempeh for a plant-based option. If you add meat, make sure to cook it before adding to the crockpot. This way, your soup stays flavorful and filling. After you make your veggie loaded taco soup, let it cool down. Use an airtight container for storage. Glass containers work well because they do not absorb odors. Make sure to label and date your containers. This way, you will know how long they have been in the fridge. You can freeze the soup for later. Just pour it into freezer-safe bags or containers. Remove as much air as you can to prevent freezer burn. It will last about three months in the freezer. When you're ready to eat, thaw it in the fridge overnight. Reheat on the stove or in the microwave until hot. Stir well to ensure even heating. When you have leftovers, store them in small portions. This makes it easier to reheat just what you need. If you have toppings like avocado or cilantro, add those fresh when serving. This keeps them crisp and tasty. Always check your soup for freshness before eating it. If it smells or looks off, throw it out. Enjoy your hearty meal again! Yes, this taco soup is already vegetarian. It uses black and kidney beans for protein. You can add more veggies like carrots or sweet potatoes for added flavor. If you want to enhance taste, try adding more spices or herbs. You can make your own taco seasoning easily. Just mix cumin, paprika, garlic powder, and onion powder. Adjust to your taste. You can also use chili powder or a store-bought spice blend if you prefer. This recipe is gluten-free if you choose gluten-free broth and seasonings. Always check labels on your ingredients. Most canned beans, corn, and tomatoes are gluten-free, but it’s good to verify. This blog post shared how to make a tasty veggie loaded taco soup. You learned about key ingredients and optional garnishes to enhance your dish. I provided step-by-step instructions for cooking it in a crockpot, along with tips to boost flavors and avoid mistakes. Exploring variations helps you customize the soup to your taste. Lastly, I covered how to store your soup and answered common questions. Enjoy your cooking, and remember, each bowl can be a new adventure!

Veggie Loaded Taco Soup Crockpot Easy Comfort Meal

Are you ready for a warm, hearty meal that requires minimal effort? This veggie-loaded taco soup in the crockpot is

- 2 cups fresh strawberries, hulled and diced - 1/4 cup granulated sugar - 1 teaspoon lemon juice - 1 cup heavy cream - 1 cup sweetened condensed milk - 1 teaspoon vanilla extract - 1 cup crushed shortbread cookies (about 10-12 cookies) - 1/4 cup additional crushed shortbread cookies for topping - A pinch of salt - 1 cup = 240 milliliters - 1/4 cup = 60 milliliters - 1 teaspoon = 5 milliliters These conversions help when you need to adjust the recipe for your needs. If you don’t have heavy cream, use coconut cream for a dairy-free option. For sweetened condensed milk, try using evaporated milk mixed with sugar. You can substitute shortbread cookies with graham crackers if needed. Fresh strawberries can be swapped for raspberries or blueberries for a different flavor. Start by washing 2 cups of fresh strawberries. Remove the green tops and dice them into small pieces. In a medium bowl, mix the strawberries with 1/4 cup of granulated sugar and 1 teaspoon of lemon juice. Toss them well to coat. Let this mixture sit for about 15-20 minutes. This step helps the strawberries become sweet and juicy. In a large mixing bowl, pour in 1 cup of heavy cream. Use a hand mixer to whip the cream until it forms stiff peaks. This means the cream should hold its shape well. Next, gently fold in 1 cup of sweetened condensed milk, 1 teaspoon of vanilla extract, and a pinch of salt. Mix carefully to keep the cream light and fluffy. Line an 8x8 inch baking dish with parchment paper. Start by sprinkling half of the crushed shortbread cookies on the bottom of the dish. Then, pour the strawberry-cream mixture over the cookies. Spread it evenly with a spatula. Next, add the remaining crushed shortbread cookies on top, pressing them down slightly. Cover the dish with plastic wrap and freeze for at least 4-6 hours. Once frozen, let it sit for 5 minutes outside the freezer. This makes cutting easier. Lift the parchment paper out and slice into bars. Enjoy your tasty frozen treat! To get the best texture for your strawberry shortcake ice cream bars, focus on the whipped cream. Whip the cream until it forms stiff peaks. This step gives the bars a light, creamy feel. Gently fold in the sweetened condensed milk and vanilla. If you stir too hard, you can lose that fluffiness. When adding the strawberries, keep their juices. They add flavor and moisture, making the bars richer. Serve your ice cream bars chilled for the best taste. You can drizzle some strawberry sauce on top for a sweet touch. Fresh mint leaves make a lovely garnish. They add color and a refreshing flavor. If you want to wow your guests, serve the bars on a chilled plate. This simple step looks nice and keeps the bars cool longer. For making these bars, you’ll need a few key tools: - Medium mixing bowl: To mix the strawberries. - Large mixing bowl: For whipping the cream. - Whisk or electric mixer: To whip the cream. - Parchment paper: To line your baking dish. - 8x8 inch baking dish: For setting the bars. - Sharp knife: To cut the bars after freezing. Using the right tools makes the process easier and ensures better results. {{image_2}} You can easily turn your strawberry shortcake bars into chocolate ones. For this twist, add cocoa powder to the whipped cream. Use about 1/4 cup of unsweetened cocoa powder. You can also fold in chocolate chips along with the strawberries. This will give you a rich, chocolatey flavor. The mix of chocolate and strawberry will delight your taste buds! If you want a dairy-free treat, swap out the heavy cream and sweetened condensed milk. You can use coconut cream instead. Make sure to chill the can first. This will help it whip up nicely. For the sweetened condensed milk, try a dairy-free version made from coconut or almond milk. This keeps your bars creamy and tasty without dairy. To make your strawberry shortcake bars gluten-free, choose gluten-free cookies. Many brands offer great options that taste just as good. Look for shortbread cookies made from almond or coconut flour. This way, you can enjoy your bars without the gluten. Just be sure to check the labels to ensure they are certified gluten-free. To keep your strawberry shortcake ice cream bars fresh, store them in a freezer-safe container. I prefer using an airtight container to prevent freezer burn. You can also wrap the bars in plastic wrap for extra protection. Make sure to label your container with the date. This way, you know when you made the treat. These bars can last in the freezer for about 2 to 3 months. They taste best when eaten within a month. After that, the flavors may fade a bit. If you see ice crystals forming, it’s time to toss them. Trust me, you want to enjoy these at their best! To enjoy your ice cream bars, thaw them the right way. Take them out of the freezer and let them sit at room temperature for about 5 to 10 minutes. This makes them soft enough to cut and eat. If you are in a hurry, you can microwave them for a few seconds, but be careful not to melt them! Enjoy your tasty treat! Yes, you can use frozen strawberries. Just thaw them first. Drain any extra water. This helps keep your ice cream bars creamy. If using frozen strawberries, keep an eye on the sugar. They tend to be sweeter. Adjust the sugar to your taste. You can make these bars a day or two in advance. Prepare them, then freeze as directed. Just remember to let them sit for about 5 minutes before cutting. This makes slicing easier. They stay fresh in the freezer for up to two weeks. You can use coconut milk or almond milk for a lighter option. Just add sugar to match the sweetness. Another option is a mix of cream and sugar. This gives a similar creaminess. Adjust the amount to suit your taste. This blog post covered all you need for making delicious strawberry treats. We discussed ingredients, measurements, and substitutions. I shared step-by-step instructions for preparation and assembly. You also learned helpful tips for great texture and serving ideas. Don’t forget the fun variations you can try, like chocolate bars or dairy-free options. Finally, I detailed best practices for storing your treats. Enjoy your kitchen time and create something delightful!

Strawberry Shortcake Ice Cream Bars Tasty Frozen Treat

Craving a sweet and refreshing treat? Strawberry Shortcake Ice Cream Bars are the answer! This easy recipe packs all the

- 4 salmon fillets - 2 tablespoons olive oil - 3 cloves garlic, minced - 1 cup fresh spinach - 1/2 cup sun-dried tomatoes, chopped - 1 cup heavy cream - 1 teaspoon Italian seasoning - 1/2 cup grated Parmesan cheese - Salt and pepper to taste - Fresh basil, for garnish This dish shines with its fresh and vibrant ingredients. You start with salmon fillets, which are high in protein and omega-3s. Olive oil brings a rich flavor and healthy fats. Garlic adds a punch of taste that brightens the dish. Fresh spinach gives a nice color and nutrients. Sun-dried tomatoes introduce a sweet and tangy note. For the sauce, the heavy cream makes it rich and creamy. Italian seasoning enhances the flavor with herbs like oregano and basil. Grated Parmesan cheese adds a salty, nutty touch. Don’t forget salt and pepper to taste. Fresh basil on top adds both aroma and a pop of color. Using quality ingredients elevates this meal. Each component plays a role in making your One-Skillet Tuscan Salmon both delicious and healthy. First, heat 2 tablespoons of olive oil in a large skillet over medium-high heat. While the oil warms, season 4 salmon fillets with salt and pepper. Once the oil shimmers, place the salmon skin-side down in the skillet. Cook the salmon for about 4-5 minutes on each side. You want a golden-brown crust. Check for doneness by gently flaking the thickest part of the fillet. When it flakes easily, it’s ready. Remove the salmon from the skillet and set it aside. Next, in the same skillet, add 3 minced garlic cloves. Sauté them for about 30 seconds until they are fragrant. Then, add 1/2 cup of chopped sun-dried tomatoes. Cook for another minute to soften them. Reduce the heat to medium-low and pour in 1 cup of heavy cream. Stir continuously to mix with the garlic and tomatoes. Add 1 teaspoon of Italian seasoning and let it simmer for about 2-3 minutes until it thickens slightly. Now, stir in 1 cup of fresh spinach and let it wilt for 1-2 minutes. Once the spinach is soft, sprinkle in 1/2 cup of grated Parmesan cheese. Stir until the cheese melts and the sauce becomes creamy. Carefully return the cooked salmon to the skillet. Spoon the sauce over each fillet to coat it well. Let everything simmer together for an additional 2 minutes to reheat the salmon. Finally, remove the skillet from the heat and garnish with fresh basil before serving. To ensure your salmon is cooked properly, focus on timing. Cook each fillet for about 4-5 minutes on each side. Look for a golden brown color. The salmon should flake easily with a fork when done. If you prefer, use a meat thermometer. Aim for an internal temperature of 145°F. For a creamy sauce consistency, stir in the heavy cream slowly. Keep the heat on medium-low to avoid burning. Add the Parmesan cheese after the cream. This helps it melt well and gives a rich texture. If the sauce gets too thick, add a splash of water or broth. Garnish your dish with fresh basil for a pop of color and flavor. Just sprinkle the leaves on top right before serving. This adds a fresh taste that balances the creaminess. When it comes to sides, pair this dish with simple options. Steamed green beans or a fresh salad work great. You can also serve it with crusty bread to soak up the sauce. Each bite will be a delight! {{image_2}} You can change the vegetables in this dish to suit your taste. Try using kale or arugula instead of spinach. Both add unique flavors and nutrients. You can also add bell peppers or zucchini for a colorful twist. If you want to swap proteins, go for chicken or shrimp. Both options give a nice flavor and cook well in the skillet. For a vegetarian option, use firm tofu or chickpeas. Just make sure to adjust cooking times for these swaps. Cheese can be varied too. If you want a sharper taste, try using aged cheddar or goat cheese instead of Parmesan. Each cheese will change the dish’s flavor profile. Herbs and spices can take this dish to the next level. Adding fresh herbs like thyme or oregano can boost the taste. If you love heat, sprinkle in some red pepper flakes for a kick. Citrus is another great way to add brightness. You can squeeze fresh lemon or lime juice over the dish before serving. This small step will brighten the flavors and refresh your palate. Consider adding lemon zest for an extra zing. These variations let you make One-Skillet Tuscan Salmon your own. Have fun experimenting with different ingredients and flavors! To keep your One-Skillet Tuscan Salmon fresh, store it in the fridge. Place the salmon in an airtight container. It will last for up to three days. For best taste, eat it within two days. When you reheat, use the stovetop. Heat on low until warm. This keeps the salmon moist and tasty. You can also use a microwave. Cover the salmon with a damp paper towel to prevent it from drying out. To freeze One-Skillet Tuscan Salmon, let it cool completely. Wrap each fillet in plastic wrap. Then place them in a freezer-safe bag. Remove as much air as possible. It can stay in the freezer for up to three months. When ready to eat, thaw it in the fridge overnight. For quick thawing, place the bag in cold water for an hour. After thawing, you can reheat it using the stovetop method or the microwave. Cooking salmon in a skillet takes about 8 to 10 minutes. - Cook skin-side down for 4-5 minutes. - Flip and cook for another 4-5 minutes. - Aim for an internal temperature of 145°F. Yes, you can use frozen salmon fillets. - Thaw them overnight in the fridge. - If you need to cook them frozen, add a few extra minutes. - Cook until the salmon is opaque and flakes easily. You can pair this dish with several sides. - Serve with creamy mashed potatoes. - Try garlic bread for a crunchy touch. - A fresh salad with lemon vinaigrette works well too. - Roasted vegetables add a nice color and flavor. In this article, we explored the key ingredients for One-Skillet Tuscan Salmon, like salmon, garlic, and fresh spinach. We walked through step-by-step instructions for preparing the salmon and making a creamy sauce. I also shared tips to perfect your dish, offering serving suggestions and variations. Final thoughts: This meal is simple yet flavorful, making it a great option for any night. Enjoy your cooking journey and share this delicious dish with loved ones.

One-Skillet Tuscan Salmon Quick and Flavorful Meal

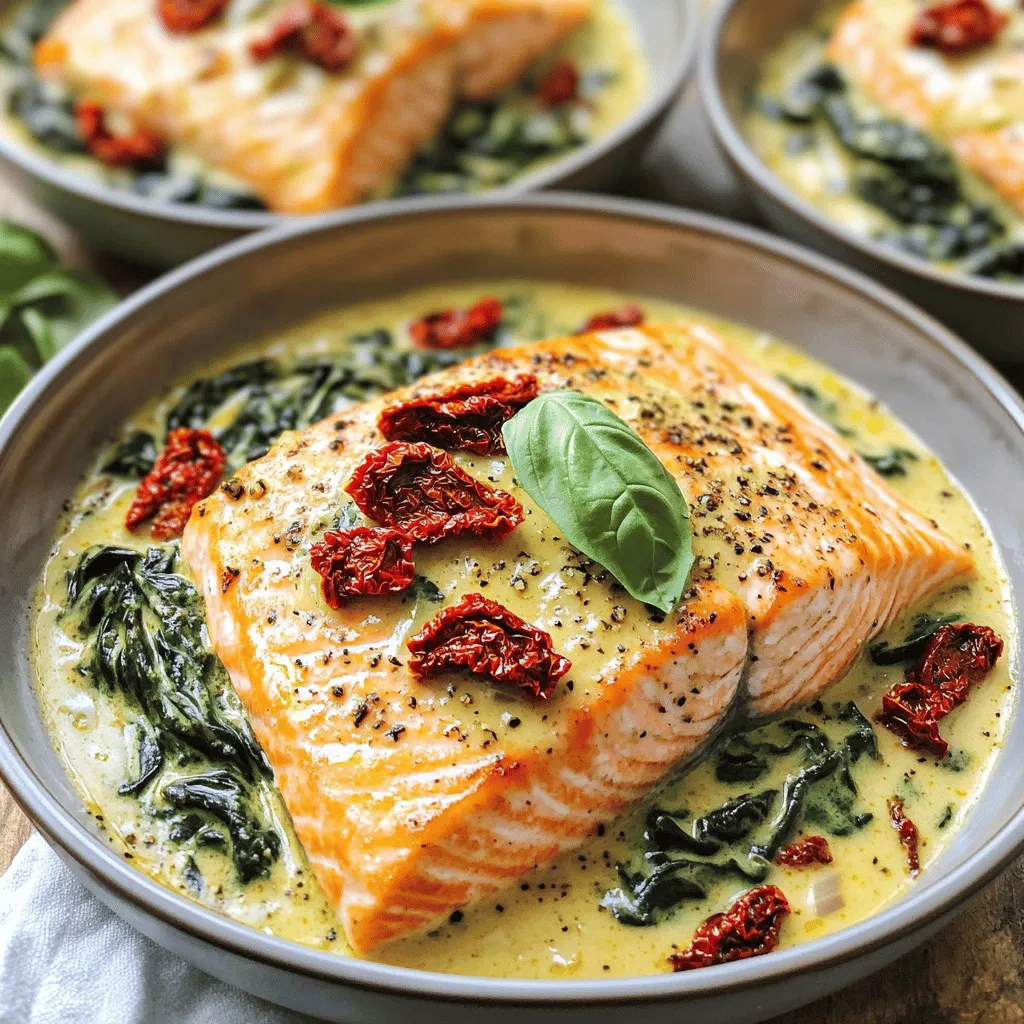
Looking for a quick and tasty meal? This One-Skillet Tuscan Salmon recipe checks all the boxes. With just a few

- 1 cup ricotta cheese - 2 large eggs - 1 cup milk - 1 tablespoon lemon zest - 2 tablespoons lemon juice - 1 cup all-purpose flour - 2 tablespoons sugar - 1 tablespoon baking powder - ½ teaspoon salt - 1 cup fresh blueberries - Butter or oil for cooking For this recipe, using ricotta cheese is key. It makes the pancakes light and fluffy. If you don't have ricotta, you can use cottage cheese. Just blend it until smooth. Sour cream can also work as a substitute. It adds creaminess too. For the milk, any type is fine. Whole milk makes them richer. Almond or oat milk also works well for a dairy-free option. If you prefer less sugar, you can cut the sugar by half. The pancakes will still taste great. You can also use honey or maple syrup as a sweetener instead. Garnishing your pancakes can add extra flair. Here are some ideas: - A pat of butter on top - Additional fresh blueberries - A drizzle of maple syrup - A sprinkle of powdered sugar - Lemon slices for a fresh touch These garnishes can enhance the look and taste of your pancakes. They make each bite even more delicious! Start by taking a large mixing bowl. Add 1 cup of ricotta cheese, 2 large eggs, and 1 cup of milk. Then, zest one lemon and add 1 tablespoon of lemon zest. Squeeze in 2 tablespoons of lemon juice for a fresh kick. Use a whisk to mix everything together. You want it smooth and well blended. In another bowl, add 1 cup of all-purpose flour, 2 tablespoons of sugar, 1 tablespoon of baking powder, and ½ teaspoon of salt. Use a whisk to combine these dry ingredients well. This step is key for the pancakes to rise nicely. Now, gently fold the dry mix into the ricotta mixture. Be careful not to overmix; a few lumps are okay. Once mixed, fold in 1 cup of fresh blueberries. Heat a non-stick skillet over medium heat. Add a little butter or oil to grease it. Pour about ¼ cup of batter for each pancake. Cook for 3-4 minutes until bubbles appear and edges look set. Flip the pancakes and cook for another 2-3 minutes until golden brown. Repeat until all the batter is cooked. Serve warm with butter, extra blueberries, and maple syrup if you like! To make your pancakes fluffy, use fresh ricotta cheese. It adds moisture and lightness. Make sure to whisk the eggs well before adding them. This helps to incorporate air, which leads to fluffiness. When mixing the dry and wet ingredients, mix gently. Overmixing will make the pancakes dense. A few lumps are okay. Finally, let the batter sit for a few minutes. This allows the flour to hydrate and makes for a better texture. Flipping pancakes can be tricky. Wait until you see bubbles forming on the surface. This shows that the pancake is ready to flip. Use a thin spatula to slide under the pancake. Lift gently, and flip quickly. If the pancake sticks, it may need more cooking time. Cook the second side until it is golden brown. This usually takes about 2-3 minutes. If you have leftovers, let them cool first. Place pancakes in an airtight container. Store them in the fridge for up to three days. For longer storage, freeze the pancakes in a single layer. Once frozen, transfer them to a freezer bag. They can last up to three months in the freezer. When you're ready to eat, reheat pancakes in a toaster or microwave. This brings back their fluffy texture. {{image_2}} You can easily make these pancakes gluten-free. Just swap the all-purpose flour with a gluten-free blend. Look for blends that include xanthan gum. This will help your pancakes stay fluffy. Mix the gluten-free flour in the same way as regular flour. The taste and texture will still be delicious. If you want to mix things up, try using different berries. Strawberries or raspberries work great too. Just chop the strawberries into small pieces. For raspberries, you can just fold them in whole. Each berry adds a unique flavor and color to your pancakes. This keeps breakfast fun and fresh. Want to add some crunch? Try folding in nuts like walnuts or pecans. They add a nice texture and flavor. For a sweet twist, mix in chocolate chips. They melt and give a rich taste. You can use dark, milk, or white chocolate chips. This way, every pancake can be a little different. Enjoy experimenting with these fun and tasty variations! You can store leftover pancakes in the fridge. Place them in an airtight container. They will stay fresh for about 2 to 3 days. Make sure to let them cool before sealing. This helps prevent moisture from making them soggy. For longer storage, freeze your pancakes. Stack them with a piece of parchment paper in between each one. Place the stack in a freezer-safe bag or container. They can last up to 2 months in the freezer. Just label the bag with the date. This way, you can enjoy them later! To reheat pancakes, you can use the microwave or a skillet. For the microwave, place them on a plate and cover with a damp paper towel. Heat for 30 seconds or until warm. If you prefer a crispier pancake, use a skillet. Heat over medium heat for about 1 to 2 minutes on each side. Enjoy them warm and fluffy again! Yes, you can make these pancakes ahead of time. Just cook them and let them cool. Once cool, stack them with parchment paper between each pancake. Place the stack in a covered container in the fridge. You can keep them for up to three days. When you are ready to eat, warm them in a toaster or microwave. If you don’t have ricotta, you can use cottage cheese. Blend it smooth for a similar texture. You can also use cream cheese. Just soften it first and mix it well. Greek yogurt is another option, but it will change the flavor a bit. Watch for bubbles on the surface of the pancakes. When you see bubbles, it’s time to flip them. The edges will also look set. After flipping, let them cook until they are golden brown. You can test with a toothpick; it should come out clean when done. You learned how to make delicious Blueberry Lemon Ricotta Pancakes. We covered the right ingredients, how to measure, and possible substitutes. I shared tips for fluffy pancakes and storing leftovers. You can even explore variations like gluten-free options. Remember, making pancakes can be fun and easy. Experiment with flavors and enjoy your meals!

Blueberry Lemon Ricotta Pancakes Fluffy and Delicious

Start your day with a burst of flavor! Blueberry Lemon Ricotta Pancakes are fluffy, light, and oh-so-delicious. Imagine biting into

To make Creamy Sun-Dried Tomato Gnocchi, gather these key items: - 1 pound potato gnocchi - 1 cup sun-dried tomatoes (packed in oil), chopped - 1 cup heavy cream - 1/2 cup grated Parmesan cheese - 2 tablespoons olive oil - 2 cloves garlic, minced - 1 teaspoon dried basil - Salt and pepper to taste - Fresh basil leaves for garnish You can add a few extras for more taste: - Crushed red pepper flakes for spice - Extra herbs like oregano or thyme - A splash of white wine for depth If you need to change an ingredient, here are some options: - Use gluten-free gnocchi for a gluten-free dish. - Swap heavy cream with coconut cream for a dairy-free version. - Try nutritional yeast instead of Parmesan for a vegan option. Using these ingredients wisely will help create a rich and tasty dish. Each choice adds to the flavor, so feel free to mix and match to your liking! To start, bring a large pot of salted water to a boil. This step is key for cooking the gnocchi perfectly. Once boiling, gently add 1 pound of potato gnocchi to the pot. Cook them for about 2-3 minutes. Watch closely; they are ready when they float to the top. After cooking, drain the gnocchi and set them aside. Next, take a large skillet and heat 2 tablespoons of olive oil over medium heat. Add 2 cloves of minced garlic, and sauté for about 1 minute. You want the garlic to smell fragrant, not brown. Now, stir in 1 cup of chopped sun-dried tomatoes. Let these cook for another 2-3 minutes. This step allows the flavors to mix well. After that, pour in 1 cup of heavy cream. Bring the mixture to a gentle simmer. This is where the dish gets its creaminess! Add in 1/2 cup of grated Parmesan cheese and 1 teaspoon of dried basil. Stir until the cheese melts, taking about 3-4 minutes. Season with salt and pepper to taste. For a bit of heat, sprinkle in some crushed red pepper flakes if you like. Now it’s time to bring the dish together! Gently fold the cooked gnocchi into the creamy sauce. Make sure every piece is coated well. Heat through for another 2-3 minutes, so everything warms up nicely. After that, remove from heat and let the dish stand for a minute before serving. This short wait helps the flavors settle. When you serve, use shallow bowls and garnish with fresh basil leaves. A sprinkle of Parmesan on top adds a nice touch. If you drizzle a bit of olive oil over the top, it will look even better. Enjoy your creamy sun-dried tomato gnocchi! To get the best texture, choose good gnocchi. I like using potato gnocchi. Cook it in salted water until it floats. This usually takes about 2-3 minutes. Don’t overcook it! Overcooked gnocchi can become mushy. Drain it gently and set it aside. This step sets the stage for a perfect bite. The cream sauce needs balance. Start by heating olive oil in your skillet. Sauté minced garlic until it smells good. Add chopped sun-dried tomatoes next. This adds a tasty punch. Pour in the heavy cream and let it simmer gently. Stir in Parmesan cheese and dried basil. This creates a rich, creamy sauce. Taste it! Add salt, pepper, or crushed red pepper to adjust the flavor. You want it creamy but not too heavy. Presentation matters! Serve your gnocchi in shallow bowls. Top with fresh basil leaves for color. A sprinkle of Parmesan adds flair. For extra richness, drizzle some olive oil over the top. These simple steps make your dish look great and inviting. Enjoy sharing this meal with friends or family! {{image_2}} You can make your creamy sun-dried tomato gnocchi even better with add-ins. Adding vegetables boosts color and nutrition. Try spinach, mushrooms, or bell peppers. Simply sauté them with garlic before adding the sun-dried tomatoes. For proteins, cooked chicken or shrimp work well. They add heartiness to your dish. Just mix them in when you combine the gnocchi and sauce. Want to elevate the flavor? Fresh herbs are the way to go! Basil adds a bright taste. You can also try thyme or parsley for a different twist. For a bit of heat, sprinkle in crushed red pepper flakes. This adds a kick to your creamy sauce. If you love a smoky flavor, add a touch of smoked paprika. It brings depth to your dish. You can easily adapt this recipe for vegan or dairy-free diets. Use vegan gnocchi made from plant sources. Replace heavy cream with coconut cream or cashew cream. For cheese, use vegan Parmesan or nutritional yeast. This still gives you that creamy texture and rich flavor. Always check the labels to ensure your ingredients fit your dietary needs. To keep your creamy sun-dried tomato gnocchi fresh, store it in an airtight container. Let the dish cool to room temperature first. Then, cover it tightly. This helps prevent moisture loss and keeps flavors intact. You can store the leftovers in the fridge for up to three days. If you want to enjoy it later, consider freezing. When you're ready to eat the leftovers, reheating is easy. You can use the stovetop or microwave. For the stovetop, place the gnocchi in a skillet over low heat. Add a splash of cream or water to help the sauce. Stir gently until heated through. If you use the microwave, place the gnocchi in a microwave-safe bowl. Cover it with a damp paper towel. Heat in short bursts, stirring in between, until hot. Freezing creamy sun-dried tomato gnocchi is a great option for meal prep. To freeze, portion the gnocchi into freezer-safe containers. Make sure to leave some space at the top to allow for expansion. You can freeze the dish for up to two months. When you're ready to enjoy it, thaw it in the fridge overnight. Then, reheat as mentioned above. For best results, avoid freezing the dish with fresh basil, as it may not retain its flavor. You know gnocchi is cooked when it floats. Boil water and add the gnocchi. Wait for 2-3 minutes. When they rise to the top, they are ready. This means they have cooked through. It’s important to drain them right away. Overcooking makes them soft and mushy. Yes, you can use fresh tomatoes. Fresh tomatoes will give a different flavor. They will not be as rich as sun-dried tomatoes. Use about 2 cups of diced fresh tomatoes. Cook them longer until they break down a bit. This will help create a nice sauce. Many side dishes go great with gnocchi. A fresh salad adds a nice crunch. Try a simple arugula salad with lemon. Garlic bread also works well, giving a tasty, buttery side. You can even serve grilled vegetables for a healthy option. Each of these choices balances the creamy sauce nicely. You learned about the key ingredients and how to make creamy sun-dried tomato gnocchi. I shared tips for perfecting texture and balancing flavors. The variations offered ways to customize your dish to fit any diet. Proper storage information ensures your leftovers stay fresh. Now, you have all the tools to create a tasty meal. Dive in and enjoy the process! Your cooking can impress anyone.

Creamy Sun-Dried Tomato Gnocchi Simple and Tasty Dish

Are you ready to impress your taste buds with a bowl of Creamy Sun-Dried Tomato Gnocchi? This quick, simple dish

- 2 medium cucumbers, thinly sliced - 1 carrot, julienned - 1 red bell pepper, thinly sliced - 2 green onions, chopped - 1 small red chili, finely chopped (adjust to taste) - 2 tablespoons fresh lime juice - 1 tablespoon fish sauce (or soy sauce for vegetarian option) - 1 tablespoon palm sugar or brown sugar - 1 tablespoon sesame oil - Fresh cilantro leaves for garnish - Crushed peanuts for topping (optional) This salad is bright and fresh. I love combining crisp cucumbers and sweet carrots. The red bell pepper adds a pop of color and flavor. Green onions give a nice bite that I find delightful. Adjust the red chili for your spice level. You can always start small and add more. The dressing is key. Lime juice adds tartness, while fish sauce gives umami. If you prefer, use soy sauce for a vegetarian twist. Palm sugar or brown sugar brings a hint of sweetness. Sesame oil adds richness to the mix. Don’t forget the garnishes! Fresh cilantro brightens the dish, and crushed peanuts add crunch. You can skip the peanuts if you have allergies. Gather these ingredients for a refreshing dish that’s perfect for any meal! Start by gathering your fresh veggies. Take 2 medium cucumbers and slice them thin. Next, julienne 1 carrot for added crunch. Then, slice 1 red bell pepper into thin strips. Chop 2 green onions and finely chop 1 small red chili, adjusting to your heat preference. Combine all these veggies in a large mixing bowl. The colors will make your salad pop! Now it’s time to whip up the dressing. In a small bowl, whisk together 2 tablespoons of fresh lime juice, 1 tablespoon of fish sauce (or soy sauce for a vegetarian option), 1 tablespoon of palm sugar or brown sugar, and 1 tablespoon of sesame oil. Keep whisking until the sugar dissolves. This tangy dressing will bring everything together. Pour the dressing over the vegetable mixture in your large bowl. Toss everything gently, coating the veggies evenly. Let the salad sit for about 10-15 minutes. This wait allows the flavors to blend and the cucumbers to soften a bit. Before serving, toss it again lightly. Garnish with fresh cilantro leaves and sprinkle crushed peanuts on top if you want an extra crunch. Enjoy your fresh and zesty delight! To change the heat of your salad, adjust the amount of red chili. Start with a small amount. If you want more heat, add more chili. Remember, fresh chilies can vary in heat. Taste as you go. This way, you control the spice to your liking. Picking fresh cucumbers and veggies is key. Look for cucumbers that are firm and smooth. Avoid any with soft spots or wrinkles. For bell peppers, choose ones that are bright and shiny. Fresh veggies make the salad crisp and tasty. This salad pairs well with many dishes. Serve it as a side for grilled meats or fish. It also goes great with rice or noodles. Enjoy it on hot days or at barbecues. You can serve it as an appetizer or a light meal. {{image_2}} To make a vegan version of Spicy Thai Cucumber Salad, you can swap a few ingredients. Instead of fish sauce, use soy sauce or tamari. This keeps the umami flavor while keeping it plant-based. You can also add more veggies, like radishes or bell peppers, for extra crunch. This way, you maintain a fresh taste while keeping it all vegan. If you want to add protein to your salad, consider shrimp, chicken, or tofu. For shrimp, cook them until pink and toss them in. For chicken, grill or sauté it first, then slice it thin. Tofu can be cubed and either pan-fried or baked. Each of these options adds a heartiness that complements the fresh veggies well. Experimenting with different dressings can give your salad a new twist. Try adding peanut sauce for a creamy texture. You can also mix in a bit of sesame dressing for a nutty flavor. Another option is a spicy sriracha dressing for those who love heat. These variations keep your salad exciting and fresh every time you make it. After you make the Spicy Thai Cucumber Salad, store leftovers in an airtight container. Place it in the fridge right away. This keeps the salad fresh for up to two days. The cucumbers will stay crunchy, but they may lose some crispness over time. If you want to keep them crunchy, wait to add the dressing until you are ready to serve. You can prepare the salad ahead of time for quick meals. Slice the cucumbers, carrot, and bell pepper and store them in the fridge. Keep the dressing in a separate container. When you are ready to eat, mix the veggies with the dressing. This method saves time and keeps everything fresh. You can even cut the vegetables the night before. I do not recommend freezing this salad. Cucumbers tend to get mushy when frozen. If you want to freeze some components, you can freeze the chopped bell peppers. When you're ready to use them, thaw and add them to your salad. Enjoy the fresh taste of the salad by serving it fresh! For salads, I recommend using English cucumbers. They are longer and have fewer seeds. Persian cucumbers work well too. They are crunchy and sweet. Both types add a refreshing taste to salads. Avoid regular cucumbers, as they can be bitter and watery. Yes, you can prepare this salad ahead of time. Chop your veggies and mix them in a bowl. Make the dressing separately. Combine them just before serving. This keeps the salad crisp and fresh. Letting it sit too long can make it soggy. To reduce the heat, simply use less red chili. You can remove the seeds for less spice. Adding more cucumber or other veggies can balance the heat. A touch of sugar can also help to tone it down. Adjust to your taste for the perfect kick! This blog post shared how to create a fresh and vibrant salad. You learned about key ingredients, including fresh veggies and flavor enhancers. I offered steps to prepare the salad, tips to customize it, and storage advice for any leftovers. In closing, this salad is versatile and simple to make. Whether you adjust the spice or add protein, it can fit your taste. Enjoy making this dish as a healthy, delicious option for any meal!

Spicy Thai Cucumber Salad Fresh and Zesty Delight

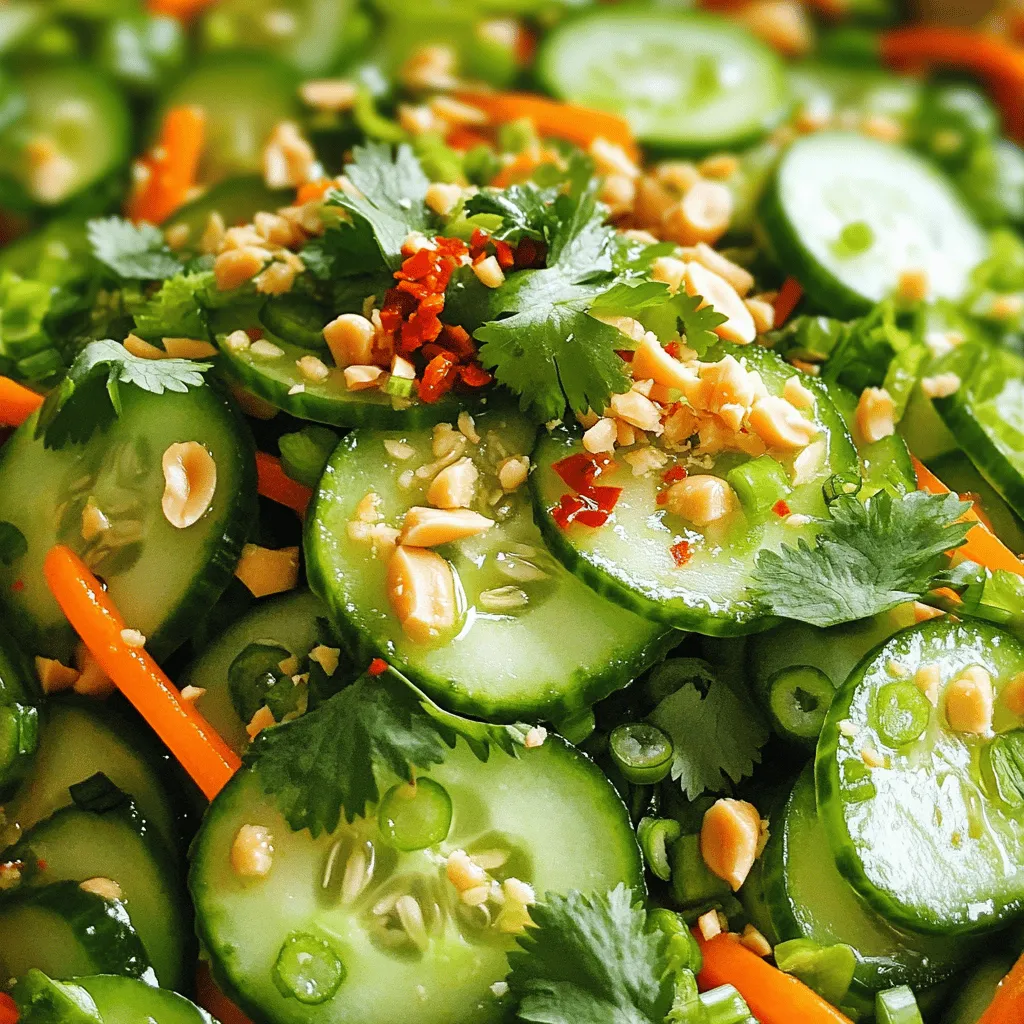
If you crave a fresh and zesty dish, try my Spicy Thai Cucumber Salad. This salad bursts with flavor and

Older posts
Newer posts
← Previous Page1 … Page32 Page33 Page34 … Page84 Next →

dsad

© 2026 easycookingbite • Built with GeneratePress

Our Policies

  • Copyright Policy
  • Cookie Policy
  • GDPR Policy
  • Privacy Policy
  • Disclaimer
  • Terms Of Use

More Information

  • Home
  • About
  • Contact
  • Appetizers
  • Dessert
  • Dinner
  • Drinks
©2026, easycookingbite About Back To Top