Skip to content
DisclaimerTerms Of UseGDPR PolicyCookie Policy

easycookingbite

  • Home
  • Drinks
  • Appetizers
  • Dinner
  • Dessert
  • About
  • Contact
  • Privacy Policy
DisclaimerTerms Of UseGDPR PolicyCookie Policy

NO-ING-IMG

You will need coconut milk for this pudding. I recommend using full-fat coconut milk. It gives a rich and creamy texture. If you prefer, you can use almond milk or any milk you like. The almond milk adds a nice nutty flavor. Mixing both coconut and almond milk creates a great base for this treat. Chia seeds are key for this recipe. They help thicken the pudding. You will need 1/4 cup of chia seeds. For sweetness, use 2 tablespoons of maple syrup or honey. Both these options work well. They add a touch of natural sweetness without overpowering the coconut flavor. A pinch of salt enhances all the flavors. Fresh fruit makes this dish pop! You will need one ripe mango, diced. The sweet and juicy mango adds a bright flavor. For the fun finish, use toasted coconut flakes. They add crunch and a lovely coconut taste. Fresh mint leaves also make a nice garnish. They give a burst of color and flavor on top. To start, gather your ingredients. You will need coconut milk, almond milk, maple syrup, vanilla extract, and a pinch of salt. In a large bowl, combine 1 cup of coconut milk with 1/2 cup of almond milk. Whisk these together until they blend well. Add 2 tablespoons of maple syrup and 1/2 teaspoon of vanilla extract. Finally, sprinkle in a pinch of salt to enhance the flavors. Now, it's time to add the chia seeds. Measure out 1/4 cup of chia seeds and slowly sprinkle them into your liquid mixture. As you add the seeds, whisk continuously. This keeps the seeds from clumping together. Make sure they are evenly distributed throughout the mix. Cover the bowl with plastic wrap or pour the mixture into a jar with a lid. Place it in the fridge for at least 4 hours, or even overnight. This time allows the chia seeds to absorb the liquid and thicken into a pudding-like texture. After chilling, stir the pudding well to break up any clumps. Now you can serve it in bowls or jars. Top with fresh mango and toasted coconut flakes for a tasty finish! To make your mango coconut chia pudding smooth, start with the right mix of liquids. Use full-fat coconut milk for creaminess and almond milk for balance. Whisk them together until well combined. Slowly add the chia seeds while whisking to avoid clumps. This helps the seeds mix evenly. Let the mixture chill for at least 4 hours or overnight. This time allows the chia seeds to absorb liquid and thicken. If it feels too thick later, stir in a bit more milk. To boost the flavor of your pudding, use ripe fruit. Fresh mango adds a sweet touch. You can also mix in some vanilla extract to enhance the taste. Consider adding a sprinkle of cinnamon or nutmeg for warmth. If you want extra sweetness, try using honey or agave syrup. Experiment with flavors to find what you love best. Each addition can change the taste profile, making it unique. When serving your pudding, think about presentation. Layer it in clear jars to show off the colors. Top each serving with diced mango for a fresh look. A sprinkle of toasted coconut flakes adds a nice crunch. Garnish with fresh mint leaves for a splash of green. Serve it chilled for a refreshing treat. This dish works great as a breakfast, snack, or dessert. You can even make it ahead of time for busy days. {{image_2}} You can make this mango coconut chia pudding even more exciting. Adding other fruits can bring new flavors and colors. Try diced pineapple, papaya, or kiwi. You can mix and match to find your favorite. Each fruit adds its own twist. For example, pineapple adds sweetness and a bit of tartness. This makes your pudding a true tropical delight. Maple syrup is great, but you have options. You can use agave nectar or coconut sugar instead. These sweeteners change the taste a bit. Agave is more neutral, while coconut sugar gives a caramel hint. You might also try mashed bananas for natural sweetness. Just remember to adjust your liquid ingredients if you do! Coconut milk is rich and creamy, but other milks work too. Almond milk is lighter and has a nutty flavor. Oat milk adds a smooth texture, and soy milk is another option. Each milk brings its own taste. You can even mix two types for a unique flavor. Experiment to find your perfect blend. To keep your mango coconut chia pudding fresh, store it in an airtight container. Glass jars work great for this. Make sure to seal the lid tightly. Keep it in the fridge. The chill helps maintain its creamy texture. Chia pudding stays good for about 5 days in the fridge. After that, it may lose its taste and texture. Always check for any off smell or changes in color before eating. If your pudding thickens too much, add a splash of coconut or almond milk. Stir it well to mix. This will bring back its creamy consistency. You can also add fresh fruit or nuts to brighten the flavor. Enjoy your tasty treat again! Yes, you can use many fruits! Berries, bananas, or kiwi work great. Try adding strawberries for a sweet touch. Pineapple can bring a tropical vibe. Each fruit adds its own flavor and color. You can mix and match to keep it fun. Chia pudding is very healthy! Chia seeds are full of fiber, protein, and omega-3s. They help keep you full and support digestion. Coconut milk provides healthy fats. Almond milk is low in calories and adds nutrients. This pudding is a great choice for breakfast or a snack. Chia seeds need about 4 hours to thicken. If you can, let them sit overnight. This gives them time to soak up the liquid. After this time, they will turn creamy and pudding-like. Stir once before serving to mix everything well. You can create delicious chia pudding with simple ingredients and easy steps. We explored coconut milk, chia seeds, and fresh fruits. You learned how to prepare the base and mix in the chia seeds for the right thickness. Tips helped you find the best consistency and flavor. Remember, you can switch up the fruits and milk for fun variations. Store your pudding well to keep it fresh. With this guide, you’ll enjoy chia pudding that’s both tasty and healthy. Enjoy making it your way!

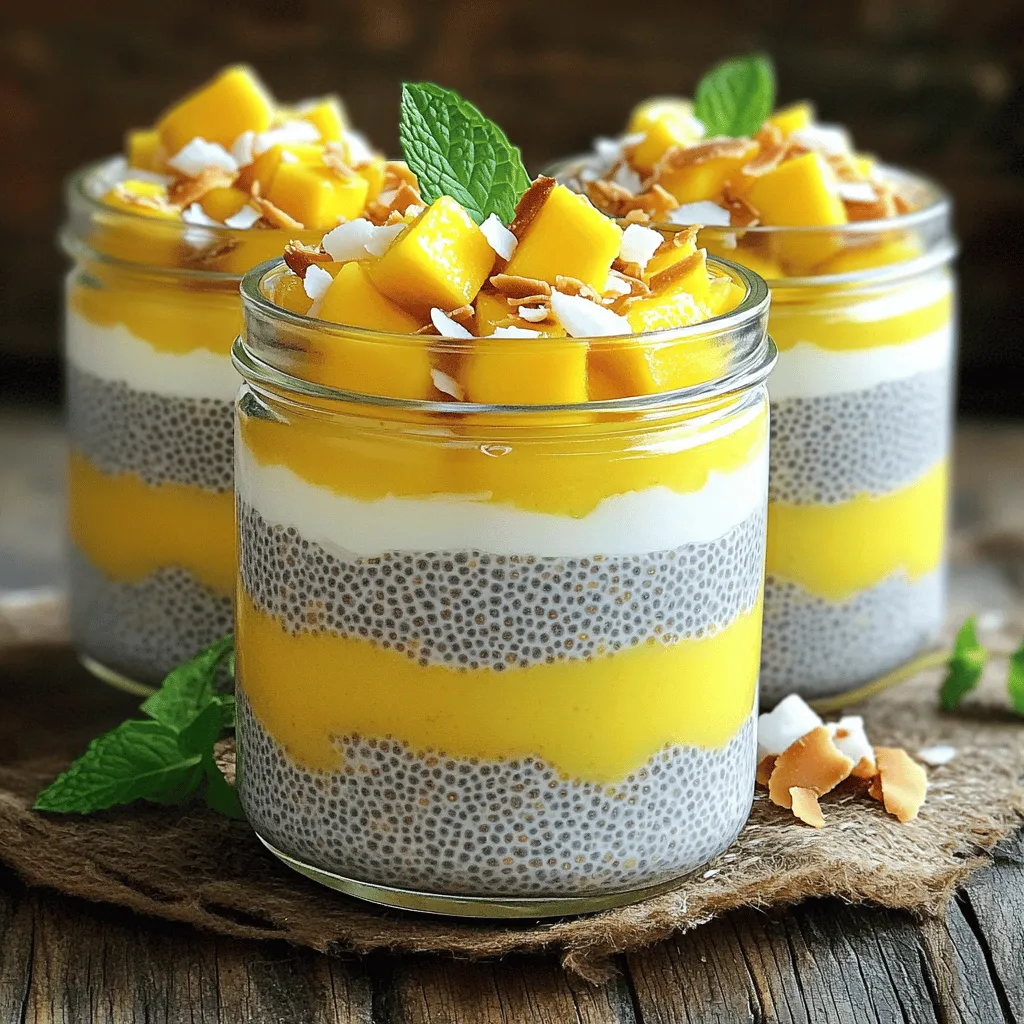
Mango Coconut Chia Pudding Refreshing and Healthy Treat

Craving a cool, healthy treat? Let me introduce you to Mango Coconut Chia Pudding! This delicious dessert combines creamy coconut

For a tasty Creamy Mushroom Marsala, you will need: - 500g mixed mushrooms (cremini, button, shiitake), sliced - 1 medium onion, finely chopped - 3 cloves garlic, minced - 1 cup vegetable broth - 1 cup heavy cream - 2 tablespoons olive oil - 1 tablespoon flour - 1 teaspoon dried thyme - 1 teaspoon dried rosemary - Salt and pepper to taste - Fresh parsley, chopped (for garnish) - 300g pasta (fettuccine or tagliatelle) When picking mushrooms, look for firm ones. They should be dry and clean. Avoid mushrooms with dark spots or slimy areas. Fresh mushrooms give the best flavor. A mix of mushroom types adds depth to your dish. Cremini, button, and shiitake mushrooms work well together. Each type adds its own unique taste and texture. For this recipe, you want a good Marsala wine. Choose a dry or semi-dry Marsala for the best taste. Brands like Florio or Pellegrino are popular choices. They are easy to find and add rich flavor to the sauce. Avoid sweet Marsala, as it can overpower the dish. A good wine makes a big difference, so choose wisely! Start by boiling water in a large pot. Add salt to the water for flavor. Once it boils, add 300g of your favorite pasta, like fettuccine or tagliatelle. Cook the pasta until it is al dente, according to the package instructions. This usually takes about 8-10 minutes. Stir occasionally to prevent sticking. When done, drain the pasta in a colander and set it aside. In a large skillet, heat 2 tablespoons of olive oil over medium heat. Once the oil is warm, add 1 finely chopped onion. Sauté the onion until it turns translucent, about 3-4 minutes. This adds a nice flavor base. Next, add 3 minced garlic cloves to the skillet. Stir and cook for about 1 minute until fragrant. This step gives your dish a wonderful aroma. Now, it's time for the star of the dish: the mushrooms! Add 500g of sliced mixed mushrooms to the skillet. Cook them until tender and golden brown, around 7-8 minutes. This brings out their rich flavors. Once the mushrooms are ready, sprinkle 1 tablespoon of flour over the mixture. Stir it well and cook for another minute. This helps thicken the sauce. Slowly pour in 1 cup of vegetable broth while stirring continuously. This prevents lumps from forming. Bring the mixture to a simmer and let it cook for 5 minutes. This allows the sauce to thicken nicely. After that, reduce the heat to low and mix in 1 cup of heavy cream, along with 1 teaspoon of dried thyme and 1 teaspoon of dried rosemary. Let it simmer for another 3-4 minutes to enhance the flavors. Finally, season the sauce with salt and pepper to taste. Adjust as needed. Toss the cooked pasta into the sauce, ensuring each noodle is well coated. Serve your creamy mushroom marsala on plates, garnished with fresh parsley for a pop of color. Enjoy this flavorful dinner delight! To get that rich, creamy texture, use heavy cream. It blends well with the sauce. Add the cream slowly after the broth thickens. Stir it gently to keep it smooth. If you want extra creaminess, add a splash more cream. Cook on low heat to avoid curdling. This keeps the sauce velvety. One common mistake is not cooking the mushrooms long enough. Cook them until they are golden brown. This step adds flavor. Another mistake is adding cream too early. Always wait until the broth thickens. This helps the flavors meld. Lastly, don’t skip the seasoning. Salt and pepper enhance the taste. Adjust them at the end for best results. Using fresh herbs makes a big difference. Fresh parsley adds brightness at the end. Thyme and rosemary bring depth to the sauce. Try adding them just after you stir in the cream. This way, their flavors stay vibrant. You can also use basil or oregano for different notes. Fresh herbs elevate the dish and make it more fragrant. {{image_2}} For a vegetarian option, use vegetable broth and heavy cream. The mushrooms add rich, earthy flavors. If you want a vegan dish, switch the heavy cream for coconut cream or cashew cream. You can blend soaked cashews with water for a creamy texture. This keeps the dish smooth and delicious without dairy. Use a splash of lemon juice for brightness. It balances the flavors well. To make this dish gluten-free, swap the flour for cornstarch or a gluten-free flour blend. Mix the cornstarch with a little water to make a slurry. This helps thicken the sauce without gluten. Ensure the pasta you choose is gluten-free too. Many brands offer great options made from rice or quinoa. This way, everyone can enjoy this tasty meal. If you want to add protein, consider using chicken or shrimp. Cook diced chicken in the skillet until golden brown, then add the mushrooms. For shrimp, add them after the mushrooms are tender. Both options complement the sauce well. If you prefer plant-based protein, add cooked lentils or chickpeas. They add heartiness and texture without meat. You can keep leftover creamy mushroom marsala in the fridge. Store it in an airtight container. It stays fresh for about three to four days. Before storing, let it cool to room temperature. This helps prevent moisture build-up. When you’re ready to eat, check for any signs of spoilage. If you want to store creamy mushroom marsala for longer, freezing is a great option. Use a freezer-safe container or a zip-top bag. Make sure to leave some space for expansion. It can last up to three months in the freezer. When ready to use, just thaw it in the fridge overnight. Reheat creamy mushroom marsala gently. The best method is to use the stove. Pour the dish into a pan over low heat. Stir it often to ensure even heating. If the sauce is too thick, add a splash of vegetable broth or cream. You can also use the microwave. Heat it in short bursts, stirring in between. Enjoy it warm! Yes, you can use any pasta you like. Fettuccine and tagliatelle work best. However, penne or farfalle also taste great. Choose a pasta shape that holds sauce well. Whole wheat or gluten-free options are fine too. Just remember to cook it al dente for the best texture. If you don’t have Marsala wine, try using sherry or Madeira. These wines have a similar flavor. You can also use a mix of grape juice and vinegar. This combination adds sweetness with some acidity. If you prefer a non-alcoholic option, use broth with a splash of balsamic vinegar. Creamy Mushroom Marsala stays fresh for about three days in the fridge. Store it in an airtight container. Make sure it cools down before sealing it. Reheat gently on the stove or in the microwave. Add a splash of cream if it thickens too much while reheating. We covered many aspects of making Creamy Mushroom Marsala. You learned about the key ingredients, from mushrooms to wine types, and how to cook them step-by-step. I shared tips to avoid common mistakes and ways to make this dish fit your diet. Remember to store leftovers properly. Overall, this meal is easy to make and full of flavor. With practice, it can become a favorite in your kitchen. Enjoy cooking and impressing others with your creamy mushroom dish!

Creamy Mushroom Marsala Flavorful Dinner Delight

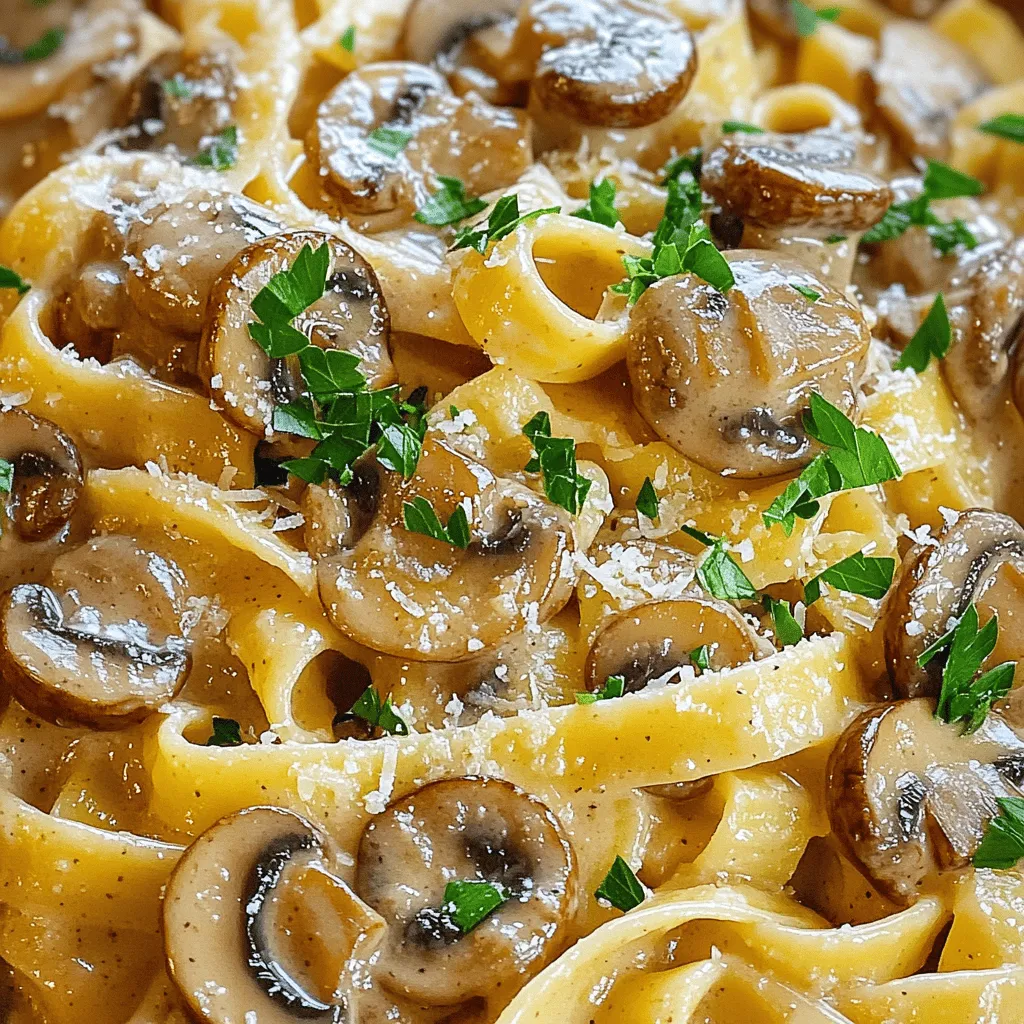
Are you ready to impress at dinner tonight? My Creamy Mushroom Marsala is a flavorful delight that will wow your

- 2 cans (15 oz each) chickpeas, drained and rinsed - 1 can (13.5 oz) coconut milk - 1 onion, finely chopped - 3 cloves garlic, minced - 1 tablespoon fresh ginger, grated - 2 tablespoons curry powder - 1 teaspoon ground turmeric - 1 teaspoon cumin - 1 red bell pepper, diced - 1 cup spinach leaves, fresh - 2 tablespoons olive oil - Salt and pepper to taste I love using chickpeas because they are filling and healthy. They soak up flavor well. Coconut milk adds creaminess and a hint of sweetness. Aromatics like onion, garlic, and ginger build a strong base for the dish. The spices are key to this dish. Curry powder brings warmth and color. Turmeric adds earthiness, while cumin gives a nice depth. You can’t forget the fresh vegetables! A red bell pepper adds crunch and sweetness, and spinach adds color and nutrients. - Fresh cilantro - Lime wedges Garnishes add a fresh touch. Cilantro gives a burst of flavor, and lime adds brightness. Both make the dish look more appealing too. - Cooked rice - Quinoa Serving this curry over rice or quinoa makes it more filling. Both options soak up the sauce well. You can choose based on your taste or what you have at home. - Draining and rinsing chickpeas: Open two cans of chickpeas. Pour them into a strainer. Rinse them under cold water for about 30 seconds. This helps remove any excess salt and makes them cleaner. - Chopping onion and bell pepper: Take one onion and chop it finely. Next, dice one red bell pepper into small pieces. This gives your dish color and crunch. - Mincing garlic and grating ginger: Peel three cloves of garlic. Mince them finely. Then, peel fresh ginger and grate about one tablespoon. These will add a great flavor to your curry. - Sautéing aromatics: In a large skillet, heat two tablespoons of olive oil over medium heat. Add the chopped onion. Cook for about 5-7 minutes until it turns soft and clear. Then, add in the minced garlic and grated ginger. Cook for 1-2 minutes until you smell their aroma. - Adding spices and toasting: Stir in two tablespoons of curry powder, one teaspoon of ground turmeric, and one teaspoon of cumin. Mix well and cook for about one minute. This toasts the spices and brings out their flavor. - Combining coconut milk and chickpeas: Pour in one can of coconut milk and stir to mix. Add the drained chickpeas next. Bring the mixture to a gentle simmer. Let it cook for about 10-15 minutes. This helps the flavors blend well. Stir occasionally to stop sticking. - Cooking spinach: After the chickpeas have simmered, toss in one cup of fresh spinach leaves. Cook for an additional 2-3 minutes until the spinach wilts down nicely. - Adjusting seasoning: Taste your dish and add salt and pepper as needed. This step is key to making the flavors pop. - Resting before serving: Remove the skillet from heat. Let the curry sit for a few minutes. This allows the flavors to settle, making it even tastier when you serve it. To make your coconut curry chickpeas even better, you can use a few simple tricks. - Toasting spices: When you add curry powder, turmeric, and cumin, toast them in the pan first. This step brings out their rich flavors. Just cook them for one minute before adding other ingredients. - Adding more vegetables: You can mix in other veggies like carrots or peas. They add color and extra nutrients to your dish. Choosing the right skillet is key to great cooking. - Best skillet type for sautéing: A non-stick skillet works best for this recipe. It helps prevent food from sticking and makes cleanup easier. I recommend a large one to fit all your ingredients. - How to prevent sticking: Use enough olive oil when cooking. If you notice things starting to stick, lower the heat a bit. Stir often to keep things moving in the pan. How you serve your dish can make it shine. - Presentation ideas: Serve the chickpeas over a bed of fluffy rice or quinoa. This adds texture and makes the dish look inviting. - Best garnishes for taste: Fresh cilantro makes a great garnish. Sprinkle it on top just before serving for a pop of flavor and color. You can also add lime wedges for a zesty kick. {{image_2}} You can change this dish easily. Adding more veggies is a great way to start. Carrots and peas add color and taste. You can also try adding sweet potatoes for a sweeter flavor. If you want protein, add tofu or chicken. Tofu gives a nice texture, while chicken adds richness. Both options make the dish more filling. For gluten-free options, check your curry powder. Most are gluten-free, but it's good to confirm. You can also use tamari instead of soy sauce if you want to add more flavor. For vegan alternatives, the recipe is already vegan since it uses coconut milk and no animal products. You can swap olive oil for avocado oil if you prefer. The curry powder choice can change the dish's taste. Try different types, like madras or yellow curry, for a new twist. You can also adjust the spice level. Add more chili powder for heat or remove it for a milder dish. Experimenting helps you find the perfect balance you love. For storing coconut curry chickpeas, use airtight containers. Glass or plastic containers work well. This dish lasts about 3-5 days in the fridge. Make sure it cools down before sealing it. This keeps the flavor fresh and tasty. To freeze coconut curry chickpeas, let it cool completely. Then, place it in freezer-safe bags or containers. Remove as much air as possible. It can last up to 3 months in the freezer. To thaw, move it to the fridge overnight. For reheating, gently warm it on the stove. For best results, reheat on the stove over low heat. Stir it often to avoid burning. You can add a splash of coconut milk if it looks dry. This helps keep the flavor and texture just right. Enjoy every bite of your delicious coconut curry chickpeas! Can I use dried chickpeas instead of canned? Yes, you can use dried chickpeas! Just soak them overnight. Cook them until tender before adding to the curry. How do I make the dish spicier? Add more curry powder or a pinch of cayenne pepper. You can also add chopped jalapeños for heat. What are the health benefits of chickpeas? Chickpeas are high in protein and fiber. They aid digestion and help keep you full longer. They are also rich in vitamins and minerals. Is coconut curry chickpeas a healthy meal option? Yes, coconut curry chickpeas are healthy! They provide good fats from coconut milk and plant-based protein from chickpeas. How can I thicken the coconut curry? To thicken, let it simmer longer without the lid. You can also add a bit of cornstarch mixed with water. Can I make this recipe in advance? Yes, you can! Prepare it a day ahead and store it in the fridge. Just reheat before serving. This coconut curry chickpea recipe is easy and tasty. You learned about key ingredients, like chickpeas and spices, plus cooking steps you can follow. We also shared tips to enhance flavors and make variations that suit your taste. With proper storage, you can enjoy this dish later. Overall, this meal is healthy and flexible. It fits many diets and makes cooking fun. Now it’s your turn to try it and enjoy the delicious results!

Coconut Curry Chickpeas Flavorful and Easy Recipe

If you’re seeking a simple, tasty meal, look no further! My Coconut Curry Chickpeas recipe is a delightful blend of

To create a vibrant Honey Lime Fruit Salad, you need a mix of fresh fruits. Here’s what I use: - 1 cup strawberries, hulled and sliced - 1 cup blueberries - 1 cup kiwi, peeled and diced - 1 cup pineapple, chopped - 1 mango, diced These fruits bring color and flavor. Each one adds its own unique taste and texture. The dressing makes the salad shine. Here are the key ingredients: - 2 tablespoons honey - 2 tablespoons fresh lime juice - Zest of 1 lime This dressing balances sweetness and tang. It enhances the fruits and ties everything together. For that extra touch, you’ll need: - Fresh mint leaves for garnish The mint adds freshness. It also makes the dish look beautiful and inviting. First, we need to prepare our fruits. Start with the strawberries. Hull them and slice them into thin pieces. Next, grab the kiwi. Peel it and dice it into small cubes. Then, take the pineapple and chop it into bite-sized pieces. Finally, dice the mango into small chunks. Now you have a colorful mix of fruits ready for the salad! In a small bowl, combine two tablespoons of honey with two tablespoons of fresh lime juice. Then, add the zest of one lime to the mix. Whisk these ingredients together until they blend well. This dressing adds a sweet and tangy flavor that lifts the fruits. In a large mixing bowl, mix all your prepared fruits. Add the strawberries, blueberries, kiwi, pineapple, and mango. Drizzle the honey lime dressing over the fruits. Gently toss everything together until the fruits are well coated. Let the salad sit for about 10 minutes at room temperature. This time allows the flavors to meld beautifully. Before serving, give it another gentle toss. You can garnish with fresh mint leaves for a pop of color and taste. Enjoy your refreshing honey lime fruit salad! To make a great fruit salad, pick the best seasonal fruits. In summer, strawberries, blueberries, and mangoes shine. In winter, think about citrus fruits like oranges and grapefruits. Always look for ripe fruits. Ripe fruits taste better and are sweeter. For strawberries, search for bright red color and no white spots. Blueberries should be plump and firm. Always choose kiwi and mango that yield slightly to gentle pressure. You can change the sweetness of your salad. If you like it sweeter, add more honey. Start with the original two tablespoons. Taste the fruit salad and adjust if needed. Use less honey if you prefer a tart flavor. The lime juice adds a nice zing, balancing the sweetness. Remember, you can always add more honey, but it’s hard to take it out! This fruit salad fits many occasions. Serve it at brunch, picnics, or barbecues. It also makes a great dessert. Pair it with yogurt or serve it alongside grilled meats. For a refreshing drink, enjoy it with iced tea or lemonade. Garnish with fresh mint leaves to add color and flavor. Your guests will love the bright look and taste! {{image_2}} You can switch up the fruits to make your salad more fun. Try using mango, papaya, or passion fruit. These tropical fruits add a sweet and juicy twist. You will love how they mix with the honey lime dressing! Want to spice things up? Add a pinch of cinnamon for warmth. If you like heat, try a small amount of jalapeño. It gives a nice kick and contrasts with the sweet fruits. Just be careful, as a little goes a long way! If you need a vegan option, use agave nectar instead of honey. For a sugar-free salad, try using a sugar-free sweetener. This keeps it tasty without extra sugar. Enjoy every bite without worry! To keep your honey lime fruit salad fresh, place it in an airtight container. Make sure to store it in the fridge. This helps maintain the flavors and crispness of the fruit. Try to consume the salad within two days for the best taste. You can freeze fruit salad, but it may not keep its best texture. Freezing changes the fruit's structure. When you thaw it, the fruit might be mushy. If you decide to freeze it, use a freezer-safe container. Enjoy it in smoothies or as a topping after thawing. The honey lime fruit salad lasts about two days in the fridge. After that, the fruit may start to lose its freshness. For the best flavor and texture, eat it within this time frame. Always check for any signs of spoilage before enjoying. You can use many fruits in this salad. If you want a twist, try these: - Raspberries - Blackberries - Grapes, halved - Oranges, segmented - Apples, diced Mix and match to find your favorite flavors. Just keep the ratios similar to ensure balance. This way, you still get that sweet and tangy taste. Yes, you can prep this salad ahead. For best results, follow these tips: - Cut and store each fruit in separate containers. - Mix honey and lime juice but keep it off the fruit. - Combine everything just before serving. This method keeps the fruit fresh and crunchy. You can enjoy the salad at its best this way. To keep your fruit looking fresh, use these techniques: - Apply lime juice to cut fruits like apples or bananas. - Soak them briefly in a mix of water and lemon juice. - Choose fresh fruits that are ripe but not overripe. These steps help maintain vibrant colors. Your salad will look as good as it tastes! In this blog post, we explored creating a vibrant Honey Lime Fruit Salad. We covered selecting fresh fruits, making a homemade honey lime dressing, and adding garnishes. I shared tips for selecting the best fruits and adjusting sweetness. You also learned how to store leftovers and variations to try. This salad is perfect for any occasion. It’s simple to make and delightful to eat. Enjoy your fresh creation, and don’t hesitate to switch up the fruits to match your taste!

Honey Lime Fruit Salad Refreshing and Fruity Delight

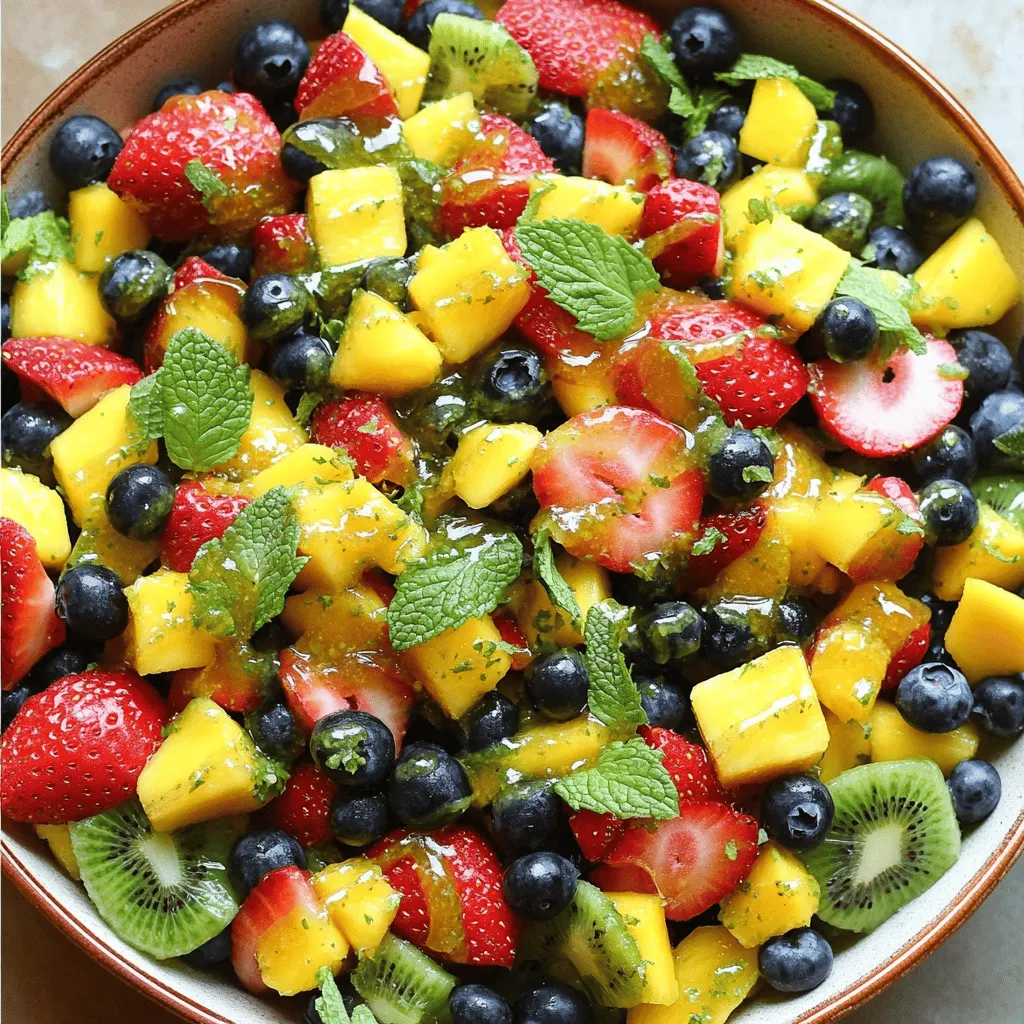
Are you ready to dive into a refreshing treat that bursts with flavor? My Honey Lime Fruit Salad combines vibrant

To make One-Pot Taco Rice, gather these simple ingredients: - 1 cup long-grain white rice - 1 lb ground turkey or beef - 1 onion, finely chopped - 2 cloves garlic, minced - 1 bell pepper, diced (any color) - 1 can (15 oz) black beans, rinsed and drained - 1 can (14.5 oz) diced tomatoes with green chilies - 1 cup chicken or vegetable broth - 1 tablespoon taco seasoning - 1 teaspoon cumin - Salt and pepper to taste - 1 cup corn kernels (fresh, frozen, or canned) - 1 cup shredded cheddar cheese - Fresh cilantro, chopped (for garnish) - Sour cream and diced avocado (for serving) You can swap or add ingredients for fun twists: - Use quinoa instead of rice for a grain swap. - Add jalapeños for some heat. - Try different beans like pinto or kidney. - Use a mix of cheeses for extra flavor. - Top with green onions for a fresh crunch. Having the right tools makes cooking easier and more fun: - A large pot or Dutch oven for even cooking. - A wooden spoon or spatula for stirring. - A sharp knife for chopping veggies. - A cutting board for safe prep. - Measuring cups and spoons for accuracy. These ingredients and tools will help you create a flavorful and simple dinner delight! First, gather all your ingredients. You will need: - 1 cup long-grain white rice - 1 lb ground turkey or beef - 1 onion, finely chopped - 2 cloves garlic, minced - 1 bell pepper, diced - 1 can (15 oz) black beans, rinsed and drained - 1 can (14.5 oz) diced tomatoes with green chilies - 1 cup chicken or vegetable broth - 1 tablespoon taco seasoning - 1 teaspoon cumin - Salt and pepper to taste - 1 cup corn kernels - 1 cup shredded cheddar cheese - Fresh cilantro, chopped - Sour cream and diced avocado Make sure everything is prepped and ready to go. This makes the cooking easy and fun. Next, heat a splash of oil in a large pot over medium heat. Add the chopped onion. Cook for about 3-4 minutes until it turns soft and clear. Then, stir in the minced garlic and diced bell pepper. Cook for another 2 minutes. The garlic should smell great, and the pepper should soften a bit. Now, add the ground turkey or beef. Break it up, and cook until it is browned. This will take about 6-8 minutes. Once it looks good, sprinkle in the taco seasoning, cumin, salt, and pepper. Mix it all well and let it cook for another minute. This helps the flavors blend nicely. Now it’s time to combine everything. Pour in the rice, black beans, diced tomatoes (with juices), corn, and broth. Stir well to mix all the ingredients. Bring this mixture to a boil, then reduce the heat. Cover the pot and let it simmer for 20 minutes. This is when the rice cooks and absorbs all the flavors. Check it occasionally and stir to avoid sticking. After 20 minutes, take it off the heat. Fluff the rice gently with a fork. Top it with shredded cheddar cheese. Cover the pot again for a few minutes to let the cheese melt. Now, it’s ready to serve! Enjoy your tasty One-Pot Taco Rice with fresh cilantro, sour cream, and diced avocado. To boost flavors, use fresh herbs like cilantro. It adds a bright taste. You can also try lime juice for a zesty kick. For extra texture, mix in crunchy toppings like tortilla chips or diced radishes. These add a fun crunch. One common mistake is not rinsing the rice. Rinsing helps remove excess starch. This keeps your rice fluffy and not sticky. Another mistake is cooking the meat too long. Overcooking can make it dry. Always cook until just browned for the best taste. Stir the pot every few minutes. This prevents sticking and ensures even cooking. If the rice seems dry, add a splash of broth. It’s better to add liquid slowly than to have mushy rice. Lastly, let the dish rest for a few minutes after cooking. This helps flavors meld together. {{image_2}} You can make One-Pot Taco Rice meatless with easy swaps. Use plant-based ground meat or lentils. These options work well and add great texture. Replace chicken broth with vegetable broth for a vegan touch. Add extra vegetables like zucchini or mushrooms for more flavor and nutrients. You can also use quinoa instead of rice for a protein boost. If you want to change the protein, chicken works great. Use diced chicken breast in place of turkey or beef. Cook it until browned before adding other ingredients. Tofu is another great choice. Press it to remove water, then cube it. Sauté the tofu until golden. Both options fit well into the One-Pot Taco Rice. You can mix up the spices to create new flavors. Try using chili powder or smoked paprika for a smoky taste. Add cayenne pepper for some heat. If you like a sweeter flavor, toss in a bit of brown sugar. Experimenting with spices can make this dish exciting and unique every time you cook it. After enjoying your One-Pot Taco Rice, store any leftovers in an airtight container. Make sure to cool the dish to room temperature first. This helps keep the food fresh. Place the container in the fridge. It will stay good for about 3 to 4 days. When you're ready to eat your leftovers, you can reheat them easily. Place the rice in a pan over medium heat. Add a splash of water or broth to keep it moist. Stir it well to heat evenly. You can also use a microwave. Just cover it loosely and heat in 30-second intervals, stirring in between. This will help it heat up without drying out. If you want to save your One-Pot Taco Rice for later, freezing is a great option. Allow the dish to cool completely. Then, transfer it to a freezer-safe container. Make sure to leave some space at the top for expansion. It can last in the freezer for up to 3 months. When you're ready to enjoy it again, thaw it in the fridge overnight. Reheat it as mentioned above for a quick and tasty meal. Yes, you can make One-Pot Taco Rice ahead of time. Cook it as normal and let it cool. Store it in an airtight container in the fridge. It will stay fresh for about three days. When you are ready to eat, just reheat it on the stove or in the microwave. Add a splash of broth if it seems dry. You can serve One-Pot Taco Rice with several tasty sides. Some great options include: - Fresh salad - Tortilla chips - Guacamole - Salsa - Sour cream - Diced avocado These sides add more flavor and texture to your meal. You can mix and match based on your taste. To serve more people, simply double the recipe. Use 2 cups of rice and 2 pounds of meat. You can also increase the veggies and beans. Make sure to use a larger pot to hold everything. Cook time may be the same, but check the rice. It may need a few extra minutes to cook fully. In this post, I covered how to make One-Pot Taco Rice. We went through all the key ingredients, easy steps to cook it, and some helpful tips. Remember to experiment with variations like vegetarian options or different proteins. Storing leftovers properly can save time later. This meal shines with its simple flavors and quick prep. Enjoy making this dish your own, and you'll keep coming back for more. Cooking doesn't have to be hard; it can be fun!

One-Pot Taco Rice Flavorful and Simple Dinner Delight

Looking for an easy and tasty dinner? Try my One-Pot Taco Rice! This simple dish combines savory flavors and requires

- 1 cup fresh spinach - 1 ripe banana - 1/2 cup diced pineapple (fresh or frozen) - 1/2 cup mango chunks (fresh or frozen) - 1/2 avocado - 1 cup coconut water - 1 tablespoon chia seeds - 1 tablespoon honey or agave syrup (optional) - A squeeze of lime juice You need fresh spinach for a healthy base. Spinach adds vitamins and minerals. It also gives your smoothie a vibrant green color. Next, grab a ripe banana. Bananas add natural sweetness and creaminess. They help keep you full too. Use diced pineapple, fresh or frozen. Pineapple brings a tropical twist. It has a bright flavor that balances the greens. Now, add mango chunks, fresh or frozen. Mangoes add extra sweetness and a smooth texture. Don't forget half an avocado. Avocado makes the smoothie rich and creamy. It also adds healthy fats, which are good for you. Next, pour in coconut water. Coconut water is hydrating and delicious. It also adds a hint of tropical flavor. Add a tablespoon of chia seeds. Chia seeds are tiny but mighty. They are full of fiber and omega-3 fatty acids. For sweetness, include honey or agave syrup if you want. Finally, squeeze some lime juice. Lime juice brightens the flavors and adds a zesty kick. These ingredients work together to create a refreshing and tasty smoothie. You can mix and match, but this list gives the best results! 1. First, gather your fresh spinach, ripe banana, diced pineapple, mango chunks, and avocado. Place these ingredients in your blender. The fresh spinach adds a nice green color and boosts the nutrients. 2. Next, pour in one cup of coconut water. This gives the smoothie a tropical taste. Then, add one tablespoon of chia seeds. They add fiber and are great for health. 3. Now, squeeze in a bit of lime juice. This step brightens the flavors and adds a nice zing. 4. Blend on high until the mix is smooth and creamy. Make sure there are no lumps. If it's too thick, add a little more coconut water to help. 5. Taste your smoothie. If you want it sweeter, add a bit of honey or agave syrup. Blend again to mix. 6. Finally, pour the smoothie into tall glasses. Serve it right away for the best taste and texture. Enjoy your tropical green smoothie! To make your Tropical Green Smoothie super smooth, follow these tips: - Start with the leafy greens first. Add the fresh spinach to the blender first. This helps it blend easily. - Next, add soft fruits like banana and avocado. These fruits help create a creamy texture. - After that, add your frozen fruits like pineapple and mango. They will chill your smoothie too. - Pour in the coconut water slowly. This helps to blend everything well. If your smoothie is too thick, add a bit more coconut water. - Blend on high until it’s creamy. If you see lumps, blend for a bit longer. - If you have leftover smoothies, store them in an airtight jar. Keep them in the fridge for up to 24 hours. This smoothie is not just tasty; it is also very healthy. Here’s why: - Spinach and kale: Both are packed with vitamins and minerals. They help support your immune system. They’re also great for your skin and eye health. - Tropical fruits: Pineapple and mango are full of vitamin C. These fruits boost your energy and help your body heal. - Coconut water: This has lots of electrolytes. It keeps you hydrated and helps with digestion. Using fresh, whole ingredients makes this smoothie a nutritious choice. Enjoy the health benefits while sipping on something delicious! {{image_2}} You can easily change the recipe to fit your taste. Here are some ideas: - Alternate leafy greens: If you want a different flavor, try kale or romaine instead of spinach. Both are healthy and add unique tastes. - Using different tropical fruits: You can swap pineapple and mango for other fruits. Papaya or passion fruit will make your smoothie just as tasty. - Adding protein sources: To make your smoothie more filling, you can add yogurt or protein powder. This gives you energy and helps you feel full longer. Enhancing the flavor of your smoothie is simple. Here are a few suggestions: - Spices or herbs: Add a pinch of ginger or mint for a fresh twist. These can bring out the fruity flavors and give your drink a zing. - Using different natural sweeteners: Instead of honey or agave syrup, try maple syrup or stevia. These options can change the taste while still keeping it sweet. When you make a Tropical Green Smoothie, storing it right can keep it fresh. For short-term storage, pour your smoothie into a jar. Seal it tightly and place it in the fridge. It stays good for up to 24 hours. The color may change slightly, but the taste will be great. For long-term storage, freezing works well. Pour your smoothie into ice cube trays or freezer-safe bags. This way, you can enjoy a quick blend later. Just thaw the cubes in the fridge or blend them straight from the freezer. Leftover fruits and greens can add flavor to many dishes. Use ripe bananas in pancakes or muffins. Diced pineapple works well in salads or salsas. Mango chunks can go in yogurt or oatmeal. Fresh spinach can easily be added to pasta or omelets. Consider blending leftover greens into soups for extra nutrients. This not only reduces waste but also gives you tasty meals! You can use water or almond milk. Both give a nice taste. If you want sweetness, add a bit of honey. Coconut milk is creamy and rich too. Yes, you can prepare it a few hours in advance. Store it in the fridge. Just give it a good shake before drinking. It might separate, but that's normal. This recipe is already dairy-free! Just skip any dairy products. Stick to coconut water or almond milk for a creamy texture. Absolutely! Frozen fruits are great for smoothies. They make it cold and thick. Just blend them as you would with fresh fruits. You may need a bit more liquid to help blend smoothly. This blog post covered how to make a delicious smoothie. You learned about the fresh ingredients like spinach, fruits, and coconut water. I gave you step-by-step instructions for blending. We also explored tips for storage and variations to keep it fun. Smoothies can be healthy and tasty with so many options. You can enjoy them as a snack or meal! Mixing flavors and using fresh ingredients makes all the difference. Now, grab your blender and get creative with your own unique mixes!

Tropical Green Smoothie Refreshing Health Boost Recipe

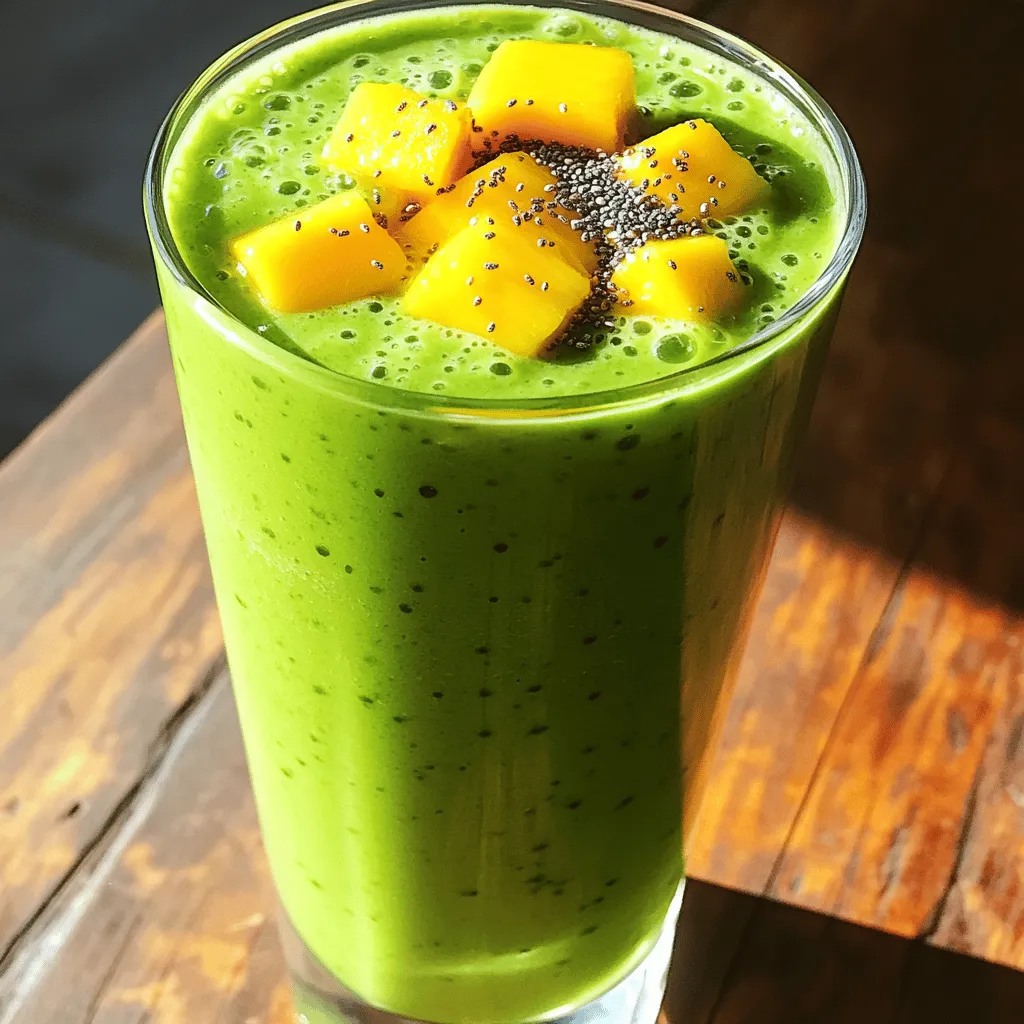
Looking for a refreshing drink that packs a health punch? My Tropical Green Smoothie is the perfect blend of fruits

- 1 lb (450g) potato gnocchi - 2 tablespoons olive oil - 3 cloves garlic, minced Potato gnocchi is the star of this dish. It gives a soft and pillowy texture. Olive oil adds richness and flavor. Minced garlic brings a wonderful aroma. - 1 can (14 oz) crushed tomatoes - 1 cup fresh spinach, chopped - 1 cup heavy cream Crushed tomatoes make the sauce bright and tangy. Fresh spinach adds color and nutrients. Heavy cream gives the dish its creamy texture. - 1/2 cup grated Parmesan cheese - 1 teaspoon Italian seasoning - Salt and pepper to taste - Fresh basil leaves for garnish Parmesan cheese enhances the flavor of the sauce. Italian seasoning adds warmth and depth. Salt and pepper balance the dish. Fresh basil leaves make a lovely garnish. To start, fill a large pot with water and add salt. Bring the water to a boil. It should bubble rapidly. Once boiling, add 1 lb of potato gnocchi. Cook the gnocchi according to the package. Watch closely; they are ready when they float to the top. This usually takes about 2-3 minutes. Once they float, drain them and set aside. Next, grab a large skillet and add 2 tablespoons of olive oil. Heat the oil over medium heat. Add 3 cloves of minced garlic and sauté for 1-2 minutes. The garlic should smell nice but not burn. After that, pour in a can of crushed tomatoes. Stir well and let it simmer for about 5 minutes. This helps all the flavors mix. Now, add 1 cup of chopped fresh spinach. Stir until the spinach wilts, which takes about 2 minutes. After that, lower the heat and pour in 1 cup of heavy cream. Stir until everything is mixed. Then, add 1/2 cup of grated Parmesan cheese. Keep stirring until the cheese melts into the sauce. Now it’s time to bring everything together. Take the cooked gnocchi and toss them in the creamy sauce. Make sure they are well-coated. Season with 1 teaspoon of Italian seasoning, and add salt and pepper to taste. Let the gnocchi heat through for another 2-3 minutes. Stir gently as you do this. Finally, remove the skillet from the heat. Garnish with fresh basil leaves before serving. Enjoy your creamy tomato spinach gnocchi hot! To cook gnocchi just right, use a large pot. Bring salted water to a boil. Drop in the gnocchi and watch them closely. They are ready when they float to the top. This usually takes about 2 to 3 minutes. After cooking, drain them well. Set them aside for the sauce. For a creamy sauce, use heavy cream. Pour it in gently after the spinach wilts. Stir in Parmesan cheese slowly. This helps it melt smoothly. If the sauce feels too thick, add a splash of pasta water. This will make it creamy and light. To boost flavor, try adding fresh herbs. Basil and oregano work well. A pinch of crushed red pepper can add heat. For a twist, use lemon zest. It brightens the dish nicely. If you want a cheese alternative, try nutritional yeast. It gives a nutty flavor. You can also use pecorino cheese. It offers a sharp taste that pairs well with the sauce. Garnishing with fresh basil makes the dish pop. Pluck a few leaves and place them on top when serving. This adds color and freshness. For a beautiful plate, use wide bowls. Place the gnocchi in the center. Drizzle extra sauce around the edges. A sprinkle of black pepper adds a nice touch. Enjoy your creamy tomato spinach gnocchi with pride! {{image_2}} To make this dish dairy-free, you can use coconut cream instead of heavy cream. It gives a nice richness without dairy. For cheese, try nutritional yeast or a dairy-free cheese alternative. These options keep the creamy texture while making it suitable for everyone. You can add cooked chicken or shrimp for extra protein. To keep it vegetarian, consider using chickpeas or lentils. These options are healthy and fill you up. Just cook them separately and mix them in when you add the gnocchi. Using seasonal vegetables can elevate this dish. In spring, add asparagus or peas for a fresh crunch. In fall, consider butternut squash or kale for warmth and depth. Tailoring your dish to the season makes it even more special. Select veggies based on what’s fresh to enhance flavors and nutrition. To store leftovers, let the creamy tomato spinach gnocchi cool to room temperature. Place the gnocchi in an airtight container. Ensure you cover it tightly. This helps keep the dish fresh. You can store it in the fridge for up to three days. For best reheating, use a skillet on low heat. Add a splash of water or cream to keep it moist. Stir gently until it is hot throughout. You can also use a microwave. Heat in short intervals, stirring often. This prevents uneven heating. If you want to freeze the gnocchi, it’s best to do it before adding the sauce. Prepare the gnocchi and cool it completely. Spread them in a single layer on a baking tray. Freeze for about one hour until firm. Then, transfer them to a freezer-safe bag. Label it with the date. They can last up to three months in the freezer. When you’re ready to use, thaw the gnocchi in the fridge overnight. For reheating, cook them directly in the sauce. This keeps the flavors fresh. Just add a bit of extra cream to ensure it stays creamy. Heat until everything is warm and delicious. Gnocchi cooks quickly. Watch for it to float. When gnocchi rises to the top, it's ready. This usually takes about 2-3 minutes. If you see them floating, gently drain and set aside. They should feel soft, not mushy. Yes, you can use homemade gnocchi! This can add a personal touch to your dish. Just make sure they are cooked the same way. If they are made fresh, they may cook even faster. You can also try store-bought versions like gluten-free or whole wheat gnocchi. This dish pairs well with many sides. Try a simple salad with mixed greens. Garlic bread makes a nice addition too. If you want more veggies, roasted Brussels sprouts or steamed broccoli work well. You can also serve it with a light soup like minestrone for a full meal. In this blog post, we explored how to make creamy tomato spinach gnocchi. We covered essential ingredients like gnocchi, garlic, and spinach. I shared step-by-step cooking instructions and tips for perfecting texture and flavor. You learned about variations, storage, and common questions. As you prepare this dish, remember to have fun and experiment with flavors. Enjoy the process and make it your own!

Creamy Tomato Spinach Gnocchi Easy and Flavorful Dish

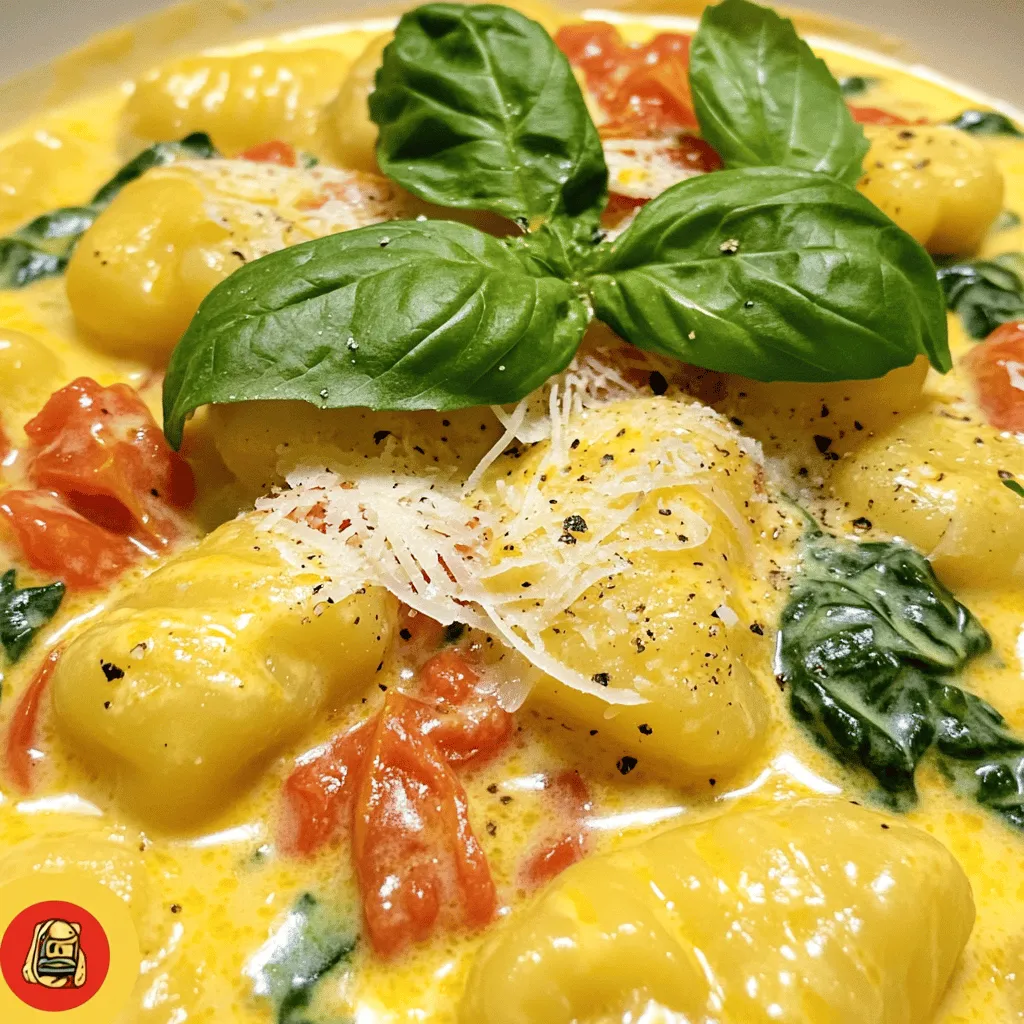
Are you ready to whip up a cozy meal that bursts with flavor? This Creamy Tomato Spinach Gnocchi is just

- 1 cup warm water (110°F) - 1 packet (2 ¼ teaspoons) active dry yeast - 1 tablespoon granulated sugar - 3 cups all-purpose flour - 1 teaspoon salt - ¼ cup unsalted butter, melted - ½ cup baking soda - 1 large egg, beaten - ½ cup granulated sugar (for coating) - 2 teaspoons ground cinnamon - Coarse sea salt for sprinkling Each ingredient has a role in making the perfect cinnamon sugar pretzel bites. - Warm water helps activate the yeast. - Active dry yeast is key for the dough to rise. - Granulated sugar feeds the yeast and sweetens the dough. - All-purpose flour gives structure to the pretzel bites. - Salt enhances flavor and strengthens the dough. - Unsalted butter adds richness and moisture. - Baking soda helps develop the pretzel's unique taste and texture. - Egg creates a shiny finish and adds richness. - Granulated sugar and ground cinnamon make the delicious coating. - Coarse sea salt adds a savory touch that balances the sweetness. Choosing quality ingredients will make your pretzel bites taste amazing. Use fresh yeast and good flour for the best results. You can even experiment with different types of sugar or cinnamon to find your favorite flavor mix! To start, we need to activate the yeast. In a large mixing bowl, mix 1 cup of warm water with 1 packet of active dry yeast and 1 tablespoon of granulated sugar. Let it sit for about 5 minutes. You will see bubbles form on the surface. This means your yeast is ready! Next, combine the dry and wet ingredients. Stir in 3 cups of all-purpose flour and 1 teaspoon of salt. Add in ¼ cup of melted unsalted butter. Mix until a dough begins to form. Now, it’s time to knead and form the dough. Take the dough out and place it on a floured surface. Knead it for about 5 minutes. You want the dough to be smooth and elastic. After kneading, we prepare for the first rise. Place the dough in a greased bowl and cover it with a damp cloth. Let it rise in a warm place for about 1 hour. You’ll know it’s ready when it doubles in size. The temperature and texture of the dough are key. Warmth helps the yeast grow. A smooth texture shows that the dough is well-kneaded. Now, we boil the pretzel bites. In a large pot, bring 6 cups of water to a boil. Add ½ cup of baking soda to the boiling water. Carefully drop 4-5 pretzel bites into the water for about 30 seconds. Use a slotted spoon to remove them and place them on a prepared baking sheet. Next, we coat the pretzel bites. Brush them with a beaten egg. In a separate bowl, mix ½ cup of granulated sugar with 2 teaspoons of ground cinnamon. Sprinkle this cinnamon sugar mixture generously over the bites. Finally, we bake the pretzel bites. Preheat your oven to 425°F (220°C). Bake the pretzel bites for about 12-15 minutes. They should turn a lovely golden brown. Let them cool slightly before serving. Enjoy the warm, sweet, and savory goodness! Kneading is key to good dough. It helps to develop gluten, which gives pretzel bites their chewy texture. Knead for about five minutes. The dough should feel smooth and elastic when ready. Humidity can change how much flour you need. On a humid day, you may need less flour. Start with three cups, but add more if the dough is sticky. Always feel the dough while you work. To get that golden brown color, keep an eye on your oven. Bake the pretzel bites for 12 to 15 minutes. Check them around the 10-minute mark. If they need more time, rotate the pan for even baking. Make sure to brush the bites with egg wash before baking. This step helps them turn a lovely golden brown and adds a nice shine. Cinnamon sugar pretzel bites are great alone, but dips can make them better. Try pairing with warm chocolate sauce or cream cheese dip. You could also serve them with a cold glass of milk or hot cocoa for a fun treat. For a creative twist, serve pretzel bites on a wooden board with different dips. You can even sprinkle some extra cinnamon sugar on the board for added fun. {{image_2}} You can get creative with your cinnamon sugar pretzel bites. Adding chocolate or cheese can take them to a new level. For chocolate, dip the warm bites in melted chocolate after baking. For cheese, stuff some dough with your favorite cheese before forming the balls. You can also change up the spices in the sugar coating. Try nutmeg or allspice for a unique twist. You can even add a hint of vanilla or orange zest to the sugar mix for extra flavor. If you need a gluten-free version, use gluten-free flour. There are many blends available that work well in baking. Just ensure that your baking soda is gluten-free too. For a vegan alternative, swap the egg with a plant-based option. You can use flaxseed meal mixed with water as a binding agent. Replace butter with a vegan butter or coconut oil to keep it dairy-free. You can make pretzel bites in different sizes. Miniature sizes are great for parties, while full-size bites can be fun for sharing at home. Use small cookie cutters for fun shapes if you want to impress your guests. Another fun way to serve them is by skewering the pretzel bites. This makes for easy serving and can add a playful touch to your snack table. Just thread them onto skewers after baking, and serve with dips like chocolate or cheese sauce. To keep your cinnamon sugar pretzel bites fresh, store them at room temperature. Use an airtight container to prevent them from drying out. They taste best within two days. If you need to store them longer, refrigerate them. Wrap each bite in plastic wrap or place them in a sealed bag. This helps keep them soft. You can also freeze pretzel bites. Place them in a freezer bag. Make sure to remove as much air as possible. They can last up to three months in the freezer. When you're ready to enjoy them, let them thaw in the fridge overnight. To reheat your pretzel bites, the oven is your best friend. Preheat the oven to 350°F (175°C). Place the bites on a baking sheet. Heat them for about 10 minutes. This method helps keep them crunchy on the outside. If you're in a hurry, you can use a microwave. However, this can make them soggy. To avoid this, place a paper towel under the bites. Heat for about 20-30 seconds. Keep an eye on them to make sure they don’t get too soft. Enjoy your warm, tasty pretzel bites! What are cinnamon sugar pretzel bites? Cinnamon sugar pretzel bites are small, soft pretzels rolled in a sweet cinnamon and sugar mix. They are warm, fluffy, and perfect for snacking. How long do they last? These bites stay fresh for about 2 days at room temperature. For longer storage, keep them in the fridge for up to a week. Can I make the dough ahead of time? Yes, you can make the dough ahead of time. Just cover it well and store it in the fridge. Use it within 24 hours for best results. What can I use instead of active dry yeast? You can use instant yeast instead of active dry yeast. Just add it directly to the dry ingredients without proofing. Is there a substitute for granulated sugar? Yes, you can use brown sugar or coconut sugar. They will add a nice flavor to the pretzel bites. Nutritional breakdown per serving Each serving has about 100 calories. They contain 2 grams of protein, 3 grams of fat, and 18 grams of carbs. Recommended serving sizes for parties and gatherings For parties, plan on serving about 4-6 pretzel bites per person. This way, everyone can enjoy a tasty snack! In this article, we explored how to make delicious cinnamon sugar pretzel bites. We covered the basic ingredients and their roles in creating the perfect dough. You learned the steps to mix, rise, boil, and bake these treats for the best flavor. We shared tips for perfecting the dough and creative serving ideas. Now, you can enjoy fresh pretzel bites at home. Whether you stick to the classic flavor or try new variations, great pretzels are within reach! Happy baking!

Cinnamon Sugar Pretzel Bites Irresistible Snack Idea

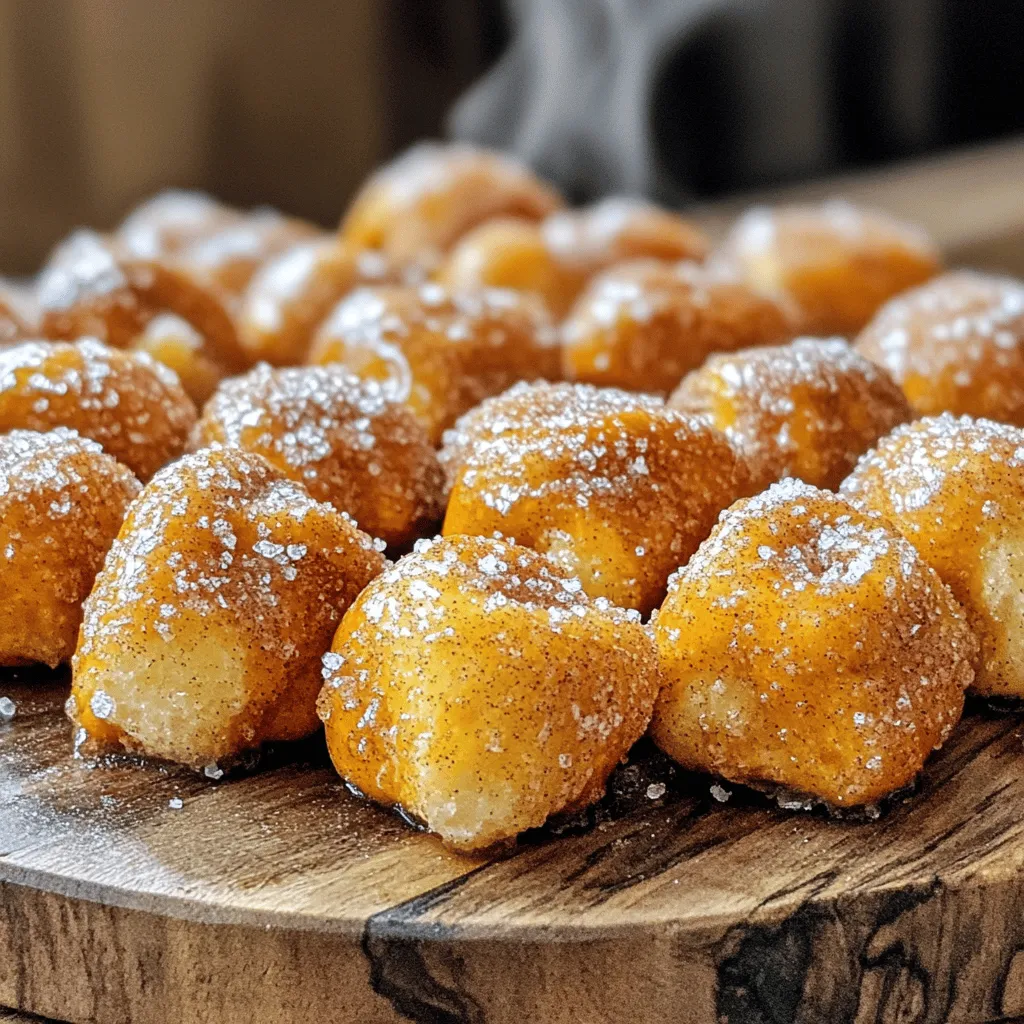
Craving a sweet and salty snack? Look no further! Cinnamon Sugar Pretzel Bites are the ultimate treat to satisfy your

To make Spicy Garlic Edamame, gather these key ingredients: - 2 cups edamame (in pods, fresh or frozen) - 3 tablespoons olive oil - 4 cloves garlic, minced - 1 teaspoon red pepper flakes (adjust to taste) - 1 tablespoon soy sauce - 1 tablespoon sesame oil - 1 tablespoon lemon juice - Salt to taste These ingredients come together to create a bold and tasty dish. Edamame is the star here. It’s packed with protein and fiber. Olive oil adds healthy fats. Garlic gives that wonderful aroma. Red pepper flakes add heat, while soy sauce and sesame oil bring umami. You can enhance your Spicy Garlic Edamame with some optional garnishes: - Sesame seeds for garnish - Chopped green onions for garnish These add a nice crunch and a pop of color. Feel free to mix in other spices or herbs if you like. Edamame is a superfood. It is rich in nutrients that are good for you: - High in protein, making it great for plant-based diets - Contains fiber, which aids digestion - Packed with vitamins like K and C - Full of antioxidants, which help protect your body This makes Spicy Garlic Edamame a healthy snack or appetizer. You get great taste and nutrition in every bite! To start, you need to choose your edamame. You can use fresh or frozen pods. If you pick frozen edamame, bring a pot of water to a boil. Add the frozen edamame and boil for about five minutes. This makes them tender. After boiling, drain them and set aside. If you choose fresh edamame, steam them until they are tender. Both options work great, and they taste good! Next, we will cook the garlic and spices. In a large skillet, heat three tablespoons of olive oil over medium heat. Once the oil is hot, add four minced garlic cloves and one teaspoon of red pepper flakes. Sauté for about one to two minutes. This step is key! You want the garlic to become fragrant but not browned. Browned garlic can taste bitter. Now it's time to add the cooked edamame to the skillet. Toss them well to coat in the garlic oil mixture. Drizzle one tablespoon of soy sauce and one tablespoon of sesame oil over the edamame. Mix everything thoroughly to combine the flavors. Squeeze in one tablespoon of lemon juice and season with salt to taste. Cook for another two to three minutes. This allows the sugars to caramelize and flavors to meld. Once done, remove the skillet from heat and transfer the edamame to a serving bowl. Garnish with sesame seeds and chopped green onions. This adds beauty and extra flavor to your dish! If you want more heat, add more red pepper flakes. Start with a little. Taste after cooking. You can always add more, but you can’t take it out. If you like it mild, use less red pepper flakes. You can also skip them for a non-spicy version. Try adding a pinch of sugar to balance excess heat. This gives you more control over the spice level. Use fresh or frozen edamame for the best taste. If using frozen, boil it for around five minutes. This keeps the pods tender and bright green. For fresh edamame, steam them until soft. Always drain and set aside after cooking. Heat olive oil over medium heat. This prevents burning the garlic. Cook the garlic until fragrant, not browned. This keeps the flavor fresh and bright. Serve your Spicy Garlic Edamame in a rustic bowl. This adds a homemade touch. Garnish with sesame seeds and chopped green onions for color. Place a small dish of soy sauce on the side. This gives extra flavor for dipping. Enjoy the edamame hot for the best taste. Perfect as a snack or appetizer, these edamame will impress your guests! {{image_2}} You can change the taste of spicy garlic edamame easily. Try adding different spices. For a sweeter flavor, mix in some honey or maple syrup. If you like it even spicier, toss in more red pepper flakes. You might also add lime juice instead of lemon for a fun twist. Substitute sesame oil with peanut oil for a nutty taste. Roasting or grilling edamame gives it a unique taste. To roast, toss the pods with olive oil and salt. Spread them on a baking sheet and roast for 20 minutes at 400°F. For grilling, heat your grill and place the pods in a grill basket. Grill for about 5-7 minutes, turning often. Both methods add a delicious char that pairs well with garlic. Spicy garlic edamame goes well with many dishes. Serve it with sushi or sashimi for a tasty meal. It also pairs nicely with rice or noodles. For a light snack, try it with a cold beer or green tea. You can even enjoy it as a side dish with grilled meats or veggies. After enjoying your spicy garlic edamame, you might have some left. Store leftovers in an airtight container. Make sure to let them cool first. Keep them in the fridge for up to three days. This keeps the edamame fresh and tasty. If you notice any changes in smell or texture, it’s best to toss them. When it’s time to eat your leftovers, reheating is key. Use a skillet over medium heat. Add a splash of olive oil for moisture. Toss the edamame in the pan. Heat them for about 3-5 minutes until warm. This method brings back their delicious flavor and keeps them crisp. You can also microwave them, but be careful not to overcook. Heat in short bursts of 30 seconds. Freezing edamame is a smart way to save them for later. If you have leftover edamame, let them cool completely. Place them in a freezer-safe bag. Remove as much air as possible before sealing. You can freeze them for up to three months. When you're ready to eat, just boil or steam them straight from the freezer. This keeps their taste and texture intact. No, dried edamame won't work well here. Dried edamame needs more water and time to cook. This recipe shines with fresh or frozen edamame. They stay tender and flavorful. Use cooked pods for the best taste and texture. Spicy garlic edamame pairs nicely with a few tasty dips. Here are some options: - Soy sauce for a salty touch - Sriracha for extra heat - Sweet chili sauce for a sweet contrast - Sesame dipping sauce for nutty flavor These dips enhance the dish and offer a fun twist. Feel free to mix and match to find your favorite combo! This recipe is already vegan! All the ingredients, like edamame, garlic, and oils, fit a vegan diet. If you want to boost flavor, add more spices or fresh herbs. Try adding fresh cilantro or lime juice for a zesty twist. Enjoy your flavorful vegan snack! Spicy garlic edamame is a tasty snack that’s easy to make. We covered essential ingredients, step-by-step cooking methods, and helpful tips. Edamame is not only delicious, but it also provides great nutrition. You can adjust the spice level and try different cooking methods to suit your taste. With all the variations and storage tips, you'll enjoy this dish for days. Get creative with flavors, pair it with your favorite foods, and enjoy! Making spicy garlic edamame will surely impress your friends and family.

Spicy Garlic Edamame Flavorful and Easy Recipe

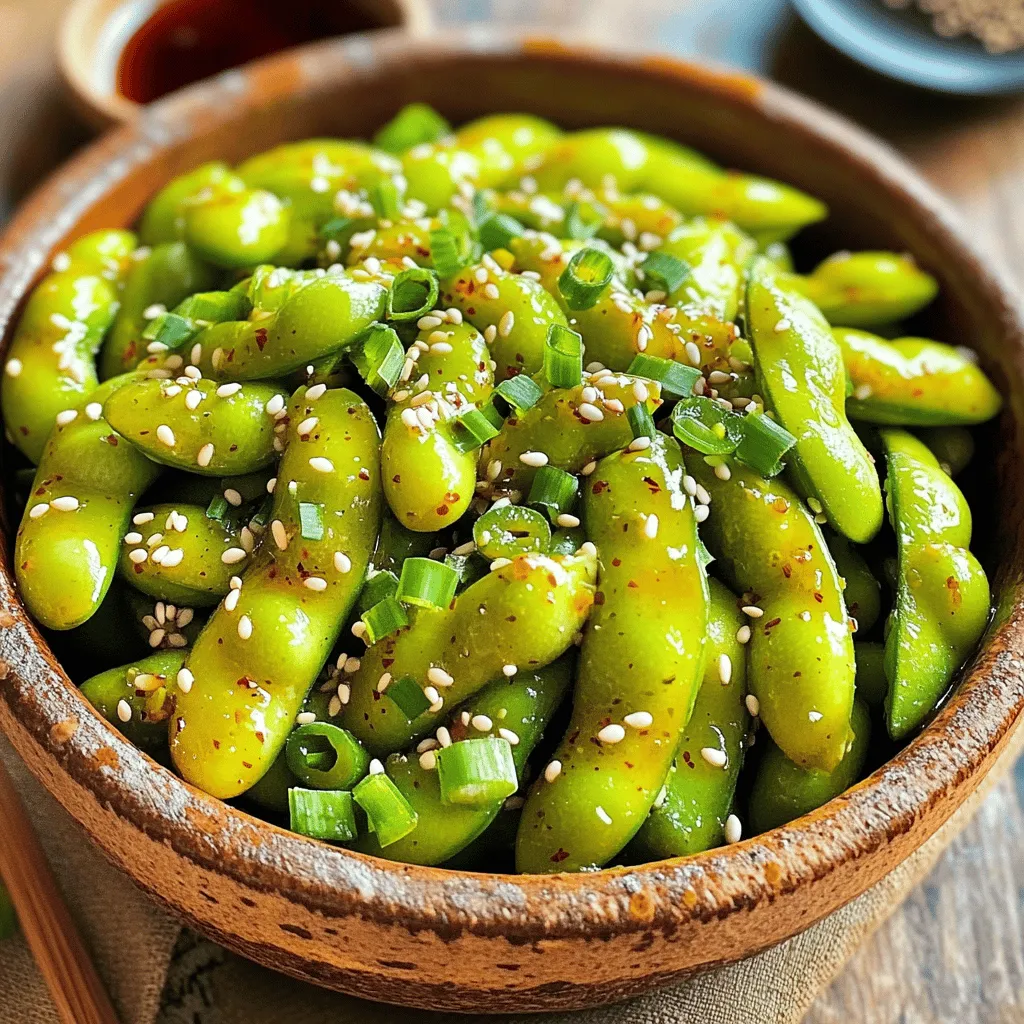
Are you ready to spice up your snack game? Today, I’ll share my simple recipe for Spicy Garlic Edamame. This

For this recipe, you need two cups of fresh strawberries. Make sure to hull and quarter them. Then, you will also need two cups of rhubarb. Trim the ends and cut it into one-inch pieces. The sweet strawberries balance the tart rhubarb perfectly. This mix creates a bright flavor that shines. You will use one cup of granulated sugar. This amount may change if your fruit is very tart. Add one tablespoon of lemon juice for a fresh zing. A teaspoon of vanilla extract adds warmth. Finally, include one teaspoon of cornstarch. This helps thicken the fruit filling as it bakes. For the crisp topping, gather one cup of rolled oats. You also need half a cup of all-purpose flour. Combine this with half a cup of packed brown sugar for richness. Melt a quarter cup of unsalted butter and mix it in. Add one teaspoon of cinnamon for warmth and a pinch of salt to enhance flavor. This mixture will create a crunchy topping that contrasts nicely with the fruit. Start by washing your strawberries. Remove the green tops and cut them into quarters. For the rhubarb, trim the ends and slice it into 1-inch pieces. In a large bowl, mix the strawberries and rhubarb together. Add sugar, lemon juice, vanilla extract, and cornstarch. Toss the fruit gently so every piece is coated. This mixture brings out the sweet and tart flavors. Once mixed, pour it into a greased 9x13 inch baking dish. In another bowl, combine rolled oats, flour, brown sugar, and a pinch of salt. Pour in the melted butter and cinnamon. Mix until the ingredients form a crumbly texture. This topping adds a nice crunch to your dish. Make sure it’s evenly mixed so every bite is tasty. Preheat your oven to 350°F (175°C). Once the oven is hot, sprinkle the crisp topping over the fruit mixture. Bake for 35 to 40 minutes. Watch for the top to turn golden brown. You will also see the fruit bubbling around the edges. After baking, take it out and let it cool for a few minutes. This cooling time helps the crisp set up. Enjoy your warm, homemade strawberry rhubarb crisp! To get a perfect crisp, follow these steps: - Use fresh strawberries and rhubarb. They bring out the best flavor. - Mix the fruit with sugar, lemon juice, and cornstarch. This helps thicken the filling. - Make sure the oat topping is crumbly. Use melted butter for a rich flavor. - Bake until the top is golden brown. This usually takes around 35-40 minutes. - Let it cool a bit before serving. This helps the filling set. Here are some common mistakes to watch out for: - Not measuring the sugar correctly. This can make your crisp too sweet or too tart. - Skipping the cornstarch. It is key to thickening the fruit mixture. - Overmixing the topping. This can lead to a dense, rather than crumbly, texture. - Not checking for doneness. Look for bubbling around the edges and a golden top. - Serving it too hot. Allow it to cool slightly for better texture and flavor. For serving, try these ideas: - Serve warm with a scoop of vanilla ice cream. The cold ice cream pairs well with the warm crisp. - Add a sprig of mint for a nice touch on the plate. - Pair with whipped cream for a creamy contrast. - Enjoy it as a breakfast dish with yogurt. It makes for a great morning treat. - Consider serving it with a drizzle of caramel sauce for extra sweetness. {{image_2}} If you want to make a gluten-free version, swap the all-purpose flour for a gluten-free blend. Look for a blend that works well in baking. You can also use almond flour or oat flour as a substitute. Make sure to check labels for any hidden gluten. You can change the fruits based on what you have. Try using peaches, blueberries, or blackberries instead of strawberries and rhubarb. Each fruit gives a new taste. You can mix and match your favorites. Just keep the ratio of fruit the same for best results. Add different spices to boost the flavor. Try nutmeg or cardamom for a warm twist. You can also add a splash of orange juice for a bright note. If you love nuts, sprinkle some chopped walnuts or pecans on top of the crisp. This adds crunch and flavor. After you make your strawberry rhubarb crisp, let it cool. Store leftovers in an airtight container. Keep it in the fridge. It stays fresh for about three days. If you want to keep it longer, try freezing it. To reheat your crisp, preheat your oven to 350°F (175°C). Place the crisp in a baking dish. Cover it with foil to keep it from drying out. Heat for about 15 to 20 minutes. You want the top to be warm and crisp again. You can also use a microwave. Heat it for about 30 seconds to 1 minute. If you want to freeze your crisp, do it before baking. Assemble the fruit and topping in a freezer-safe dish. Cover tightly with plastic wrap, then foil. It can last up to three months in the freezer. When you're ready to bake, just remove it from the freezer. Bake it straight from frozen. Add an extra 10 to 15 minutes to the baking time. Enjoy that fresh taste anytime! Yes, you can use frozen fruit. Frozen strawberries and rhubarb work well in this recipe. They may release more water, so you might need to adjust the sugar. Use about 1 tablespoon more cornstarch to help thicken the filling. The crisp is done when the top is golden brown. You should see the fruit bubbling around the edges. Bake for 35-40 minutes at 350°F. If it looks too dry, it may need a few more minutes. Serve warm crisp with vanilla ice cream for a tasty treat. You can also add whipped cream or yogurt. A sprig of mint on top adds a nice touch. Enjoy your dessert with family and friends! You learned how to make a delicious strawberry rhubarb crisp. We covered the fresh ingredients, step-by-step instructions, and handy tips. Remember, the right sweetener and crisp topping make a big difference. Don’t skip the variations to fit your needs and taste. Proper storage keeps leftovers tasty. Enjoy your crisp warm, and pair it with ice cream or whipped cream. Sharing this treat makes it even better. Now, go ahead and make your own perfect strawberry rhubarb crisp!

Strawberry Rhubarb Crisp Simple and Delicious Recipe

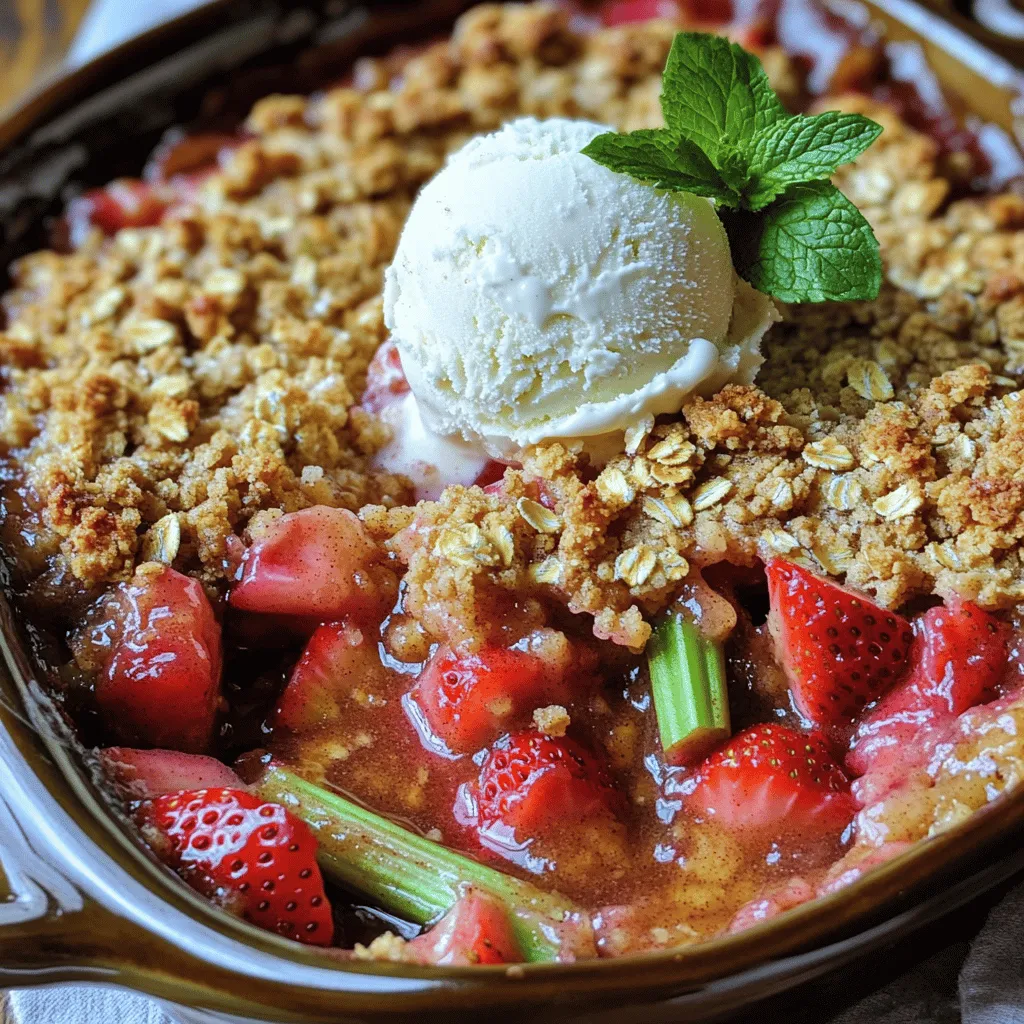
Craving a dessert that’s easy to make and bursting with flavor? You’re in the right place! This Strawberry Rhubarb Crisp

Older posts
Newer posts
← Previous Page1 … Page34 Page35 Page36 … Page84 Next →

dsad

© 2026 easycookingbite • Built with GeneratePress

Our Policies

  • Copyright Policy
  • Cookie Policy
  • GDPR Policy
  • Privacy Policy
  • Disclaimer
  • Terms Of Use

More Information

  • Home
  • About
  • Contact
  • Appetizers
  • Dessert
  • Dinner
  • Drinks
©2026, easycookingbite About Back To Top