Skip to content
DisclaimerTerms Of UseGDPR PolicyCookie Policy

easycookingbite

  • Home
  • Drinks
  • Appetizers
  • Dinner
  • Dessert
  • About
  • Contact
  • Privacy Policy
DisclaimerTerms Of UseGDPR PolicyCookie Policy

NO-ING-IMG

- 1 cup fresh lemon juice (about 4-6 lemons) - 1 cup coconut water - 1/2 cup honey or agave syrup For the best Blue Lagoon Tropical Lemonade, start with fresh lemon juice. It gives the drink a bright and zesty flavor. You will need about four to six lemons to get one cup of juice. Coconut water adds a lovely tropical taste. It makes the drink smooth and refreshing. Next, sweeten your lemonade with honey or agave syrup. You can adjust the amount based on your taste. - 1/2 cup blue spirulina powder (or blue food coloring) - Fresh mint leaves for garnish - Slices of lemon and lime for garnish To achieve that stunning blue color, you can use blue spirulina powder. It is natural and healthy. If you prefer, blue food coloring works too. Just a little bit will give you a beautiful hue. Garnishing your drink is key. Fresh mint leaves add a pop of green. Lemon and lime slices make it look vibrant and inviting. - Recommended glassware: tall glasses or mason jars - Additional garnish ideas: edible flowers, colorful straws For serving, tall glasses or mason jars look great. They show off the beautiful color of your drink. You can add more garnishes like edible flowers for a fun touch. Colorful straws can make drinking even more enjoyable. 1. Start by juicing about 4 to 6 lemons. You need 1 cup of fresh lemon juice. This will give your drink a bright, zesty flavor. 2. In a large pitcher, add the lemon juice and 1/2 cup of blue spirulina powder. If you don't have spirulina, blue food coloring works too. Stir well until it is smooth. This gives the drink its stunning blue color. 3. Pour in 1 cup of coconut water. This adds a tropical twist and keeps the drink refreshing. 4. To sweeten your mixture, add 1/2 cup of agave syrup or honey. Stir again to mix well. You can adjust the sweetness based on your taste. 1. Slowly pour in 3 cups of sparkling water. Stir gently so you keep the bubbles. This makes your drink fizzy and fun. 2. Grab some glasses and fill them with ice cubes. Pour the Blue Lagoon Tropical Lemonade over the ice. This keeps the drink chilled and refreshing. 1. For a beautiful touch, garnish each glass with fresh mint leaves. They add a pop of green and a fresh scent. 2. Add slices of lemon and lime to the rim of the glass. This makes your drink look lovely and bright. 3. Before drinking, give the lemonade a gentle stir. Enjoy the refreshing tropical flavor! To make your Blue Lagoon Tropical Lemonade perfect, you can adjust the sweetness. Start with half a cup of agave syrup or honey. After mixing, taste it. If it’s not sweet enough, add more. You can also try other sweeteners like stevia or maple syrup. Each sweetener gives a unique flavor. Just remember, you want a balance that suits your taste. Keeping your lemonade bubbly is key for that refreshing feel. When you mix in the sparkling water, pour it slowly. Stir gently to avoid losing the bubbles. Use chilled sparkling water to help it stay fizzy longer. Serve it right away for the best experience. If you prepare it ahead, add the sparkling water just before serving. Want to make your lemonade even more exciting? Try adding different fruits like pineapple or mango. These fruits pair well with lemon. You can also toss in fresh herbs like basil or rosemary for a twist. Just crush the herbs lightly before adding them. This helps release their flavor. Get creative and find the mix that you love! {{image_2}} You can switch up the Blue Lagoon Tropical Lemonade by using different fruit juices. Try pineapple or orange juice for a tropical twist. These juices add new flavors while keeping the drink fresh. You can also choose between non-alcoholic and alcoholic versions. For a fun party drink, add vodka or rum. This adds an adult touch while still being refreshing. Summer is a great time to add berries to your lemonade. Raspberries or blueberries can make it even more colorful and tasty. You’ll love the burst of flavor they bring. For holidays, think about colorful layers. Use red berries and green mint for a festive look. This makes the drink perfect for any special occasion. If you have a big gathering, you can easily adjust the recipe. Double or triple the ingredients for more servings. This way, everyone can enjoy the Blue Lagoon Tropical Lemonade. When making larger batches, mix everything in a big punch bowl. This saves time and keeps the lemonade well-mixed. Just remember to add the sparkling water last, so it stays fizzy! To keep your Blue Lagoon Tropical Lemonade fresh, store it in the fridge. Use a sealed pitcher or container. This method prevents any odors or flavors from other foods. Drink within three days for best taste. If you see any changes in color or smell, it is best to throw it away. You can freeze Blue Lagoon Tropical Lemonade for later use. Pour the lemonade into ice cube trays. Once frozen, transfer the cubes to a bag. This way, you can enjoy a quick treat anytime. When ready to use, just thaw the cubes in the fridge or at room temperature. Serve them in a glass with fresh lemonade for a cool drink. If you have a party or event, pre-mix the lemonade ahead of time. Store it in a large container with a lid. This makes serving easy and quick. For portable ideas, fill mason jars with lemonade. Add ice and a slice of lemon or lime on top. These jars are fun, easy to carry, and perfect for sharing. To make Blue Lagoon Tropical Lemonade more kid-friendly, you can start by reducing the sweetness. Kids often prefer less sweet drinks. You can use less agave syrup or honey. Try using coconut water, which adds natural sweetness without being too sugary. Fun recipe modifications can also help. Consider adding fruit pieces, like berries or mango. Kids enjoy colorful drinks. You can even let them help with the mixing. This makes it a fun activity and a tasty treat! Yes, you can use fresh ingredients only! Fresh lemon juice gives a bright taste and aroma. Using fresh coconut water adds a tropical feel. It is healthier and has no added preservatives. The benefits of fresh versus powdered ingredients are clear. Fresh ingredients often taste better and have more nutrients. They also make your drink look more vibrant and appealing. If you want the best flavor, always choose fresh! You can buy blue spirulina powder at health food stores or online. Many shops offer it in bulk or as single packs. Popular online options include Amazon and specialty health sites. When shopping, compare prices to find the best deal. Some stores may offer discounts or sales. Check the ingredient list to ensure you are getting pure spirulina. This way, you know you’re making a healthy choice for your drink! You now have all the tools to make Blue Lagoon Tropical Lemonade. We covered the key ingredients like fresh lemon juice and coconut water. You learned about mixing, serving, and garnishing to make it visually appealing. Adjust sweetness with ease and keep it bubbly for everyone to enjoy. Explore variations for different tastes and seasons. Remember, proper storage can keep it fresh for later. Get ready to impress friends with your new lemonade recipe! Enjoy your refreshing drink!

Blue Lagoon Tropical Lemonade Refreshing and Zesty Drink

Looking for a drink that’s both refreshing and fun? Say hello to Blue Lagoon Tropical Lemonade! This colorful beverage packs

- 1 cup canned pumpkin puree - 1 frozen banana - 1 cup almond milk (or milk of choice) - 1/2 cup Greek yogurt or a dairy-free alternative These main ingredients create a creamy and smooth base for your pumpkin pie smoothie. Canned pumpkin puree is rich in flavor, while the frozen banana adds natural sweetness and a nice texture. Almond milk makes this drink light, and Greek yogurt gives it a protein boost. - 2 tablespoons maple syrup (adjust to taste) - 1 teaspoon pumpkin pie spice - 1/4 teaspoon vanilla extract - A pinch of salt These sweeteners and spices bring out the fall flavors. Maple syrup lets you control the sweetness. Pumpkin pie spice adds warmth, while vanilla extract rounds out the taste. The pinch of salt enhances all the flavors. - Ice cubes (for a thicker texture) If you want a thicker smoothie, toss in some ice cubes. This simple addition makes your drink colder and creamier. It's perfect for hot days or when you want a more substantial snack. {{ingredient_image_1}} Combining the base ingredients Start by placing 1 cup of canned pumpkin puree in your blender. Next, add 1 frozen banana for sweetness and creaminess. Pour in 1 cup of almond milk or any milk you prefer. Then, add 1/2 cup of Greek yogurt for a rich texture. Adding sweeteners and spices Now, it’s time to add flavor. Pour in 2 tablespoons of maple syrup. You can adjust this later. Sprinkle in 1 teaspoon of pumpkin pie spice for that cozy taste. Add a 1/4 teaspoon of vanilla extract and a pinch of salt to enhance the flavors. Achieving the right consistency Blend all the ingredients on high until the mixture is smooth and creamy. If you want a thicker smoothie, toss in a few ice cubes and blend again. This will give your smoothie a delightful texture. Adjusting sweetness as needed Once blended, taste your smoothie. If it needs more sweetness, add extra maple syrup. Blend again briefly to mix in the syrup. This step is key to making your smoothie just right. Pouring into glasses Once your smoothie is ready, pour it into glasses. This recipe makes enough for two servings. Garnishing tips For a fun touch, sprinkle a bit of pumpkin pie spice on top. You can also add a swirl of whipped cream for extra flair. Enjoy your tasty pumpkin pie smoothie right away! To get a smooth and creamy pumpkin pie smoothie, blending is key. Start by layering your ingredients properly. Place the canned pumpkin puree, frozen banana, and almond milk in the blender first. This helps the blades move freely. Blend on high until everything is well mixed. If you want a thicker smoothie, add ice cubes. Blend again until the ice is crushed and mixed in. Presentation matters! Pour your smoothie into clear glasses to show off that lovely color. For a special touch, garnish your smoothie with a sprinkle of pumpkin pie spice. If you love whipped cream, add a dollop on top. This makes it look fancy and tastes great too. Use tall glasses to make your drink feel more festive. You can make this smoothie your own! If you like it sweeter, add more maple syrup. For a spicier kick, increase the pumpkin pie spice. You can even swap almond milk for oat or coconut milk. Each option gives your smoothie a new twist. Try adding a scoop of protein powder for an extra boost. Enjoy playing with flavors to find your perfect mix! Pro Tips Use Fresh Ingredients: Opt for fresh pumpkin puree if available, as it provides a more vibrant flavor compared to canned versions. Adjust Sweetness: Start with less maple syrup and adjust to your taste, especially if your banana is very ripe and sweet. Add Protein: For an extra protein boost, consider adding a scoop of protein powder or nut butter. Garnish Creatively: Enhance the presentation with toppings like chia seeds, crushed nuts, or a sprinkle of cinnamon for added texture and flavor. {{image_2}} To make this smoothie vegan, swap Greek yogurt for dairy-free yogurt. Use coconut or almond yogurt for great flavor. For sweetness, try agave syrup or date syrup. Both are tasty and plant-based. You can use different types of milk in this recipe. Oat milk adds a creamy texture. Coconut milk gives a rich, tropical taste. Almond milk is light and slightly nutty. Try them all to find your favorite! Fall is a great time to add other flavors. Consider adding a pinch of nutmeg for warmth. You can also toss in some spinach for extra nutrients. For fun, try adding a spoonful of apple sauce to bring in another fall flavor. Each change makes the smoothie unique! You can store leftover pumpkin pie smoothie in the fridge for about two days. Just pour it into an airtight container. When you're ready to drink it, give it a good shake. If you want to make your smoothie ahead of time, freezing is a great option. Just pour the smoothie into ice cube trays or freezer bags. It can last for up to a month in the freezer. When you're ready to enjoy it, you can blend the frozen cubes with a little milk for a fresh drink. To enjoy your frozen smoothie, let it thaw in the fridge overnight. If you're in a hurry, you can blend it straight from the freezer. Just add a splash of almond milk to help it blend smoothly. This way, you get to savor the delicious taste whenever you want! Yes, you can use fresh pumpkin. Fresh pumpkin gives a vibrant taste. However, it requires more prep time. Canned pumpkin is ready to use and saves time. Fresh pumpkin has a lighter texture, while canned is thicker. Both options can make a tasty smoothie. If you use fresh, roast and puree it first for the best flavor. This smoothie is quite healthy! It packs in many nutrients. Canned pumpkin is high in fiber and vitamin A. Bananas add potassium and natural sweetness. Greek yogurt or dairy-free options provide protein and probiotics. Almond milk keeps it low in calories. Maple syrup adds a touch of sweetness but can be adjusted. Overall, this smoothie offers a great balance of taste and health. Sure! If you don't like bananas, there are great alternatives. You can use 1/2 cup of applesauce for sweetness. A frozen peach or mango can also work well. They give a creamy texture and fruity flavor. Just make sure to adjust your sweeteners to taste. This guide covers all you need for a delicious pumpkin pie smoothie. We explored key ingredients like canned pumpkin, frozen banana, and Greek yogurt. I shared blending tips to achieve the right texture and served creative ideas for an attractive presentation. You can even customize your smoothie with different milks and spices, or adjust it for dietary needs. Enjoy making this healthy treat, storing it well, and exploring variations. Every sip can reflect your own taste. Happy blending!

Pumpkin Pie Smoothie Simple and Delicious Recipe

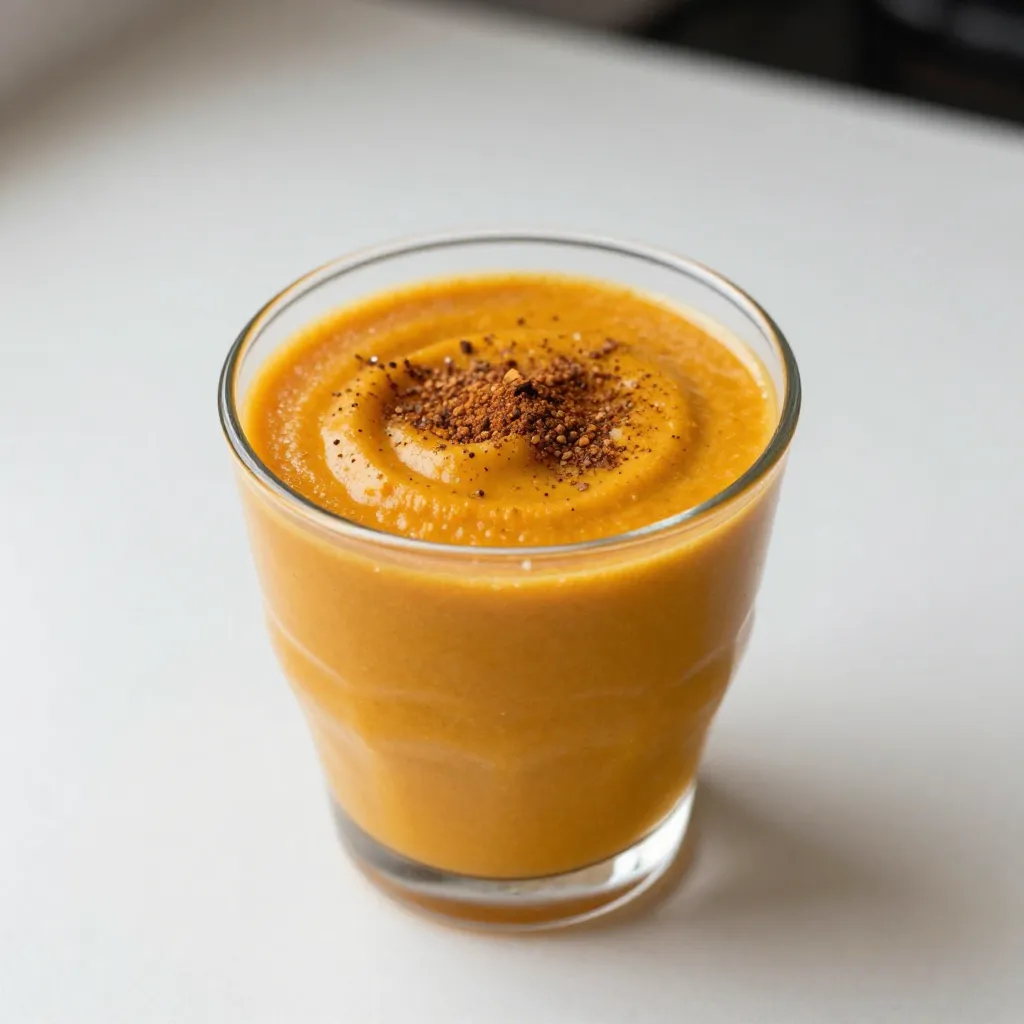
Are you craving a cozy fall treat that’s both healthy and easy to make? Look no further! This Pumpkin Pie

For the teriyaki chicken lettuce cups, you will need: - 1 lb (450g) chicken breast, finely diced - 1 tablespoon sesame oil - 2 cloves garlic, minced - 1 inch ginger, grated - 1/4 cup soy sauce (or tamari for gluten-free) - 2 tablespoons honey or maple syrup - 1 tablespoon rice vinegar - 1 teaspoon cornstarch mixed with 2 tablespoons water - 1/2 cup carrots, grated - 1/2 cup bell peppers, finely chopped - 1/4 cup green onions, thinly sliced - 1 head of butter lettuce or iceberg lettuce, leaves separated - Sesame seeds for garnish You can add extra flavors or textures to your cups: - Chopped nuts for a crunchy bite - Cilantro or mint for fresh herbs - Chili flakes for some heat - Cucumber or avocado for creaminess If you have dietary needs, here are some swaps: - Use ground chicken or turkey instead of breast. - Swap honey with agave or maple syrup for a vegan option. - Choose coconut aminos over soy sauce for a lower sodium choice. - Use any crunchy vegetable if you can't find carrots or bell peppers. {{ingredient_image_1}} To start, heat 1 tablespoon of sesame oil in a large skillet over medium-high heat. Once the oil is hot, add 2 cloves of minced garlic and 1 inch of grated ginger. Sauté this for around 30 seconds. You want to smell the garlic and ginger but not burn them. Next, add 1 pound of finely diced chicken breast. Cook this chicken for 5 to 7 minutes until it is browned and fully cooked. Stir often to avoid sticking. While the chicken cooks, grab a small bowl. In it, whisk together 1/4 cup of soy sauce, 2 tablespoons of honey or maple syrup, and 1 tablespoon of rice vinegar. Then, mix 1 teaspoon of cornstarch with 2 tablespoons of water in another small bowl. This will help to thicken the sauce later. Once the chicken is done, pour the sauce mixture over the chicken. Stir this mixture until it thickens, which should take about 2 to 3 minutes. Now it’s time to add some crunch! Mix in 1/2 cup of grated carrots and 1/2 cup of finely chopped bell peppers into the chicken. Cook this for 1 to 2 minutes, just until the veggies are slightly tender. Finally, remove the skillet from heat and stir in 1/4 cup of thinly sliced green onions. To serve, take a head of butter lettuce or iceberg lettuce and separate the leaves. Spoon the teriyaki chicken mixture into the leaves, making cups. Garnish each cup with sesame seeds for a lovely touch before enjoying! To make your teriyaki chicken burst with flavor, start by using fresh garlic and ginger. These ingredients add depth and warmth to the dish. Sauté them in sesame oil until they smell amazing. This step wakes up the flavors. Cook the chicken until it’s golden brown. Browning adds a nice texture and taste. When you add the sauce, let it simmer for a bit. This helps it stick to the chicken and coat it well. You will need some simple tools to make this recipe smooth. A large skillet works well for cooking the chicken. Use a whisk to mix the sauce and prevent lumps. A cutting board and sharp knife help you chop the veggies neatly. Grab a spoon to serve the mixture into the lettuce cups. Lastly, a small bowl is handy for mixing the cornstarch with water. Serve the teriyaki chicken in crisp lettuce leaves as cups. This makes a fun, hands-on meal. You can add extra toppings like sesame seeds for crunch. Sliced cucumbers or avocado also make great additions. Pair these cups with a side of rice or a light salad. This adds more texture and flavor to your meal. Enjoy the fresh, vibrant colors on your plate. Pro Tips Use Fresh Ingredients: Fresh vegetables and high-quality chicken enhance the flavor and texture of your lettuce cups. Customize Your Veggies: Feel free to add or substitute other vegetables like zucchini or snap peas for added flavor and color. Make It Spicy: Add a dash of sriracha or red pepper flakes to the sauce for a spicy kick that complements the sweetness. Serve Immediately: For the best texture, serve the lettuce cups right after assembling to keep the leaves crisp and fresh. {{image_2}} You can make Teriyaki Chicken Lettuce Cups vegetarian or vegan easily. Instead of chicken, use diced tofu or tempeh. Both options soak up the sauce well. For a hearty texture, press the tofu to remove excess water before cooking. Cook the tofu until golden brown. Use the same sauce recipe to keep that sweet and savory flavor. For a low-carb or keto version, skip the honey or maple syrup. Use a sugar-free sweetener instead. You can also add more veggies like zucchini or mushrooms for extra bulk. These choices keep the dish filling without the carbs. Always check the nutritional labels on sauces to ensure they fit your diet. You can mix up the flavor in your Teriyaki Chicken Lettuce Cups. Try adding a splash of sriracha for heat. You can also use different sauces like hoisin for a twist. Add fresh herbs like cilantro or basil to brighten the taste. With each change, you create a new flavor journey in your lettuce cups. You can keep leftover teriyaki chicken in the fridge. Place it in an airtight container. It stays fresh for 3 to 4 days. Make sure to separate the chicken from the lettuce. This keeps the lettuce crisp. To freeze teriyaki chicken, let it cool first. Place it in a freezer-safe bag. Remove as much air as you can. It’s best used within 2 to 3 months. You can freeze the chicken, but not the lettuce. Lettuce does not freeze well. To reheat, you can use a skillet over medium heat. Add a splash of water to keep it moist. Heat for about 5 minutes until warm. You can also microwave it in short bursts. Stir in between to heat evenly. Serve it fresh in new lettuce cups for the best taste. For lettuce cups, I love using butter lettuce or iceberg lettuce. Butter lettuce has soft, tender leaves that wrap nicely around the filling. Iceberg lettuce is crisp and holds its shape well. Both types add a fresh crunch to your Teriyaki Chicken Lettuce Cups. Yes, you can make Teriyaki Chicken ahead of time. Cook the chicken and sauce, then store it in the fridge for up to three days. When you're ready to serve, just reheat the chicken mixture. This makes for a quick and easy meal on busy days. To make the dish gluten-free, simply use tamari instead of regular soy sauce. Tamari is a gluten-free option that tastes great in this recipe. Always check labels to ensure other ingredients are also gluten-free. You can serve Teriyaki Chicken Lettuce Cups with steamed rice or quinoa for a filling meal. A side of fresh veggies or a light salad also pairs well. For a fun twist, try making a dipping sauce with soy sauce and sesame oil for extra flavor. You learned how to make tasty Teriyaki Chicken Lettuce Cups. We covered key ingredients, step-by-step cooking, and helpful tips. You can customize the dish to fit your needs, whether you're vegan or on a low-carb diet. Proper storage ensures your cups stay fresh for later. Enjoy your cooking and serving experience! This dish not only tastes great but also allows for creativity. Try new flavors and variations to find your favorite style. I hope you love making this dish as much as I do.

Teriyaki Chicken Lettuce Cups Simple and Healthy Recipe

Looking for a fresh, simple meal? Teriyaki Chicken Lettuce Cups are your answer! This recipe is not just healthy; it’s

To make these yummy cheesecake cups, you will need: - 1 cup pumpkin puree - 8 oz cream cheese, softened - 1/2 cup Greek yogurt - 1/2 cup vanilla protein powder - 1/4 cup maple syrup - 1 tsp vanilla extract - 1 tsp pumpkin pie spice - 1/4 tsp salt These main ingredients bring the pumpkin flavor and creamy texture. The Greek yogurt adds protein and tang, while maple syrup gives sweetness. For the crust, gather these items: - 1 cup crushed graham crackers - 2 tbsp melted coconut oil This crust is simple yet tasty. The graham crackers bring crunch, while the coconut oil binds it all together. You can make your dessert even better with these extras: - Whipped cream (for topping, optional) - Cinnamon for dusting (optional) Whipped cream adds a fluffy touch, and cinnamon gives a warm flavor kick. Enjoy customizing your cheesecake cups! Start by gathering your ingredients. You need crushed graham crackers and melted coconut oil. In a medium bowl, mix the graham cracker crumbs with the coconut oil. Make sure the crumbs get evenly coated. This mix will form a tasty base. Next, divide this mixture into 6-8 small cups. Press it down firmly to create a solid layer at the bottom. In a large bowl, beat 8 oz of softened cream cheese with an electric mixer. Mix until it is smooth and creamy. Then, add 1 cup of pumpkin puree, 1/2 cup of Greek yogurt, and 1/2 cup of vanilla protein powder. Pour in 1/4 cup of maple syrup, 1 tsp of vanilla extract, 1 tsp of pumpkin pie spice, and 1/4 tsp of salt. Blend everything together until it is well mixed and smooth. Now, take your cheesecake filling and spoon it over the crust in each cup. Fill them to the top and smooth the surface with a spatula. Once all cups are filled, place them in the refrigerator. Let them chill for at least 4 hours. For the best texture, leave them overnight. When you are ready to serve, take the cups out of the fridge. You can add whipped cream on top for extra flavor. A light dusting of cinnamon adds a nice touch too. Enjoy your delightful pumpkin protein cheesecake cups! To get a creamy texture, start with softened cream cheese. Beat it well until smooth. This step is key. When you add pumpkin puree and Greek yogurt, mix slowly. Use an electric mixer for best results. If you see lumps, keep mixing. The more you blend, the creamier it gets. Chilling is essential for the best texture. After you fill the cups, place them in the fridge. Let them chill for at least four hours. Overnight is even better. This time helps the flavors meld and the filling set. Cover the cups with plastic wrap. This keeps them fresh and prevents drying out. You can easily modify this recipe. If you want a different flavor, swap pumpkin for sweet potato puree. You can also use flavored protein powder for a twist. For a lower sugar option, use a sugar substitute in place of maple syrup. If you're dairy-free, try cashew cream instead of cream cheese. These swaps keep the dessert fun and flexible! {{image_2}} You can mix up the flavors in these cups. Try adding cocoa powder for a chocolate twist. You could also use flavored protein powder, like chocolate or vanilla. If you want a fruity touch, consider mixing in some mashed bananas or applesauce. Each flavor change gives a new taste that keeps things fun. Looking to make a healthier version? Swap the cream cheese for a dairy-free cream cheese. Use coconut yogurt or almond yogurt for a lighter touch. Choose a low-sugar maple syrup or a sugar substitute like stevia. These changes keep the treat tasty while cutting back on sugar and calories. You can serve these cheesecake cups in various ways. Instead of small cups, layer the filling and crust in a glass for a parfait. This looks fancy and gives a fun twist. You can also make mini cups using smaller containers. These are great for parties or snacks. Just remember, presentation can make a simple dessert feel special! Store your pumpkin protein cheesecake cups in the fridge. Use an airtight container. This keeps them fresh and tasty. If you have extra cups, wrap them well. Use plastic wrap or foil to cover them tightly. These cheesecake cups last about 5 days in the fridge. After that, they may lose their flavor and texture. To enjoy them at their best, eat them within this time. If they look or smell off, it’s best to toss them. You can freeze these cups for longer storage. First, let them chill in the fridge for a few hours. Then, wrap each cup tightly in plastic wrap. Place them in a freezer-safe container. They should stay good for up to 3 months. When ready to eat, thaw them in the fridge overnight. Enjoy them as a cool, sweet treat! Yes, you can use a different protein powder. Just choose one that fits your taste. If you want a chocolate flavor, go for chocolate protein powder. If you want no flavor, use unflavored protein. The texture may change a bit, but it will still taste great. You can store these cheesecake cups for up to five days in the fridge. Make sure to cover them well to keep them fresh. If you have leftovers, they will still taste yummy later on. Yes, you can make this a vegan dessert! Use vegan cream cheese and coconut yogurt instead of Greek yogurt. Swap maple syrup for agave or another vegan sweetener. This way, you can enjoy a tasty treat without any animal products. If you don’t have pumpkin puree, try using sweet potato puree or butternut squash puree. Both options bring a nice flavor and texture. You can even use mashed bananas for a fun twist! Just keep in mind that the taste will change a bit. You now have all you need to make cheesecake cups. We discussed key ingredients, a clear step-by-step guide, and useful tips. We also explored variations and how best to store them. Whether you enjoy classic flavors or want to try healthy options, these cheesecake cups are simple and delicious. Get creative with your toppings and substitutions. Your friends and family will love your treats. Enjoy your cheesecake adventure!

No Bake Pumpkin Protein Cheesecake Cups Delightful Treat

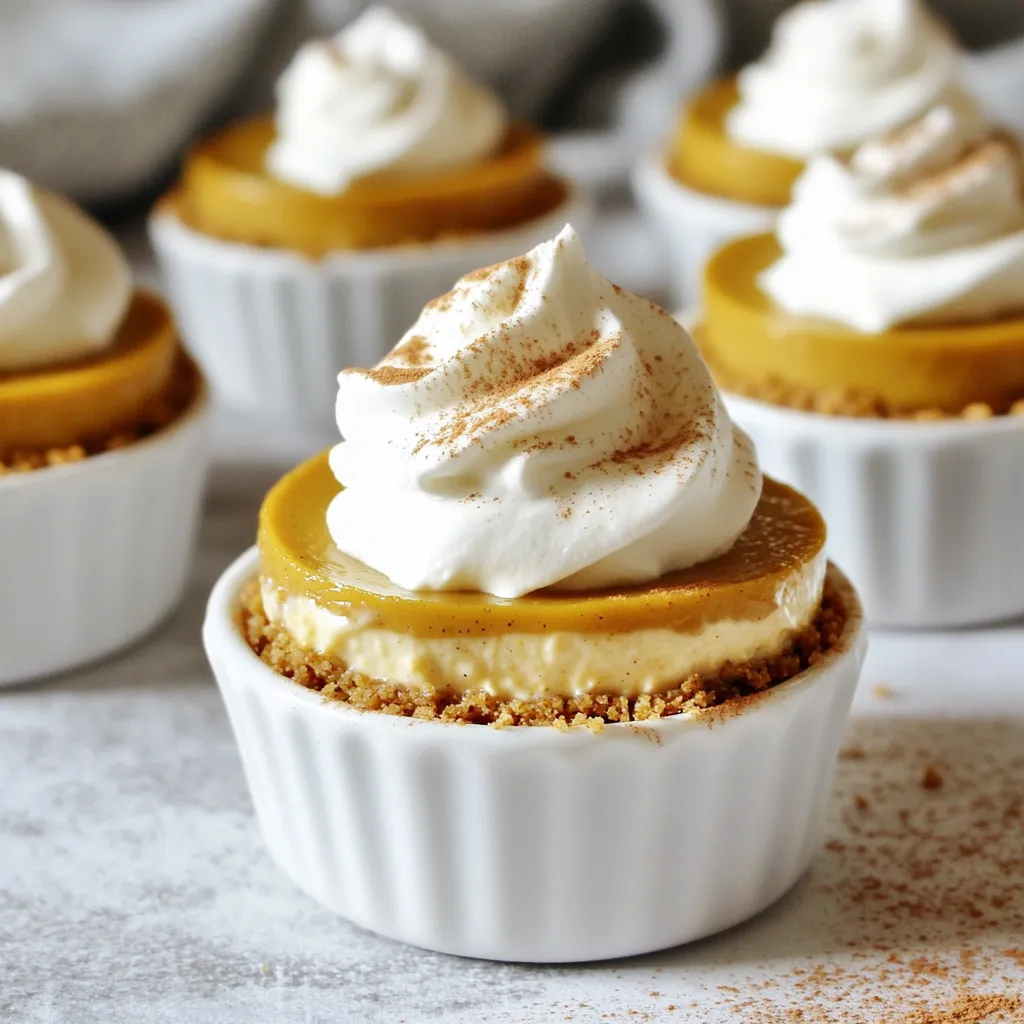
Craving a sweet treat that fits your healthy lifestyle? Look no further! These No Bake Pumpkin Protein Cheesecake Cups combine

To make a Maple Apple Galette, gather these key items: - 2 cups all-purpose flour - 1/2 teaspoon salt - 1 tablespoon sugar - 1/2 cup unsalted butter, chilled and diced - 6-8 tablespoons ice water - 3-4 medium apples (like Granny Smith or Honeycrisp), peeled, cored, and thinly sliced - 1/4 cup pure maple syrup - 1 tablespoon lemon juice - 1 teaspoon cinnamon - 1/4 teaspoon nutmeg - 1 tablespoon cornstarch - 1 egg, beaten (for egg wash) - Sugar for sprinkling You can add your twist to the galette with these options: - A pinch of ginger for warmth - Chopped nuts for crunch - Raisins or dried cranberries for sweetness - A splash of vanilla extract for depth If you need swaps, here are some ideas: - Use whole wheat flour for a nuttier taste. - Swap unsalted butter with coconut oil for a dairy-free option. - Maple syrup can be replaced with honey or agave syrup. - Use any tart apple variety if you can’t find the ones listed. These ingredients come together to create a warm, sweet treat. Each part plays a key role in flavor and texture. The key is to have fun while mixing and matching based on what you like! Mixing Dry Ingredients Start by gathering your dry ingredients. In a large bowl, mix 2 cups of all-purpose flour, 1/2 teaspoon of salt, and 1 tablespoon of sugar. This mix gives your dough the right texture and flavor. Adding Butter and Forming Dough Next, take 1/2 cup of chilled, diced unsalted butter. Add it to the dry mix. Use your fingers or a pastry cutter to blend until it looks like coarse crumbs. This step is key for a flaky crust. Chilling the Dough Now, add ice water slowly, about 6-8 tablespoons. Mix until a ball forms. Wrap the dough in plastic wrap and chill it in the fridge for at least 30 minutes. This keeps the butter cold and helps the dough hold its shape. Combining Ingredients While the dough chills, prepare the apples. Peel and core 3-4 medium apples, like Granny Smith or Honeycrisp, then slice them thin. In a bowl, mix the apple slices with 1/4 cup of pure maple syrup, 1 tablespoon of lemon juice, 1 teaspoon of cinnamon, 1/4 teaspoon of nutmeg, and 1 tablespoon of cornstarch. Toss well until the apples are coated. Allowing Flavors to Develop Let the apple mixture sit for about 10 minutes. This allows the flavors to blend and the apples to soften slightly. Rolling Out the Dough Preheat your oven to 425°F (220°C). On a floured surface, roll out the chilled dough into a 12-inch round circle. Be gentle to keep the dough light and flaky. Transfer the rolled dough to a parchment-lined baking sheet. Placing and Folding the Apples Spoon the apple filling into the center of the dough, leaving a 2-inch border around the edges. Carefully fold the edges over the apples, making pleats as you go. This creates a rustic look and holds in the filling. Baking Instructions Brush the edges of the dough with a beaten egg for a golden finish. Sprinkle sugar on top for extra sweetness. Place the galette in your preheated oven and bake for 25-30 minutes. The crust should turn golden brown, and the apples need to be tender. To make your galette dough just right, keep your butter cold. Cold butter creates flaky layers. Mix the flour, salt, and sugar first. Then, add the chilled butter and mix until it looks like crumbs. Add the ice water slowly. This gives the dough a nice texture. Don't overmix; just bring it together. The best apples for this galette are tart and sweet. I love using Granny Smith or Honeycrisp apples. They hold their shape well when baked. You want apples that balance sweetness and tartness. This mix gives great flavor and texture. Avoid mushy apples like Red Delicious. Always preheat your oven to 425°F (220°C). A hot oven helps the crust become golden and crispy. Bake until the edges look brown and the apples are soft. Let the galette cool for a few minutes before slicing. This helps the filling set, making it easier to cut. Enjoy your galette warm or at room temperature! {{image_2}} You can mix flavors in your galette for fun. Try pears with apples for a sweet twist. Adding cranberries gives a tart kick. Want a spice boost? Use ginger or cardamom. You can also add nuts like walnuts or pecans for crunch. Mix and match to find your favorite blend! If you need a gluten-free option, swap the flour. Use a gluten-free blend instead. Make sure it has xanthan gum for proper texture. The rest of the recipe stays the same. Your galette will still taste great and have a lovely crust. Seasonal fruits can change the galette's vibe. In spring, use cherries or strawberries. Summer is perfect for peaches or plums. In fall, stick with apples or pears. Winter calls for citrus fruits like oranges or grapefruits. Each fruit brings its own charm to the dish! After enjoying your galette, let any leftovers cool completely. Place slices in an airtight container. You can store them in the fridge for up to 3 days. If you cover the galette well, it stays fresh longer. To reheat, preheat your oven to 350°F (175°C). Place the galette on a baking sheet. Heat for about 10-15 minutes. This warms the galette and keeps the crust crispy. You can also use a microwave for quick reheating. Just warm it for 30 seconds, but know the crust will not be as crisp. If you want to save some galette for later, you can freeze it. Wrap the cooled galette tightly in plastic wrap and then in foil. It can stay in the freezer for about 2-3 months. When you're ready to enjoy it, thaw it in the fridge overnight. Then, reheat in the oven for the best texture. A galette is more rustic than a pie. It has a free-form shape, while a pie is in a dish. The crust of a galette is usually thicker and flakier. You can see the filling peeking out, which adds to its charm. A pie has a top crust and is often more formal. Both are delicious, but a galette feels more casual and easy. Yes, you can use other sweeteners if you prefer. Honey, agave syrup, or brown sugar work well. Each sweetener will change the flavor slightly. Maple syrup adds a unique taste, but other options can be just as tasty. Adjust the amount based on how sweet you want your filling. You’ll know the galette is done when the crust is golden brown. The apples should be tender and bubbly. Baking usually takes 25-30 minutes at 425°F (220°C). Keep an eye on it towards the end. If the crust is brown and the apples are soft, it’s ready to come out! This post covered all the steps to make a great galette. We explored key ingredients, from essential items to custom options. I shared tips on making the best dough and choosing the right apples. We also looked at fun variations and how to store leftovers. You can now enjoy delicious galette with confidence. Experiment with flavors and share your results. Happy baking!

Maple Apple Galette Perfectly Simple Dessert Recipe

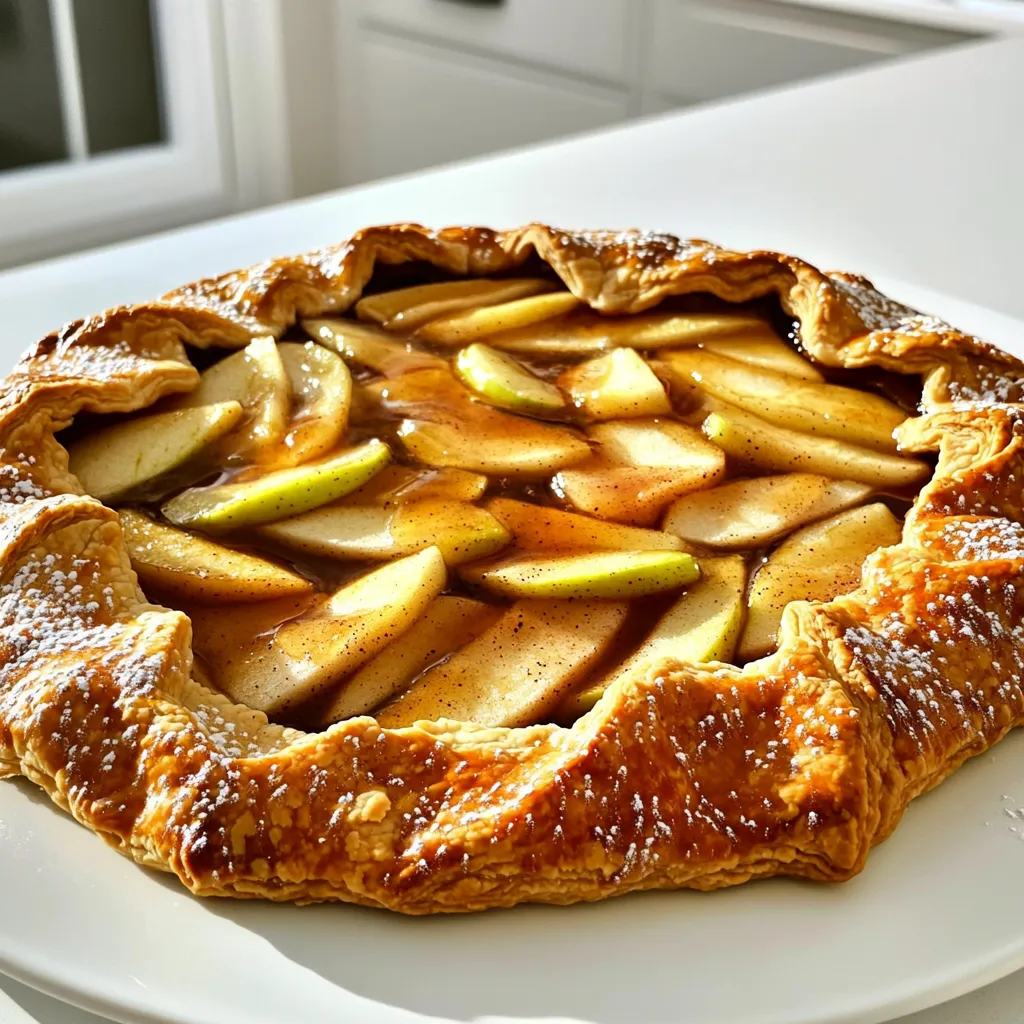
If you’re craving a dessert that’s both simple and delicious, you’re in the right place! This Maple Apple Galette is

- 1 lb boneless, skinless chicken breasts - 4 cups chicken broth - 1 cup diced carrots - 1 cup diced celery - 1 cup diced onion - 3 cloves garlic, minced - 1 can (14.5 oz) diced tomatoes, undrained - 2 cups fresh spinach - 1 package (9 oz) cheese tortellini - 1 teaspoon dried Italian seasoning - Salt and pepper to taste - Fresh parsley, chopped for garnish I love using simple, fresh ingredients to make this soup. First, I choose one pound of boneless, skinless chicken breasts. They cook well and shred easily. Next, I add four cups of chicken broth. This makes the base rich and tasty. For the vegetables, I dice one cup each of carrots and celery. They add sweetness and crunch. I also include one cup of diced onion and three minced garlic cloves. These ingredients bring great flavor to the broth. I like to add one can of diced tomatoes, undrained. Their juices mix well with the broth. Plus, I throw in two cups of fresh spinach for color and nutrition. To finish, I include one package of cheese tortellini. This gives the soup a creamy texture. I season everything with one teaspoon of dried Italian seasoning, salt, and pepper. Finally, I top the soup with chopped fresh parsley for a bright finish. This blend of ingredients creates a warm, hearty dish. The mix of flavors will make you feel good inside. To start, place your chicken breasts in the bottom of the slow cooker. This is the main protein for your soup. Next, add the chicken broth. This gives the soup a rich base. Then, chop your vegetables. Add 1 cup each of diced carrots, diced celery, and diced onion. Lastly, add 3 cloves of minced garlic. This mix of veggies will add flavor and texture. Now, pour in the can of diced tomatoes. Make sure to include the juices too. This will add a sweet and tangy taste. Next, sprinkle in 1 teaspoon of dried Italian seasoning. This blend brings warmth and depth to the soup. Don’t forget to season with salt and pepper to your liking. These simple spices will enhance all the flavors. Cover the slow cooker. Cook on low for 6 hours or high for 3 hours. When the chicken is cooked through, take it out. Shred the chicken using two forks. This makes it easy to mix back into the soup. Return the shredded chicken to the slow cooker. Next, stir in 2 cups of fresh spinach and the 9 oz package of cheese tortellini. Cover the slow cooker again and cook on high for an additional 30 minutes. This will make the tortellini tender. At the end, season with salt and pepper if needed. Serve hot, and enjoy your cozy soup! How to avoid overcooked tortellini To keep your tortellini from getting mushy, add it near the end of cooking. I suggest adding the cheese tortellini 30 minutes before serving. This way, it cooks just right and stays firm. Best practices for shredding chicken After cooking, remove the chicken breasts and place them on a cutting board. Use two forks to shred the chicken. Shred it while it is still warm for the best texture. Then, return the shredded chicken to the soup. Recommended side dishes This soup pairs well with crusty bread or a light salad. A simple green salad adds freshness and balances the soup's richness. You can also serve it with garlic bread for a warm treat. Ideal garnishes for presentation For a pop of color, sprinkle fresh parsley on top before serving. You can also add some grated Parmesan cheese for extra flavor. It looks nice and adds a tasty touch. How to customize seasoning levels Taste the soup before serving. Add salt and pepper to your liking. If you want more herbs, try adding more Italian seasoning or fresh basil. Just remember to add a little at a time, so you don’t overpower the dish. Adding heat with spices If you like spicy food, add some red pepper flakes. Start with a pinch and stir it in. You can always add more if you want more kick. This is a great way to make the soup your own. {{image_2}} You can easily swap chicken for turkey. It gives a nice flavor change. If you prefer vegetarian options, use mushrooms or chickpeas. Both add texture and taste. You can also play with vegetables. Try zucchini, bell peppers, or green beans. Each choice brings a new twist. For a gluten-free option, look for gluten-free tortellini. Many brands offer tasty alternatives. You can also use low-sodium broth. This way, you control the salt level. It keeps the soup healthy without losing flavor. To make the soup pop, add fresh herbs. Basil or thyme can brighten the taste. You could also sprinkle in some crushed red pepper for heat. Cheese types can change the soup too. Try using Parmesan or a creamy mozzarella. Each adds its own unique touch. After enjoying your slow cooker chicken tortellini soup, let it cool down a bit. Store leftovers in an airtight container. You can keep it in the fridge for up to three days. Make sure to label it with the date. For longer storage, freeze the soup. Use freezer-safe containers or bags. Leave some space for expansion. The soup can last up to three months in the freezer. When it's time to enjoy your soup again, you have a few options. The best way is to reheat it on the stove over medium heat. Stir it often until it's hot. If you're short on time, use the microwave. Heat in a bowl for about 2-3 minutes. Stir halfway through to ensure even heating. Always check that the soup reaches a safe temperature of 165°F. Leftovers can stay fresh in the fridge for about three days. If you freeze it, the soup can last for three months. After that, the taste may fade. Always check for any signs of spoilage before eating. If it smells bad or looks strange, it’s better to throw it out. This way, you ensure every bowl is delicious and safe! Can I make Slow Cooker Chicken Tortellini Soup ahead of time? Yes, you can. This soup keeps well in the fridge. You can make it the day before. Just store it in an airtight container. When ready to eat, reheat it gently. How can I make it dairy-free? To make this soup dairy-free, skip the cheese tortellini. Use a dairy-free tortellini option instead. Check labels for dairy ingredients. You can add more veggies for taste. What can I use instead of chicken broth? You can use vegetable broth for a lighter flavor. Water with seasonings works too. If you like, try bone broth for added richness. Alternatives for fresh spinach? Kale or Swiss chard are great substitutes for spinach. Both add good nutrients. You could also use frozen spinach. Just thaw and add it during cooking. How long does it take to cook on low vs. high? Cooking on low takes about 6 hours. If you choose high, it will take around 3 hours. Both methods yield delicious soup. Can I speed up the cooking process? Yes, you can speed it up by cutting chicken into smaller pieces. This allows it to cook faster. Another tip is to use the high setting. This blog post covered a simple and tasty Slow Cooker Chicken Tortellini Soup recipe. You learned about the key ingredients and steps for making it. I shared helpful tips on perfecting your soup and ways to customize it. By following the instructions, you can enjoy a warm meal that's easy to make. Remember, the best part is adjusting it to your taste. Try different ingredients or spices to find your perfect bowl of soup. Happy cooking!

Slow Cooker Chicken Tortellini Soup Flavorful Delight

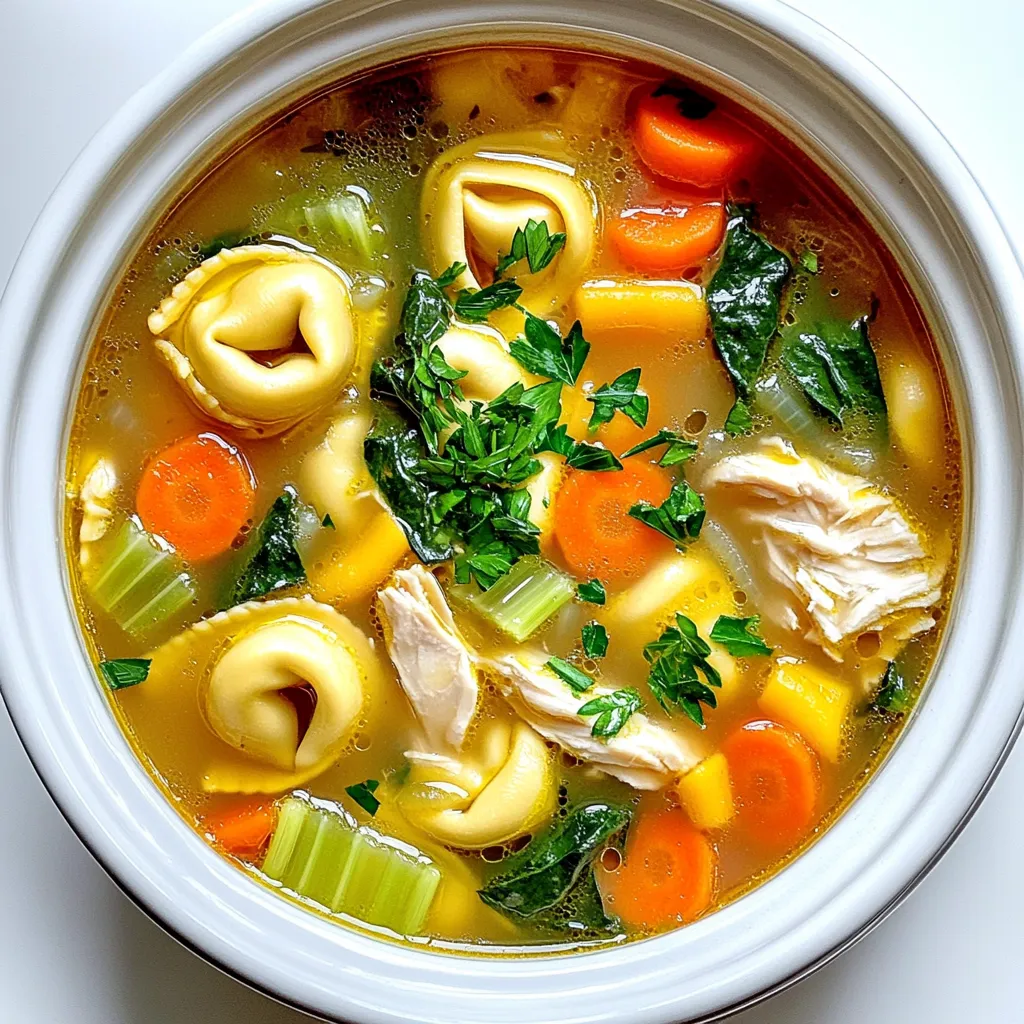
Are you ready to warm up with a bowl of comfort? My Slow Cooker Chicken Tortellini Soup is the ultimate

- 1 cup all-purpose flour - 1/2 teaspoon baking powder - 1/4 teaspoon salt - 1/2 cup unsalted butter, softened - 1/2 cup sugar - 1 large egg - 1 teaspoon vanilla extract - 1 tablespoon cinnamon sugar (for sprinkling) - 2 (8 oz) packages cream cheese, softened - 1 cup pumpkin puree - 1/2 cup sugar - 1/2 teaspoon ground cinnamon - 1/4 teaspoon nutmeg - 1 teaspoon vanilla extract - 3 large eggs When I make Pumpkin Churro Cheesecake Bars, I love the mix of flavors. The churro crust gives a sweet and buttery base. It pairs so well with the rich cheesecake layer. For the churro crust, you need flour, baking powder, salt, butter, sugar, an egg, and vanilla. Each ingredient plays a special role. The flour gives structure. The butter adds moisture and flavor. The sugar sweetens it all up. Next is the cheesecake layer. Here, cream cheese, pumpkin puree, and spices come together. You will also need sugar and eggs. The cream cheese makes it rich. Pumpkin adds a lovely fall flavor. Cinnamon and nutmeg give warmth and spice. Gather these ingredients before you start. It makes the process smooth and fun! Enjoy the mix of sweet churros and creamy cheesecake in every bite. - Preheat the oven to 350°F (175°C). - Line a 9x9 inch baking pan with parchment paper. - First, whisk together 1 cup of flour, 1/2 teaspoon baking powder, and 1/4 teaspoon salt. - In a separate bowl, cream together 1/2 cup of softened butter and 1/2 cup of sugar until light. - Mix in 1 large egg and 1 teaspoon of vanilla extract. Then, add the dry ingredients and stir until combined. - In a large bowl, beat 2 packages of softened cream cheese until smooth. - Add 1 cup of pumpkin puree, 1/2 cup of sugar, 1/2 teaspoon of cinnamon, 1/4 teaspoon of nutmeg, and 1 teaspoon of vanilla extract. Mix well. - Incorporate 3 large eggs one at a time, beating well after each addition. - Pour the cheesecake mixture over the churro crust in the baking pan. - Bake for 45-50 minutes, or until the center is set and the edges are slightly golden. - Allow to cool completely in the pan on a wire rack. Then, use the parchment to lift out the cheesecake bars. - Sprinkle the top with 1 tablespoon of cinnamon sugar before slicing into bars. - For the best texture, refrigerate for at least 2 hours before serving. - Ensure butter is softened for proper creaming. Soft butter mixes well with sugar. - Don't overmix the dough. Mix just until combined for a light crust. The churro crust is key. If your butter is cold, it won't cream right. This affects the whole texture. Mixing too much can make it tough instead of soft and crumbly. - Use room temperature cream cheese. Cold cream cheese will not blend smoothly. - Beat the eggs in gradually. This helps keep the mixture light and fluffy. A smooth cheesecake is a must. Room temperature cream cheese blends easily, giving a creamy texture. Adding eggs one by one keeps air in the mix, which helps it rise during baking. - Top with whipped cream or additional cinnamon sugar. This adds a nice touch. - Serve chilled for best flavor. Chilling enhances the taste and texture. Presentation is important. A sprinkle of cinnamon sugar makes it look inviting. Whipped cream adds creaminess. Plus, chilling the bars lets the flavors meld beautifully, making every bite delicious. {{image_2}} You can make these bars even better with a few tweaks. Try adding chocolate chips to the cheesecake mix. This gives a sweet twist to the bars. You can also switch up the spices. Ginger or allspice adds a warm touch that pairs well with pumpkin. These small changes can make a big difference in flavor. For those who need a gluten-free option, no problem! Just swap the all-purpose flour with a gluten-free blend. Many blends work well in baking. Look for one that says it is great for cookies or cakes. This way, everyone can enjoy these delicious bars. If you want to make fewer or more bars, you can easily adjust the recipe. For smaller batches, cut the ingredients in half. For larger groups, double the recipe. Just keep the baking time the same. Use a larger pan if you double the recipe. You will have tasty bars for any occasion! Keep these bars fresh by storing them in an airtight container. They stay good for up to 5 days in the refrigerator. This way, you can enjoy a tasty treat for days. You can freeze the pumpkin churro cheesecake bars too! Wrap them tightly in plastic wrap. Place them in a freezer-safe container. They can last for up to 3 months. When you’re ready to eat, just thaw them in the refrigerator before serving. These bars taste great chilled. If you prefer them warm, microwave them gently. Heat for just 10-15 seconds. This will bring back that delicious flavor without overcooking. Yes, you can use fresh pumpkin. Just cook and puree it first. Fresh pumpkin has a lighter taste. It may take more time to prepare, but it adds a unique flavor. If you go fresh, make sure to drain excess water after cooking. This keeps your cheesecake firm and avoids a soggy texture. To check if your cheesecake is set, look for a slight jiggle in the center. It should not be liquidy but still a bit soft. The edges should be golden and firm. You can also insert a toothpick into the center. If it comes out clean or with a few moist crumbs, it's ready. Yes, you can make this cheesecake dairy-free! Use dairy-free cream cheese and coconut milk instead of regular cream cheese. Also, make sure your butter is dairy-free or use coconut oil. This way, you keep the creamy texture without dairy. This blog post showed how to make delicious pumpkin cheesecake bars with churro crust. We covered the ingredients, step-by-step instructions, and helpful tips. I shared ways to customize the recipe and how to store your treats. Remember, you can enjoy these bars chilled or warm. With these tips, you can create a tasty dessert your friends will love. Happy baking!

Pumpkin Churro Cheesecake Bars Irresistible Dessert Treat

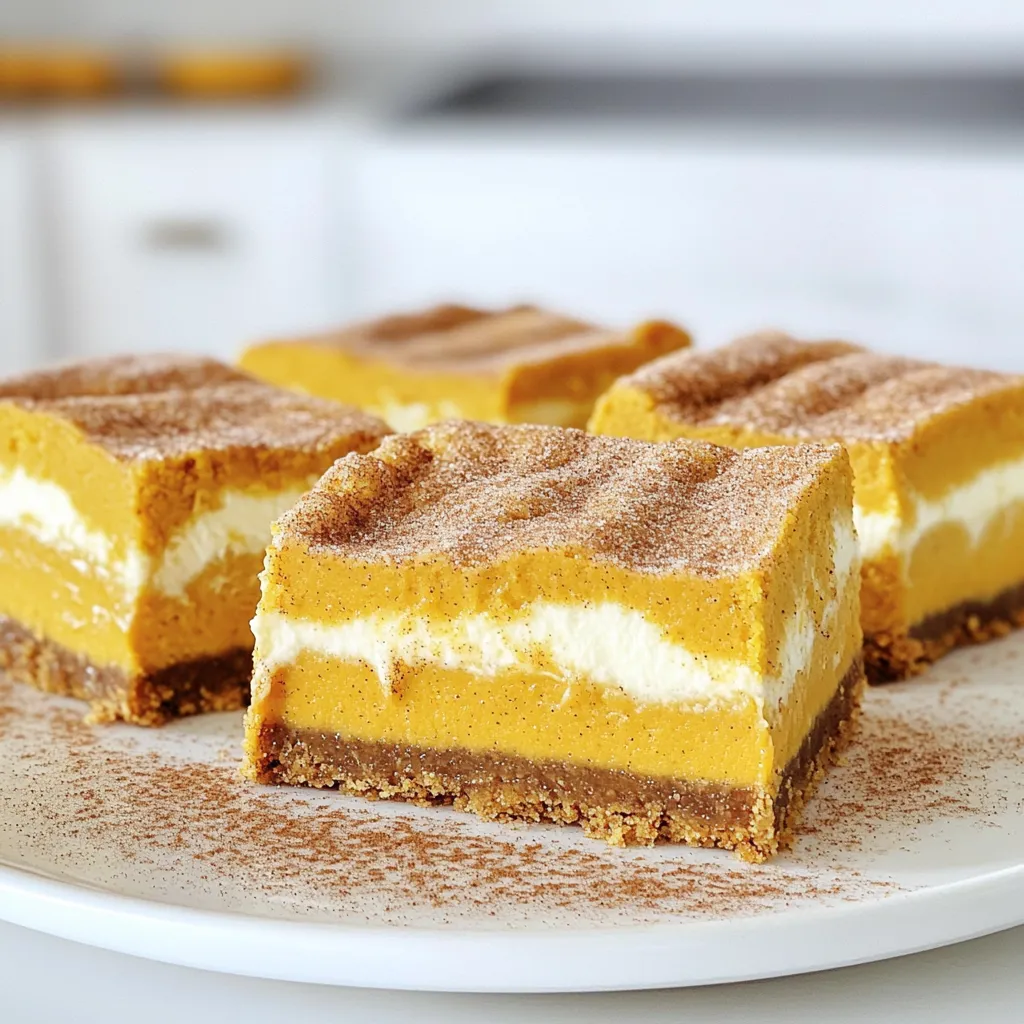
Get ready to satisfy your dessert cravings with my Pumpkin Churro Cheesecake Bars! This recipe combines two fall favorites: churros

- 14 oz firm tofu - 1 cup panko breadcrumbs - 1/2 cup cornstarch - 1/2 teaspoon garlic powder - 1/2 teaspoon onion powder - 1 teaspoon paprika - 1/2 teaspoon salt - 1/4 teaspoon black pepper - 1 tablespoon soy sauce - 1 tablespoon olive oil - Optional: 1 teaspoon sesame seeds for garnish When I make air fryer tofu nuggets, I focus on great ingredients. Firm tofu is key. It has a nice texture. You can find it in most stores. Panko breadcrumbs give the nuggets a crispy shell. They are lighter than regular breadcrumbs. This helps create a crunch that you will love. Cornstarch is also important. It helps the coating stick to the tofu. It gives a nice crunch when cooked. For flavor, I use garlic powder and onion powder. These add depth to the taste. Paprika gives a hint of smokiness. Don't forget the salt and black pepper! They boost the overall flavor. For an extra kick, I mix soy sauce and olive oil. This adds a savory taste. If you want, sprinkle sesame seeds on top. They add a nice look and a bit of nuttiness. Gather these ingredients and get ready for a tasty snack! Pressing the tofu First, you need to press the tofu. This step is key. Wrap the tofu in a clean kitchen towel. Place a heavy object on top, like a cast iron skillet. Let it sit for 15-20 minutes. This removes extra moisture and helps the tofu get crispy. Cutting tofu into cubes After pressing, it’s time to cut the tofu. Use a sharp knife to slice it into bite-sized cubes. Aim for pieces about one inch big. Set the cubes aside while you prepare the coating. Mixing dry ingredients In a bowl, mix the cornstarch, garlic powder, onion powder, paprika, salt, and black pepper. This blend gives the tofu a flavorful crust. Make sure to mix well so every piece gets the same taste. Preparing the wet mixture In another bowl, combine the soy sauce and olive oil. Stir until they mix well. This mixture helps the dry coating stick to the tofu. Coating process Now, dip each tofu cube into the soy sauce mixture. Ensure every side gets coated. Then roll the tofu in the dry mix you made earlier. Press gently to help it stick. Lastly, roll the tofu in panko breadcrumbs. This gives a nice crunch. Preheating the air fryer Before cooking, preheat your air fryer. Set it to 400°F (200°C) and let it heat for about 5 minutes. This step is important for even cooking. Air frying instructions Place the tofu nuggets in a single layer in the air fryer basket. Do not crowd them; give each piece space. Cook at 400°F (200°C) for 12-15 minutes. Flipping for even cooking Halfway through, flip the nuggets. This helps them crisp up on all sides. When they turn golden brown, they’re done! Remove them from the air fryer and let them cool slightly before serving. Enjoy your tasty snack! To get crispy tofu nuggets, start by pressing the tofu. This step is key. Pressing removes moisture. Moisture means soggy nuggets. Wrap your tofu in a towel. Place something heavy on it for about 15-20 minutes. This simple trick works wonders. Next, ensure your coating is right. Use a mix of cornstarch and spices. This gives a nice crunch. After dipping the tofu in the soy sauce mix, roll it in the cornstarch mixture. Make sure it’s fully covered. Then, coat it with panko breadcrumbs. Press lightly to help the crumbs stick. This extra step makes all the difference. When serving, pair your crispy nuggets with the best dipping sauces. I love sriracha for a spicy kick. Sweet chili sauce adds a nice touch of sweetness. You can also try a tangy soy sauce mix. This will enhance the flavor. For plating, arrange the nuggets on a nice serving platter. Add a bowl of sauce in the center. You can sprinkle sesame seeds on top for a fun look. It makes the dish pop and adds texture. Every air fryer is different. You might need to adjust the cooking time. Check your model’s instructions. Most air fryers work well at 400°F (200°C). Cook for about 12-15 minutes. Flip halfway for even crisping. If you like spicy food, modify the spice levels. Add more paprika or some chili powder. This gives your nuggets a nice heat. Tailor the recipe to your taste for the best results. {{image_2}} You can make your tofu nuggets even tastier by trying new flavors. For a spicy kick, add chili powder to the cornstarch mix. This will give your nuggets a nice heat. If you prefer fresh tastes, use dried herbs like oregano or thyme. Just sprinkle them into the dry mix. Both options will add fun layers of flavor. If you don't have an air fryer, you can still enjoy these nuggets! You can bake them in the oven. Preheat your oven to 400°F (200°C) and line a baking sheet with parchment paper. Place the coated tofu nuggets in a single layer and bake for about 20-25 minutes. Flip them halfway for even crisping. Another option is pan-frying. Heat some oil in a skillet over medium heat. Add the coated tofu nuggets and cook for about 3-5 minutes on each side. This method gives a nice golden crust. Need gluten-free options? Use gluten-free panko breadcrumbs and check your soy sauce for gluten-free labels. This way, everyone can enjoy your tasty snack. For those who want vegan substitutions, ensure your soy sauce is vegan. You can also skip the olive oil if you want a lighter option. These small changes still keep the flavor high while meeting dietary needs. To store your tofu nuggets in the refrigerator, first let them cool completely. Place them in an airtight container. They can stay fresh for about 3 to 5 days. When you are ready to eat them, reheat the nuggets in the air fryer at 375°F (190°C) for about 5 to 7 minutes. This helps them regain their crispiness. For long-term storage, you can freeze tofu nuggets. Allow them to cool down, then arrange the nuggets in a single layer on a baking sheet. Freeze them for about 1 hour. Once frozen, transfer the nuggets to a freezer-safe bag or container. They can last up to 2 months in the freezer. To thaw and reheat, take them out the night before and place them in the fridge. When ready, reheat in the air fryer at 375°F (190°C) for about 8 to 10 minutes. This method keeps them crispy. Tofu nuggets maintain their best quality for about 3 to 5 days in the fridge. If frozen, they stay fresh for up to 2 months. Always check for signs of spoilage before eating. Enjoy your crispy snack! To make tofu nuggets crispy, start by pressing the tofu. This helps remove moisture. Next, coat the tofu first in cornstarch, then in panko breadcrumbs. The panko creates a great crunch when cooked. Air fry the nuggets at the right temperature and time. Flip them halfway for even crispiness. I recommend using firm tofu for this recipe. Firm tofu holds its shape better and creates a nice texture. Soft tofu may break apart and not give you the nugget shape you want. If you only have soft tofu, consider making a different dish. The best temperature for air frying tofu nuggets is 400°F (200°C). This high heat allows them to cook quickly and get crispy. Preheat your air fryer for about 5 minutes before adding the nuggets. Leftover tofu nuggets can last for about 3 to 5 days in the fridge. Be sure to store them in an airtight container. When you're ready to eat them, reheat in the air fryer for a few minutes to regain their crunch. Yes, you can prepare tofu nuggets in advance. You can coat them and store them in the fridge for a few hours before cooking. This allows flavors to develop. Just remember to air fry them when you're ready to eat for the best texture. You’ve learned how to make tasty tofu nuggets step by step. We discussed the main ingredients, including firm tofu and panko breadcrumbs. You now know tips for achieving the perfect crispy texture and how to modify flavors to your liking. Whether you air fry, bake, or pan-fry, these nuggets are versatile. Remember, keeping them fresh is easy with proper storage. Enjoy your cooking journey!

Air Fryer Tofu Nuggets Crispy and Flavorful Snack

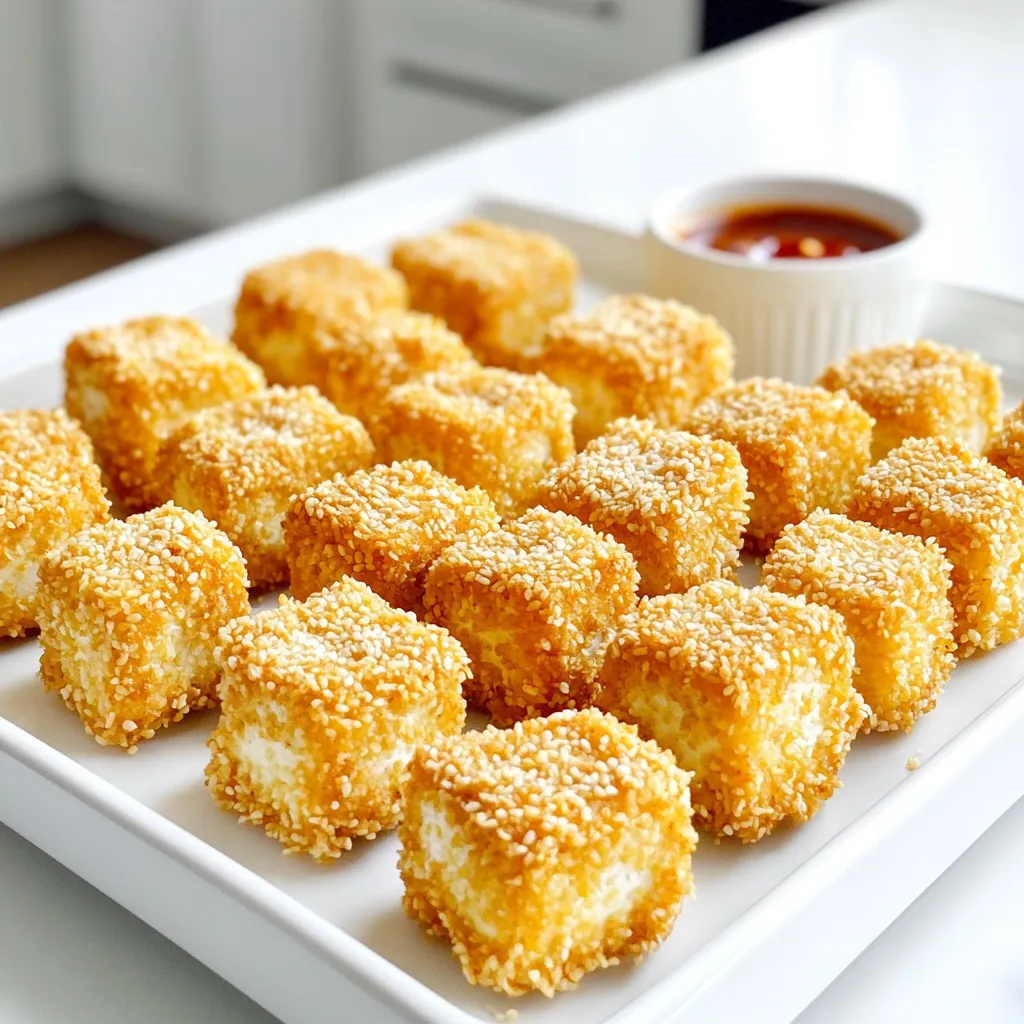
Looking for a tasty snack that’s quick and easy? You’ve found it! Air Fryer Tofu Nuggets are crispy, flavorful, and

- 4 salmon fillets (6 oz each) - 2 cups green beans, trimmed - 4 tablespoons unsalted butter, melted - 4 cloves garlic, minced - 1 lemon, juiced (reserve zest) The main ingredients are key to this dish. Salmon fillets provide great flavor and healthy fats. Green beans add a crisp texture and bright color. You will create a garlic butter sauce using butter, minced garlic, and lemon juice for extra zest. - 1 teaspoon paprika - Salt and pepper to taste - 1 tablespoon fresh parsley, chopped (for garnish) - Lemon zest Seasoning is vital for taste. Paprika gives a mild smokiness. Salt and pepper enhance the overall flavor. Fresh parsley adds a pop of color and freshness. Zesting the lemon brightens the dish and adds more aroma. - Sheet pan and parchment paper - Mixing bowls and measuring spoons Using the right tools makes cooking easier. A sheet pan allows for even cooking and easy cleanup with parchment paper. Mixing bowls help combine ingredients well. Measuring spoons ensure accuracy in your sauce and seasoning. - Preheat the oven to 400°F. - Line the sheet pan with parchment paper. This helps with easy cleaning. - In a small bowl, mix melted butter, minced garlic, lemon juice, and paprika. - Stir well until the mixture is smooth. This sauce gives flavor to your dish. - Place the salmon fillets on one side of the sheet pan. - Season the salmon with salt and pepper. - Drizzle half of the garlic butter sauce over the salmon. - On the other side, add the trimmed green beans. - Drizzle the rest of the garlic butter sauce over the green beans. Toss them lightly to coat. - Bake in the preheated oven for 15-20 minutes. - Check when the salmon flakes easily with a fork and the green beans are tender. - The salmon should be opaque and not raw in the middle. Enjoy your meal and the easy clean-up! - Adjusting cook time for different salmon sizes If you use smaller salmon fillets, reduce the cook time. Thin fillets need about 12-15 minutes. Thicker cuts may take up to 20-25 minutes. Always check for flakiness. - Substituting vegetables Feel free to swap green beans for asparagus or broccoli. Just make sure to cut them to a similar size for even cooking. - Additional seasoning ideas You can add a pinch of cayenne for heat or switch to dill for a fresh taste. Try lemon pepper for a zesty kick. - Using different types of garlic Instead of fresh garlic, you can use garlic powder or roasted garlic. Each gives a unique flavor twist to your dish. - Ideal side dishes to complement the meal Serve this dish with rice or quinoa for a filling meal. A light salad adds freshness and crunch. - Presentation tips for an attractive look Arrange salmon and beans on a large platter. Drizzle leftover garlic butter on top. Add lemon slices and fresh parsley for color. {{image_2}} You can add fresh or dried herbs to make your salmon special. Try dill, thyme, or rosemary. These herbs mix well with garlic butter. Just sprinkle them on the salmon before baking. This gives your dish fresh, bright flavors. You will love the new taste! Change the flavor of your green beans by adding lemon zest and garlic. You can toss in some crushed red pepper for a kick. This gives the beans a zesty twist. It pairs well with the rich salmon. Your meal will taste bright and fresh! Feel free to add more veggies or proteins to your sheet pan. Carrots, bell peppers, or asparagus work great. You can even add shrimp for extra protein. Just cut them to similar sizes to cook evenly. This way, you create a colorful and hearty meal. Everyone at the table will enjoy it! To keep your garlic butter salmon and beans fresh, store leftovers in an airtight container. Make sure the dish cools down to room temperature first. This method helps maintain flavor and texture. Refrigerate for up to three days. When you're ready to eat, check for any signs of spoilage before reheating. Reheating can dry out the salmon if not done right. I recommend using the oven or microwave. For the oven, preheat it to 350°F (175°C). Place your salmon and beans on a baking sheet, cover with foil, and heat for about 10-15 minutes. If using a microwave, place the food on a microwave-safe plate. Cover it with a damp paper towel and heat in short bursts of 30 seconds, checking often. You can freeze this dish, but it's best if you do it before reheating. Allow the dish to cool completely, then transfer it to a freezer-safe container. Seal it tightly to prevent freezer burn. This meal can stay fresh for about two months in the freezer. To thaw, move it to the fridge overnight. Reheat using the methods mentioned above to enjoy your meal again! Bake salmon at 400°F for 15 to 20 minutes. This time works best for six-ounce fillets. Look for the salmon to flake easily with a fork when done. The green beans should be tender but still bright. This method gives you juicy, flavorful salmon. Yes, you can use frozen salmon. However, you should thaw it first. Place the frozen salmon in the fridge overnight to defrost. If you need to cook it right away, run it under cold water. Just add a few extra minutes to your bake time if it's still a bit icy. This dish is quite healthy! Salmon is rich in omega-3 fatty acids. These fats are good for your heart and brain. Salmon also provides protein, which helps build muscles. Green beans add fiber, vitamins, and minerals. Together, they make a balanced meal that is both tasty and nutritious. This blog post covers a simple and tasty garlic butter salmon recipe. We discussed key ingredients like salmon, green beans, and garlic butter sauce. You learned to prep your oven and assemble the dish easily. We provided cooking tips, variations, and storage info for leftovers. Cooking can be fun and rewarding. This dish fits nicely into a healthy meal plan. Try adding your twist to the recipe. Enjoy your cooking adventure!

Sheet Pan Garlic Butter Salmon & Beans Delight

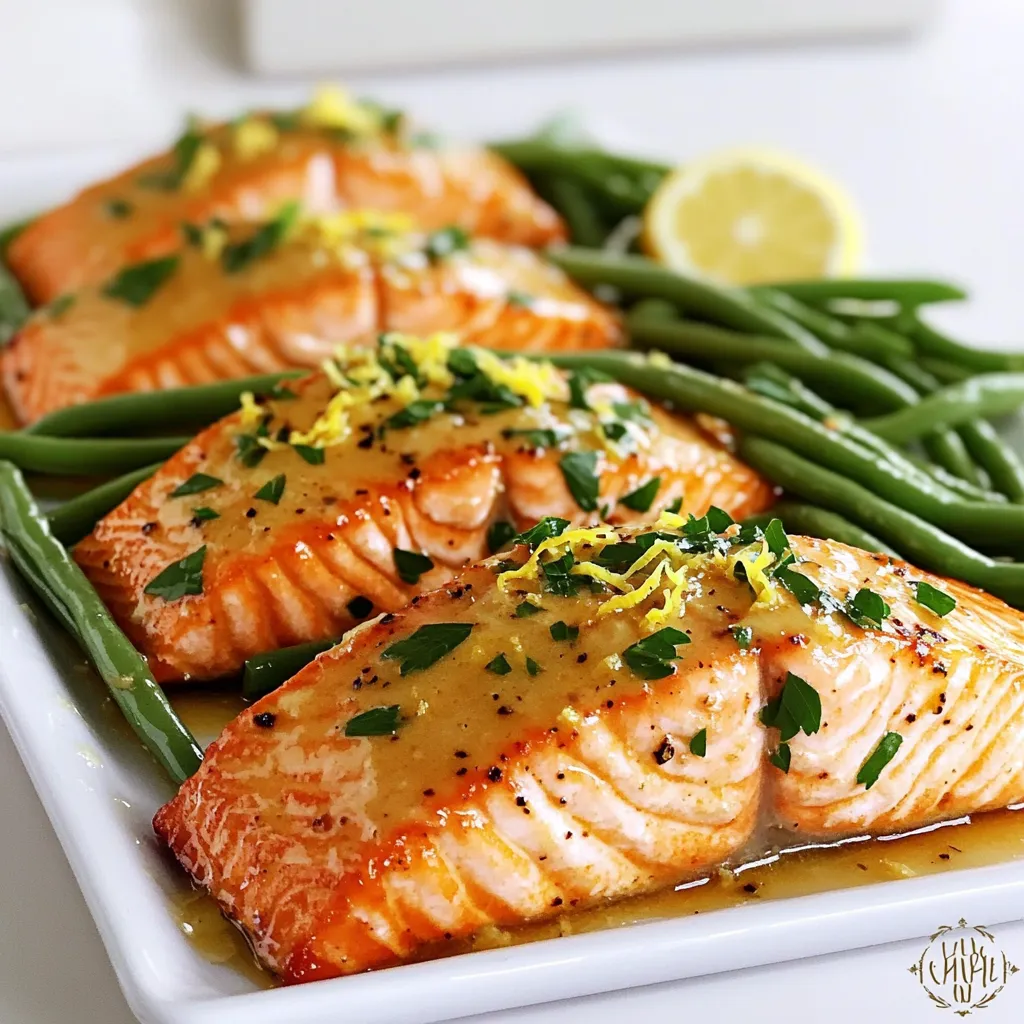
Get ready to savor a delightful dish that’s both easy and tasty! My Sheet Pan Garlic Butter Salmon & Beans

- 2 cups cooked jasmine rice (preferably day-old) - 2 tablespoons chili crisp (store-bought or homemade) - 1 tablespoon soy sauce - 1 teaspoon sesame oil - 1 cup mixed vegetables (peas, carrots, corn) - 1 egg, beaten - 2 green onions, finely chopped - Salt and pepper to taste - Fresh cilantro for garnish (optional) - Lime wedges for serving For this dish, I love using day-old rice. It makes the fried rice less sticky. The chili crisp adds a wonderful kick. You can choose store-bought or make your own. I often use soy sauce for flavor, and sesame oil gives it a nice nutty taste. The mixed vegetables are key to making this dish colorful and healthy. I like peas, carrots, and corn, but you can use any veggies you have. One beaten egg is perfect for adding protein and richness. Don't forget the green onions! They add a fresh crunch. Season with salt and pepper to taste. You can use fresh cilantro to garnish. Lime wedges on the side bring a bright, zesty finish to the meal. First, heat a large skillet or wok over medium-high heat. You want it hot, but not smoking. Next, add 1 teaspoon of sesame oil. Let it warm for a few seconds. This oil gives the dish a nice flavor. Now, add the mixed vegetables to the hot skillet. Cook them for about 2-3 minutes. You want them to soften a bit but still be crisp. Once they are ready, push the veggies to one side of the skillet. Pour in the beaten egg. Scramble it until it’s just set, then mix it with the vegetables. After that, it’s time to add the cooked jasmine rice. Break apart any clumps. Stir everything together until it’s well combined. This step ensures every bite is tasty. Next, pour in 1 tablespoon of soy sauce and 2 tablespoons of chili crisp. Stir well to coat the rice evenly. This adds a great kick! Continue to fry for another 2-3 minutes. You want the rice to be heated through and slightly crispy. Finally, sprinkle in salt and pepper to taste. Just before serving, stir in the chopped green onions for a fresh touch. Using day-old rice is key for fried rice. Fresh rice can be too sticky. Day-old rice dries out a bit. This helps each grain stay separate and crispy. Adjust spice levels with chili crisp to suit your taste. If you like it mild, use less chili crisp. For a kick, add more. You can also mix in other sauces like sriracha. Pair your fried rice with lime wedges. A squeeze of lime adds a bright flavor. It balances the heat from the chili crisp. Garnish with fresh cilantro for a pop of color. Cilantro adds freshness that complements the dish. You could also use green onions for extra crunch. {{image_2}} You can switch up the veggies in your fried rice. Try bell peppers, broccoli, or snap peas. Each vegetable brings a new taste and crunch. You can also use frozen mixed veggies for ease. For proteins, tofu is a great choice. It soaks up flavors well and adds texture. Chicken or shrimp work nicely too. Just cook them first, then add them back in with the rice. This lets all the flavors blend together. To make this dish vegetarian or vegan, skip the egg. Instead, you can add more veggies or use tofu for protein. It will still be tasty and filling. If you need it gluten-free, use tamari instead of soy sauce. It has a similar taste without gluten. Always check labels on your chili crisp too, as some may contain gluten. After you enjoy your Minute Chili Crisp Fried Rice, save any leftovers. Let the dish cool down to room temperature. Then, put it in a container. Use an airtight container to keep it fresh. Glass or plastic containers work well. Make sure to seal it tight. This keeps moisture out. Store the fried rice in the fridge. It will last for about 3 to 4 days. If you want to keep it longer, you can freeze it. Just place it in a freezer bag or a container made for freezing. Remember to remove as much air as you can. This helps prevent freezer burn. When it's time to eat, you need to reheat the rice. You can use two methods: microwave or stovetop. For the microwave, place the rice in a safe bowl. Add a splash of water to keep it moist. Cover the bowl with a lid or a damp paper towel. Heat it for about 1-2 minutes. Stir halfway through to warm it evenly. If you prefer stovetop reheating, use a skillet. Heat it on medium. Add a little sesame oil or water to avoid sticking. Stir the rice often to keep it from burning. This method helps keep the texture nice and crisp. No matter how you reheat it, check that it’s hot all the way through before serving. Enjoy your meal again! Chili crisp is a spicy oil with crunchy bits. It often includes fried garlic and onions. You can find popular brands like Lao Gan Ma or Fly By Jing. These brands give your food a great kick and flavor. You can also make your own at home if you want. The mix of heat and crunch makes it a favorite in many kitchens. Yes, using leftover rice is a great idea. Day-old rice has dried out a bit, which helps it fry better. Fresh rice can be too sticky and mushy. Here are some tips for using leftover rice: - Make sure to spread it out on a plate. This helps it cool and dry. - If it clumps together, break it apart with your hands before cooking. - The less moisture, the better the fried rice will be. If you want more heat, try these tips: - Add extra chili crisp to the mix. - Toss in some fresh chopped chili peppers. - Use a spicy soy sauce for an added kick. - Serve with hot sauce on the side for those who love heat. These options will help you create a fiery dish everyone will enjoy! This blog post covered a simple, flavorful dish using jasmine rice and chili crisp. We explored the main ingredients, cooking steps, and various tips. The dish is easy to customize with different veggies and proteins. You can also make it vegetarian or adjust for gluten-free needs. Remember to store your leftovers properly to keep them fresh. With these strategies, you can enjoy a tasty meal any time. Dive in and try this dish your way; it’s fun and rewarding!

Minute Chili Crisp Fried Rice Tasty and Quick Meal

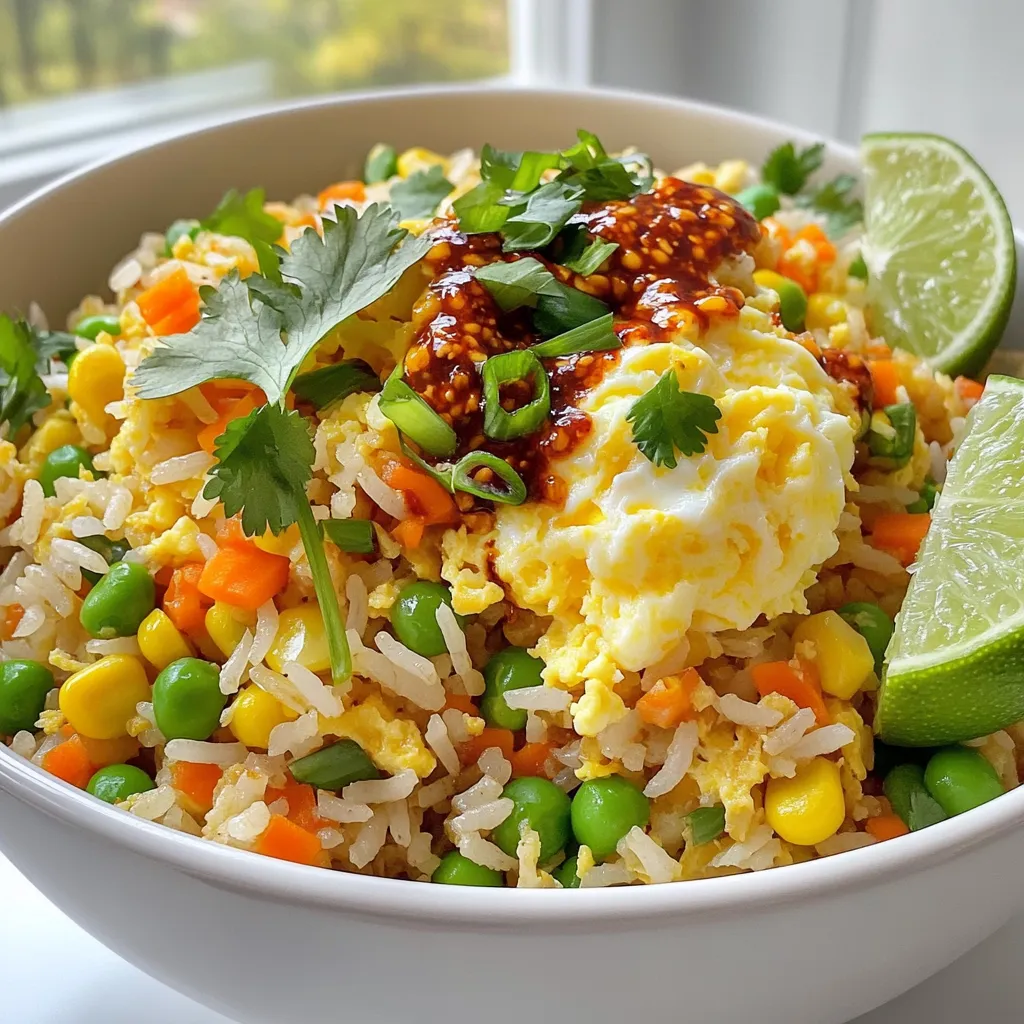
Looking for a quick and tasty meal? Minute Chili Crisp Fried Rice is your answer! With just a few simple

Older posts
Newer posts
← Previous Page1 … Page3 Page4 Page5 … Page84 Next →

dsad

© 2026 easycookingbite • Built with GeneratePress

Our Policies

  • Copyright Policy
  • Cookie Policy
  • GDPR Policy
  • Privacy Policy
  • Disclaimer
  • Terms Of Use

More Information

  • Home
  • About
  • Contact
  • Appetizers
  • Dessert
  • Dinner
  • Drinks
©2026, easycookingbite About Back To Top