Skip to content
DisclaimerTerms Of UseGDPR PolicyCookie Policy

easycookingbite

  • Home
  • Drinks
  • Appetizers
  • Dinner
  • Dessert
  • About
  • Contact
  • Privacy Policy
DisclaimerTerms Of UseGDPR PolicyCookie Policy

NO-ING-IMG

- 1 cup all-purpose flour - 1/2 teaspoon baking soda - 1 tablespoon ground ginger - 1 tablespoon ground cinnamon - 1/4 teaspoon ground nutmeg - 1/4 teaspoon ground cloves - 1/4 teaspoon salt - 1/2 cup brown sugar, packed - 1/4 cup unsalted butter, softened - 1 tablespoon molasses - 1 teaspoon vanilla extract - 1/4 cup mini chocolate chips (or dark chocolate chips) - 1/4 cup chopped walnuts or pecans (optional) When making gingerbread cookie dough bites, the right ingredients turn a simple treat into a festive delight. Each item plays a key role in flavor and texture. - Flour gives the dough structure. All-purpose flour works best for a soft bite. - Baking soda helps the dough rise slightly, creating a light texture. - Ground ginger and cinnamon add warmth and spice, making it feel like the holidays. - Nutmeg, cloves, and salt enhance these flavors, balancing sweetness with spice. - Brown sugar adds moisture and a rich flavor, while butter provides creaminess. - Molasses gives that classic gingerbread taste and chewy texture. - Vanilla extract adds depth, rounding out the taste. - Mini chocolate chips bring sweetness, and nuts add crunch. You can leave them out if you prefer. This mix creates a cookie dough that is easy to work with and delicious to eat. Making gingerbread cookie dough bites is simple and fun. Gather your ingredients first. You will need both wet and dry items. This helps keep the process smooth. - Step 1: Prepare the dry ingredients In a medium bowl, whisk together these dry ingredients: - 1 cup all-purpose flour - 1/2 teaspoon baking soda - 1 tablespoon ground ginger - 1 tablespoon ground cinnamon - 1/4 teaspoon ground nutmeg - 1/4 teaspoon ground cloves - 1/4 teaspoon salt Mix until well combined. Set this bowl aside for later. - Step 2: Cream butter and sugar Take a large mixing bowl. Add: - 1/2 cup brown sugar, packed - 1/4 cup unsalted butter, softened Use a mixer to beat these together until light and fluffy. This should take about 2 to 3 minutes. - Step 3: Combine ingredients Now, mix in these wet ingredients: - 1 tablespoon molasses - 1 teaspoon vanilla extract Stir until everything is blended well. Gradually add the dry mixture to the wet mixture. Stir until combined. The dough will be thick, which is perfect. - Step 4: Form the dough balls Use a spoon to scoop out small portions of the dough. Roll them into bite-sized balls, about 1 inch in diameter. They should fit nicely in your hand. - Step 5: Freezing instructions Place the dough balls on a parchment-lined baking sheet. Freeze them for about 30 minutes. This helps the bites firm up and hold their shape. Enjoy these gingerbread cookie dough bites as a sweet holiday treat! - Ensuring the right dough consistency: Your dough should be thick and not too sticky. If it feels too wet, add a bit more flour. This helps keep the bites firm. - Using softened butter correctly: Make sure your butter is soft but not melted. This helps it cream well with the sugar. Aim for a light and fluffy mix. - How to fold in mix-ins: Gently fold in the chocolate chips and nuts. Use a spatula and be careful not to over-mix. This keeps your dough tender. One common mistake is using cold butter. It won't mix well and can lead to a dense texture. Also, overworking the dough can make it tough. Keep the mixing gentle and quick. Lastly, don’t skip the freeze. Chilling the dough helps the bites hold their shape. - Creative serving suggestions: Arrange the gingerbread cookie dough bites on a festive plate. A colorful platter adds cheer. You can use cupcake liners for a fun touch too. - Garnishing ideas: Sprinkle with powdered sugar for a snowy effect. For a fancy twist, drizzle melted dark chocolate on top. Edible gold or silver flakes make them look extra special. Enjoy sharing these bites at your holiday gatherings! {{image_2}} You can change the flavor of your gingerbread cookie dough bites easily. Here are two fun ideas: - Pumpkin Spice Version: Replace some of the ginger and cinnamon with pumpkin spice. This mix has nutmeg and cloves too. It gives a warm, cozy taste, perfect for fall. - Chocolate Peppermint Twist: Add peppermint extract to the dough. You can also swap some chocolate chips for crushed candy canes. This gives a sweet and minty flavor, great for the holidays. If you have special dietary needs, you can still enjoy these bites. Here are some easy swaps: - Gluten-Free Adaptations: Use a gluten-free flour blend instead of all-purpose flour. Make sure it has a good texture for cookies. This way, you can enjoy the bites without worries. - Vegan Modifications: Replace the butter with vegan butter. Use flaxseed meal mixed with water as an egg substitute. This keeps the recipe plant-based while still tasting great. These variations make it easy for everyone to join in on the fun! To keep your gingerbread cookie dough bites fresh, store them in the fridge or freezer. - Refrigeration guidelines: Place the bites in an airtight container. They stay good for about one week in the fridge. - Freezing instructions: For longer storage, freeze them. Arrange the bites on a baking sheet and freeze until firm. Then, transfer them to a freezer bag. They can last up to three months in the freezer. When stored properly, gingerbread cookie dough bites have a good shelf life. In the fridge, they last about seven days. In the freezer, they stay fresh for up to three months. Always check for any signs of spoilage before enjoying them! If you want to enjoy your bites warm, you can reheat them. Simply take the bites out of the fridge or freezer. If frozen, let them thaw in the fridge overnight. Then, place them in the microwave for about 10-15 seconds. You can also warm them in the oven at 350°F for a few minutes. Serve them as they are or drizzle with melted chocolate for extra fun! Yes, you can make these gingerbread cookie dough bites ahead of time. They freeze well. Once you form the dough balls, place them in a freezer-safe bag. They can stay frozen for up to three months. When you want to enjoy them, just thaw them in the fridge. If you want to change the flavor, you can use several options. Try using dried fruits like cranberries or raisins. You can also use white chocolate chips, butterscotch chips, or even chopped up candy bars. These alternatives add fun flavors to your bites. To make these bites extra festive, try some simple ideas. You can drizzle melted dark chocolate over the tops. Add a sprinkle of edible glitter or powdered sugar for a snowy look. Use colorful holiday sprinkles to decorate and make them pop. Yes, these cookie dough bites are safe to eat. We bake the flour before using it to kill any bacteria. Also, we don’t use raw eggs. This makes them safe for everyone to enjoy. Just remember to keep them stored well to keep them fresh. We covered the ingredients, steps, and tips for making gingerbread cookie dough bites. It’s fun and easy to create tasty treats. Remember to be mindful of dough consistency and try new flavors. Store them well to enjoy later. With the right care, these bites can be a hit for any occasion. Use creativity to make them your own. This recipe lets you impress family and friends with minimal effort. Enjoy your baking adventure!

Gingerbread Cookie Dough Bites Irresistible Holiday Treat

Get ready to savor the season with my mouthwatering Gingerbread Cookie Dough Bites! These tasty treats combine classic holiday spices

To make the best smoked Gouda mac and cheese, you need a few key items: - 8 oz elbow macaroni - 2 tablespoons unsalted butter - 2 tablespoons all-purpose flour - 2 cups whole milk - 1 cup smoked Gouda cheese, shredded - 1 cup sharp cheddar cheese, shredded - 1 teaspoon garlic powder - 1 teaspoon onion powder - Salt and pepper to taste - 1/2 cup breadcrumbs (preferably panko for crunch) - 2 tablespoons fresh parsley, chopped (for garnish) These ingredients work together to create a creamy and flavorful dish. The smoked Gouda adds a rich flavor, while the sharp cheddar gives it a nice bite. If you want to mix things up, you can try different cheeses. Here are some great options: - Fontina: It melts well and adds creaminess. - Gruyère: This cheese gives a nutty flavor. - Monterey Jack: This cheese is mild and smooth. Mixing these cheeses can lead to unique flavors that enhance your dish. Adding herbs and spices can elevate your mac and cheese. Consider these options: - Fresh thyme: This adds a fragrant touch. - Smoked paprika: It gives a smoky flavor. - Mustard powder: This adds a hint of tang. Using these herbs and seasonings will make your dish more exciting and flavorful. Start by boiling water in a large pot. Add salt to the water for flavor. Once the water boils, add 8 oz of elbow macaroni. Cook it until it's al dente, about 7-9 minutes. Stir occasionally so it doesn’t stick. Drain the pasta and set it aside. In the same pot, melt 2 tablespoons of unsalted butter over medium heat. When the butter is melted, whisk in 2 tablespoons of all-purpose flour. Keep whisking for about 1-2 minutes until it turns lightly golden. Then, gradually add 2 cups of whole milk, stirring continuously. This helps avoid lumps. Cook until the mixture thickens, which takes about 5 minutes. Reduce the heat to low. Add 1 cup of shredded smoked Gouda and 1 cup of shredded sharp cheddar cheese to the pot. Stir until both cheeses melt and the sauce is smooth. Add 1 teaspoon of garlic powder and 1 teaspoon of onion powder. Season with salt and pepper to your taste. Then, add the cooked macaroni to the cheese sauce. Stir until every piece of pasta is coated. Preheat your oven to 350°F (175°C). Transfer the mac and cheese into a greased baking dish. In a small bowl, mix 1/2 cup of breadcrumbs with a drizzle of olive oil, if you like. Sprinkle this mixture evenly over the top. Bake for 20-25 minutes. The top should be golden and crispy when it’s done. Remove it from the oven, let it cool for a few minutes, and then garnish with 2 tablespoons of chopped fresh parsley before serving. For the creamiest texture, use whole milk. It adds richness to your dish. When you make the roux, whisk the flour and butter well. This step helps to avoid lumps. Gradually add the milk while stirring constantly. This keeps your cheese sauce smooth and creamy. After adding cheese, stir until it's fully melted. This step is key for a velvety feel. To prevent overcooking pasta, cook it until just al dente. This means it should still have a slight bite. Remember, it will cook more when you bake it. Drain the pasta and rinse it with cold water. This stops the cooking process. Mix it quickly with your cheese sauce. This helps keep it from sticking together. You can boost flavor with easy additions. Try adding crispy bacon or sautéed mushrooms. They add depth to your dish. Fresh herbs like thyme or basil can brighten the taste. You might use smoked paprika for a smoky kick. Don’t forget salt and pepper; they bring out all the flavors. {{image_2}} You can make this dish heartier by adding protein. Cooked chicken or crispy bacon works great. Chop the chicken into bite-sized pieces or crumble the bacon. Stir them into the cheese sauce before you mix in the pasta. This addition adds flavor and texture, making each bite more satisfying. To keep this dish vegetarian, skip the meat. You can still pack in flavor. Add vegetables like spinach, mushrooms, or bell peppers. Lightly sauté them first to bring out their taste. Mix them into the cheese sauce with the pasta. This way, you get a colorful and tasty meal that everyone will enjoy. While smoked Gouda is amazing, you can mix it up. Try using other cheese blends for new tastes. Creamy brie or tangy blue cheese can add depth. Experiment with different ratios of cheese to find your favorite combo. Each cheese brings its own flavor profile, making this dish exciting every time you make it. To keep your smoked Gouda mac and cheese fresh, let it cool first. Then, place it in an airtight container. This helps keep moisture in and air out. Store it in the fridge for up to three days. If you want to save it longer, freezing is a great option. When you reheat your mac and cheese, use the oven for the best results. Preheat your oven to 350°F (175°C). Place your mac and cheese in an oven-safe dish. Add a splash of milk to help it stay creamy. Cover it with foil to prevent it from drying out. Heat it for about 20 minutes. If you're in a hurry, the microwave works too. Just heat in short bursts, stirring in between, until it warms up. To freeze your smoked Gouda mac and cheese, use a freezer-safe container. Portion it into smaller servings for easy reheating. You can also wrap it tightly in plastic wrap, then aluminum foil. Label it with the date. It can last up to three months in the freezer. When you're ready to eat, thaw it in the fridge overnight before reheating. Yes, you can! While elbow macaroni is classic, you can try other shapes. Fusilli, penne, or shells work well. Each type holds the cheese sauce differently, so experiment. Just ensure the pasta cooks to al dente for best results. To make this dish gluten-free, swap the elbow macaroni for gluten-free pasta. Use gluten-free flour for the roux. Many brands offer good options. Just check the labels to ensure they fit your needs. The taste and texture will still be great! This dish pairs well with many sides. You can serve it with a fresh salad for balance. Roasted vegetables add a nice touch, too. For a heartier meal, try grilled chicken or shrimp. These options complement the creamy mac and cheese nicely. Homemade mac and cheese lasts about 3 to 5 days in the fridge. Store it in an airtight container to keep it fresh. Just reheat it well before serving. It may dry out, so a splash of milk can help restore creaminess. In this post, we explored how to make smoked Gouda mac and cheese. We looked at essential ingredients and step-by-step instructions. You learned tips for creamy texture and how to enhance flavors. We also discussed tasty variations, like adding protein or making it vegetarian. Finally, proper storage and reheating tips ensure your dish stays fresh. With these insights, you can create a delicious dish that impresses everyone. Enjoy your cooking journey!

Savory Smoked Gouda Mac and Cheese Recipe Guide

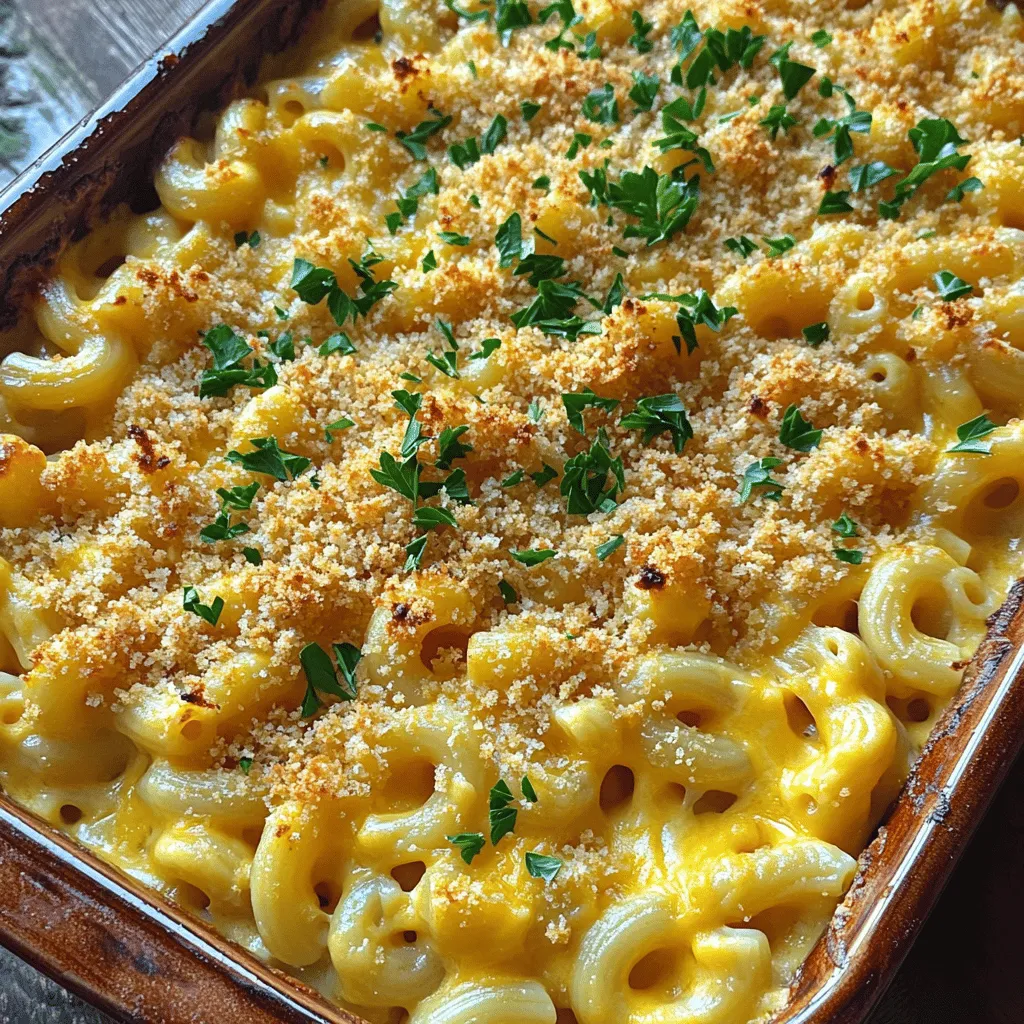
Are you ready to take your mac and cheese game to a new level? In this Savory Smoked Gouda Mac

- 4 cups apple cider - 2 cups cranberry juice - 1 cup sparkling water or soda - 1/2 cup orange juice - 1/4 teaspoon ground cinnamon - 1/4 teaspoon ground nutmeg - 1 orange, sliced - 1 apple, sliced - 1 cup fresh cranberries (optional) - Ice cubes For the best taste, use fresh apple cider. It brings a sweet and tangy flavor. Choose 100% pure cranberry juice for a nice balance. Fresh oranges and apples add color and zing to the punch. - A pinch of ground ginger for a spicy kick - A splash of vanilla extract for extra depth - Maple syrup to sweeten, if desired If you want a different taste, feel free to swap ingredients. For a low-sugar option, use diet cranberry juice. You can also use sparkling water with no sugar. This punch is easy to adjust to fit your needs and tastes. 1. Start by mixing the apple cider, cranberry juice, orange juice, ground cinnamon, and ground nutmeg in a large pitcher or bowl. Stir well with a spoon. This step blends the flavors nicely. 2. Next, add the sliced orange and apple to the mix. If you want, drop in fresh cranberries for a festive look. 3. Chill your punch in the fridge for at least 1 hour. This chilling helps the flavors meld together. 4. Just before serving, gently stir in the sparkling water or soda. This adds a bubbly effect that makes it fun. 5. Fill glasses with ice cubes. Pour the punch over the ice. You can garnish with more fruit slices if you like. Serve the punch in clear glass pitchers. This shows off the vibrant colors of the drink. Use tall glasses to make it look fancy. You can also add mint leaves for a fresh touch. This small detail makes the punch more appealing. To make your Apple Cider Harvest Punch just right, you can adjust the sweetness or spice. If you want it sweeter, add more apple cider or cranberry juice. For a bolder flavor, try adding extra cinnamon or nutmeg. Blending flavors is key. Mix the juices well before adding the spices. Let the punch chill for at least an hour. This wait helps the flavors blend nicely. For a beautiful look, serve the punch in clear glass pitchers. This way, the vibrant colors shine through. You can garnish with fresh herbs like mint or lemon balm. Slices of orange and apple on top add a lovely touch too. When serving, fill glasses with ice first. This keeps the punch cool and refreshing. {{image_2}} You can make Apple Cider Harvest Punch even more fun by adding some spirits. Rum or bourbon works great! Just add about 1 to 1.5 cups of your chosen spirit to the punch mix. This will give your drink a warm kick that’s perfect for chilly evenings. When pairing alcohol, think about flavors. If you use rum, it adds sweetness. Bourbon, on the other hand, brings a smoky touch. You can even try spiced rum for a festive feel. Each spirit can change the punch's taste, so feel free to experiment! This punch is flexible! You can switch up the fruits based on what’s in season. For example, in winter, add pomegranate seeds or slices of pear. In summer, think about peaches or blueberries. Each fruit gives a new taste and look to your punch. For holiday themes, add spices like cloves or allspice for warmth. You can also use themed fruits, like cranberries for Thanksgiving or citrus for New Year’s. These changes can make your punch feel special for any gathering! To keep your Apple Cider Harvest Punch fresh, use a large pitcher or glass jar. Glass works best to avoid any odd tastes. Seal it well to keep out air and light. This helps the flavors stay strong. Store the punch in the fridge. If you have leftover fruit, remove it before storing. The fruit can get mushy and change the taste. Your punch lasts about three days in the fridge. After that, it may lose its fresh taste. Check for signs of spoilage. If you see any odd smells, colors, or textures, it’s time to toss it. Always trust your senses. If it seems off, don’t drink it. Staying safe is key! What can I substitute for sparkling water? If you don't have sparkling water, you can use lemon-lime soda or ginger ale. Both add a nice fizz and sweetness. Adjust the amount based on your taste. If you want less sweet, try tonic water for a crisp flavor. Can I make this punch ahead of time? Yes, you can make this punch a few hours early. Mix the apple cider, cranberry juice, and spices. Chill it in the fridge. Just before serving, add the sparkling water and ice. This keeps the bubbles fresh and lively. Is this recipe gluten-free? Yes, this recipe is gluten-free. All the ingredients, like apple cider and juice, are safe for those with gluten issues. Always check labels for any added ingredients, just to be sure. How to make a low-sugar version of the punch? To lower the sugar, use unsweetened apple cider and cranberry juice. You can also add more fresh fruit for natural sweetness. This makes the punch tasty without extra sugar. What fruits work best as garnishes? Fresh fruits like oranges, apples, and cranberries work great. They add color and flavor. You can slice the fruits and place them in the punch or on the rim of the glass. Can I use dried fruits instead of fresh? Yes, dried fruits can work as garnishes too. Use dried cranberries or apple slices. Just remember, they won't look as vibrant as fresh fruits. So, mix and match for the best look! This blog post covered everything you need to make a great punch. We discussed essential ingredients, tips for mixing, and ways to present your drink. I shared ideas for variations based on seasons and dietary needs. Finally, I provided storage tips to keep your punch fresh. With these steps, you can impress your guests at any gathering. Enjoy your punch experiments, and don’t be afraid to try new flavors. Your next party will be a hit!

Apple Cider Harvest Punch Refreshing Fall Delight

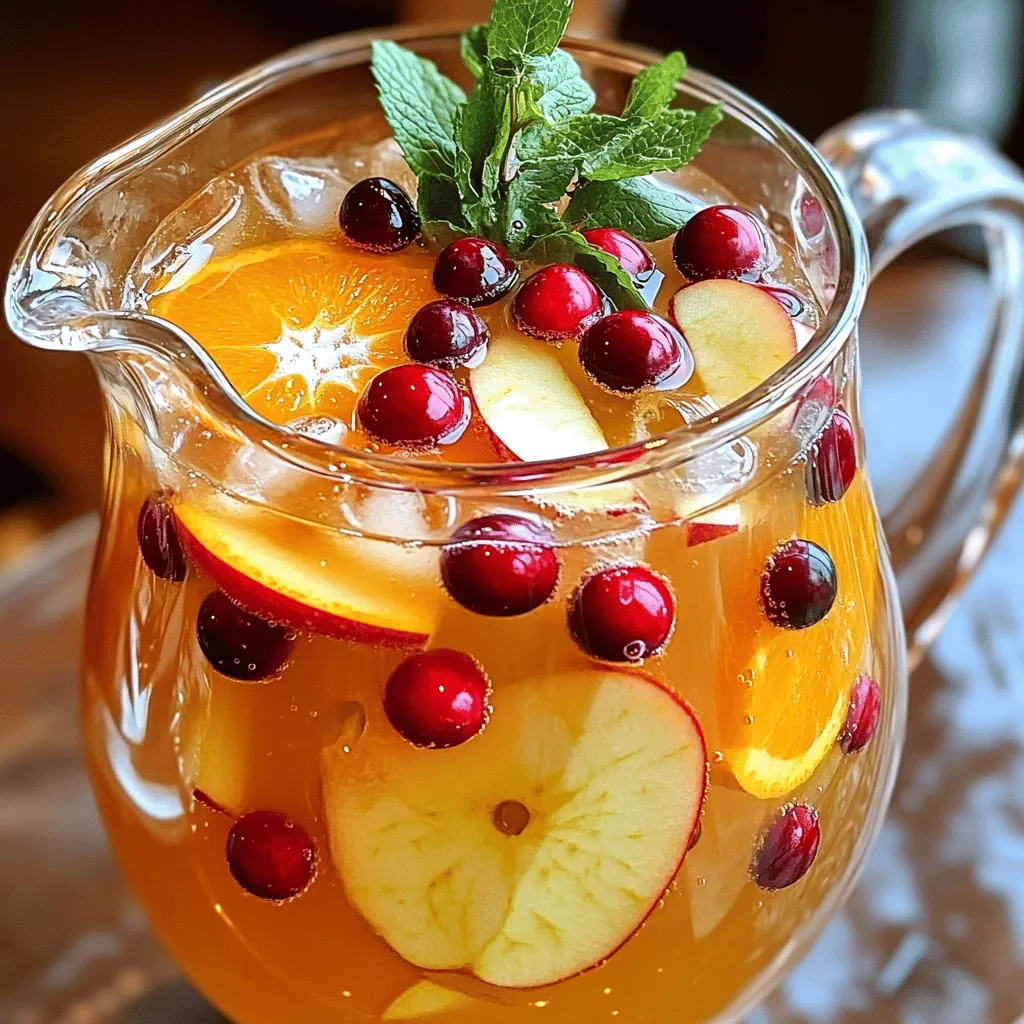
Get ready for fall with my delicious Apple Cider Harvest Punch! This easy recipe blends fresh flavors that celebrate the

- 4 large bell peppers (any color) - 1 cup cooked quinoa or rice - 1 cup marinara sauce - 1 teaspoon Italian seasoning - 1 cup shredded mozzarella cheese - 1/2 cup sliced pepperoni - 1/4 cup chopped black olives (optional) - 1/4 cup grated Parmesan cheese - Salt and pepper to taste - Fresh basil leaves for garnish When I create Pepperoni Pizza Stuffed Peppers, I focus on fresh and vibrant ingredients. Start with large bell peppers. You can use red, yellow, or green ones. Each color gives a nice touch to your dish. Next, I use cooked quinoa or rice. Quinoa adds a nutty flavor, while rice keeps it classic. Both options work well. I love adding marinara sauce for that pizza flavor. Italian seasoning blends perfectly with the sauce, enhancing the taste. For toppings, mozzarella cheese is a must. It melts beautifully and gives that gooey texture. Pepperoni adds a savory punch. If you enjoy olives, feel free to toss in black olives. They add a salty note. Don't forget the grated Parmesan cheese. It gives a nice finish. Lastly, season with salt and pepper to your liking. Fresh basil leaves add a pop of color and freshness. With these ingredients, you set the stage for a delicious meal. - Preheat your oven to 375°F (190°C). - Wash the bell peppers under cool water. Slice the tops off and remove the seeds and membranes. Set the cleaned peppers aside. - In a mixing bowl, combine 1 cup of cooked quinoa or rice with 1 cup of marinara sauce. - Add 1 teaspoon of Italian seasoning and half of the mozzarella cheese. - Stir in 1/2 cup of sliced pepperoni and 1/4 cup of chopped black olives, if you like. - Season with salt and pepper to taste. Mix everything well. - Stuff each bell pepper with the pizza filling. Press down gently to pack it in. - Place the stuffed peppers upright in a baking dish. You can add a bit of water to the bottom to help steam them. - Cover the dish with aluminum foil and bake for 25 minutes. - Remove the foil and sprinkle the remaining mozzarella cheese and 1/4 cup of grated Parmesan on top of each pepper. - Return the peppers to the oven and bake uncovered for another 10-15 minutes until the cheese is bubbly and golden. When choosing bell peppers, look for large, firm ones. They should have a smooth skin and vibrant color. This helps them hold their shape while baking. Avoid peppers with soft spots or wrinkles. To stop peppers from getting too soft, bake them with the tops on first. This helps steam them without losing structure. You can also add a bit of water to the baking dish. This extra moisture helps keep them firm while baking. Mozzarella and Parmesan are classic choices, but you can mix it up. Try using provolone for a sharper taste. Cheddar brings a rich flavor that pairs well too. If you want a vegan option, look for cashew cheese or almond-based cheese. Nutritional yeast also gives a cheesy flavor without dairy. These options can make your dish just as tasty and satisfying. Want to spice things up? Add crushed red pepper to the filling. Just a pinch can bring some heat to your dish. You can also toss in other pizza toppings. Sautéed mushrooms add a nice earthy taste. Chopped onions bring sweetness and depth. Feel free to get creative and add your favorite toppings! {{image_2}} You can easily make this dish healthier. First, try substituting quinoa with cauliflower rice. Cauliflower rice lowers carbs and adds veggie goodness. It keeps the dish light and tasty. Next, consider using low-sugar marinara sauce. Many brands offer this option. This swap helps cut down on added sugars. You won’t lose that classic pizza flavor! Let’s explore new flavors! For a Mexican twist, use taco seasoning in your filling. This adds a spicy kick and fun texture. You’ll love the blend of flavors with the peppers. Another option is a Mediterranean version. Swap out the pepperoni for feta cheese and black olives. This change gives a fresh taste. It’s a great way to enjoy different cuisines. Many people have dietary needs. Thankfully, you can make this dish gluten-free easily. Just ensure your marinara and any added ingredients are gluten-free. This keeps everyone happy at the table. If you want a vegetarian alternative, skip the pepperoni. You can add more veggies instead. Consider mushrooms, zucchini, or spinach. These options keep the dish hearty and satisfying. To store leftover stuffed peppers, let them cool first. Then, place them in an airtight container. Make sure to seal it tightly. This method keeps them fresh and tasty. You can store them in the fridge for about 3 to 5 days. If you want to enjoy them later, freezing is a great option. To freeze your stuffed peppers, wrap each one in plastic wrap. Then, place them in a freezer-safe bag or container. Label the bag with the date. Stuffed peppers can stay good in the freezer for up to 3 months. When you're ready to eat them, take them out and let them thaw in the fridge overnight. To reheat stuffed peppers without drying them out, use the oven. Preheat your oven to 350°F (175°C). Place the peppers in a baking dish with a bit of water at the bottom. Cover the dish with foil and bake for about 20 minutes. This method keeps them moist and tasty. You can also microwave them, but be careful not to overcook. Enjoy your delicious meal! You can prep the filling in advance. Mix the quinoa, marinara, Italian seasoning, cheeses, and pepperoni. Store this mix in the fridge. You can also wash and cut the peppers, then keep them in a covered dish. When ready to cook, stuff the peppers and bake them. This makes it easy to enjoy a quick meal. Yes, you can! Mini peppers make great bite-sized snacks. Sweet peppers bring a nice flavor. If you like heat, try using hot peppers. Each type gives a new twist to the dish. Just remember that cooking times may vary based on the pepper size. Pepperoni pizza stuffed peppers go well with fresh salads. A crisp garden salad adds a nice crunch. You can also serve it with dips like ranch or marinara. Garlic bread is another tasty side. These options will enhance your meal. Absolutely! You can add jalapeños to the filling for a kick. Spicy marinara sauce is another option. Try mixing in crushed red pepper flakes as well. Adjust the spice to fit your taste, and enjoy the heat! To summarize, this blog post covered how to make delicious Pepperoni Pizza Stuffed Peppers. We learned about the main ingredients, preparation steps, and tips to customize the recipe. You can store leftovers properly and even freeze them for later. Remember, you can always mix in different flavors or use other types of peppers. This dish is fun to create and versatile for any meal. Enjoy experimenting and making it your own! Let's get cooking!

Pepperoni Pizza Stuffed Peppers Flavorful Comfort Dish

Craving a dish that combines comfort and flavor? Try these Pepperoni Pizza Stuffed Peppers! They’re the perfect twist on your

- 4 cups all-purpose flour - 2 tablespoons sugar - 1 teaspoon salt - 2 teaspoons instant yeast - 1 cup whole milk, warmed to 110°F (43°C) - 2 large eggs - 1/4 cup unsalted butter, melted - 1 cup chocolate hazelnut spread (like Nutella) - 1/2 cup finely chopped hazelnuts - 1 egg (for egg wash) - 1 tablespoon water (for egg wash) - Optional: powdered sugar for dusting The first step in making a delicious chocolate hazelnut babka is gathering the right ingredients. Each item plays a role in creating that soft, sweet, and rich flavor. Start with all-purpose flour. It gives the dough structure. You will need four cups for this recipe. Sugar adds sweetness and helps with browning. You need two tablespoons. Next, salt is key to balance the sweetness. Just one teaspoon will do. Instant yeast helps the dough rise. Use two teaspoons for a nice, fluffy texture. Now, let’s talk about milk. Whole milk warms to 110°F (43°C). This warmth helps activate the yeast. Use one cup. You will need two large eggs to bind everything together. Melted butter adds richness. A quarter cup is perfect. Now for the fun part, the filling! You will need one cup of chocolate hazelnut spread. It adds that dreamy flavor. Don’t forget the chopped hazelnuts for crunch. Half a cup gives the babka a nice texture. For the final touch, an egg wash helps give your babka a golden crust. Mix one egg with a tablespoon of water for this purpose. Lastly, if you want to impress, sprinkle some powdered sugar on top before serving. With these ingredients, you are ready to create a stunning and tasty babka. Enjoy the process and get ready for a treat! Start by mixing the dry and wet ingredients. In a large bowl, combine 4 cups of flour, 2 tablespoons of sugar, 1 teaspoon of salt, and 2 teaspoons of instant yeast. In another bowl, mix 1 cup of warmed milk (110°F), 2 large eggs, and 1/4 cup of melted butter. Slowly pour the wet mix into the dry mix. Stir until you form a sticky dough. Next, transfer this dough to a floured surface. Knead it for about 8 to 10 minutes. You want it to feel smooth and elastic. Place the dough in a greased bowl, cover it with a damp cloth, and let it rise. Find a warm spot. Let it rise for 1 to 2 hours, or until it doubles in size. Once the dough has risen, punch it down. Roll it out into a rectangle, about 16 by 24 inches, on a floured surface. Spread 1 cup of chocolate hazelnut spread over the dough. Leave a small border around the edges. Sprinkle 1/2 cup of chopped hazelnuts over the spread. Now, starting from the long edge, roll the dough tightly into a log. Pinch the edges to seal it. Slice the log in half lengthwise to see the swirls. Twist the two halves together and place them in a greased loaf pan. Cover the loaf pan with a cloth and let it rise again for 30 to 45 minutes until puffy. While it rises, preheat your oven to 350°F. In a small bowl, whisk together 1 egg and 1 tablespoon of water for the egg wash. Brush this mix over the top of the babka for a golden finish. Bake the babka in the preheated oven for 30 to 35 minutes. Look for a golden brown top. To check if it's done, insert a toothpick. If it comes out clean, it’s ready. Let it cool in the pan for 10 minutes, then move it to a wire rack. Dust with powdered sugar if you like, and enjoy your delicious babka! Kneading is key to great dough. Aim for about 8-10 minutes of kneading. You want it smooth and elastic. To check if your dough is ready to rise, perform the "poke test." Gently poke the dough. If it springs back slowly, it’s ready. Cover it and let it rise in a warm spot until it doubles in size. When spreading the chocolate hazelnut mix, use a spatula. Start from the center and move outward. This helps you cover the dough evenly. Leave a small border to prevent overflow. For a twist, try filling with almond butter or fruit preserves. You can even mix in spices like cinnamon for extra flavor. Babka is great warm or at room temperature. Slice it thick for a hearty treat. You can dust it with powdered sugar for a pretty touch. Pair your babka with coffee or hot chocolate. A scoop of vanilla ice cream on the side makes it extra special. Enjoy with family or friends for a cozy treat! {{image_2}} You can switch up the flavor of your babka easily. Try using different nut spreads. Almond or cashew spread adds a unique taste. You could also mix in spices. Cinnamon or cardamom gives a warm twist. Adding fruit can work wonders too. Consider using mashed bananas or chopped apples. They add moisture and sweetness. If you want a gluten-free babka, choose the right flour. Almond flour or a gluten-free blend works well. You will need to adjust the yeast too. Add a bit more yeast to help it rise. Keep an eye on moisture. Gluten-free dough may need extra liquid. A splash of milk or water can help. Making mini babkas is a fun idea. To do this, roll out smaller pieces of dough. Use a 12x12 inch square instead of a large rectangle. After spreading the filling, roll each piece tightly. Cut them into smaller logs. Place these in muffin tins. Bake them for about 20-25 minutes. Check for a golden color to know they’re done. These bite-sized treats are great for sharing! To keep your chocolate hazelnut babka fresh for a few days, wrap it in plastic wrap. This helps trap moisture and keeps it soft. You can also place it in an airtight container. Store it at room temperature away from direct sunlight. Enjoy it within three days for the best taste and texture. If you need to store babka for longer, freezing is a great option. Wrap the babka tightly in plastic wrap, then in aluminum foil. This keeps out air and helps prevent freezer burn. You can freeze it for up to three months. When you're ready to enjoy it, thaw it overnight in the fridge. For the best taste, warm the babka in the oven at 350°F (175°C) for about 10 minutes. This brings back its soft texture and rich flavor. Chocolate hazelnut babka lasts about three days at room temperature. If stored properly, it can last up to three months in the freezer. Enjoy it fresh for the best experience! To check if your babka is done, use a toothpick. Insert it into the center of the loaf. If it comes out clean, your babka is ready. Also, look for a golden-brown top. This color shows the sugars caramelized, giving a sweet crust. Yes, you can prep your babka in advance. Make the dough and let it rise. After shaping it, cover and store it in the fridge overnight. The next day, let it come to room temperature before baking. This saves time on busy days. To reheat leftover babka, wrap it in aluminum foil. Place it in a preheated oven at 350°F for about 10-15 minutes. This warms it without drying it out. You can also microwave slices for about 15 seconds for a quick treat. Enjoy your delicious leftovers! Making chocolate hazelnut babka is fun and rewarding. You learned about the key ingredients, the step-by-step instructions, and tips to perfect your dough. Exploring flavor variations and storage helps you get the best from your babka. Whether you bake it for yourself or share it, you’ll impress everyone. Don’t forget the fun of serving with your favorite drinks. Enjoy this tasty treat and keep experimenting with your creations. Happy baking!

Chocolate Hazelnut Babka Irresistible and Easy Recipe

Are you ready to indulge in a sweet, gooey treat? This Chocolate Hazelnut Babka is not only irresistible, but it’s

- 1 cup orzo pasta - 2 cups fresh spinach, chopped - 1 cup vegetable broth - 1 cup heavy cream - 1 cup grated Parmesan cheese - 2 cloves garlic, minced - 1 tablespoon olive oil - 1 teaspoon onion powder - Salt and pepper to taste - Optional garnish: Fresh parsley The key to this dish lies in its simple yet rich ingredients. Orzo pasta gives a nice texture, while fresh spinach adds color and nutrients. The heavy cream and Parmesan cheese create that creamy goodness you crave. Vegetable broth adds depth and flavor, making every bite satisfying. For the seasonings, garlic is a must. It brings out the flavors of the spinach and cheese. Olive oil helps sauté the garlic and gives a nice base for the dish. Onion powder adds a subtle kick. Don't forget salt and pepper; they balance the taste. If you want to make it pretty, sprinkle fresh parsley on top before serving. This blend of ingredients makes Creamy Spinach Parmesan Orzo a comforting dish. You will enjoy the harmony of flavors in every bite. {{ingredient_image_1}} To start, bring a medium pot of salted water to a boil. Use enough salt to make the water taste like the sea. This adds flavor to the orzo. Add 1 cup of orzo to the boiling water. Cook it according to the package instructions, usually around 8-10 minutes. The goal is to have it al dente, which means it should still have a bit of bite. Once cooked, drain the orzo and set it aside. Next, grab a large skillet and heat 1 tablespoon of olive oil over medium heat. Once hot, add 2 minced cloves of garlic. Sauté the garlic for about 1 minute until it becomes fragrant but not burnt. This gives a nice flavor base. Now, stir in 2 cups of chopped spinach. Cook for about 2-3 minutes until the spinach wilts down. You want it to be bright green and tender. Now it's time to create the creamy sauce. Pour in 1 cup of vegetable broth and 1 cup of heavy cream into the skillet. Stir well to combine. Bring this mixture to a gentle simmer over medium heat. Let it simmer for about 5 minutes. This helps the flavors meld together. Be careful not to let it boil too hard, as this can change the sauce's texture. After the sauce simmers, add the cooked orzo to the skillet. Then, sprinkle in 1 cup of grated Parmesan cheese, 1 teaspoon of onion powder, and season with salt and pepper to taste. Mix everything well. This step is key to achieving the right consistency. Let it cook for another 2-3 minutes. The sauce should thicken slightly, coating the orzo nicely. If it seems too thick, you can add a bit more broth or cream to reach your desired creaminess. Heavy cream is key for that rich and smooth feel. It adds depth to your dish. If you want more creaminess, try these tips: - Cream Cheese: Mix in a bit of cream cheese for extra thickness. - Nut Milk: A thick nut milk can work if you're looking for a lighter option. - Starch: Add a bit of cornstarch mixed with water to thicken the sauce. Fresh herbs make a big difference. Try adding basil or thyme for a fresh taste. Here are some optional ingredients to boost flavor: - Lemon Zest: Adds brightness. - Red Pepper Flakes: For a little heat. - Sun-Dried Tomatoes: They bring a sweet and tangy note. Creamy Spinach Parmesan Orzo pairs well with simple sides: - Garlic Bread: Perfect for dipping. - Roasted Veggies: Adds color and nutrients. - Simple Salad: A fresh crunch balances the creaminess. For plating, use a wide bowl. This shows off the vibrant colors. Garnish with fresh parsley for a pop of green. Enjoy! Pro Tips Perfectly Cooked Orzo: Make sure to cook the orzo in well-salted water to enhance its flavor. Drain it promptly to avoid overcooking. Fresh Spinach Addition: For the best flavor and texture, use fresh spinach instead of frozen. It wilts beautifully and retains more nutrients. Parmesan Variations: Consider using a mix of Parmesan and Pecorino Romano for an extra depth of flavor. Adjust the amount based on your salt preference. Garnish for Presentation: Fresh parsley not only adds color but also brings a refreshing taste that complements the creaminess of the dish. {{image_2}} You can easily add protein to this dish. Chicken, shrimp, or tofu all work well. For chicken, use cooked, shredded pieces. For shrimp, add them while sautéing the garlic. They will cook fast and add great flavor. If you prefer tofu, choose firm or extra-firm. Sauté it until golden for a nice texture. If you want to mix it up, consider other leafy greens. Kale, Swiss chard, or even arugula can add new tastes. You can also add veggies like zucchini or bell peppers. Just chop them small and sauté them with the spinach. This keeps the dish colorful and fresh. To make it gluten-free, swap orzo for gluten-free pasta. Many brands offer great options that have a similar taste and texture. For a vegan version, replace heavy cream with coconut milk or a plant-based cream. Use nutritional yeast instead of Parmesan for a cheesy flavor. These swaps make the dish fit many diets without losing taste. After enjoying your creamy spinach parmesan orzo, store any leftovers in the fridge. Place them in an airtight container. This dish stays fresh for up to three days. If you need to keep it longer, freezing is a great option. Pour the orzo into a freezer-safe container. It can last up to three months in the freezer. Just remember to cool it completely before freezing. For the best reheating, use the stovetop. Place the orzo in a skillet over low heat. Add a splash of water or more cream to keep it creamy. Stir often until it's heated through. You can also use a microwave. Place the orzo in a bowl, cover it, and heat in 30-second intervals. Add a bit of cream if it looks dry. This way, your dish stays rich and smooth! You can swap Parmesan cheese for several options. If you want a dairy-free choice, try nutritional yeast. It adds a cheesy flavor without the dairy. Other cheese options include Pecorino Romano or Grana Padano. They work well in this dish and give a similar taste. Yes, you can prepare Creamy Spinach Parmesan Orzo in advance. Cook the orzo and mix with the creamy sauce as directed. After that, store it in an airtight container in the fridge. When you're ready to eat, reheat gently on the stove. Add a splash of cream for extra richness. To make this dish gluten-free, you can use gluten-free orzo pasta. Many brands offer great taste and texture. Be sure to check the label for gluten-free certification. The other ingredients work well without changes, so your dish will still be creamy and delicious. You can create a tasty Creamy Spinach Parmesan Orzo with simple ingredients. I covered orzo, spinach, broth, cream, and Parmesan. You learned step-by-step how to cook and combine these items for a rich meal. Remember to play with flavors by adding herbs or proteins to fit your taste. This dish stores and reheats well, so you can enjoy it again. With these tips and variations, you can impress anyone at your table! Dive into this easy recipe and enjoy every bite.

Creamy Spinach Parmesan Orzo Irresistible Comfort Dish

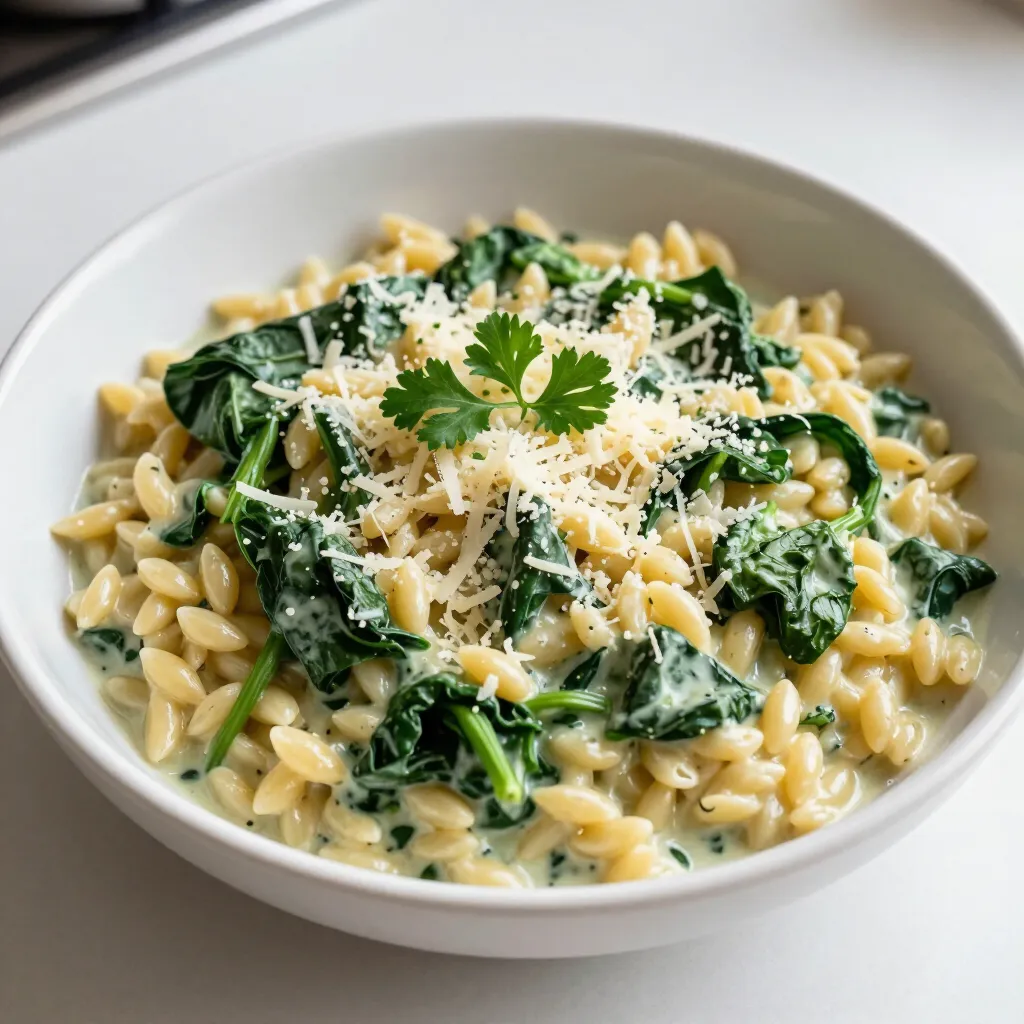
Craving a dish that’s both creamy and comforting? Look no further! In this blog post, I’ll guide you through making

- 4 large bell peppers (any color) - 1 cup cooked quinoa or rice - 1 cup marinara sauce - 1 cup shredded mozzarella cheese - 1 cup sliced pepperoni - ½ teaspoon Italian seasoning - ¼ teaspoon garlic powder - ¼ teaspoon red pepper flakes (optional) - Olive oil for drizzling - Fresh basil leaves for garnish - Baking dish - Mixing bowl - Aluminum foil - Sharp knife When I create Pepperoni Pizza Stuffed Peppers, I focus on fresh and vibrant ingredients. The bell peppers serve as a colorful base. You can use any color you like, but I often choose red or yellow for their sweetness. The quinoa or rice adds a hearty texture that makes the dish filling. Choosing a good marinara sauce is key. I prefer a rich and flavorful sauce, as it ties everything together. The mozzarella cheese melts beautifully and gives that classic pizza feel. Sliced pepperoni brings the familiar taste of pizza into each bite. Don’t forget the seasonings! Italian seasoning and garlic powder enhance the flavors. If you enjoy a little heat, consider adding red pepper flakes. A drizzle of olive oil helps everything cook evenly and adds a nice gloss. Finally, fresh basil leaves brighten the dish and add a pop of color. Gather these ingredients, and you're set for a fun cooking adventure! - Preheat oven to 375°F (190°C). - Slice the tops off the bell peppers. Remove seeds and membranes. Rinse them lightly under cold water to clean. - In a mixing bowl, combine: - 1 cup cooked quinoa or rice - 1 cup marinara sauce - 1 cup shredded mozzarella cheese (save some for topping) - 1 cup sliced pepperoni - ½ teaspoon Italian seasoning - ¼ teaspoon garlic powder - ¼ teaspoon red pepper flakes (if you like heat) - Mix well until all ingredients blend together. - Fill each bell pepper generously with the pizza mixture. Press it down lightly to pack it in. - Drizzle a little olive oil over each pepper to boost flavor and help with browning. - Cover the baking dish with aluminum foil. Bake for 25 minutes. - After 25 minutes, remove the foil. Add the reserved mozzarella cheese on top of the stuffed peppers. - Bake uncovered for another 10-15 minutes, until the cheese is melted and bubbly. - Perfecting the baking time: Bake your stuffed peppers at 375°F (190°C) for 25 minutes covered. This softens them. Then, uncover and bake for another 10-15 minutes. This helps the cheese melt and bubble nicely. - Ensuring even cooking: Make sure to pack the filling tightly inside each pepper. This helps them cook evenly. Rotate the baking dish halfway through for more even heat. - Alternatives for mozzarella cheese: You can use cheddar or provolone cheese instead of mozzarella. Both melt well and add great flavor. - Using different meats or veggies: Try turkey pepperoni or salami as a meat option. You can also add more vegetables like mushrooms or spinach to add more nutrients. - Accompaniments for the dish: A simple side salad or garlic bread works well. They add freshness and balance the meal. - Presentation ideas: Garnish with fresh basil leaves. You can also drizzle a bit of extra marinara sauce on the plate for color. This makes your dish look even more inviting. {{image_2}} You can make a great vegetarian version of these stuffed peppers. Swap the pepperoni for plant-based pepperoni. This keeps the pizza taste while being meat-free. You can also add more veggies. Try mushrooms, zucchini, or spinach for extra flavor. These options add nutrients and color to your dish. If you want a lower-carb meal, you can use cauliflower rice instead of quinoa or rice. Simply pulse fresh cauliflower in a food processor until it looks like rice. It cooks quickly and absorbs flavors well. This swap keeps your meal light and healthy without losing the delicious taste. For those who enjoy a kick, add jalapeños or extra red pepper flakes to your filling. These will elevate the flavor and heat of the dish. You can mix in sliced jalapeños right into the stuffing. If you prefer more heat, sprinkle extra red pepper flakes on top before baking. This spicy twist makes the dish exciting and fun! To store leftovers, let the stuffed peppers cool down first. Then, place them in an airtight container. You can keep them in the fridge for up to three days. This method keeps the flavors intact and prevents spoilage. Make sure the container is sealed well to avoid drying out. Freezing is a great way to save your stuffed peppers for later. First, let them cool completely. Wrap each pepper in plastic wrap tightly. Then, place them in a freezer-safe bag. Label the bag with the date. You can freeze them for up to three months. This way, you always have a delicious meal on hand. When you’re ready to enjoy your stuffed peppers again, there are easy ways to reheat them. The oven gives the best results. Preheat it to 350°F (175°C). Place the peppers in a baking dish and cover them with foil. Bake for about 20 minutes or until warmed through. You can also use the microwave. Just heat them for 2-3 minutes, checking to see if they are hot. Enjoy your meal! Pepperoni Pizza Stuffed Peppers can last up to four days in the fridge. To store them, place the leftovers in an airtight container. This keeps them fresh and helps avoid odors from other foods. When ready to eat, you can enjoy them cold or heat them up. Yes, you can make these stuffed peppers ahead of time! Here’s how: 1. Prepare the Peppers: Follow the recipe up to the point of baking. 2. Store in the Fridge: Place the stuffed peppers in a covered dish in the fridge. They will stay fresh for one to two days. 3. Bake Before Serving: When you’re ready, bake them as directed. Add a few extra minutes if they are cold from the fridge. These stuffed peppers pair well with several side dishes and drinks. Here are some great options: - Salad: A fresh green salad adds crunch and color. - Garlic Bread: This classic side complements the Italian flavors. - Beverages: Serve with a light soda, lemonade, or a glass of red wine. Here’s a quick overview of the complete recipe and cooking steps: 1. Preheat your oven to 375°F (190°C). 2. Prepare your bell peppers by removing the tops and seeds. 3. Mix cooked quinoa or rice, marinara sauce, mozzarella cheese, pepperoni, and seasonings in a bowl. 4. Stuff each pepper with the mixture. 5. Place the peppers in a baking dish and drizzle with olive oil. 6. Cover and bake for 25 minutes. 7. Remove the foil, add more cheese, and bake for another 10-15 minutes. 8. Let cool, then garnish with fresh basil before serving. We covered how to make Pepperoni Pizza Stuffed Peppers, starting with main ingredients and equipment. You learned step-by-step instructions for preparation, mixing, and baking. I shared tips for cooking, ingredient swaps, and serving ideas. When you try this dish, you can mix it up to suit your taste. Enjoy your delicious, stuffed peppers fresh or as leftovers! Happy cooking!

Pepperoni Pizza Stuffed Peppers Tasty and Easy Recipe

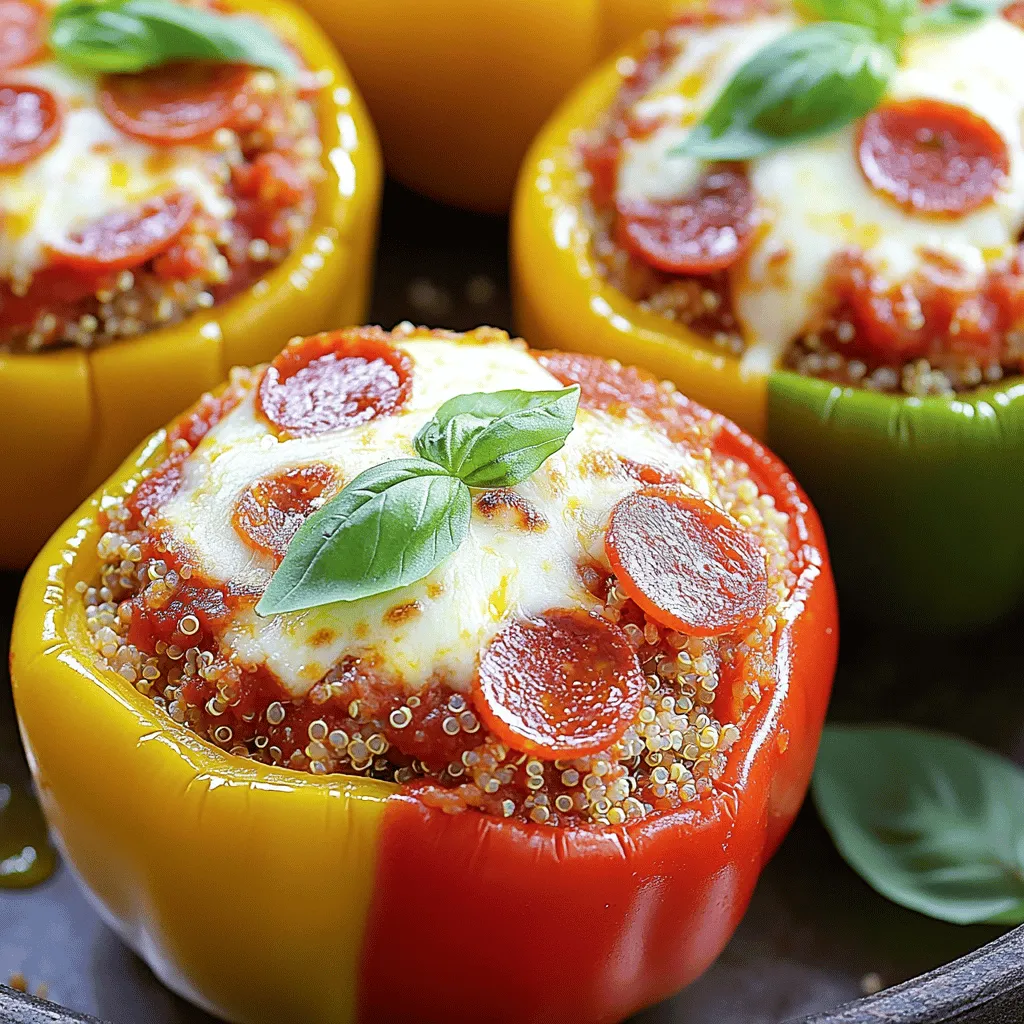
Are you ready to try something new for dinner? These Pepperoni Pizza Stuffed Peppers blend all your favorite pizza flavors

- 4 cups all-purpose flour - 2 tablespoons granulated sugar - 1 teaspoon salt - 1 packet (2 ¼ teaspoons) instant yeast The main ingredients include all-purpose flour, which gives the babka its structure. Granulated sugar adds sweetness, while salt balances the flavor. Instant yeast helps the dough rise quickly, making the process easier. - 1 cup whole milk (warm) - 4 tablespoons unsalted butter (melted) - 2 large eggs These extra ingredients add richness and moisture. Warm whole milk activates the yeast and helps the dough rise. Unsalted butter brings a lovely flavor and a soft texture. Eggs enrich the dough, providing a tender crumb. - 1 cup chocolate hazelnut spread (e.g., Nutella) - ½ cup roasted hazelnuts (roughly chopped) - 1 tablespoon cocoa powder (sifted) - Powdered sugar for dusting These special additions make the babka truly delightful. Chocolate hazelnut spread creates a creamy, sweet filling. Chopped hazelnuts add crunch and nutty flavor. Cocoa powder enhances the chocolate taste, while powdered sugar gives a lovely finish. To make the dough, start by mixing the dry ingredients. In a large bowl, combine 4 cups of all-purpose flour, 2 tablespoons of granulated sugar, and 1 teaspoon of salt. Stir well to mix evenly. Next, in another bowl, whisk together 1 cup of warm whole milk, 4 tablespoons of melted unsalted butter, and 2 large eggs. Slowly add this mixture to the dry ingredients. Sprinkle 1 packet of instant yeast over the top and stir until you see the dough start to form. Now, knead the dough. Transfer it to a floured surface and knead for about 8 to 10 minutes. The dough should feel smooth and elastic. After kneading, place the dough in a lightly greased bowl. Cover the bowl with a cloth and let it rise in a warm spot. This should take about 1 to 1.5 hours, or until the dough doubles in size. Once the dough has risen, gently punch it down. This helps to release any air bubbles. Let it rest for 10 minutes. Roll out the dough on a floured surface into a large rectangle. Aim for about 16 by 24 inches. Now, spread 1 cup of chocolate hazelnut spread evenly over the rolled dough. Leave a ½ inch border around the edges. Next, sprinkle 1 tablespoon of sifted cocoa powder and ½ cup of roughly chopped roasted hazelnuts on top of the spread. To shape the babka, start from the long side and carefully roll the dough into a tight log. Pinch the ends to seal. With a sharp knife, cut the log in half lengthwise. Twist the two strands together gently and place them in a greased 9x5 inch loaf pan. Cover with a cloth and let the babka rise again for about 30 to 45 minutes, until it puffs up. While the babka rises, preheat your oven to 350°F (175°C). For a glossy finish, beat 1 egg and brush it over the top of the babka. Bake for 30 to 35 minutes. It should look golden brown, and a skewer inserted in the center should come out clean. Once baked, let it cool in the pan for 10 minutes. Then, transfer it to a wire rack to cool completely. Dust with powdered sugar before serving. Enjoy your delicious babka! To get the best dough, aim for a soft and slightly sticky texture. If it feels too dry, add a splash of warm milk. If it's too wet, sprinkle in a bit more flour. The right texture helps the dough rise well. For rising, choose a warm spot. A sunny kitchen corner works great. You can also place the bowl in the oven with just the light on. This gentle heat helps the yeast grow, making your babka fluffy. To check if your babka is done, look for a golden brown crust. Gently tap the bottom of the loaf; it should sound hollow. If it’s too light, give it a few more minutes. For a perfect crust, brush the top with egg wash before baking. This will help it turn a beautiful golden color. After baking, let your babka cool slightly. Dust the top with powdered sugar for a lovely finish. This adds a nice touch to the look and taste. When serving, slice it into thick pieces. You can pair it with coffee or tea for a delightful treat. Enjoy it warm or at room temperature for the best flavor. {{image_2}} You can change the flavor of your babka easily. Try different nut spreads, like almond or cashew. Each one gives a new taste. You can also stir in spices or extracts. Cinnamon or vanilla can add warmth. These small changes can make a big difference! If you need gluten-free options, use a gluten-free flour blend. This works well with the same recipe. For vegan adaptations, swap the milk and butter for plant-based versions. Use flax eggs instead of regular eggs. These swaps keep the babka tasty while meeting dietary needs. Adding toppings is fun and makes your babka special. You can sprinkle crushed nuts or chocolate chips on top. Drizzling melted chocolate can also enhance the look and taste. For serving, slice the babka thick. Pair with coffee or tea for a cozy treat. You can also toast slices for a warm snack! To keep your chocolate hazelnut babka fresh at room temperature, wrap it well. Use plastic wrap or aluminum foil to cover the loaf. This will keep it moist and tasty. Make sure to store it in a cool, dry place. Avoid direct sunlight or heat sources. Your babka will stay fresh for about 3 days this way. For long-term storage, freezing is the best option. Wrap the babka tightly in plastic wrap. Then, place it in a freezer-safe bag. Make sure to squeeze out as much air as possible. You can freeze it for up to 3 months. When you are ready to enjoy it, thaw the babka in the fridge overnight. To reheat, simply pop it in a warm oven for 10-15 minutes. This will restore its soft texture. How long does babka last? When stored properly at room temperature, it lasts about 3 days. In the fridge, it can last up to a week. If frozen, it will stay good for about 3 months. Look for signs of spoilage. If you see mold, or if it smells off, it's best to toss it. A fresh babka should smell sweet and chocolatey. Always trust your senses when checking for freshness. Chocolate hazelnut babka is a sweet, twisted bread. It has roots in Eastern European Jewish culture. Babka means "grandma" in Polish, named after the shape of the bread. The dough is soft and rich, with a filling of chocolate and hazelnuts. This bread is perfect for breakfast or dessert. It brings warmth and joy to gatherings. Yes, you can make babka without yeast! You can use baking powder or baking soda instead. These options create a quick bread that rises faster. However, the texture will differ. Yeast gives babka its soft, airy quality. If you want a traditional taste, stick with yeast. If you're in a hurry, the quick method can work too. To check if your babka is done, use a skewer. Insert it into the thickest part of the bread. If it comes out clean, the babka is ready. You can also look for a golden-brown color on top. The bread should feel firm but springy to the touch. If it looks too light, give it more time in the oven. You can find chocolate hazelnut babka at local bakeries. Look for bakeries that focus on artisan bread. Many grocery stores may also carry it. If you prefer online shopping, check sites like Goldbelly or local delivery services. They often offer fresh babka from well-known bakeries. Always read reviews for the best options. Absolutely! You can use many fillings for babka. Try almond paste or fruit jams for a twist. You can also mix chocolate with spices like cinnamon. For a nutty crunch, add chopped walnuts or pecans. The options are endless! Get creative and find your favorite combination. Your babka can be unique to you! In this post, we explored how to make Chocolate Hazelnut Babka. We covered key ingredients like flour and eggs, followed by step-by-step instructions for preparing and baking. There were also tips for perfecting your dough and storage info to keep it fresh. Finally, don’t be afraid to get creative with flavors and fillings. Making babka can be a fun adventure, and your friends will love it. Enjoy baking and taste the sweet success of your creation!

Chocolate Hazelnut Babka Tasty and Easy Recipe

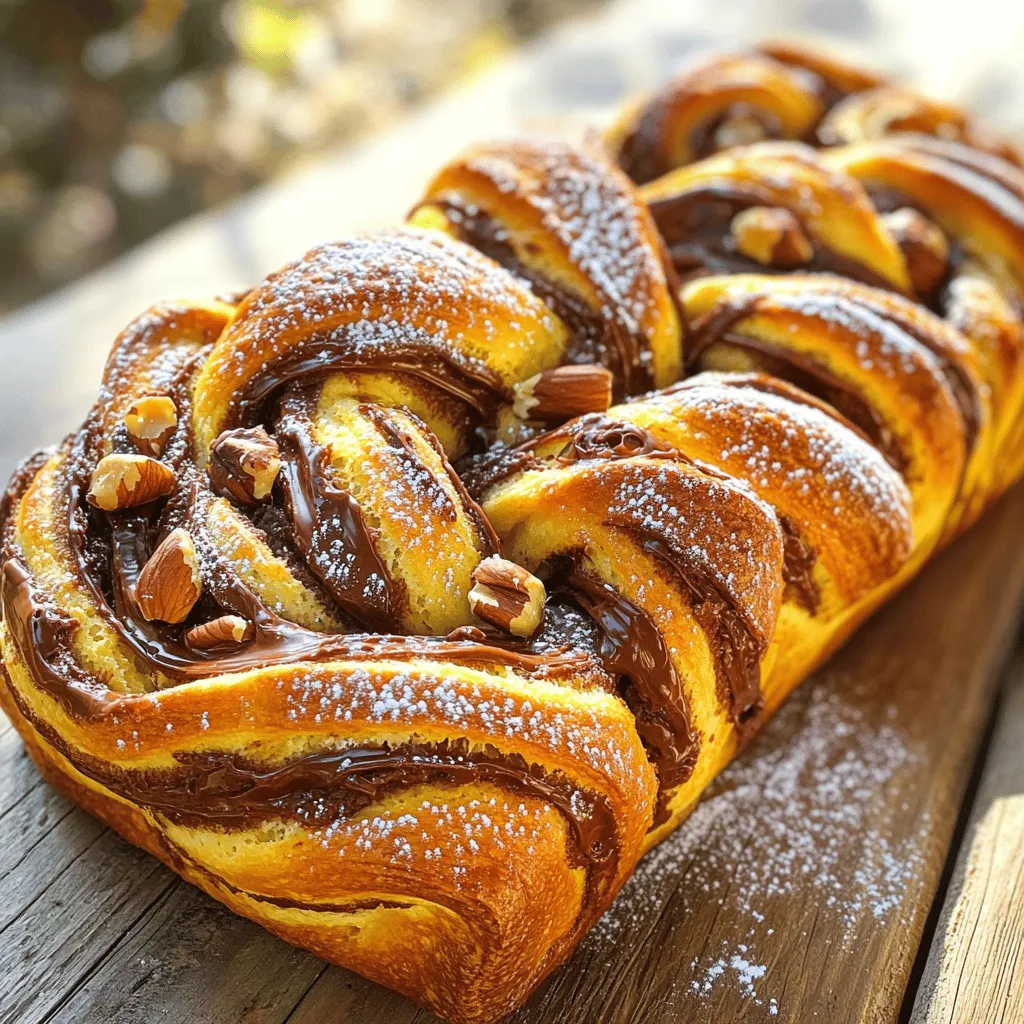
Are you ready to indulge in a sweet, rich treat? Chocolate Hazelnut Babka is the perfect mix of soft dough

- 1 cup all-purpose flour - 1 ½ teaspoons baking powder - ¼ teaspoon salt - 5 large eggs, separated - 1 cup granulated sugar, divided - ½ cup whole milk - 1 teaspoon vanilla extract - 1 can (12 oz) evaporated milk - 1 can (14 oz) sweetened condensed milk - 1 cup heavy cream - Fresh berries (strawberries, blueberries) for garnish - Ground cinnamon for dusting (optional) To create the perfect tres leches cake, you need a mix of basic and rich ingredients. Start with all-purpose flour, baking powder, and salt to form the cake's base. The eggs play a crucial role. You separate the whites from the yolks, using both for texture and sweetness. You will need 5 large eggs. Use ¾ cup of sugar for the yolks and ¼ cup for the whites. This balance helps the cake rise and stay light. For the milk, you’ll use a blend of whole milk, evaporated milk, and sweetened condensed milk. This combination gives the cake its signature moistness. Don't forget the heavy cream for a rich topping. Finally, fresh berries add a touch of color and sweetness. A sprinkle of ground cinnamon is optional but can elevate the flavor. {{ingredient_image_1}} First, set your oven to 350°F (175°C). This is the right temperature for baking. While it heats, take your 9x13-inch baking dish. Grease it well with butter or cooking spray. Then, dust it lightly with flour. This will help the cake come out easily later. Next, we need to mix the dry ingredients. In a medium bowl, sift together 1 cup of all-purpose flour, 1 ½ teaspoons of baking powder, and ¼ teaspoon of salt. Set this mixture aside. Now, grab a large bowl for the egg yolks. Beat 5 large egg yolks with ¾ cup of granulated sugar. Mix until it turns pale and creamy. Add ½ cup of whole milk and 1 teaspoon of vanilla extract to this bowl. Stir until everything combines well. Gradually add the dry mixture to the yolk mixture. Mix just until combined. Now, let’s whip the egg whites. In another bowl, beat the 5 egg whites until soft peaks form. Slowly add the remaining ¼ cup of sugar. Keep beating until stiff peaks form. To combine, gently fold the egg whites into the cake batter. Do this in three parts. Be careful not to deflate the mixture. This step is key to keeping your cake light and airy. Pour your batter into the prepared baking dish. Smooth the top with a spatula. Bake the cake for 25 to 30 minutes. Check if it is done by inserting a toothpick in the center. If it comes out clean, your cake is ready. After baking, let the cake cool completely in the pan. Cooling is important before soaking it in the tres leches mixture. To get a soft and fluffy cake, you must fold the egg whites gently. This keeps the air in the mixture. If you mix too hard, you lose that lightness. Take your time. When you fold, use a spatula or a large spoon. Go from the bottom to the top. Repeat until the egg whites blend in but still look fluffy. To avoid a dry cake, do not bake too long. Watch for when a toothpick comes out clean but not too soon. Another tip is to soak the cake well in the tres leches mixture. This makes the cake moist and rich. Let it soak for at least one hour or overnight for the best taste. When serving, cut the cake into squares. A sharp knife helps you make clean cuts. Place each piece on a plate. Add a dollop of whipped cream on top for a nice look. You can also add a few fresh berries for color. Strawberries and blueberries work great. For a final touch, sprinkle some ground cinnamon over the cake. This adds flavor and a pretty finish. A good presentation makes your cake even more inviting. Pro Tips Choose the Right Pan: Using a glass or ceramic dish can help the cake bake evenly and retain moisture, resulting in a perfectly soaked tres leches cake. Cool Completely: Allow the cake to cool completely before soaking it in the milk mixture to prevent it from becoming too soggy too quickly. Soak Overnight: For the best flavor and texture, let the cake soak in the tres leches mixture overnight in the refrigerator. Whip Cream to Stiff Peaks: When whipping the cream for the topping, beat it until stiff peaks form to ensure it holds its shape when spread over the cake. {{image_2}} You can play with the flavor of your tres leches cake. Adding different extracts can change the taste. Try almond extract for a nutty flavor. Coconut extract gives a tropical touch. You can also mix in spices like nutmeg or cardamom for warmth. Incorporating tropical fruits can enhance your cake too. Fresh mango, passion fruit, or even pineapple can add brightness. Slice them thin and layer them on top of the cake. They add both flavor and color. If you need gluten-free options, swap the all-purpose flour for a gluten-free blend. Many stores sell mixes that work well in cakes. Just check the package for the right measurements. For dairy-free options, use almond milk or coconut milk instead of whole milk. Replace heavy cream with coconut cream for a rich texture. These simple swaps allow everyone to enjoy this treat. To keep your tres leches cake fresh, follow these easy tips: - Refrigeration: Store the cake in the fridge. Cover it with plastic wrap or a lid. This keeps it from drying out. The cake stays moist and delicious this way. - Shelf Life: If stored properly, the cake lasts about 3 to 5 days in the fridge. After that, it may lose its great taste and texture. Always check for signs of spoilage before eating. You can freeze tres leches cake if you want to save some for later. Here’s how: - Freezing: Cut the cake into individual pieces. Wrap each piece tightly in plastic wrap. Then, place them in a freezer bag. This helps keep moisture in. - Thawing Tips: To enjoy the cake, move it to the fridge. Let it thaw overnight. This method helps keep the cake’s moist texture. Avoid microwaving it, which can make it dry. Following these storage tips gives you the best chance to savor your delicious tres leches cake. Enjoy every bite! Tres Leches Cake is a famous Mexican dessert. It translates to "three milks cake." This cake is light and moist. It gets its name from the three types of milk used in the recipe. These milks are evaporated milk, sweetened condensed milk, and heavy cream. The cake absorbs these milks, making it rich and tender. People often enjoy it at parties and celebrations. Yes, you can make Tres Leches Cake in advance. It actually tastes better the next day! After soaking the cake, cover it well. Store it in the fridge until you are ready to serve. This helps the flavors blend together. Just remember to whip the cream topping right before serving. This keeps it fresh and fluffy. If your Tres Leches Cake is too soggy, don't worry. You can fix it! First, check how much milk you added. If you soaked the cake too long, that might be the cause. Next time, try soaking it for a shorter time. You can also serve it with less milk. Lastly, ensure that you poke the holes evenly. This helps the cake soak up just the right amount of milk. If you want to skip heavy cream, try these options. You can use coconut cream for a tropical twist. Whole milk or half-and-half also works well. For a lighter option, try whipped topping made from plant-based cream. These alternatives keep your cake creamy and delicious. In this post, I covered the key steps to making a great Tres Leches Cake. You learned about the important ingredients, how to mix them properly, and the baking process. I also shared tips for perfect texture and presentation. You can experiment with flavors and find ways to store your cake. Remember, practice leads to the best results. With the right techniques, you’ll impress everyone with your dessert. Enjoy baking and tasting this delicious treat!

Classic Tres Leches Cake Rich and Moist Delight

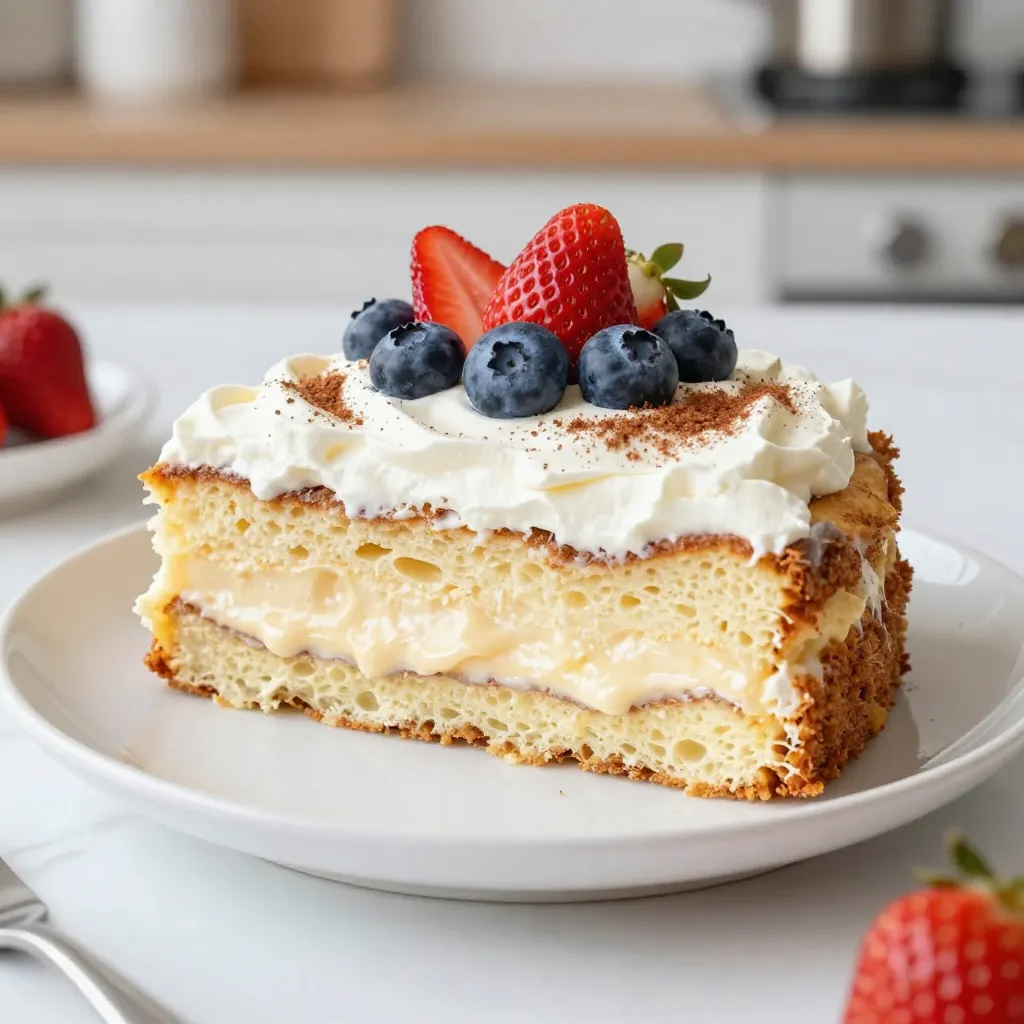
Are you ready to master the art of classic Tres Leches Cake? This rich and moist delight brings a taste

To make a delicious roasted garlic hummus, gather these key ingredients: - 1 cup dried chickpeas or 2 cans (15 oz) of chickpeas, drained and rinsed - 1 whole bulb of garlic - 1/4 cup tahini - 3 tablespoons lemon juice - 1/4 cup extra virgin olive oil, plus more for serving - 1 teaspoon ground cumin - 1/2 teaspoon smoked paprika - Salt to taste - Water (as needed for consistency) - Fresh parsley, for garnish These ingredients work together to create a rich and creamy dip. You can enhance your hummus with some fun garnishes. Try these options: - Extra virgin olive oil drizzle - Smoked paprika sprinkle - Pine nuts or walnuts - Fresh herbs like cilantro or mint These add a pop of color and flavor to your dish. Roasted garlic hummus is not only tasty but also healthy. Here’s a quick overview of its nutrition per serving (about 2 tablespoons): - Calories: 70 - Protein: 2 grams - Carbohydrates: 5 grams - Fat: 5 grams - Fiber: 1 gram This dip is packed with nutrients from chickpeas and healthy fats from olive oil. Enjoy your hummus with pride, knowing it's good for you! For the full recipe, check out the details above. Start by preheating your oven to 400°F (200°C). Take a whole bulb of garlic. Slice off the top to expose the cloves. Drizzle a bit of olive oil over it. Wrap the bulb in aluminum foil. Place it in the oven and roast for about 30 to 35 minutes. The garlic should become soft and caramelized. After roasting, let it cool a bit before you handle it. This step adds a rich flavor to your hummus. You can choose between dried or canned chickpeas. If you go with dried chickpeas, soak them overnight in plenty of water. The next day, drain them. Place the soaked chickpeas in a pot. Cover them with fresh water. Bring it to a boil, then simmer for about 1 to 1.5 hours until they are soft. If time is tight, use canned chickpeas. Just drain and rinse them before adding to your recipe. Both options work great in making hummus. Now it’s time to blend! In a food processor, add the roasted garlic cloves. Squeeze out the soft garlic from their skins. Then, add tahini, lemon juice, and ground cumin. Blend these together until smooth. Next, add the chickpeas to the food processor. Blend again, adding olive oil and water to reach a creamy texture. Taste your hummus and add salt and smoked paprika as you like. Blend once more for a smooth finish. For the full recipe, check the details above! To make your hummus creamy, blend it well. Start with a food processor. Add roasted garlic, tahini, and lemon juice. Blend until smooth. Then, add chickpeas. If it's too thick, add water, one tablespoon at a time. Blend again until it reaches your desired creaminess. Using canned chickpeas can also help with texture, as they are softer. You can boost the flavor of your hummus in many ways. Add a pinch of ground cumin for warmth. Smoked paprika gives a nice smoky touch. Don’t forget fresh herbs like parsley or cilantro for freshness. You can also add a dash of lemon zest to brighten the taste. Experiment with flavors like roasted red peppers or sun-dried tomatoes for a twist. Avoid over-blending; it can make your hummus too runny. Check your seasoning early. Salt can be added later, but taste as you go. If you use dried chickpeas, ensure they are cooked enough. Undercooked chickpeas can result in a grainy texture. Lastly, remember to store your hummus in an airtight container, so it stays fresh longer. For the full recipe, check out the instructions above. {{image_2}} You can spice up roasted garlic hummus easily. Add jalapeños or red pepper flakes. This gives heat and depth. Start with a pinch and taste as you go. If you love heat, add more! This variation pairs well with fresh veggies and chips. Adding herbs makes hummus vibrant and fresh. Try adding fresh basil, cilantro, or dill. Blend them in with the other ingredients. This adds flavor and color to your dish. Each herb brings a unique taste. Experiment with your favorites for a personal touch. Seasonal ingredients can take your hummus to the next level. In summer, add fresh tomatoes or roasted peppers. In fall, try pumpkin or butternut squash. These add sweetness and nutrition. Each season brings new tastes to explore. Get creative and let your palate guide you. Enjoy the adventure! To store your roasted garlic hummus, place it in an airtight container. Make sure to cover the surface with a little olive oil. This keeps the hummus fresh and prevents it from drying out. Store the container in your fridge. Homemade hummus lasts about five to seven days in the fridge. If you want to keep it longer, you can freeze it. Use a freezer-safe container and leave some space at the top. Hummus expands when frozen. It can last up to three months in the freezer. When you’re ready to eat your hummus, thaw it in the fridge overnight. If it seems thick, add a little water or olive oil to restore its creamy texture. Blend it again to mix well. This will refresh your hummus and keep it tasty. For more details on making this dip, check the Full Recipe. Making roasted garlic hummus vegan is easy! The main ingredients are already plant-based. Use dried chickpeas or canned ones. Ensure your tahini is pure and free from additives. For creaminess, you add olive oil and lemon juice. All these ingredients are vegan. Just follow the [Full Recipe] to enjoy a tasty dip. Hummus is not just tasty; it is healthy too! It is rich in protein and fiber. Chickpeas help with digestion and keep you full. Olive oil is heart-healthy and adds good fats. Garlic boosts your immune system and adds flavor. Overall, hummus is a great snack or meal addition. You can find roasted garlic hummus at many grocery stores. Look in the deli or refrigerated section. Some health stores also carry it. If you want a fresh option, try local markets. Many places sell homemade versions too. Roasted garlic hummus is a simple and tasty dish. You learned about key ingredients, cooking steps, and how to store it. I shared tips to make your hummus creamy and flavors pop. You can try fun variations, like spicy or herb-infused hummus. Remember, homemade is best! With this guide, you can create a delicious dip that impresses anyone. Enjoy making your hummus and sharing it with friends and family!

Roasted Garlic Hummus Creamy and Flavorful Dip

If you love rich, bold flavors, you’re in for a treat! This Roasted Garlic Hummus is your new favorite creamy

Older posts
Newer posts
← Previous Page1 … Page41 Page42 Page43 … Page84 Next →

dsad

© 2026 easycookingbite • Built with GeneratePress

Our Policies

  • Copyright Policy
  • Cookie Policy
  • GDPR Policy
  • Privacy Policy
  • Disclaimer
  • Terms Of Use

More Information

  • Home
  • About
  • Contact
  • Appetizers
  • Dessert
  • Dinner
  • Drinks
©2026, easycookingbite About Back To Top