Skip to content
DisclaimerTerms Of UseGDPR PolicyCookie Policy

easycookingbite

  • Home
  • Drinks
  • Appetizers
  • Dinner
  • Dessert
  • About
  • Contact
  • Privacy Policy
DisclaimerTerms Of UseGDPR PolicyCookie Policy

NO-ING-IMG

To make these tasty teriyaki meatball bowls, gather these key ingredients: - 1 lb ground chicken (or turkey) - 1/2 cup breadcrumbs - 1/4 cup green onions, finely chopped - 1 egg - 2 tablespoons soy sauce - 1 tablespoon sesame oil - 1 teaspoon garlic powder - 1 teaspoon ginger powder - 1/2 cup teriyaki sauce (store-bought or homemade) - 2 cups cooked rice (white or brown) - 1 cup steamed broccoli florets - 1 red bell pepper, sliced - Sesame seeds for garnish These ingredients come together to create a delightful dish. The meatballs are juicy and full of flavor. The rice and veggies add great texture and nutrition. You can swap some ingredients to fit your taste or what you have on hand: - Use ground beef or pork instead of chicken. - Try panko breadcrumbs for extra crunch. - Replace green onions with chives or shallots. - Use tamari for a gluten-free option. - Olive oil can work instead of sesame oil. These swaps keep the dish tasty while allowing you to customize it. To make your bowls even more appealing, consider these garnishes: - Chopped cilantro for freshness. - Sliced avocado for creaminess. - Crushed red pepper flakes for heat. - More sesame seeds for extra crunch. Garnishes add a nice touch and make your meal look beautiful. You can mix and match to create your perfect bowl. For the full recipe, check out the details above. Start by gathering your ingredients. You need ground chicken, breadcrumbs, green onions, egg, soy sauce, sesame oil, garlic powder, and ginger powder. In a large bowl, mix these items. Use your hands or a spoon to combine until everything is well mixed. It should feel sticky but hold together. This mixture is key for juicy meatballs. Now, preheat your oven to 400°F (200°C). While it heats, form the meat mixture into small balls, about 1 inch wide. Place them on a lined baking sheet. Make sure they are spaced out, so they cook evenly. Bake these meatballs for about 20 minutes. They should look golden and cooked throughout when done. While the meatballs bake, prepare the rice and veggies. Cook your rice according to the package instructions. Steam the broccoli florets until they are bright green and tender. Slice the red bell pepper into thin strips. Once the meatballs are ready, drizzle them with teriyaki sauce. In serving bowls, layer the rice, broccoli, and bell pepper. Top with the meatballs and more teriyaki sauce if you like. Finally, sprinkle sesame seeds on top for a nice finish. For the full recipe, check the details above. Enjoy your tasty teriyaki meatball bowls! To make juicy meatballs, start with ground chicken or turkey. They have fat, which keeps your meatballs moist. Mix your meat with breadcrumbs, egg, and some flavorings. The key is to not overmix. Form them gently into balls, about one inch wide. This helps them stay tender. Bake them until they are just cooked through. No one likes dry meatballs! Meal prep can save you time. First, mix your meatball mixture in bulk. You can make extra and freeze the rest. When you bake the meatballs, do it in batches. While they bake, prepare your rice and veggies. Use a rice cooker for perfectly cooked rice. It takes care of itself while you focus on other tasks. Cooking rice seems simple, but there are tricks. Rinse your rice before cooking. This removes excess starch and helps it stay fluffy. Use one part rice to two parts water. Bring it to a boil, then cover and reduce heat. Let it simmer for about 18 minutes. Turn off the heat and let it sit for a few minutes before serving. Fluff it with a fork for the best texture. For the full recipe, check out the Teriyaki Meatball Bowls section. {{image_2}} You can swap the ground chicken for other proteins. Ground turkey works well. For a beef twist, use ground beef. If you prefer pork, ground pork is a tasty choice. Each protein brings its own flavor to the dish. You can even use fish, like salmon, for a unique spin. Adjust cooking times as needed for different meats. You can choose between homemade and store-bought teriyaki sauce. Store-bought sauce is quick and easy. Just heat it before serving. However, making your own sauce is fun and lets you control the flavors. Combine soy sauce, brown sugar, and ginger in a pot. Simmer until thickened. This gives you a fresh taste that’s hard to beat. You can make this dish vegetarian or vegan. Use plant-based ground meat or mashed chickpeas for the meatballs. For the sauce, check that your soy sauce is vegan. You can use agave syrup instead of brown sugar. Serve the meatballs over rice with plenty of veggies. This way, everyone can enjoy teriyaki meatball bowls. For the full recipe, check out the recipe section. To keep your teriyaki meatball bowls fresh, store leftovers in an airtight container. Place them in the fridge. They last for up to three days. If you want to keep them longer, freezing is a great option. When you’re ready to eat leftovers, reheating is simple. You can use the microwave or the oven. For the microwave, place the meatballs and rice in a bowl. Heat for about 1-2 minutes. If you use the oven, preheat it to 350°F (175°C). Place the meatballs and rice in a baking dish, cover with foil, and heat for about 15 minutes. Make sure everything is hot before serving. To freeze meatballs, first let them cool completely. Then, place them in a single layer on a baking sheet. Freeze for about 1-2 hours until firm. After that, transfer them to a freezer-safe bag. Label the bag with the date. You can freeze them for up to three months. When you want to use them, thaw overnight in the fridge before reheating. For more details, check the Full Recipe. You can serve your Teriyaki Meatball Bowls with a variety of sides. Here are some options: - Steamed vegetables like broccoli, carrots, or snap peas - A fresh salad to add crunch - Edamame for a tasty snack - Pickled ginger for extra flavor - Seaweed salad for a unique twist These sides will enhance the meal and add color to your plate. They pair well with the sweet and savory flavors of the teriyaki sauce. Making homemade teriyaki sauce is easy and fun. Here’s a quick method: - 1/2 cup soy sauce - 1/4 cup brown sugar - 1 tablespoon rice vinegar - 1 teaspoon garlic, minced - 1 teaspoon ginger, minced Mix all the ingredients in a small saucepan. Heat over medium heat, stirring often. Simmer for about five minutes, until it thickens. This sauce will taste fresh and delicious. You can adjust the sweetness by adding more sugar or honey if you like. Yes, you can use frozen vegetables in your Teriyaki Meatball Bowls. Frozen veggies are convenient and save time. They are also often flash-frozen, which helps keep their nutrients. Just steam or sauté them before adding to your bowls. This way, they will blend well with the meatballs and rice. Plus, they add color and nutrition to your meal. You’ve learned how to make tasty teriyaki meatball bowls from scratch. We covered the key ingredients, tips for juicy meatballs, and how to save time in meal prep. Don’t forget the fun with variations and how to store leftovers. Experiment with different proteins and sauces for new flavors. Your teriyaki meatball bowls can suit anyone’s taste. Enjoy the process, and make these bowls your own!

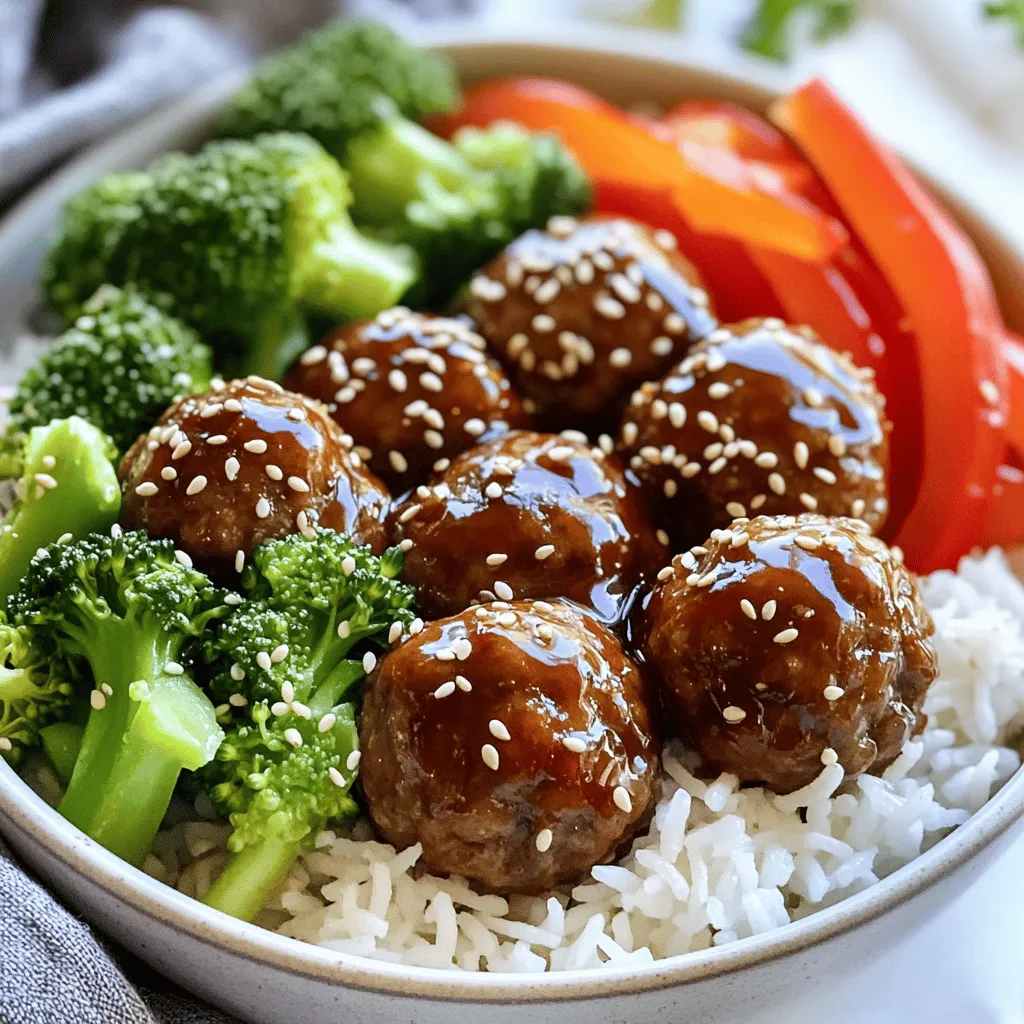
Teriyaki Meatball Bowls Flavorful and Easy Recipe

Are you ready to spice up your dinner routine? Teriyaki Meatball Bowls are not only flavorful but also quick to

To make chocolate dipped pretzel rods, you need simple ingredients that are easy to find. Here’s what you will need: - 12 pretzel rods - 1 cup semi-sweet chocolate chips - 1 tablespoon coconut oil (or any neutral oil) - 1/2 cup assorted toppings (sprinkles, crushed nuts, shredded coconut, mini chocolate chips, etc.) These ingredients come together to create a sweet and salty treat. The pretzel rods give a nice crunch, while the chocolate adds sweetness. You can also mix and match toppings to suit your taste. I love using colorful sprinkles for a fun look, or crushed nuts for a little extra crunch. If you want to explore more, check out the Full Recipe for detailed steps and tips. Enjoy crafting your own chocolate dipped pretzel rods! Start by lining a baking sheet with parchment paper. This will help the pretzel rods not stick. Make sure to gather all your ingredients and tools. You will need pretzel rods, chocolate chips, coconut oil, and toppings. Keep them close by for easy access. To melt the chocolate, use a microwave-safe bowl. Combine the semi-sweet chocolate chips with the coconut oil. Heat in the microwave in 30-second bursts. Stir well after each burst until the chocolate is smooth. If you don’t have a microwave, use a double boiler. Place a heat-safe bowl over simmering water, and stir until melted. Once the chocolate melts, grab a pretzel rod. Hold it by one end and dip it into the chocolate. Twist it out to get an even coat. Let the extra chocolate drip back into the bowl. While the chocolate is still wet, roll the dipped part in your toppings. This is when the fun begins! Place the dipped pretzel rods on the lined baking sheet. Repeat the dipping with all pretzel rods. After dipping, chill them in the refrigerator for about 30 minutes. This helps the chocolate set well. For best results, avoid moving them until they are set. When ready to serve, take the pretzel rods out of the fridge. You can arrange them in a tall glass or jar. This makes for a fun display. For gifts, tie them with a colorful ribbon. You can pair them with hot cocoa or a sweet dip for extra fun. Check the Full Recipe to make these delightful treats! To keep your chocolate smooth, you need to control the heat. Melt your chocolate in short bursts. Microwave it for just 30 seconds at a time. Stir after each burst. This helps avoid hot spots that can scorch the chocolate. Add one tablespoon of coconut oil to the chocolate. This will help it melt better and stay smooth. Coconut oil makes the chocolate shiny and gives it a nice finish. If you see clumps in your chocolate, don’t panic. Just keep stirring. If the chocolate cools too much, you can heat it again for a few seconds. When you dip your pretzel rods, hold them by one end. This makes it easy to control the dip. Dip the rod into the chocolate at an angle. This helps get a nice coat without too much mess. Make sure to twist the rod as you pull it out. This lets the excess chocolate drip off. You want an even coating, so don’t rush this part. A good dip makes the pretzel look great and taste better. Decorating your pretzel rods can be fun. Use colorful toppings to make them pop. Sprinkles, nuts, and mini chocolate chips work well. You can mix and match to create unique looks. Think about the season too. Use red and green sprinkles for Christmas. For Halloween, go with orange and black. These small touches can make your treats stand out. You can find the full recipe for these chocolate dipped pretzel rods to get started! {{image_2}} You can switch up the chocolate for your pretzel rods. White chocolate is a fun choice. It adds a sweet and creamy taste that pairs well with the salty pretzel. You can also melt flavored chocolates. You might try caramel or mint chocolate. Each type adds its own twist to the classic recipe. Mixing toppings can change your pretzel rods from good to great! Think about sweet and savory mixes. You can use crushed pretzels for a salty kick. Or add a sprinkle of sea salt for a great contrast. For holidays, try festive toppings. Red and green sprinkles for Christmas or pastel colors for Easter make them pop! Pretzel rods are popular, but don’t forget about pretzel bites. They are smaller and great for dipping too. If you need a gluten-free option, there are many brands out there. Just check the label to make sure. No matter the type, chocolate-dipped pretzels are always a hit. For the full recipe, check out the details above! To keep your chocolate dipped pretzel rods fresh, you can store them at room temperature or in the fridge. If you choose room temperature, place them in a cool, dry spot away from sunlight. This keeps the chocolate smooth and tasty. If it’s hot, the fridge is better. Just make sure they are sealed well. Use an airtight container to store your pretzel rods. This will keep them crunchy and prevent them from absorbing moisture. If you stack them, separate layers with parchment paper to avoid sticking. Chocolate dipped pretzel rods can last about two weeks if stored properly. After that, they may start to lose their crunch. Signs of spoilage include a dull appearance or a change in texture. If the chocolate looks white or chalky, that’s called bloom. This means it’s time to toss them. Enjoy your sweet treats while they’re at their best! For the full recipe, check out the details above. Yes, you can use different types of chocolate for your pretzel rods. If you like dark chocolate, go for it! Dark chocolate adds a rich flavor. If you prefer a sweeter taste, milk chocolate works great too. You can even mix chocolates for a fun twist. Just melt them the same way as the semi-sweet chocolate. To make pretzel rods gluten-free, simply use gluten-free pretzels. Many brands offer gluten-free options that taste just as good. Check labels to ensure they are safe for your diet. You can also find recipes to make your own gluten-free pretzels at home if you want to try that route. These pretzel rods are perfect for many events! They make great snacks for birthday parties and movie nights. You can serve them at holiday gatherings or bake sales too. They are also fun for kids' parties or school events. People love them, and they look great on a snack table! You now have all you need to make delicious chocolate-dipped pretzel rods. We covered the ingredients, preparation, and creative ways to decorate them. You learned tips to maintain smooth chocolate and got ideas for tasty variations. Remember to store them well to enjoy later. These treats are perfect for parties or just for fun. Get creative with flavors and toppings. Enjoy making and sharing them!

Chocolate Dipped Pretzel Rods Irresistible Sweet Treats

If you’re looking for a treat that’s both sweet and salty, chocolate dipped pretzel rods are the perfect snack! Easy

- 1 pound Brussels sprouts, trimmed and halved - 4 tablespoons olive oil - 4 cloves garlic, minced - ½ cup grated Parmesan cheese - 1 teaspoon garlic powder - ½ teaspoon crushed red pepper flakes (optional) - Salt and pepper to taste - 2 tablespoons fresh parsley, chopped (for garnish) You can swap out olive oil for coconut or avocado oil. If you want a different cheese, try Pecorino Romano. For a vegan option, use nutritional yeast instead of cheese. When picking Brussels sprouts, look for bright green ones. They should feel firm and heavy. Avoid any yellow or wilted leaves. Fresh garlic adds great taste. It should be firm and dry. Avoid garlic that is sprouting or soft. These tips can make your Garlic Parmesan Brussels Sprouts shine. For the full recipe, check the previous section. 1. Preheat your oven to 400°F (200°C). This ensures even cooking. 2. Prepare a baking sheet by lining it with parchment paper. This helps with easy cleanup. 3. In a large mixing bowl, combine the halved Brussels sprouts, olive oil, minced garlic, garlic powder, crushed red pepper flakes, salt, and pepper. 4. Toss everything together until the Brussels sprouts are well coated. This step adds flavor. 1. Spread the Brussels sprouts in a single layer on the baking sheet. Avoid crowding them. 2. Roast the sprouts in the preheated oven for about 25-30 minutes. Stir halfway through for even cooking. 3. Check for doneness. The sprouts should be golden brown and tender. If they need more time, roast for a few extra minutes. 1. Once roasted, remove the baking sheet from the oven. 2. Sprinkle grated Parmesan cheese over the hot Brussels sprouts. This helps the cheese melt better. 3. Return the baking sheet to the oven for an additional 5 minutes. This makes the cheese slightly crispy and delicious. 4. Remove from the oven and garnish with fresh chopped parsley before serving. This adds a nice pop of color and freshness. For the full recipe, you can refer back to the beginning. Enjoy your cooking! To boost the taste of your Garlic Parmesan Brussels sprouts, consider adding spices. A pinch of smoked paprika gives a nice smoky flavor. You can also try adding onion powder for depth. Mixing in other veggies can create a colorful dish. Carrots, bell peppers, or red onions pair nicely. Their sweetness balances the sprouts' natural bitterness. If you want options beyond roasting, sautéing or air frying works well. Sautéing gives a nice golden color while keeping the sprouts tender. Air frying makes them crispy without much oil. For even cooking, cut the Brussels sprouts into similar sizes. This helps them roast or fry consistently. Stir them halfway through cooking to avoid burning. When serving, a simple platter looks great. You can place the Brussels sprouts in a bowl and drizzle with more olive oil. For garnishing, sprinkle fresh parsley on top. It adds a pop of color and fresh taste. You might also add lemon zest for a bright finish. For the full recipe, check out the link! {{image_2}} You can easily adapt this dish to fit your diet. For a vegan or dairy-free option, swap out the Parmesan cheese with nutritional yeast. This gives a cheesy flavor without dairy. You can also try using a cashew cream for a rich taste. If you're on a low-carb or keto diet, keep the Brussels sprouts as they are. They are low in carbs and high in fiber. Just skip the cheese, or use a small amount to stay within your carb limit. Want to spice things up? Add more crushed red pepper flakes or a dash of sriracha. This will give your Brussels sprouts a nice kick. If you prefer something sweet, drizzle some maple syrup or balsamic glaze before roasting. This balances the savory garlic and Parmesan. You can take this dish around the world with a few simple changes. For an Italian twist, add balsamic vinegar and fresh herbs like oregano or thyme. This gives a bright flavor that complements the sprouts well. For an Asian-inspired version, mix in soy sauce or sprinkle sesame seeds on top. These additions bring a nutty taste and a different texture. Don't be afraid to get creative and make it your own! For the full recipe, check out the section on ingredients and instructions. To store leftovers, place the Brussels sprouts in an airtight container. They stay fresh in the fridge for about 3 to 4 days. When you're ready to eat them, the best way to reheat is in the oven. Set it to 350°F (175°C). Spread the sprouts on a baking sheet and heat for about 10 minutes. This keeps them crispy and tasty. If you want to freeze Garlic Parmesan Brussels Sprouts, first let them cool completely. Place them in a single layer on a baking sheet and freeze for 1 to 2 hours. Then, transfer the sprouts to a freezer-safe bag or container. They can stay in the freezer for up to 3 months. To thaw, move them to the fridge overnight. Reheat in the oven the same way as before for best results. For the best taste, eat the Brussels sprouts within 3 to 4 days if stored in the fridge. Watch for signs of spoilage, like a sour smell or mushy texture. If they look slimy or have dark spots, it's best to toss them. Always check for freshness to enjoy your Garlic Parmesan Brussels Sprouts at their best. To make Garlic Parmesan Brussels sprouts, follow these steps: 1. Preheat your oven to 400°F (200°C). 2. Trim and halve 1 pound of Brussels sprouts. 3. In a bowl, mix Brussels sprouts with 4 tablespoons of olive oil, 4 minced garlic cloves, 1 teaspoon of garlic powder, and salt and pepper to taste. 4. Spread the mixture on a baking sheet lined with parchment paper. 5. Roast for about 25-30 minutes, stirring halfway through. 6. Add ½ cup of grated Parmesan cheese and roast for another 5 minutes. 7. Garnish with chopped parsley before serving. This simple recipe creates a tasty dish that's easy to love. You can find the Full Recipe for more details. Yes, you can prepare Brussels sprouts ahead of time. Clean and cut them a day before and store them in an airtight container in the fridge. This saves time on busy days. You can also toss them with olive oil and seasonings beforehand. Just cover and chill until ready to roast. This way, your meal prep becomes quick and easy. Garlic Parmesan Brussels sprouts pair well with many dishes. Here are some ideas: - Roast chicken or turkey for a hearty meal. - Grilled salmon adds nice flavor and protein. - Serve with quinoa or rice for a filling side. - Include a fresh salad for a light touch. These options make your meal colorful and balanced. You can make Garlic Parmesan Brussels sprouts healthier by trying these tips: - Use less olive oil or swap for a spray version. - Replace Parmesan with a lower-fat cheese or nutritional yeast. - Skip the red pepper flakes if you want less heat. - Add more veggies like carrots or bell peppers to increase fiber. These changes help you enjoy a tasty dish while keeping an eye on calories. In this post, we explored how to make Garlic Parmesan Brussels Sprouts. We covered the essential ingredients, substitutions, and tips for freshness. I provided step-by-step instructions for preparing and roasting. We discussed flavor enhancements, cooking techniques, and creative variations. Lastly, I shared storage tips to keep them fresh. Overall, these sprouts are tasty and easy to make. You can enjoy them as a side or a healthy snack option.

Garlic Parmesan Brussels Sprouts Simple and Tasty Dish

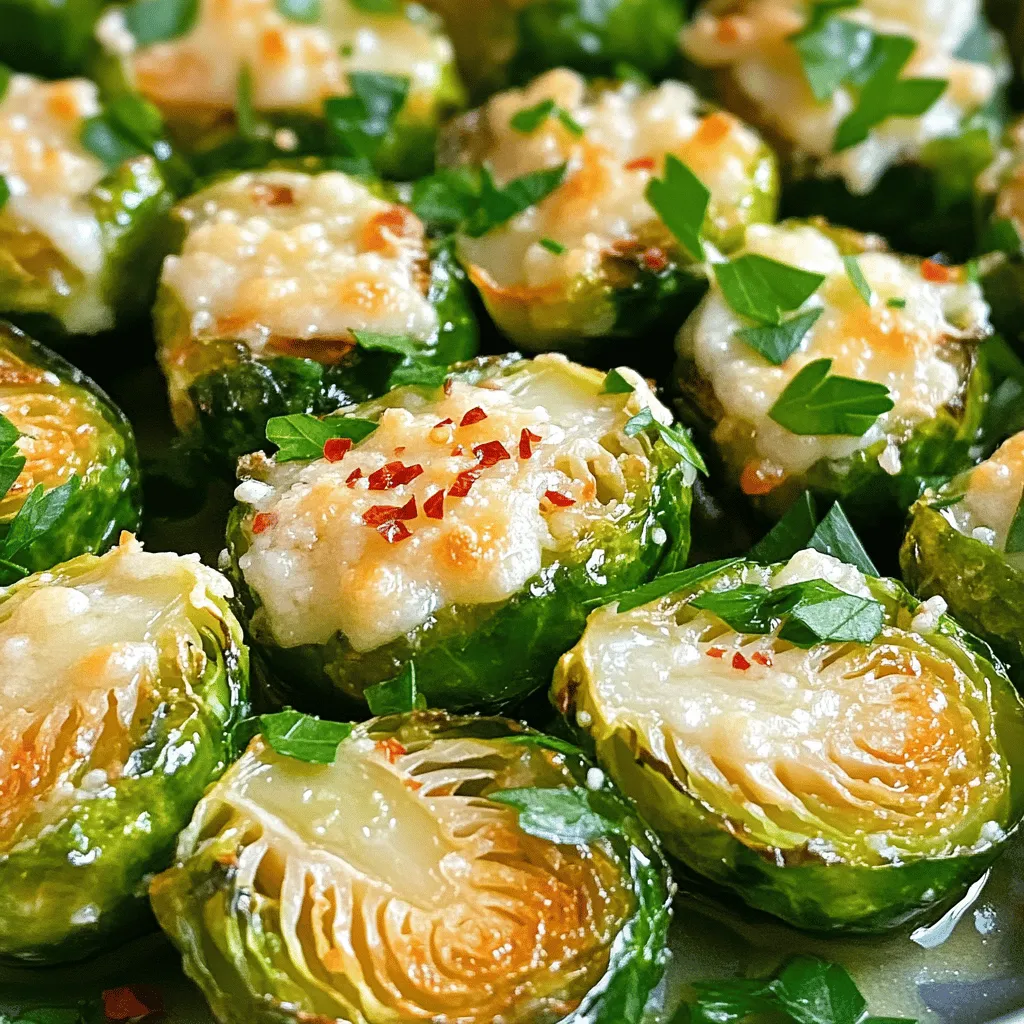
If you’re ready to fall in love with veggies, Garlic Parmesan Brussels Sprouts are a must-try! This simple dish packs

To make tasty Air Fryer Apple Chips, you need just a few simple items. Here’s what you need: - 2 medium-sized apples (choose your favorite variety) - 1 teaspoon cinnamon - 1 tablespoon sugar (optional) - Pinch of salt These ingredients make the perfect blend for a crunchy snack. You can use any apple you like. Sweet apples, like Fuji or Honeycrisp, work great. Tart apples, like Granny Smith, add a nice contrast. The cinnamon adds warmth and depth to the flavor. If you want it sweeter, add sugar. If you prefer a healthier snack, skip the sugar. A pinch of salt helps to enhance the apple's natural taste. Gather these ingredients, and you're ready to create a delicious treat! For detailed steps, check the Full Recipe. - Wash and dry apples. - Slice apples into thin rounds. - Remove apple seeds. Start by washing your apples well. This step ensures they are clean and safe to eat. Once dried, grab a sharp knife or a mandoline slicer. Slice the apples into thin rounds, about 1/8 inch thick. Thin slices cook evenly and get extra crispy. As you slice, take a moment to remove any seeds. This will make your chips tastier and more enjoyable. - Prepare the cinnamon mixture. - Toss apple slices in the mixture. Next, it’s time to make a cinnamon mixture. In a small bowl, combine 1 teaspoon of cinnamon, a pinch of salt, and 1 tablespoon of sugar if you like a sweeter chip. Mix these well. Now, place your apple slices in a larger bowl. Sprinkle the cinnamon mixture over the slices. Toss gently until every slice is coated. This step adds flavor and makes your apple chips delicious. - Preheat air fryer to 350°F (175°C). - Arrange apple slices in the air fryer. - Cooking time and flipping instructions. Now we get to the fun part: air frying! Preheat your air fryer to 350°F (175°C). While it heats, arrange the apple slices in a single layer in the basket. Make sure they don’t overlap so they cook evenly. If you have a lot of slices, you might need to do this in batches. Cook them for about 10-15 minutes. Flip the slices halfway through the cooking time. Start checking at the 10-minute mark. You want them crisp but not burnt. When done, let them cool on a wire rack. This will help them get even crunchier. Enjoy your tasty air fryer apple chips! For the full recipe, check out the earlier section. When making air fryer apple chips, choose the right apples. Some good choices are: - Honeycrisp - Fuji - Gala - Granny Smith Honeycrisp and Fuji are sweet. They give a great taste. Gala apples are also sweet but a bit softer. Granny Smith apples add a nice tartness. You can mix sweet and tart apples for more flavor. To get crispy apple chips, slice the apples thin. Aim for about 1/8 inch thick. Thin slices cook better and crisp up nicely. Use a sharp knife or a mandoline for even cuts. Keep an eye on the cooking time. Start checking at 10 minutes. Flip the slices halfway through. If they aren't crispy yet, let them cook a bit longer. Just don’t let them burn! Adding spices can take your apple chips to the next level. Try these options: - Nutmeg - Ginger - Vanilla extract For sweet chips, use cinnamon and sugar. For savory, try a sprinkle of chili powder or salt. You can even mix sweet and savory spices for a fun twist. Experiment and find your favorite blend. {{image_2}} You can change the taste of your apple chips easily. One fun way is to use spices. Instead of just cinnamon, try adding nutmeg or ginger. They give a warm flavor that pairs well with apples. Just a pinch can make a big difference. Another option is to add extracts. A few drops of vanilla or almond will enhance the flavor. These small changes can make your chips taste unique and exciting. Experiment with these spices and extracts to find your favorite mix. Mixing different fruits can create a tasty twist. Try adding pears with your apples. Pears add a soft sweetness that works well. You can slice them thin and mix with apple slices before air frying. You can also add dried fruits for extra flavor. Raisins or cranberries can bring a nice chewiness to the crunch. This mix of fresh and dried fruit can make your apple chips more interesting. Feel free to explore these combinations to make your snack special. For the full recipe, check out the [Full Recipe]. To keep your apple chips fresh, store them in an airtight container. This helps lock in their crunchiness. You can use glass jars or resealable plastic bags. Make sure to remove all air before sealing. Proper storage can keep your apple chips tasty for about one week. After that, they may lose some crispness. If your apple chips lose their crunch, don't worry! You can easily regain their crispiness. Simply place them in the air fryer at 350°F (175°C) for about 3-5 minutes. This will refresh them without adding extra oil. Check them often to avoid burning. Enjoy your crispy apple chips again just like when they were fresh! Air fryer apple chips can stay fresh for about one week. Store them in an airtight container. This keeps moisture out and helps them stay crunchy. If you notice any softness, they may need to be eaten sooner. For best results, enjoy them within a few days of making. Yes, you can make tasty apple chips without sugar. Simply skip the sugar in the recipe. The natural sweetness of the apples shines through. You can also use spices like cinnamon or nutmeg for flavor. If you want a little sweetness, try a sprinkle of honey or maple syrup after cooking. Some great apples for chips include Fuji, Honeycrisp, and Granny Smith. Fuji apples are sweet and juicy, while Granny Smith adds a nice tartness. Honeycrisp offers a balance of sweet and tart. Choose apples based on your taste. Mix different varieties for a fun flavor twist! You now know how to make delicious air fryer apple chips. Start with your favorite apples and add cinnamon for flavor. The process is simple: slice, coat, and fry for a crispy treat. Don't forget to experiment with different spices or fruit combos. Storing them in an airtight container keeps them fresh. With these tips, you're fully ready to impress friends or enjoy a healthy snack. Get cooking and enjoy your crispy creations!

Air Fryer Apple Chips Crunchy and Tasty Recipe

If you love crunchy snacks, you’ll adore making Air Fryer Apple Chips! This simple recipe transforms fresh apples into tasty

- 8 oz rice noodles - 1 red bell pepper, thinly sliced - 1 cup cucumber, julienned - 1 cup shredded carrots - 1/2 cup red cabbage, thinly sliced - 1/4 cup green onions, chopped - 1/4 cup fresh cilantro, chopped In this salad, rice noodles act as the base. They soak up the flavors well. Fresh vegetables add crunch and color. The red bell pepper brings sweetness. Cucumbers give a refreshing bite. Carrots and red cabbage add vibrant color. Green onions and cilantro give fresh notes. - 1/4 cup creamy peanut butter - 2 tablespoons soy sauce - 2 tablespoons sesame oil - 1 tablespoon honey (or maple syrup for vegan) - 1 tablespoon lime juice - 1 teaspoon grated ginger - 1 clove garlic, minced - Water (to thin the sauce) The peanut sauce makes this dish shine. Creamy peanut butter provides richness. Soy sauce adds saltiness, while sesame oil gives a nutty taste. Honey or maple syrup adds sweetness. Lime juice brightens the flavor. Ginger and garlic add depth and warmth. You can adjust the sauce thickness with water. - 1/4 cup peanuts, chopped (for garnish) - Fresh cilantro Garnishes elevate this salad. Chopped peanuts add crunch. Fresh cilantro enhances the flavor. You can sprinkle these on top for a beautiful finish. For the full recipe, check out the instructions above. Enjoy your tasty and nourishing Thai Peanut Noodle Salad! 1. Preparing the noodles: Start by bringing a pot of water to a boil. Add 8 oz of rice noodles and cook per the package instructions. Usually, this takes about 4 to 6 minutes. Stir occasionally to keep them from sticking. 2. Cooling and rinsing: Once cooked, drain the noodles in a colander. Rinse them under cold water to stop the cooking. This helps keep the noodles firm and chewy. 1. Combining fresh ingredients: In a large bowl, add your fresh veggies: slice 1 red bell pepper, julienne 1 cup of cucumber, shred 1 cup of carrots, and thinly slice 1/2 cup of red cabbage. Then, chop 1/4 cup of green onions and 1/4 cup of fresh cilantro. 2. Preparing for the sauce: Mix all the chopped vegetables together well. This colorful base will give your salad a fresh crunch. 1. Whisking the sauce ingredients: In a separate bowl, combine 1/4 cup of creamy peanut butter, 2 tablespoons of soy sauce, 2 tablespoons of sesame oil, 1 tablespoon of honey (or maple syrup), 1 tablespoon of lime juice, 1 teaspoon of grated ginger, and 1 clove of minced garlic. 2. Adjusting the consistency: Whisk until smooth. If the sauce is too thick, add water a tablespoon at a time until you reach your preferred thickness. 1. Coating the vegetables and noodles: Pour the peanut sauce over the bowl of vegetables. Toss to coat all the veggies with the sauce. 2. Final touches before serving: Add your cooled rice noodles to the salad. Toss gently to combine everything. Serve in a large bowl or individual bowls, and sprinkle 1/4 cup of chopped peanuts on top for a satisfying crunch. For the full recipe, refer to the ingredients and instructions provided earlier! Enjoy your tasty and nourishing Thai Peanut Noodle Salad! - How to achieve the perfect noodle texture: Cook rice noodles until just tender. Drain and rinse them in cold water. This stops the cooking and keeps them from getting mushy. Avoid overcooking, as they can turn sticky and clump together. - Tips for freshness of vegetables: Use fresh, crisp veggies for the best flavor and crunch. Slice bell peppers, cucumbers, and carrots just before serving. This keeps them vibrant and full of nutrients. Store any leftovers in an airtight container to keep them fresh longer. - Ideal serving methods: Serve the Thai peanut noodle salad in a large bowl. This makes it easy for everyone to help themselves. You can also use individual bowls for a more personal touch. A sprinkle of chopped peanuts on top adds a nice crunch. - Pairing with proteins: To make this salad a full meal, add proteins like grilled chicken, shrimp, or tofu. These options boost the nutrition and make the dish even more filling. Grilled salmon also works well and adds a rich flavor. - Preparing ingredients in advance: Chop veggies and make the peanut sauce a day ahead. Keep each component separate until you're ready to eat. This helps maintain the freshness of the salad. - Storage tips for best results: Store the salad in the fridge for up to two days. Keep the dressing in a separate jar. This prevents the noodles and veggies from getting soggy. When ready to serve, toss everything together for a fresh taste. {{image_2}} You can make your Thai Peanut Noodle Salad even better by adding protein. Chicken, tofu, or shrimp all work great. If you want a meat option, grilled chicken adds nice flavor. For a plant-based choice, tofu gives a good texture and absorbs the sauce well. Shrimp cooks fast and adds a lovely seafood touch. You can also adjust for dietary needs. If you want it vegan, just stick with tofu. Want to spice it up? Add chili paste or sriracha for heat. A little goes a long way! You can also try different sauces to change the taste. For a sweeter kick, use teriyaki sauce. For a tangy twist, swap in a lemon-garlic dressing. Each option gives your salad a unique flavor profile. Using local and seasonal veggies can elevate your salad. You could add snap peas in spring or roasted butternut squash in fall. This keeps your dish fresh and exciting. Feel free to swap any ingredients based on what you find at your market. If cucumbers are out of season, try using radishes for crunch instead. Your creativity can lead to delightful new flavors. To keep your Thai Peanut Noodle Salad fresh, store it in an airtight container. This helps prevent moisture loss and keeps the flavors intact. I suggest using glass containers for better preservation. They are durable and easy to clean. When stored properly, the salad lasts about 3 to 5 days in the fridge. Check for signs of spoilage, like a sour smell or slimy texture. If you notice any changes, it's best to throw it away. You can enjoy the salad cold, but if you prefer warm noodles, gently reheat it. Use a microwave or a pan on low heat. Add a splash of water to keep it moist. This salad pairs well with grilled chicken or shrimp for a complete meal. I love using rice noodles for this salad. They have a great texture and soak up flavors well. You can find them in many stores. Look for wide rice noodles or vermicelli. They cook quickly and are gluten-free. Just remember to rinse them under cold water after cooking. This stops the cooking process and keeps them firm. Yes, you can make the peanut sauce ahead of time. It stores well in the fridge. Just mix the peanut butter, soy sauce, sesame oil, honey, lime juice, ginger, and garlic as listed in the recipe. Place it in an airtight container. When you need it, just give it a good stir. If the sauce is too thick, add water to thin it out a bit. Absolutely! This salad is perfect for meal prep. You can store it in the fridge for a few days. Just keep the noodles and veggies separate from the sauce until you’re ready to eat. This keeps everything fresh and crunchy. When you’re ready, mix it all together. Enjoy a tasty meal anytime! This blog post covered how to make a delicious rice noodle salad. We explored key ingredients, from rice noodles and fresh veggies to creamy peanut sauce. I shared tips for preparing, storing, and enjoying your salad. Remember, you can customize it with proteins or spices for extra flavor. This dish is not only tasty but also easy to prep ahead. Enjoy your cooking journey and make this salad a staple in your meals!

Thai Peanut Noodle Salad Tasty and Nourishing Dish

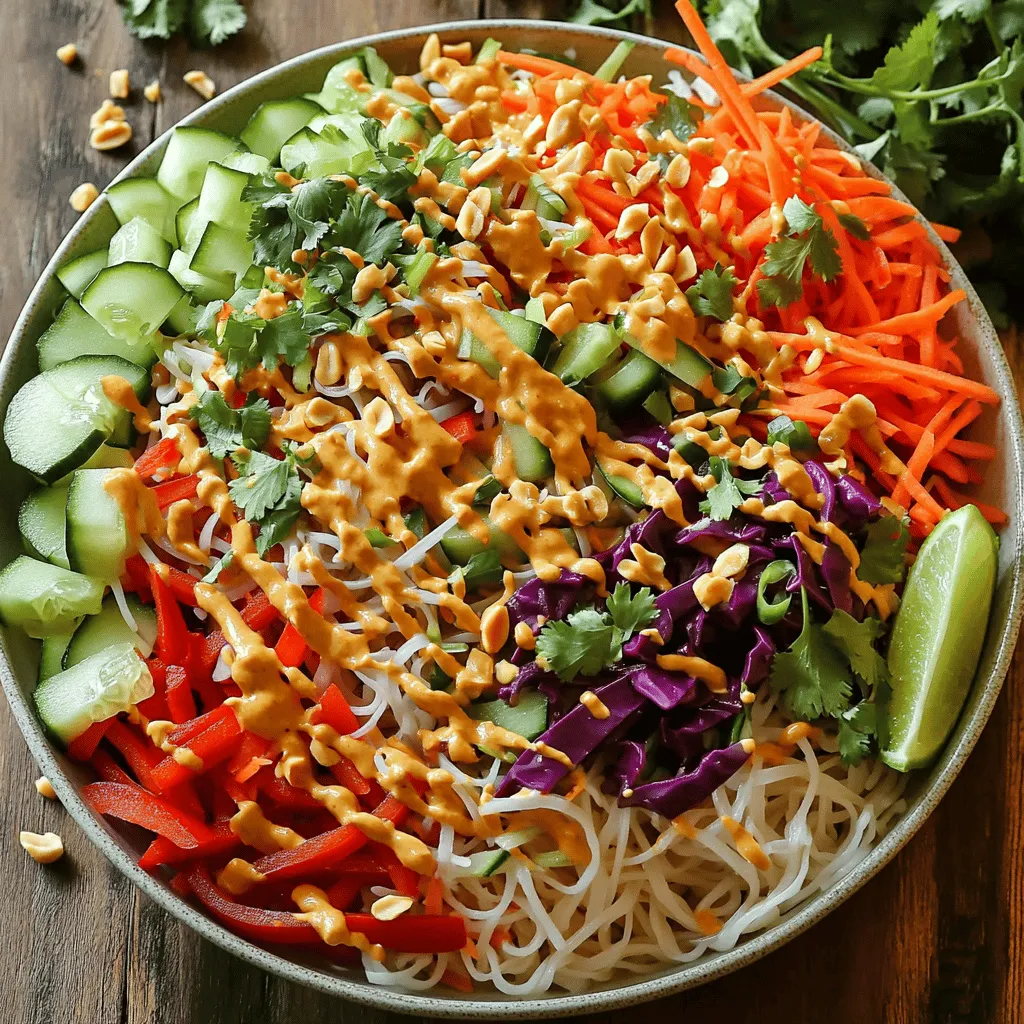
Looking for a refreshing dish that’s both tasty and nourishing? You’ll love this Thai Peanut Noodle Salad! It’s packed with

The right ingredients make all the difference in tasty air fryer mozzarella sticks. Here’s what you need: - 12 mozzarella cheese sticks - 1 cup all-purpose flour - 2 large eggs, beaten - 1 cup breadcrumbs (preferably panko for extra crunch) - 1 teaspoon garlic powder - 1 teaspoon onion powder - 1 teaspoon Italian seasoning - ½ teaspoon salt - ½ teaspoon black pepper - Cooking spray Each ingredient plays a key role. The mozzarella sticks provide that gooey, melty center. The flour helps the egg stick, while the egg binds the breadcrumbs. Panko breadcrumbs give a crispier texture, which is essential for that perfect crunch. Spices like garlic powder, onion powder, and Italian seasoning add layers of flavor. Salt and black pepper enhance the taste, while cooking spray ensures a golden finish. Using high-quality ingredients leads to exceptional results. {{ingredient_image_1}} - Optional: Slice mozzarella sticks in half for shorter portions. - Set up a breading station with three shallow dishes. In the first dish, add one cup of all-purpose flour. This will help the egg stick to the cheese. In the second dish, place two beaten eggs. This will coat the sticks and add richness. In the third dish, mix one cup of breadcrumbs, one teaspoon of garlic powder, one teaspoon of onion powder, one teaspoon of Italian seasoning, half a teaspoon of salt, and half a teaspoon of black pepper. This mixture gives flavor and crunch to your sticks. - Dredge the cheese sticks in flour. Make sure each stick is fully coated. - Dip the floured sticks in the beaten eggs. Let the extra egg drip off. - Coat the sticks with the breadcrumb mixture. Press gently so the breadcrumbs stick well. This three-step process ensures each stick gets a good layer. The flour helps the egg stick, and the breadcrumbs create that crispy outer layer. - Freeze the coated sticks for at least 30 minutes. This step helps them keep their shape while cooking. - Preheat your air fryer to 390°F (200°C) for about 4-5 minutes. This ensures a hot cooking environment. - Cook the sticks for 6-8 minutes. Flip them halfway through for even cooking. You want the sticks to turn golden brown and crispy. Keep an eye on them as they cook. When done, let them cool for a minute. Serve warm with marinara sauce for dipping. Enjoy your delicious snack! To make your mozzarella sticks extra crispy, use panko breadcrumbs. Panko is lighter and gives a great crunch. This makes your snack feel gourmet! Freezing the sticks is also key. It keeps them from melting too fast in the air fryer. Freeze them for at least 30 minutes before cooking. You can use olive oil instead of cooking spray. Olive oil can add a nice flavor, too. Just remember to spray lightly for the best results. This helps keep the sticks crispy while cooking. Want to kick up the flavor? Add extra spices! You can try chili powder for heat or paprika for smokiness. Different cheeses can also change the taste. Provolone or sharp cheddar can make your sticks pop with flavor. Mix and match to find your favorite! Pro Tips Freeze for Firmness: Freezing the coated mozzarella sticks for at least 30 minutes not only helps keep them from melting too quickly but also ensures a firmer texture when cooked. Panko Perfection: Using panko breadcrumbs instead of regular breadcrumbs will give your mozzarella sticks an extra crunch that is hard to resist. Cooking Spray Boost: A light spray of cooking spray before air frying helps to achieve that golden brown color and crispy texture. Serve Fresh: For the best flavor and texture, serve the mozzarella sticks immediately after cooking while they are still warm and crispy. {{image_2}} You can switch up the cheese for fun. Provolone brings a nice twist. It has a creamy texture and melts well. Cheddar adds a sharp flavor that many love. Mixing cheeses can also be a great idea. Try a blend of mozzarella and cheddar for extra depth. Just remember, the more cheese, the more stretch! Want a kick? Add some chili flakes to the breadcrumb mix. It gives a nice heat without being too strong. You can also try different herbs. Basil and oregano can add a fresh taste. Experiment with dried herbs or even a bit of paprika. This way, you can make your mozzarella sticks unique. If you don't have an air fryer, you can still enjoy these sticks. Baking them in the oven is a good option. Preheat your oven to 400°F (200°C) and bake for about 10-12 minutes. Watch them closely for that golden color. Another method is deep frying. Heat oil in a pan and fry until crispy. This will give you a rich flavor, but it adds more oil. Choose the method that fits your taste best! To keep your leftover mozzarella sticks fresh, place them in an airtight container. Refrigerate them within two hours of cooking. They stay tasty for up to three days. If you want to eat them later, consider freezing instead. You can freeze mozzarella sticks before cooking. After breading, lay them on a baking sheet. Freeze for about 30 minutes until firm. Then, transfer them to a freezer bag. They can stay frozen for up to three months. To reheat, cook them from frozen in the air fryer at 390°F for 8-10 minutes. To keep the texture crispy, reheating in the air fryer works best. Preheat the air fryer to 390°F. Cook the sticks for 4-5 minutes until hot. Avoid using the microwave, as it can make them soggy. - Answer: 6-8 minutes at 390°F (200°C) Cooking mozzarella sticks in the air fryer is quick and easy. In just 6-8 minutes, you can enjoy a crispy snack. Make sure to preheat your air fryer before cooking. This helps the sticks cook evenly and get that perfect golden-brown color. - Answer: Yes, but panko provides a crunchier texture. You can use regular breadcrumbs if needed. However, I recommend panko for its extra crunch. Panko breadcrumbs come from Japanese cuisine and add a light, airy texture. They help create a crispier outer layer on your mozzarella sticks. - Answer: Marinara sauce, ranch dressing, or spicy aioli. Dipping sauces make mozzarella sticks even better! Marinara sauce is a classic choice. It offers a sweet and tangy flavor. Ranch dressing is a creamy option that many enjoy. If you want a kick, try spicy aioli. Each sauce brings out the flavor of the cheese. - Answer: Yes, you can prepare and freeze them to cook later. You can make mozzarella sticks ahead of time. After breading, freeze them for later use. This way, you can have a tasty snack ready when you want it. Just cook them directly from the freezer when you're ready to eat! This guide shared a simple way to make crispy mozzarella sticks. We covered the ingredients, steps, and helpful tips. You learned about variations to boost flavor and how to store leftovers. The air fryer method ensures a crunchy texture without much oil. With these tips, you can enjoy delicious snacks that impress. Get creative with cheese and spices to make them your own. Enjoy every bite and share with friends or family!

Air Fryer Mozzarella Sticks Crispy and Flavorful Snack

Are you craving a crispy and flavorful snack that’s easy to make? Look no further! Air Fryer Mozzarella Sticks combine

To make Cheesy Spinach Artichoke Dip, you need these simple ingredients: - 1 cup fresh spinach, chopped - 1 cup canned artichoke hearts, drained and chopped - 1 cup cream cheese, softened - 1/2 cup sour cream - 1 cup shredded mozzarella cheese - 1/2 cup grated Parmesan cheese - 1 clove garlic, minced - 1/2 teaspoon onion powder - 1/2 teaspoon red pepper flakes (optional) - Salt and pepper to taste - Tortilla chips or sliced baguette for serving You can easily swap some items to fit your taste or needs: - Use frozen spinach if fresh is not available. Just thaw and drain it well. - Swap canned artichokes with fresh ones, but make sure to cook them first. - Cream cheese can be replaced with Greek yogurt for a lighter option. - If you don’t have mozzarella, try other cheeses like cheddar or gouda. - Skip the red pepper flakes for a milder dip, or use jalapeños for more heat. This dip is rich and tasty, but it also has some calories. Here’s a quick breakdown per serving (assuming 8 servings): - Calories: 175 - Total Fat: 12g - Saturated Fat: 7g - Cholesterol: 40mg - Sodium: 250mg - Total Carbohydrates: 6g - Dietary Fiber: 1g - Sugars: 1g - Protein: 7g Knowing the nutritional info helps you enjoy this dip while keeping balance in your diet. {{ingredient_image_1}} 1. Preheat your oven to 350°F (175°C). This step warms up your oven. 2. In a large bowl, mix the softened cream cheese, sour cream, and minced garlic. Stir until the mix is smooth. 3. Add in the chopped spinach and artichoke hearts. 4. Stir in the mozzarella and Parmesan cheeses. This makes the dip cheesy and rich. 5. Sprinkle in the onion powder, red pepper flakes, salt, and pepper. Mix until all ingredients blend well. 1. Transfer the mixture to a baking dish. Spread it out evenly. 2. Bake in the oven for 20-25 minutes. Look for bubbling and a golden top. 3. Remove the dish from the oven. Let it cool for a few minutes before serving. - Soften the cream cheese before mixing. This helps it blend easily. - Mix ingredients well to avoid clumps. - Use a spatula to fold in the spinach and artichokes gently. This keeps the mix light and fluffy. You can prepare Cheesy Spinach Artichoke Dip ahead of time. Mix all the ingredients as stated in the recipe. Once mixed, place it in a baking dish. Cover it with plastic wrap and store it in the fridge. When you're ready to bake, just remove it from the fridge. Let it sit for about 15 minutes before baking. This helps it bake evenly. Tortilla chips and sliced baguette make great dips. Both options are crunchy and hold up well. You can also try fresh veggies like carrots, celery, or bell peppers. They add color and crunch. For a fun twist, use pita chips or crackers. Each choice gives a unique taste and texture. Serve the dip warm for the best flavor. Place it in the center of your table. Surround it with your chosen dips. This makes it easy for guests to grab a bite. You can also add small bowls of olives or pickles for extra flavor. Pairing drinks with the dip can elevate the experience. A light white wine or sparkling water works well. Don’t forget napkins for easy cleanup! Pro Tips Use Fresh Ingredients: Fresh spinach and high-quality artichokes will enhance the flavor and texture of your dip. Add Extra Cheese: For a cheesier dip, consider adding more mozzarella or a blend of your favorite cheeses. Serve Immediately: This dip is best enjoyed warm, so serve it right after baking for the ultimate cheesy experience. Customize Spice Level: Adjust the amount of red pepper flakes based on your preference for heat. {{image_2}} You can add a creamy twist with avocado. Simply mash one ripe avocado and mix it into your dip. This adds a rich texture and a fresh taste. Avocado pairs well with spinach and artichokes. It also gives a nice green color. Your guests will love this new layer of flavor. If you like heat, try adding jalapeños or diced green chiles. Mix in one finely chopped jalapeño to the dip for a spicy kick. You can also add extra red pepper flakes. This version wakes up the classic dip and adds excitement. Serve it with tortilla chips for a fun, zesty treat. To make a vegan dip, swap out dairy for plant-based products. Use vegan cream cheese and sour cream instead. Nutritional yeast can add a cheesy flavor without dairy. Blend in chopped spinach and artichokes just like the original. This option is great for guests with dietary needs and tastes just as good! After your party, store any leftover dip in an airtight container. Keep it in the fridge. It’s best to eat it within three days. If you want to enjoy it later, make sure it cools first. This keeps the texture nice. To reheat your dip, place it in a baking dish. Preheat your oven to 350°F (175°C). Bake for about 15 minutes, or until it’s hot and bubbly again. You can also use a microwave. Heat it in short bursts of 30 seconds, stirring between each burst. This helps to warm it evenly. You can freeze Cheesy Spinach Artichoke Dip, but it might change texture. To freeze, put it in a freezer-safe container. Make sure it’s tightly sealed. Label with the date too. It can last up to two months in the freezer. When you want to eat it, thaw it in the fridge overnight before reheating. Yes, you can use frozen spinach. Just make sure to thaw it first. Squeeze out the extra water after thawing. This keeps your dip from getting too watery. Frozen spinach works well in this recipe. It still gives you that great spinach flavor. This dip pairs well with many tasty options. I suggest using tortilla chips for a crunchy bite. Sliced baguette is also a great choice. You can even try it with fresh veggies like carrots and celery. These add a nice, healthy crunch to your dip experience. To add more heat, try red pepper flakes. You can add more than 1/2 teaspoon if you like it hot. Another option is to mix in some diced jalapeños. They will bring a nice kick. Adjust the spices to match your taste. Enjoy experimenting with the flavors! This blog post covered how to make a tasty Cheesy Spinach Artichoke Dip. We explored key ingredients, substitutions, and nutritional details. I shared clear steps for preparation and baking, along with tips for a smooth mix. We also discussed how to make it ahead, serve it at parties, and various tasty variations like vegan options. In the end, this dip is great for any gathering. Enjoy experimenting and make it your own!

Cheesy Spinach Artichoke Dip Flavorful Party Treat

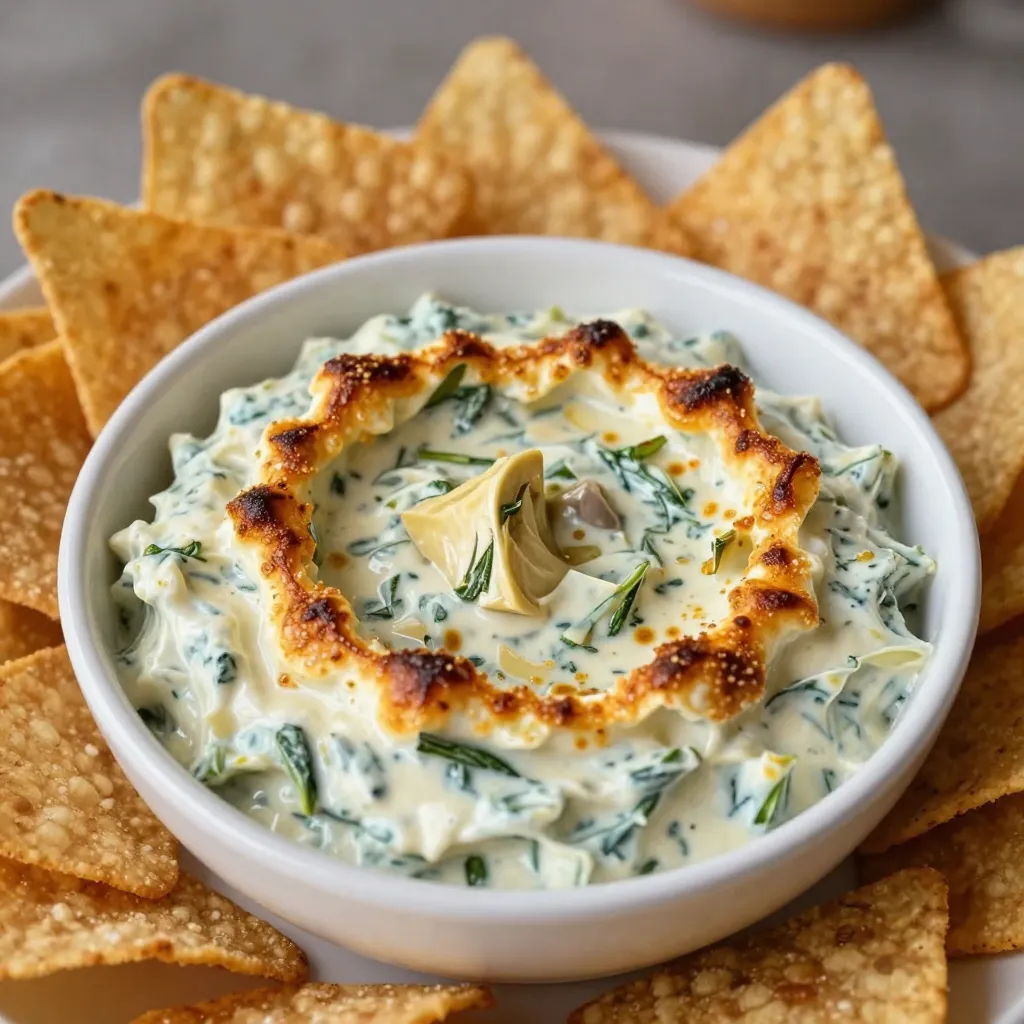
Are you ready to elevate your snack game? This Cheesy Spinach Artichoke Dip is the perfect party treat! Packed with

For Small Batch Chocolate Chip Cookies, you will need the following ingredients: - 1/4 cup unsalted butter, softened - 1/4 cup brown sugar, packed - 1/4 cup granulated sugar - 1/2 teaspoon vanilla extract - 1/4 teaspoon baking soda - 1/4 teaspoon salt - 1 cup all-purpose flour - 1/2 cup chocolate chips - 1/4 cup chopped walnuts (optional) You can also customize your cookies with optional ingredients. Try adding: - A pinch of cinnamon for warmth - Sea salt on top for balance - Different types of chocolate chips, like dark or milk Getting the right measurements is key for perfect cookies. Here are the exact amounts: - 1/4 cup butter should be softened, not melted. - Use packed brown sugar for the best taste. - The flour should be spooned into the measuring cup, not scooped. If you need substitutions, here are some options: - For gluten-free cookies, use a gluten-free flour blend. - To make it vegan, swap butter for coconut oil and use a flax egg. - If you don’t have brown sugar, you can mix granulated sugar with a bit of molasses. These tips help ensure your small batch cookies turn out just right! For the full recipe, check the details above. Before you start baking, get your kitchen ready. Gather all your tools and ingredients. You will need a mixing bowl, a whisk, a baking sheet, and parchment paper. Preheat your oven to 350°F (175°C). This step is key for perfect cookies. Line your baking sheet with parchment paper to prevent sticking. 1. Mix the Butter and Sugars: In a medium bowl, cream together the softened butter, brown sugar, and granulated sugar. Mix until the mixture is light and fluffy. This takes about 2-3 minutes. Tip: Make sure your butter is soft. Cold butter will not mix well. 2. Add Vanilla: Pour in the vanilla extract and mix well. This adds a lovely flavor to your cookies. 3. Prepare Dry Ingredients: In another bowl, whisk the baking soda, salt, and flour together. This helps to evenly distribute the baking soda and salt. Tip: Sift the flour for a lighter cookie. 4. Combine Mixtures: Gradually add the dry ingredients to the wet mixture. Stir until just combined. Do not overmix; this can make the cookies tough. 5. Fold in Chocolate Chips: Gently fold in the chocolate chips and walnuts if you choose to use them. This step adds texture and richness to your cookies. 6. Scoop the Dough: Using a tablespoon or cookie scoop, drop rounded portions of dough onto the prepared baking sheet. Leave space between each cookie for spreading. 7. Bake: Place the baking sheet in the oven and bake for 10-12 minutes. Look for lightly golden edges, but keep the centers soft. Tip: Check your cookies at the 10-minute mark to avoid overbaking. 8. Cool the Cookies: After baking, remove the cookies from the oven. Let them cool on the baking sheet for a few minutes. Then transfer them to a wire rack to cool completely. This small batch recipe yields six delicious cookies. For the full recipe, refer to the ingredients list above. Enjoy these delightful treats! To make the best small batch chocolate chip cookies, focus on texture and flavor. Start with softened butter. This helps create a creamy mix. Mix the butter with sugars well. Aim for a light and fluffy texture. This is key for great cookies. Use fresh ingredients. Old baking soda can ruin your cookies. Ensure your flour is measured correctly. Spoon it into your measuring cup and level it off. This gives you the right amount. If you want a chewy cookie, bake just until the edges are golden. The centers should look a bit soft. They will firm up as they cool. Many people forget to preheat their oven. This can lead to uneven baking. Always check that your oven is hot before you start. Another common mistake is overmixing the dough. This can make your cookies tough. Mix until just combined for a softer bite. Also, avoid skipping the cooling time. Letting cookies cool on the baking sheet is important. If you rush this, they may break apart. Lastly, watch the baking time. Every oven is different, so check a minute early. Cooling your cookies properly is vital. After baking, let them cool on the baking sheet for 5 minutes. This helps them set. Then, transfer them to a wire rack. This allows air to flow around them. They stay crispier this way. For serving, a simple plate works well. You can stack them high for a fun look. Add a glass of milk for a classic touch. Want to impress? Drizzle melted chocolate over the top. This adds a nice finish. You can also sprinkle sea salt for a sweet and salty combo. For the full recipe, check out the details above. {{image_2}} You can change up the flavors in your small batch chocolate chip cookies. Try using dark chocolate chips instead of regular milk chocolate. Dark chocolate adds a rich taste that many love. White chocolate is another fun option. It brings a sweet, creamy bite. You can also mix in other tasty elements. Dried fruit like cranberries or cherries adds a nice twist. Chopped nuts, like pecans or almonds, can boost crunch. Feel free to get creative! You can even add a sprinkle of sea salt on top before baking. This brings out the flavors even more. Making this recipe fit your diet is easy. To make it gluten-free, swap the all-purpose flour for gluten-free flour. This change keeps the cookies soft and chewy. If you need dairy-free cookies, use coconut oil instead of butter. You can also find dairy-free chocolate chips at stores. These adjustments keep the taste great without dairy. For those who want vegan cookies, replace the butter with a vegan spread. Use flax eggs instead of regular eggs. Mix one tablespoon of ground flaxseed with three tablespoons of water. Let it sit until it thickens. This makes a perfect egg substitute. Low-sugar options are also available. You can use less sugar or a sugar substitute like stevia. Just remember that this may change the cookie's texture. Always test a small batch first. Check out the Full Recipe for more details on making these delightful treats! To keep your small batch chocolate chip cookies fresh, use a few simple steps. First, let the cookies cool completely after baking. This prevents steam buildup, which can make them soggy. Next, place them in an airtight container. If you stack cookies, add parchment paper between layers to avoid sticking. Store the container at room temperature. These cookies stay fresh for about 3 to 5 days. Freezing cookies is easy and keeps them tasty. To do this, place your cooled cookies on a baking sheet in a single layer. Freeze them for about 1 hour. Once frozen, transfer them to a freezer-safe bag or container. This helps keep their shape. You can freeze cookies for up to 3 months. When you want to enjoy a cookie, take one out and let it thaw at room temperature. If you prefer warm cookies, you can reheat them in the oven. Preheat your oven to 350°F (175°C) and bake for about 5-7 minutes. This brings back that fresh-baked taste. Enjoy your treats! Yes, you can double the small batch recipe. When you scale up, you might notice a change in texture. Cookies can become too thick or dry if you double the ingredients without adjusting. To keep them soft and chewy, try these tips: - Use an extra tablespoon of butter. - Watch the baking time closely. Start with the same time, then check for doneness. - Make sure to mix well but don’t overmix the dough. If your cookies don’t spread, a few things might be wrong. Here are the common causes: - Cold butter: Make sure your butter is softened but not melted. - Too much flour: Measure flour with care. Use the spoon-and-level method. - Baking soda issues: Check if your baking soda is fresh. Old baking soda won’t work well. - Dough chilling: If you chill the dough for too long, it can cause cookies to stay thick. To achieve a softer texture in your cookies, follow these tips: - Use more brown sugar than white sugar. Brown sugar has moisture, which helps keep cookies soft. - Add an extra egg yolk. This adds fat and makes cookies chewy. - Don’t overbake. Take the cookies out when the edges are golden, but the centers are soft. They will continue to cook on the pan. In this post, we explored how to make small batch chocolate chip cookies. We covered everything from necessary ingredients to measurements and substitutions. I shared step-by-step baking instructions to guide you through each part. You learned tips for perfect cookies and common mistakes to avoid. We also looked at fun variations and proper storage methods. With this easy guide, you can bake delicious cookies with confidence. Enjoy your baking journey and have fun trying new flavors!

Small Batch Chocolate Chip Cookies Delightful Treat

Discover the joy of baking with my Small Batch Chocolate Chip Cookies! Perfect for satisfying sudden cravings or sharing with

To make One Bowl Brownie Cookies, gather these key ingredients: - 1 cup semi-sweet chocolate chips - 1/2 cup unsalted butter - 1 cup granulated sugar - 2 large eggs - 1 teaspoon vanilla extract - 1/2 cup all-purpose flour - 1/4 cup unsweetened cocoa powder - 1/2 teaspoon baking powder - 1/4 teaspoon salt - 1 cup chopped walnuts or pecans (optional) These ingredients come together to create a rich and chewy cookie that has a brownie-like texture. You can customize your cookies with these fun add-ins: - 1/2 cup white chocolate chips - 1/2 cup milk chocolate chips - 1/2 cup dried cherries or cranberries - 1/2 cup shredded coconut Feel free to mix and match these options based on your taste. They add extra flavor and fun textures to your cookies. Before you start baking, make sure you have these tools: - Microwave-safe bowl - Mixing spoon or spatula - Measuring cups and spoons - Baking sheet - Parchment paper - Wire rack for cooling Having the right equipment makes your baking process smooth and enjoyable. Once you gather everything, you’ll be ready to create these delicious treats. Check out the Full Recipe for more details on the process! First, gather all your ingredients. You will need chocolate chips, butter, sugar, eggs, and more. I find it helps to measure everything out first. This way, you won’t miss any ingredient. Next, preheat your oven to 350°F (175°C). Line a baking sheet with parchment paper. This keeps the cookies from sticking. In a medium microwave-safe bowl, add the semi-sweet chocolate chips and butter. Microwave them together in 20-second bursts. Stir between each burst until smooth. Once melted, let it cool for a minute. Then, stir in the granulated sugar until it mixes well. Add the eggs, one at a time. Mix well after each egg. Then, add the vanilla extract. In another bowl, whisk the flour, cocoa powder, baking powder, and salt together. Gradually add this to the chocolate mix. Stir until just combined. If you want, fold in chopped nuts for a nice crunch. Use a tablespoon to scoop the dough. Drop the cookie balls onto the prepared baking sheet, leaving space between them. They will spread while baking. Bake for 10-12 minutes. The edges should set, but the centers will be soft. Remove them from the oven and let them cool on the sheet for 5 minutes. After that, transfer them to wire racks to cool completely. For the full recipe, check the details above. To make your brownie cookies chewy, focus on the baking time and ingredients. Use semi-sweet chocolate chips for rich flavor. The butter adds moisture, while sugar keeps them soft. Mix just until combined to avoid tough cookies. One common mistake is overmixing the batter. Stir gently after adding dry ingredients. Another mistake is baking too long. Check them at 10 minutes. The centers should look a bit soft. This helps keep them chewy. Baking time is key for chewy cookies. Start with 10 to 12 minutes at 350°F. Use the edges as your guide. They should be set, but the center can still look soft. Cool them slightly on the sheet before moving them. This will help them firm up just right. For the full recipe, check the instructions above. {{image_2}} You can make your One Bowl Brownie Cookies even more fun by adding flavors. Mint is a great choice. Just mix in a few drops of mint extract. This gives a fresh twist. You can also try peanut butter. Swirl in some creamy peanut butter for a rich taste. Both options add new life to the classic recipe. Nuts can make your cookies crunchy and tasty. I love using walnuts or pecans because they add great texture. You can also try almonds or hazelnuts. Chop them up and fold them into the dough before baking. This gives each bite a nice crunch and a nutty flavor. Fruits can add a burst of flavor to your cookies. Cherries taste great when mixed in. You can use fresh or frozen cherries, just chop them up. Raspberries are another fantastic option. They add a sweet and tart flavor. Just make sure to use them gently so they don’t break apart too much. These fruity additions can turn your cookies into a special treat. For the Full Recipe, check back in the earlier sections. To keep your brownie cookies fresh, store them in an airtight container. Place a piece of parchment paper between layers to avoid sticking. They stay good at room temperature for up to five days. If you live in a humid area, put them in the fridge. This helps them last longer and keeps them chewy. You can freeze brownie cookies for later treats. First, let them cool completely. Then, place them in a single layer on a baking sheet and freeze for about an hour. After that, transfer them to a freezer bag. They can stay frozen for up to three months. When ready, just take out what you need and let them thaw at room temperature. To enjoy your brownie cookies warm, preheat your oven to 350°F (175°C). Place the cookies on a baking sheet for about five minutes. This warms them up and makes them soft again. You can also microwave them for about 10 seconds. Just be careful not to overheat, as they can become too soft. For the best taste, enjoy them fresh! For the full recipe, check out the One Bowl Brownie Cookies section. You can easily make these brownie cookies gluten-free. Just swap the all-purpose flour with a gluten-free blend. Use a mix that works well for baking. I suggest using a blend with xanthan gum. This will help the cookies hold together. Always check the package to make sure it’s safe for baking. Yes, using dark chocolate is a great choice! Dark chocolate gives a richer taste. It also makes the cookies taste more intense. Just keep in mind that dark chocolate can be less sweet. If you prefer sweeter cookies, you may want to add a bit more sugar. Adjust to your taste, and you’ll love the result! To keep your brownie cookies fresh, store them in an airtight container. This helps them stay soft and chewy. You can keep them at room temperature for up to five days. If you want to save them longer, freeze them. Just place them in a freezer-safe bag. They can last up to three months this way. When you crave one, let it thaw at room temperature. Enjoy every bite! For the full recipe, check out the detailed steps and ingredients to make these delicious cookies. You learned how to make delicious brownie cookies step by step. We covered key ingredients and optional mix-ins, along with essential tools for baking. I shared helpful tips for chewier cookies and common mistakes to avoid. These cookies have endless flavor possibilities, like mint or peanut butter. Storing your cookies properly ensures they stay fresh. With all this info, you can bake with confidence. Enjoy sharing your tasty treats!

One Bowl Brownie Cookies Easy and Chewy Recipe

Craving rich, chewy cookies that are easy to make? You’re in the right place! My One Bowl Brownie Cookies recipe

To make these tasty No Bake Chex Peanut Butter Bars, you need: - 3 cups rice Chex cereal - 1 cup creamy peanut butter - 1/2 cup honey or maple syrup - 1/2 cup powdered sugar - 1/2 cup mini chocolate chips (plus extra for topping) - 1 teaspoon vanilla extract - A pinch of salt If you want to change the sweetness, try these options: - Agave syrup for a lower glycemic index. - Coconut sugar for a more natural taste. - Brown rice syrup for a unique flavor. All these sweeteners work well. Just keep the same amount as honey. Toppings can take your bars to the next level. Here are some fun ideas: - Drizzle melted chocolate for a rich finish. - Sprinkle crushed nuts for crunch. - Add dried fruit for a fruity twist. Mix and match to find your favorite topping! Explore these options to make your bars unique and delicious. To make No Bake Chex Peanut Butter Bars, gather your ingredients first. You will need rice Chex cereal, creamy peanut butter, honey or maple syrup, powdered sugar, mini chocolate chips, vanilla extract, and a pinch of salt. This mix gives the bars their sweet and crunchy texture. Next, melt the peanut butter and honey. Use a medium saucepan on low heat. Stir them constantly until they blend together smoothly. This step is crucial. If you let it get too hot, it can burn. Once melted, add the vanilla extract and powdered sugar. Stir until the mixture is smooth and creamy. Now, it’s time to mix the melted peanut butter with the cereal. Pour the peanut butter mixture over the rice Chex cereal in a large bowl. Use a spatula to gently fold the cereal until it is well coated. This is where the magic happens! Stir in the mini chocolate chips, spreading them evenly through the mix. After that, line an 8x8 inch baking dish with parchment paper. This helps with easy removal later. Transfer the mixture into the dish and press it down firmly. Make sure it is tightly packed. Top with some extra mini chocolate chips and press them in lightly. Refrigerate for at least an hour before slicing. For the full recipe, check the section above. To get the best texture in your Chex peanut butter bars, make sure to pack the mixture tightly. After pouring the mixture into your baking dish, use the back of a spatula or your hands. Press down firmly to create a solid layer. This step helps the bars hold together well when you cut them. If they are too loose, they may fall apart. One common mistake is to skip the refrigeration step. Chill the bars for at least one hour. This allows them to set properly. Another mistake is not mixing the ingredients well. Ensure the peanut butter mixture coats every piece of cereal. If you don’t mix it enough, some bites may be dry or bland. These bars are great for any occasion. You can cut them into squares or rectangles. Serve them on a nice platter for a party. Drizzle melted chocolate on top for an extra touch. Pair them with a glass of milk for a tasty treat. For a fun twist, add some nuts or dried fruit on the side. Enjoy these easy no-bake bars anytime! For the full recipe, check the previous section. {{image_2}} You can make these bars even better by adding mix-ins. Try nuts, dried fruit, or seeds. Chopped walnuts or almonds add crunch and flavor. Dried cranberries or raisins give a sweet bite. You can even add coconut flakes for a tropical twist. Just remember to keep the total amount about one cup so the bars hold together well. If you want to switch up the base flavor, you can use other nut butters. Almond butter or cashew butter works great. Sunflower seed butter is a good choice for nut-free diets. Each option will change the taste a bit, but it remains delicious. Just ensure the texture is similar, so the bars stay firm. To boost flavor, you can add spices or extracts. A dash of cinnamon adds warmth. A bit of cocoa powder gives a rich chocolate flavor without extra chocolate chips. For a minty twist, add a few drops of peppermint extract. These small changes can make your bars unique and fun to eat. For the full recipe and more ideas, check out the provided link. To keep your No Bake Chex Peanut Butter Bars fresh, store them in an airtight container. I recommend placing parchment paper between layers to avoid sticking. This helps keep them nice and neat. Store them in the fridge if you want them to stay firm and cool. You can freeze these bars for later. Cut them into squares before freezing. Wrap each piece in plastic wrap, then place them in a freezer-safe bag. They can last for up to three months in the freezer. When you're ready to enjoy, just thaw them in the fridge for a few hours. These bars can last up to one week in the fridge. If you keep them well-sealed, they stay tasty and fresh. After a week, you might notice a change in texture, but they will still be safe to eat. For the best taste, enjoy them within this time frame. Yes, you can use other cereals. Corn Chex or honey nut Chex work well. They add a nice crunch and flavor. Just keep the same amount, three cups. This change can create a fun twist in taste. Feel free to experiment with your favorite cereals. To make these bars vegan, swap honey for maple syrup. Use dairy-free chocolate chips instead of regular ones. Also, ensure your peanut butter has no added ingredients that are not vegan. These swaps keep the taste and texture great while being plant-based. Enjoy the same yummy treat! If you don’t have powdered sugar, you can make your own. Take granulated sugar and blend it until fine. You can use a food processor or a blender for this. You can also use coconut sugar for a healthier option. Just remember, it may change the flavor slightly. This blog post covers key steps to make tasty peanut butter bars. We discussed ingredients, tips, and variations for flavor. You learned how to combine your cereal, avoid mistakes, and store leftovers well. Remember, you can swap ingredients or make these bars vegan. Choose toppings and mix-ins based on your taste. With these insights, you can enjoy personalized snacks at home. The fun is in trying different flavors and sharing them with friends. Happy cooking!

No Bake Chex Peanut Butter Bars Easy and Tasty Treat

If you love tasty treats and easy recipes, you’re in for a delight! No Bake Chex Peanut Butter Bars are

Older posts
Newer posts
← Previous Page1 … Page47 Page48 Page49 … Page84 Next →

dsad

© 2026 easycookingbite • Built with GeneratePress

Our Policies

  • Copyright Policy
  • Cookie Policy
  • GDPR Policy
  • Privacy Policy
  • Disclaimer
  • Terms Of Use

More Information

  • Home
  • About
  • Contact
  • Appetizers
  • Dessert
  • Dinner
  • Drinks
©2026, easycookingbite About Back To Top