Skip to content
DisclaimerTerms Of UseGDPR PolicyCookie Policy

easycookingbite

  • Home
  • Drinks
  • Appetizers
  • Dinner
  • Dessert
  • About
  • Contact
  • Privacy Policy
DisclaimerTerms Of UseGDPR PolicyCookie Policy

NO-ING-IMG

- 1 can (15 oz) chickpeas, drained and rinsed - 1 tablespoon olive oil - 1 teaspoon garlic powder - 1 teaspoon smoked paprika - 1/2 teaspoon cayenne pepper (adjust for spice level) - 1/2 teaspoon salt - 1/2 teaspoon black pepper - 1 cup mixed nuts (almonds, cashews, walnuts) - 1/2 cup dried cranberries or raisins - 1/4 cup pumpkin seeds (pepitas) You need these ingredients to make Crispy Roasted Chickpea Snack Mix. The chickpeas give the mix its base and protein. The olive oil helps the spices stick and creates crispiness. The spices add flavor. Garlic powder gives a savory twist. Smoked paprika adds depth. Cayenne pepper adds heat, but you can adjust this to your taste. Salt and black pepper round out the flavors. Mixed nuts and dried fruits add crunch and chewiness. Pumpkin seeds boost the nutrition even more. - 1 teaspoon maple syrup (optional, for sweetness) - Additional spices for flavor variations If you want a touch of sweetness, try adding maple syrup. It balances the spices and makes the mix even more fun to eat. You can also play with other spices. Try cumin for warmth or cinnamon for a sweet twist. These additions can change the whole taste of the mix. This snack is easy to prepare and perfect for sharing. You can find the full recipe in this article to guide you through the steps. 1. Preheat the oven and prepare chickpeas Start by preheating your oven to 400°F (200°C). This heat helps the chickpeas become crispy. Next, open a can of chickpeas. Drain them well in a colander and rinse them under cold water. This removes any excess sodium. Use a clean kitchen towel to pat the chickpeas dry. Removing moisture is key for crispiness. 2. Seasoning the chickpeas In a mixing bowl, add the dried chickpeas. Pour in 1 tablespoon of olive oil. Then add 1 teaspoon of garlic powder, 1 teaspoon of smoked paprika, 1/2 teaspoon of cayenne pepper, 1/2 teaspoon of salt, and 1/2 teaspoon of black pepper. Toss everything well so each chickpea gets coated. This mix gives a great flavor boost. 1. Roasting the chickpeas Spread the seasoned chickpeas in a single layer on a baking sheet lined with parchment paper. Place them in the oven and roast for 25-30 minutes. Don't forget to shake the pan halfway through. This helps them cook evenly. You want them to be golden brown and crispy. 2. Toasting the nuts While your chickpeas roast, grab a dry skillet. Over medium heat, add 1 cup of mixed nuts. Stir frequently for about 5-7 minutes. You want them to become fragrant but not burnt. Toasting enhances their flavor. 1. Mixing the roasted chickpeas with nuts and fruits Once the chickpeas are done, take them out and let them cool slightly. If you like a hint of sweetness, drizzle 1 teaspoon of maple syrup over them and toss to coat. In a large mixing bowl, combine the roasted chickpeas, toasted nuts, 1/2 cup of dried cranberries or raisins, and 1/4 cup of pumpkin seeds. Mix everything well until it is evenly combined. 2. Allowing the mixture to cool Let the snack mix cool completely before storing. This step keeps it crunchy. Once cool, transfer your snack mix to an airtight container. This will keep it fresh longer. Enjoy your healthy crunch from this crispy roasted chickpea snack mix! For a detailed view of steps, check the Full Recipe. To get that perfect crunch, drying the chickpeas is key. After rinsing them, pat them dry with a clean towel. This step helps remove excess moisture. If they stay wet, they won’t crisp up. Baking time is also important. Depending on your oven, you may need to adjust the time. Start checking at 25 minutes. Look for a golden-brown color. If they aren’t crispy yet, give them a few more minutes. Adding spices can really boost the flavor. Consider trying cumin or chili powder for a kick. You can also mix in some Italian herbs for a different taste. If you want sweetness, you can add honey or agave instead of maple syrup. This can make the snack mix more delightful. Experiment with these flavors to find what you love! For presentation, use colorful bowls or mason jars. This makes the mix look fun and inviting. You can even add a sprig of rosemary or mint on top for a fresh touch. Pair your snack mix with drinks like sparkling water or herbal tea. It also goes great with a light beer or a glass of white wine. Enjoy it during movie nights or as a healthy snack anytime! {{image_2}} You can make your crisp roasted chickpeas sweet or savory. For a sweet touch, add maple syrup or cinnamon. If you want a savory kick, try adding more spices like cumin or chili powder. You can also mix in different nuts and seeds. Almonds, cashews, and walnuts work great. You can even add sunflower or sesame seeds for extra crunch. If you need a vegan or gluten-free snack, this recipe fits the bill. Chickpeas are naturally vegan and gluten-free. For nut-free options, skip the mixed nuts or use seeds instead. You can replace nuts with more chickpeas or try using puffed grains. This keeps your snack tasty and safe for those with allergies. If you're short on time, you can find store-bought crispy roasted chickpea mixes. Many brands offer great options. Look for those with clean ingredients and no added sugars. Some recommended brands include Biena and The Good Bean. They provide the same crunch and flavor, making them a quick and tasty alternative to homemade. Store your crispy roasted chickpea snack mix in an airtight container. This keeps air out and helps the mix stay crunchy. You can use glass jars or plastic containers with tight-fitting lids. Make sure the mix is completely cool before sealing. This prevents moisture build-up, which can ruin the texture. If stored properly, your snack mix lasts about one week. After that, it may lose its crunch and flavor. Signs of spoilage include a soft texture or an off smell. If you notice these signs, it’s best to toss the mix and make a fresh batch. To re-crisp the mix, spread it on a baking sheet. Heat your oven to 350°F (175°C) and bake for about 5-10 minutes. Keep an eye on it to prevent burning. If the mix is stale, try adding a touch of olive oil. This can help bring some life back to your snack mix. How do I know when the chickpeas are done roasting? You will know the chickpeas are done when they are golden brown and crispy. They should be firm and crunchy, not soft. Shake the pan halfway through to help them roast evenly. Keep an eye on them in the last few minutes to avoid burning. Can I make this recipe in advance? Yes, you can make this snack mix in advance. Just store it in an airtight container after it cools down. It stays fresh for about a week. You can enjoy it anytime as a quick snack! What are the health benefits of chickpeas? Chickpeas are high in protein and fiber. They help keep you full and satisfied. They also contain vitamins and minerals like iron and folate. Eating chickpeas can support heart health and aid digestion. How many calories are in a serving of this snack mix? A serving of this snack mix has roughly 200 calories. This count may vary based on the nuts and fruits you use. It’s a healthy choice for a crunchy snack! Can I use other legumes instead of chickpeas? Yes, you can use other legumes like black beans or lentils. Just make sure to adjust the cooking time since they may take less time to roast. What can I replace nuts with in this recipe? If you need a nut-free option, try using seeds like sunflower or sesame seeds. These will still add crunch and flavor to your mix! You now know how to create a tasty roasted chickpea snack mix. We covered essential and optional ingredients, plus easy preparation steps. You learned tips for perfect crispiness and flavor boosts. Explore variations to suit your taste and dietary needs. Finally, I shared best practices for storage and reheating. Making this snack is simple, fun, and healthy. Enjoy your tasty creation at any time!

Crispy Roasted Chickpea Snack Mix for Healthy Crunch

Snack time just got a major upgrade! If you crave a crunchy treat that’s both tasty and healthy, look no

To make the delightful pumpkin spice cream cheese swirl muffins, gather these fresh ingredients: - 1 cup canned pumpkin puree - 1/2 cup vegetable oil - 1 cup brown sugar - 1/2 cup granulated sugar - 3 large eggs - 1 teaspoon vanilla extract - 1 3/4 cups all-purpose flour - 1 teaspoon baking powder - 1/2 teaspoon baking soda - 1 tablespoon pumpkin pie spice - 1/2 teaspoon salt - 8 oz cream cheese, softened - 1/4 cup powdered sugar - 1 egg yolk - 1 teaspoon cinnamon for sprinkling on top (optional) These ingredients come together to create a warm and cozy treat. The canned pumpkin puree gives the muffins a rich flavor and moisture. Vegetable oil keeps them soft and fluffy. Brown sugar adds depth, while granulated sugar provides sweetness. Using three eggs helps bind everything. Vanilla extract adds a lovely aroma. All-purpose flour is the base, and baking powder and baking soda help them rise. Pumpkin pie spice brings that classic fall flavor, while salt balances it all. The cream cheese and powdered sugar mix creates the dreamy swirl. An egg yolk makes this mixture smooth and rich. You can sprinkle cinnamon on top for extra warmth. This list gives you everything you need to bake these muffins. You can find the full recipe in our recipe section. Enjoy the fun of baking! First, set your oven to 350°F (175°C). This temperature helps the muffins rise perfectly. Next, prepare your muffin tin. You can use paper liners, or grease the tin with butter or oil. This step keeps the muffins from sticking. In a large bowl, combine the canned pumpkin puree, vegetable oil, brown sugar, and granulated sugar. Whisk them together until smooth. Then, add three large eggs and a teaspoon of vanilla extract. Mix again until everything is well combined. In another bowl, sift together the all-purpose flour, baking powder, baking soda, pumpkin pie spice, and salt. Sifting breaks up clumps and adds air. Slowly, add this dry mix to the wet ingredients. Stir gently until just combined. Be careful not to overmix; this keeps the muffins light. In a medium bowl, blend the softened cream cheese with powdered sugar and an egg yolk. Mix until creamy and smooth. This mixture adds a rich flavor to your muffins. Begin by spooning a small amount of pumpkin batter into each muffin cup, filling them about one-third full. Next, add a dollop of the cream cheese mixture on top. Then, finish with more pumpkin batter until each cup is about two-thirds full. This layering creates a beautiful swirl. Place the muffin tin in the preheated oven and bake for 18 to 20 minutes. To check if they are done, insert a toothpick into the center. It should come out clean. After baking, cool the muffins in the tin for five minutes. Finally, transfer them to a cooling rack to cool completely. Enjoy the delicious aroma filling your kitchen! To make great muffins, avoid overmixing. When you combine the wet and dry ingredients, mix just until you see no dry flour. This helps keep your muffins soft and fluffy. Overmixing can make them tough. Check for doneness using a toothpick. Insert it into the center of a muffin. If it comes out clean, your muffins are ready. If it has wet batter, bake them a little longer. You can add other spices for more flavor. Consider nutmeg or ginger to complement the pumpkin spice. Chopped nuts or chocolate chips also work well. Serve these muffins warm. A little butter on top makes them even better. You can also enjoy them with a cup of coffee or tea. One common mistake is measuring ingredients incorrectly. Use dry measuring cups for flour and sugar. Always level off the top to avoid using too much. Watch out for baking mishaps. Don't open the oven too soon. This can cause your muffins to sink. Trust the timer and let them bake undisturbed until they are done. For the full recipe, check out the Pumpkin Spice Cream Cheese Swirl Muffins. {{image_2}} You can easily make these muffins fit your diet. For gluten-free options, use a gluten-free flour blend. This swap keeps the taste and texture intact. Many brands offer great mixes that work well in baking. For vegan substitutions, replace the eggs with flax eggs. Just mix one tablespoon of ground flaxseed with two and a half tablespoons of water. Let it sit until it thickens. Use dairy-free cream cheese to keep the cream cheese swirl creamy and delicious. Want to add a twist? Chocolate chips can take these muffins to a new level. Just fold in half a cup of chocolate chips into the batter. The chocolate pairs well with pumpkin spice. You can also incorporate nuts or dried fruit. Chopped walnuts or pecans add a nice crunch. Dried cranberries or raisins give a sweet bite. Just mix in about a half cup of your choice to the batter for a fun surprise. Change up the spices for different seasons. Instead of pumpkin pie spice, try cinnamon, nutmeg, or even ginger. Each spice adds its own flair. You can adapt these muffins for holidays too. For Thanksgiving, add a sprinkle of nutmeg. For Halloween, use orange food coloring in the swirl for extra fun. Each change brings a new taste to enjoy. For the full recipe, check out the details above. To keep your Pumpkin Spice Cream Cheese Swirl Muffins fresh, store them at room temperature. Place them in an airtight container. This helps keep them moist and soft for up to three days. You can also use a zip-top bag. Just be sure to squeeze out as much air as possible. If you want to keep them even fresher, you can wrap each muffin in plastic wrap before placing them in the container or bag. If you want to save your muffins for later, freezing is a great option. To freeze, let the muffins cool completely. Then, wrap each muffin tightly in plastic wrap. Place them in a freezer-safe bag or container. This way, they can last for up to three months. When you're ready to eat one, take it out and let it thaw at room temperature. If you want a warm muffin, reheat it in the microwave for about 15-20 seconds. How long do these muffins last? When stored properly, they stay fresh for up to three days at room temperature and up to three months in the freezer. Watch for signs of spoilage. If you see mold or if they smell off, it’s best to throw them away. Enjoy your muffins while they’re fresh for the best taste and texture! For the full recipe, check out the original source. Yes, you can use fresh pumpkin! Fresh pumpkin gives a different taste and texture. It is often more moist and has a richer flavor. To use fresh pumpkin, cook and puree it first. Make sure to drain excess water for the best results. To make the muffins moist, try these tips: - Use more oil or add applesauce. - Avoid overmixing the batter; it can make them dry. - Bake them just until a toothpick comes out clean. - Let the muffins cool in the pan for a few minutes before moving them. If you're out of cream cheese, try these options: - Mascarpone cheese for a richer taste. - Greek yogurt for a tangy flavor. - Silken tofu for a dairy-free option. These substitutes change the taste and texture, but they still work well! To check if the muffins are done, use a toothpick. Insert it in the center of a muffin. If it comes out clean, they are ready. If the toothpick has wet batter on it, bake for a few more minutes. Yes, you can make these muffins ahead! Here’s how: - Bake the muffins and let them cool completely. - Store them in an airtight container for up to three days. - You can also freeze them for up to three months. Just thaw them before serving. For the full recipe, check out the details above! This blog post explored how to make delicious pumpkin muffins. We started with a list of ingredients, then moved through each step of mixing, baking, and cooling. I shared tips to enhance flavor and avoid common mistakes. You learned about variations to suit dietary needs and how to store your muffins for later. In conclusion, making pumpkin muffins is fun and rewarding. Follow these steps, and enjoy a tasty treat at home. You'll impress everyone with your baking skills!

Pumpkin Spice Cream Cheese Swirl Muffins Delight

Fall is here, and there’s no better way to celebrate than with Pumpkin Spice Cream Cheese Swirl Muffins! You’ll love

To make a tasty lemon poppy seed yogurt loaf, gather these items: - 1 ½ cups all-purpose flour - 1 tablespoon poppy seeds - 1 teaspoon baking powder - ½ teaspoon baking soda - ¼ teaspoon salt - ½ cup granulated sugar - ½ cup plain yogurt (Greek or regular) - 2 large eggs - ¼ cup vegetable oil - Zest of 1 lemon - 2 tablespoons lemon juice - ½ teaspoon vanilla extract These ingredients give the loaf a light, fluffy texture and a bright lemon taste. When picking your ingredients, focus on freshness. Here are some tips: - Flour: Check the expiration date. Fresh flour gives better texture. - Lemon: Choose firm lemons. They should feel heavy and have a bright color. - Eggs: Look for eggs with clean, uncracked shells. Check the sell-by date for freshness. - Yogurt: Go for plain yogurt with no added sugars. Check the date for freshness. - Sugar: Granulated sugar should be dry and free from lumps. Fresh ingredients make a huge difference in flavor and texture. If you have dietary needs, here are some easy swaps: - Gluten-free: Use a gluten-free all-purpose flour blend instead of regular flour. - Dairy-free: Replace yogurt with a plant-based yogurt, like almond or coconut. - Egg-free: Use flax eggs. Mix 1 tablespoon of flaxseed meal with 2.5 tablespoons of water, let it sit for 5 minutes before adding. - Sugar-free: Try a sugar substitute like monk fruit or stevia for sweetness. These substitutions keep the loaf delicious while meeting dietary needs. For the complete recipe, check out the Full Recipe. Start by preheating your oven to 350°F (175°C). This step is key for even baking. Next, take a 9x5 inch loaf pan and grease it well. I like to use butter or cooking spray for this. After greasing, line the bottom with parchment paper. This makes it easy to remove your loaf later. In a medium bowl, whisk together your dry ingredients. Combine 1 ½ cups of all-purpose flour, 1 tablespoon of poppy seeds, 1 teaspoon of baking powder, ½ teaspoon of baking soda, and ¼ teaspoon of salt. This mix creates a nice base for your loaf. Set this bowl aside. Now, grab a large mixing bowl. Add ½ cup of granulated sugar, ½ cup of plain yogurt, 2 large eggs, ¼ cup of vegetable oil, the zest of 1 lemon, 2 tablespoons of lemon juice, and ½ teaspoon of vanilla extract. Whisk these together until smooth. Once mixed, it’s time to combine the two bowls. Gradually add the dry mix to the wet mix. Fold gently with a spatula, but don’t overmix. A few lumps are fine. Pour your batter into the prepared loaf pan. Smooth the top with a spatula. Place the pan in your preheated oven. Bake for 45 to 50 minutes. Your loaf is done when a toothpick inserted in the center comes out clean and the top is golden brown. Once baked, take the pan out of the oven. Let it cool for about 10 minutes in the pan. Then, remove the loaf from the pan and place it on a wire rack to cool completely. Enjoy the delightful smell as it cools! For the full experience, check out the Full Recipe. To get a soft and moist loaf, use yogurt in your mix. Yogurt adds great moisture. When mixing, do not overdo it. A few lumps are okay. This keeps the loaf light. Also, let your batter rest for about 10 minutes before baking. This helps the flour absorb moisture better. To boost the lemon flavor, use fresh lemons for zest and juice. The zest gives a bright taste, while fresh juice adds tang. If you want more lemony goodness, add a bit more zest. You can even add a little lemon extract for an extra kick. This makes each bite burst with lemony joy. One common mistake is not measuring ingredients carefully. Use proper measuring cups for dry and wet items. Another is baking at the wrong temperature. Make sure your oven is preheated to 350°F. Lastly, avoid opening the oven door too early. This can cause the loaf to collapse. Follow these tips for a perfect Lemon Poppy Seed Yogurt Loaf! For the full recipe, check the earlier section. {{image_2}} You can boost the flavor and crunch by adding nuts or seeds. Chopped walnuts or almonds work well. They add a nice texture to the soft loaf. You can also use sunflower seeds or pumpkin seeds for a nut-free option. Just fold them into the batter before pouring it into the pan. This simple twist makes your lemon poppy seed yogurt loaf even more delightful. A glaze can add a touch of sweetness and shine. I love mixing powdered sugar with lemon juice for a bright glaze. Just combine one cup of powdered sugar with two tablespoons of lemon juice. Drizzle it over the cooled loaf. You can also add a bit of vanilla extract for extra flavor. This glaze makes each slice look stunning and taste even better. While lemon is a star in this loaf, you can switch it up. Try using orange or lime zest and juice instead. Each citrus brings its own unique taste. Orange gives a sweet, fruity twist, while lime adds a zesty kick. Experiment with what you like best. Mixing citrus flavors can create a fun and exciting loaf every time. For the full recipe, check the earlier section. If you have leftover lemon poppy seed yogurt loaf, store it well. Wrap the loaf in plastic wrap. This keeps it moist. You can also place it in an airtight container. Store it at room temperature for up to three days. If you want it to last longer, refrigerate it. Just remember, the fridge can dry it out. To freeze your loaf, first, let it cool completely. Slice the loaf into pieces for easy access. Wrap each slice in plastic wrap tightly. Then, place the slices in a freezer bag. Remove as much air as possible. Label the bag with the date. Your loaf can stay fresh in the freezer for up to three months. When you’re ready to enjoy it, thaw it in the fridge overnight or at room temperature. If your lemon poppy seed yogurt loaf becomes stale, don't worry. You can easily refresh it. Preheat your oven to 300°F (150°C). Wrap the loaf in aluminum foil to keep it moist. Heat it in the oven for about 10 to 15 minutes. This will warm it up and revive the flavors. You can also drizzle a bit of lemon juice over the slices for extra zest. Enjoy your loaf freshly baked again! Your lemon poppy seed yogurt loaf lasts about 3 to 4 days at room temperature. Wrap it in plastic wrap or store it in an airtight container. If you want it to last longer, keep it in the fridge. In the fridge, it stays fresh for up to a week. Just remember to let it warm up a bit before serving for the best taste. Yes, you can make this recipe in mini loaf pans! Use two or three mini pans, depending on their size. Adjust the baking time to about 25-30 minutes. Check for doneness with a toothpick. If it comes out clean, your mini loaves are ready. This is a fun way to share with friends or enjoy different flavors. You can serve this loaf with a variety of tasty options. Consider pairing it with fresh fruit, like berries or sliced peaches. A dollop of whipped cream or Greek yogurt adds creaminess. For a little crunch, try some nuts or granola on the side. These options enhance the flavor and make your meal more fun. If you want a sweet touch, drizzle some lemon glaze on top. For the full recipe, check the details above. This blog post covered all you need to know about lemon poppy seed yogurt loaf. We explored key ingredients, helpful tips for freshness, and ways to accommodate dietary needs. I provided step-by-step instructions and essential tips for perfect texture and flavor. Variations let you customize your loaf, while storage tips ensure it stays fresh longer. With this knowledge, you can confidently bake a delicious lemon poppy seed yogurt loaf. Enjoy the process and have fun experimenting with flavors!

Lemon Poppy Seed Yogurt Loaf Simple and Flavorful Delight

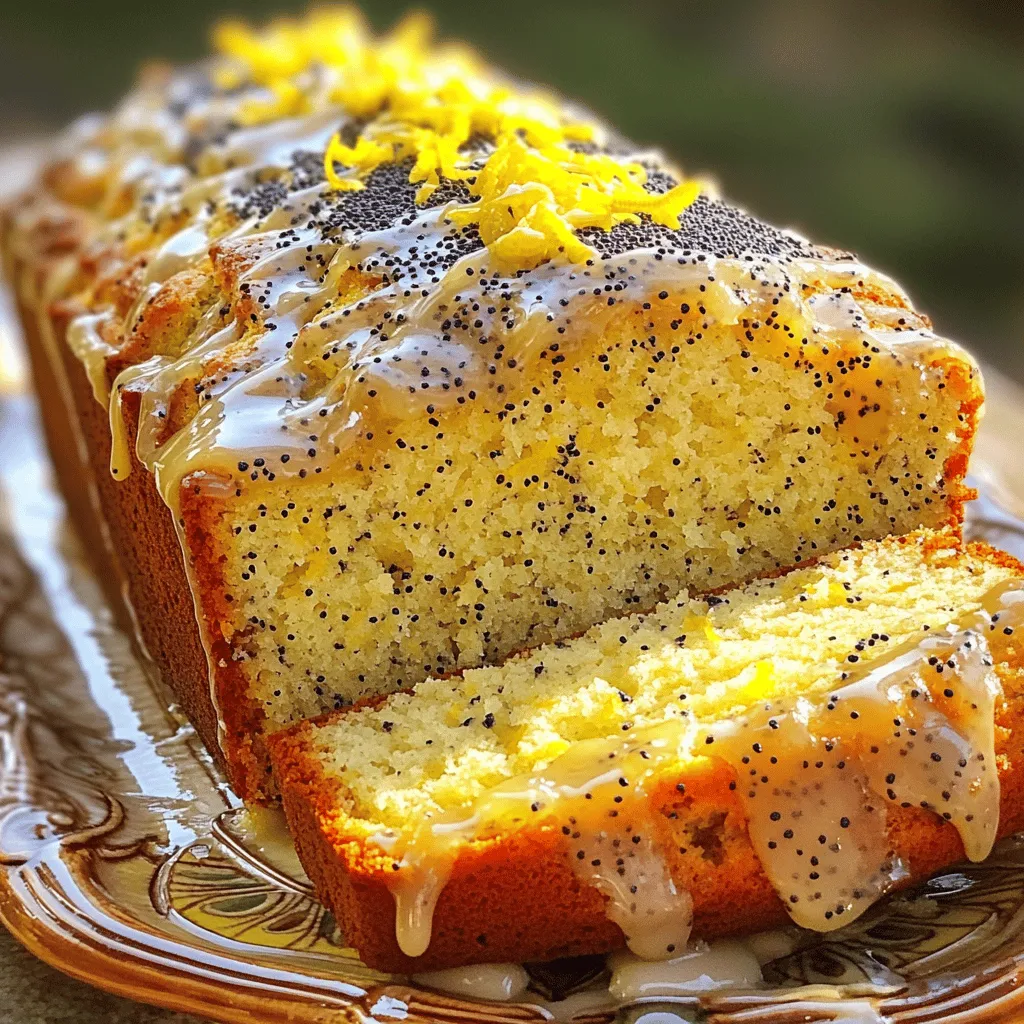
Looking for a simple and flavorful treat? This Lemon Poppy Seed Yogurt Loaf is your answer! Bursting with bright lemon

To make Honey Mustard Chicken and Rice Skillet, you need: - 1 lb (450g) boneless, skinless chicken thighs, cut into bite-sized pieces - 1 tablespoon olive oil - 1 cup long-grain white rice - 2 cups chicken broth - 1/4 cup honey - 1/4 cup Dijon mustard - 1 teaspoon garlic powder - 1 teaspoon onion powder - 1/2 teaspoon smoked paprika - 1 teaspoon dried thyme - Salt and pepper to taste - 1 cup frozen peas - 2 green onions, sliced (for garnish) These ingredients create a tasty, easy dish. The chicken thighs add juicy flavor. The rice soaks up the yummy sauce. Honey and mustard give it a sweet and tangy kick. The seasonings are key to this dish. Garlic powder and onion powder add depth. Smoked paprika gives a little warmth. Dried thyme brings a hint of earthiness. For garnishing, I use green onions. They add a crisp finish and a pop of color. You can also sprinkle some fresh herbs if you want. You can swap out some ingredients if needed. Instead of chicken thighs, try chicken breasts for a leaner option. You can also use quinoa or brown rice for a healthier twist. If you want a vegan version, replace chicken with chickpeas or tofu. Use vegetable broth instead of chicken broth. The honey can be swapped for maple syrup or agave nectar for a vegan touch. For the full recipe, check the section above! First, gather all your ingredients. You need chicken thighs, olive oil, and spices. I like to cut the chicken into bite-sized pieces. This helps them cook evenly. Heat a large skillet over medium-high heat. Pour in one tablespoon of olive oil. Once hot, add the chicken and season it with salt and pepper. Cook the chicken for about 5 to 7 minutes. You want it golden brown and cooked through. Once done, take the chicken out and set it aside on a plate. In the same skillet, add the uncooked rice. Toast the rice for about 2 minutes. Stir it often to avoid burning. This step boosts the rice’s flavor. Now, pour in 2 cups of chicken broth. Bring it to a gentle simmer. While that happens, mix together honey, Dijon mustard, garlic powder, onion powder, smoked paprika, and dried thyme in a bowl. Once the broth is simmering, stir in your honey mustard mix. Then, return the cooked chicken to the skillet. Cover the skillet and turn down the heat to low. Let it cook for 15 to 20 minutes. This allows the rice to soak up all the flavors. When the rice is tender, add in one cup of frozen peas. Stir gently to mix them in. Cover the skillet again and let them heat for about 5 minutes. Once everything is ready, fluff the rice with a fork. Mix the peas well and ensure the chicken is spread throughout. For an extra touch, garnish with sliced green onions. You can serve this dish right in the skillet or plate it out for a nice meal. Enjoy your Honey Mustard Chicken and Rice Skillet Delight! For the full recipe, check out the recipe section. To cook rice perfectly, start with rinsing it. Rinse it under cold water until it runs clear. This step removes extra starch and helps keep it fluffy. Use a 2:1 ratio of chicken broth to rice. This ensures the rice cooks well and absorbs great flavor. Once the broth simmers, cover the skillet tightly. This keeps the steam in, cooking the rice evenly. After 15-20 minutes, check if the rice is tender. If it isn’t, add a splash of broth and cook a few more minutes. To boost your honey mustard flavor, add some fresh herbs. Chopped parsley or chives work great. You can also try adding a splash of apple cider vinegar. This adds a nice tang. If you like heat, mix in a pinch of cayenne pepper or red pepper flakes. These little tweaks can change the whole dish. For a richer taste, swap half the Dijon mustard with whole-grain mustard. This will add a nice texture and depth. Store any leftovers in an airtight container. This keeps your Honey Mustard Chicken and Rice fresh for up to three days in the fridge. To reheat, use a skillet on low heat. Add a splash of broth or water to prevent sticking. Stir often until heated through. If you want to save it for longer, freeze portions in single-serving bags. This way, you can enjoy it later without losing flavor. {{image_2}} You can switch up the protein in this dish. Chicken is great, but you can try turkey or pork. Both options work well with the honey mustard sauce. For a lighter touch, use shrimp. Just cook them until they turn pink and tender. If you want a quick dinner, rotisserie chicken saves time. Just shred it and mix it in at the end. For a vegetarian or vegan version, use tofu or tempeh. These proteins soak up the sauce well. Press and cube the tofu, then sauté it until golden. Cook it the same way as chicken. You can also use chickpeas. They add protein and texture. For a grain base, consider quinoa or farro instead of rice. Both add a nutty flavor and extra nutrients. You have options for rice too. Long-grain white rice is classic, but brown rice adds fiber. If you prefer, try jasmine or basmati rice for a fragrant twist. Just keep in mind that cooking times may vary. Adjust the broth amount and cooking time as needed. For a fun twist, use cauliflower rice for a low-carb meal. Just sauté it with the other ingredients until tender. You can find the full recipe to guide you through these variations. After making your Honey Mustard Chicken and Rice Skillet, let it cool. Transfer the skillet to an airtight container. You can also use a glass dish with a lid. Store it in the fridge for up to three days. Make sure to label the container with the date. This helps you keep track of freshness. To reheat, place the skillet back on the stove over low heat. Add a splash of chicken broth or water to avoid drying out. Stir gently and heat until warm. You can also use the microwave. Heat in short bursts, stirring often to ensure even heating. Cover the dish to keep moisture in. If you want to freeze your meal, let it cool completely first. Portion it into freezer-safe containers. Leave some space at the top for expansion. Seal tightly and label with the date. You can freeze it for up to three months. Thaw it in the fridge overnight before reheating. This keeps the flavors fresh and delicious. For the complete recipe, check the Full Recipe section. It takes about 40 minutes to cook Honey Mustard Chicken and Rice Skillet. This includes 10 minutes to prep and 30 minutes to cook. You will spend about 5-7 minutes browning the chicken first. Then, you'll toast the rice and simmer it with broth. Finally, let everything cook together for 15-20 minutes until the rice is tender. Yes, you can use brown rice instead of white rice. Brown rice takes longer to cook. It usually needs about 45-50 minutes. Make sure to adjust the amount of broth. You may need to add a little more liquid to get it just right. The flavor will be a bit nuttier and heartier, which can work well with the honey mustard sauce. You can serve this dish with a fresh salad or steamed vegetables. Consider a light cucumber salad or roasted broccoli. You might also enjoy it with some crusty bread to soak up the sauce. For a fun twist, pair it with a side of mashed potatoes or corn on the cob. The options are endless! For the full recipe, check out the Honey Mustard Chicken & Rice Skillet. In this article, we explored the delicious recipe for Honey Mustard Chicken and Rice Skillet. We looked at the main ingredients, seasonings, and some tasty alternatives. I shared step-by-step instructions to make cooking easy. You also learned tips for perfect rice and clever storage ideas. Finally, I discussed variations to fit your taste and dietary needs. Enjoy trying this recipe yourself, and remember, a little creativity makes meals even better. Happy cooking!

Honey Mustard Chicken and Rice Skillet Delight

Looking for a quick and tasty meal? Honey Mustard Chicken and Rice Skillet Delight is your answer! This dish combines

To make Quick Garlic Parmesan Pretzel Bites, you need the following items: - 1 can of refrigerated pizza dough - 1/4 cup baking soda - 1 cup water - 4 tablespoons unsalted butter, melted - 1 teaspoon garlic powder - 1/2 teaspoon salt - 1 cup grated Parmesan cheese - 1 tablespoon fresh parsley, chopped (for garnish) When measuring ingredients, use dry measuring cups for solids and liquid cups for liquids. For butter, a stick is often marked, making it easy to measure. If you need a precise amount, use a scale. This can help with the baking soda and cheese. Remember, too much of these can change the taste and texture. If you don't have pizza dough, you can use bread dough or even biscuit dough. For the baking soda, do not substitute with baking powder as they work differently. If you want a different cheese, try mozzarella or cheddar. If you need a dairy-free option, use plant-based butter and cheese alternatives. These changes can still give you a tasty snack! For the full recipe, refer to the section above. First, get your oven hot. Preheat it to 425°F (220°C). While that heats, line a baking sheet with parchment paper. This keeps the bites from sticking. Next, unroll your pizza dough. Cut it into small squares, about 1-inch each. This size is perfect for snacking. Now, let's prepare the baking soda solution. In a pot, bring 1 cup of water to a boil. Once boiling, add 1/4 cup of baking soda. Stir until it dissolves. This step gives the pretzels their classic flavor and texture. Using a slotted spoon, dip each square of dough into the boiling solution for 30 seconds. This helps them puff up while baking. After that, place the dough pieces on your prepared baking sheet. Now it's time to add flavor. In a bowl, mix 4 tablespoons of melted butter, 1 teaspoon of garlic powder, and 1/2 teaspoon of salt. Brush this mixture over each pretzel bite. Don’t be shy! Make sure they’re well-coated. Next, sprinkle 1 cup of grated Parmesan cheese over the dough pieces. This cheese will melt and create a tasty crust. Once you finish this, it’s time to bake. Place the baking sheet in the preheated oven. Bake for 10-12 minutes, or until the bites turn golden brown. After baking, take them out and let them cool for a few minutes. If you have extra garlic butter left, drizzle it on top for more flavor. These pretzel bites are great on their own. Serve them warm for the best taste. You can also pair them with your favorite dipping sauces. Mustard or marinara sauce works well. For a fresh touch, sprinkle chopped parsley on top before serving. This adds color and a burst of flavor. For more details, refer to the Full Recipe. Enjoy making these quick garlic Parmesan pretzel bites! To get soft and chewy pretzel bites, you must boil the dough. Boiling it in baking soda water helps create that classic pretzel crust. Keep the boil time short, just 30 seconds. This step is key for the right texture. The outside becomes crisp, while the inside stays fluffy. While garlic and Parmesan shine, you can add more flavors. Try adding Italian herbs or chili flakes for a kick. You can also mix some smoked paprika into the butter for a deeper taste. Experiment with different cheeses like cheddar or mozzarella for fun twists. One common mistake is not boiling long enough. This can lead to pretzel bites that are too soft. Another mistake is skipping the melted butter. The butter adds flavor and helps the cheese stick. Lastly, don’t overcrowd the baking sheet; give each bite space to rise. For the full recipe, you can refer back to the main section. {{image_2}} You can switch up the cheese in these pretzel bites. Try using cheddar or mozzarella. For a spicy kick, add pepper jack cheese. Each cheese brings a new taste and fun twist. You can mix two or more types for a rich flavor. Experiment with different cheeses to find your favorite blend. Dipping sauces add more fun to your pretzel bites. You can go classic with mustard or ranch dressing. For a zesty option, try a spicy Sriracha mayo. Cheese sauce is a great choice for cheese lovers. You can even make a sweet dip with chocolate or caramel for a dessert twist. Feel free to get creative with seasonings. You can add Italian herbs like oregano or basil for a fresh taste. Smoked paprika gives a nice smoky flavor. If you love heat, sprinkle some cayenne or chili powder. You can also use everything bagel seasoning for a crunchy topping. Each seasoning adds a unique touch to your pretzel bites. To keep your pretzel bites fresh, place them in an airtight container. You can store them at room temperature for up to two days. If you want them to last longer, place them in the fridge. In the fridge, they stay fresh for about a week. Just make sure to cool them completely before sealing. When you're ready to enjoy your pretzel bites again, the oven is best. Preheat your oven to 350°F (175°C). Place the bites on a baking sheet. Heat them for about 5 to 8 minutes. This keeps them crispy. You can also use a microwave, but they may get soft. Heat them for 15 to 20 seconds, checking after each interval. If you want to save some for later, freezing is a great option. First, let the pretzel bites cool completely. Then, place them in a single layer on a baking sheet. Freeze them for about an hour. Once frozen, transfer them to a freezer bag or container. They can stay in the freezer for up to three months. To eat, thaw them in the fridge overnight and reheat as mentioned above. For the full recipe, refer back to the ingredients and steps provided earlier. To make these pretzel bites gluten-free, you can use gluten-free pizza dough. Many stores sell it. Look for brands that are soft and easy to shape. When baking, keep an eye on the time. Gluten-free dough sometimes bakes faster. This way, you can still enjoy a tasty snack without gluten. Yes, you can use different cheeses! Cheddar, mozzarella, or even a spicy pepper jack work great. Each cheese adds a unique flavor. Experiment with your favorites to find your best match. Mixing cheeses can also create a fun taste. These pretzel bites go well with many dips. A simple cheese dip is a classic choice. You can also serve them with mustard or ranch dressing. For a fresh touch, try a spicy salsa. These dips enhance the flavor of the bites. To make homemade pretzel dough, you need just a few ingredients. Mix warm water, yeast, flour, and a bit of salt. Knead the dough until it is smooth. Let it rise for about an hour. After that, shape it into bites and follow the rest of the baking steps. Making your dough gives a personal touch. For the complete instructions and ingredients, refer to the Full Recipe for Quick Garlic Parmesan Pretzel Bites. It lays out everything you need to create this fun snack! This post covered how to make delicious pretzel bites from start to finish. We explored ingredients, preparation, and baking. I shared tips for the best texture and flavor. Variations with cheese and dips add fun twists. Lastly, I provided storage tips to keep your bites fresh. Now, you’re ready to enjoy these tasty treats. Happy baking!

Quick Garlic Parmesan Pretzel Bites Easy Snack Idea

Looking for a quick and tasty snack? These Quick Garlic Parmesan Pretzel Bites are your answer! They’re easy to make,

To make this tasty Giant Cinnamon Roll Skillet Cake, you need a few key ingredients: - 4 cups all-purpose flour - 1 packet (2 1/4 tsp) active dry yeast - 1 cup warm milk (110°F / 43°C) - 1/2 cup granulated sugar - 1/3 cup unsalted butter, melted - 2 large eggs - 1 tsp vanilla extract - 1 tsp salt - 1 tablespoon ground cinnamon - 1 cup packed brown sugar These ingredients create a soft, fluffy dough and a sweet filling that you will love. You can add some fun extras to your cake: - 1/2 cup chopped pecans (optional) - 1 cup powdered sugar for glaze - 2 tablespoons milk for glaze - 1/2 tsp vanilla extract for glaze Chopped pecans give a nice crunch, while the glaze adds sweetness. You will need a few basic tools: - Mixing bowls - A whisk - A rolling pin - An oven-safe skillet (about 12 inches) - A clean towel These tools help you mix, shape, and bake your delicious cake. For the Full Recipe, you can follow the steps I provided to create your own Giant Cinnamon Roll Skillet Cake. Enjoy baking! To start, gather your ingredients. You need flour, sugar, yeast, milk, butter, eggs, and salt. In a bowl, mix warm milk with yeast and a pinch of sugar. Let it sit for 5-10 minutes until it foams. This means the yeast is active. In a larger bowl, whisk flour, sugar, and salt. Make a well in the center. Add melted butter, eggs, and the yeast mix into this well. Stir until a dough forms. Knead the dough for 5-7 minutes until it feels smooth. If it sticks to your hands, add more flour slowly. Place the dough in a greased bowl. Cover it with a towel. Let it rise in a warm spot for about 1 hour, until it doubles in size. Once the dough has risen, punch it down gently. Transfer it to a floured surface. Roll it out into a large rectangle, about 1/4 inch thick. In a small bowl, mix brown sugar and cinnamon. If you like, add chopped pecans for crunch. Spread this mixture evenly over the rolled-out dough. Now, roll the dough tightly from one long side to the other. Pinch the edges to seal it well. Slice the roll into about 12 equal pieces. Grab a well-greased oven-safe skillet, about 12 inches wide. Arrange the cinnamon roll slices in a circle, placing one in the center. Cover with a towel again and let it rise for another 30 minutes. During this time, preheat your oven to 350°F (175°C). Bake the skillet cake for 25-30 minutes. Look for a golden brown top. While it bakes, whip up the glaze by mixing powdered sugar, milk, and vanilla extract until smooth. After baking, drizzle the glaze over the warm cake. For the full recipe, check the details above! Enjoy your delicious creation! To make the best dough, start with warm milk. The milk should feel warm but not hot. This warmth helps the yeast grow. If your dough is too sticky, add a bit more flour. Knead the dough for about 5-7 minutes. It should feel smooth and elastic. When it rises, it should double in size. A well-risen dough makes a fluffy cake. You can save time by prepping the dough the night before. Let it rise in the fridge. This slow rise adds flavor. When you wake up, roll it out and fill it. If you want to make it even faster, use pre-made dough. Just roll and fill, and you'll have a quick treat! To get a nice golden brown top, pay attention while it bakes. Set your oven to 350°F (175°C). Bake for 25-30 minutes. Check for doneness by looking at the color. It should be golden and firm to the touch. If the top gets too dark, cover it with foil for the last few minutes. This way, you keep it soft and moist inside. For the full recipe, check the details above. {{image_2}} You can change the filling of your Giant Cinnamon Roll Skillet Cake. Try using chocolate chips for a sweet twist. Cream cheese mixed with sugar can also be a great filling. For a fruity touch, add fresh berries or sliced apples. Mix in nuts like walnuts or almonds for extra crunch. Each option brings a new flavor that makes the cake fun and unique. The glaze is key to the cake's taste. You can stick to the classic vanilla glaze, but why not try a maple glaze? Just mix maple syrup with powdered sugar for a rich flavor. For a citrusy kick, add lemon juice and zest to your glaze. You can even use cocoa powder to make a chocolate glaze. The glaze can make each bite even more special. If you want a gluten-free version, it’s simple! Use a gluten-free flour blend instead of all-purpose flour. Make sure the blend has xanthan gum to help with the dough’s texture. Check your baking powder and other ingredients to ensure they are gluten-free. This way, everyone can enjoy this delicious skillet cake without worry. For the full recipe, follow the steps outlined in this guide and mix and match to find your favorite flavors! To keep your Giant Cinnamon Roll Skillet Cake fresh, let it cool first. Once cool, cover it with plastic wrap or foil. You can also place it in an airtight container. This will help keep the moisture in and prevent it from drying out. Store it at room temperature for up to three days. If you won't eat it in that time, consider freezing it. To reheat your skillet cake, slice it into pieces. You can use the microwave or oven. For the microwave, heat one slice for about 20-30 seconds. Check to see if it’s warm enough; if not, heat a bit longer. If using the oven, preheat it to 350°F. Wrap the cake in foil and heat for about 10 minutes. This method keeps the cake moist. To freeze the Giant Cinnamon Roll Skillet Cake, first slice it into pieces. Wrap each piece tightly in plastic wrap. Then, place the wrapped slices in a freezer bag. Squeeze out as much air as possible before sealing. You can store it in the freezer for up to three months. When you're ready to enjoy it, thaw it in the fridge overnight before reheating. This keeps the flavor and texture just right. The Giant Cinnamon Roll Skillet Cake lasts about 3 days when stored properly. Keep it in an airtight container at room temperature. If you want it to last longer, you can refrigerate it. This may change the texture slightly, but it will still taste great. Yes, you can make this recipe in advance. Prepare the dough and shape it into rolls. Instead of baking, cover the skillet and place it in the fridge. You can do this up to 24 hours before baking. When ready to bake, let it rise for 30 minutes before popping it in the oven. If you don't have active dry yeast, you can use instant yeast. Use the same amount, 2 1/4 teaspoons. Instant yeast does not need to be proofed in warm milk. Just mix it directly with the dry ingredients. Another option is to use sourdough starter. However, you will need to adjust the liquid in the recipe. This blog post covered how to make a Giant Cinnamon Roll Skillet Cake. We discussed key ingredients, essential tools, and detailed steps for preparing, baking, and storing your cake. You learned tips for the best texture and golden finish, plus options for variations and how to store leftovers. In the end, this recipe is a fun treat for any occasion. Enjoy making and sharing this delicious cake!

Giant Cinnamon Roll Skillet Cake Decadent and Easy Recipe

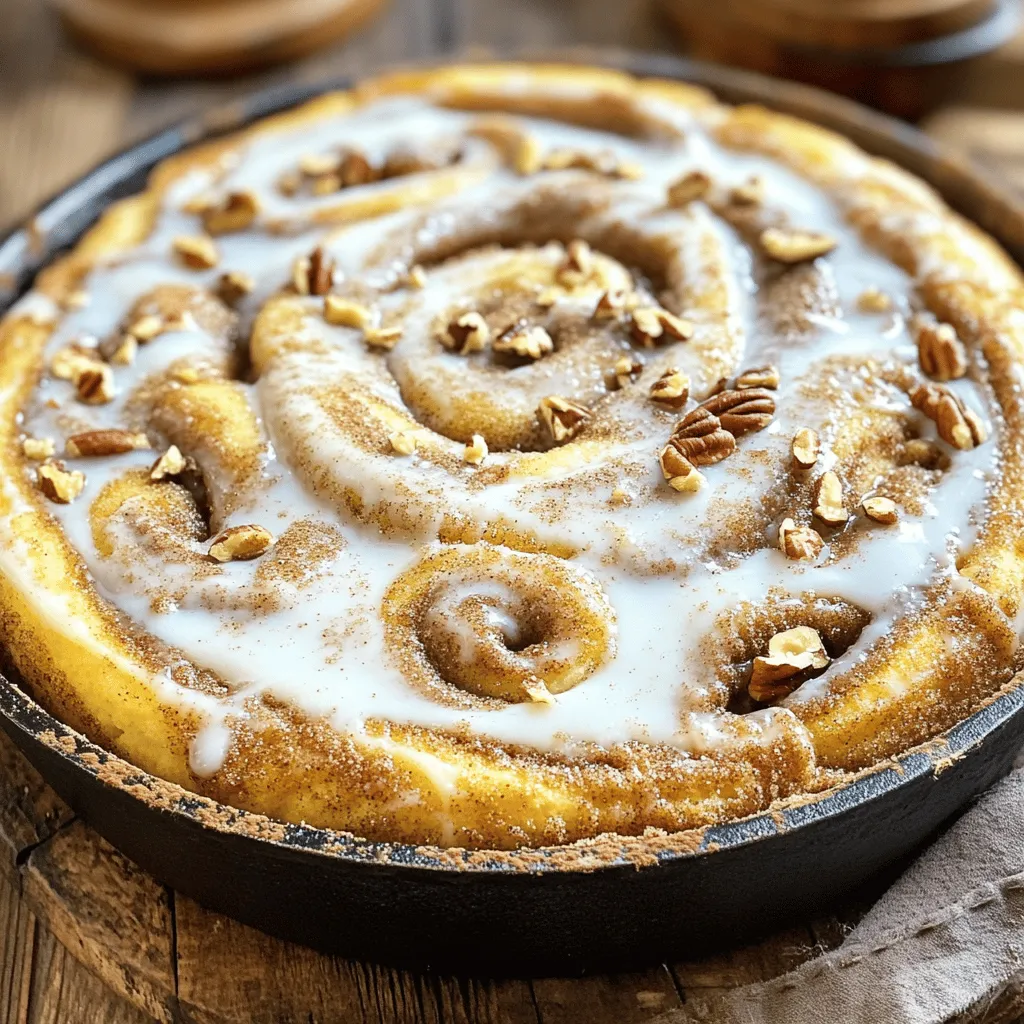
Get ready to indulge in a giant treat—the Giant Cinnamon Roll Skillet Cake! This delightful dessert combines warm cinnamon goodness

- 2 cups brown rice - 4 cups vegetable broth (or water) - 1 small onion, finely chopped - 2 cloves garlic, minced - 1 carrot, diced - 1 celery stalk, diced - 1 cup frozen peas - 2 tablespoons olive oil - 1 teaspoon ground cumin - 1 teaspoon turmeric - 1 teaspoon salt - 1/2 teaspoon black pepper - Fresh parsley, chopped (for garnish) - Instant Pot - Measuring cups and spoons - Cutting board and knife I love using these ingredients for my Instant Pot brown rice pilaf. They mix well to create a tasty dish. Brown rice gives a nutty flavor and is packed with nutrients. The vegetable broth adds depth, but water works too. The onion and garlic bring a savory base. Diced carrot and celery add color and texture. Peas give a sweet touch and nice pop. Olive oil helps everything sauté well and adds richness. Cumin and turmeric not only enhance flavor but also provide a warm color. Salt and black pepper balance the dish. Fresh parsley brightens the dish when sprinkled on top. Having the right cooking tools makes the process smooth. The Instant Pot speeds up cooking and infuses flavors. Measuring cups and spoons help you get the right amounts. A cutting board and knife make prep easy. Using these ingredients and tools, you can create a delicious brown rice pilaf that impresses everyone! {{ingredient_image_1}} - Rinse and Drain the Brown Rice: Start by rinsing 2 cups of brown rice under cold water. This helps remove excess starch. Drain the rice well and set it aside. - Chop the Vegetables: Finely chop 1 small onion and mince 2 cloves of garlic. Dice 1 carrot and 1 celery stalk. Set these chopped veggies aside for later. - Sautéing the Aromatics and Vegetables: Turn the Instant Pot to sauté mode. Add 2 tablespoons of olive oil. Once hot, add the chopped onion and minced garlic. Sauté for about 3-4 minutes until the onion is translucent. - Adding Spices and Brown Rice: Next, add the diced carrot and celery. Stir for another 3 minutes until they soften. Add 1 teaspoon of ground cumin, 1 teaspoon of turmeric, 1 teaspoon of salt, and 1/2 teaspoon of black pepper. Cook for 1 more minute to release the spice aroma. Add the rinsed brown rice and mix well. - Pouring in the Broth: Pour 4 cups of vegetable broth into the pot. Stir everything together to combine. - Setting the Instant Pot: Secure the Instant Pot lid, making sure the valve is set to sealing. Set it to manual high pressure for 22 minutes. - Natural Pressure Release: When the timer goes off, let the pressure release naturally for 10 minutes. After that, carefully switch the valve to venting to release any remaining steam. - Adding Frozen Peas: Open the lid and add 1 cup of frozen peas. Gently fold them into the cooked rice. Let it sit for 5 minutes to warm through. - Fluffing the Rice: Finally, fluff the rice with a fork. Serve in bowls and garnish with freshly chopped parsley for a touch of color and flavor. - How to Properly Rinse Brown Rice Rinsing brown rice is key. Place the rice in a bowl, then cover it with cold water. Swirl the rice around gently. This helps wash away excess starch. After a minute, drain the water. Repeat this process one or two more times until the water runs clear. This step ensures fluffy rice and prevents it from being too sticky. - Best Practices for Sautéing Vegetables Sautéing vegetables adds flavor. Start with the Instant Pot on sauté mode. Once hot, add olive oil. Add onions and garlic first. Cook them until they turn soft. It takes about 3-4 minutes. Then add diced carrots and celery. Stir them often for another 3-4 minutes until they soften. This builds a great base for your pilaf. - Adding Herbs for Extra Flavor Fresh herbs can elevate your dish. Try adding parsley or thyme. Stir them in right before serving. This adds a fresh taste and bright color. You can also add dried herbs while sautéing for more depth. - Incorporating Protein (e.g., chicken, chickpeas) Want a heartier meal? Add protein! You can mix in cooked chicken or chickpeas. If using chickpeas, add them with the rice. If using chicken, sauté it with the veggies. This makes your pilaf more filling and nutritious. - Ideal Accompaniments for Brown Rice Pilaf Brown rice pilaf pairs well with many sides. Serve it with grilled veggies or a fresh salad. You can also add a protein like grilled chicken or fish. This makes a balanced and tasty meal. - Presentation Tips for a Beautiful Dish Presentation matters. Serve the pilaf in a shallow dish. This shows off the vibrant colors. Top it with chopped parsley for a fresh touch. A sprinkle of lemon juice can also brighten the flavors. This makes your dish look and taste amazing! Pro Tips Rinse the Rice: Always rinse your brown rice thoroughly before cooking to remove excess starch, which helps prevent it from becoming too sticky. Flavor Boost: For an extra layer of flavor, consider sautéing the spices with the onions and garlic for a minute before adding the rice. Natural Release: Allowing the Instant Pot to naturally release pressure for 10 minutes ensures the rice finishes cooking gently and retains moisture. Storage Tips: This pilaf stores well in the fridge for up to 5 days. Reheat with a splash of vegetable broth to restore moisture. {{image_2}} You can switch up the grains in this pilaf. Quinoa is a great choice. It cooks fast and has a nice nutty flavor. Just use the same amount as brown rice. White rice is another option, but it cooks quicker. Reduce the cooking time to 10 minutes if using white rice. Feel free to swap out the veggies. Try bell peppers, zucchini, or even corn. These add color and crunch. For the broth, use chicken broth if you want a richer flavor. You can also try using water for a lighter taste. This recipe is easy to make vegan and gluten-free. Just check that the broth is vegan. You can skip the salt if you want a low-sodium dish. Add herbs like thyme or rosemary for flavor without extra salt. These adjustments make the dish fit for everyone. For best results, store your brown rice pilaf in the fridge. Use an airtight container to keep it fresh. It will last for about 4 to 5 days. If you want to keep it longer, freezing is a great option. - To freeze, let the pilaf cool down first. - Then, place it in freezer bags or containers. - Make sure to remove excess air to avoid freezer burn. When it’s time to enjoy your leftovers, reheating is simple. The best methods are using a microwave or stovetop. - For the microwave, place the pilaf in a bowl. - Add a splash of water to keep it moist. - Heat it in short intervals, stirring in between. - On the stovetop, use a pan over low heat with a bit of water. Stir often to warm it evenly. To avoid mushy rice, don’t overheat it. Brown rice pilaf stays good for about 4 to 5 days in the fridge. If you freeze it, it can last for about 3 months. Just remember to label your containers with the date, so you know when to use them. Enjoy your pilaf fresh and tasty! To cook brown rice in an Instant Pot, start by rinsing 2 cups of brown rice. This helps remove extra starch. After rinsing, drain the rice and set it aside. Turn the Instant Pot to sauté mode and add 2 tablespoons of olive oil. Once hot, add 1 small chopped onion and 2 minced garlic cloves. Sauté for about 3-4 minutes until the onion is clear. Then, add 1 diced carrot and 1 diced celery stalk, stirring for another 3-4 minutes. Next, mix in 1 teaspoon of ground cumin, 1 teaspoon of turmeric, 1 teaspoon of salt, and 1/2 teaspoon of black pepper. Toast these spices for a minute. Add the rinsed rice and stir well. Pour in 4 cups of vegetable broth and mix. Close the lid and set the valve to sealing. Cook on manual high pressure for 22 minutes. Let it sit for 10 minutes after cooking, then release the rest of the steam. Yes, you can make Instant Pot Brown Rice Pilaf ahead of time. Once cooked, let it cool completely. Store it in an airtight container in the fridge. It will stay fresh for about 4-5 days. You can also freeze it for up to 3 months. When you are ready to eat, just reheat it on the stove or in the microwave. You can add many ingredients to boost the flavor of brown rice pilaf. Try adding fresh herbs like parsley or cilantro. You can also mix in nuts like almonds or pine nuts for crunch. For protein, consider adding cooked chicken, chickpeas, or tofu. Dried fruits like raisins or cranberries add sweetness, too. Feel free to adjust spices or add a squeeze of lemon for brightness. Yes, brown rice pilaf is very healthy. Brown rice is a whole grain, rich in fiber. It helps keep you full and supports good digestion. The added vegetables, like carrots and peas, provide vitamins and minerals. Using vegetable broth adds flavor without extra calories. This dish is great for a balanced meal. To make your pilaf less sticky, rinse the brown rice well before cooking. This removes excess starch. Also, use the right water-to-rice ratio. For brown rice, 2 cups of rice should be paired with 4 cups of broth. If your pilaf is still sticky, fluff it gently with a fork after cooking. This helps separate the grains. This blog post guides you through making a tasty brown rice pilaf in an Instant Pot. You learned about the ingredients, like rice, broth, and vegetables, and followed easy steps to prepare and cook the dish. Remember to explore variations and storage tips for your leftovers. Brown rice pilaf is versatile and healthy, perfect for any meal. Enjoy cooking and make it your own!

Instant Pot Brown Rice Pilaf Simple and Flavorful Dish

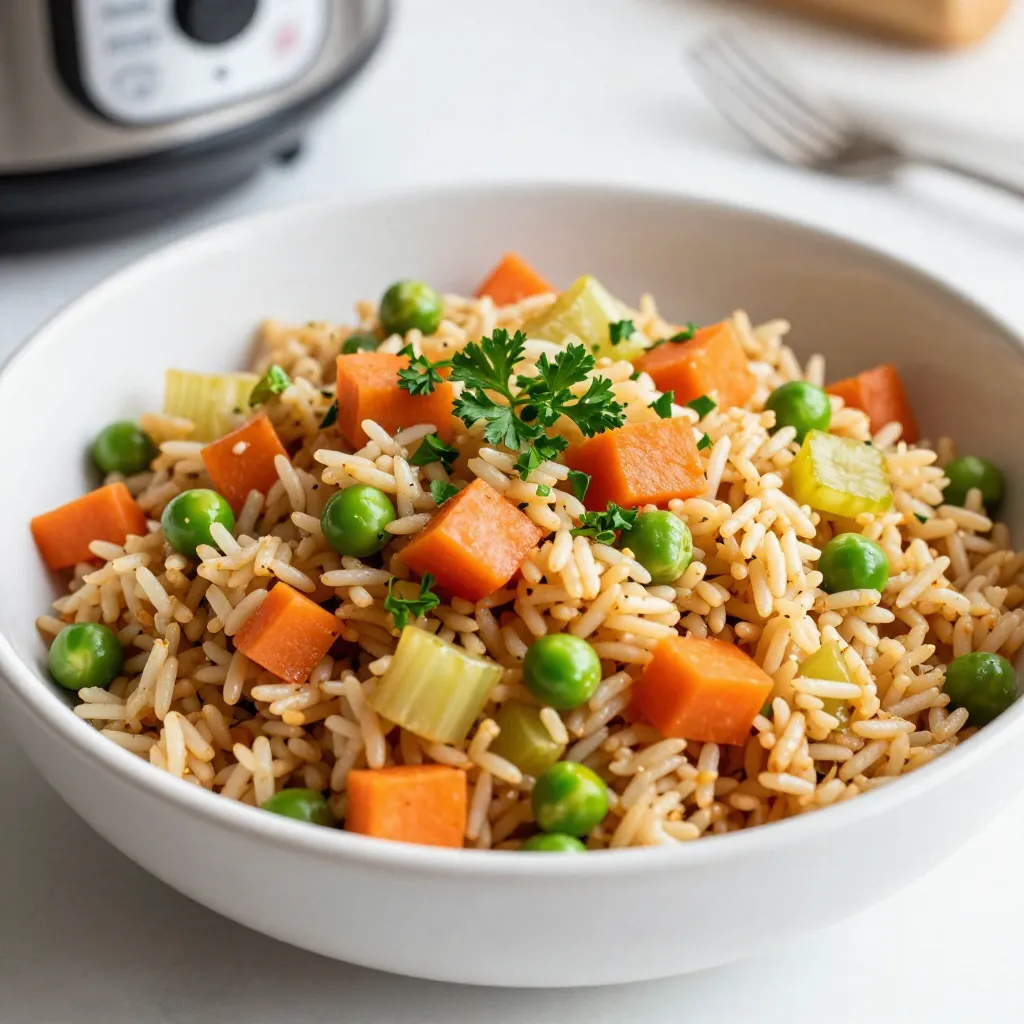
Looking for a simple yet tasty recipe? This Instant Pot Brown Rice Pilaf is just what you need! With just

- 1 cup pure pumpkin puree (canned or freshly made) - 1/2 cup vegetable oil - 1 cup brown sugar - 1/2 cup granulated sugar - 3 large eggs - 1 teaspoon vanilla extract - 1 1/2 cups all-purpose flour - 1 teaspoon baking soda - 1/2 teaspoon baking powder - 1 teaspoon cinnamon - 1/2 teaspoon nutmeg - 1/4 teaspoon clove - 1/2 teaspoon salt - 1 cup semi-sweet chocolate chips - 1/2 cup chopped walnuts (optional) When I create pumpkin chocolate chip bread, I focus on fresh, rich flavors. The pumpkin puree is the star of this recipe. You can use canned or make your own. I often choose canned for ease. It gives a smooth texture and great taste. The sugars in the recipe balance the bread's flavors. I use brown sugar for its deep flavor and granulated sugar for sweetness. The mix of both creates a lovely moist crumb. Next, I add eggs, which bind all the ingredients. Eggs also help the bread rise. Don't skip the vegetable oil; it keeps the bread rich and moist. Vanilla extract adds warmth and depth. For the dry ingredients, I sift together flour, baking soda, and baking powder. This process adds air and keeps the bread light. The spices—cinnamon, nutmeg, and clove—bring warmth and a hint of spice. Salt enhances all these flavors. Finally, I fold in semi-sweet chocolate chips and walnuts. They add crunch and richness. The chocolate melts and creates pockets of sweetness. If you want a nutty taste, add walnuts. If not, the bread is great without them. {{ingredient_image_1}} First, you need to preheat your oven to 350°F (175°C). This step is key for even baking. While your oven heats up, grab a 9x5 inch loaf pan and grease it well. You can use butter or cooking spray. This helps the bread release easily after baking. In a large bowl, combine 1 cup of pure pumpkin puree, 1/2 cup of vegetable oil, 1 cup of brown sugar, and 1/2 cup of granulated sugar. Crack in 3 large eggs and add 1 teaspoon of vanilla extract. Whisk everything together until the mixture is smooth and creamy. The pumpkin adds moisture and flavor, while the sugars give it sweetness. In another bowl, sift together 1 1/2 cups of all-purpose flour, 1 teaspoon of baking soda, and 1/2 teaspoon of baking powder. Add 1 teaspoon of cinnamon, 1/2 teaspoon of nutmeg, 1/4 teaspoon of clove, and 1/2 teaspoon of salt. Sifting ensures no lumps and blends the spices evenly into the flour. Now, slowly add the dry mixture to the wet mixture. Stir gently until just combined. Be careful not to overmix; this keeps the bread tender. Once combined, fold in 1 cup of semi-sweet chocolate chips and 1/2 cup of chopped walnuts if you like. This adds extra flavor and crunch. Pour the batter into the greased loaf pan. Use a spatula to smooth the top. Place the pan in the oven and bake for 60-70 minutes. Check for doneness by inserting a toothpick into the center. If it comes out clean, your bread is ready. After baking, remove the loaf from the oven. Let it cool in the pan for about 10 minutes. Then, transfer it to a wire rack to cool completely. This helps the bread set and makes slicing easier. Enjoy the rich smell as it cools! Set your oven to 350°F (175°C). This heat is perfect for baking pumpkin bread. Use the middle rack for even cooking. Always check the bread at 60 minutes. Insert a toothpick in the center. If it comes out clean, the bread is done. If not, bake for another 5-10 minutes. Let the bread cool for 10 minutes in the pan before moving it. This helps it stay moist and rich. Mix the wet ingredients gently. Start with pumpkin puree, oil, sugars, eggs, and vanilla. Once mixed, add the dry ingredients. Stir until just combined. Be careful not to overmix. Overmixing makes the bread tough. You want it light and fluffy. If you see flour pockets, that's okay. The batter should be thick but not dry. Slice your pumpkin bread after it cools. Serve it warm or at room temp. For a fun twist, dust powdered sugar on top. You can also add a dollop of whipped cream or cream cheese frosting. These toppings enhance the flavors. Serve alongside a hot drink for the perfect treat. Enjoy sharing this delicious bread with friends and family! Pro Tips Use Fresh Pumpkin: For a more robust flavor, consider using freshly roasted pumpkin instead of canned puree. It adds a delightful depth to your bread. Don’t Overmix: When combining wet and dry ingredients, mix until just combined. Overmixing can make the bread tough instead of tender. Chocolate Chip Quality: Opt for high-quality semi-sweet chocolate chips for a richer taste. You can also experiment with dark chocolate for a more intense flavor. Storage Tip: Store any leftover bread in an airtight container at room temperature for up to 3 days, or freeze for longer storage. Just make sure to slice it first for easy thawing! {{image_2}} You can change the spices to make this bread unique. Try adding cardamom for warmth. Ginger adds a nice kick too. For a twist, use different extracts. Almond or maple can bring a delightful flavor. If you want to cut sugar, use honey or maple syrup. Coconut oil can replace vegetable oil for a lighter taste. For gluten-free options, almond or oat flour works well too. These swaps keep the bread tasty while meeting your needs. You can mix in other goodies beyond chocolate chips and walnuts. Dried cranberries or raisins add sweetness. For a crunchy bite, try chopped pecans or sunflower seeds. You can even add a swirl of cream cheese for richness. To keep your pumpkin chocolate chip bread fresh, store it in an airtight container. You can place it at room temperature for up to three days. If you prefer, wrap the bread in plastic wrap before putting it in the container. This extra layer helps keep it moist. Freezing is a great way to save extra bread. First, let the bread cool completely. Then, wrap it tightly in plastic wrap. After that, place the wrapped bread in a freezer bag. Make sure to remove as much air as possible. To thaw, take it out of the freezer and leave it at room temperature for several hours. You can also thaw it in the microwave for a quick treat. This bread stays fresh for about three days at room temperature. If you store it in the fridge, it can last up to a week. When frozen, the bread can stay good for about three months. Just remember to check for any signs of freezer burn when you take it out. Yes, you can use fresh pumpkin. Just cook and mash it first. Make sure to drain extra moisture. This helps keep the bread from getting too wet. Fresh pumpkin gives a rich taste and texture. You can use flax eggs, applesauce, or mashed banana. For one flax egg, mix one tablespoon of flaxseed meal with two and a half tablespoons of water. Let it sit for five minutes. Applesauce adds moisture and sweetness. Use 1/4 cup for one egg. To adjust for a different pan, change the baking time. A smaller pan needs less time, while a larger pan needs more. Check for doneness by inserting a toothpick into the center. If it comes out clean, your bread is ready. I recommend semi-sweet chocolate chips. They melt well and balance the pumpkin flavor. Dark chocolate chips also work if you want a richer taste. You can also try milk chocolate for a sweeter option. This blog post covered how to make delicious pumpkin chocolate chip bread. We discussed the right ingredients, from pumpkin puree to optional mix-ins like nuts. I shared step-by-step directions for baking and cooling your bread to perfection. You now have tips for serving and storing your creation. Remember, you can customize flavors to suit your taste. Enjoy this fun baking adventure, and share it with friends for a tasty treat! Happy baking!

Pumpkin Chocolate Chip Bread Rich and Moist Delight

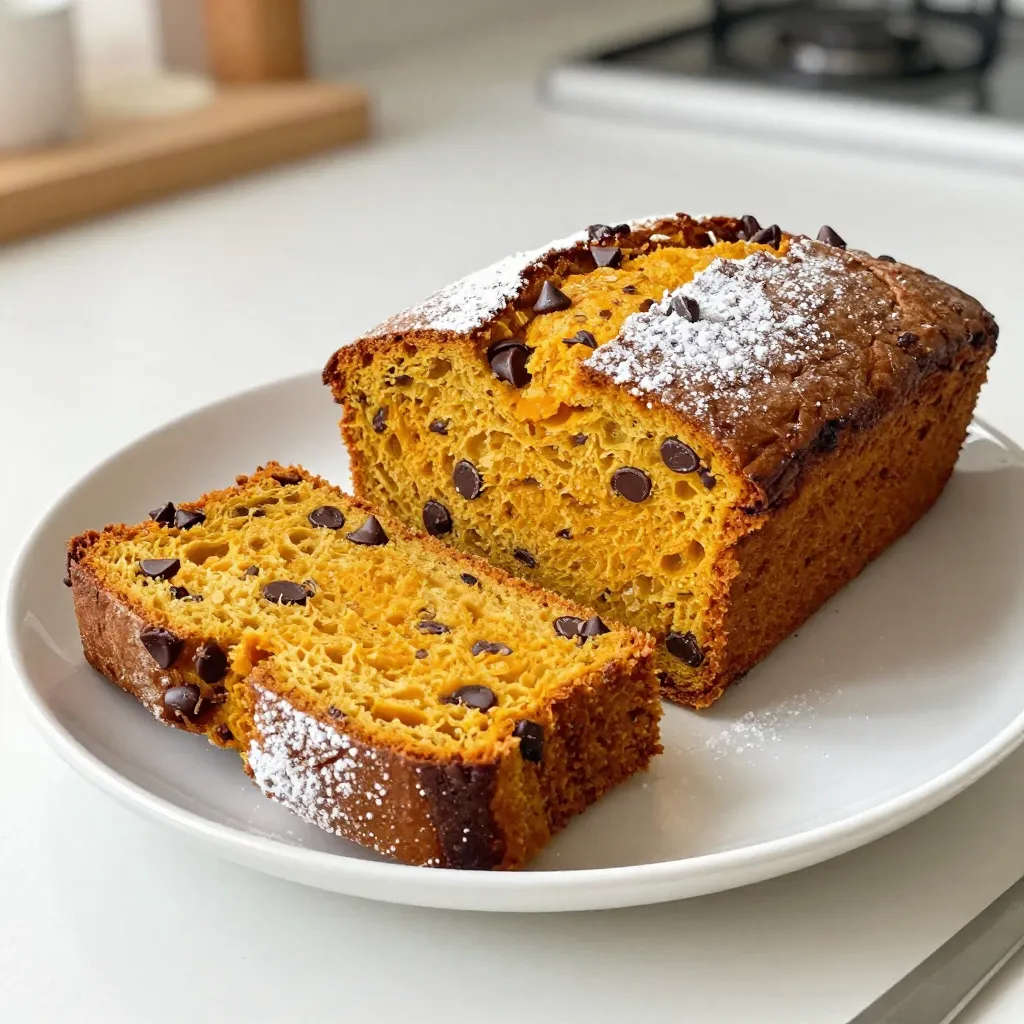
Get ready to savor the perfect blend of fall flavors with my rich and moist Pumpkin Chocolate Chip Bread! This

To make tasty oven baked buffalo cauliflower wings, you'll need simple ingredients. Each item plays a key role in flavor and texture. Here’s what you need: - Cauliflower florets - 1 cup all-purpose flour - 1 teaspoon garlic powder - 1 teaspoon onion powder - ½ teaspoon smoked paprika - ½ teaspoon salt - ½ teaspoon black pepper - 1 cup unsweetened almond milk (or any non-dairy milk) - 1 cup buffalo sauce (store-bought or homemade) - 2 tablespoons olive oil - Fresh parsley, chopped (for garnish) - Sliced celery and carrot sticks (for serving) These ingredients work together to create a crispy delight. The cauliflower florets serve as the base. The flour and spices form a crunchy coating. Non-dairy milk helps bind everything. The buffalo sauce gives that bold kick. Olive oil adds richness, while parsley and veggies make the dish pop. For the full recipe, check out the details! 1. Preheating the oven and lining the baking sheet: Start by preheating your oven to 450°F (232°C). While it heats, line a baking sheet with parchment paper. This helps the cauliflower wings cook evenly and makes cleanup easy. 2. Whisking together the batter ingredients: In a large bowl, whisk together 1 cup of all-purpose flour, 1 teaspoon of garlic powder, 1 teaspoon of onion powder, ½ teaspoon of smoked paprika, ½ teaspoon of salt, and ½ teaspoon of black pepper. This mix gives your batter a nice flavor. 3. Coating the cauliflower florets: Slowly pour in 1 cup of unsweetened almond milk while whisking. Keep mixing until you have a smooth batter. Dip each cauliflower floret in the batter, making sure they are fully coated. Place them on the prepared baking sheet. 4. Baking process and flipping: Bake the cauliflower in the preheated oven for 20 minutes. Be sure to flip them halfway through. This allows all sides to get crispy and golden brown. 1. Drizzling and tossing with buffalo sauce: After baking, remove the cauliflower from the oven. Drizzle 1 cup of buffalo sauce over the wings. For extra richness, mix in 2 tablespoons of olive oil before tossing the wings. Make sure they are evenly coated in the sauce. 2. Final baking for sauce setting: Return the coated cauliflower to the oven and bake for another 10 minutes. This helps the sauce set and adds a nice finish to the wings. 1. Garnishing with parsley: Once out of the oven, garnish your buffalo cauliflower wings with chopped fresh parsley. This adds color and a fresh taste. 2. Accompanying side suggestions: Serve these wings hot with sliced celery and carrot sticks. They add a crunchy contrast and are a classic pairing with buffalo wings. Enjoy this crispy delight! To get those crunchy oven-baked buffalo cauliflower wings, you need to focus on a few key areas. - Choosing the right flour: Use all-purpose flour for the best results. It creates a light and crispy coating. You can also try rice flour for a gluten-free option. - Cooking temperature and time tips: Preheat your oven to 450°F (232°C). This high heat helps to crisp up the coating fast. Bake the cauliflower for 20 minutes, flipping halfway through. This ensures even cooking. - Flipping technique: Use tongs to turn each floret. This keeps the coating intact and helps them crisp up nicely. If you want a gluten-free version, it's easy to adapt the recipe. - Alternative flours to use: You can use almond flour or chickpea flour instead of regular flour. Both give a good texture. - Adjusting liquid ingredients: When using alternative flours, you might need to change the amount of almond milk. Start with less and add more if needed, until you reach a good batter consistency. These tips will help you create the perfect crispy buffalo cauliflower wings. For the full recipe, check out the section above. {{image_2}} You can change the heat of your buffalo cauliflower wings. Use spicy buffalo sauce for a kick. If you prefer mild flavors, choose a milder sauce. You can also mix sauces. Try a blend of buffalo and barbecue sauce for a sweet twist. For extra flavor, consider adding spices. A dash of cayenne pepper gives heat. You could also use smoked paprika for a deeper taste. For an herb twist, add dried oregano or thyme. These flavors can elevate your dish. To make a vegan version, use non-dairy milk. Almond and oat milk work well. You can also skip the egg and use a flaxseed mixture instead. This keeps the wings crispy and holds the batter. Want to add more veggies? Broccoli, carrots, or Brussels sprouts roast well. Just cut them into similar sizes as the cauliflower. This way, everything cooks evenly. Toss them in the same batter for a fun mix. This makes your meal colorful and tasty. Try these variations to personalize your oven baked buffalo cauliflower wings. You can find the full recipe to get started! To keep your oven baked buffalo cauliflower wings fresh, place them in an airtight container. Store the container in the fridge. They stay good for about 3 to 5 days. For longer storage, you can freeze them. Use a freezer-safe bag or container. They can last up to 3 months in the freezer. Just remember to let them cool completely before packing. To reheat the wings, the oven is your best friend. Preheat it to 375°F (190°C). Spread the wings on a baking sheet. Heat them for about 10 to 15 minutes. This keeps them crispy. You can also use an air fryer. Set it to 350°F (175°C) and heat for about 5 to 7 minutes. Both methods help maintain that great texture. Enjoy your tasty snack again! For the complete recipe, check the [Full Recipe]. You can make these wings spicier by using a hotter buffalo sauce. Look for sauces labeled as "extra hot" or "spicy." You can also add cayenne pepper to the batter. Just a pinch can elevate the heat. If you want more kick, sprinkle red pepper flakes on the wings before baking. Yes! This recipe works well with other veggies like broccoli, Brussels sprouts, or zucchini. Just cut them into similar-sized pieces for even cooking. Each vegetable will bring its own flavor and texture. You can even mix different veggies for a fun platter. Absolutely! You can prep the cauliflower and batter a few hours in advance. Just store them in the fridge until you're ready to bake. If you want to make them even earlier, bake them without sauce and store them. When you’re ready, toss them with the sauce and bake again for a crispy finish. Check the Full Recipe for detailed steps. This blog post covers a delicious buffalo cauliflower recipe. You learned about the key ingredients, such as cauliflower, flour, and buffalo sauce. The step-by-step instructions guide you through preparation, baking, and serving. Tips include achieving a crispy texture and making it gluten-free. We shared tasty variations and storage tips to keep your wings fresh. In the end, enjoy this fun and flavorful dish anytime! You can easily customize it to suit your taste. Happy cooking!

Oven Baked Buffalo Cauliflower Wings Crispy Delight

Are you ready to enjoy a tasty twist on a classic favorite? Oven Baked Buffalo Cauliflower Wings offer a crispy

To make the creamy avocado cilantro lime pasta, you need a few simple items. Here’s the list of ingredients: - 12 oz pasta of your choice (spaghetti or fettuccine recommended) - 2 ripe avocados, halved and pitted - 1/4 cup fresh cilantro leaves - 2 cloves garlic, minced - 1/4 cup lime juice (about 2 limes) - 1/4 cup olive oil - 1/4 teaspoon red pepper flakes (optional) - Salt and pepper to taste - 1/2 cup cherry tomatoes, halved (for garnish) - Zest of 1 lime (for garnish) Each ingredient plays a key role in this dish. The ripe avocados bring creaminess. Lime juice adds a zesty kick. Fresh cilantro gives it a bright flavor. Garlic adds depth. The red pepper flakes give an optional hint of heat. When you gather these items, make sure your avocados are ripe. They should feel slightly soft when you press them. Fresh cilantro should look green and vibrant. Lime juice is best when fresh, so squeeze your limes just before using. You can find the full recipe for detailed steps on how to prepare this delicious dish. Enjoy the process of cooking, and don't hesitate to modify the ingredients to suit your taste! To start, we need to cook the pasta. Fill a large pot with water and add a generous pinch of salt. Bring the water to a boil over high heat. Once boiling, add 12 oz of your favorite pasta, like spaghetti or fettuccine. Cook the pasta according to the package instructions. This usually takes about 8 to 10 minutes. To check if the pasta is done, taste a piece. It should be firm but not hard, which we call al dente. When it’s ready, reserve 1 cup of pasta water. Drain the pasta in a colander and set it aside. Now let’s make the creamy avocado sauce. You’ll need the following ingredients: - 2 ripe avocados, halved and pitted - 1/4 cup fresh cilantro leaves - 2 cloves garlic, minced - 1/4 cup lime juice (about 2 limes) - 1/4 cup olive oil - 1/4 teaspoon red pepper flakes (optional) - Salt and pepper to taste In a food processor or blender, combine the ripe avocados, cilantro, minced garlic, lime juice, olive oil, and red pepper flakes if you like some heat. Blend until the sauce is smooth and creamy. If it’s too thick, add a little reserved pasta water until you get the right consistency. Next, mix the pasta with the avocado sauce. In a large mixing bowl, combine the drained pasta with the creamy sauce. Toss it all together so every piece is coated. Season with salt and pepper to taste. For a lovely touch, divide the pasta onto plates. Garnish with halved cherry tomatoes and sprinkle lime zest over the top. You can even add extra cilantro leaves for color and flavor. This dish not only looks great but also tastes amazing. For the full recipe, check out the detailed steps above. To make your avocado sauce smooth, keep a cup of pasta water. When you mix the sauce with pasta, add a bit of this water. It helps the sauce stick well and stay creamy. If the sauce feels thick, just add more water a little at a time. This way, you can reach the perfect creamy texture. Seasonings are very important. Taste the sauce before you mix it with the pasta. You can add more salt, pepper, or lime juice if needed. This small step makes a big difference in flavor. Remember, fresh ingredients shine best when seasoned just right. For a well-rounded meal, pair your pasta with a side salad or grilled veggies. A fresh green salad with a simple vinaigrette works great. You can also serve it with some crusty bread to soak up the sauce. To make your dish look stunning, serve the pasta in deep bowls. Add cherry tomatoes on top for color. A sprinkle of lime zest gives the dish a nice pop. You can place a lime wedge on the side for guests to squeeze over their pasta. This adds a fun touch and extra flavor. {{image_2}} You can easily boost your Creamy Avocado Cilantro Lime Pasta by adding protein. Here are some great options: - Chicken: Grilled or shredded chicken adds a hearty touch. - Shrimp: Sauté shrimp in garlic and olive oil for a quick, tasty addition. - Tofu: For a plant-based choice, use firm tofu. Sauté it until golden for more flavor. If you want a vegan dish, simply swap a few ingredients. Use nutritional yeast instead of cheese for a cheesy taste without dairy. You can also add more veggies, like spinach or bell peppers, for extra nutrients. This way, you keep the dish fresh and plant-based. Sometimes, you may run out of key ingredients. Don’t worry! Here are some swaps: - Cilantro: Use parsley or basil if you dislike cilantro. - Avocado: If avocados aren’t available, try ripe peas for creamy texture. These swaps still keep the dish rich and flavorful. For the full recipe, check out the link. To keep your creamy avocado cilantro lime pasta fresh, store it in an airtight container. This helps prevent air from making the sauce brown. Place it in the fridge right after serving. It will stay good for about 2-3 days. If you notice the sauce thickening, just add a bit of water or olive oil before eating. You can freeze the avocado sauce, but the pasta does not freeze well. To freeze, pour the sauce into a freezer-safe container. Leave some space at the top for expansion. The sauce will last about a month in the freezer. When you’re ready to eat it, just thaw it in the fridge overnight. To keep the sauce creamy when reheating, use low heat. If you heat it too fast, it might separate. Add a splash of water or olive oil to help it stay smooth. Stir well to mix everything together. Enjoy your tasty leftovers just like the first time! Yes, you can! If you want a gluten-free option, use rice pasta or quinoa pasta. Whole grain pasta is also a great choice for added fiber. Both will still taste great with the creamy avocado sauce. To add some heat, try using more red pepper flakes. You can also mix in some diced jalapeños or a splash of hot sauce. Adjust the spice level based on your taste. Start small, and you can always add more. Absolutely! To prepare in advance, cook the pasta and make the sauce separately. Store them in airtight containers in the fridge. When you’re ready to eat, just warm the pasta and mix in the sauce. This helps keep everything fresh. This blog post showed you how to make a creamy avocado pasta dish. We covered ingredients, cooking steps, tips, and variations. You can create a simple yet tasty meal with these easy steps. Remember to try different proteins or swap ingredients for your taste. Enjoy this dish fresh or reheated. I hope you feel confident to make it your own. Happy cooking!

Creamy Avocado Cilantro Lime Pasta Delicious Delight

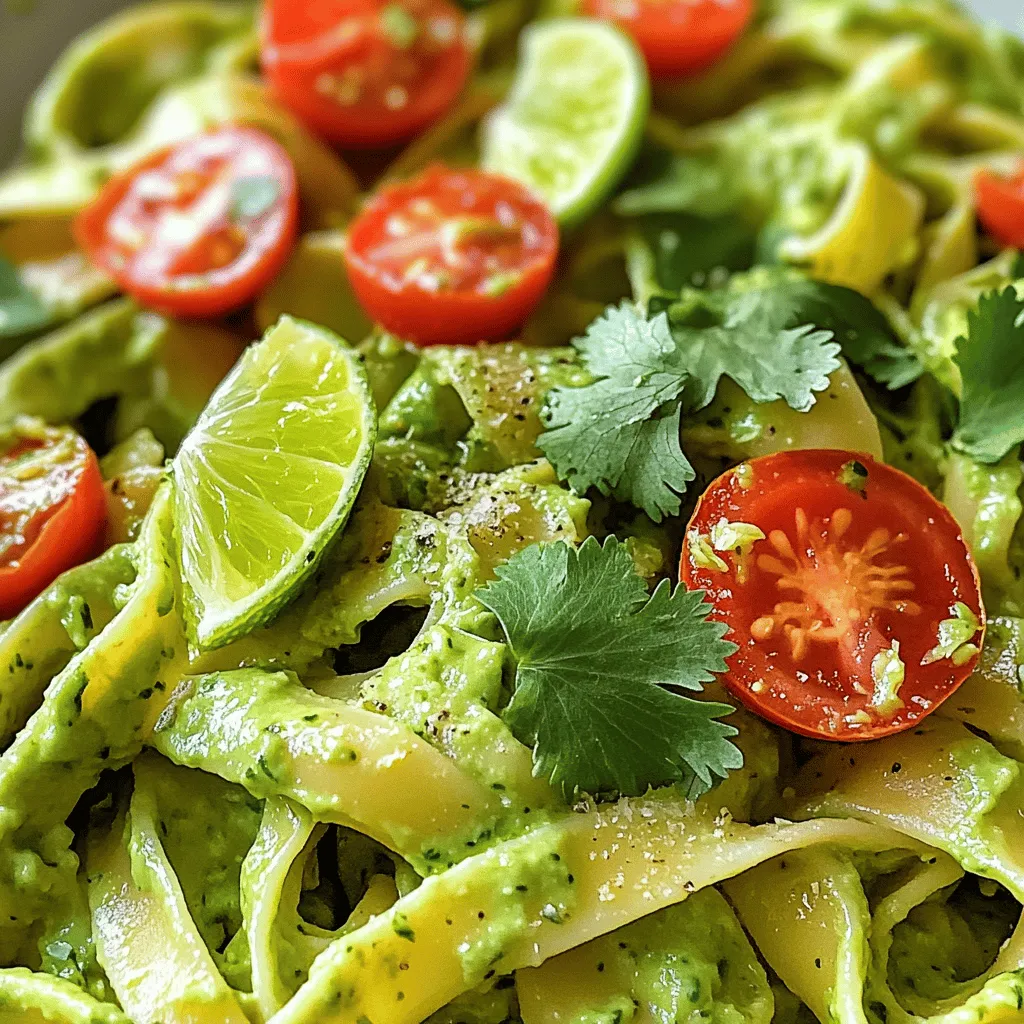
If you’re ready to impress your taste buds, look no further! This Creamy Avocado Cilantro Lime Pasta is a game

Older posts
Newer posts
← Previous Page1 … Page52 Page53 Page54 … Page84 Next →

dsad

© 2026 easycookingbite • Built with GeneratePress

Our Policies

  • Copyright Policy
  • Cookie Policy
  • GDPR Policy
  • Privacy Policy
  • Disclaimer
  • Terms Of Use

More Information

  • Home
  • About
  • Contact
  • Appetizers
  • Dessert
  • Dinner
  • Drinks
©2026, easycookingbite About Back To Top