Skip to content
DisclaimerTerms Of UseGDPR PolicyCookie Policy

easycookingbite

  • Home
  • Drinks
  • Appetizers
  • Dinner
  • Dessert
  • About
  • Contact
  • Privacy Policy
DisclaimerTerms Of UseGDPR PolicyCookie Policy

NO-ING-IMG

To make tasty Air Fryer Jalapeño Popper Bites, you need simple ingredients. Here’s the list: - 10 fresh jalapeños, halved and seeded - 1 cup cream cheese, softened - 1 cup shredded cheddar cheese - 1/2 cup breadcrumbs (panko for extra crunch) - 1 teaspoon garlic powder - 1 teaspoon onion powder - 1/2 teaspoon smoked paprika - Salt and pepper to taste - 1 tablespoon fresh chives, chopped (for garnish) Each ingredient plays a key role in flavor. The jalapeños give heat, while cream cheese adds creaminess. Shredded cheddar adds a rich taste. Panko breadcrumbs make the bites crunchy. Garlic powder and onion powder enhance the overall flavor. Smoked paprika adds a touch of smokiness, giving depth to each bite. Don’t forget salt and pepper, as they bring all the flavors together. Finally, fresh chives add a pop of color and fresh taste. Gather these items before you start. It makes cooking smoother and more fun! I start by preheating the air fryer to 350°F (175°C). This step is key for even cooking. It helps the poppers crisp up nicely. Just a few minutes of preheating makes a big difference. Next, I mix the fun part: the cheese mixture. In a bowl, I combine 1 cup of softened cream cheese with 1 cup of shredded cheddar cheese. Then, I add 1 teaspoon each of garlic powder and onion powder. I also sprinkle in 1/2 teaspoon of smoked paprika. A little salt and pepper goes in too. I mix everything until it’s smooth and creamy. Now, I take my fresh jalapeños and cut them in half. I remove the seeds for less heat. Each half gets a generous spoonful of the cheese mixture. I press it in gently to make sure it stays. Filling them well is important for a tasty bite. For the next step, I grab a shallow dish and pour in 1/2 cup of panko breadcrumbs. I dip the top of each stuffed jalapeño half into the breadcrumbs. This adds a nice crunch when they cook. I make sure the cheese mixture is well coated. I place the coated jalapeño poppers in the air fryer basket. I arrange them in a single layer, making sure they don’t touch. I set the timer for about 10-12 minutes. I keep an eye on them until they are tender and golden brown on top. Once they are done, I carefully take them out of the air fryer. I let them cool for a few minutes. Just before serving, I sprinkle fresh chives on top for a pop of color and flavor. These poppers look great and taste even better! Choose fresh jalapeños that feel firm and look bright. Look for ones without dark spots. A good jalapeño should have a nice shine. If you want more heat, pick smaller peppers. If you prefer milder flavors, choose larger, fatter ones. Always taste a small piece to check the heat level before cooking. You can prepare jalapeño popper bites ahead of time. Fill and coat the jalapeños, then place them on a baking sheet. Freeze them until solid, then transfer to a bag. They will last up to three months in the freezer. When ready to cook, air fry them straight from the freezer. Just add an extra couple of minutes to the cooking time. To ensure your poppers are crispy, use panko breadcrumbs. They give a great crunch. Make sure to coat the tops well by pressing them into the crumbs. Arrange the jalapeños in a single layer in the air fryer. Avoid overcrowding. This allows hot air to circulate and crisp them up perfectly. Air fry until golden brown, and enjoy every bite! {{image_2}} You can add hot sauce to the cheese mix for more heat. I like to use about one tablespoon of your favorite hot sauce. This makes the poppers extra spicy and fun! Just mix the hot sauce with your cream cheese and cheddar. Adjust the amount to fit your taste. While cheddar is classic, other cheeses work well too. Try using pepper jack for a kick or mozzarella for a milder taste. Mix different cheeses to find your favorite combo. Each cheese brings its own flavor and texture. It’s a fun way to customize your poppers! If you want a lighter option, use Greek yogurt instead of cream cheese. It gives a nice tang and cuts some fat. You can also try a dairy-free cream cheese if you want to avoid dairy. These options still give you a creamy filling without losing taste. Once you make these air fryer jalapeño popper bites, you might have some leftovers. Store any uneaten poppers in an airtight container. Keep them in the fridge, where they will last for up to three days. Make sure they cool down completely before sealing the container. This helps keep them fresh and tasty. To reheat the jalapeño poppers, preheat your air fryer to 350°F (175°C). Place the poppers in the basket in a single layer. Reheat them for about 5 to 7 minutes. This method helps restore their crunchiness. You can also use a microwave, but they may turn soft. If you use a microwave, heat them in short bursts of 30 seconds until warm. If you want to save some poppers for later, freezing is a great option. Before frying, flash-freeze the filled jalapeños on a baking sheet. Once frozen, transfer them to a freezer bag. They can last up to three months in the freezer. When you’re ready to eat them, cook straight from frozen. Just add a few extra minutes to the cooking time in the air fryer. Yes, you can use frozen jalapeños. Just make sure to thaw them first. Frozen jalapeños might be a bit softer than fresh ones. But they still work well for poppers. You may want to adjust the cooking time slightly. Many sauces taste great with jalapeño poppers. Here are a few ideas: - Ranch dressing - Creamy chipotle sauce - Sour cream with lime - Spicy salsa These sauces add extra flavor and fun to your snack. To make dairy-free jalapeño poppers, swap out the cream cheese and cheddar. Use vegan cream cheese and dairy-free cheese instead. Check the labels to ensure they fit your needs. You can also add nutritional yeast for a cheesy flavor. Yes, you can bake jalapeño poppers in the oven. Preheat the oven to 375°F (190°C). Place the stuffed jalapeños on a baking sheet. Bake for about 20-25 minutes. Look for a golden brown top and tender jalapeños. Enjoy your tasty snack! In this post, we explored how to make delicious jalapeño poppers. We covered ingredients, preparation steps, and smart tips to enhance your dish. You learned about spicy variations and how to store leftovers. These poppers can be enjoyed fresh or frozen for later. Try these recipes and make them your own. Enjoy the fun of cooking and sharing!

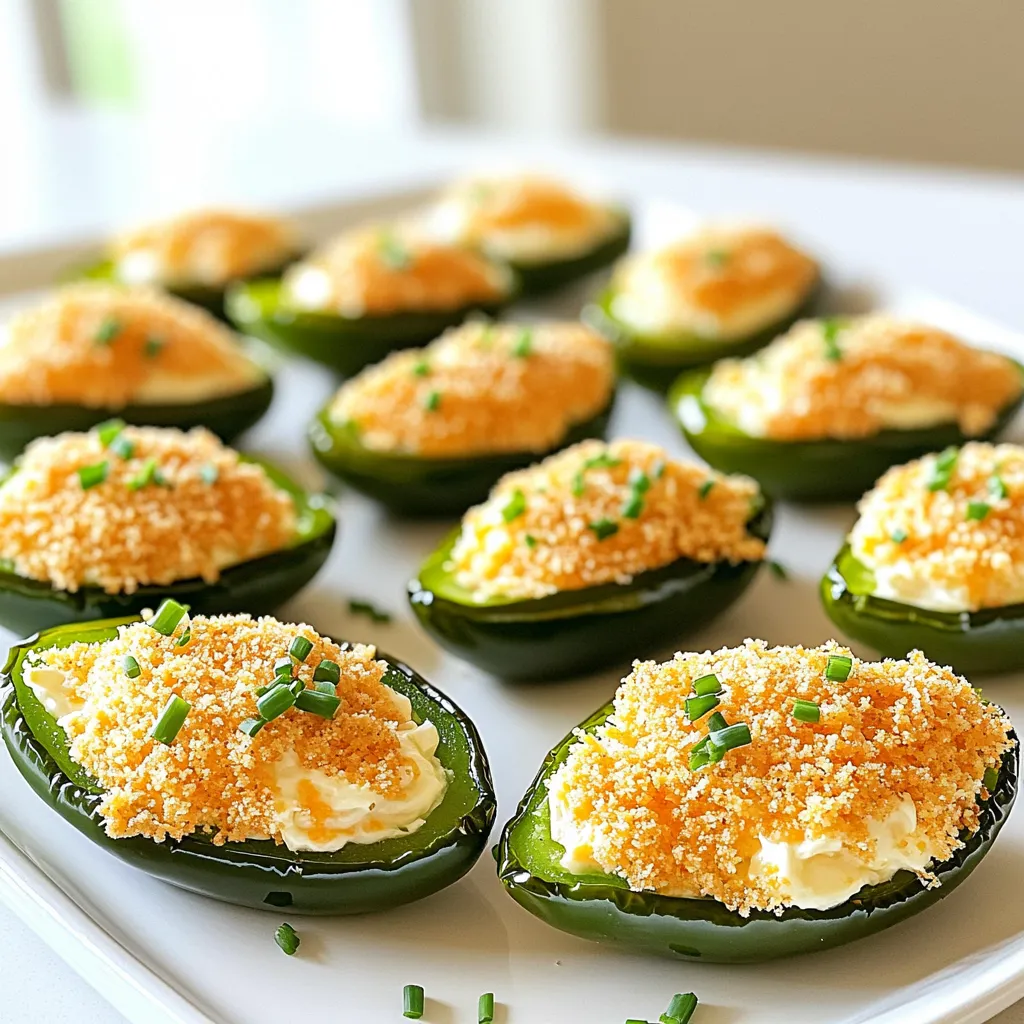
Air Fryer Jalapeño Popper Bites Tasty Snack Idea

Are you on the hunt for a quick and tasty snack? Look no further! Air Fryer Jalapeño Popper Bites are

- 1 cup almond milk (or any milk of choice) - 1/3 cup chia seeds - 1/2 cup canned pumpkin puree - 2 tablespoons maple syrup - 1 teaspoon vanilla extract - 1 teaspoon pumpkin pie spice - Pinch of salt - Optional toppings: whipped coconut cream, crushed pecans, cinnamon You can swap almond milk for any milk you like. Try coconut or oat milk for different flavors. If you want a sweeter taste, add more maple syrup. You can also use honey or agave syrup if you prefer. For pumpkin pie spice, mix cinnamon, nutmeg, and ginger if you don’t have it on hand. - Chia seeds: These tiny seeds pack a punch! They are high in fiber and omega-3 fatty acids. They help with digestion and heart health. - Pumpkin puree: This adds rich flavor and nutrients. It is full of vitamins A and C. It also has antioxidants that support your immune system. - Maple syrup: This natural sweetener has minerals like manganese and zinc. It can be a better option than refined sugar. - Almond milk: This dairy-free milk is low in calories. It is also high in vitamin E, which is great for your skin. The combination of these ingredients makes this chia pudding not only tasty but also good for you! 1. Mix the Base. Start by taking a medium bowl. Whisk together 1 cup of almond milk, 1/2 cup of canned pumpkin puree, 2 tablespoons of maple syrup, 1 teaspoon of vanilla extract, 1 teaspoon of pumpkin pie spice, and a pinch of salt. This step makes a smooth, creamy mix that is the base of your pudding. 2. Add Chia Seeds. Next, add 1/3 cup of chia seeds to the bowl. Stir well to make sure the seeds spread evenly in the mix. This helps them soak up the liquid. 3. Cover and Chill. Now, cover the bowl with plastic wrap or pour the mix into a jar with a tight lid. Place it in the fridge. Let it chill for at least 4 hours or overnight. This time is key! The chia seeds will expand and thicken the pudding. 4. Stir Before Serving. When you are ready to eat, remove the pudding from the fridge. Give it a good stir. If it's too thick for your taste, add a splash of milk until it's just right. 5. Serve It Up. Spoon the pudding into bowls or jars. - Mix Well. Ensure the chia seeds are fully mixed in. This avoids clumps and gives a better texture. - Use a Jar. Storing in a jar makes it easy to grab for breakfast or a snack. Plus, it looks nice! - Flavor Boost. If you want more sweetness, add extra maple syrup. Taste as you go to find your perfect level. - Top It Off. Add whipped coconut cream on top for a rich taste. - Add Crunch. Sprinkle crushed pecans for some texture. - Cinnamon Sprinkle. A light dusting of cinnamon adds a warm touch. - Layer It. For a fun twist, layer the pudding with some yogurt or extra pumpkin puree in a tall glass. This pudding is not just tasty; it looks beautiful, too! When making pumpkin pie overnight chia pudding, avoid these common mistakes: - Not whisking well: Mix the almond milk and pumpkin until smooth. This helps to blend all flavors. - Skipping the chill time: Letting it chill is key. If you skip this, the chia seeds won't thicken. - Using too few chia seeds: Ensure you use enough chia seeds. They absorb the liquid and give it texture. For the best results, chill your pudding for at least 4 hours. However, overnight gives the best texture. The longer it sits, the thicker it gets. Aim for a minimum of 4 hours, but overnight is ideal. This allows the chia seeds to soak up all the flavors. To boost flavor and texture, try these tips: - Add toppings: Whipped coconut cream adds creaminess. Crushed pecans add crunch. - Mix in spices: A sprinkle of cinnamon on top brightens the dish. Try adding a little nutmeg for warmth. - Adjust sweetness: If you like sweeter pudding, add more maple syrup. Start with one tablespoon, then taste and adjust. These simple tips can make your pumpkin pie overnight chia pudding even more delightful. Enjoy exploring different combinations! {{image_2}} You can use various milk options for this recipe. Almond milk gives a nutty taste. Other choices include soy milk, oat milk, or coconut milk. Each type adds its own flavor. If you want creaminess, full-fat coconut milk works great. For a light touch, try unsweetened almond milk. To make this pudding even better, add your favorite flavors. You can mix in some cocoa powder for a chocolate twist. A dash of maple syrup boosts sweetness. If you love nuts, add crushed pecans or walnuts. For a fruity kick, try stirring in some diced apples or pears. This pudding is perfect for all seasons. In fall, use extra pumpkin spice for warmth. In winter, mix in a hint of peppermint for a festive touch. In spring, add fresh berries for brightness. In summer, use tropical fruits like mango or pineapple. Each season brings new tastes to enjoy. To store your pumpkin pie chia pudding, use an airtight container. Glass jars work great for this. Make sure to keep it in the fridge. This helps keep the pudding fresh and tasty. If you plan to add toppings, store them separately. This keeps the toppings crisp and prevents sogginess. Pumpkin pie chia pudding can last up to five days in the fridge. However, for the best taste, enjoy it within three days. As time goes by, the chia seeds may absorb more liquid. This can make the pudding thicker, so adjust with a splash of milk if needed. You can eat pumpkin pie chia pudding cold or warm it up. To warm it, place it in a microwave-safe bowl. Heat it in short bursts of 20 seconds. Stir after each burst until it’s warm enough for your taste. If you find it too thick after reheating, add a little milk and stir. Enjoy your tasty treat! Chia pudding lasts up to five days in the fridge. Store it in a covered jar or container. This keeps it fresh and tasty. You may notice it thickens over time. If it gets too thick, just stir in a bit of milk. Yes, you can make this pudding ahead of time! It’s perfect for meal prep. Prepare it the night before, and let it sit in the fridge. This lets the chia seeds soak up the liquid. You can enjoy it for breakfast or a snack later. If you don’t have pumpkin pie spice, no worries! You can mix your own using common spices. Combine cinnamon, nutmeg, and ginger for a great flavor. Use one teaspoon of each spice for a similar taste. This way, you can still enjoy that warm, cozy flavor in your pudding. In this post, we explored how to make delicious chia pudding. We covered key ingredients, step-by-step instructions, and helpful tips. You learned about common mistakes and how to enhance flavor. I shared variations using milk alternatives and fun mix-ins for seasonality. Remember to store your pudding properly for the best shelf life. Chia pudding is easy to customize and packed with nutrients. Enjoy making it your own and savor every bite!

Pumpkin Pie Overnight Chia Pudding Delightful Treat

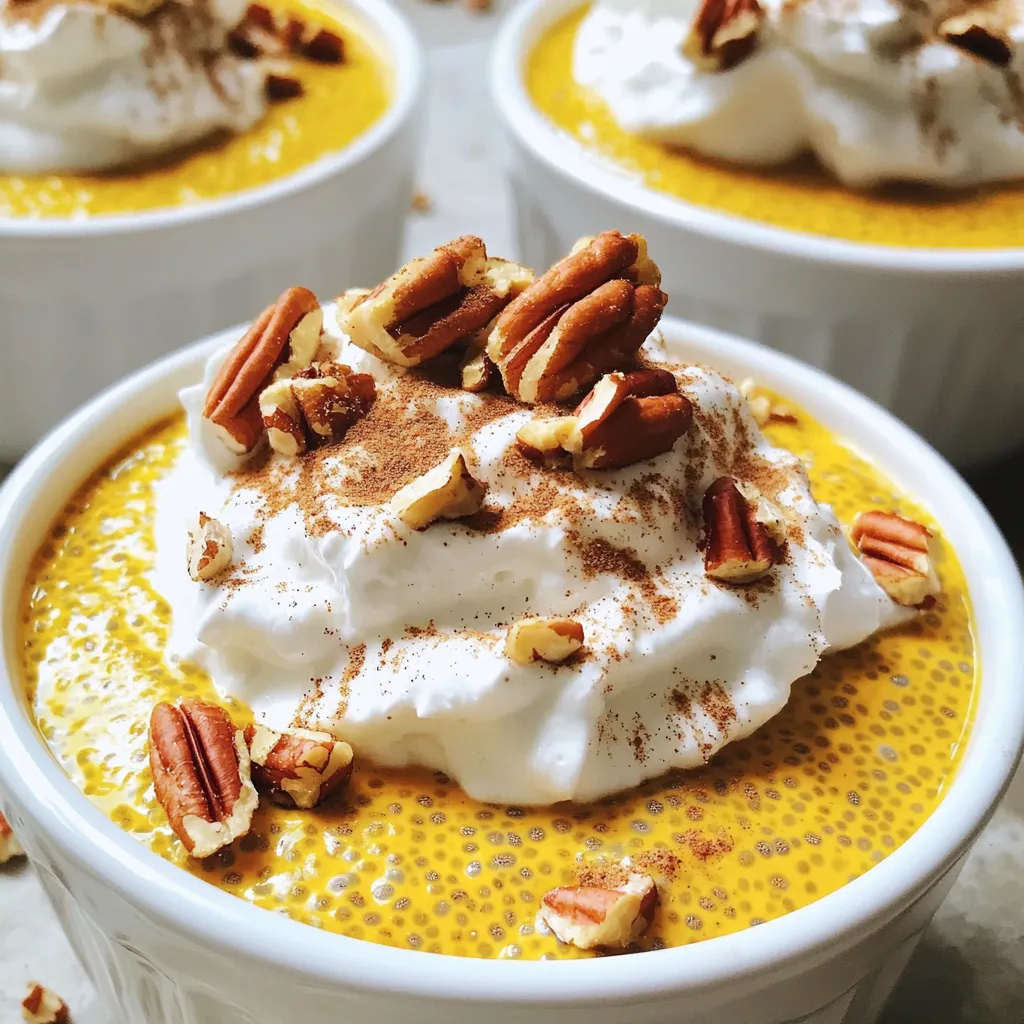
Craving a delicious and healthy treat? Let me introduce you to Pumpkin Pie Overnight Chia Pudding. This delightful dish combines

- 2 cups apple cider - 1/4 cup freshly squeezed lime juice - 1/4 cup orange juice The main ingredients create the base of this mocktail. Apple cider adds a rich, sweet flavor. Fresh lime juice gives a nice tang, and orange juice brightens the drink. Together, they make a tasty mix. - 1 tablespoon agave syrup - 1/2 teaspoon ground cinnamon - 1/4 teaspoon ground ginger Optional additions can enhance the flavor. Agave syrup adds sweetness if you like it sweeter. Ground cinnamon and ground ginger give warmth and depth. You can adjust these to fit your taste. - Lime wedges - Apple slices - Coarse salt and sugar mixture Garnishes make your drink look pretty and add flavor. Lime wedges and apple slices are great choices. The coarse salt and sugar mixture on the rim adds a fun touch. It balances the sweet and tart flavors in each sip. To start, we need to prepare the glasses. First, mix equal parts of coarse salt and sugar on a small plate. This blend adds a nice touch. Next, take a lime wedge and rub it around the rim of each glass. This step helps the salt-sugar mix stick well. Finally, dip the rims into the mixture. Make sure to coat them evenly for a tasty finish. Now, let’s mix the mocktail. In a large pitcher, combine the apple cider, freshly squeezed lime juice, and orange juice. These juices create a great base. If you like it sweeter, add a tablespoon of agave syrup. Then, sprinkle in the ground cinnamon and ground ginger for extra flavor. Stir well until everything is nicely mixed together. It’s time to assemble the drink! Start by filling each prepared glass with ice cubes. This keeps your mocktail nice and chilled. Next, pour the apple cider mixture over the ice. Fill each glass about two-thirds full. Top off your drink with a splash of sparkling water for a refreshing fizz. Finally, garnish with lime wedges and apple slices. You can place them on the rim or let them float in the drink. Enjoy this delightful fall treat! To make your Apple Cider Margarita Mocktail extra tasty, consider these tips: - Adjusting sweetness with agave syrup: If you like your drinks sweet, add 1 tablespoon of agave syrup. Mix it in with the other liquids. Taste as you go and add more if needed. - Spice blend variations: Want to spice things up? Try adding nutmeg or cloves. Just a pinch will add warmth and depth to your drink. A great drink needs a great look. Here are some ideas: - Creative garnishing ideas: For a fun touch, add lime wedges or apple slices. You can float them in the drink or place them on the rim. - Glassware recommendations: Use clear glasses to show off the colors. A tall glass works well for this mocktail. Don’t forget to rim it with salt and sugar for extra flair. Want to save time? Here’s how: - Pre-mixing the mocktail: You can mix the apple cider, lime juice, and orange juice ahead of time. Store it in the fridge for up to 24 hours. Just add the sparkling water and ice right before serving for a fresh taste. {{image_2}} You can mix fun juices in your Apple Cider Margarita Mocktail. Try using cranberry juice for a tart twist. Pomegranate juice adds a sweet and vibrant color. You can also infuse your drink with fresh herbs. Adding mint or rosemary gives your mocktail a fresh, aromatic kick. If you want a different sweetness, try honey or maple syrup. Both add a nice flavor that works well with apple cider. You can also use stevia for a low-calorie option. Just remember to taste as you go. Adjust the sweetness to match your preference. You can create a fall-themed punch with your favorite seasonal fruits. Combine apple cider, orange slices, and cranberries in a big bowl. This makes a great drink for parties. You can also try mocktail versions of classic cocktails. Mix lemonade with a splash of ginger beer for a fun twist. You might have some mocktail mix left over. To store it, pour the mix into a clean jar. Seal the jar tightly and place it in the fridge. This keeps the mix fresh for up to three days. Before serving, give it a good shake. This ensures all the flavors mix well again. Freshness matters for the best taste. Apple cider stays good in the fridge for about a week after opening. Lime juice and orange juice should also be fresh. If you use bottled juice, check the expiration date. Ground spices, like cinnamon and ginger, last a long time in your pantry. However, they are best when fresh. Serve your mocktail chilled for a refreshing drink. Pour the mix over ice in a glass. Add a splash of sparkling water on top. This gives it a nice fizz. Garnish with lime wedges and apple slices. This not only looks nice but adds more flavor too. Enjoy your drink while it’s cold for the best taste! Yes, you can easily turn this mocktail into a cocktail. To add some kick, try using tequila or spiced rum. These spirits mix well with apple cider and citrus. Start with 1 to 2 ounces of your chosen alcohol for each drink. Adjust to your taste. The flavors balance nicely with the mocktail's sweetness. If you want a less sweet drink, skip the agave syrup. You can also use less apple cider and replace it with more lime or orange juice. This will keep the flavor bright without the extra sugar. Another option is to use a tart apple cider. It gives a nice balance to the drink. You can switch up the spices to fit your taste. Try nutmeg for a warm note or cardamom for a unique twist. Cloves also add a lovely fall flavor. Just remember, a little goes a long way. Start with a pinch and taste as you go. This lets you find the perfect spice blend for your mocktail. This blog post covered how to make a refreshing apple cider mocktail with simple ingredients. We discussed the main ingredients and optional additions, along with tips for flavoring and presentation. I shared ways to mix, garnish, and store your drink. Mocktails can be a fun and tasty option, even for kids. You can swap juices or sweeteners to match your taste. Get creative with your drinks and enjoy!

Apple Cider Margarita Mocktail Refreshing Fall Drink

Fall is here, and that means it’s the perfect time for a cozy drink! The Apple Cider Margarita Mocktail offers

To make these key lime pie bars, you need a few key ingredients: - 1 ½ cups graham cracker crumbs - ⅓ cup granulated sugar - ½ cup unsalted butter, melted - 1 can (14 oz) sweetened condensed milk - ¾ cup fresh key lime juice (about 10 key limes) - 2 large eggs - 1 teaspoon lime zest The graham cracker crumbs create a tasty crust. The sugar adds sweetness to the crust and filling. Butter helps bind the crumbs. Sweetened condensed milk gives the filling its creamy texture. Fresh key lime juice provides that zesty flavor we love. Eggs help set the filling, while lime zest adds extra zing. You can enhance your key lime pie bars with some fun garnishes: - Whipped cream, for serving - Lime slices, for garnish Whipped cream adds a light and fluffy touch. Lime slices give a fresh look and more flavor. You can also drizzle extra lime juice on top for a burst of acidity. If you don’t have some ingredients, here are some simple swaps: - For graham cracker crumbs, use crushed cookies like Digestive biscuits. - Swap granulated sugar with brown sugar for a deeper flavor. - If you can’t find key limes, regular limes work fine, but the taste will differ slightly. - Use egg substitutes like flaxseed meal or applesauce if needed. These substitutions keep the essence of the dessert alive while making it easier to prepare. {{ingredient_image_1}} First, I preheat the oven to 350°F (175°C). I line a 9x9 inch baking dish with parchment paper. I let the paper overhang a bit. This helps me lift the bars out later. In a mixing bowl, I combine 1 ½ cups of graham cracker crumbs with ⅓ cup of granulated sugar. Then, I add ½ cup of melted butter. I mix these until it looks like wet sand. Next, I press the mixture firmly into the bottom of the dish. It should be even and compact. I bake it for 10 to 12 minutes until it looks lightly golden. After that, I take it out and let it cool slightly. Now, I grab another bowl. I whisk together one can of sweetened condensed milk, ¾ cup of fresh key lime juice, and 2 large eggs. I also add 1 teaspoon of lime zest. I mix until it is smooth and well combined. Then, I pour the key lime filling over the cooled crust. I spread it out evenly with a spatula. I bake the dish again for 15 to 20 minutes. The filling should be set but still a bit jiggly in the center. Once done, I take it out and let it cool at room temperature for about 30 minutes. Next, I place the dish in the fridge for at least 2 hours. This helps the bars set fully. When they are chilled, I lift them out using the parchment overhang. I cut them into squares or rectangles. Finally, I serve the bars with a dollop of whipped cream and a slice of lime on top. This adds a nice touch! To get the best crust for your Key Lime Pie Bars, use fresh graham cracker crumbs. Crush the crackers finely so they mix well with the sugar and butter. Use a measuring cup to press the mixture firmly into the baking dish. This helps it hold together after baking. Bake the crust until it turns a light golden brown. This step adds flavor and texture. To make a smooth key lime filling, whisk the ingredients well. Combine sweetened condensed milk, fresh key lime juice, eggs, and lime zest in a bowl. Mix until there are no lumps. If you want an extra smooth texture, you can strain the mixture through a fine sieve. This step removes any bits of lime zest or egg that might remain. Once you cut the bars, serve them with whipped cream on top. A dollop adds creaminess and balances the tart flavor. For a pop of color, add a slice of lime on each bar. You can also sprinkle some lime zest for extra flair. If you want a special touch, drizzle with more lime juice before serving. Pro Tips Use Fresh Key Limes: For the best flavor, use freshly squeezed key lime juice instead of bottled varieties, as it provides a more vibrant and tangy taste. Chill Thoroughly: Allow the bars to chill in the refrigerator for at least 2 hours; this helps the filling to set properly, resulting in cleaner cuts and a better texture. Customize Your Toppings: Try adding toasted coconut or a sprinkle of graham cracker crumbs on top of the whipped cream for added texture and flavor. Make Ahead: These bars can be made a day in advance. They store well in the refrigerator, allowing the flavors to meld even further. {{image_2}} You can switch up the flavor by using other citrus fruits. Try using regular limes, lemons, or even oranges. Each choice gives a new twist. For instance, lemon juice adds a bright, sweet flavor. Orange juice brings a nice sweetness and a unique taste. Experiment with different fruits to find your favorite blend. Get creative by adding fun mix-ins to your key lime pie bars. Chopped nuts, like pecans or almonds, add crunch. You can also mix in coconut flakes for a tropical touch. Chocolate chips can bring a rich flavor that pairs well with the tartness. Just remember to keep the mix-ins balanced so they don’t overpower the key lime flavor. If you need a gluten-free version, it’s simple! Replace graham cracker crumbs with gluten-free options. Look for gluten-free graham cracker brands or use crushed nuts. Almond flour works well too. Make sure all other ingredients are gluten-free. This way, everyone can enjoy these tasty bars without worry. To keep your key lime pie bars fresh, store them in an airtight container. Place parchment paper between layers to avoid sticking. You can also cover the dish with plastic wrap. This keeps the bars moist and tasty. In the fridge, key lime pie bars last about 5 to 7 days. Make sure to check for any signs of spoilage before eating. If they look or smell off, it’s best to throw them away. Always enjoy them chilled for the best flavor. Freezing is a great option if you want to save some bars for later. Cut the bars into squares before freezing. Wrap each square in plastic wrap and place them in a freezer-safe bag. They can last up to 3 months in the freezer. When you’re ready to eat them, thaw them in the fridge overnight. Enjoy those refreshing flavors anytime! Yes, you can use bottled key lime juice. It is a great time-saver. However, fresh key lime juice gives the best flavor. Fresh juice has a bright, zesty taste. That really makes your bars pop. If you use bottled juice, check the label for quality. Look for 100% pure juice without added sugars. You can tell the bars are done when the filling is mostly set. The center should still jiggle a bit. It should not look liquidy. You can also check with a toothpick. Insert it in the center; it should come out clean. If it has filling on it, bake for a few more minutes. There are a few common mistakes to watch out for. First, don’t skip cooling the crust. It needs to be cool before adding the filling. Second, mix the filling well, but don’t overbeat the eggs. This can make the bars puff up and crack. Lastly, don’t rush the chilling time. Let them sit for at least two hours in the fridge. This helps them set properly. We covered the key ingredients, step-by-step instructions, and helpful tips for making key lime pie bars. You learned about ingredient swaps and tasty variations. Remember, good storage keeps them fresh longer. Whether you bake with fresh limes or try fun mix-ins, your treats will impress. Stay confident and enjoy the process. Making these bars is all about having fun in the kitchen and sharing with friends. Happy baking!

Key Lime Pie Bars Easy and Refreshing Dessert Recipe

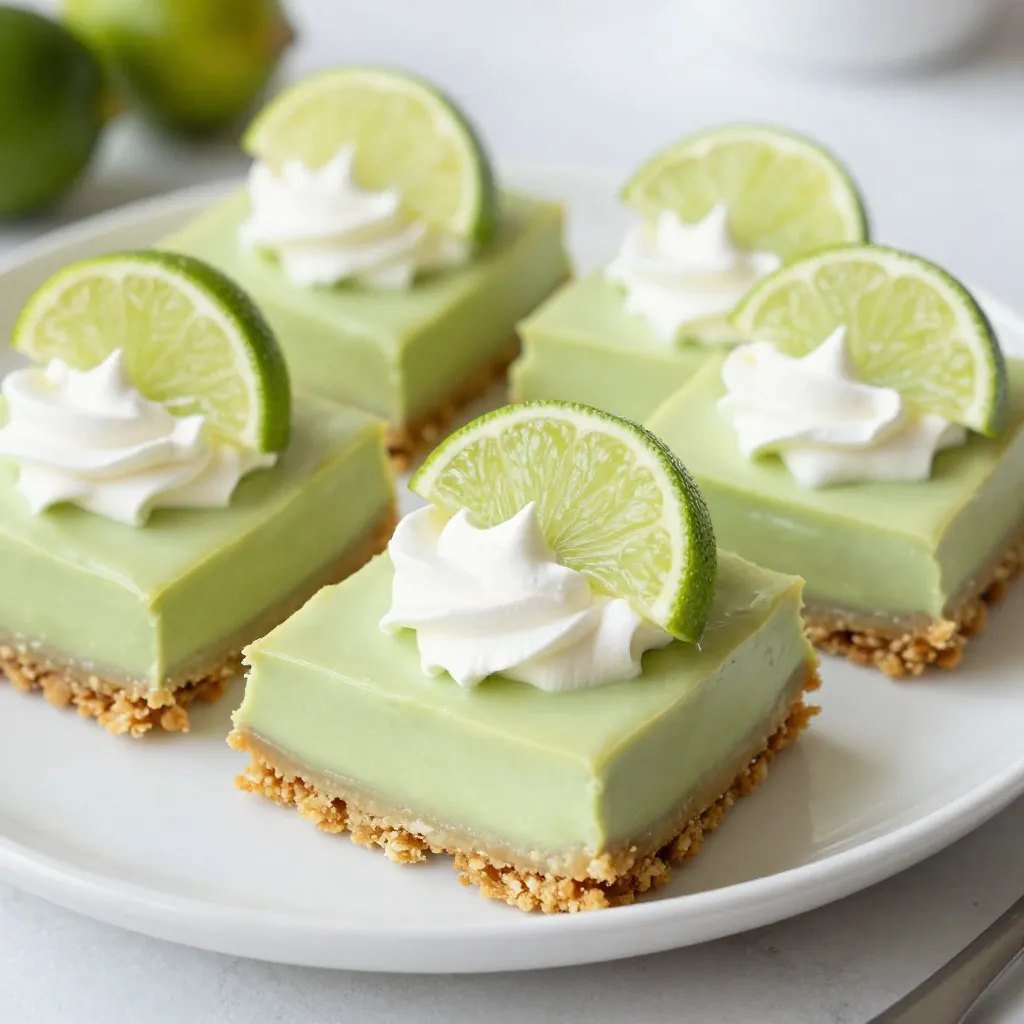
Looking for a sweet treat that brightens your day? You’ll love these Key Lime Pie Bars! They are easy to

- 4 tilapia fillets - 4 tablespoons unsalted butter - 4 cloves garlic, minced - Juice and zest of 1 lemon - 1 teaspoon dried oregano - 1 teaspoon chopped fresh parsley - Salt and pepper, to taste Garlic Butter Lemon Tilapia is simple to make. You need fresh tilapia fillets, butter, garlic, and lemon. The garlic adds a rich taste. The lemon brightens the dish. For the main ingredients, choose four good tilapia fillets. Make sure they are fresh. Use unsalted butter for a creamy texture. Mince the garlic cloves finely to enhance their flavor. Squeeze all the juice from one lemon. Use the zest for extra lemony goodness. Next, you add seasoning and garnish. A teaspoon of dried oregano gives a nice herbal note. Fresh parsley adds color and freshness. Salt and pepper are key to bring out all the flavors. This dish is perfect for a quick weeknight dinner. You can serve it with rice or veggies. The ingredients are simple but so tasty. Keep these basics on hand for quick meals. {{ingredient_image_1}} First, I pat the tilapia fillets dry with paper towels. This step is key because it helps the fish sear nicely. I then season both sides of the fillets with salt and pepper. This simple seasoning brings out the fish's natural flavor. Next, I heat a large skillet over medium heat. I add 4 tablespoons of unsalted butter and let it melt. Once melted, I toss in 4 cloves of minced garlic. I sauté the garlic for about 1 minute until it smells amazing. Careful not to burn it, as that can ruin the dish. After the garlic is fragrant, I squeeze the juice of 1 lemon into the skillet. I also add the zest of that lemon for extra flavor. I stir this mix well and let it simmer for 2 minutes. Now, I carefully place the tilapia fillets into the skillet. I cook them for 3 to 4 minutes on one side until they turn golden and flaky. Using a spatula, I gently flip them over and cook for another 2 to 3 minutes on the other side. As the tilapia cooks, I sprinkle 1 teaspoon of dried oregano over the fillets. This adds a lovely herbal note, enriching the dish. Once the fish is fully cooked, I transfer the fillets to serving plates. I spoon the garlic butter sauce over the top for a rich finish. Finally, I garnish with chopped fresh parsley for a pop of color and flavor. To get a nice sear on your tilapia, start by drying the fillets. Wet fish won’t brown well. Use paper towels to pat them dry. This step makes a big difference. Cook the fish on medium heat. If it’s too hot, the butter can burn. If it’s too low, the fish won’t cook right. Aim for a steady temperature for the best results. You can change the garlic and lemon to suit your taste. If you love garlic, add more minced cloves. For a tangier flavor, use extra lemon juice or zest. Try adding herbs like thyme or dill. These can give your dish a fresh twist. You can also sprinkle in some red pepper flakes for heat. This dish goes well with simple side dishes. Try steamed veggies or a fresh salad. Rice or quinoa also pairs nicely. For wine, choose a light white like Sauvignon Blanc. Its crisp taste matches the lemon flavor well. Enjoy your meal with a side of your favorite drink! Pro Tips Use Fresh Ingredients: Always opt for fresh garlic and lemons for the best flavor. Fresh ingredients enhance the dish significantly compared to their dried or bottled counterparts. Perfect Cooking Temperature: Ensure your skillet is at medium heat to avoid burning the garlic while still achieving a nice sear on the tilapia. Adjust the heat as necessary during cooking. Sauce Consistency: If you prefer a thicker garlic butter sauce, let it simmer for a few extra minutes to reduce it further before adding the tilapia. Garnish with Citrus: For an extra burst of flavor and presentation, consider garnishing with additional lemon slices or wedges alongside the fresh parsley. {{image_2}} You can easily change the fish in this recipe. If tilapia isn’t your favorite, try cod or sole. Both work well with garlic and lemon. For a fun twist, use salmon for a richer taste. If you need a dairy-free option, there are great butter swaps. Coconut oil or vegan butter can replace regular butter. These alternatives still give you that tasty flavor without dairy. You can cook this dish in different ways. Grilling gives a nice smoky flavor. It adds a lovely char to the fish. Just be sure to keep an eye on it to avoid drying out. Pan-searing is a fast method that keeps the fish juicy. It also helps create a crispy edge. If you prefer, you can bake the tilapia. Oven-baking is easy and keeps the kitchen clean. Set the oven to 400°F and bake for about 15-20 minutes. This recipe fits into low-carb or gluten-free diets. Tilapia is naturally low in carbs, which is great for these diets. Use fresh herbs to add flavor without extra carbs. You can add vegetables to make it a complete meal. Try asparagus or zucchini. Roasted veggies pair well with the fish. They add color and nutrients to your plate. To keep your Garlic Butter Lemon Tilapia fresh, refrigerate it right away. Place the fillets in an airtight container. They will stay good for about 2-3 days. If you want to save some for longer, freezing is a great option. Wrap each fillet tightly in plastic wrap. Then, put them in a freezer-safe bag. You can freeze them for up to 2 months. Just remember to label the bag with the date. This way, you know when you made it. When you’re ready to enjoy your leftovers, reheating is easy. The best method is to use the skillet. Heat it over medium-low heat. Add a little butter or oil to prevent sticking. Place the tilapia in the skillet for about 3-4 minutes. This will warm it up nicely without drying it out. You can also use the microwave. If you choose this method, cover your plate with a paper towel. Heat for 30 seconds at a time until warm. Be careful not to overcook it, as tilapia can become tough. Enjoy your meal just like the first time! Garlic Butter Lemon Tilapia cooks quickly. It takes about 20 minutes total. You spend 10 minutes prepping and 10 minutes cooking. Each side of the fish needs just 3-4 minutes. When the fish looks golden and flakes easily, it is done. Yes, you can use frozen tilapia fillets. Just remember to thaw them first. The best way is to leave them in the fridge overnight. If you're in a hurry, you can run them under cold water for about 30 minutes. Once thawed, pat them dry before seasoning and cooking. Garlic Butter Lemon Tilapia pairs well with many sides. Here are some popular choices: - Steamed broccoli - Garlic mashed potatoes - Rice pilaf - Mixed green salad - Roasted asparagus These sides balance the rich, buttery fish and add freshness to your meal. Enjoy your cooking! This blog showed you how to make Garlic Butter Lemon Tilapia from start to finish. You learned about the key ingredients, step-by-step cooking, and helpful tips. Remember to dry your fillets for that perfect sear. You can also try different cooking methods or add veggies for variety. Feel free to mix and match flavors to suit your taste. Enjoy your tasty tilapia dish, knowing you can customize it to make it your own!

Garlic Butter Lemon Tilapia Tasty and Simple Dish

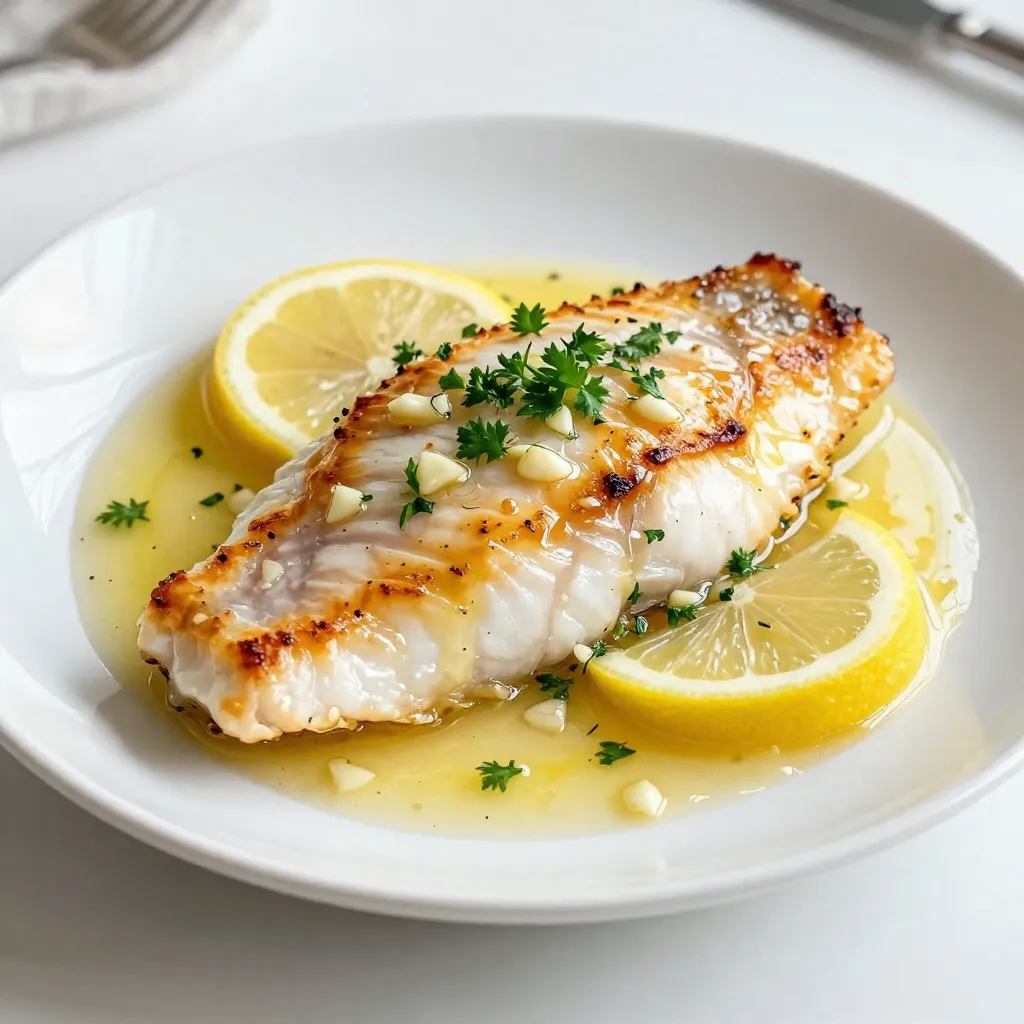
Looking for a quick and easy meal? Garlic Butter Lemon Tilapia is your answer! This dish bursts with flavor and

To make these tasty rolls, gather these simple items: - 2 ¾ cups all-purpose flour - ¼ cup granulated sugar - 1 packet (2 ¼ tsp) active dry yeast - ½ tsp salt - ½ tsp ground cinnamon - ¼ tsp nutmeg - ½ cup warm milk (110°F) - 1/3 cup pumpkin puree - 1 large egg - 2 tablespoons unsalted butter, melted For the sweet maple icing, you'll need: - 1 cup powdered sugar - 2 tablespoons pure maple syrup - 1-2 tablespoons milk (adjust for desired consistency) Feel free to add a few fun extras: - ¼ cup chopped walnuts (for crunch) - You can swap pumpkin for other purees, like sweet potato - Consider adding dried fruits like raisins or cranberries for sweetness These ingredients come together to create a delightful mix of flavors. The pumpkin adds a rich taste, while the spices bring warmth. The maple icing ties everything together with a sweet finish. Enjoy crafting these rolls and feel free to experiment! Start by mixing the dry ingredients. In a bowl, combine 2 cups of all-purpose flour, sugar, yeast, salt, ground cinnamon, and nutmeg. Whisk these ingredients well. Next, mix the wet ingredients in another bowl. Add warm milk, pumpkin puree, the egg, and melted butter. Stir until smooth. Slowly add the wet mix to the dry mix. Stir until a soft dough forms. Now, it’s time to add more flour. Gradually add the remaining ¾ cup of flour, ¼ cup at a time. Stir until the dough pulls away from the bowl. Transfer the dough to a floured surface. Knead it for about 5 minutes. The dough should feel smooth and elastic. Place the kneaded dough in a greased bowl. Cover it and let it rise in a warm spot for about 1 hour, or until it doubles in size. Once your dough has risen, roll it out on a floured surface. Aim for a large rectangle, about ¼ inch thick. Spread softened butter evenly over the rolled dough. Then, sprinkle brown sugar and ground cinnamon on top. If you like, add chopped walnuts for extra flavor. Now, start rolling the dough tightly from one long edge, making a log shape. After rolling, cut the log into 12 equal pieces. Arrange these pieces in a greased baking dish. Cover them and let them rise again for another 30 minutes. Preheat your oven to 350°F (175°C). Bake the rolls for 20-25 minutes or until they turn golden brown. While the rolls bake, prepare the maple icing. In a bowl, whisk together powdered sugar, maple syrup, and milk. Adjust the milk until you achieve a smooth drizzle consistency. Once the rolls are done, allow them to cool slightly. This step helps the icing stick better. Drizzle the maple icing over the warm cinnamon rolls. Enjoy this sweet, warm treat! To get the right dough, use warm milk at 110°F. This helps the yeast grow. Mix the dry and wet ingredients well. The dough should feel soft but not sticky. If it's too sticky, add flour slowly until it pulls away from the bowl. Knead the dough for about five minutes. This makes it smooth and elastic, which is key for fluffy rolls. One big mistake is not letting the dough rise enough. If you rush this step, the rolls will be dense. Make sure to cover the dough while it rises. Another mistake is rolling the dough too thin. Aim for about 1/4 inch thick. If you roll it too thin, the filling may leak out. Lastly, don’t skip the icing! It adds a sweet finish that makes these rolls special. To boost flavors, try adding more spices. A pinch of ginger or allspice can add warmth. You can also mix in some orange zest for a fresh twist. If you love nuts, add chopped pecans or almonds in the filling. For a richer taste, use brown sugar instead of white sugar. These tips will make your pumpkin cinnamon rolls delightfully unique! {{image_2}} You can make these rolls your own by adding nuts or dried fruits. Chopped pecans or almonds work great. They add a nice crunch. Dried cranberries or raisins bring sweetness. Just sprinkle them on the filling after the brown sugar and cinnamon. This makes each bite unique. If you're not a fan of pumpkin, try other purees. Sweet potato or butternut squash can be good choices. They give a similar texture and taste. Just use the same amount as the pumpkin in the recipe. This simple swap can change the flavor, but still keep it tasty. You can switch up the icing too. Cream cheese frosting can add a tangy twist. Just mix cream cheese, butter, and powdered sugar until smooth. You can also try a chocolate glaze for a rich flavor. Just melt chocolate with a bit of cream for a quick topping. Each option offers a fun take on the classic recipe. Keep leftover cinnamon rolls fresh by placing them in an airtight container. This helps maintain their soft texture. If you have a lot leftover, wrap them tightly in plastic wrap first. You can also use aluminum foil for added protection. Store them at room temperature for up to three days. For longer storage, consider freezing them. To enjoy your cinnamon rolls warm, you can reheat them in the oven. Preheat your oven to 350°F (175°C). Place the rolls on a baking sheet and cover them with foil. Heat for about 10 to 15 minutes. This method keeps them soft. You can also use the microwave. Heat one roll for about 15 to 20 seconds. Add a teaspoon of water on the plate to create steam for a moister roll. For long-term storage, freezing is your best option. First, let the rolls cool completely. Wrap each roll tightly in plastic wrap. Then place them in a freezer bag. Remove as much air as possible before sealing the bag. You can freeze them for up to three months. When you're ready to eat, thaw them in the fridge overnight. Reheat as mentioned above for best results. Yes, you can use fresh pumpkin. First, peel and chop the pumpkin. Then, steam or roast the pieces until soft. Blend or mash the pumpkin until smooth. Fresh pumpkin gives a great taste. Just make sure it is not too watery. Drain any excess moisture before using it in the recipe. To check if the rolls are done, look for a golden-brown color. They should rise nicely and feel soft to the touch. You can also use a toothpick. If it comes out clean, the rolls are ready. Bake for 20-25 minutes for the best results. You can use almond milk, soy milk, or oat milk instead of regular milk. These alternatives work well for the icing. Start with a small amount and adjust for your desired thickness. Using these options keeps the flavor rich and tasty. Making pumpkin cinnamon rolls is a fun and tasty adventure. We covered key ingredients, step-by-step instructions, and tips to make them just right. You learned about variations to suit your taste and how to store and enjoy leftovers. Remember, baking is about exploring. Don’t hesitate to try new flavors or swap ingredients. Your perfect pumpkin cinnamon roll is just a few simple steps away. Enjoy every bite!

Pumpkin Cinnamon Rolls with Maple Icing Delight

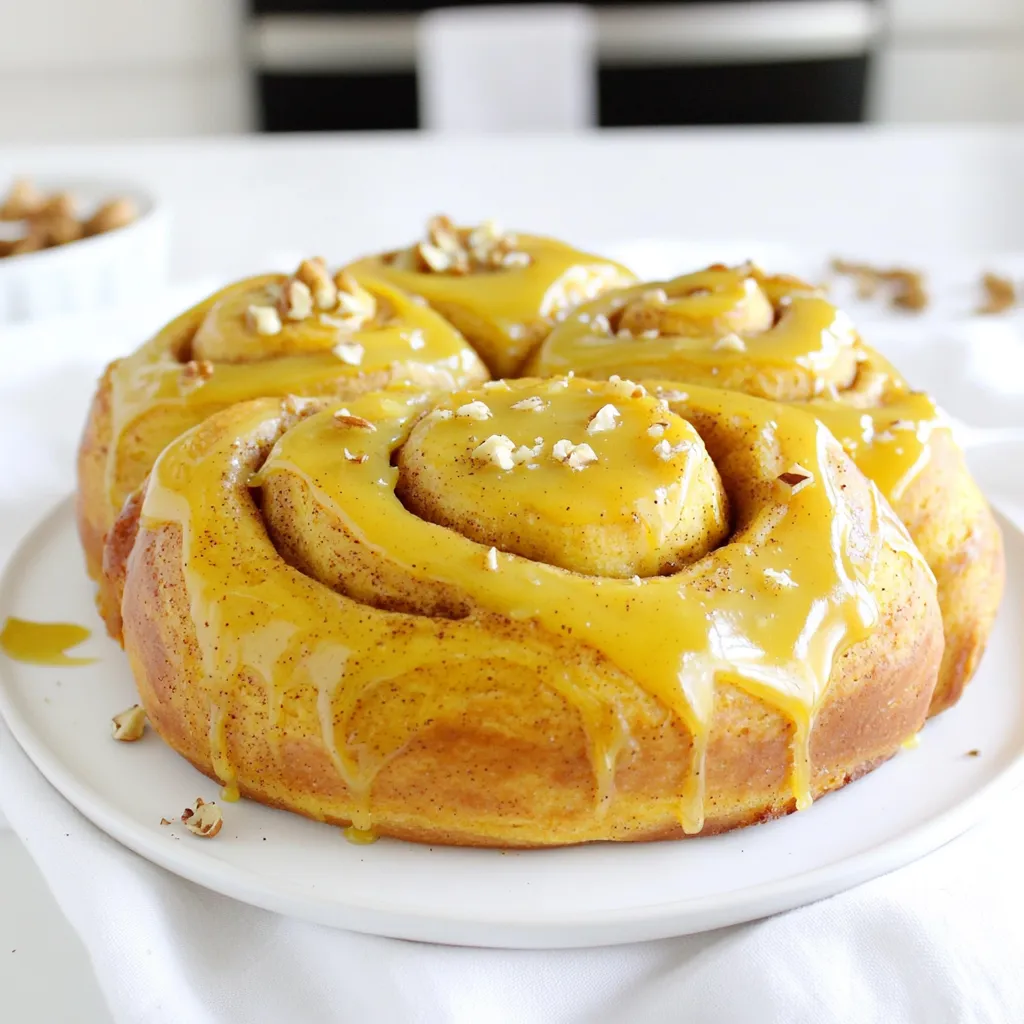
Get ready for a cozy treat that blends the warmth of fall with sweet goodness! In this article, I’ll guide

- 1 lb (450g) boneless, skinless chicken breasts - 8 oz (225g) pasta (e.g., fettuccine or penne) - 4 cloves garlic, minced - 1 cup chicken broth - 1 cup heavy cream - 1 cup grated Parmesan cheese - 1 teaspoon Italian seasoning - Salt and pepper to taste - 2 tablespoons olive oil In this dish, chicken breasts are the star. They soak up all the flavors. The pasta adds a nice base, holding the creamy sauce. Garlic gives a rich taste, while chicken broth adds depth. Heavy cream makes it all smooth and rich. Parmesan cheese brings a salty touch that blends so well. Italian seasoning adds a bit of herb flavor that ties everything together. To cook this dish well, you need a few key tools. A slow cooker is crucial for easy cooking. A skillet helps to sear the chicken first. A pot for boiling the pasta is also needed. You will also want a set of measuring cups and spoons for accuracy. Finally, a pair of forks will help shred the chicken once it's done cooking. - Fresh parsley, chopped - Extra grated Parmesan cheese Garnishing makes the dish look great. Fresh parsley adds a pop of color. It also gives a fresh taste that balances the creaminess. A sprinkle of extra Parmesan on top makes it even more inviting. These small touches elevate your meal from simple to stunning. Start by seasoning the chicken breasts. Use salt, pepper, and Italian seasoning. Heat olive oil in a skillet over medium-high heat. Sear the chicken for 3-4 minutes on each side. The chicken should turn golden brown. It does not need to cook fully; it will finish in the slow cooker. Place the seared chicken breasts into the slow cooker. Add minced garlic, chicken broth, and heavy cream on top of the chicken. This will create a rich base for the sauce. Make sure everything is well distributed. Cover the slow cooker and set it on low. Cook for 4-5 hours or on high for 2-3 hours. Check for tenderness; the chicken should easily shred with a fork. This slow cooking allows the flavors to meld beautifully. About 15-20 minutes before serving, cook your pasta in a separate pot. Follow the package instructions to ensure it is al dente. Once cooked, drain the pasta and set it aside. This timing is key to keeping the pasta from getting mushy. Remove the chicken from the slow cooker and shred it with two forks. Return the shredded chicken to the pot. Stir in grated Parmesan cheese. Mix until the cheese melts and forms a creamy sauce. Taste and add more salt or pepper if needed. Add the cooked pasta directly into the slow cooker. Gently toss everything together to coat the pasta in the sauce. Scoop the creamy garlic Parmesan chicken pasta into bowls. For a nice finish, garnish with chopped fresh parsley and a sprinkle of extra Parmesan cheese. Enjoy your delicious meal! To get that smooth, creamy sauce, use heavy cream. It blends well with the cheese. Stir in the grated Parmesan slowly. This helps it melt evenly. If the sauce seems thick, add a splash of chicken broth. This keeps it nice and light. For the best results, cook on low for 4-5 hours. This makes the chicken tender and full of flavor. If you're short on time, cooking on high for 2-3 hours works too. Ensure the chicken reaches an internal temperature of 165°F (75°C) before serving. Don’t skip searing the chicken. This step adds a rich flavor. Avoid overcooking the pasta. It should be al dente, as it will finish cooking in the sauce. Lastly, taste the dish before serving. Adjust salt and pepper to your liking for the best flavor. {{image_2}} You can switch the chicken for shrimp or tofu. Shrimp cooks fast and gives a nice taste. Use about one pound of shrimp. Just add it to the slow cooker in the last hour. Tofu is a great choice too. Use firm tofu, cut into cubes. Add it same time as the chicken. Both options make this dish fun and different. To make this dish gluten-free, swap the pasta for gluten-free options. You can try quinoa pasta or rice noodles. Both work well and taste great. Also, check the chicken broth. Some brands have gluten, so look for gluten-free labels. These simple swaps keep the dish tasty and safe for everyone. Adding veggies is a smart way to boost flavor and nutrition. You can add spinach, bell peppers, or mushrooms. Add about two cups of chopped veggies to the slow cooker. Toss them in with the chicken and other ingredients. They will cook down and blend nicely with the sauce. This makes the meal colorful and healthy. To keep your creamy garlic Parmesan chicken pasta fresh, store it in an airtight container. Make sure to let it cool down before sealing it. This helps prevent excess moisture inside the container. You can keep it in the fridge for up to three days. If you want to enjoy it later, freezing is a great option. When you’re ready to eat, reheat the pasta gently. You can use a microwave or a stovetop. If using the microwave, heat in short bursts, stirring often. If using the stovetop, add a splash of chicken broth or cream to keep it creamy. Stir until it is warmed through. This will help prevent it from drying out. To freeze the creamy garlic Parmesan chicken pasta, portion it into smaller containers. This makes it easier to thaw only what you need. Be sure to use freezer-safe containers. The pasta can be kept in the freezer for up to three months. When you are ready to eat, thaw it overnight in the fridge before reheating. It takes 4 to 5 hours on low or 2 to 3 hours on high. The chicken should be tender and cooked through. I prefer the low setting for a soft texture. The slow cooker makes the chicken juicy and full of flavor. Yes, you can use any pasta you like! Fettuccine or penne work great, but you can try rotini or even gluten-free pasta. Just make sure to adjust the cooking time for the pasta. Cook it al dente, as it will mix into the creamy sauce later. If the sauce is too thick, add a little chicken broth or cream. Stir it in slowly until you reach your desired consistency. This keeps the sauce creamy and helps it coat the pasta nicely. Yes, you can make this in an Instant Pot! Simply use the sauté function to sear the chicken. Then, add the other ingredients and cook on high pressure for about 10 minutes. Let it naturally release for 5 minutes before serving. To serve more people, just double the ingredients! Use 2 pounds of chicken and 16 ounces of pasta. You may need a larger slow cooker or cook in batches. Adjust the cooking time slightly if you add more ingredients, but keep an eye on the chicken for doneness. This blog post covered all you need for creamy garlic parmesan chicken pasta. We explored key ingredients, cooking steps, and easy variations. I shared tips to avoid common mistakes and how to store leftovers. Remember, you can switch proteins and add veggies for fun twists. Enjoy creating this dish that brings comfort and flavor to your table! With a little practice, you’ll master this meal in no time. Happy cooking!

Creamy Garlic Parmesan Chicken Pasta Slow Cooker Delight

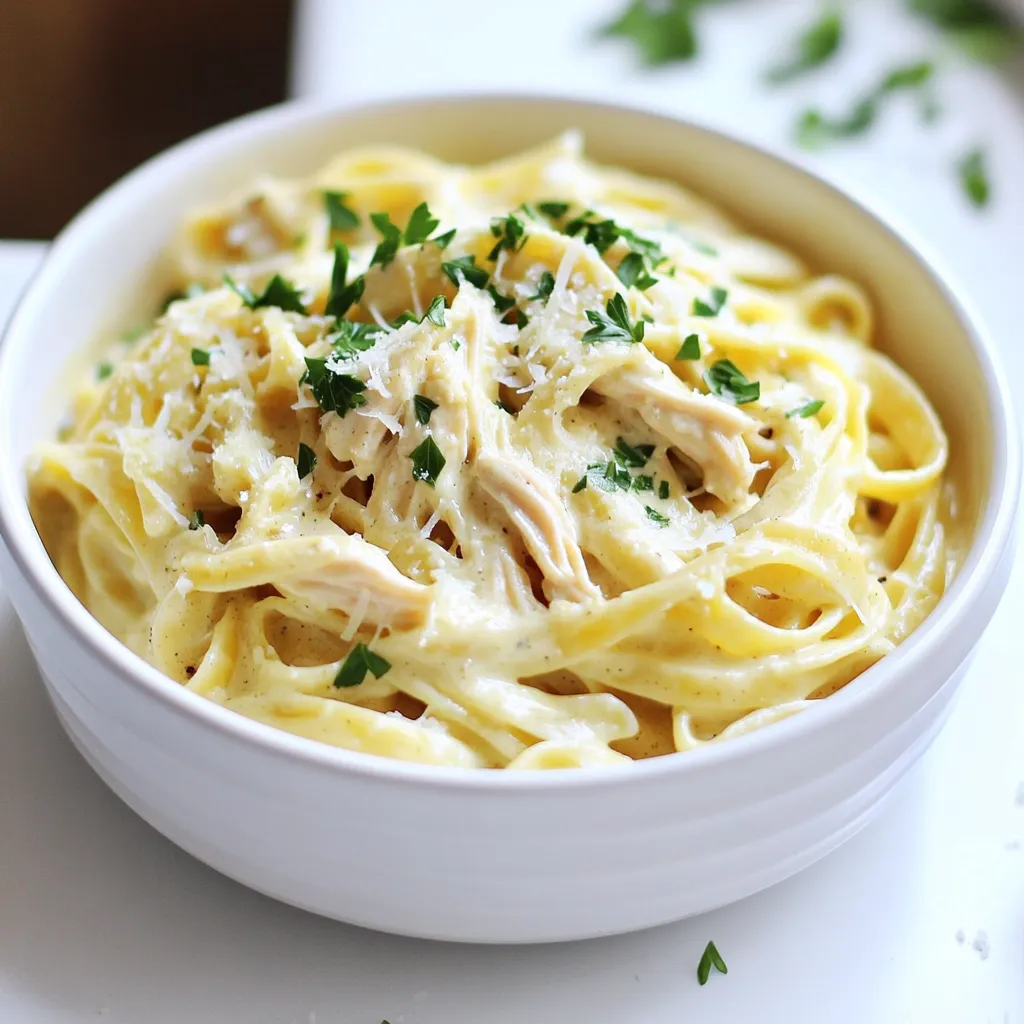
Are you ready to dive into a dish that combines comfort and flavor? My Creamy Garlic Parmesan Chicken Pasta Slow

- 4 chicken thighs (bone-in, skin-on or boneless, skinless) - 2 tablespoons olive oil - 2 tablespoons lime juice (freshly squeezed) - 1 tablespoon chili powder - 1 teaspoon cumin - 1 teaspoon smoked paprika - 1 tablespoon honey - Salt and pepper to taste - 1 red bell pepper, sliced - 1 yellow bell pepper, sliced - 1 green bell pepper, sliced - 1 medium red onion, cut into wedges - Fresh cilantro for garnish (optional) Using chicken thighs gives this dish a juicy flavor. You can use bone-in or boneless thighs, depending on your taste. The marinade combines olive oil and fresh lime juice. This mix adds a bright, zesty flavor. Don't forget the spices! Chili powder, cumin, and smoked paprika create a warm, smoky taste. Honey balances the heat, while salt and pepper bring everything together. For the veggies, I love using colorful bell peppers. They add sweetness and crunch. Red, yellow, and green peppers look great together. The red onion adds even more flavor. When roasted, the veggies become tender and sweet. You can top the dish with fresh cilantro if you like. It adds a nice herbal touch. Enjoy this colorful meal right from the sheet pan! To start, grab a large bowl. Combine the olive oil and lime juice in the bowl. Next, add the chili powder, cumin, smoked paprika, honey, salt, and pepper. Mix everything well. This will create a bright and zesty marinade for your chicken. Now, take the chicken thighs and place them in the bowl. Make sure to coat the chicken evenly with the marinade. I like to let it sit for at least 20 minutes. If you have more time, marinate it overnight in the fridge. This helps boost the flavor. On a large sheet pan, lay out the sliced bell peppers and red onion. Spread them out evenly so they cook well. After that, place the marinated chicken thighs right on top of the vegetables. If you have any leftover marinade, drizzle it over everything for extra flavor. Preheat your oven to 425°F (220°C). Once it's hot, put the sheet pan inside. Roast the dish for 25 to 30 minutes. The chicken should reach an internal temperature of 165°F (74°C). The vegetables will become tender and colorful. After roasting, take the pan out and let it rest for 5 minutes before serving. Marinating is key for great flavor. I suggest marinating the chicken for at least 20 minutes. For deeper flavor, you can marinate overnight in the fridge. The longer you marinate, the more the chicken soaks up the zesty chili lime goodness. To ensure your chicken is tender, use a meat thermometer. This tool helps you check the chicken’s doneness. Cook until the internal temperature reaches 165°F (74°C). This gives you juicy chicken every time, and it avoids any guesswork. Different veggies cook at different rates. Bell peppers and onions cook quickly. They usually take about 25 to 30 minutes in the oven. Keep an eye on them, so they stay tender and crisp. You want the veggies to be vibrant and not mushy. {{image_2}} You can easily change the heat of your dish. If you love spice, add jalapeños or extra chili powder. Start with one jalapeño, diced, and mix it with the marinade. This adds a nice kick. For more heat, add a teaspoon of chili powder. Adjust to your taste. Feel free to swap the protein in this recipe. Chicken thighs work great, but chicken breast is leaner. You can also use shrimp for a lighter option. Just remember to adjust the cooking time. Shrimp cooks faster, so check them at 15 minutes. You can mix in other veggies to boost flavor and nutrition. Try zucchini, corn, or even asparagus. Chop them into similar sizes as the peppers and onion. This ensures even cooking. The more colors, the better! It makes your meal look and taste fantastic. To store leftovers, let the chicken and peppers cool first. Place them in an airtight container. This keeps them fresh for about 3 to 4 days. Make sure to separate the chicken from the veggies if you want them to stay crisp. For the best taste, reheat in the oven. Preheat your oven to 350°F (175°C). Place the chicken and peppers on a baking tray. Heat for about 15 to 20 minutes or until warm. You can also use the microwave. Just cover the dish to keep moisture in. Heat in short bursts, stirring between, until hot. To freeze, first cool the dish completely. Cut the chicken and veggies into serving sizes. Use freezer-safe bags or containers. Label them with the date. They can last up to 3 months in the freezer. When ready to eat, thaw in the fridge overnight. Reheat as mentioned above for best results. For the best flavor, marinate the chicken for at least 20 minutes. If you have time, marinate it overnight in the fridge. This brings out the zesty chili lime taste. Yes, you can use other meats like pork or shrimp. Just adjust the cooking time. Chicken thighs are perfect because they stay juicy. Here are some tasty side ideas: - Rice or quinoa for a filling option - Fresh salad for a light crunch - Black beans for extra protein - Corn on the cob for sweetness These sides balance the chicken's zesty flavor well. This blog post shared how to make a flavorful Chili Lime Chicken and Peppers dish. You learned about the key ingredients like chicken thighs, a fresh marinade, and colorful veggies. The step-by-step instructions guide you through marinating, roasting, and garnishing your meal. You also got useful tips for perfecting your dish and variations based on your taste. Remember, cooking is about finding what you enjoy. Use these ideas to create a meal that excites you and your family. Happy cooking!

Chili Lime Chicken and Peppers Sheet Pan Delight

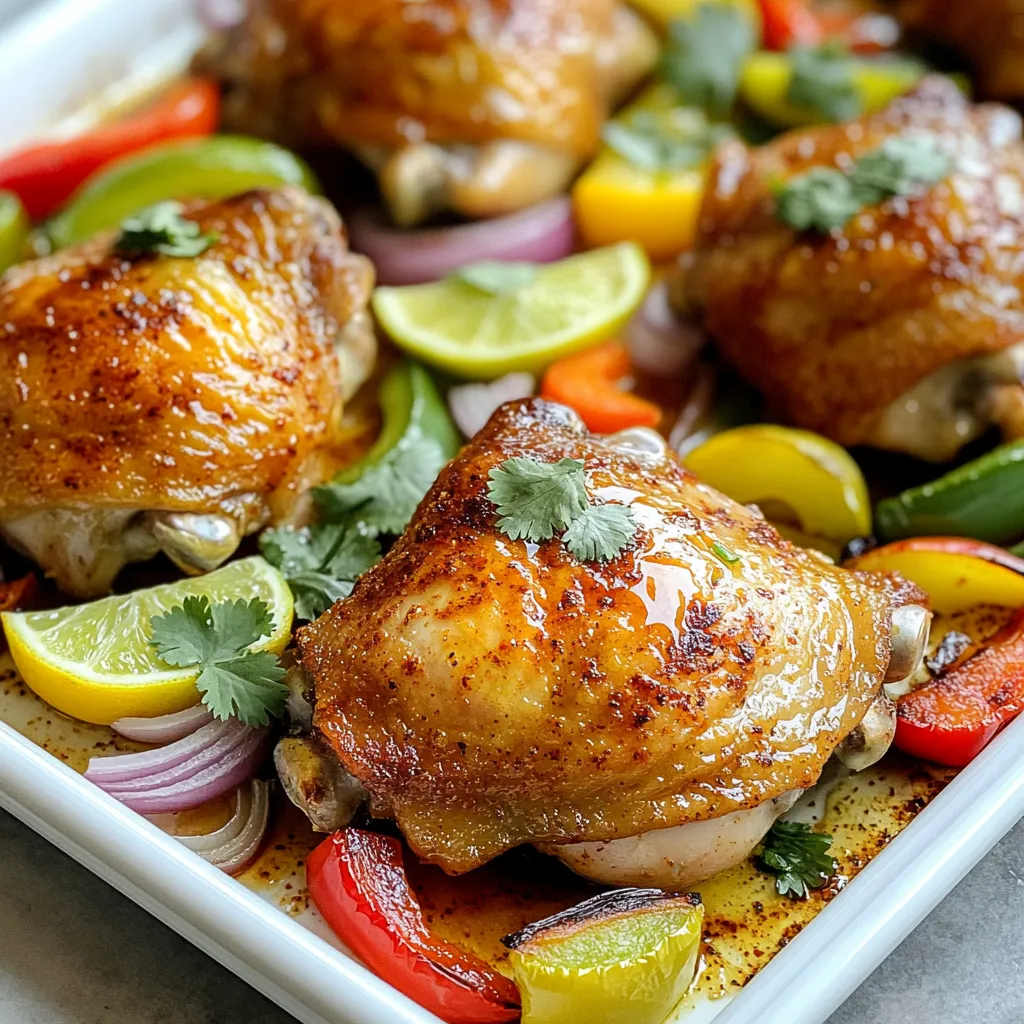
Get ready for a burst of flavor with my Chili Lime Chicken and Peppers Sheet Pan Delight! This easy recipe

For this Roasted Butternut Squash Apple Soup, you will need the following ingredients: - 1 medium butternut squash, peeled and cubed - 2 medium apples (Granny Smith or Honeycrisp), peeled and diced - 1 large onion, chopped - 3 cloves garlic, minced - 4 cups vegetable broth - 1 tablespoon olive oil - 1 teaspoon ground cinnamon - ½ teaspoon nutmeg - Salt and pepper to taste - ½ cup coconut milk (for creaminess) - Fresh parsley or chives for garnish These ingredients create a warm, rich flavor. The butternut squash brings natural sweetness. The apples add a nice tang. Together, they form the heart of this creamy delight. Don't forget the spices! They elevate the soup's taste. Ground cinnamon and nutmeg add warmth and depth. Make sure to use fresh ingredients for the best flavor. Organic produce can enhance the dish. Each bite should feel hearty and comforting. Trust me; this soup is perfect for chilly days! - Preheat the oven to 400°F (200°C). - In a large bowl, toss the cubed butternut squash and diced apples with: - 1 tablespoon olive oil - Salt and pepper to taste - 1 teaspoon ground cinnamon This step is key for getting great flavor. The olive oil helps the squash and apples roast well. The spices add warmth and sweetness. - Spread the mixture on a baking sheet in a single layer. - Roast for 25-30 minutes. The time in the oven allows the squash and apples to caramelize. This brings out their natural sweetness. When they are tender, you know they are ready. - Heat a large pot over medium heat. - Add 1 chopped onion and sauté until it is translucent, about 5 minutes. - Stir in 3 minced garlic cloves and cook for 1-2 minutes until fragrant. These steps build a great base for your soup. The onion adds depth, and garlic brings a lovely aroma. - Once the squash and apples are done roasting, add them to the pot. - Pour in 4 cups of vegetable broth and bring to a simmer. - Let it simmer for about 10 minutes. This simmering time blends all the flavors. - Use an immersion blender to puree the soup until smooth. - Stir in ½ cup of coconut milk and ½ teaspoon of nutmeg. - Adjust the seasoning with more salt and pepper if needed. The coconut milk makes the soup creamy and rich. - Allow the soup to gently heat through for about 5 minutes before serving. This final step ensures every bite is warm and comforting. To make your soup great, start with even cubing of the butternut squash. Cut the pieces into similar sizes. This helps them cook at the same rate. When you roast them, aim for caramelization. This browning adds deep, rich flavors to your soup. Want a sweeter soup? Try adding more apples or a touch of maple syrup. If you like spice, a pinch of cayenne pepper or a dash of hot sauce can bring some heat. Taste as you go. Adjust until it’s just right for you. For a vegan twist, swap out coconut milk for almond milk or cashew cream. Both will give you a creamy texture, with less fat. Choose unsweetened varieties to keep the flavors balanced. These options keep your soup rich without dairy. {{image_2}} You can boost nutrition by adding more veggies. Carrots add sweetness and color. Sweet potatoes bring creaminess and a rich flavor. Leeks offer a mild taste and a touch of onion flavor. Simply chop them and roast them with the butternut squash. This method will keep your soup tasty and vibrant. To enhance the flavor, consider adding ginger or herbs. Fresh ginger gives a warm, zesty note. You can also try thyme or rosemary for a herby twist. Adding these ingredients while cooking the onions will infuse the soup with deep flavors. Experimenting with different herbs can create a unique taste each time. If you like heat, add chili flakes or jalapeños. Start with a small amount, then taste as you go. This will ensure you achieve your desired level of spice. The heat from these ingredients pairs well with the natural sweetness of the squash and apples. It transforms the soup into a comforting yet exciting dish. After enjoying your Roasted Butternut Squash Apple Soup, let it cool. Pour the soup into an airtight container. This keeps the flavors fresh. Store it in the fridge for up to five days. If you want to enjoy it later, consider freezing it instead. To freeze the soup, use freezer-safe containers. Fill them but leave some space for expansion. This soup freezes well for up to three months. When you are ready to eat, thaw it in the fridge overnight. Reheat the soup gently on the stove. Stir it well to keep the texture smooth. This delicious soup stays fresh for about five days in the fridge. If you freeze it, you can enjoy it for three months. Keep an eye on the smell and color. If it changes, it’s best to toss it. Always trust your senses when it comes to food safety! I recommend using Granny Smith or Honeycrisp apples. These apples add a nice balance of tartness and sweetness. Granny Smith gives a tangy flavor that cuts through the creaminess. Honeycrisp is sweet and juicy, adding a lovely texture. Yes, you can use fresh butternut squash! To prepare it, first, peel the squash with a sharp knife. The skin can be tough. Cut it in half and scoop out the seeds. Then, cube the flesh into even pieces for even cooking. Making this soup takes about 55 minutes. You’ll spend 15 minutes prepping the ingredients. The roasting takes around 25 to 30 minutes, and the cooking and blending take about 15 minutes. You can use chicken broth if you want. It will add a richer flavor to the soup. However, it makes the soup non-vegetarian. Vegetable broth keeps it light and plant-based, so choose what fits your diet best. This blog post guided you through making Roasted Butternut Squash Apple Soup. You learned about essential ingredients, from butternut squash to coconut milk. I detailed simple steps for prep, roasting, and blending to get a creamy texture. I also shared tips for flavor adjustments and variations to cater to your taste. Plus, I covered storage info to keep your soup fresh. With this recipe, you can enjoy a tasty, healthy dish that warms the soul. Happy cooking!

Roasted Butternut Squash Apple Soup Creamy Delight

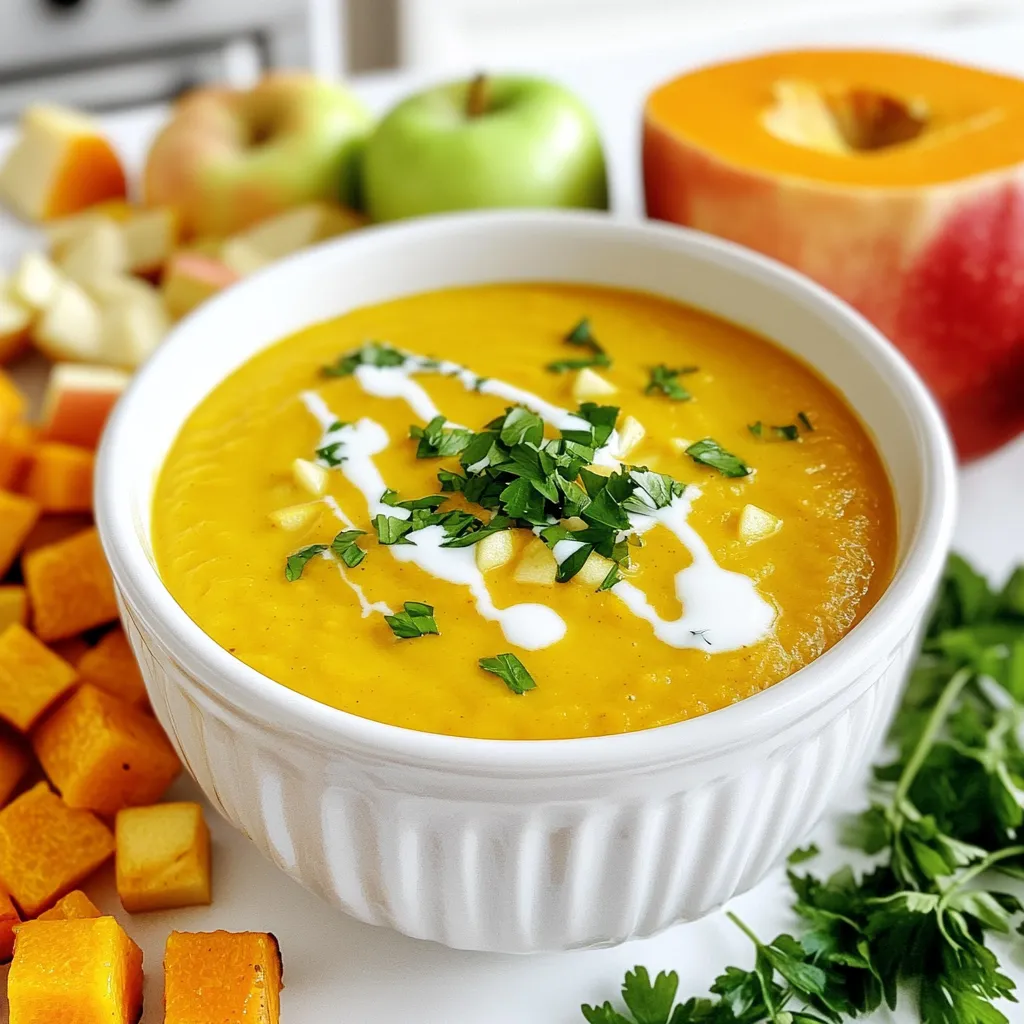
Looking for a warm, creamy soup that bursts with flavor? This Roasted Butternut Squash Apple Soup is your answer. It’s

To make caramel apple popcorn clusters, you will need: - 8 cups popped popcorn (about 1/2 cup kernels) - 1 cup chopped apples (preferably Granny Smith) - 1 cup granulated sugar - 1/2 cup unsalted butter - 1/4 cup light corn syrup - 1/2 teaspoon salt - 1/2 teaspoon baking soda - 1 teaspoon vanilla extract - 1 teaspoon cinnamon - 1/2 cup chopped nuts (optional, such as pecans or walnuts) If you want to mix it up, there are easy swaps. Use brown sugar instead of granulated sugar for a deeper flavor. You can also swap the Granny Smith apples for any sweet-tart apple you like. For a nut-free version, skip the nuts or use seeds like pumpkin seeds. Feel free to add some fun extras. Dried cranberries or raisins can give a chewy texture. You can sprinkle some sea salt on top for a sweet and salty twist. If you love chocolate, drizzle some melted chocolate over the clusters after baking. To start, you need to pop the popcorn. You can use an air popper or the stovetop method. Use about 1/2 cup of kernels. Once popped, place the popcorn in a large mixing bowl. Make sure there are no unpopped kernels left behind. This step is key to a great texture. Next, let’s make the caramel. Grab a medium saucepan and set it over medium heat. Combine 1 cup of granulated sugar, 1/2 cup of unsalted butter, 1/4 cup of light corn syrup, and 1/2 teaspoon of salt. Stir this mix constantly until it comes to a boil. Let it boil without stirring for about 4 to 5 minutes. You want it to turn a light golden color. Be careful! It’s hot! After that, remove the pan from heat. Stir in 1/2 teaspoon of baking soda. The mixture will bubble up, so watch your hands! Then, add in 1 teaspoon of vanilla extract and 1 teaspoon of cinnamon. Mix well until combined. Now, it’s time to combine everything. Pour the caramel over the popcorn in the large bowl. Use a spatula to mix and coat all the popcorn evenly. Next, add in 1 cup of chopped apples. If you like, toss in 1/2 cup of chopped nuts too. Gently fold everything together. Once mixed, spread the popcorn mixture onto a baking sheet lined with parchment paper. Make sure it’s in an even layer. Bake this in a preheated oven at 200°F (95°C) for 30 minutes. Stir every 10 minutes to coat evenly and prevent burning. Once done, let it cool completely on the baking sheet. When cool, break it into clusters. Store these yummy treats in an airtight container. Enjoy your tasty fall treat! To make the best popcorn, I always use an air popper or the stovetop. If you use the stovetop, heat oil in a big pot before adding the kernels. Cover the pot and shake it often. This keeps the kernels moving and helps them pop evenly. Once popped, check for unpopped kernels. Remove them to avoid any hard bites later on. The key to great caramel is cooking it just right. Start by mixing sugar, butter, corn syrup, and salt in a saucepan. Heat it over medium heat, stirring as it melts. Once it boils, stop stirring. Let it bubble for 4-5 minutes until it turns light golden. If it's too dark, it might taste burnt. When you add the baking soda, the mix will bubble. This makes the caramel light and fluffy. Once your clusters cool, store them in an airtight container. This keeps them fresh and crunchy. You can serve them in clear bags tied with ribbons for gifts or in a fun bowl for parties. If you store them well, they can last several days. Enjoy sharing this tasty treat with friends and family! {{image_2}} You can change the flavor of caramel apple popcorn clusters easily. For a chocolate twist, add cocoa powder to the caramel. You can also mix in some melted chocolate chips after baking. If you love peanut butter, try adding a spoonful to your caramel mix. This will give your clusters a nutty flavor. For a fun twist, sprinkle some sea salt on top. This will balance the sweetness and add depth. If you want a healthier option, use air-popped popcorn instead of oil-popped. You can swap out granulated sugar for coconut sugar to lower the glycemic index. If you're dairy-free, use coconut oil in place of butter. For a vegan option, use maple syrup instead of corn syrup. These swaps keep the treat tasty while fitting different diets. Fall is perfect for adding seasonal spices. Try adding nutmeg or allspice to your caramel mix. You can also fold in dried cranberries or pumpkin spice for a festive touch. In winter, consider using peppermint extract for a refreshing flavor. You can even add mini marshmallows for a cozy, holiday vibe. Each of these twists makes the caramel apple popcorn clusters special for any season. To keep your caramel apple popcorn clusters fresh, store them in an airtight container. This will help keep moisture out and maintain crunchiness. Use a glass jar or a plastic container with a tight lid. Avoid using bags that can let air in. If you plan to keep them for a while, consider layering clusters with parchment paper. This keeps them from sticking together. When stored correctly, caramel apple popcorn clusters can last up to two weeks. They taste best in the first few days, as freshness is key. After a week, they may start to lose their crunch. To check freshness, simply take a piece and see if it still has a crisp bite. If it feels soft, it’s time to toss it and make a new batch! If your clusters lose some crunch, you can revive them. Preheat your oven to 250°F (120°C). Spread the clusters on a baking sheet lined with parchment paper. Bake for about 5-10 minutes. Keep an eye on them to avoid burning. Let them cool before enjoying again. This simple step can bring back that delightful crunch and flavor! Yes, you can make these clusters ahead of time. They store well for about a week. Just keep them in an airtight container. This keeps them fresh and crunchy. Making them early is great for parties or gifts. To prevent soggy popcorn, coat it quickly with caramel. The heat helps the caramel stick. Also, bake the popcorn in the oven. This dries out any moisture. Stir every ten minutes while baking to keep it crispy. These clusters pair well with warm apple cider or hot chocolate. You can also serve them with vanilla ice cream. The sweet and salty flavors work great together. For a snack mix, add pretzels or chocolate candies. We discussed how to make delicious caramel apple popcorn clusters. You learned about the key ingredients and their substitutions. I shared step-by-step instructions for making the popcorn and caramel. You also got tips for achieving perfect popcorn and storing your treats. In closing, enjoy experimenting with variations and flavors. This snack will impress every time you make it. Follow these steps, and you’ll create a treat everyone loves. Keep it fresh, and share it with friends and family!

Caramel Apple Popcorn Clusters Tasty Fall Treat

Fall is here, and what better way to celebrate than with Caramel Apple Popcorn Clusters? This tasty treat blends crunchy

Older posts
Newer posts
← Previous Page1 … Page6 Page7 Page8 … Page84 Next →

dsad

© 2026 easycookingbite • Built with GeneratePress

Our Policies

  • Copyright Policy
  • Cookie Policy
  • GDPR Policy
  • Privacy Policy
  • Disclaimer
  • Terms Of Use

More Information

  • Home
  • About
  • Contact
  • Appetizers
  • Dessert
  • Dinner
  • Drinks
©2026, easycookingbite About Back To Top