Skip to content
DisclaimerTerms Of UseGDPR PolicyCookie Policy

easycookingbite

  • Home
  • Drinks
  • Appetizers
  • Dinner
  • Dessert
  • About
  • Contact
  • Privacy Policy
DisclaimerTerms Of UseGDPR PolicyCookie Policy

NO-ING-IMG

Chickpea Shawarma Wraps are packed with flavor and freshness. To make these wraps, you need simple and tasty ingredients. Here’s what you’ll need: - Chickpeas and Spices - 1 can (15 oz) chickpeas, drained and rinsed - 2 tablespoons olive oil - 2 teaspoons ground cumin - 2 teaspoons ground coriander - 1 teaspoon smoked paprika - 1 teaspoon garlic powder - 1/2 teaspoon cayenne pepper (adjust to taste) - Salt and pepper to taste - Fresh Vegetables - 1 cup mixed greens (spinach, arugula, etc.) - 1/2 cucumber, sliced - 1 medium tomato, diced - 1/4 red onion, thinly sliced - Fresh parsley, chopped (for garnish) - Flatbread or Pita Bread - 4 large whole wheat wraps or pita bread - Tahini Sauce - 1/2 cup tahini sauce (store-bought or homemade) These ingredients blend to create a delicious meal. The chickpeas add protein and flavor. The spices make them taste like shawarma. Fresh vegetables bring crunch and color. The tahini sauce ties it all together. You can find the full recipe above to guide you through each step. Enjoy making these wraps! Oven Preheating and Chickpea Preparation Start by preheating your oven to 400°F (200°C). This high heat helps make the chickpeas crispy. While the oven heats, drain and rinse one can of chickpeas. Pat them dry with a paper towel. Dry chickpeas roast better. Roasting Process Details In a bowl, mix the chickpeas with olive oil, cumin, coriander, smoked paprika, garlic powder, cayenne pepper, salt, and pepper. Stir until all the chickpeas are well coated. Spread them on a baking sheet in a single layer. Roast for 25-30 minutes, shaking the pan halfway through. They should turn golden brown and crispy. Vegetable Preparation Tips While the chickpeas roast, prepare your veggies. Slice half a cucumber, dice one medium tomato, and thinly slice a quarter of a red onion. Fresh, crisp veggies add great taste and texture. Layering for Best Flavor Be sure to layer your ingredients right. Start with a handful of mixed greens as your base. Then, add a generous scoop of crispy chickpeas. Next, add the cucumber, tomato, and red onion. This order keeps everything fresh and tasty. Step-by-Step Assembly Process To assemble, take a large whole wheat wrap or pita. Place it flat on a clean surface. Layer the mixed greens, chickpeas, and veggies as mentioned. Drizzle some tahini sauce on top for richness. Folding Techniques Fold the sides of the wrap in first, then roll tightly from the bottom up. This keeps all the delicious fillings inside. Repeat this process until you use all your ingredients. Your wraps are now ready to enjoy! For the full recipe, check out the ingredients and steps provided earlier. To get crispy chickpeas, you need to roast them well. Here are some simple tips: - Oven Tips for Optimal Roasting: Preheat your oven to 400°F (200°C). Spread the seasoned chickpeas in one layer on a baking sheet. This helps them cook evenly. Shake the pan halfway through to ensure they crisp up all around. Roast for about 25-30 minutes. Look for a golden brown color for the best texture. - Spice Adjustments for Personal Preference: You can change the spices based on your taste. For more heat, add extra cayenne pepper. If you prefer milder flavors, cut back on the spices. Feel free to experiment with other spices, like paprika or turmeric, to find your perfect mix. How you present your wraps can make a big difference. Here are some ideas to make them look great: - Serving Suggestions: Serve the wraps on a wooden board or slate. It adds a rustic feel. Cut them in half to showcase the colorful filling. You can also place some extra tahini sauce in a small bowl for dipping. - Garnishing for Appeal: Sprinkle fresh parsley on top of your wraps for a pop of color. You can also add a few slices of lemon on the side. This not only looks nice but also adds a fresh zing when squeezed over the wrap. For the full recipe, check the details above! {{image_2}} You can easily make Chickpea Shawarma Wraps gluten-free. Choose gluten-free wraps or lettuce leaves. These options work well and add a fresh touch. You can also use rice paper for a different texture. If you want to change the recipe, swap traditional tahini sauce. Try hummus or yogurt as a creamy spread. These will taste great and keep your meal light. To boost the nutrition in your wraps, add protein. Grilled chicken, shrimp, or tofu can make these wraps heartier. Each option gives a unique flavor and texture. For sauce ideas, think beyond tahini. You could use garlic sauce, spicy harissa, or a yogurt sauce. Each sauce changes the flavor and makes the wrap special. Mix and match based on what you like! For the full experience, check out the Full Recipe. To keep your leftover wraps fresh, place them in an airtight container. You can store them in the fridge for up to three days. This helps keep the flavors intact. If you want to reheat them, use a skillet. Heat it over medium heat and warm each wrap for about 2-3 minutes on each side. This method keeps the wrap soft and the filling warm. You can also use a microwave. Just heat for 30 seconds at a time until warm, but the wrap may get a bit soggy. If you want to save the chickpea mixture for later, freezing works great. First, let the chickpeas cool completely after roasting. Then, place the chickpeas in a freezer-safe bag. Remove as much air as possible before sealing. This helps prevent freezer burn. You can freeze the chickpea mixture for up to three months. To thaw, move the bag to the fridge overnight. For reheating, spread the chickpeas on a baking sheet and warm them in a preheated oven at 400°F for about 10-15 minutes. This makes them crispy again and ready for your wraps. For the full recipe, check the complete guide to making these Chickpea Shawarma Wraps. If you want to swap tahini, try these options: - Hummus: Use plain or flavored hummus for a creamy texture. - Nut Butters: Almond or cashew butter can work well. - Greek Yogurt: It adds creaminess and tanginess. - Sunflower Seed Butter: A nut-free choice with a similar texture. These substitutes can change the flavor a bit but will still taste great! This recipe is already vegan. Just ensure: - Chickpeas: They should be canned or cooked from scratch. - Wraps: Use whole wheat wraps that are free from animal products. - Tahini Sauce: Ensure it's made without honey or dairy. You can easily enjoy this meal while staying plant-based. If you want to eat out, look for places like: - Middle Eastern Restaurants: They often serve shawarma wraps. - Vegan Cafés: Many have creative wraps on their menu. - Food Trucks: Some specialize in Mediterranean or vegan cuisine. Search for local spots online or on food apps to find tasty options. Yes, you can make this recipe ahead! Here’s how: - Chickpeas: Roast them a day early and store in the fridge. - Wraps: Prepare all veggies in advance and keep them fresh. - Assembly: Wrap them right before eating for the best taste. This makes meal prepping easy and convenient! For the full recipe, check out the earlier section. You learned how to make delicious chickpea shawarma wraps. We covered the key ingredients, like chickpeas, spices, and fresh veggies. You also got step-by-step instructions for prepping and roasting. The tips helped you achieve crispy chickpeas and present your wraps well. You now know about variations, storage, and even FAQs. Enjoy making this tasty meal. The recipe is simple, fun, and perfect for friends or family. Get ready to dig in and share your creations!

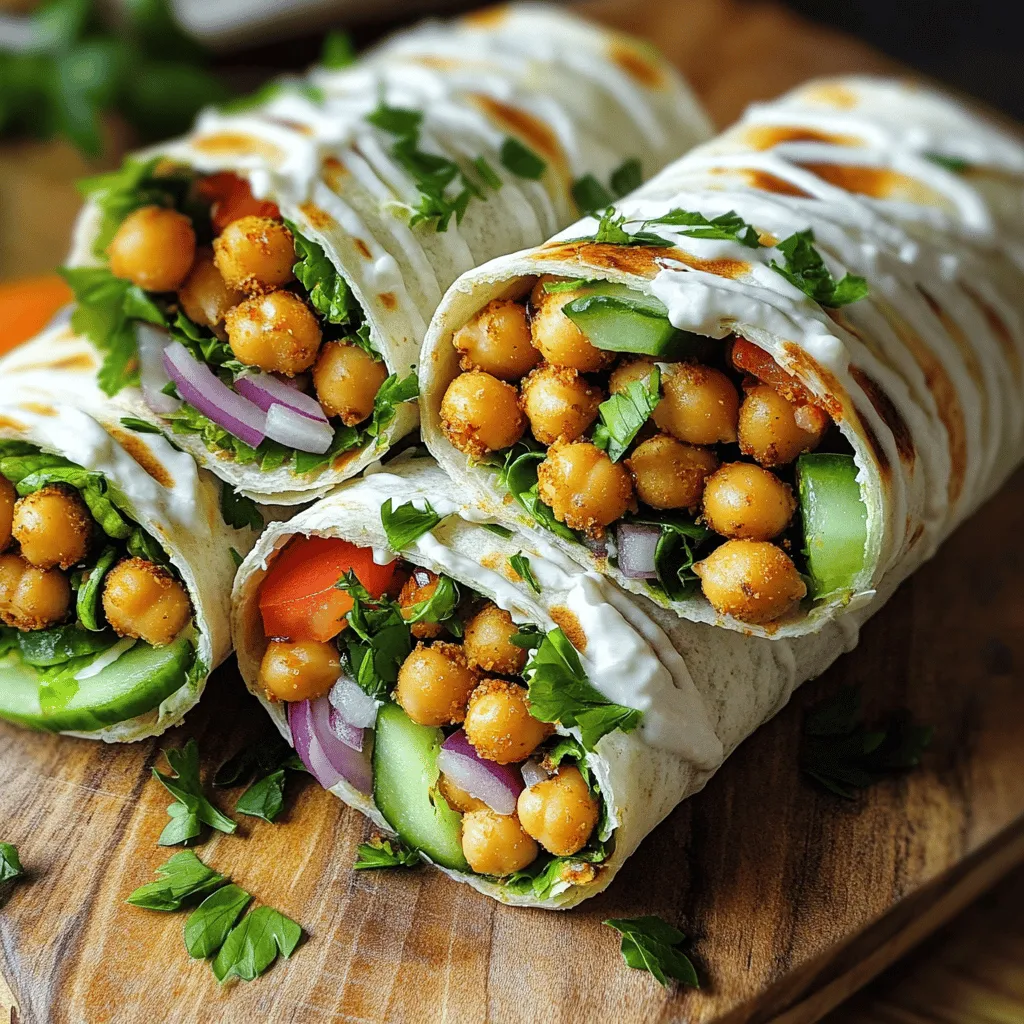
Chickpea Shawarma Wraps Flavorful and Fresh Meal

Looking for a fresh and tasty meal that’s easy to make? Chickpea shawarma wraps are your answer! Packed with spiced

To make rich and fudgy vegan sweet potato brownies, you need simple ingredients. Here’s the list: - 1 medium sweet potato (about 1 cup, mashed) - 1/2 cup almond butter (or other nut butter) - 1/4 cup maple syrup - 1/4 cup cocoa powder - 1/2 cup almond flour - 1/4 cup oats (ground into flour) - 1/2 teaspoon baking powder - 1/4 teaspoon salt - 1/2 cup dark chocolate chips (dairy-free) - 1 teaspoon vanilla extract These ingredients work well together. The sweet potato gives moisture and natural sweetness. Almond butter adds creaminess. Maple syrup brings in extra sweetness that blends perfectly with cocoa powder. You might want to add more depth to your brownies. Here are some optional ingredients: - 1/2 teaspoon cinnamon for warmth - 1/4 cup chopped nuts for crunch - 1/4 cup dried fruit for sweetness - 1 tablespoon of espresso powder for a coffee flavor - A pinch of sea salt on top for contrast These additions can enhance your brownies. They allow you to customize flavors to your liking. If you have allergies, I have some easy swaps for you: - Use sunflower seed butter instead of almond butter for nut-free brownies. - Substitute maple syrup with agave syrup or date syrup for a different sweetener. - For gluten-free options, ensure your oats are certified gluten-free. - Replace almond flour with oat flour or coconut flour. These substitutions keep your brownies safe and tasty. Enjoy crafting your own version! Check out the Full Recipe for more detailed steps. First, gather all your ingredients. You will need a medium sweet potato, almond butter, maple syrup, cocoa powder, almond flour, ground oats, baking powder, salt, dark chocolate chips, and vanilla extract. This step is easy and fun. It sets you up for success. 1. Preheat the Oven: Start by preheating your oven to 350°F (175°C). This ensures even baking. Line an 8x8-inch baking dish with parchment paper, letting it hang over the sides for easy removal later. 2. Prepare the Sweet Potato: Wash the sweet potato well. Use a fork to pierce it. Microwave it on high for 5-7 minutes until soft, or roast it in the oven. Once cooked, let it cool, peel, and mash it in a bowl until smooth. 3. Combine Ingredients: In a large bowl, mix the mashed sweet potato, almond butter, maple syrup, and vanilla extract. Stir until everything is well blended. 4. Add Dry Ingredients: In another bowl, whisk together cocoa powder, almond flour, ground oats, baking powder, and salt. Gradually add this mix to the wet ingredients. Stir until fully combined. The batter should be thick and fudgy. 5. Add Chocolate Chips: Now, fold in the dark chocolate chips. Make sure they spread evenly in the batter. 1. Pour and Bake: Pour your batter into the prepared baking dish. Spread it evenly. Bake in the oven for 20-25 minutes. To check if they are done, insert a toothpick in the center. If it comes out clean, they are ready. 2. Cool and Slice: Let the brownies cool in the pan for about 10 minutes. Lift them out using the parchment paper. Place them on a wire rack to cool completely before slicing them into squares. For the full recipe, check the details above. Enjoy your delicious vegan sweet potato brownies! To make your brownies rich and fudgy, use a ripe sweet potato. This gives natural sweetness and moisture. Also, mix the batter well, but don't overdo it. Too much mixing can make the brownies tough. I like to fold in the chocolate chips gently. This keeps them intact and gives you great bites of chocolate. One common mistake is not measuring ingredients correctly. Use measuring cups and spoons for accuracy. Overbaking is another issue. Keep an eye on your brownies and trust the toothpick test. If it comes out with a few moist crumbs, they are done. Lastly, don’t skip the cooling time. Letting them cool helps with texture and flavor. To test for doneness, use a toothpick or a skewer. Insert it into the center of the brownies. If it comes out clean or with a few crumbs, they are ready. If it has wet batter, bake them a bit longer. Remember, the brownies will continue to firm up as they cool. Enjoy the full recipe for more tips! {{image_2}} You can change your vegan sweet potato brownies with fun add-ins. Try nuts like walnuts or pecans for a crunchy texture. Dried fruits like cherries or cranberries add a sweet twist. You can also mix in spices like cinnamon or nutmeg for warmth. For a minty flavor, add a drop of peppermint extract. Each add-in makes the brownies unique and exciting! If you need gluten-free brownies, swap the almond flour for coconut flour. You can also use gluten-free oats instead of regular oats. These swaps keep your brownies tasty and free from gluten. Make sure to check labels on all ingredients to ensure they are gluten-free. Enjoy your rich and fudgy treat without worry! You can switch out maple syrup for other sweeteners. Agave nectar or brown rice syrup work great too. Each sweetener has a unique taste. Agave is milder, while brown rice syrup adds a deep flavor. You can also use date syrup for a fruity note. Just remember that changing sweeteners may alter the brownie’s texture or sweetness level. Find what works best for your taste! For the full recipe, check the details above. Store your vegan sweet potato brownies in an airtight container. This keeps them fresh and moist. You can place a piece of parchment paper between layers to avoid sticking. Keep them at room temperature for up to three days. If you want them to last longer, the fridge is a good option. Just make sure to seal them well to avoid drying out. When stored properly at room temperature, these brownies last about three days. In the fridge, they can stay fresh for up to a week. If you notice any change in smell or texture, it’s best to toss them. Always use your best judgment. To freeze these brownies, cut them into squares first. Wrap each square tightly in plastic wrap. Then, place them in a freezer-safe bag. They can last for up to three months in the freezer. When you’re ready to eat, just thaw them in the fridge overnight or at room temperature for a few hours. You can also warm them in the microwave for a soft, gooey treat. For the full recipe, check the earlier section. Yes, you can use other veggies. Pumpkin is a great choice. It adds a nice flavor. You could also use mashed carrots or zucchini. Each will change the taste a bit. Just make sure they are soft and smooth when mixed in. These brownies fit many diets. They are vegan, so no animal products are in them. They are also gluten-free if you use almond flour and gluten-free oats. Since they use natural sweeteners, they may suit those avoiding refined sugar. Always check the labels of your ingredients to be sure. To cut the sweetness, reduce the maple syrup. You can try using only 2 tablespoons instead of 1/4 cup. You can also use cocoa powder to balance the sweetness. Adding a pinch of salt can help too. If you like nuts, try adding chopped walnuts or pecans for a nice crunch. Don't forget to check the full recipe for more tips! You now know how to make vegan sweet potato brownies. We discussed key ingredients and optional add-ins for flavor. You also learned about common allergens and how to substitute them. Followed clear steps for cooking and baking, plus tips to get moist, fudgy brownies. I shared fun variations and best ways to store and freeze your brownies. These brownies can fit many diets and are fun to customize. Enjoy making a tasty treat!

Vegan Sweet Potato Brownies Rich and Fudgy Treat

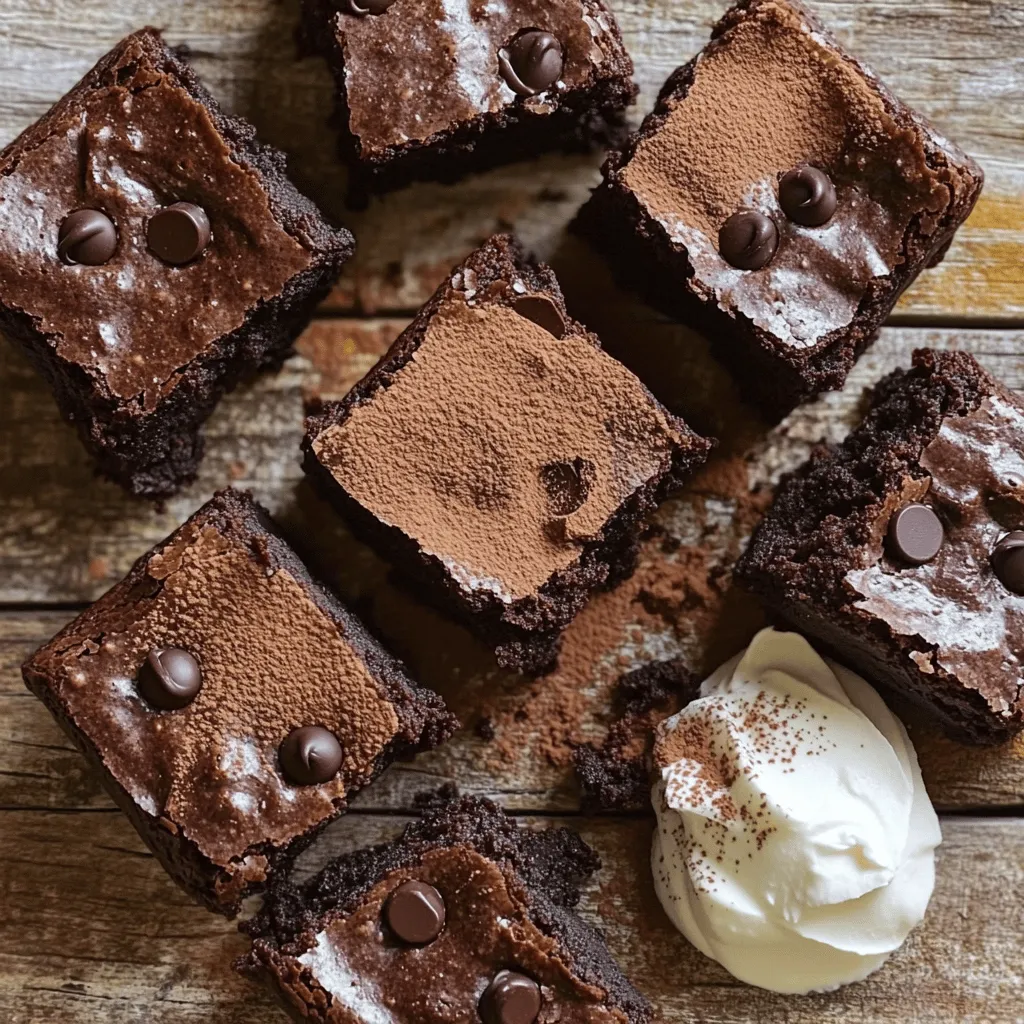
Are you ready to indulge in a guilt-free treat? These Vegan Sweet Potato Brownies are rich, fudgy, and packed with

To make this refreshing drink, you will need: - 4 cups ripe cantaloupe, cubed - 1 large cucumber, peeled and chopped - 2 cups water - 2 tablespoons fresh lime juice - 2 tablespoons agave syrup (or to taste) - Fresh mint leaves for garnish - Ice cubes Choosing ripe cantaloupe is key for great flavor. Look for a cantaloupe that feels heavy for its size. The skin should have a nice beige color and a slight give when you press it. A sweet smell at the stem end is a good sign too. For cucumbers, pick firm ones without soft spots. The skin should be bright green and smooth. If you can, choose organic cucumbers. They often taste better and are free from wax and pesticides. You can add a few fun twists to your agua fresca. Try adding: - A pinch of salt to enhance sweetness - A splash of coconut water for a tropical vibe - A few slices of jalapeño for a spicy kick - Basil leaves instead of mint for a unique taste These options can elevate your drink and make it special. Enjoy experimenting with different flavors! First, gather your ingredients. You need ripe cantaloupe, cucumber, water, lime juice, and agave syrup. Cut the cantaloupe into cubes and chop the cucumber. Put them in a blender with the water. Blend until the mix is smooth. Next, you will strain the mix. This step helps remove any pulp. Use a fine mesh sieve or cheesecloth. Press down with a spoon to get all the juice out. This gives you a clean drink. After straining, add fresh lime juice and agave syrup. Stir well and taste. Adjust the sweetness to your liking. Serve over ice in tall glasses. Don’t forget to garnish with mint leaves for a fresh touch. Using the blender correctly is key to a good texture. Start on low speed to combine the ingredients. Gradually increase to high speed. This helps break down the cantaloupe and cucumber. Blend for about 30 seconds until smooth. If your blender struggles, add a bit more water. This helps it blend evenly. Avoid adding too much water, as it may dilute the flavor. A well-blended mix ensures a refreshing drink. Straining is important for the final drink. It removes any solid bits, making it smooth. Use a fine mesh sieve for the best results. Pour the blended mix into the sieve slowly. Use the back of a spoon to press the pulp down. This action helps you get every drop of juice. Take your time with this step; it’s worth it. A silky texture makes your agua fresca more enjoyable. For the full recipe, refer to the provided instructions. Enjoy your refreshing drink! To make the best cantaloupe cucumber agua fresca, follow these tips: - Choose ripe cantaloupe. It should smell sweet and feel slightly soft. - Use a fresh cucumber. Look for smooth skin and firm texture. - Blend well. A smooth mix ensures a creamy drink. - Strain thoroughly. This removes pulp and gives a clean finish. - Chill your ingredients. Cold fruits make a refreshing drink. Avoid these common pitfalls: - Skipping the straining step can lead to a chunky drink. - Using too much sweetener can overpower the fresh flavors. - Not adjusting flavors. Always taste and tweak to your liking. - Forgetting to garnish. A sprig of mint adds flair and aroma. - Using warm ingredients can dull the drink's freshness. You can easily adjust sweetness and flavor: - Start with a small amount of agave syrup. Add more if needed. - Try adding lime zest for a zesty kick. - Consider a splash of coconut water for a tropical twist. - Experiment with fresh herbs like basil or cilantro for unique flavors. - Mix in other fruits like watermelon or strawberries for variety. For the full recipe, check the link above! {{image_2}} You can switch up the fruits and veggies in your agua fresca. Try using honeydew or watermelon instead of cantaloupe. These fruits have a similar sweetness that works well. You could also add mint or basil for a fresh twist. If you want crunch, grated carrots can add a nice texture. If you want a healthier drink, use honey or maple syrup instead of agave syrup. These options are natural and add unique flavors. You can also try using stevia or monk fruit for a low-calorie choice. Remember to adjust the amount since some sweeteners are sweeter than others. For a fun twist, turn your agua fresca into a cocktail. Add a splash of vodka or rum for an adult version. You can also mix in some sparkling water for fizz. Garnish with a lime wedge or cucumber slice to make it look fancy. Enjoy your drink on a hot summer day! For the full recipe, check out the [Full Recipe]. To store leftover agua fresca, pour it into a clean glass jar. Seal it tightly with a lid. Make sure the jar is not too full. Leave some room for expansion. This way, the drink stays fresh and tasty. Keep your agua fresca in the fridge. It tastes best when cold. Serve it with ice, but avoid adding ice to the jar. Ice melts and can water down the drink. Instead, add ice to each glass when serving. If you want to keep it fresh longer, consider not adding lime juice until serving. Acid can change the flavor over time. Cantaloupe cucumber agua fresca stays fresh for about three days in the fridge. After that, it may lose flavor. Check for signs of spoilage. If it smells sour or looks cloudy, it's time to toss it. Always use your senses. Better safe than sorry! Enjoy your refreshing drink, and don't forget the full recipe for more fun. Cantaloupe Cucumber Agua Fresca is a light, fruity drink. It mixes ripe cantaloupe and cucumber with water. This drink is refreshing and perfect for hot days. You blend the fruits and strain them for a smooth texture. You can sweeten it with lime juice and agave syrup. The result is a bright, tasty drink. Yes, you can make Cantaloupe Cucumber Agua Fresca ahead of time. It stays fresh in the fridge for up to three days. Just store it in a sealed pitcher. Before serving, add ice and a mint garnish. This makes it feel fresh and ready to enjoy. Yes, Cantaloupe Cucumber Agua Fresca is healthy. It has low calories and is hydrating. Cantaloupe is full of vitamins A and C. Cucumber adds extra hydration and nutrients. Agave syrup is a healthier sweetener than regular sugar. This drink is a great choice for hot days or a fun party. This recipe makes about four servings. Each serving is refreshing and light. You can easily double or halve the recipe. It’s perfect for sharing with friends or family. Yes, you can mix in other fruits or veggies. Watermelon, pineapple, or mint are great choices. Each adds a unique twist to the drink. It’s fun to experiment with flavors and find your favorite. Cantaloupe Cucumber Agua Fresca is a refreshing drink that's easy to make. We covered the best ingredients, tips for freshness, and step-by-step instructions. You learned how to blend and strain for the perfect texture. I shared tips to avoid common mistakes and ways to personalize your drink. With variations using different fruits and sweeteners, you can get creative. Plus, store leftovers properly for lasting freshness. Enjoy experimenting and finding your ideal flavor. This drink is sure to impress at any gathering or on a hot day.

Cantaloupe Cucumber Agua Fresca Refreshing Summer Drink

Looking for a refreshing drink this summer? Cantaloupe Cucumber Agua Fresca is your answer! This delicious blend of sweet cantaloupe

To make your Salted Caramel Praline Shake, gather these key ingredients: - 2 cups vanilla ice cream - 1 cup whole milk - 1/2 cup salted caramel sauce (plus extra for drizzling) - 1/2 cup praline nuts, chopped - Whipped cream, for topping - A pinch of sea salt - Chocolate shavings or curls, for garnish Feel free to add your personal touch with these optional ingredients: - Different ice cream flavors like chocolate or coffee - A splash of espresso for a coffee kick - Crushed cookies or candy for extra crunch You will need some basic tools to make this shake: - A blender for smooth mixing - Measuring cups for accuracy - Serving glasses for presentation - A spatula for drizzling caramel These ingredients and tools make it easy to create a delicious treat. You can find the full recipe below for more details on how to prepare this shake. First, gather your ingredients. You will need two cups of vanilla ice cream, one cup of whole milk, and half a cup of salted caramel sauce. You can also grab half a cup of chopped praline nuts. This mix creates a rich base for your shake. In a blender, combine the ice cream, milk, and salted caramel sauce. Blend on medium speed. You want it smooth and creamy. This should take about 30 seconds. The smell of caramel will fill your kitchen! Now, add the chopped praline nuts to the blender. Pulse the blender a couple of times. You want to mix in the nuts but keep some crunch. The texture makes the shake fun to drink! Next, taste the shake. If you want it sweeter, add more salted caramel sauce. Blend lightly if you add more. This step lets you customize the flavor just for you. Before pouring, drizzle extra salted caramel sauce inside your serving glasses. This adds a nice touch! Pour the shake into the glasses, leaving room for whipped cream. Top the shake with a generous amount of whipped cream. Sprinkle a pinch of sea salt on top. This balance of flavors is key! Finally, add chocolate shavings or curls for a beautiful garnish. Serve with a fun straw and a small drizzle of caramel on top. This shake is a creamy and delicious treat you'll love. Enjoy every sip! To get the best shake, start with cold ice cream. Use two cups of vanilla ice cream. Blend it with one cup of whole milk. This mix creates a smooth base. If your shake is too thick, add more milk. If it's too thin, use more ice cream. The right mix gives a creamy texture that you will love. The flavor balance is key. Use half a cup of salted caramel sauce for sweetness. But don’t forget the sea salt! A pinch of sea salt enhances the flavors. Taste your shake as you mix. If you want it sweeter, add more caramel. Just blend lightly to keep some crunch from the praline nuts. Make your shake look fun! Drizzle extra caramel sauce inside the glasses. This adds flavor and a nice look. Use whipped cream on top, then sprinkle sea salt. For a fancy touch, add chocolate shavings or curls. Serve with colorful straws to make it festive. These small details make your shake stand out! {{image_2}} You can switch up the flavor of this shake. Instead of vanilla ice cream, try chocolate or caramel ice cream. You can even use coffee ice cream for a rich twist. Each choice gives your shake a unique taste. Experimenting can lead to fun surprises! If you prefer a vegan shake, use coconut or almond milk. Replace the ice cream with a dairy-free version made from cashews or coconut. Look for vegan salted caramel sauce, which is easy to find in stores. This way, you can enjoy a creamy treat without dairy. Want to make your shake even tastier? Add a splash of espresso for a coffee kick. You can mix in some chocolate syrup for a richer flavor. A dash of cinnamon or nutmeg adds warmth and depth. These little extras can take your shake to the next level. For the full recipe, check out the recipe section above. If you have leftover salted caramel praline shake, store it in the fridge. Use an airtight container to keep it fresh. Try to enjoy it within two days. After that, the texture may change. The shake might become icy or lose creaminess. If you want to save some for later, follow the freezing instructions. For long-term storage, you can freeze the shake. Pour it into a freezer-safe container. Leave some space at the top for expansion. Seal it tightly and label it with the date. You can freeze it for up to a month. When you're ready to enjoy it, let it thaw in the fridge overnight. When you want to drink your shake again, check the texture first. If it's too thick after thawing, add a splash of milk. Blend it again to smooth it out. Taste it to see if you need more caramel sauce. This simple trick makes your shake feel fresh and delicious again. If you don’t have praline nuts, use chopped pecans or walnuts. Toast them lightly for more flavor. You can also try crushed graham crackers for a different crunch. They add a nice texture and sweetness. To reduce sweetness, cut back on the caramel sauce. You can also add more milk or ice cream. This keeps the shake creamy while balancing the flavors. Another option is to mix in a little unsweetened cocoa powder for a rich taste. Absolutely! You can use almond milk, oat milk, or any other non-dairy milk. Each type of milk brings its unique flavor. Just keep in mind that it may change the shake's overall taste and creaminess. Adjust the ingredients to suit your taste. For the full recipe, check out the Salted Caramel Praline Shake 🥤 section. You learned how to make a delicious Salted Caramel Praline Shake. We covered the key ingredients, step-by-step instructions, and fun tips. You can customize it to suit your taste or dietary needs. Whether you want to store it or adjust sweetness, you have options. This shake is not just a treat; it’s an experience. With these ideas, you can impress friends and family or enjoy it all by yourself. Dive in and enjoy your tasty creation!

Salted Caramel Praline Shake Creamy Delicious Treat

Indulging in a Salted Caramel Praline Shake is like treating yourself to dessert in a cup! This creamy delight is

- 1 ripe dragon fruit, peeled and diced - 1 ripe mango, peeled and diced - 2 cups brewed green tea, cooled - 1/2 cup milk (or a non-dairy alternative) - 2 tablespoons honey or agave syrup (adjust to taste) - 1/2 teaspoon vanilla extract - Ice cubes - Fresh mint leaves for garnish To make dragon fruit mango milk tea, you need fresh ingredients. Dragon fruit is bright and sweet. Mango adds a tropical flair. Brewed green tea gives a smooth base. For extra flavor, choose milk or a non-dairy option. Honey or agave syrup sweetens it up nicely. A splash of vanilla extract brings warmth. Don't forget to add ice cubes for chill. Finally, fresh mint leaves make a lovely garnish. This drink is colorful and fun. You can serve it at parties or enjoy it on a hot day. For the full recipe, check the link above. 1. Start by peeling the dragon fruit. Use a sharp knife to cut off the skin. 2. Cut the dragon fruit into small cubes. Set them aside. 3. Next, peel the mango. Slice off the cheeks and remove the pit. 4. Dice the mango into small pieces. Combine the fruit in a bowl. 5. Now, brew your green tea. Use two cups of hot water. Let it steep for 3-5 minutes. 6. Once brewed, let the tea cool down. This helps keep your drink refreshing. 1. In a blender, add the diced dragon fruit and mango. 2. Pour in the cooled green tea. Add honey or agave syrup for sweetness. 3. Include half a teaspoon of vanilla extract. 4. Blend until the mixture is smooth and creamy. You can stop here for a nice texture. 5. If you want it super smooth, strain it through a fine mesh sieve. This step is optional. 1. Fill each glass with ice cubes. This keeps your drink chilled. 2. Pour the blended fruit mixture over the ice until each glass is about three-quarters full. 3. Now, it’s time to layer the milk. Gently pour the milk over the back of a spoon. This creates a pretty layer. 4. You can stir the drink if you want a mixed look, or leave it layered for fun. 5. Finally, garnish with fresh mint leaves. This adds a pop of color and fresh taste. Enjoy your Dragon Fruit Mango Milk Tea! You can refer to the Full Recipe for more detailed instructions. To make the best dragon fruit mango milk tea, start with ripe fruits. Look for dragon fruit that has bright pink or yellow skin. It should feel slightly soft but not mushy. For mangoes, choose ones that give a little when you press them. They should smell sweet and fruity. Next, sweetness is key. If your fruits are ripe, you might not need much sweetener. Start with less honey or agave syrup, then taste and adjust. You want a balance, not to overpower the natural flavors. For a stunning presentation, use tall glasses. Clear glass lets the bright colors show through. It makes your drink look as good as it tastes! Pour over ice to keep it cold and refreshing. Pair your drink with light snacks. Think fresh fruit, light crackers, or even a slice of cake. These will complement the flavors and create a lovely treat for your guests. You can also serve it at parties for a fun twist on traditional drinks. {{image_2}} You can change the flavor of dragon fruit mango milk tea by using different fruits. Berries like strawberries or blueberries can add a sweet twist. Kiwi adds a nice tartness. Both will make your drink colorful and tasty. You can also adjust the tea type. While I love green tea, black tea adds a strong flavor. Herbal tea can provide a nice change too. For a vegan option, you can swap milk for almond or coconut milk. This keeps it creamy without dairy. You can also make it richer by adding boba or tapioca pearls. These chewy delights add fun to every sip. Boba is a popular choice and gives a nice texture. You can find boba at most grocery stores or online. You can check the Full Recipe for more ideas. To keep your dragon fruit mango milk tea fresh, refrigerate it right away. Place the drink in an airtight container. This helps seal in the flavors. It’s best to store it for up to two days. After that, the taste may not be as vibrant. If you notice separation, just give it a good shake before serving. If you want to revive the drink, you can add more ice or fresh fruit. This brightens the flavor. You can also blend it again to mix everything back together. If you have leftovers, consider freezing some. Pour the tea into ice cube trays. This way, you can use it later in smoothies or other drinks. It’s a fun way to enjoy your creation again! What health benefits does dragon fruit offer? Dragon fruit is packed with nutrients. It has fiber, vitamin C, and antioxidants. These help boost your immune system. The fiber also aids digestion and keeps you full longer. Eating dragon fruit can even help lower blood sugar levels. It's a tasty way to add healthy goodness to your diet. How can I make this drink more diabetes-friendly? To make this drink better for diabetes, swap honey for a low-calorie sweetener. You can use stevia or monk fruit. Also, reduce the amount of fruit. This cuts down on sugar while still keeping flavor. Focus on unsweetened non-dairy milk options to lower carbs. Local grocery stores vs. online options You can find dragon fruit and mango at local grocery stores. Check the produce section for fresh fruits. If you want a wider selection, try online grocery stores. They often have exotic fruits like dragon fruit delivered to your door. Specialty stores for exotic fruits Specialty stores are great for finding unique ingredients. Look for Asian markets or health food stores. They usually stock fresh dragon fruit and ripe mangoes. You may also find organic options at these stores. What to do if the drink is too sweet? If your drink is too sweet, add more brewed green tea. This will balance the sweetness. You can also add a bit of milk to cut the sweetness. Stir well and taste until it’s just right. How to improve texture if it’s too thick? If your drink is too thick, add more milk or water. Blend again until you reach the desired texture. You can also add more brewed tea for a lighter drink. Adjust slowly to get the perfect consistency. This blog post guides you in making a delicious drink with ripe dragon fruit, mango, and green tea. You prepared the base, blended the ingredients, and learned serving tips. I hope you feel ready to try different fruits and adapt the recipe for your taste. Remember, you can store leftovers and revive them later. Enjoy experimenting and sharing your unique twists!

Dragon Fruit Mango Milk Tea Refreshing Delight Recipe

Looking for a refreshing drink that’s packed with flavor? Let me introduce you to Dragon Fruit Mango Milk Tea! This

To create a cozy Spiced Cranberry Apple Cider, gather these key ingredients: - 4 cups apple cider - 2 cups cranberry juice (100% juice, no added sugars) - 1/2 cup fresh cranberries (optional, for garnish) - 2 oranges, sliced Apple cider brings a sweet base, while cranberry juice adds a tart kick. Fresh cranberries and orange slices give a vibrant touch and extra flavor. The magic in this drink comes from spices and flavor enhancers: - 1 tablespoon whole cloves - 1 tablespoon cinnamon sticks (about 2-3 sticks) - 1/2 tablespoon allspice berries - 1/4 cup brown sugar (adjust to taste) - 1 teaspoon vanilla extract Whole cloves and cinnamon sticks add warmth and depth. Allspice berries bring in a hint of nutmeg and pepper. Brown sugar sweetens the mix, while vanilla gives a smooth finish. For a little flair, consider these optional garnishes: - Fresh rosemary sprigs - Additional fruit options Fresh rosemary adds a lovely aroma. You can also use other fruits like apple slices or additional citrus for a fun twist. This recipe is perfect for gatherings or a quiet evening at home. Enjoy crafting this delightful drink with the Full Recipe. First, gather your ingredients. You need apple cider, cranberry juice, oranges, and spices. I love using whole cloves, cinnamon sticks, and allspice berries. They add a warm flavor. In a large pot, mix the apple cider and cranberry juice. Pour in the water and stir it well. Next, toss in orange slices, cloves, cinnamon sticks, allspice berries, brown sugar, and vanilla extract. This mix gives a great taste. Now, bring the mix to a gentle boil over medium heat. Once it boils, reduce the heat to low. Let it simmer for 15 to 20 minutes. This step lets the spices infuse their flavors into the cider. While it simmers, you can mash the fresh cranberries a bit. This helps release their juices and adds more flavor. After simmering, taste the cider. If you want it sweeter, stir in more brown sugar. Adjust it to your liking. Once the cider smells amazing, it’s time to strain it. Use a fine mesh sieve to remove the spices. This step ensures a smooth drink. Now, serve the hot cider in mugs. You can garnish it with fresh cranberries and a sprig of rosemary if you like. For the full recipe, check out the complete guide. Enjoy your warm drink! To achieve the best flavor and aroma in your spiced cranberry apple cider, focus on the spice infusion. Start by adding the whole spices early in the cooking process. Let them simmer well. This allows their flavors to release fully into the cider. If you want a stronger spice taste, consider adding more cloves or cinnamon sticks. Adjusting sweetness is also key. The brown sugar adds a lovely depth. However, not everyone likes their cider sweet. After simmering, taste the cider. If it needs more sweetness, add a little more brown sugar until you find the right balance. When serving your cider, think about your drinkware. Mugs are classic and keep your drink warm. Glasses can add a nice touch for guests. Whichever you choose, serve the cider hot for the best experience. A warm drink on a chilly day feels comforting and festive. Pair your cider with snacks or meals for a full experience. Think about spiced nuts or cheese platters. These bites complement the drink's flavors. For gatherings, get creative! Serve cider in a big pot where guests can help themselves. Add garnishes like fresh cranberries or rosemary sprigs for a festive touch. This makes the drink look inviting and adds extra flavor. Try these tips to elevate your spiced cranberry apple cider. Enjoy the rich flavors and the warmth it brings! For the complete guide, check out the Full Recipe. {{image_2}} You can make Spiced Cranberry Apple Cider even more exciting. Adding alcohol gives it a fun twist. Try mixing in rum or whiskey. Both pair well with the spices. If you want a lighter drink, consider adding fruit blends. Pears or berries can add a fresh taste. These fruits enhance the cider's flavor and aroma, making it unique. For those watching their sugar, you can use substitutes. Stevia or honey can replace brown sugar. This keeps the drink sweet without extra calories. If you prefer a non-alcoholic version, simply skip the spirits. The cider will still taste great and is perfect for all ages. You can also give your cider a festive flair. Try adding holiday spices like nutmeg or ginger. These will bring warmth to your drink. Think about using cinnamon sticks as stirrers for a cozy touch. You might even add a splash of pomegranate juice for a pop of color and flavor. For the full recipe, refer to the Spiced Cranberry Apple Cider section. Enjoy crafting your own special variations! After you enjoy your spiced cranberry apple cider, store any leftovers in the fridge. Place the cider in an airtight container. This helps keep the flavors fresh for up to five days. When you want to drink it again, just reheat it on the stove. Stir it well to mix any settled spices. If you want to save cider for later, freezing is a great choice. Pour the cider into freezer-safe containers, leaving some space at the top. This is important as liquids expand when frozen. Label each container with the date. You can freeze cider for up to three months. To enjoy frozen cider, move it to the fridge overnight to thaw. If you need it sooner, run the container under warm water. Once thawed, heat it on the stove, stirring well. Leftover cider can be more than just a drink. You can use it in recipes to add flavor. Try making a cranberry glaze for meats or a sauce for desserts. You can also use it in marinades or salad dressings. These ideas help reduce waste and keep your meals exciting. For more ideas, check out the full recipe for spiced cranberry apple cider. To make spiced cranberry apple cider from scratch, follow these steps: 1. Mix the liquids: Start by mixing 4 cups of apple cider and 2 cups of cranberry juice in a large pot. 2. Add water: Pour in 2 cups of water and stir well. 3. Incorporate flavors: Toss in sliced oranges, whole cloves, cinnamon sticks, allspice berries, brown sugar, and vanilla extract. 4. Heat: Bring the mixture to a gentle boil over medium heat. 5. Simmer: Lower the heat and let it simmer for 15-20 minutes. This helps the spices infuse their flavors. 6. Mash cranberries: If using fresh cranberries, mash them slightly as you stir. This releases their juices. 7. Taste and adjust: Taste the cider and add more brown sugar if you want it sweeter. 8. Strain: Once it smells amazing, strain out the spices using a fine mesh sieve. 9. Serve: Pour the hot cider into mugs. Add garnishes like fresh cranberries and rosemary if you like. You can find the full recipe in earlier sections of this article. Yes, you can easily make this drink in a slow cooker. Here’s how: 1. Combine ingredients: Place all the ingredients in the slow cooker. This includes apple cider, cranberry juice, water, orange slices, spices, and sugar. 2. Set the heat: Cook on low for 4-6 hours or on high for 2-3 hours. This allows the flavors to blend well. 3. Adjust sweetness: Taste the cider and add more sugar if needed. 4. Serve: Once done, serve it hot, just like you would from a pot. Spiced cranberry apple cider has several health benefits: - Cranberries: They are high in antioxidants and may support urinary health. - Apples: These are a good source of fiber and vitamin C, promoting heart health. - Spices: Cinnamon and cloves can help with digestion and may have anti-inflammatory effects. - Low in added sugars: This recipe uses brown sugar and can be adjusted to your taste, making it a healthier choice. Enjoying this drink not only warms you up but also adds some health benefits to your holiday gatherings! Spiced cranberry apple cider is a warm, flavorful drink perfect for any occasion. We covered the main ingredients, spices, and how to mix them for maximum taste. You learned tips for serving and variations to keep it fresh. Incorporate your favorite fruits or spices to personalize the recipe. Remember to store leftovers properly to enjoy later. This cider is not just a drink; it’s a cozy experience that can brighten any gathering. Enjoy making it your own!

Spiced Cranberry Apple Cider Flavorful Holiday Drink

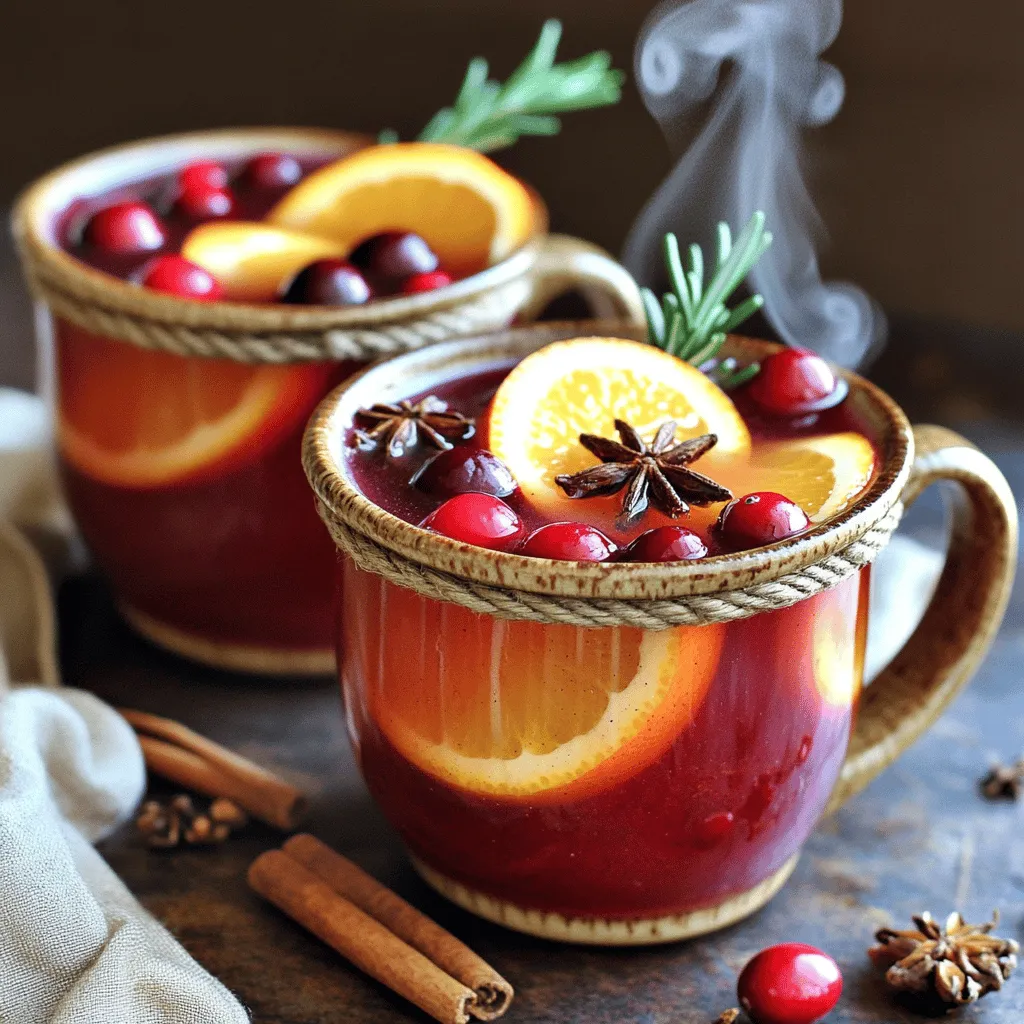
Get ready to warm your heart with my Spiced Cranberry Apple Cider, the perfect holiday drink! This festive treat blends

- 1 cup fresh strawberries, hulled and sliced - 1/4 cup rose syrup (store-bought or homemade) - 1/2 cup freshly squeezed lemon juice (about 4 lemons) - 4 cups cold water - 1/4 cup honey or agave syrup (adjust based on sweetness preference) - Fresh mint leaves for garnish - Ice cubes Each ingredient in strawberry rose lemonade brings unique benefits. Fresh strawberries provide vitamins and antioxidants. They are low in calories and high in fiber, making them a healthy choice. Lemon juice adds vitamin C, which boosts your immune system. It also adds a bright, tangy flavor. Rose syrup brings a lovely aroma and flavor, providing calming effects. Honey or agave syrup adds natural sweetness and can soothe a sore throat. Mint leaves not only add a fresh taste but also aid digestion. Together, these ingredients create a drink that is both tasty and good for you. You can easily swap ingredients for your needs. If you don’t have fresh strawberries, use frozen ones. They work well in the puree. For the rose syrup, you can use flavored simple syrup. This will change the taste but keep it sweet. Instead of honey or agave, use maple syrup for a different flavor. If you want a sugar-free version, try a sugar substitute like stevia. You can also add other herbs, like basil or lavender, for a unique twist. This drink is flexible, so you can make it your own. For the full recipe, follow the instructions provided above. Making Strawberry Rose Lemonade is simple and fun. You will need fresh ingredients and a blender. Gather your items before you start. This drink takes about 10 minutes to prep and 30 minutes to chill. The total time is just 40 minutes, and it serves 4 to 6 people. First, take 1 cup of fresh strawberries. Hull and slice them. Next, put the strawberries in a blender with 1/4 cup of rose syrup. Blend until the mix is smooth. If you want a finer drink, you can strain the puree. This step is not necessary, but it helps to remove seeds. Now, you will mix the lemonade. Grab a large pitcher and pour in 1/2 cup of freshly squeezed lemon juice. Add 4 cups of cold water to the pitcher. Then, mix in 1/4 cup of honey or agave syrup. Stir it well so everything blends nicely. Add the strawberry puree to this mixture. Stir until fully mixed. If you want it sweeter, add more honey or agave. To finish, chill the mix in the fridge for at least 30 minutes. This time lets the flavors come together. When you serve, fill glasses with ice cubes. Pour the Strawberry Rose Lemonade over the ice. Garnish with fresh mint leaves. You can also add a slice of lemon for a pretty touch. Enjoy your refreshing drink! For a complete guide, check the Full Recipe. When sweetening your strawberry rose lemonade, you have great options. Honey adds a floral note, while agave syrup blends well. You can also use simple syrup or even stevia for a low-calorie choice. Each sweetener gives a different taste. Start with less and add more if needed. This lets you find your perfect level of sweetness. Balancing flavors is key to a great drink. The tartness of lemons needs a sweet touch. The rose syrup brings floral notes that brighten the drink. Taste as you mix. If it's too tart, add more sweetener. If it’s too sweet, a splash of lemon juice can help. Adjust until the flavor is just right for you. How you serve your drink makes a big impact. Use clear glasses to show off the pretty pink color. Add ice cubes for a refreshing chill. Garnish with mint leaves for a pop of green. You can also place whole strawberries on top for a nice touch. A lemon slice on the rim adds style. These little details make your lemonade stand out. For the full recipe, check the earlier section. {{image_2}} Herbs can boost the taste of your Strawberry Rose Lemonade. Mint is a classic choice. It adds a cool note that pairs well with the strawberry and rose flavors. You can muddle fresh mint leaves in the pitcher before adding the liquids. This releases more mint flavor into your drink. Basil is another option. It gives a unique twist. Just be careful not to add too much, as its flavor can be strong. You can easily turn this drink into a fun cocktail. Adding a splash of vodka or gin can make it lively. Use about 1 to 2 ounces per glass, depending on your taste. If you prefer a bubbly drink, add sparkling wine or prosecco. This adds fizz and makes the drink feel festive. Remember to adjust the sweetness to balance the alcohol flavors. Feel free to mix in other fruits for a fresh twist. In summer, try adding peaches or watermelon for a juicy touch. In fall, use apples or pears to bring a cozy vibe. You can blend these fruits with strawberries for a unique puree. Just keep the rose syrup and lemon juice the same for balance. This way, you can enjoy different flavors all year round! For the full recipe, check out the section on Ingredients. Store any leftover strawberry rose lemonade in a sealed container. Keep it in the fridge for freshness. Use it within three days for the best taste. If you see any changes in color or smell, it’s best to discard it. To freeze strawberry puree, pour it into ice cube trays. Once frozen, transfer the cubes to a freezer bag. This method helps you use the puree later while keeping the flavor fresh. You can thaw it in the fridge overnight before using it again. Prepared strawberry rose lemonade stays good in the fridge for up to three days. After that, the flavors may start to fade. If you notice separation, just stir it well before serving. Always check for freshness before enjoying! Strawberry rose lemonade is a sweet and tangy drink. It combines fresh strawberries, lemon juice, and rose syrup. The flavors blend well to create a refreshing taste. This drink has a lovely pink color, making it fun to serve. It’s perfect for warm days or special events. You can find the full recipe above. Yes, you can make this drink in advance. Prepare the strawberry rose lemonade and chill it in the fridge. It tastes even better after resting for a while. Just make sure to stir it well before serving. This drink stays fresh for up to two days. If you make it early, add ice just before serving. Strawberry rose lemonade has many health benefits. Strawberries are rich in vitamins and antioxidants. They help support your immune system and skin health. Lemons provide vitamin C, which boosts your health too. Rose syrup can help improve mood and digestion. This drink is a tasty way to enjoy these benefits while staying hydrated. This blog post covered how to make delicious Strawberry Rose Lemonade. We explored the right ingredients to use and their benefits. You learned step-by-step how to prepare, blend, and mix the drink. I shared tips on sweeteners, flavor balance, and presentation. We also discussed fun variations and how to store the drink. Strawberry Rose Lemonade is refreshing and easy to customize. Enjoy making your own unique version!

Strawberry Rose Lemonade Delightful and Refreshing Drink

Are you ready to sip on something truly delightful? Strawberry Rose Lemonade is the perfect drink to enjoy on hot

- Cold brew coffee - Milk options - Sweeteners and spices - Toppings and garnishes For the perfect Cinnamon Roll Cold Brew, you need just a few simple ingredients. First, start with cold brew coffee. It gives you that smooth, rich flavor, perfect for this drink. Next, choose your milk options. You can use dairy milk, almond milk, or oat milk. Each adds a unique taste. Next, you’ll need sweeteners and spices. I recommend brown sugar for that warm, caramel flavor. Add vanilla extract and ground cinnamon to bring in that cinnamon roll vibe. You can adjust these based on your taste. Finally, consider your toppings and garnishes. Whipped cream is a must for that rich, creamy finish. A light dusting of a cinnamon and sugar mixture on top is key to replicating the taste of a warm cinnamon roll. If you want extra crunch, sprinkle on some crushed pecans or walnuts. You now have all the ingredients for a delicious drink. For the full recipe, check out the details above. To make your Cinnamon Roll Cold Brew, follow these easy steps: 1. Mix the Ingredients: In a pitcher, add the cold brew coffee, milk, brown sugar, vanilla extract, and ground cinnamon. Stir well until the sugar dissolves completely. A smooth mix makes a big difference. 2. Prepare Your Glass: Take a tall glass and fill it with ice cubes. The ice keeps your drink cool and refreshing. 3. Pour the Mixture: Slowly pour the cinnamon coffee mix over the ice. Watch the layers blend together. It’s a treat for your eyes! 4. Add Toppings: Top your drink with a generous dollop of whipped cream. This adds creaminess and sweetness. 5. Garnish: Lightly sprinkle a mix of ground cinnamon and sugar over the whipped cream. This gives the drink that sweet cinnamon roll taste. 6. Optional Crunch: If you like, add crushed pecans or walnuts for an exciting crunch. This extra texture makes each sip fun. 7. Serve and Enjoy: Serve your drink immediately. Use a straw or a cinnamon stick for stirring. Sip and enjoy this delightful treat! - If you like it sweeter, add more brown sugar. Start with one extra teaspoon and mix again. - For less sweetness, cut back on sugar. You can also use a sugar substitute. - Taste as you go! Adjusting sweetness is all about your personal preference. For the full recipe, refer to the section above! To make your Cinnamon Roll Cold Brew shine, start with blending flavors well. Mix cold brew, milk, and spices in a pitcher. Stir until smooth. This helps each sip taste just right. When it comes to milk, you have choices. Dairy milk gives a rich flavor. Almond or oat milk adds a nutty twist. Experiment to find what you like best. Some readers enjoy a creamier texture, while others prefer a lighter taste. Next, focus on the whipped cream. Whip it until it holds peaks. This means it should stand up strong. A good whip adds a soft touch to your drink. It makes every sip feel special. For the best look, add a sprinkle of cinnamon and sugar on top. This tiny step makes your drink pop. If you want a crunch, consider crushed pecans or walnuts. They add fun texture and flavor. Overall, these tips will help you create a perfect drink. The sweet and spicy blend will keep you coming back for more. For the full recipe, check out the details above. {{image_2}} You can change the flavors in your Cinnamon Roll Cold Brew for fun. - Dairy-free options: Use almond, oat, or coconut milk instead of regular milk. They add a nice twist. - Flavor infusions: Try adding caramel or chocolate syrup for extra sweetness. Just mix it in with the other ingredients. - Seasonal variations: In fall, add pumpkin spice for warmth. In winter, mix in peppermint for a festive taste. These alternatives make the drink your own. You can create something unique to match your mood or season. Want the full recipe? Check out the [Full Recipe] for all the details! To keep your Cinnamon Roll Cold Brew fresh, follow these tips: - Use an airtight container. This helps keep the cold brew from losing flavor. - Store in the fridge. Cold brew stays good for up to two weeks when chilled. If you have leftovers, pour them into a clean jar. Seal it tight and put it in the fridge. That way, you can enjoy it later. For reheating, avoid the microwave. Instead, pour it into a pot and warm it gently on the stove. Stir it often to avoid burning. You can also repurpose it into a smoothie or dessert. Just mix it with ice cream or yogurt for a tasty treat. This way, you can enjoy your Cinnamon Roll Cold Brew even after the first sip! What is the best cold brew coffee to use? I suggest using a smooth, medium roast cold brew. Look for one with rich flavor and low acidity. This helps the cinnamon and vanilla shine. If you make your own, steep coarsely ground coffee in cold water for 12-24 hours. Strain and enjoy a fresh brew. Can I make it vegan? Yes, you can easily make this drink vegan. Use a non-dairy milk like almond, oat, or soy. They all blend well with the coffee and spices. Use a vegan whipped cream for the topping. This way, you keep the taste without dairy. How can I sweeten my cold brew without sugar? You can use natural sweeteners like maple syrup or agave. They add a nice flavor without refined sugar. You could also try dates or stevia for a low-calorie option. Adjust to your taste as you mix the flavors together. For the full recipe, check out the details above! In this blog post, I shared how to make a delicious cinnamon roll cold brew. You learned about the essential ingredients like cold brew coffee, milk options, and tasty toppings. I detailed the preparation steps and offered tips for perfecting your drink. We explored fun variations and storage tips to keep your cold brew fresh. In my final thoughts, enjoy experimenting with flavors and making each cup unique!

Cinnamon Roll Cold Brew Irresistible Flavor Boost

Are you ready to take your coffee game to the next level? Cinnamon Roll Cold Brew blends the rich taste

To make the Mango Coconut Chai Cooler, gather all ingredients before you start blending. - 1 ripe mango, peeled and diced - 1 cup coconut milk - 1 cup brewed chai tea, cooled - 2 tablespoons honey (or maple syrup for a vegan option) - 1 tablespoon fresh lime juice - 1/4 teaspoon ground cinnamon - 1/4 teaspoon ground ginger - Ice cubes - Fresh mint leaves for garnish If you don't have coconut milk, try almond milk or oat milk. You can swap honey for agave syrup or leave it out for a sugar-free drink. For a stronger spice flavor, add a pinch of nutmeg or cardamom. If mango isn't in season, use ripe peaches or pineapple instead. Each option brings a new twist to this refreshing drink! First, gather all your ingredients. You’ll need: - 1 ripe mango, peeled and diced - 1 cup coconut milk - 1 cup brewed chai tea, cooled - 2 tablespoons honey (or maple syrup for a vegan option) - 1 tablespoon fresh lime juice - 1/4 teaspoon ground cinnamon - 1/4 teaspoon ground ginger - Ice cubes - Fresh mint leaves for garnish Make sure your mango is ripe. This gives the drink a sweet flavor. Dice the mango into small pieces for easy blending. Brew your chai tea ahead of time and let it cool. This step is key for a refreshing drink. Now, it’s time to blend. In your blender, combine the diced mango, coconut milk, cooled chai tea, honey, lime juice, ground cinnamon, and ground ginger. Blend on high for about 30 seconds. You want a smooth and creamy mix. If it’s too thick, add a little more coconut milk to help it blend better. After blending, taste the mixture. If you want it sweeter, add more honey. Blend again briefly to mix it in. Grab a glass and fill it with ice cubes. Pour the mango coconut mix over the ice. Stir gently to help chill it. For a beautiful touch, garnish with fresh mint leaves on top. This not only looks nice but also adds a fresh scent. Enjoy your Mango Coconut Chai Cooler right away! You can find the Full Recipe for more details. To make your Mango Coconut Chai Cooler smooth, start with ripe mango. The riper the fruit, the creamier the drink. When blending, add coconut milk first. This helps the mango blend easier. If your mix is too thick, add more coconut milk a little at a time. Blend until it’s silky and light. Taste your drink before serving. If you find it needs more sweetness, add honey or maple syrup. Start with a little. You can always add more. Remember, the sweetness can change based on the mango's ripeness. Adjust it to match your taste. The chai tea you choose can change your drink's flavor. Use a bold chai for a stronger taste. If you want a milder flavor, use less chai tea or a lighter blend. Let the tea cool before mixing. This keeps your cooler refreshing. For a fun twist, try flavored chai, like vanilla or spiced chai. For the full recipe, refer back to the main section. Enjoy making this delightful drink! {{image_2}} If you want a dairy-free drink, coconut milk is your best friend. It gives a rich taste. You can use almond milk or oat milk as well. These options keep it creamy and light. Just check that your milk is unsweetened. This way, you control the sweetness in the cooler. Adding more fruit makes this drink even better. You can blend in pineapple or banana for a tropical twist. Both fruits add natural sweetness and flavor. If you like berries, try adding strawberries or blueberries. They give a nice color and tartness to the drink. You can even mix in a handful of spinach for added nutrition. This keeps the drink fresh and colorful. Want to spice it up? Try adding a dash of vanilla extract. This gives a warm, sweet note that pairs well with the mango. You can also include a pinch of nutmeg or cardamom for a unique taste. If you prefer a drink with a kick, add a bit of fresh ginger. This brightens the flavor and adds a zing. Each of these tweaks makes your Mango Coconut Chai Cooler truly your own. After you make your Mango Coconut Chai Cooler, you might have some left. You can store it in an airtight container in the fridge. It stays fresh for up to two days. If you see separation, just shake it well before drinking. This drink tastes best when chilled, so keep it cold! You can freeze this cooler for a hot day. Pour the mixture into ice cube trays or freezer-safe bags. This way, you can enjoy it later. When you want a cold treat, blend the frozen cubes with a little coconut milk. It will be like a smoothie! To keep your drink tasty, use ripe mangoes and fresh coconut milk. Check for any signs of spoilage before use. If your mango is overripe or brown, it won't taste as good. Always look for bright, colorful ingredients. They make your cooler delicious and refreshing. You can use almond milk for a lighter drink. Oat milk also works well. If you want a creamy texture, try cashew milk. These options provide a nice flavor without coconut. Yes, you can make this drink ahead. Blend all the ingredients and store in the fridge. Just remember to stir before serving. The flavors will blend well overnight. Serve it chilled over ice for the best taste. To lower the sweetness, reduce the honey or maple syrup. You can also add more lime juice for a tart flavor. Experiment with the spices too. A pinch of salt can balance the sweetness nicely. We covered the essential ingredients and steps to create a delicious drink. You can customize it with various substitutions and tips for the best texture. Storing your leftovers properly ensures freshness, and we provided simple answers to your questions. Experimenting with flavors or dairy-free options makes this drink your own. Each step helps you enjoy this recipe to the fullest. Enjoy making your own unique version!

Mango Coconut Chai Cooler Refreshing Summer Drink

Looking for a cool drink to beat the summer heat? The Mango Coconut Chai Cooler is your answer! This tasty

To make a refreshing Turmeric Pineapple Fizz, you need some simple and tasty ingredients. Here’s what you’ll gather for this vibrant drink: - Fresh pineapple juice - Ground turmeric - Honey or agave syrup - Fresh lime juice - Sparkling water - Ice cubes - Fresh mint leaves - Lime slices Fresh pineapple juice gives this drink a sweet and tropical flavor. The ground turmeric adds a warm, earthy taste and bright color. Honey or agave syrup sweetens the drink just right. Fresh lime juice brings a tangy kick that balances the sweetness. Sparkling water adds fizz and makes it extra refreshing. Ice cubes keep the drink cool and enjoyable. Fresh mint leaves give a lovely aroma and make it look pretty. Lastly, lime slices are perfect for garnish and extra flavor. You’ll love how easy it is to make this drink. Just gather all the ingredients, and you're ready to whip up a delicious Turmeric Pineapple Fizz. For the complete details on making it, check the Full Recipe. 1. Start by mixing the fresh pineapple juice, ground turmeric, honey, and lime juice in a bowl. Stir it well. Make sure the honey dissolves completely. This step is key for a smooth drink. 2. Next, fill your serving glasses halfway with ice cubes. Use plenty of ice. It keeps the drink cold and refreshing. 3. Now, pour the pineapple and turmeric mix over the ice. Fill each glass about two-thirds full. This helps balance the flavors with the sparkling water. 4. Top off each glass with sparkling water. Gently stir to combine everything. This adds the fizz that makes it fun to drink. 1. For a lovely touch, garnish each glass with fresh mint leaves and a slice of lime. This adds color and a burst of flavor. 2. Serve the drink immediately. Enjoy it fresh for the best taste. The fizz and tropical flavors will make it a hit! For the complete recipe, you can refer to the Full Recipe. You can make this drink just the way you like it. If you want it sweeter, add more honey or agave syrup. Start with one tablespoon and taste it. If you want more sweetness, add a little bit more. You can also try using fresh herbs like basil or cilantro. They can add a fun twist to your drink. Just muddle a few leaves in your glass before adding the ice and drink mixture. This adds a fresh and bright flavor. To ensure your turmeric mixes well, stir it in the pineapple juice fully. This helps it blend smoothly and gives you an even taste. If you see any lumps, just keep stirring until they disappear. For the best fizz, keep your sparkling water chilled. Make sure your drink is cold before serving. This keeps it refreshing on a hot day. Always serve it right after mixing. The fizz tastes best when fresh! For the full recipe, check the earlier section. {{image_2}} You can change the taste of your Turmeric Pineapple Fizz easily. Adding ginger gives it a spicy kick. Just grate a small piece and mix it in. Mint also adds a cool twist. You can muddle fresh mint leaves before adding the juice. If you want to try other fruit juices, you can use orange or mango juice. These juices add sweetness and change the flavor. Mixing different juices makes the drink fun and fresh. This drink pairs well with many snacks and light meals. Try it with shrimp tacos or a fresh salad. The fizz and flavors complement light dishes perfectly. In summer, enjoy it chilled by the pool. For winter, warm the pineapple juice and turmeric. This way, you can enjoy a cozy drink even when it’s cold outside. For the full recipe, refer to the earlier section. You can make the turmeric pineapple mixture ahead of time. This saves you effort when hosting friends or family. Simply mix the pineapple juice, turmeric, honey, and lime juice in a bowl. Store it in the fridge for up to three days. This way, your drink stays fresh and flavorful. Just remember to stir it again before serving. The ingredients can settle, especially the turmeric. Freezing is a great way to keep the flavors longer. You can freeze the pineapple juice in ice cube trays. Once frozen, pop the cubes into a bag. This lets you use them later for other drinks. You can also freeze any leftover mixture. Pour it into a container and seal it well. When you want a fizzy drink, just thaw it and mix with sparkling water. Making ice cubes from leftovers is simple. Pour the mixture into trays and freeze. These cubes will add a burst of flavor to your drinks. You can also use them in smoothies for a tasty twist. What are the health benefits of turmeric? Turmeric has many great health benefits. It can help reduce inflammation and boost your immune system. The active compound, curcumin, is known for its strong antioxidant properties. This means it helps fight free radicals in the body. Turmeric may also improve digestion and support joint health. Adding it to drinks, like our Turmeric Pineapple Fizz, makes it easy to enjoy these benefits. Can I use canned pineapple juice? Yes, you can use canned pineapple juice. However, fresh juice tastes better and has more nutrients. If you choose canned juice, pick one with no added sugar. This keeps your drink healthy and tasty. You may need to adjust the sweetness, as canned juice can be sweeter than fresh juice. How can I make this recipe vegan? Making this recipe vegan is simple. Just swap honey for agave syrup or maple syrup. Both options add sweetness without animal products. The rest of the ingredients in the Turmeric Pineapple Fizz are already vegan. This means you can enjoy this refreshing drink without worry. For the Full Recipe, check the main section of this article. You now have a simple recipe for a tasty Turmeric Pineapple Fizz. We covered the key ingredients like fresh pineapple juice and turmeric. I offered easy steps for making and serving your drink. Remember, you can customize it with different herbs and flavors. Always keep the drink cold for the best taste. Feel free to prepare it ahead of time or freeze extras. Enjoy sharing this refreshing drink with snacks or meals. With these tips, you can make it your own and impress your friends.

Turmeric Pineapple Fizz Refreshing Summer Beverage

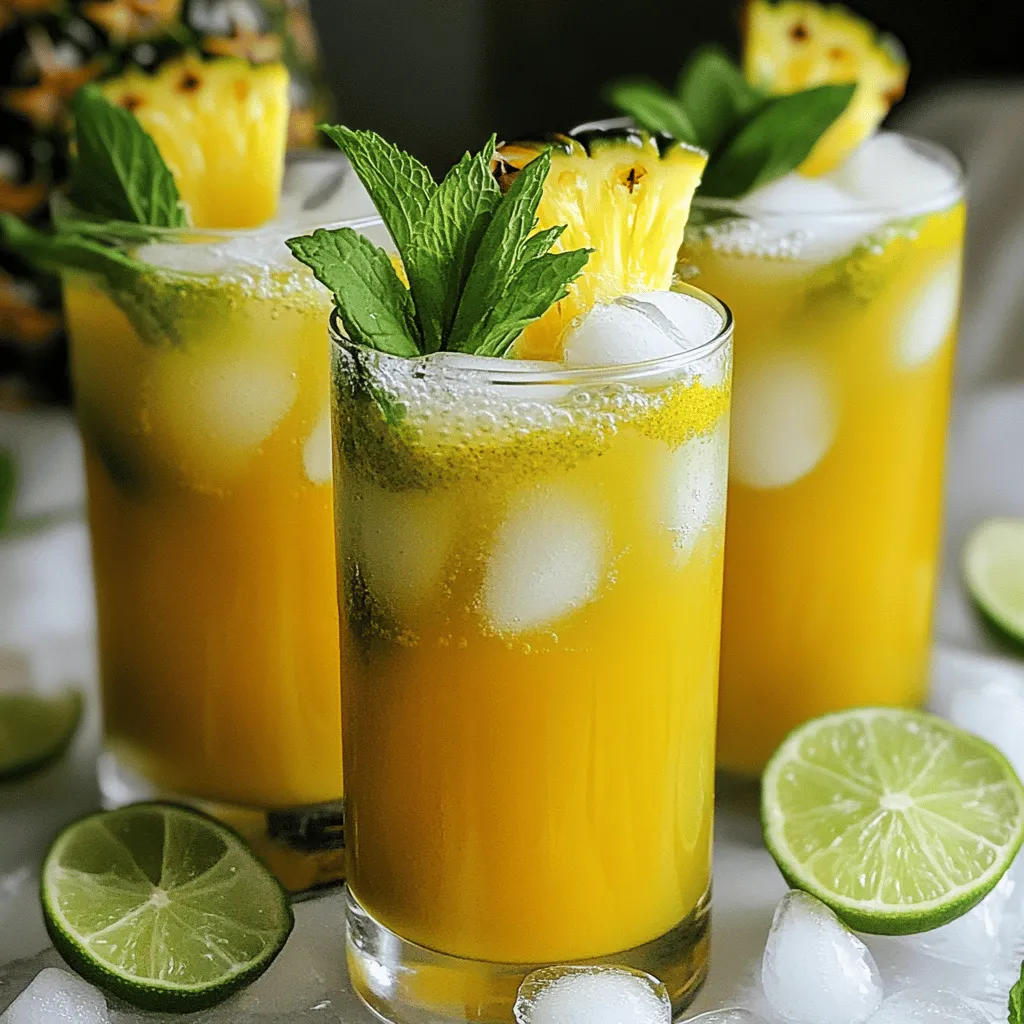
Looking for a drink that cools you down and boosts your health? Meet the Turmeric Pineapple Fizz! This bright and

Older posts
Newer posts
← Previous Page1 … Page69 Page70 Page71 … Page84 Next →

dsad

© 2026 easycookingbite • Built with GeneratePress

Our Policies

  • Copyright Policy
  • Cookie Policy
  • GDPR Policy
  • Privacy Policy
  • Disclaimer
  • Terms Of Use

More Information

  • Home
  • About
  • Contact
  • Appetizers
  • Dessert
  • Dinner
  • Drinks
©2026, easycookingbite About Back To Top