Skip to content
DisclaimerTerms Of UseGDPR PolicyCookie Policy

easycookingbite

  • Home
  • Drinks
  • Appetizers
  • Dinner
  • Dessert
  • About
  • Contact
  • Privacy Policy
DisclaimerTerms Of UseGDPR PolicyCookie Policy

NO-ING-IMG

- Fresh blackberries - Sugar - Lemon juice - Vanilla extract - Sparkling water - Ice cubes - Whipped cream - Additional blackberries for garnish - Vanilla bean for garnish - Calories and serving size: Each serving has about 150 calories. - Sugar content and adjustments: You can adjust the sugar to your taste. Use less or none for a lower sugar drink. Blackberry Vanilla Cream Soda is a delight for summer. The fresh blackberries bring a burst of flavor, while the vanilla adds a smooth touch. You can customize it with more blackberries or even a vanilla bean for a fancy look. To start, take a medium bowl and add your fresh blackberries. Add two tablespoons of sugar and one tablespoon of lemon juice. Use a fork or a masher to mash the blackberries. Keep mashing until you see a chunky puree form. If you want a smoother drink, you can blend the mixture in a blender until it is velvety. Now it’s time to build your drink! Grab a glass and fill it with a few ice cubes. Spoon 2-3 tablespoons of your blackberry puree over the ice. Next, add one teaspoon of vanilla extract to the glass. Gently stir to mix everything together. Slowly pour in one cup of sparkling water, filling the glass. Be careful to maintain the fizz while stirring gently. Top your drink with a generous dollop of whipped cream. For a special touch, you can add a few whole blackberries and a slice of vanilla bean. This will not only look great but will also boost the flavor. Serve your drink right away to enjoy the refreshing fizz! - Adjusting sweetness to taste: Start with the basic recipe. Use 2 tablespoons of sugar. If you like it sweeter, add more sugar. Taste as you go. You want it just right for you. - Maintaining carbonation: Pour the sparkling water slowly. This keeps the fizz. Stir gently after pouring. Avoid too much mixing. - Best glassware for presentation: Use tall glasses to show off the layers. Clear glassworks best to see the colors. A fun straw adds a nice touch, too. - Pairing with snacks or appetizers: Serve with light snacks. Cheese and crackers work well. Fresh fruit or light dips complement the drink nicely. - Variations in flavor profiles: Try different berries. Raspberries or strawberries can add a new twist. Don’t hesitate to mix flavors. You can even use herbal extracts for fun. - Using other berries or extracts: Experiment with blueberries or cherries. Each berry will change the flavor. Vanilla can also be swapped for almond or coconut for a unique taste. You can check the Full Recipe for more details on making this refreshing drink! {{image_2}} You can make your blackberry vanilla cream soda even better by adding other flavors. Citrus fruits like lime or orange give a bright zing. Just squeeze some juice into your mix. It adds a refreshing twist that pairs well with blackberries. You can also try herbs like mint or basil. These herbs add a unique taste and aroma. Muddle a few leaves into your blackberry puree. This will create a fun, herbal note in your drink. Each sip will surprise your taste buds! Want to turn your drink into a cocktail? It's easy! Add a splash of your favorite spirit. Vodka or rum works well with the fruity flavors. Just pour in one ounce and stir gently. You’ll have a delightful summer cocktail ready to sip. If you want a stronger drink, try gin. Its herbal notes mix nicely with the blackberries and vanilla. You can also use bourbon for a richer flavor. Each spirit brings its own charm to the drink. In winter, fresh blackberries can be hard to find. Use frozen blackberries instead. They still taste great and keep the same fun color. Just blend them into your puree as you would with fresh ones. You can also infuse your soda with seasonal fruits. In the fall, try adding sliced apples or pears. In summer, peaches or strawberries are perfect. Each season brings new flavors to explore. You can find endless ways to enjoy your blackberry vanilla cream soda! For the full recipe, check out the steps to create this delightful drink at home. To keep your blackberry puree fresh, place it in an airtight container. Store it in the fridge. It will stay good for about three days. If you have extra sugar mix, store it in a dry place in a sealed jar. For carbonated drinks, it's best to drink them right away. Once opened, the fizz will fade quickly. If you must save some, keep it in the fridge. Use a bottle with a tight cap to help keep some bubbles. After you mix your blackberry vanilla cream soda, it starts to lose fizz. Typically, the drink stays fizzy for about 30 minutes. Serve it right after making it for the best experience. To keep it fresh, use chilled glasses and sparkling water. This helps maintain the drink's coolness and enhances the fizz. You can prepare the blackberry puree ahead of time. Just mash the blackberries and mix with sugar and lemon juice. Store it in the fridge for later use. Do not pre-mix the soda and puree. Once mixed, the fizz goes away quickly. For a party, make the puree and prepare the drinks when guests arrive. This way, everyone enjoys the fresh taste. You can find the full recipe above. Blackberry Vanilla Cream Soda has a rich and fruity flavor. The blackberries give it a sweet and tangy taste. You can feel the smoothness from the vanilla. The sparkling water adds a refreshing fizz. This drink is both sweet and bubbly, perfect for hot days. You can find Blackberry Vanilla Cream Soda at many local stores. Check the soda or beverage aisle. Some specialty shops may offer it too. If you prefer online shopping, look on websites that sell gourmet drinks. You can also make it at home using the Full Recipe. Yes, you can use other fruits! Strawberries, raspberries, or blueberries work well. You can mix different fruits for a fun twist. Just remember to adjust the sugar based on the fruit's sweetness. This way, you can create your own unique flavor. This recipe is quick and easy. It takes just about 10 minutes to prepare. You mash the blackberries and mix everything together. In no time, you can enjoy this tasty drink! Absolutely! Blackberry Vanilla Cream Soda is great for kids. It has no alcohol and is full of flavor. Just be sure to supervise when using carbonated water. They will love the fruity taste and the whipped cream on top. This blog post covers how to make a delicious Blackberry Vanilla Cream Soda. You learned about key ingredients, preparation steps, and helpful tips. I shared ways to adjust flavors and suggested fun variations. You can even store your creations or make them in advance. Remember, this drink is versatile and simple to make. So grab those blackberries and get creative in your kitchen! Enjoy refreshing flavors all year round with this easy recipe.

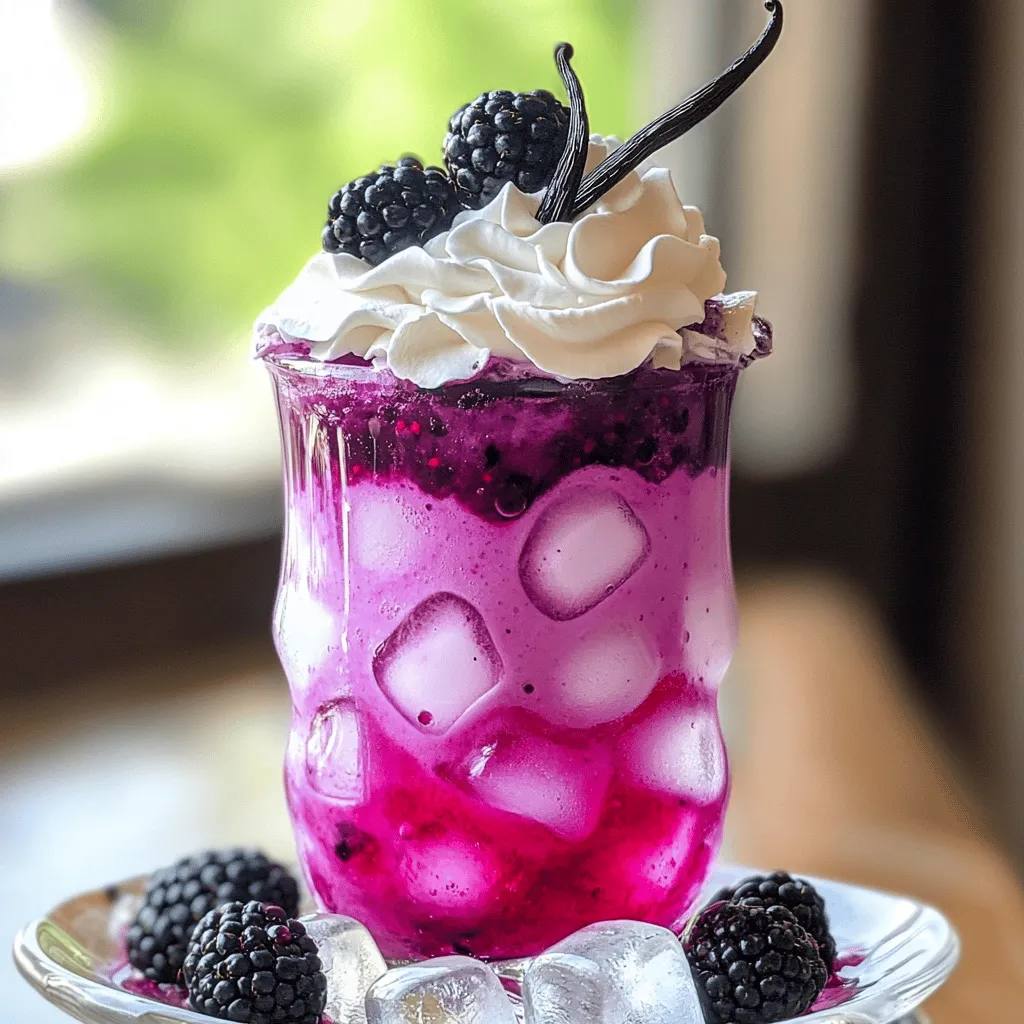
Blackberry Vanilla Cream Soda Refreshing Summer Drink

Summer calls for refreshing drinks, and nothing beats a Blackberry Vanilla Cream Soda! This easy recipe combines fresh blackberries, sugar,

- 1 large cucumber, diced - 2 cups cherry tomatoes, halved - 1 cup red bell pepper, diced - 1 small red onion, finely chopped Fresh vegetables make this salad bright and full of flavor. The cucumber adds a nice crunch. Cherry tomatoes bring sweetness. Red bell pepper gives extra color. The red onion adds a bit of bite. - 1 cup Kalamata olives, pitted and halved - 1 cup feta cheese, crumbled Kalamata olives add a salty, rich taste. Feta cheese is creamy and tangy. Together, they enhance the overall flavor. They also make your salad feel more like a meal. - 1/4 cup extra virgin olive oil - 2 tablespoons red wine vinegar (or lemon juice) - 1 teaspoon dried oregano - Salt and pepper to taste - Fresh parsley, chopped (for garnish) The dressing is key to this salad. Extra virgin olive oil gives a smooth texture. Red wine vinegar or lemon juice adds a tangy kick. Dried oregano brings a hint of warmth. Don’t forget salt and pepper; they help balance all the flavors. Fresh parsley on top looks nice and adds freshness. For the full recipe, check out the Mediterranean Chopped Greek Salad. To start, grab a large mixing bowl. Combine the diced cucumber, halved cherry tomatoes, diced red bell pepper, chopped red onion, and halved Kalamata olives. Mixing these fresh veggies brings vibrant colors and flavors to your salad. Each bite will burst with freshness. Next, add the crumbled feta cheese. Be gentle as you mix it. You want to keep the feta intact, not mashed. This adds a creamy touch that pairs perfectly with the crunch of the veggies. Now, let’s whip up the dressing. In a small bowl, whisk together olive oil, red wine vinegar or lemon juice, dried oregano, salt, and pepper. This dressing enhances the salad's taste. Pour it over the salad mixture and toss everything together. Make sure every piece gets coated. Let it sit for about 10-15 minutes. This waiting time lets the flavors meld beautifully. You can find the full recipe above for a complete guide! Letting your salad sit for 10-15 minutes helps the flavors come together. This wait time allows the dressing to soak into the veggies. You’ll taste the difference! The tomatoes release their juices, making the dish even more juicy and delicious. To present your salad well, serve it in a large, shallow bowl. This style invites guests to dig in. If you want to impress, drizzle some extra olive oil on top. A sprinkle of additional feta cheese adds a lovely touch. Fresh herbs, like parsley, also make it look bright and appealing. Adjusting the dressing can change how the salad tastes. If you like it tangy, add more vinegar or lemon juice. For a richer flavor, increase the olive oil. You can always taste as you go! Tailoring the dressing to your liking makes the dish more enjoyable. This personal touch can elevate your meal and make it just right for you. {{image_2}} Adding protein to your chopped Greek salad can make it more filling. Grilled chicken, shrimp, or chickpeas all work well. These options add flavor and texture that enhance the salad. Chicken brings a savory touch, while shrimp adds a sweet flavor. Chickpeas are a great choice for a vegetarian option. You can also make dietary swaps to fit your needs. If you want a dairy-free version, simply omit the feta cheese. Alternatively, you can use vegan cheese for a similar taste without dairy. This allows you to enjoy the dish while keeping your diet in mind. Seasonal adjustments can help keep the salad fresh and exciting. Try adding zucchini in summer or peppery arugula in spring. These veggies not only change the taste but also add color and nutrition. Feel free to mix and match based on what you have on hand. Want to explore more? Check out the Full Recipe to create your own chopped Greek salad masterpiece! Keep any leftovers in an airtight container in the refrigerator for up to 2 days. This helps maintain freshness and taste. Make sure to seal it well. If you want to prepare a batch, store the dressing separately. Mix it in just before serving. This keeps the salad crisp and tasty. Freezing is not recommended for this salad. The texture of the vegetables changes when frozen. You want your salad to stay crunchy and fresh! A chopped Greek salad has all ingredients diced into smaller, bite-sized pieces. This makes it easier to eat and mix. You can enjoy a burst of flavor in every bite. Traditional Greek salad usually has larger pieces. The chopped version creates a fun, more casual dish. Yes, feel free to add more vegetables or proteins as desired. You can try adding ingredients like radishes, avocado, or even grilled chicken. This salad is versatile. Get creative and mix in what you love! Omit feta cheese or use a plant-based alternative. There are many vegan cheese options that taste great. You can also add nuts or seeds for extra texture. This way, you keep the salad tasty and creamy without dairy. It stays fresh for about 1-2 days when stored properly in an airtight container. If you want to keep it longer, store the dressing separately. Mix it in just before serving to keep the veggies crisp. Enjoy your meal! In this post, we explored the key ingredients for a tasty chopped Greek salad. We looked at fresh veggies, mix-ins, and dressing components. I shared step-by-step instructions to make your salad shine. With tips on flavor, serving, and storage, you'll enjoy this dish anytime. You can even customize it to fit your taste and diet. Keep experimenting and find what you love most in your salad. Your chopped Greek salad journey starts now!

Chopped Greek Salad Easy and Flavorful Recipe

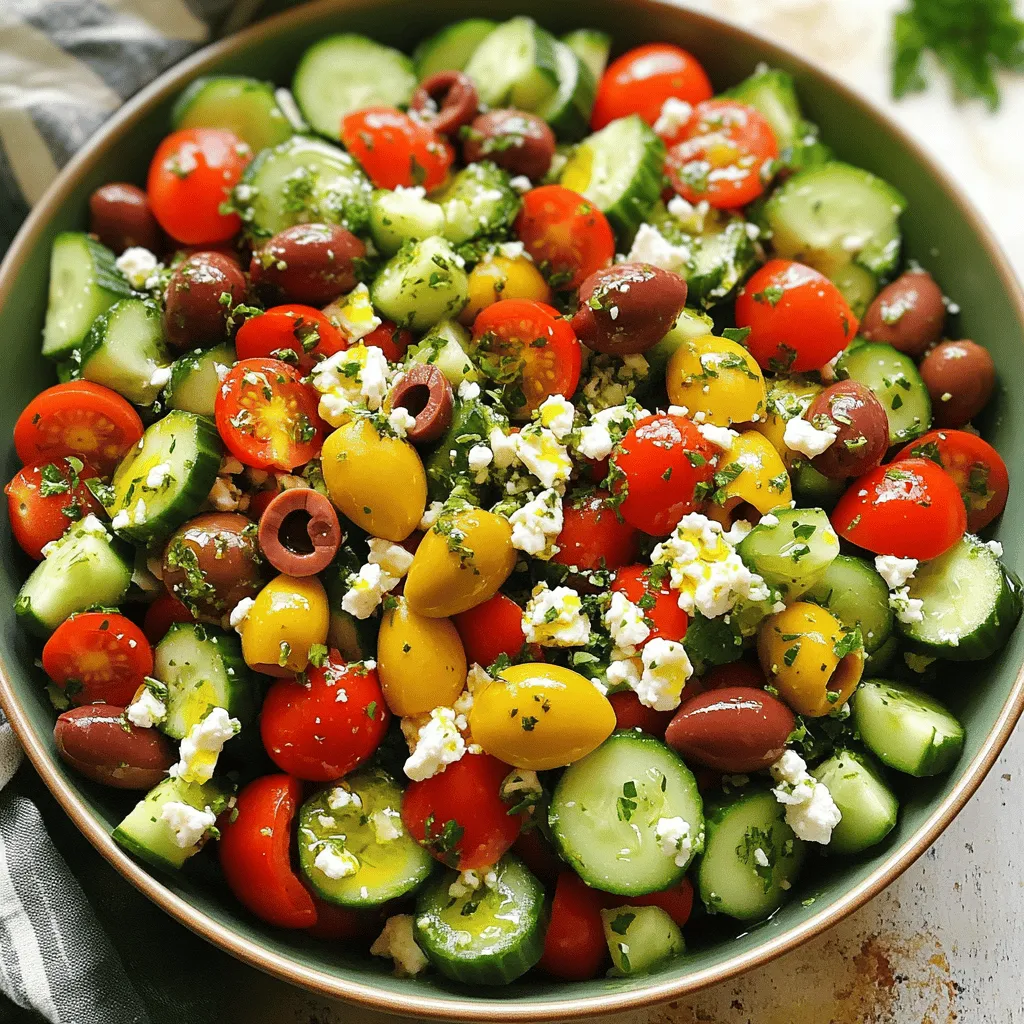
If you’re craving a fresh and vibrant dish, look no further than this Chopped Greek Salad! Made with crisp veggies,

To make crispy coconut shrimp, gather these main ingredients: - 1 pound large shrimp, peeled and deveined - 1 cup all-purpose flour - 2 large eggs, beaten - 1 cup shredded sweetened coconut - 1 cup panko breadcrumbs - 1 teaspoon garlic powder - 1 teaspoon onion powder - 1/2 teaspoon salt - 1/4 teaspoon black pepper - Oil for frying (like vegetable or canola oil) When choosing shrimp, opt for large or jumbo shrimp. They hold up well during frying. Fresh shrimp is always best, but frozen works too if thawed properly. For coconut, use sweetened shredded coconut. It adds a nice sweetness and crunch to the dish. For extra flavor, consider these optional ingredients: - Sweet chili sauce for dipping - Additional spices like cayenne pepper for heat - Fresh herbs like cilantro for garnish Sweet chili sauce pairs well with the shrimp. You can add different spices to suit your taste. Each option enhances the dish's flavor and enjoyment. If you want to explore more, check the Full Recipe for detailed steps. - Rinsing and drying the shrimp: Start by rinsing 1 pound of shrimp under cold water. Use paper towels to pat them dry. This helps the breading stick better. - Setting up the breading station: Grab three shallow dishes. Put 1 cup of flour in the first dish. In the second, add 2 beaten eggs. Mix 1 cup of shredded coconut, 1 cup of panko breadcrumbs, 1 teaspoon of garlic powder, 1 teaspoon of onion powder, 1/2 teaspoon of salt, and 1/4 teaspoon of black pepper in the third. This mixture gives the shrimp a tasty crunch. - Detailed frying instructions: Heat about 1/2 inch of oil in a large pan over medium heat. To check if the oil is ready, drop in a small piece of breading. If it sizzles and bubbles, you’re good to go! Fry the shrimp in batches to avoid crowding. Cook each shrimp for 2-3 minutes on each side. Look for a golden-brown color to know they’re done. - Tips for achieving the perfect golden-brown finish: Keep an eye on the shrimp while frying. If they brown too quickly, lower the heat. Use a slotted spoon to lift the shrimp from the oil and place them on a plate lined with paper towels. This drains excess oil and keeps them crispy. - How to plate and serve: Arrange the crispy shrimp on a nice plate. Serve them hot for the best taste. - Recommended garnishes: Add a small bowl of sweet chili sauce for dipping. You can also sprinkle some chopped herbs on top, like cilantro or parsley, for a fresh touch. Enjoy your delicious crispy coconut shrimp! - Fry in batches: Cook shrimp in small groups. This keeps the oil hot and crispy. - Temperature check: Use a thermometer. Oil should be around 350°F to 375°F for frying. - Don’t overcrowd: Leave space between shrimp. This helps them cook evenly. - Drain excess oil: Place fried shrimp on paper towels. This keeps them crispy. Avoid these common mistakes: - Wet shrimp: Make sure shrimp are dry before breading. Moisture makes breading soggy. - Skipping seasoning: Season each layer well for more flavor. Don’t skip the garlic or onion powder. - Under-frying: Cook shrimp until golden brown. This ensures they are crispy and safe to eat. For leftovers, store shrimp in an airtight container. Keep them in the fridge for up to two days. To reheat, preheat an oven to 350°F. Place shrimp on a baking sheet. Bake for 8-10 minutes. This method helps keep them crispy. Avoid using a microwave, as it makes them soggy. For more detailed cooking steps, check the Full Recipe for Crispy Coconut Shrimp. {{image_2}} You can change up the flavors of your crispy coconut shrimp easily. Try adding spices like paprika or cayenne for a kick. You can also use fresh herbs, like cilantro or parsley, to brighten the taste. For dipping sauces, consider sweet chili sauce, honey mustard, or even a spicy mango salsa. Each sauce brings its unique flavor and pairs well with the shrimp. If you want to switch up the coconut, consider using crushed nuts or breadcrumbs for a different crunch. Almonds or cashews can add a nice twist. If you prefer a healthier option, you can bake or air-fry the shrimp. For baking, preheat your oven to 400°F and place the shrimp on a baking sheet lined with parchment paper. Mist them lightly with oil and bake for about 15 minutes. For air-frying, set your air fryer to 375°F. Cook the shrimp in a single layer for about 10 minutes. Flip them halfway for even cooking. If you have allergies, you can make this dish allergy-friendly. Use gluten-free flour and breadcrumbs. You can also try a plant-based shrimp substitute for a vegan option. Adjust the oil based on your dietary needs. These variations keep the dish fresh and exciting. You can explore new tastes while enjoying the classic flavor of crispy coconut shrimp. Coconut shrimp has roots in tropical regions. The dish combines shrimp with coconut, a common ingredient in many cultures. Seafood is a staple in coastal areas, and coconut adds a sweet, crunchy twist. In the Caribbean, people often enjoy this dish at festive gatherings. Asian cuisines also feature coconut shrimp, showcasing the ingredient’s versatility. Each culture puts its spin on the dish, making it unique yet familiar. Many restaurants serve amazing coconut shrimp. If you are near a seafood spot, check their menu. Local favorites often have their take on the dish. Look for places that focus on fresh ingredients. Notable spots include beachside shacks and upscale bistros. They often offer coconut shrimp with tasty dipping sauces like sweet chili. Support your local eateries while enjoying this crunchy delight. What can I substitute for shrimp? If you can't use shrimp, try chicken or tofu. Both can work well in this recipe. Just cut them into bite-sized pieces. Adjust the cooking time based on what you use. Chicken should cook longer, while tofu needs less time. Can I make coconut shrimp ahead of time? Yes, you can prep coconut shrimp in advance. Bread the shrimp and store them in the fridge for a few hours. Fry them just before serving for the best crispiness. How do I know when the oil is hot enough? To check if the oil is hot, drop a piece of breading in. It should sizzle and bubble right away. If it doesn't, wait a bit longer. The right temperature is key for crispy shrimp. Can I use frozen shrimp for this recipe? Yes, frozen shrimp works great! Just thaw them completely and pat them dry before breading. This helps the coating stick better and keeps the shrimp crispy. What are the best side dishes to serve with coconut shrimp? Coconut shrimp pairs well with rice or a fresh salad. You can also serve it with sweet chili sauce for a fun dip. Try adding mango salsa for a tropical twist! Can I make this dish gluten-free? Absolutely! Use gluten-free breadcrumbs instead of panko. Also, choose a gluten-free flour for the breading. This way, everyone can enjoy this tasty dish. For the full recipe, check out the details above. In this article, we covered how to make crispy coconut shrimp. We talked about the key ingredients, including shrimp and coconut, and shared tips for perfect cooking. You learned about variations and how to serve this dish. Feel free to get creative with flavors and cooking methods! Remember, the right ingredients and techniques make all the difference. Enjoy your delicious coconut shrimp, and don't forget to share your creations!

Crispy Coconut Shrimp Irresistible and Easy Recipe

Crispy coconut shrimp might just be the ultimate treat for your taste buds! This easy recipe brings a crunchy outside

- 1 cup unsalted butter, softened - 1 cup brown sugar, packed - 1/2 cup granulated sugar - 1 large egg - 2 teaspoons vanilla extract - 2 1/2 cups all-purpose flour - 1 teaspoon baking soda - 1/2 teaspoon salt - 1 cup chocolate chips (semi-sweet or milk chocolate) - 1 cup mini marshmallows - 1 cup graham cracker crumbs I love using fresh ingredients for my S’mores Cookie Bars. Quality butter makes a big difference. I prefer unsalted butter because it lets me control the salt. Brown sugar gives that deep flavor. It adds moisture, making the bars soft. Granulated sugar helps with sweetness and a nice crust. I always use one large egg. It binds the dough well. Vanilla extract adds a warm taste. I choose all-purpose flour for the right texture. Baking soda helps the bars rise. Salt balances the sweetness and enhances flavors. The star ingredients are chocolate chips, mini marshmallows, and graham cracker crumbs. Use semi-sweet or milk chocolate for a classic taste. Mini marshmallows melt perfectly, creating that gooey texture. Graham cracker crumbs add crunch and that signature S’mores flavor. - For a healthier option, try using coconut oil or applesauce instead of butter. - You can use gluten-free flour blends for a gluten-free version. - For vegan options, swap the egg with flaxseed meal mixed with water and use plant-based butter. These substitutes keep the essence of S’mores Cookie Bars while making them fit different diets. 1. First, preheat your oven to 350°F (175°C). This helps the bars cook evenly. 2. Grease a 9x13-inch baking dish or use parchment paper. This makes it easy to remove the bars later. 3. In a large bowl, mix the softened butter, brown sugar, and granulated sugar. Beat until light and fluffy. 4. Add in the egg and vanilla extract. Mix until everything is well combined. 5. In another bowl, whisk together the flour, baking soda, and salt. 6. Gradually add the dry mix to the wet mix. Stir until just combined. 7. Fold in the chocolate chips and graham cracker crumbs. Make sure they are evenly mixed. 1. Press half of the cookie dough into the bottom of the prepared dish. This is your base layer. 2. Evenly spread the mini marshmallows over the dough. This adds the S’mores flavor. 3. Crumble the rest of the cookie dough over the marshmallows. Leave some gaps so the marshmallows peek through. 4. Bake in the oven for 25-30 minutes. Look for a golden brown top and set edges. 5. When done, remove from the oven and let cool completely in the pan. 1. Allow the bars to cool in the pan for about 15-20 minutes. This helps them firm up. 2. Once cool, use a sharp knife to cut them into squares. Aim for even pieces for a nice look. 3. Serve them warm or at room temperature. They are tasty either way! For more details, check the Full Recipe. To get that perfect golden brown top, keep an eye on the oven. Bake the bars for 25-30 minutes. When the edges are set and the top looks golden, they are done. You want a soft center, so don’t overbake. To avoid a dry or crumbly texture, measure your flour correctly. Too much flour can make the bars dry. Use a spoon to fluff the flour, then scoop it into your measuring cup. Level it off with a knife for accuracy. Also, remember to cream the butter and sugars until light and fluffy. This helps keep the bars moist. For best practices in storing leftovers, let the S’mores Cookie Bars cool completely. Then, place them in an airtight container. This keeps them fresh for up to a week. If you want to keep them longer, you can freeze them. To freeze S’mores Cookie Bars for later, cut them into squares first. Wrap each square tightly in plastic wrap. Then, place them in a freezer-safe bag. They will keep well for up to three months. When you're ready to enjoy, just thaw them in the fridge overnight. {{image_2}} You can switch up the chocolate in your S’mores Cookie Bars. Consider using dark chocolate for a richer taste. White chocolate adds a sweet twist, too. Another fun idea is to mix in peanut butter or Nutella. This gives your bars a creamy, nutty flavor. You can layer it in or swirl it through the dough. Each option adds a unique taste that makes these bars even more fun! Get creative with holiday themes! For winter, try adding peppermint bits or extract. This gives a fresh, festive flavor. In the fall, pumpkin spice can turn your bars into a cozy treat. You can also make them for special occasions. For birthdays, add colorful sprinkles. For summer, try a tropical twist with coconut or pineapple bits. Each theme takes your S’mores Cookie Bars to a new level! S'mores Cookie Bars look amazing when served on a rustic wooden board. You can cut them into neat squares or fun shapes to please your guests. For a fun twist, serve them warm with a scoop of vanilla ice cream on the side. This melts the chocolate and adds a creamy touch. Pair these bars with a tall glass of cold milk or a rich hot chocolate. The drinks enhance the sweet and gooey flavors of the bars. You might also try serving them with a side of fresh fruit, like strawberries or bananas, for a burst of color. Drizzling melted chocolate over the top adds a fancy touch. You can melt semi-sweet or milk chocolate for this. It creates a glossy finish that makes the bars look extra special. Toasted marshmallows make a great topping too. You can toast them quickly under the broiler or with a kitchen torch. Place the toasted marshmallows on top of the bars right before serving. This adds a crunchy layer and takes the flavor to another level. For an even richer taste, try a sprinkle of graham cracker crumbs on top. It ties in all the flavors and looks beautiful. These simple garnishes make your S'mores Cookie Bars pop when presenting them to friends or family. How do I know when S’mores Cookie Bars are done baking? Your S’mores Cookie Bars are ready when the top turns golden brown. The edges should feel set, but the center may be slightly soft. A toothpick inserted into the middle should come out with a few moist crumbs. Can I make S’mores Cookie Bars ahead of time? Yes, you can make these bars ahead of time. Bake them and let them cool completely. Then, store them in an airtight container at room temperature for up to three days. They also freeze well for longer storage. What should I do if the marshmallows burn? If marshmallows burn, it’s best to remove the bars from the oven right away. You can scrape off the burnt bits gently with a knife. The flavor will still be good, but the look might not be perfect. Can I make these cookie bars gluten-free? Yes, you can make gluten-free S’mores Cookie Bars. Simply swap regular flour with a gluten-free flour blend. Make sure the graham cracker crumbs are also gluten-free. What is the best way to store S’mores Cookie Bars to keep them fresh? To keep your S’mores Cookie Bars fresh, store them in an airtight container. You can also layer parchment paper between bars to prevent sticking. This keeps them soft and tasty. For the full recipe, check out the [Full Recipe](#). You now know how to make delicious S’mores Cookie Bars. We covered all the key ingredients, including tasty options for substitutes. I shared clear steps from preparation to serving. I also provided valuable tips, fun variations, and creative presentation ideas to keep things exciting. Enjoy baking and sharing these sweet treats! They will impress friends and family. Don’t forget to explore the FAQ for any questions. Happy baking!

S’mores Cookie Bars Irresistible and Easy Treat

Get ready to delight your taste buds with S’mores Cookie Bars! This easy treat combines creamy chocolate, fluffy marshmallows, and

To make a great Easy Chicken Enchilada Casserole, you will need a few key items. Here’s what to gather: - 3 cups cooked chicken, shredded - 2 cups enchilada sauce - 1 can (15 oz) black beans, rinsed and drained - 1 cup corn (fresh or frozen) - 1 small onion, chopped - 2 cloves garlic, minced - 1 teaspoon chili powder - 1 teaspoon cumin - 8 small flour tortillas, cut into quarters - 2 cups shredded cheese (cheddar or a cheese blend) - Fresh cilantro, for garnish - Sour cream, for serving These ingredients come together to create a warm, cheesy dish that's perfect for any meal. The shredded chicken brings protein, while black beans add fiber. Corn gives a nice sweetness, and the spices truly make the flavor pop. You can find the full recipe details to guide you through the cooking process. - Preheat the oven to 350°F (175°C). - In a large skillet, sauté the chopped onion and minced garlic until they are soft, about 3-4 minutes. This step adds great flavor to your dish. - In the skillet, mix the shredded chicken, black beans, corn, chili powder, cumin, and 1 cup of enchilada sauce. Stir everything well and cook for 5 more minutes. This helps all the flavors blend together. - In a greased 9x13 inch baking dish, spread a thin layer of the remaining enchilada sauce on the bottom. - Layer half of the cut tortillas over the sauce. Spoon half of the chicken mixture on top. Then, sprinkle a third of the cheese over it. - Repeat the layers: add the remaining tortillas, then the rest of the chicken mixture, followed by the remaining enchilada sauce. Finish with the rest of the cheese on top. - Cover the casserole with aluminum foil. Bake in the preheated oven for 20 minutes. - After 20 minutes, remove the foil and bake for an additional 10-15 minutes. You want the cheese to be bubbly and golden. - Let the casserole cool for a few minutes before serving. Garnish with fresh cilantro and serve with a dollop of sour cream. For the complete dish, check the Full Recipe. To make your chicken enchilada casserole really pop, use some great seasonings. I suggest adding chili powder and cumin. These spices give warmth and depth. You can also try adding smoked paprika for a bit of smokiness. Layering is key. Start with a base of sauce, then tortillas, then the chicken mix. Repeat this pattern. It helps all the flavors blend nicely and makes each bite tasty. Cheese is a star in this dish. I love using cheddar because it melts well and adds great flavor. You can also try Monterey Jack or a cheese blend. For the best melt, shred your cheese fresh instead of using pre-shredded. Fresh cheese melts better and tastes creamier. Sprinkle it generously on top for that golden, bubbly finish. This casserole shines with sides and toppings. Try serving it with a fresh salad or some guacamole. A dollop of sour cream adds creaminess and balances the spice. For garnish, chop up some fresh cilantro. It adds color and freshness. You can also add sliced jalapeños for a kick. Each of these ideas makes the dish even better. Enjoy your meal! {{image_2}} You can easily make this dish vegetarian. Instead of chicken, try using vegetables or beans. Bell peppers, zucchini, and mushrooms add great flavor. You can also use black beans or pinto beans for protein. This change keeps the dish hearty and satisfying. If you love heat, add jalapeños or hot sauce. Mix them into the chicken mixture for a kick. You can also adjust the seasoning levels. Sprinkle in extra chili powder or cayenne pepper to suit your taste. Just remember to start small; you can always add more! Feel free to swap out ingredients based on what you have. Different types of tortillas work well, too. Corn tortillas give a nice crunch, while whole wheat adds fiber. You can also use other beans, like kidney or chickpeas. If you don’t have corn, frozen peas can work in a pinch. This recipe is flexible and fun! For the full recipe, check the previous section. Store any leftover chicken enchilada casserole in an airtight container. It stays fresh in the fridge for about 3-4 days. When reheating, use the oven or microwave. If using the oven, preheat to 350°F (175°C) and bake until hot. In the microwave, heat in short bursts, checking often. You can freeze the casserole for longer storage. Wrap it tightly in plastic wrap and then in foil. It can last up to 3 months in the freezer. To thaw, place it in the fridge overnight. When ready to eat, reheat in the oven at 350°F (175°C) until it’s hot and bubbly. Enjoy your tasty treat! For the full recipe, check above. To make this recipe gluten-free, use corn tortillas instead of flour tortillas. Corn tortillas provide a great texture and flavor. Ensure the other ingredients, like enchilada sauce and beans, are gluten-free too. Many brands offer gluten-free options. Always check the labels to be safe. Yes, you can make the casserole ahead of time. Prepare it up to the baking step, then cover and store it in your fridge. This method saves time when you're ready to cook. Just remember to bake it for a bit longer if it's cold from the fridge. It needs about 10 extra minutes in the oven. Many side dishes pair well with this casserole. Here are some ideas: - Spanish rice adds a nice touch. - A simple green salad can balance the meal. - Fresh guacamole or salsa for added flavor. - Chips are fun for dipping. These sides make your meal more colorful and tasty. Enjoy your feast! You now have all you need to make a tasty Easy Chicken Enchilada Casserole. We covered the important ingredients, step-by-step instructions, and helpful tips. You can even explore variations, like vegetarian options and ingredient swaps. Remember to store your leftovers properly to keep them fresh. This dish is simple yet full of flavor, perfect for any meal. Enjoy sharing this recipe with friends and family!

Easy Chicken Enchilada Casserole Simple and Tasty Treat

Looking for a quick and delicious dinner idea? Try my Easy Chicken Enchilada Casserole! This simple recipe combines tender chicken,

To make Buffalo Cauliflower Bites, you need these simple ingredients: - 1 medium head of cauliflower, cut into bite-sized florets - 1 cup all-purpose flour - 1 cup water - 1 teaspoon garlic powder - 1 teaspoon onion powder - 1 teaspoon smoked paprika - 1/2 teaspoon cayenne pepper (adjust to taste) - Salt and pepper to taste - 1 cup buffalo sauce (store-bought or homemade) - 2 tablespoons butter, melted - Fresh parsley, chopped (for garnish) These ingredients come together to create a dish that is both spicy and crunchy. When picking cauliflower, look for bright white heads. The leaves should be green and crisp. Check for firm florets with no brown spots. A fresh head feels heavy for its size. If it has a strong smell, it may be past its prime. Always choose organic if you can. This ensures you get a clean, crisp taste. If you have dietary needs, don't worry! There are great swaps you can make. For a gluten-free version, use gluten-free flour instead of all-purpose flour. You can also replace buffalo sauce with a mild sauce if you want less heat. To make it vegan, use plant-based butter and a gluten-free flour blend. These alternatives keep the flavor but fit your diet. For the full recipe, check out the full recipe guide for all the steps! Start by cutting your medium head of cauliflower into bite-sized florets. This helps them cook evenly. Make sure the pieces are not too big. Next, rinse the florets under cold water. This removes dirt and makes them fresh. Dry them well with a clean towel. Wet cauliflower won’t get crispy. In a large bowl, whisk together the flour and water until smooth. Add in the garlic powder, onion powder, smoked paprika, cayenne pepper, salt, and pepper. Mix well until all the spices blend in. The batter should be thick enough to coat but not too heavy. This will give your bites that crispy crunch. Preheat your oven to 450°F (232°C) and line a baking sheet with parchment paper. Dip each cauliflower floret into the batter, letting any extra drip off. Place them on the sheet in a single layer. Bake for 20 minutes, flipping them halfway. They should look golden and crispy. While they bake, mix the buffalo sauce with melted butter in another bowl. When the cauliflower is done, toss them in this sauce. Return them to the oven for another 10 minutes. This makes them sticky and flavorful. Let them cool a bit before serving. Garnish with fresh parsley for a nice touch. For the full recipe, check the main article. To make your Buffalo cauliflower bites extra crispy, start with dry florets. Pat them dry with a towel after washing. The batter needs a good grip, so moisture is not your friend. Use a hot oven. Preheat it to 450°F (232°C) for best results. Baking at a high temperature helps the batter brown and crisp up nicely. You can also try adding a bit of cornstarch to your batter. This small addition can create an amazing crunch. Coating the cauliflower in sauce can be tricky. After baking, let them cool a bit first. This helps the sauce stick better. Use a large bowl for tossing. Add the baked florets and pour the sauce over them. Gently mix them with a spatula, so you don’t break the bites. Make sure every piece gets a good coat of sauce. You want all those spicy flavors to shine through. These bites are perfect for parties or snack time. Serve them with a side of creamy ranch or blue cheese dressing. The cool dip balances out the heat. You can also add some fresh veggies like celery and carrot sticks. They make a nice crunch and color on the plate. For a fun twist, try them on a slider. Place some on a small bun with lettuce and sauce. Check out the Full Recipe for more ideas! {{image_2}} You can turn up the heat with spicy buffalo cauliflower bites. To make them spicier, add more cayenne pepper to the batter. You can also mix your favorite hot sauce into the buffalo sauce for an extra kick. Another option is to sprinkle red pepper flakes over the bites just before serving. This adds a fun crunch and a burst of heat. Making vegan buffalo cauliflower bites is easy and fun. Simply replace the butter with olive oil or a vegan butter alternative. You can also use a plant-based milk instead of water in the batter. This keeps the flavor rich and creamy without using animal products. Enjoy the same great taste while sticking to your dietary choices! Baking is the healthier choice for buffalo cauliflower bites. Baking uses less oil than frying, which cuts down on calories. If you want a crispy texture, ensure your florets are well-coated in the batter. You can also try air frying them for a quick and easy option. If you do choose to fry, use a light oil like canola or avocado oil for a better result. For the full recipe, check the detailed instructions and enjoy these delicious bites! To keep your Buffalo Cauliflower Bites fresh, let them cool first. Place them in an airtight container. A glass or plastic container works well. Store them in the fridge for up to three days. Make sure they are not stacked too high to avoid sogginess. To reheat your cauliflower bites, use an oven or an air fryer. Preheat your oven to 350°F (175°C). Spread the bites out on a baking sheet. Heat them for about 10-15 minutes. This helps restore their crunch. If using an air fryer, set it to 350°F (175°C) and heat for 5-7 minutes. If you want to freeze Buffalo Cauliflower Bites, do it before adding the sauce. Once baked, let them cool completely. Place them in a single layer on a baking sheet. Freeze for about 1-2 hours until solid. Then, transfer them to a freezer-safe bag or container. They can last for up to three months. When ready to eat, bake them from frozen, adding sauce just before serving. For the full recipe, check out the Buffalo Cauliflower Bites section. Yes, you can make Buffalo Cauliflower Bites in an air fryer. Using an air fryer gives your bites a crispy texture without too much oil. To do this, prepare your cauliflower as you would for baking. Dip the florets in the batter, then place them in the air fryer basket. Cook at 400°F for about 15-20 minutes. Shake the basket halfway through for even cooking. Toss the cauliflower in buffalo sauce after cooking. Your bites will be crispy and delicious! Making Buffalo Cauliflower Bites gluten-free is simple. You just need to swap out the flour. Use a gluten-free all-purpose flour blend instead. This will keep the batter light and crispy. Check the labels on your sauce as well. Some sauces contain gluten, so look for gluten-free options. This way, you can enjoy these tasty bites without worry. Buffalo Cauliflower Bites taste great with many sauces. Here are a few ideas: - Ranch dressing: This classic dip cools the heat of the buffalo sauce. - Blue cheese dressing: Adds a rich, creamy flavor that complements the spice. - Honey mustard: Sweet and tangy, it gives a nice balance to the heat. - Garlic aioli: A creamy sauce that brings an extra layer of flavor. Feel free to mix and match to find your perfect pairing! For the full recipe, check out the Buffalo Cauliflower Bites section above. Buffalo cauliflower bites are a tasty and healthy option. The blog covered fresh ingredients, easy steps, and helpful tips. You learned how to make them crispier and what sauces pair well. We also explored variations for different diets and how to store leftovers. These bites fit many diets and are fun to share. I hope you feel ready to try making them yourself! Enjoy your cooking adventure!

Buffalo Cauliflower Bites Irresistible Flavor and Crunch

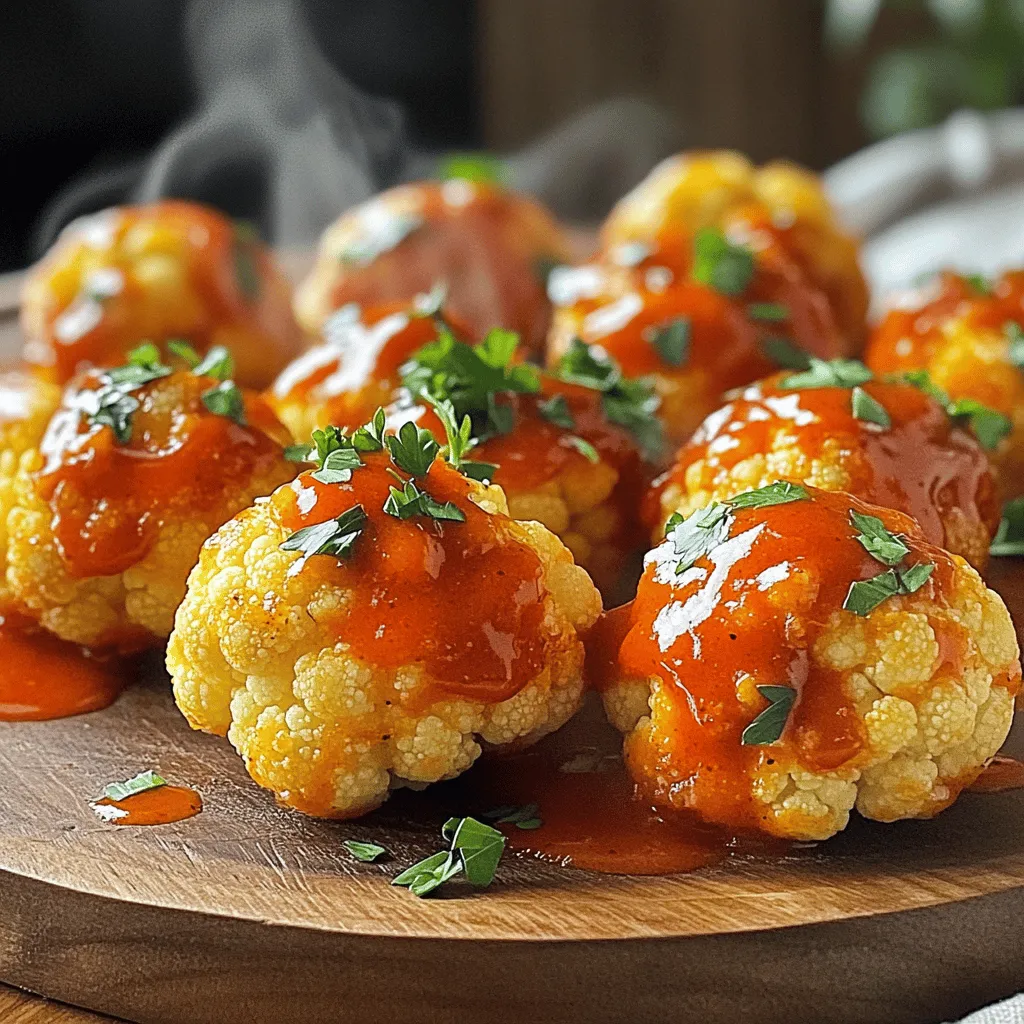
Are you ready to indulge in a dish that’s both crunchy and packed with flavor? Buffalo Cauliflower Bites offer a

To make these tasty energy balls, you need simple ingredients. Here’s the list: - 1 cup old-fashioned oats - 1/2 cup natural peanut butter - 1/4 cup honey or maple syrup - 1/4 cup ground flaxseed - 1/2 cup dark chocolate chips - 1/2 teaspoon vanilla extract - A pinch of salt Old-fashioned oats serve as the base. They add fiber and help bind the balls. Natural peanut butter gives them a rich, nutty flavor. Honey or maple syrup sweetens the mix and adds moisture. Ground flaxseed boosts nutrition with healthy fats. Dark chocolate chips bring sweetness and a bit of indulgence. Vanilla extract rounds out the flavor, while salt enhances everything. You can make these energy balls even better with some add-ins. Here are a few ideas: - Chopped nuts (like almonds or walnuts) - Dried fruits (such as cranberries or raisins) - Coconut flakes - Protein powder for an extra boost These add-ins can change the taste and texture. You get to be creative! Mix and match to find your favorite combination. These energy balls pack a punch nutritionally. Here’s what you get from the key ingredients: - Old-fashioned oats: Good source of fiber, which aids digestion. - Peanut butter: Provides protein and healthy fats for energy. - Honey or maple syrup: Natural sweeteners with some vitamins. - Flaxseed: High in omega-3 fatty acids, great for heart health. - Dark chocolate: Contains antioxidants, which are good for your body. This snack is easy to make and healthy. You can find the full recipe for Peanut Butter Chocolate Energy Balls in the previous section. Enjoy making them! Start by gathering your tools and ingredients. You will need a medium mixing bowl, a separate bowl, a spoon, and a baking sheet. Make sure to have parchment paper for easy cleanup. Clean your workspace to keep everything neat and tidy. This helps you focus and enjoy the process. 1. In a medium mixing bowl, combine the old-fashioned oats, ground flaxseed, and a pinch of salt. This mix gives a solid base. 2. In a separate bowl, blend the peanut butter, honey (or maple syrup), and vanilla extract until smooth. This step is key for flavor. 3. Slowly pour the peanut butter mixture into the dry ingredients. Stir well to mix everything together. You want a good blend. 4. Fold in the dark chocolate chips. Make sure they are evenly spread through the mix. 5. Using your hands, roll the mixture into small balls, about 1 inch in size. If the mix is sticky, dampen your hands with water. This tip helps shape the balls easily. 6. Place the energy balls on a baking sheet lined with parchment paper. Refrigerate for at least 30 minutes. This step firms them up. 7. Once set, transfer the energy balls to an airtight container. Store them in the refrigerator for up to one week. Keep your hands slightly wet while rolling. This will prevent sticking. Aim for a smooth outer layer on each ball. If you want a fun look, roll them in shredded coconut or crushed nuts. It adds texture and makes them appealing. Enjoy the process and feel free to make them your own! To get the right texture for your energy balls, use old-fashioned oats. They give your snack a nice chew. If you want a softer bite, try quick oats. Make sure your peanut butter is creamy and not too stiff. This helps the mixture stick together well. If your mixture feels dry, add a splash of water or more honey. The key is to find a good balance. One common mistake is not mixing well. If the dry and wet ingredients don't blend, the balls fall apart. Another mistake is rolling them too large. Keep them about 1 inch in size. This makes them easy to eat. Also, don’t skip refrigerating them. Chilling helps them firm up and hold their shape. Want to boost flavor? You can add a few fun ingredients. Try swapping dark chocolate chips for mini chocolate chips or dried fruits. Chopped nuts can also add crunch. If you like spices, a pinch of cinnamon or cocoa powder can enhance the taste. These simple swaps keep your energy balls fresh and exciting. For the detailed process, check the Full Recipe. {{image_2}} You can switch the peanut butter for other nut butters. Almond butter works great. Cashew butter adds a nice twist, too. Each nut butter gives a unique flavor. You can even try sunflower seed butter for a nut-free option. This makes your energy balls fun and different every time! Want to boost the nutrition? Add protein powder! Use vanilla or chocolate flavor. Just mix in about two tablespoons when you combine your wet and dry ingredients. This small step packs in more protein to fuel your day. It’s great for after workouts or busy mornings. Adding dried fruits or nuts can change the taste and texture. Chopped dates or cranberries can make the energy balls sweeter. You can also mix in walnuts or almonds for crunch. Try coconut flakes for a tropical vibe! These additions make each bite exciting and full of flavor. To keep your Peanut Butter Chocolate Energy Balls fresh, store them in an airtight container. This will help prevent them from drying out. You can also line your container with parchment paper to avoid sticking. Keep them in the fridge to maintain their texture and taste. These energy balls can last up to one week in the fridge. If you notice any change in smell or texture, it’s best to toss them. Always check for signs like dryness or a change in color. Freshness is key for the best flavor! If you want to save them for later, freezing is a great option. Place the energy balls in a single layer on a baking sheet. Freeze them for about two hours. Once they are firm, transfer them to a freezer-safe bag or container. They can last for up to three months in the freezer. Thaw them in the fridge overnight when you're ready to enjoy! Making Peanut Butter Chocolate Energy Balls takes about 15 minutes to prep. After that, you let them chill for 30 minutes. So, in total, it takes around 45 minutes from start to finish. Yes, these energy balls are healthy! They have oats, peanut butter, and flaxseed, which provide fiber and protein. The dark chocolate adds taste without too much sugar. They make a great snack for both kids and adults. Absolutely! You can use almond butter instead of peanut butter. If you want a sweeter taste, swap honey for maple syrup. You can also add nuts or seeds if you like a crunch. These swaps keep the recipe tasty and fun. Each energy ball has about 100 calories. The exact number can change if you add or swap ingredients. Counting calories helps you keep track of your snacks. To make these energy balls vegan, use maple syrup instead of honey. Also, choose dairy-free dark chocolate chips. This way, you can enjoy the same great taste without any animal products. You can find the full recipe for Peanut Butter Chocolate Energy Balls in earlier sections. It includes all the ingredients and detailed steps to make these delicious snacks at home. In this post, we explored how to make Peanut Butter Chocolate Energy Balls. We covered key ingredients and optional add-ins, giving them extra flavor. You learned precise steps, tips for texture, and ways to avoid common mistakes. We also discussed variations and storage best practices. These energy balls are not just tasty; they can fit many diets. Now, you can enjoy healthy snacks that you made yourself! Prepare to get creative and share your delicious results!

Peanut Butter Chocolate Energy Balls Healthy Snack Idea

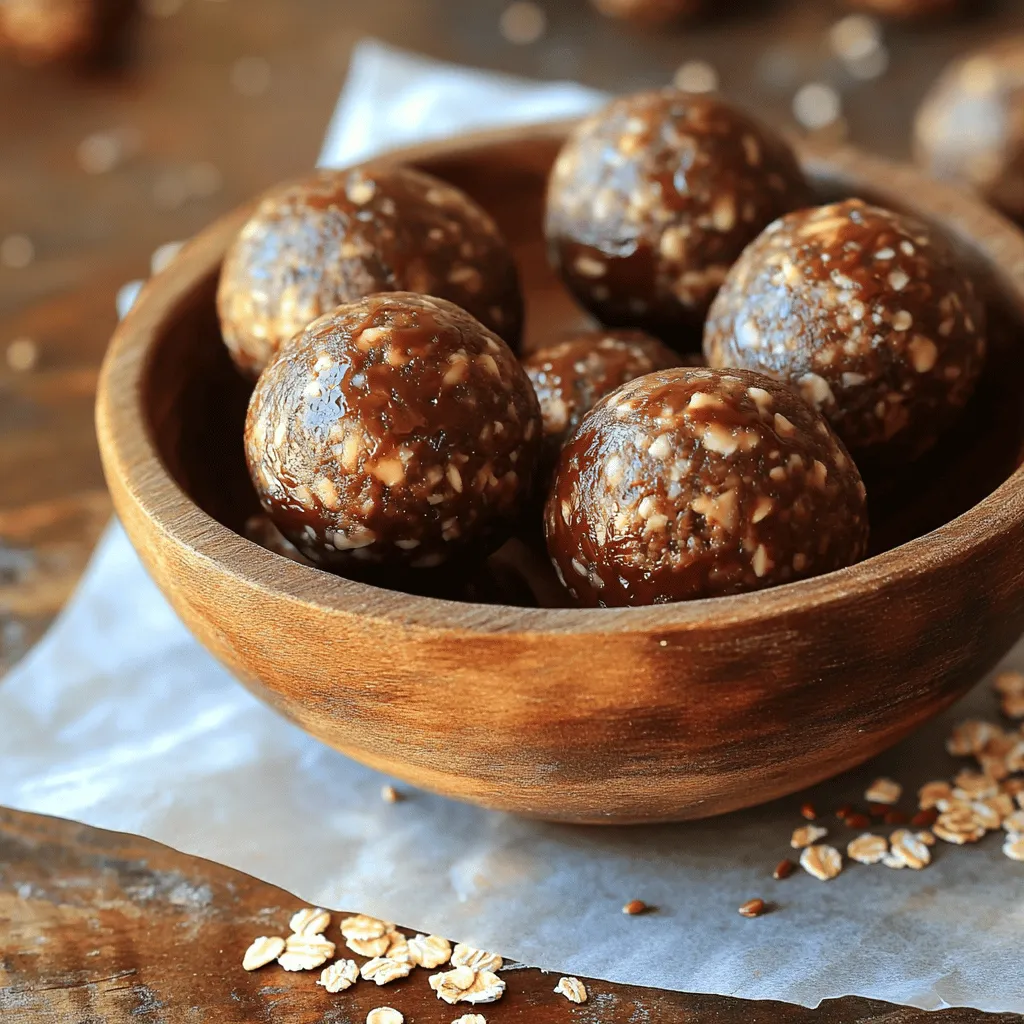
If you’re searching for a quick, healthy snack, look no further! Peanut butter chocolate energy balls are easy to make

To make Spicy Thai Cucumber Salad, gather these fresh ingredients. - 2 large cucumbers, thinly sliced - 1 red bell pepper, julienned - 1/2 cup shredded carrots - 1/4 cup fresh cilantro, chopped - 1/4 cup roasted peanuts, crushed - 2 tablespoons fresh lime juice - 1 tablespoon fish sauce - 1 tablespoon sugar - 1 teaspoon chili flakes (adjust to taste) - Salt to taste These fresh vegetables bring crunch and color. The dressing components balance sweet, sour, and spicy. Optional garnishes like cilantro and peanuts add flavor and texture. For the full recipe, check out the details above! First, wash your cucumbers under cold water. This removes any dirt. Next, slice the cucumbers thinly. You want them to be crisp and refreshing. Now, cut the red bell pepper into thin strips. This adds color and crunch. Also, shred the carrots finely. They bring sweetness to the salad. For the dressing, take a small bowl. Mix lime juice, fish sauce, sugar, chili flakes, and salt. Whisk it well until the sugar dissolves. The dressing should be balanced and flavorful. In a large mixing bowl, combine the sliced cucumbers, bell pepper, and shredded carrots. Use a spatula to mix them gently. This helps blend the flavors. Once mixed, pour the dressing over the vegetables. Toss everything together until the salad is coated. Make sure each piece gets some dressing for the best taste. Let the salad sit for about 10 minutes. This allows the flavors to blend well. Before serving, sprinkle chopped cilantro and crushed peanuts on top. The peanuts add a nice crunch, while cilantro gives it a fresh kick. Serve the salad in a shallow dish to show off its bright colors. Enjoy this fresh and flavorful delight! For the full recipe, check the details provided above. To make the best Spicy Thai Cucumber Salad, balance sweetness and spiciness. Start by adding sugar. It helps to calm the heat from the chili flakes. Use fresh lime juice for a bright flavor. Remember, fresh ingredients make a big difference. They add crispness and vibrant taste. Always pick firm cucumbers and bright bell peppers. Fresh cilantro also lifts the dish. Add crunchy items for fun textures. Consider adding sliced radishes or shredded cabbage. These will make your salad even more exciting. You can also try crispy rice noodles for a twist. For toppings, roasted peanuts bring a great crunch. If you want, use sesame seeds instead. They add a nutty flavor that complements the salad well. {{image_2}} You can easily change this salad to fit your tastes. If you want to swap ingredients, feel free! Use green bell peppers instead of red. You can also add jicama for a crunch. For a vegan version, skip the fish sauce. Instead, try soy sauce or coconut aminos. This keeps the flavor but makes it plant-based. For a gluten-free option, use tamari instead of soy sauce. Want to mix things up? Add fruits like mango or pineapple for sweetness. These fruits pair well with the spicy dressing. You can also add other veggies, like radishes or snap peas. They give extra color and crunch. If you like heat, increase the chili flakes. Start with a little, then taste and add more. This way, you find the spice level that suits you best. For the full recipe, check out the Spicy Thai Cucumber Salad section. To keep your Spicy Thai Cucumber Salad fresh, store leftovers in the fridge. Place the salad in an airtight container. This prevents moisture loss and keeps it crunchy. Avoid using metal containers, as they can react with the dressing. Glass or plastic containers work best for keeping flavors intact. In the refrigerator, your salad lasts about 2 to 3 days. Make sure to check for signs of spoilage. If the cucumbers become mushy or the dressing smells sour, it’s time to toss it. Freshness is key to enjoying this vibrant dish. For the best taste, eat it within a day or two. Don't forget to enjoy the full recipe for the best results! Can I make Spicy Thai Cucumber Salad in advance? Yes, you can make this salad ahead of time. Just prepare it and store it in the fridge. For the best taste, eat it within a day. The longer it sits, the softer the cucumbers get. How do I adjust the recipe for larger servings? To serve more people, simply double or triple the ingredients. Keep the same ratios for the dressing. Mix all veggies in a larger bowl to ensure even coating. This salad is easy to scale up for parties or gatherings. What dishes pair well with this salad? This salad goes well with grilled meats and seafood. It also complements spicy dishes, like Thai curry or satay. Serve it alongside rice for a full meal. The fresh and zesty flavors brighten any plate. For the full recipe, check the Spicy Thai Cucumber Salad section above. In this blog post, we explored how to make a Spicy Thai Cucumber Salad. We covered the key ingredients, from fresh vegetables to dressing components. I shared step-by-step instructions to prepare and combine the flavors. Tips to enhance taste and texture helped refine your dish. You learned how to store leftovers for later enjoyment and variations to suit your needs. In conclusion, this salad offers big taste with simple steps. Enjoy your fresh and zesty creation!

Spicy Thai Cucumber Salad Fresh and Flavorful Delight

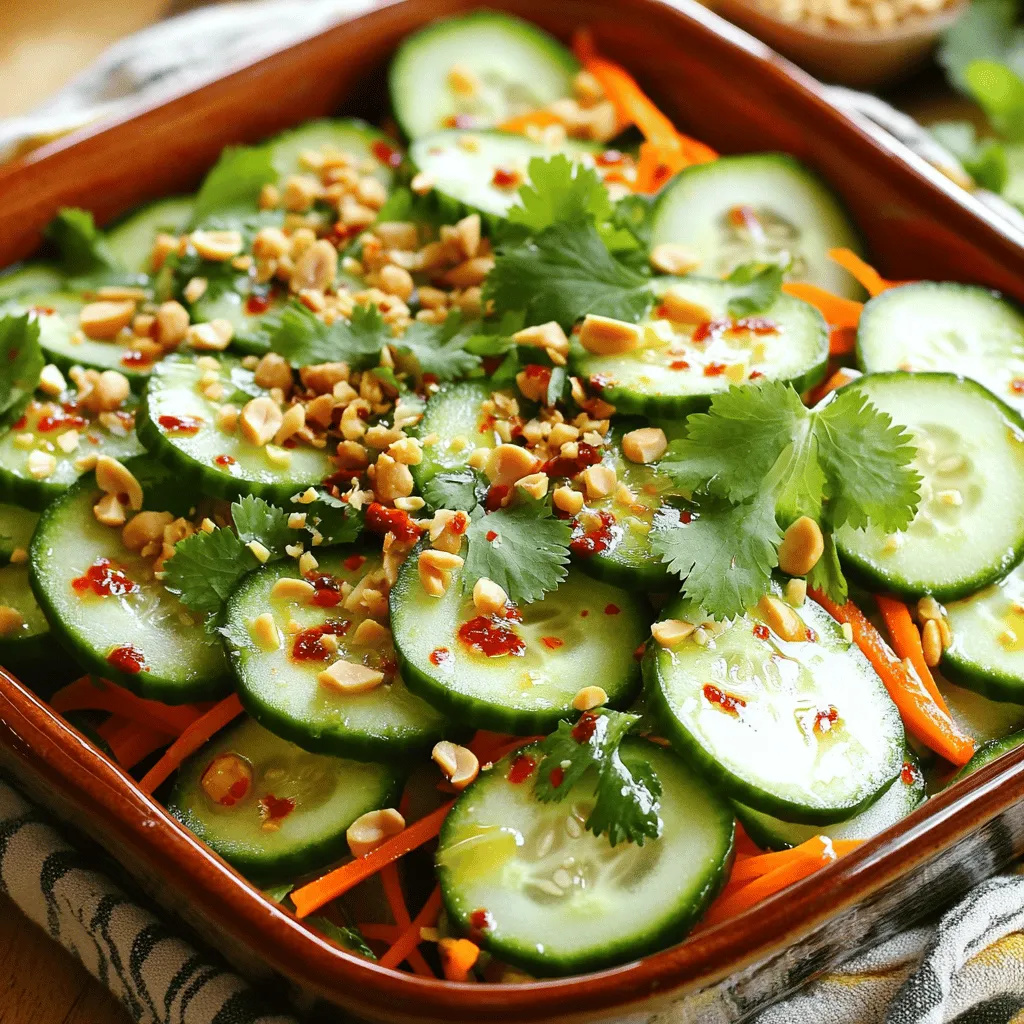
Looking for a fresh and zesty dish? This Spicy Thai Cucumber Salad packs a punch! I’ll share how to mix

- 1 cup ricotta cheese - 3 large eggs - 1/2 cup milk - 1/4 cup granulated sugar - Zest of 1 lemon - 2 tablespoons fresh lemon juice - 1 teaspoon vanilla extract - 1 cup all-purpose flour - 1 tablespoon baking powder - 1/4 teaspoon salt - Butter or oil for cooking - Maple syrup and fresh berries for serving Lemon ricotta pancakes need fresh and simple ingredients. Each item adds flavor and texture. Ricotta cheese gives these pancakes a creamy base. The eggs add richness and help them rise. Milk makes the batter smooth and easy to mix. Granulated sugar balances the tartness of the lemon. Lemon zest and juice create a bright, fresh taste. This citrus flavor is what makes these pancakes special. Vanilla extract adds warmth and depth. All-purpose flour provides structure. Baking powder helps the pancakes puff up and become fluffy. A pinch of salt enhances all the flavors. You can use butter or oil for cooking. Both options work well. Finally, serve your pancakes with maple syrup and fresh berries. They add sweetness and a pop of color to your dish. - Gluten-free flour alternative - Vegan substitutions - Flavor enhancers (like almond extract) If you want to change things up, consider these options. You can use gluten-free flour for a gluten-free version. For a vegan twist, swap eggs and dairy with plant-based options. Almond extract can give an extra layer of flavor. These variations keep the recipe fun and flexible. Start by whisking together the wet ingredients. In a big bowl, mix the ricotta cheese, eggs, milk, granulated sugar, lemon zest, lemon juice, and vanilla extract. Make sure it is smooth and well mixed. Next, sift together the dry ingredients. In another bowl, combine the all-purpose flour, baking powder, and salt. Sifting helps make the pancakes light and fluffy. Now, let’s prepare the skillet. Heat a non-stick skillet over medium heat. Add a small amount of butter or oil to the pan. This will help prevent sticking. Pour the batter onto the skillet. Use about 1/4 cup for each pancake. Cook until bubbles form on the surface, which takes about 2-3 minutes. Flip the pancakes and cook for another 2-3 minutes until they turn golden brown. After cooking, remove them from the skillet and keep warm while you cook the rest. Serve the pancakes warm for the best taste. Top them with maple syrup and fresh berries for a sweet touch. For a pretty presentation, stack the pancakes high on a plate. Garnish with powdered sugar, extra lemon zest, and a sprig of mint. This makes the dish look as good as it tastes. For the full recipe, check the recipe section above. To make your pancakes fluffy, do not overmix the batter. When you mix, stop as soon as you see no dry flour. A few lumps are fine. This keeps air in the batter, making your pancakes rise nicely. For the perfect skillet temperature, heat it over medium heat. If it is too hot, your pancakes will burn. If too cool, they will not cook well. Test the heat by dropping a small amount of batter on the skillet. If it bubbles, you’re ready! You can add spices to the batter for extra flavor. A dash of cinnamon or nutmeg pairs well with lemon. These spices add warmth and depth. Incorporating fruit into the batter can also boost flavor. Fresh blueberries or diced strawberries add sweetness and color. You can mix them in gently right before cooking. Using cold ingredients can lead to dense pancakes. Always use room temperature eggs and milk. This helps the batter mix better and rise properly. Overcooking or undercooking can ruin your pancakes. Cook them until golden brown on both sides. Look for bubbles on the surface before flipping. This way, you achieve the perfect texture every time. For the full recipe, check out the section above! {{image_2}} You can still enjoy these pancakes without gluten. Try using almond flour or oat flour in place of all-purpose flour. These options give a nice flavor and texture. You may need to add a bit more liquid to the batter since gluten-free flours absorb more moisture. Make sure to check the mix, adjusting until it’s smooth. To make these pancakes vegan, you can replace the eggs with flaxseed meal or chia seeds. Mix one tablespoon of either with three tablespoons of water, and let it sit. For the ricotta, use a plant-based alternative like almond or soy-based ricotta. Adjust the cooking time as vegan mixes can cook faster, so keep an eye on them! Toppings can make your pancakes shine. Fresh berries like strawberries, blueberries, or raspberries add a bright touch. You can also mix fruits for a fun twist. Instead of maple syrup, try honey or agave for a different flavor. These options will elevate your breakfast and make it even more enjoyable. Remember to keep the toppings colorful and fresh for a beautiful presentation. To keep your lemon ricotta pancakes fresh, store them in an airtight container. Place a layer of parchment paper between pancakes to prevent sticking. They stay fresh in the fridge for about three days. Just remember to check for any off smells or visible mold before eating. If you want to save your pancakes for later, freezing is a great option. Let the pancakes cool completely before stacking them. Wrap each stack in plastic wrap, then place them in a freezer bag. They can last up to two months in the freezer. When you're ready to eat, reheat them in a toaster or microwave. This keeps them fluffy and delicious. You might have leftover ricotta cheese after making pancakes. Use it in a creamy pasta sauce or mix it into a smoothie for added protein. You can also add it to baked goods like muffins or cakes for richness. This way, you reduce waste and enjoy more tasty meals with similar ingredients. Yes, you can make these pancakes ahead of time. To prep, cook the pancakes as directed and let them cool. Once cooled, stack them with parchment paper in between to prevent sticking. Store them in an airtight container in the fridge. They will stay fresh for about three days. For longer storage, you can freeze them. Just place the cooled pancakes in a freezer bag, and they can last up to two months. When you’re ready to enjoy, simply reheat them. To reheat pancakes, the best method is to use a microwave or a skillet. If you use a microwave, place a damp paper towel over the pancakes. Heat for about 30 seconds to 1 minute. This keeps them moist. If you prefer the skillet, heat on low and flip them for even warmth. This method can help maintain their golden texture and taste. If you want to make more pancakes, you can easily scale the ingredients. For every two additional servings, simply add half of each ingredient. For example, if you want to make six servings, use 1.5 cups of ricotta cheese, 4.5 eggs, and so on. Make sure to mix well to keep the batter smooth. This way, everyone can enjoy the deliciousness of lemon ricotta pancakes. For the complete method, check the Full Recipe. Lemon ricotta pancakes are a tasty treat you can make easily. We covered all the essentials, from the ingredients to cooking tips. I hope you feel ready to try this recipe. Remember to have fun with variations and toppings. Each bite can be your own creation. With a bit of care, your pancakes will impress anyone. Enjoy making these delicious pancakes today!

Lemon Ricotta Pancakes Delightful Breakfast Treat

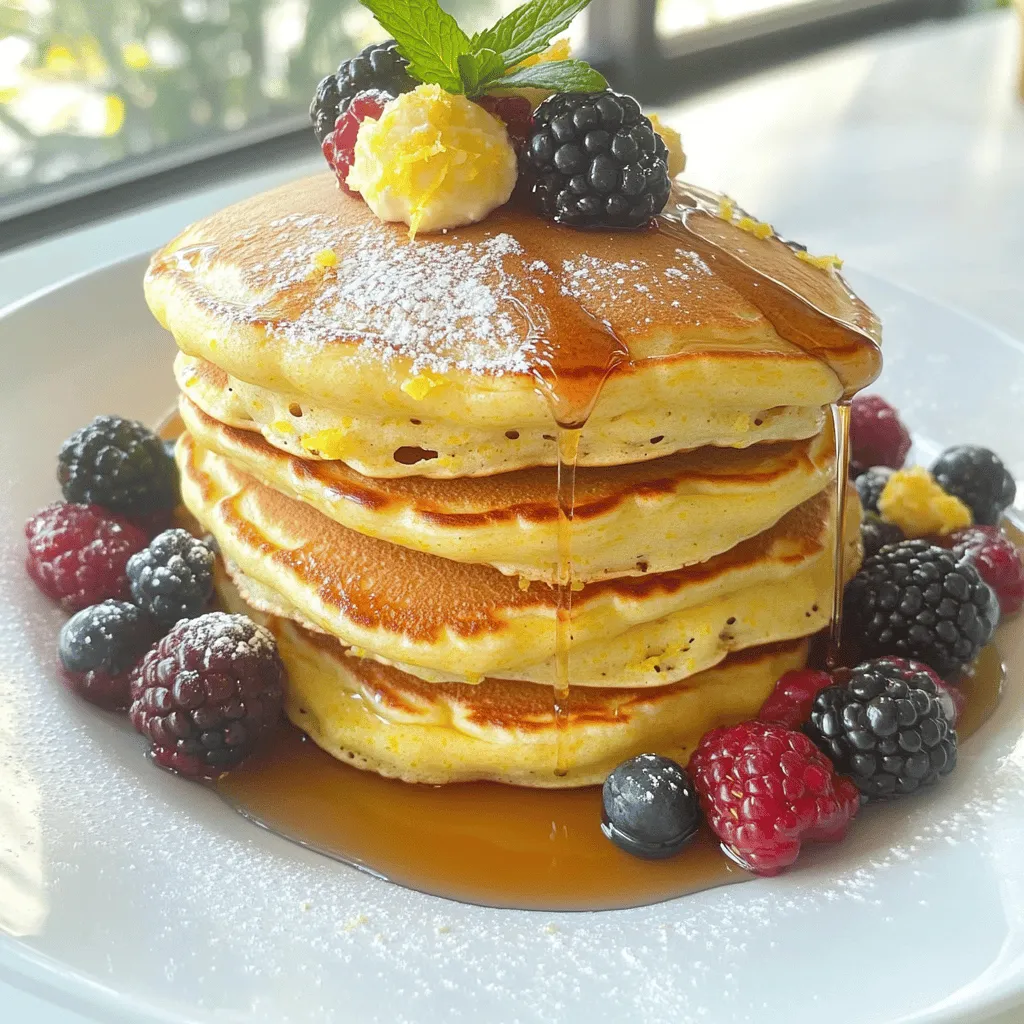
If you’re craving a delightful breakfast that brightens your morning, lemon ricotta pancakes are the answer. Soft, fluffy, and bursting

- 1 cup coconut milk (canned or carton) - 1/4 cup chia seeds - 2 tablespoons maple syrup (or honey) - 1 ripe mango, diced - 1/2 teaspoon vanilla extract - A pinch of salt - Fresh mint leaves for garnish (optional) Coconut milk is creamy and rich in good fats. It helps keep your heart healthy. Chia seeds are tiny but mighty. They give you fiber, protein, and omega-3s. Maple syrup or honey adds sweetness but also has minerals and vitamins. Mango is not just sweet; it’s full of vitamins A and C. Vanilla extract gives a lovely aroma and can boost mood. A pinch of salt enhances all these flavors, making each bite tasty. Fresh mint adds a pop of color and freshness, too. If you don’t have coconut milk, almond or oat milk works well. For chia seeds, try flax seeds, but note they act a bit differently. If you want less sugar, use stevia or agave syrup. You can swap mango for another fruit like berries or peaches. Don’t have vanilla extract? A dash of almond extract can add a nice twist. {{ingredient_image_1}} Start by grabbing a mixing bowl. Pour in 1 cup of coconut milk. Next, add 1/4 cup of chia seeds. Then, mix in 2 tablespoons of maple syrup and 1/2 teaspoon of vanilla extract. Don't forget a pinch of salt! Whisk all the ingredients together. Make sure the chia seeds spread evenly in the mix. Let your mixture sit for 10 minutes. This helps the chia seeds soak up the liquid. After that, whisk it again. This prevents the seeds from clumping together. Now, cover your bowl with plastic wrap. You can also use individual jars if you prefer. Place the bowl or jars in the fridge. Let it chill for at least 2 to 4 hours. For the best results, let it sit overnight. This makes the pudding thick and creamy. Once your pudding is ready, take it out of the fridge. If it seems too thick, stir in a bit more coconut milk. Now, it's time to serve! Layer the pudding in cups or bowls. Start with a layer of chia pudding, then add diced mango. Repeat these layers until you use all your ingredients. For a lovely touch, top with extra mango and fresh mint leaves. This adds color and flavor! Enjoy your healthy treat! To get the best texture for your pudding, use the right amount of chia seeds. I find that 1/4 cup works well. This amount gives a creamy feel. After mixing, let it sit for 10 minutes, then whisk again. This step stops clumps from forming. If it gets too thick, just stir in a bit more coconut milk. You want it smooth, not too runny or too thick. For more flavor, consider adding a pinch of cinnamon or nutmeg. These spices add warmth to the dish. You can also switch maple syrup for honey if you prefer. When serving, layer the pudding with fresh diced mango. This adds sweetness and a nice crunch. Fresh mint leaves make a lovely garnish, too. They add color and a refreshing taste. One common mistake is not whisking well enough after the chia seeds are added. Always ensure they mix well with the liquid. Another mistake is not letting it set long enough. Chia seeds need time to swell and create that pudding texture. Lastly, avoid using too much sweetener. A little goes a long way, and you want to keep a nice balance with the coconut and mango flavors. Pro Tips Use Ripe Mangoes: Choose mangoes that are slightly soft to the touch and have a sweet aroma. This ensures a deliciously sweet and juicy layer in your pudding. Chill Overnight: For the best texture, let the chia pudding sit overnight in the refrigerator. This allows the chia seeds to fully absorb the liquid and create a creamy consistency. Adjust Sweetness: Feel free to adjust the sweetness to your liking. Start with less maple syrup or honey and add more gradually to suit your taste. Add Texture: Consider adding toppings like toasted coconut flakes or nuts to enhance the texture and flavor of your pudding. {{image_2}} You can switch out the mango for other fruits. Try using berries, pineapple, or kiwi. Each fruit brings its own taste and look. Berries add a nice tartness, while pineapple gives a tropical twist. You can even mix different fruits for a fun flavor burst! To make this dish vegan, use maple syrup instead of honey. You can also skip the sweetener if you prefer. The coconut milk adds enough flavor and creaminess. For a sugar-free version, try a sugar substitute like stevia. It keeps the pudding nice and sweet without the extra sugar. Serving can be fun with this pudding. Use clear cups to show the layers. You can create a parfait by adding granola for crunch. Other fun ideas include layering with yogurt or using coconut flakes on top. Garnish with mint leaves for a fresh touch. The way you serve can make this treat even more special! Store your coconut mango chia pudding in the refrigerator. Use airtight containers or jars. This keeps the pudding fresh and tasty. Make sure to cover it well. If you used individual jars, just keep the lids on. Your chia pudding stays good for about 5 days in the fridge. After that, the flavor and texture may change. To check freshness, look for any signs of spoilage. If it smells sour or looks odd, throw it out. Always taste a small spoonful to be sure. You can freeze coconut mango chia pudding too! Just pour it into freezer-safe containers. Leave some space at the top for expansion. It will keep well for up to 3 months. When you want to eat it, thaw it in the fridge overnight. Stir well before serving to bring back its creamy texture. You can keep chia pudding in the fridge for up to five days. Make sure it stays in a sealed container. The flavors will blend as it sits, making it even tastier. Yes, you can use almond, soy, or oat milk instead of coconut milk. Each milk brings its own unique flavor. If you want a creamier texture, full-fat options work best. Absolutely! Chia pudding is packed with fiber, protein, and healthy fats. It keeps you full and satisfied. This makes it a great choice for breakfast or a snack. You can add spices like cinnamon or nutmeg for warmth. Fresh lime juice gives a zesty kick. You can also mix in other fruits, like berries, for added color and taste. In this post, we explored the key ingredients for coconut mango chia pudding and their benefits. We walked through the simple steps to make it, from mixing ingredients to serving ideas. I shared tips for perfecting the pudding’s texture and avoiding common mistakes. We also discussed fun variations and how to store your pudding properly. This dessert is easy, healthy, and delicious. You can enjoy it in countless ways. Try new flavors and make it your own!

Coconut Mango Chia Pudding Healthy and Flavorful Treat

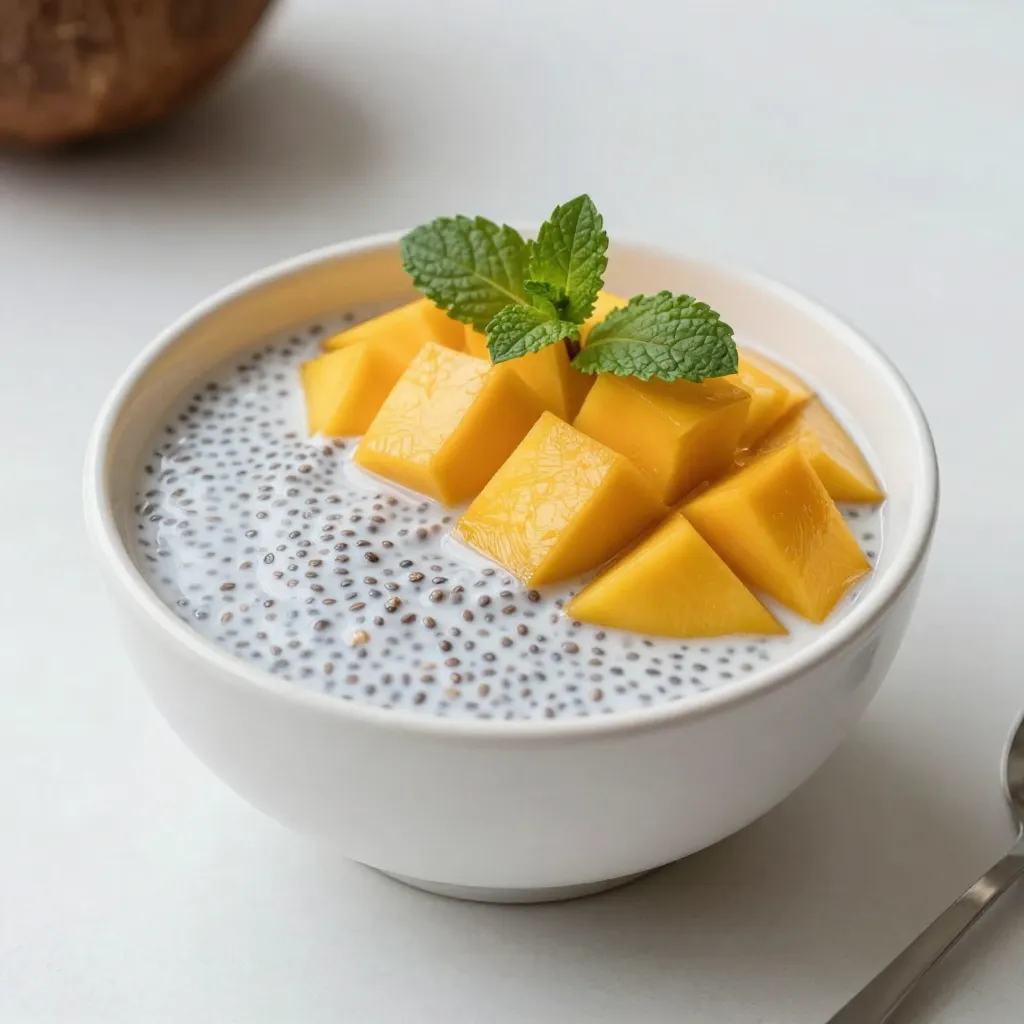
Looking for a tasty and healthy treat? Look no further than Coconut Mango Chia Pudding! This creamy delight packs a

Older posts
Newer posts
← Previous Page1 … Page70 Page71 Page72 … Page84 Next →

dsad

© 2026 easycookingbite • Built with GeneratePress

Our Policies

  • Copyright Policy
  • Cookie Policy
  • GDPR Policy
  • Privacy Policy
  • Disclaimer
  • Terms Of Use

More Information

  • Home
  • About
  • Contact
  • Appetizers
  • Dessert
  • Dinner
  • Drinks
©2026, easycookingbite About Back To Top