Skip to content
DisclaimerTerms Of UseGDPR PolicyCookie Policy

easycookingbite

  • Home
  • Drinks
  • Appetizers
  • Dinner
  • Dessert
  • About
  • Contact
  • Privacy Policy
DisclaimerTerms Of UseGDPR PolicyCookie Policy

NO-ING-IMG

To make a delicious baked spaghetti casserole, gather these simple ingredients: - 12 ounces spaghetti - 1 tablespoon olive oil - 1 medium onion, diced - 2 garlic cloves, minced - 1 pound ground beef (or ground turkey) - 1 can (28 ounces) crushed tomatoes - 1 teaspoon dried oregano - 1 teaspoon dried basil - 1/2 teaspoon red pepper flakes (optional) - Salt and pepper to taste - 2 cups ricotta cheese - 2 cups shredded mozzarella cheese - 1/2 cup grated Parmesan cheese - Fresh basil, for garnish These ingredients create a warm and hearty dish. The blend of flavors will make your family smile. The spaghetti adds a fun twist, and the cheeses make it creamy. Crushed tomatoes keep everything moist and tasty. Olive oil brings the onions and garlic to life in the pan. You can use ground beef or turkey based on your preference. Don't forget the fresh basil for a lovely touch on top! For the full recipe, check out the detailed instructions to bring this comforting meal to your table. - Cook spaghetti until al dente. - Drain and set aside. To start, bring a large pot of salted water to a boil. Add your spaghetti. I like to cook it until it’s just firm, or "al dente." This way, it won’t get mushy later. Once done, drain the pasta in a colander and let it rest. Setting it aside is key, as it will blend with the sauce later. - Sauté onion and garlic. - Brown ground beef (or turkey). - Stir in tomatoes and seasonings. In a large skillet, heat one tablespoon of olive oil over medium heat. Add diced onion and minced garlic. Sauté these until they soften and smell great. This usually takes about 3-4 minutes. Next, add your ground beef or turkey. Cook until it turns brown, which should take about 6-7 minutes. If there's extra fat, drain it. Now, stir in the crushed tomatoes, oregano, basil, red pepper flakes, salt, and pepper. Let this simmer for about 10 minutes. This step allows the flavors to mix well. - Combine spaghetti with meat sauce. - Mix ricotta cheese with mozzarella and Parmesan. - Layer ingredients in baking dish. In a big bowl, combine the cooked spaghetti with the meat sauce. Mix well so that the pasta gets coated. In another bowl, mix the ricotta cheese with half of the mozzarella and half of the Parmesan cheese. Add a pinch of salt and pepper for taste. Now, take a greased 9x13 inch baking dish. Spread half of the spaghetti mixture on the bottom. Layer the ricotta mixture on top, then add the rest of the spaghetti. Finish with the remaining mozzarella and Parmesan cheeses. - Cover and bake. - Remove foil for final browning. Preheat your oven to 350°F (175°C). Cover your dish with aluminum foil. Bake for 25 minutes. After that, remove the foil and bake for another 15 minutes. This will make the cheese on top golden and bubbly. Let the casserole cool for a few minutes before slicing. You can garnish with fresh basil before serving. Enjoy this hearty family dinner treat! For the full recipe, check out the details above. To make your baked spaghetti casserole shine, focus on fresh ingredients. Fresh veggies and herbs boost flavor and texture. Always taste your sauce as you cook. Adjust the seasoning to match your family's preferences. A little extra salt or spice can make a big difference. Cheese can change your dish's flavor and texture. Feel free to substitute different cheeses. For a twist, try using goat cheese or a sharp cheddar. I recommend a blend of mozzarella and Parmesan for that gooey, golden top. Mixing in some provolone adds a nice touch too! Cooking the meat properly is key. Aim for an internal temperature of 160°F for ground beef or turkey. This keeps your dish safe and tasty. Simmering the sauce for at least ten minutes allows the flavors to blend well. This step is essential for a rich and satisfying sauce. {{image_2}} You can easily make this dish meat-free. Replace the ground beef with veggies. Use mushrooms, zucchini, or bell peppers. You can also add plant-based proteins like lentils or chickpeas. These swaps add great flavor and texture. They keep the dish hearty while being healthy. If you need a gluten-free meal, swap regular spaghetti for gluten-free pasta. Many brands offer tasty options made from rice or quinoa. Just be sure to follow the cooking instructions on the package. This way, your pasta will turn out perfectly. Want to kick up the taste? Add spices like paprika or Italian seasoning. Fresh herbs like parsley or oregano also work well. You can mix in extra vegetables, too. Spinach or kale can add nutrients and color. This gives your baked spaghetti casserole a personal touch. You can find the full recipe at the link provided. To store leftovers, let the casserole cool first. Place it in an airtight container. You can keep it in the fridge for about 3 to 4 days. This way, you ensure it stays fresh and safe to eat. Use glass or plastic containers that seal well. These containers help keep moisture in and odors out. You can freeze baked spaghetti casserole for up to three months. For best results, cool the casserole completely. Then, wrap it tightly in plastic wrap and aluminum foil. This double wrap helps prevent freezer burn. When you want to eat it, move it to the fridge overnight to thaw. This makes it easy and ready for reheating. To reheat, place your casserole in a preheated oven at 350°F (175°C). Cover it with foil to keep it moist. Heat for about 20-25 minutes. Check if it’s warm all the way through. If you like the cheese bubbly, remove the foil for the last 5-10 minutes. Enjoy your meal just like the first time! For the full recipe, check the main article. A baked spaghetti casserole lasts about 3 to 5 days in the fridge. Make sure to store it in an airtight container. This keeps it fresh and tasty. You can also cover it tightly with foil or plastic wrap. Always check for any signs of spoilage before eating leftovers. Yes, you can prepare baked spaghetti casserole ahead of time. Cook the spaghetti and meat sauce first. Then, layer the ingredients as in the recipe. Cover the dish well and store it in the fridge. When ready to bake, heat the oven to 350°F (175°C). Bake it for about 40 to 50 minutes. This warms it through and melts the cheese. If you need a substitute for ricotta cheese, you have options. Cottage cheese works well as a swap. It has a similar texture and taste. For a vegan choice, use blended silken tofu. You can also try cream cheese mixed with a bit of milk. These options keep your dish creamy and rich. To keep your casserole moist, avoid overcooking the spaghetti. It should be al dente. Also, add enough sauce to coat the noodles well. Cover the dish while baking for the first 25 minutes. This traps steam and adds moisture. After removing the foil, keep an eye on the baking time. This prevents it from drying out. This baked spaghetti casserole is easy to make and fun to share. We covered the essential ingredients, step-by-step instructions, and helpful tips to perfect your dish. You can try variations for dietary needs and store leftovers conveniently. Remember, using fresh ingredients and adjusting seasonings can greatly enhance flavor. Whether you follow our basic recipe or customize it, your casserole will surely delight everyone. Embrace your culinary creativity and enjoy a comforting meal!

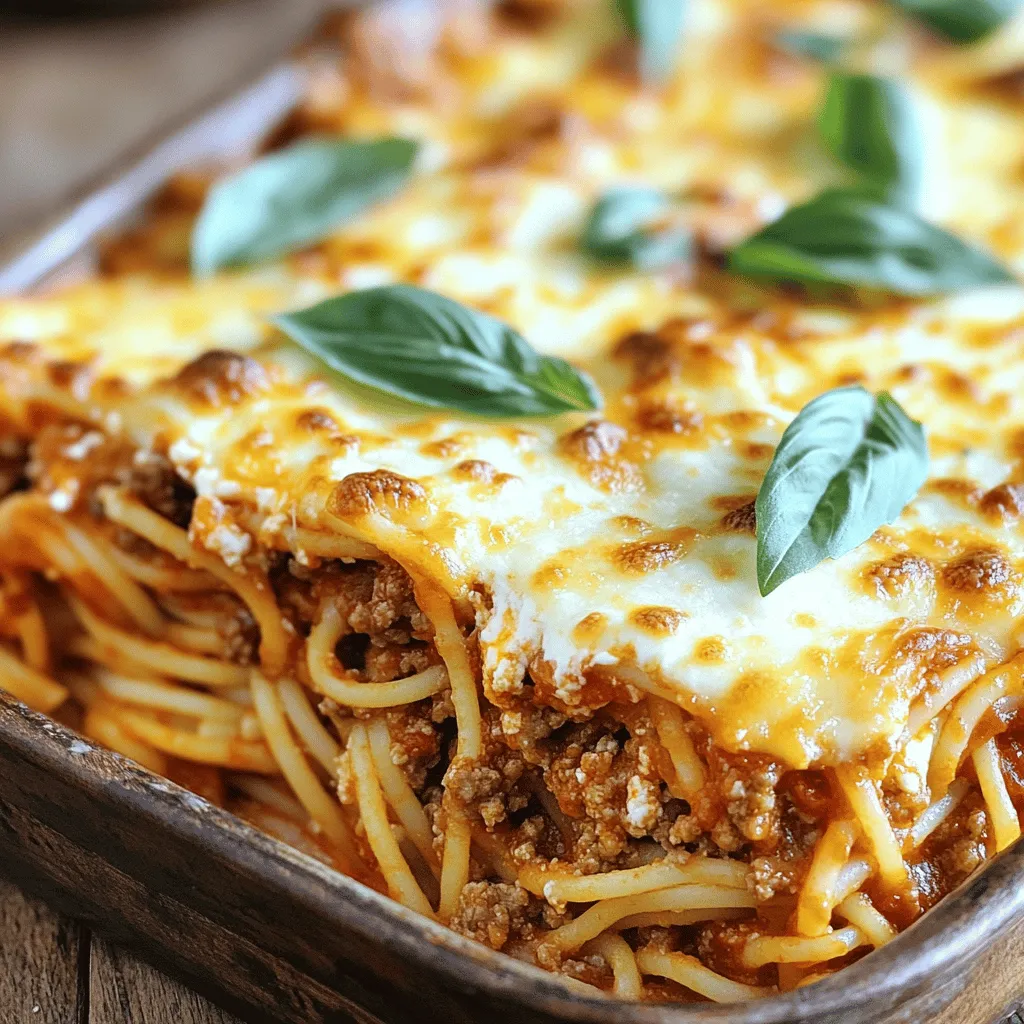
Baked Spaghetti Casserole Hearty Family Dinner Treat

Welcome to your new favorite family meal: Baked Spaghetti Casserole! This hearty dish combines pasta, savory meat, and rich cheeses

- 1 lb boneless, skinless chicken breasts, sliced into thin strips - 1 red bell pepper, sliced - 1 green bell pepper, sliced - 1 medium onion, sliced - 2 tablespoons olive oil - 2 teaspoons chili powder - 1 teaspoon cumin - 1 teaspoon smoked paprika - 1 lime, juiced - Salt and pepper to taste - 6 small flour tortillas - Fresh cilantro, for garnish - Sour cream and salsa, for serving To make your chicken fajitas, you will need: - A large bowl for mixing - A large skillet for cooking - A spatula for stirring - A knife and cutting board for slicing - Measuring spoons for the spices - A lime juicer for easy juice extraction Pair your fajitas with these tasty sides: - Mexican rice for a filling option - Refried beans for extra protein - Fresh guacamole for a creamy touch - Corn salsa for a sweet crunch - A simple green salad for freshness Using these ingredients and tools, you can create a delicious meal in no time. For the full recipe, check out the detailed steps. First, gather your ingredients. You will need chicken, spices, and lime juice. In a large bowl, add the sliced chicken. Sprinkle in the chili powder, cumin, and smoked paprika. Squeeze the lime juice over the chicken. Pour in the olive oil, and add salt and pepper. Mix everything well so the chicken gets coated. Let the chicken marinate for at least 15 minutes. This makes the chicken tasty. Now, heat a large skillet over medium-high heat. Once hot, add the marinated chicken. Cook for about 5 to 7 minutes. Stir the chicken often. You want it to get cooked through and have a nice char. After that, add the sliced onions and bell peppers. Cook them with the chicken for about 4 to 5 minutes. The veggies should get soft and a bit caramelized. While the chicken and veggies cook, warm the flour tortillas. You can do this in a separate skillet or microwave. Heat them for about 30 seconds until they feel soft. To put together the fajitas, take a warm tortilla. Spoon the chicken and veggie mix onto it. Add fresh cilantro on top. You can also add sour cream or salsa if you like. Fold the tortilla over the filling, and serve it hot. Enjoy your simple chicken fajitas! For the complete guide, check the Full Recipe. To get tender chicken, start with good quality meat. Always slice the chicken thin. This helps it cook faster and stay juicy. Marinate it for at least 15 minutes. The lime juice adds flavor and breaks down proteins. This makes the chicken more tender. Don't skip the spices! They boost the taste and keep the meat juicy. You can cook chicken fajitas in a skillet or on a grill. A skillet is easier and quicker. It gives a nice char when you cook on medium-high heat. You can stir it often, so it cooks evenly. A grill adds a smoky flavor. If you use a grill, make sure to preheat it. This helps the chicken sear well and keep its juices. To save time, prep your veggies in advance. Slice the peppers and onions the night before. Keep them in the fridge until you are ready to cook. You can also marinate the chicken ahead of time. This makes dinner prep quick and easy. Use a pre-made spice mix if you're in a hurry. It can cut down on measuring spices. For the full recipe, check out the Zesty Chicken Fajitas Fiesta. {{image_2}} You can make tasty vegetarian fajitas using fresh veggies. Try using mushrooms, zucchini, and eggplant. Just slice them up and cook them like you would the chicken. You can add black beans for protein and fiber. Don’t forget to season them well with chili powder and lime juice. This way, you’ll have a vibrant dish with lots of flavors. If you want to switch it up, try different proteins. Shrimp or beef work well too. For shrimp, just marinate the shrimp in the same spices. Cook them for about 3-4 minutes until they turn pink. For beef, use flank steak or chicken thighs. Slice them thin and follow the same steps as the chicken. Both options will give you a unique taste in your fajitas. To boost the flavors, add more spices or fresh herbs. Try fresh cilantro for a bright kick. You can also add jalapeños for heat. If you like smoky flavors, use chipotle powder instead of chili powder. Adjust the spice level based on your taste. More lime juice can add a refreshing touch. Experimenting with these options makes every meal fun and unique. For the full recipe, check out the Zesty Chicken Fajitas Fiesta. To keep your chicken fajitas fresh, store them in an airtight container. Make sure to let them cool to room temperature first. Place the fajitas in the fridge within two hours of cooking. They will stay good for about three days. If you have leftovers, separate the chicken and veggies from the tortillas. This helps keep everything fresh. When you're ready to eat, the best way to reheat fajitas is in a skillet. Heat a little oil over medium heat. Add the chicken and veggies, stirring often. This will help keep them juicy and flavorful. You can also reheat them in the microwave. Just place them on a plate and cover with a damp paper towel. Heat in 30-second intervals until warm. If you want to save some fajitas for later, freezing is easy. First, let the chicken and veggies cool completely. Then, place them in a freezer-safe bag. Remove as much air as possible before sealing. You can freeze them for up to three months. When you're ready to eat, thaw in the fridge overnight. Reheat as mentioned above. This way, you can enjoy your zesty chicken fajitas anytime! For the full recipe, check the beginning of the article. Yes, you can prep chicken fajitas ahead. Marinate the chicken for up to 24 hours. Store the marinated chicken in the fridge. Slice the veggies and keep them in the fridge too. When you’re ready, cook everything in a skillet. This speeds up your meal time. If you want a substitute for tortillas, try lettuce wraps. They are low-carb and fresh. You can also use whole wheat wraps or corn tortillas. For a fun twist, try using pita bread. Each option adds its own flavor and texture to your dish. To boost the spice level, add fresh jalapeños or serrano peppers. You can also mix in hot sauce or cayenne pepper. For a smoky flavor, include chipotle powder. Adjust spices to fit your taste. Start slow, and keep adding until it’s just right. We covered the essential ingredients and tools for making delicious chicken fajitas. You learned step-by-step instructions to cook and assemble your meal. I shared tips for tender chicken and cooking methods. You saw variations, storage tips, and answers to common questions. These tips will help you create tasty fajitas. Enjoy making them for yourself and your friends! Happy cooking!

Simple Chicken Fajitas Quick and Flavorful Recipe

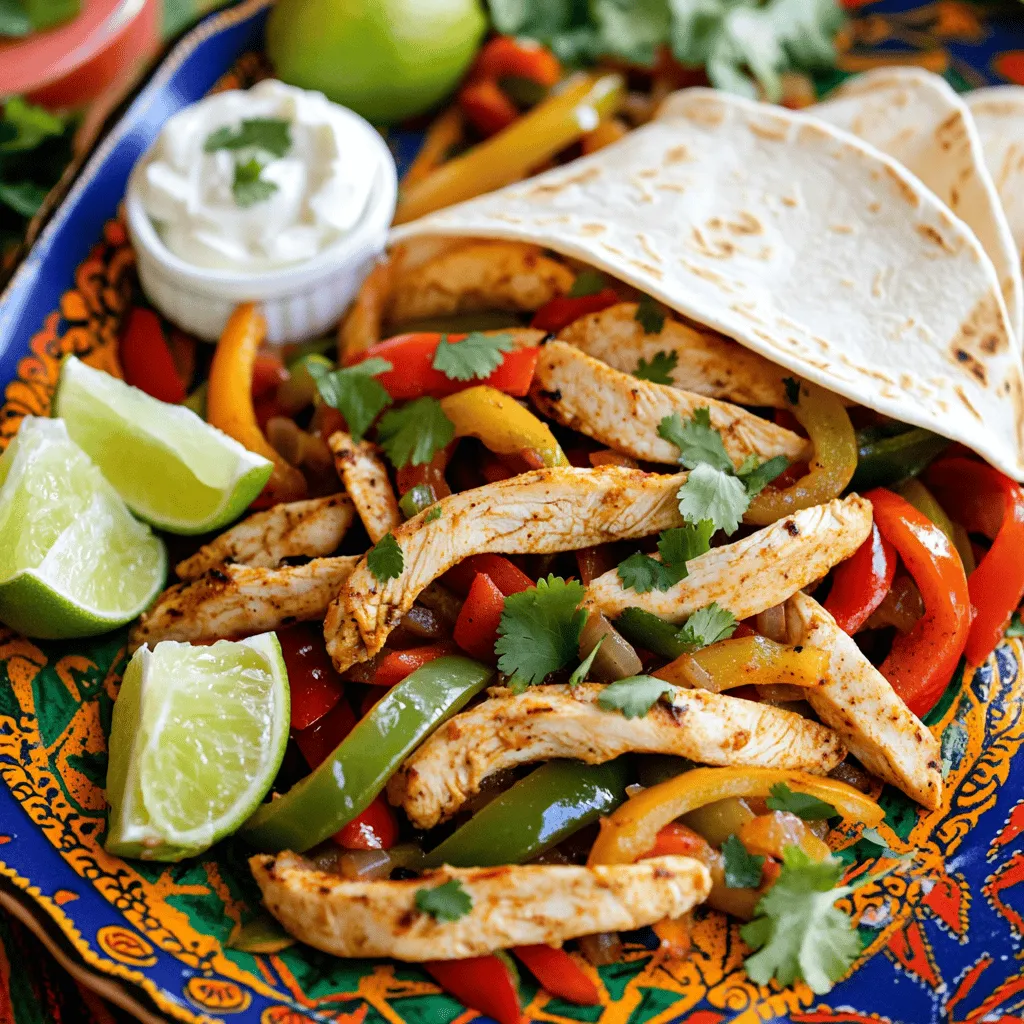
If you crave a quick, tasty meal, I have the perfect solution for you: simple chicken fajitas! These flavorful wraps

To make a delicious Cheesy Ham and Potato Casserole, you need a few key ingredients. Each one plays an important role in building flavors. Here’s what you will need: - 4 large potatoes, peeled and thinly sliced - 2 cups cooked ham, diced - 1 onion, finely chopped - 2 cups shredded cheddar cheese - 2 cups milk - 1/4 cup all-purpose flour - 3 tablespoons butter - 1 teaspoon garlic powder - 1 teaspoon dried thyme - Salt and pepper to taste - Fresh parsley, chopped for garnish These ingredients blend well to create a warm, creamy dish. The potatoes give a nice base, while the ham adds heartiness. The cheese brings it all together with rich flavor. I like to use sharp cheddar for a bold taste. Fresh parsley adds color and a hint of freshness at the end. Using good quality ingredients can make a big difference. Make sure your ham is fresh and your cheese is of high quality. This will elevate the dish and make it even more enjoyable. You can find the Full Recipe with detailed instructions to create this comforting meal. 1. Preheat your oven to 350°F (175°C). Grease a 9x13-inch baking dish with non-stick spray or butter. 2. In a large saucepan, melt 3 tablespoons of butter over medium heat. Add 1 finely chopped onion and sauté until it looks clear. This takes about 3-4 minutes. 3. Sprinkle 1/4 cup of all-purpose flour over the onions. Stir this mix to create a roux. Cook for an extra 1-2 minutes. 4. Gradually whisk in 2 cups of milk. Make sure there are no lumps. Cook until the mix thickens. This should take about 5-6 minutes. 5. Add 1 teaspoon of garlic powder, 1 teaspoon of dried thyme, salt, and pepper to taste. Stir in 1 1/2 cups of shredded cheddar cheese until it melts and becomes smooth. 1. Start with a layer. Place half of the sliced potatoes in the greased dish. Then add half of the diced ham. 2. Pour half of the cheese sauce over this first layer. Repeat the process with the remaining potatoes, ham, and cheese sauce. 3. Finish by topping the casserole with the remaining 1/2 cup of shredded cheddar cheese. 1. Cover the baking dish with aluminum foil. Bake in your preheated oven for 45 minutes. 2. After 45 minutes, remove the foil. Bake for an additional 15-20 minutes. The potatoes should be soft, and the cheese should bubble and turn golden. 3. Let the casserole cool for a few minutes. Before serving, garnish with chopped parsley for a fresh touch. For the full recipe, check out the details above! To get that perfect melty cheese texture, use good-quality cheddar. Shred it yourself for the best melt. It helps if the cheese is at room temperature before mixing. You can make this casserole ahead of time. Just layer it in the dish and cover it well. Store it in the fridge overnight. Bake it the next day without thawing. Just add an extra 10-15 minutes to the baking time. Ovens can vary in heat. If you notice the top browning too quickly, cover it with foil. If your oven runs cool, you may need to increase the baking time. Always check if the potatoes are tender before serving. If you don’t have ham, turkey or chicken work well too. For a vegetarian option, swap the meat for sautéed mushrooms or spinach. You can use different types of potatoes, like Yukon gold or red potatoes. They will change the flavor but still taste great. If you want a healthier option, sweet potatoes can add a nice twist. For gluten-free needs, use a gluten-free flour blend in place of all-purpose flour. This will help thicken your sauce just like regular flour does. Enjoy experimenting with these ideas! {{image_2}} You can make your Cheesy Ham and Potato Casserole even better. Adding vegetables boosts taste and nutrition. Try broccoli or bell peppers for a fresh twist. Just chop them small so they cook well. You can also spice things up. Adding a pinch of paprika or cayenne gives heat. A sprinkle of Italian herbs can bring a new flavor dimension. Experiment with what you like best. Cheese is key to this dish. Mixing different cheese blends can enhance flavor. Try mozzarella for creaminess or pepper jack for a kick. Each cheese brings something special to the table. Need to change the size of your casserole? It’s easy to halve or double the recipe. If you want fewer servings, just cut all ingredients in half. For more people, double them all. When adjusting, remember the baking dish size. A smaller dish works for halving. A larger one suits doubling. Make sure the casserole layers are even for the best cook. To keep your Cheesy Ham and Potato Casserole fresh, store it in an airtight container. Make sure it cools before sealing it up. This helps keep the flavors intact. In the fridge, your casserole stays good for about 3 to 4 days. If you plan to eat it later, don't forget to label it with the date. Freezing is a great option for long-term storage. To freeze, let the casserole cool completely. Then, wrap it tightly in plastic wrap or foil. Use a freezer-safe container for extra protection. It can last up to 2 to 3 months in the freezer. When you're ready to eat, thaw it in the fridge overnight. For reheating, bake it in a preheated oven at 350°F (175°C) until hot, about 30 to 40 minutes. Enjoy that creamy goodness again! How long does Cheesy Ham and Potato Casserole last? Cheesy Ham and Potato Casserole lasts about 3 to 5 days in the fridge. Store it in an airtight container. This keeps it fresh and tasty. If you freeze it, it can last up to 2 months. Can I make this recipe in advance? Yes, you can make this casserole a day ahead. Just prepare everything, cover it, and leave it in the fridge. Bake it when you’re ready to serve. This saves time and makes meal prep easier. What is the best way to reheat leftover casserole? To reheat, preheat your oven to 350°F (175°C). Cover the casserole with foil to prevent it from drying out. Heat for about 20 minutes or until it's warm throughout. You can also use the microwave for quick heating. Can I use frozen potatoes? Yes, using frozen potatoes works great. Just make sure they are not clumped together. Thaw them before layering in the dish. This helps with even cooking and flavor. Is it possible to make a vegetarian version? Absolutely! You can swap the ham for cooked mushrooms or lentils. Use vegetable broth instead of milk for the sauce. This way, you keep the flavor and texture while making it meat-free. What should I serve with this casserole? This casserole pairs well with a green salad or steamed vegetables. The fresh crunch from the salad balances the richness of the dish. You can also serve it with some crusty bread for a complete meal. How do I ensure the potatoes cook evenly? To ensure even cooking, slice the potatoes thinly and uniformly. Layer them flat in the baking dish. Cover the dish with foil for the first part of baking to trap moisture and heat. This blog post showed how to make a Cheesy Ham and Potato Casserole. We covered the needed ingredients, steps for preparation, and important tips. Remember, you can change the recipe to fit your tastes. Experiment with different cheeses or vegetables. Leftovers can be stored easily for later meals. I encourage you to try this recipe and share it with friends. Enjoy warm bites of comfort that come right from your oven!

Cheesy Ham and Potato Casserole Simple Comfort Food

Are you craving a warm, cozy dish that feels like a big hug? Look no further than my Cheesy Ham

- 1 lb boneless, skinless chicken thighs - ¼ cup soy sauce - ¼ cup honey - Additional vegetables (broccoli, bell pepper, carrot) The main ingredients form the backbone of your teriyaki chicken bowls. The chicken thighs bring rich flavor and tenderness. Soy sauce adds that salty umami kick, while honey gives a perfect touch of sweetness. Fresh vegetables like broccoli, bell peppers, and carrots not only enhance the color but also boost nutrition. - 2 cups cooked jasmine rice - Garnishes (green onions, sesame seeds) For serving, cooked jasmine rice provides a fluffy base. It soaks up the savory teriyaki sauce well. Garnishes like sliced green onions and sesame seeds add both crunch and a pop of color. These optional ingredients elevate your dish from good to great. - Swap chicken for tofu or shrimp - Use brown rice instead of jasmine rice If you want to mix things up, you can swap chicken for tofu or shrimp. Tofu works well for a vegetarian twist, while shrimp cooks quickly and adds a seafood flavor. You can also use brown rice instead of jasmine rice for a nuttier taste and extra fiber. This flexibility lets you customize your bowls according to your taste or dietary needs. For the full recipe, check out the Marvelous Teriyaki Chicken Bowls. Start by whisking together the marinade ingredients in a medium bowl. You will need soy sauce, honey, rice vinegar, sesame oil, minced garlic, and grated ginger. This mix creates a sweet and savory sauce. Once mixed, add the bite-sized chicken pieces. Let the chicken marinate for at least 15 minutes. This helps the flavors soak in well. Next, heat a large skillet over medium heat. Add the marinated chicken to the skillet, but don’t forget to save some marinade for later. Cook the chicken until it turns golden brown and is cooked through, which should take about 7 to 10 minutes. Make sure the chicken is fully done to keep it safe to eat. After the chicken is cooked, it’s time to add the vegetables. Toss in broccoli florets, sliced bell peppers, and julienned carrots into the same skillet. Stir-fry the vegetables for about 5 minutes. You want them to be tender yet still crisp. This keeps the meal fresh and colorful. Now, return the cooked chicken to the skillet with the vegetables. Pour in the reserved marinade, allowing it to coat everything well. Cook for an additional 2 to 3 minutes. This will help thicken the sauce and give it a nice glaze. Finally, divide the cooked jasmine rice into bowls. Top each bowl with the teriyaki chicken and vegetable stir-fry. For an extra touch, sprinkle some sliced green onions and sesame seeds on top. This adds both flavor and a nice crunch. You can find the Full Recipe in the article for more details. - Avoid overcooking chicken for tenderness. Cook it until golden brown. - Use high heat for quicker vegetable cooking. This keeps them crisp and bright. - Add crushed red pepper for heat. This gives a nice kick to your dish. - Include sesame oil for a nutty flavor. Just a little adds depth to the sauce. - Pair with a side salad. A fresh salad complements the rich flavors. - Serve with extra soy sauce on the side. It lets everyone adjust the flavor to their liking. These tips can make your teriyaki chicken bowls even better. Check out the Full Recipe for more details. {{image_2}} You can adapt this recipe to fit your needs. For a gluten-free option, swap soy sauce with tamari. Tamari has a similar taste but is made without wheat. If you prefer a vegan dish, use plant-based protein like tofu or tempeh. This swap keeps the dish tasty and filling. Want to change up the flavor? Use teriyaki sauce instead of the marinade. This gives a sweet and tangy kick to the chicken. You can also add pineapple chunks for a fun, sweet twist. The pineapple pairs well with the savory chicken and adds a pop of color. Feel free to mix things up with your ingredients. Instead of jasmine rice, you can use quinoa. Quinoa is a healthy alternative packed with protein. Also, use seasonal vegetables based on what you have. Bell peppers, snap peas, or zucchini all work great. These swaps keep the dish fresh and exciting. For the Full Recipe, check out the details above. To keep your teriyaki chicken bowls fresh, store them in the fridge. Place the leftover bowls in airtight containers. This helps maintain flavor and texture. Use glass or BPA-free plastic containers for best results. You can enjoy your leftovers for up to four days. When it's time to eat again, you want the best flavor. The microwave works well, but be careful not to overcook. Heat in short bursts, stirring in between. For stovetop reheating, use medium heat and add a splash of water or broth. This keeps the chicken moist. Stir until heated through, about 5-7 minutes. Yes, you can freeze teriyaki chicken bowls! To freeze, first let them cool completely. Then, place them in freezer-safe bags or containers. Remove as much air as possible. They can last for about three months in the freezer. When you're ready to eat, thaw them overnight in the fridge. Reheat as mentioned above for best taste. Enjoy your delicious meal anytime! For the full recipe, check out the Marvelous Teriyaki Chicken Bowls 🥢. You can keep leftover teriyaki chicken bowls in the fridge for about three to four days. Make sure to store them in an airtight container. This keeps the flavors fresh and safe to eat. Always check for any signs of spoilage before consuming leftovers. Yes, you can use frozen chicken! Just remember to thaw it first for even cooking. You can microwave it or leave it in the fridge overnight. If cooking from frozen, make sure the chicken reaches 165°F (75°C) to ensure it’s safe to eat. You can serve teriyaki chicken bowls with many sides. Here are some great options: - Steamed edamame - Crisp cucumber salad - Roasted sweet potatoes - Quick pickled vegetables These sides add color, crunch, and balance to your meal. To add some heat, try these tips: - Add crushed red pepper flakes to the marinade. - Slice fresh jalapeños and sprinkle them on top. - Use spicy sesame oil instead of regular sesame oil. These options boost flavor without hiding the teriyaki taste. Yes! Teriyaki chicken bowls are perfect for meal prep. You can make a big batch and store it in separate containers. This way, you have quick, healthy meals ready for the week. Just reheat them in the microwave or on the stove when you’re ready to eat. For full details, check out the Full Recipe. This blog post covered how to make a delicious teriyaki chicken bowl. You learned about key ingredients and easy steps for cooking. We discussed tips for better flavor and serving ideas. Variations let you adjust this dish to fit your needs. In conclusion, you can enjoy making and sharing this meal. It’s simple, tasty, and flexible. Time spent in the kitchen helps you create something special. So, gather your ingredients and have fun with this recipe!

Easy Teriyaki Chicken Bowls Quick and Flavorful Meal

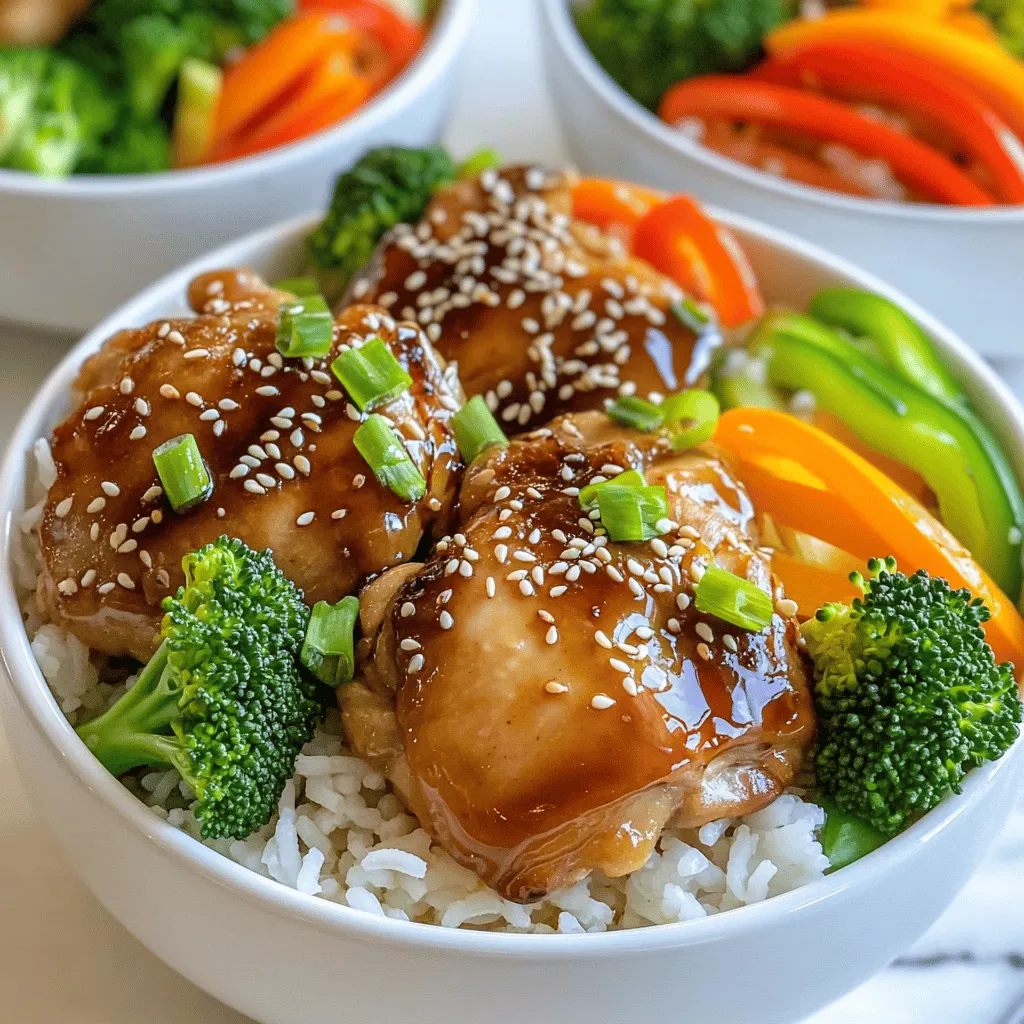
Craving a quick and tasty meal? Look no further! These Easy Teriyaki Chicken Bowls are perfect for busy weeknights. With
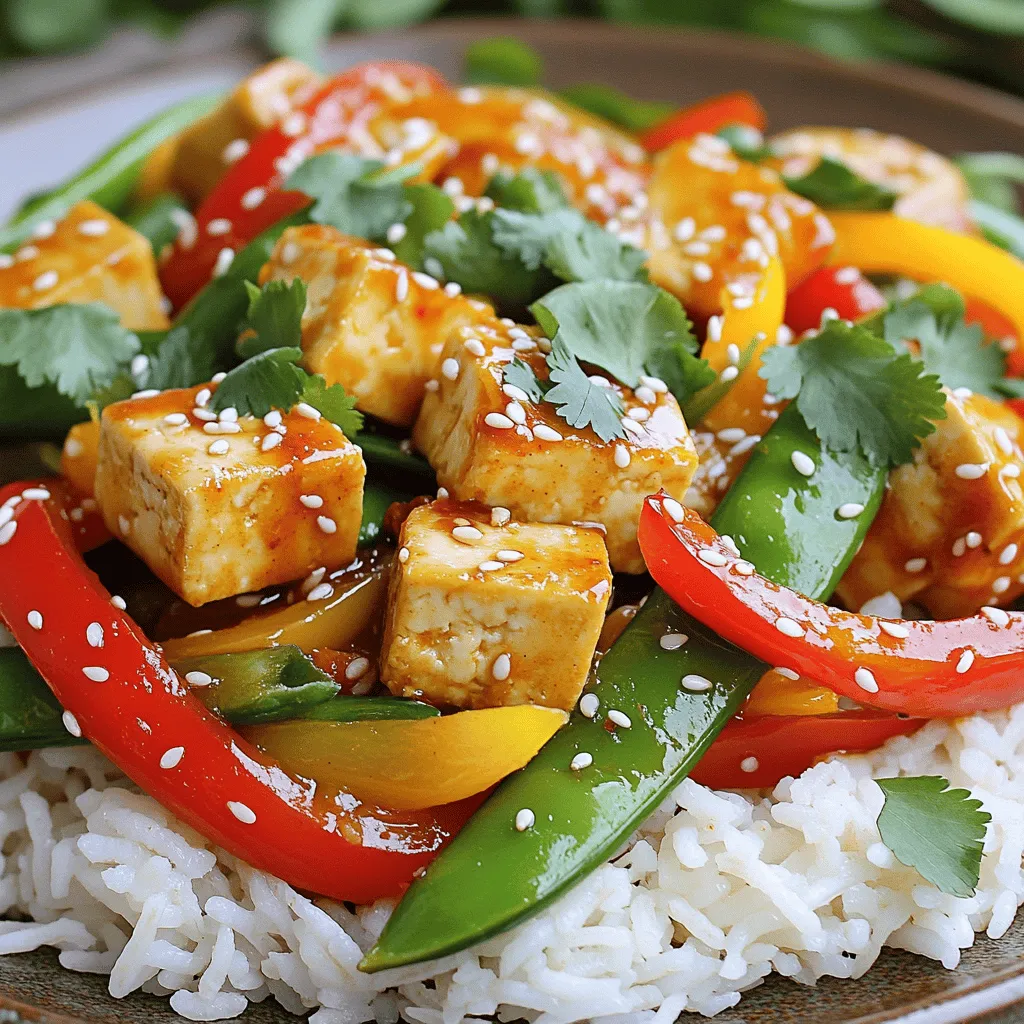
- 1 pound boneless chicken breast, thinly sliced - 2 cups mixed vegetables (bell peppers, broccoli, snap peas) For this stir fry, I start with tender chicken breast. It cooks quickly and stays juicy. I also use a mix of colorful vegetables. Bell peppers add sweetness, broccoli gives a nice crunch, and snap peas bring freshness. Together, they create a vibrant dish that looks great on the plate. - 3 tablespoons honey - 4 cloves garlic, minced - 1 tablespoon soy sauce The sauce is what makes this meal shine. Honey adds a tasty sweetness. Garlic gives a bold flavor that pairs perfectly with the chicken. I use soy sauce to add depth and umami. This mix creates a sticky, savory sauce that coats the chicken and veggies well. - 1 tablespoon cornstarch - 1 tablespoon vegetable oil - 1 teaspoon sesame oil - Salt and pepper to taste - 2 green onions, chopped (for garnish) - Toasted sesame seeds (for garnish) Cornstarch helps thicken the sauce and gives the chicken a nice texture. I use vegetable oil to cook at high heat without burning. A drizzle of sesame oil at the end adds a nutty richness. Salt and pepper enhance all the flavors. For garnishing, I add green onions and toasted sesame seeds. They provide crunch and a pop of color. For the full recipe, check out the Honey Garlic Chicken Stir Fry . Start by slicing one pound of boneless chicken breast into thin strips. This helps the chicken cook quickly. In a bowl, mix the chicken with one tablespoon of cornstarch and one tablespoon of soy sauce. Toss everything together to coat the chicken well. This marinating step makes the chicken tender and flavorful. Set the bowl aside for about ten minutes. This wait is key; it allows the chicken to soak up the flavors. While the chicken marinates, let’s prepare the sauce. In a small bowl, combine three tablespoons of honey with four cloves of minced garlic. Stir these together until they form a smooth mixture. This sauce is the heart of our dish. It brings a sweet and savory taste that pairs perfectly with the chicken. Now, heat one tablespoon of vegetable oil in a large skillet or wok over medium-high heat. Once the oil is hot, add the marinated chicken to the pan. Stir fry the chicken for five to seven minutes. Cook it until it turns brown and is no longer pink inside. Next, toss in two cups of mixed vegetables, like bell peppers, broccoli, and snap peas. Stir fry these veggies for about three to four minutes. You want them to be tender yet crisp. Finally, pour the honey garlic sauce over the chicken and vegetables. Stir everything together for about two minutes. This helps the sauce cling to the chicken and veggies. To finish, drizzle one teaspoon of sesame oil over the stir fry and give it a final toss. Your Honey Garlic Chicken Stir Fry is now ready to serve! For a complete meal, check out the [Full Recipe]. Enjoy the vibrant colors and flavors in each bite! To get the right chicken texture, start by marinating the chicken in cornstarch. This helps keep the chicken juicy. Use thin slices of chicken to cook faster and stay tender. High heat is key when stir-frying. It sears the chicken and gives it a nice color. If you lower the heat, the chicken will steam instead of fry, losing that crispy edge. Pair your honey garlic chicken stir fry with fluffy white rice or quinoa. Both add great texture and soak up the sauce well. You can also serve it with noodles for a fun twist. For plating, use colorful bowls to make the dish pop. A sprinkle of green onions and sesame seeds will make it look fancy. Want extra flavor? Try adding spices like ginger or red pepper flakes. Fresh herbs like cilantro or basil can also brighten the dish. You can mix different vegetables based on what you have. Carrots, snap peas, or even zucchini work well. This gives your stir fry a unique taste every time. For the full recipe, check out the details above! {{image_2}} You can switch up the protein in this dish easily. Shrimp, beef, or tofu can work great. For shrimp, use large, peeled shrimp. Cook them for about 3-4 minutes until they turn pink. Beef works well too. Use thinly sliced flank steak. Cook it for about 5 minutes until browned. Tofu is a fantastic option for vegans. Use firm tofu, and cook until golden brown for best results. Each protein brings its own flavor and texture to the stir fry. If you want a fully vegetarian stir fry, it's simple! Just skip the chicken and add more vegetables. You could use mushrooms, carrots, and zucchini. They add great flavor and color. You can also add chickpeas for protein. They will make the dish filling and nutritious. Don't forget to adjust the sauce to taste. This way, you keep all the yummy flavors while making it meat-free. You can change the sauce for a new taste. Teriyaki sauce is sweet and savory. It pairs well with chicken or tofu. Just swap the honey and garlic with teriyaki sauce in the recipe. Sweet and sour sauce is another fun choice. It gives a nice tangy flavor. You can mix in ginger for an extra kick. Each sauce gives a unique twist to your stir fry. Explore these options to find your favorite. Check out the Full Recipe for more ideas. To keep your Honey Garlic Chicken Stir Fry fresh, store leftovers in an airtight container. This helps lock in flavor and moisture. Make sure to cool the stir fry to room temperature before sealing it up. Place the container in the fridge right away. This keeps harmful bacteria at bay and maintains taste. If you want to save some for later, freezing is a great option. First, let the stir fry cool completely. Then, transfer it to a freezer-safe container. Remove as much air as possible to avoid freezer burn. When you're ready to eat, thaw it overnight in the fridge. Reheat in a pan over low heat until warm, stirring often. You can also microwave it, but stir halfway for even heating. In the fridge, your Honey Garlic Chicken Stir Fry lasts about 3-4 days. After that, the taste and texture start to decline. If frozen, it’s best to eat it within 2-3 months for optimal flavor. Always check for any signs of spoilage before enjoying leftovers. Yes, you can prep this dish ahead of time. For best results, follow these steps: - Marinate the chicken: Combine chicken with cornstarch and soy sauce. Store it in the fridge for up to 24 hours. - Prep the sauce: Mix honey and garlic in a small bowl. Keep it in the fridge until you need it. - Chop vegetables: Cut your bell peppers, broccoli, and snap peas. Store them in an airtight container. - Cook when ready: When you are ready to eat, just stir fry everything together. This keeps your meal fresh and quick. If you need a different sweetener, here are some great options: - Maple syrup: It has a similar sweetness and flavor. - Agave nectar: This is a great vegan option and works well in sauces. - Brown sugar: Mix it with a bit of water to create a syrupy texture. - Coconut sugar: A natural option that adds a slight caramel flavor. To make Honey Garlic Chicken Stir Fry gluten-free, use these substitutes: - Soy sauce: Choose a gluten-free soy sauce or tamari. - Cornstarch: Most brands are gluten-free, but check the label to be sure. - Vegetable oil and sesame oil: These are naturally gluten-free, so you can use them without worry. These swaps keep the dish tasty while meeting dietary needs. Enjoy your cooking! This blog post covered everything about Honey Garlic Chicken Stir Fry. We discussed the main ingredients, from chicken and veggies to the tasty honey garlic sauce. I shared cooking steps to make your dish delicious and tips for the best results. You can even try different proteins or sauces. With these easy methods, you'll enjoy a great meal any time. Follow these steps, and you'll impress everyone at your table!

Honey Garlic Chicken Stir Fry Flavorful Quick Meal

If you’re craving a quick and tasty meal, let me introduce you to Honey Garlic Chicken Stir Fry. This dish

- Chicken and vegetables - 1 lb (450g) boneless, skinless chicken breasts, diced - 1 medium onion, diced - 2 carrots, diced - 2 celery stalks, diced - 3 cloves garlic, minced - 2 cups fresh spinach, chopped - Broth and cream components - 4 cups chicken broth - 1 cup heavy cream - 1 package (16 oz) potato gnocchi - Seasonings and garnishes - 1 tablespoon olive oil - 1 teaspoon Italian seasoning - Salt and pepper to taste - Fresh parsley, chopped (for garnish) The ingredients for Creamy Chicken and Gnocchi Soup create layers of flavor. The chicken adds protein and a rich taste. Onions, carrots, and celery give a sweet, earthy base. Garlic brings a punch that makes each spoonful exciting. The broth is crucial. Chicken broth adds depth, while heavy cream makes it rich and smooth. Potato gnocchi adds heartiness and a delightful texture. Fresh spinach gives color and a mild taste. Seasonings tie everything together. Italian seasoning offers a blend of herbs. Salt and pepper bring out the best in each ingredient. Finally, chopped parsley adds a fresh finish that brightens the dish. For the full recipe, check out the details above. Cooking the chicken First, heat 1 tablespoon of olive oil in a large pot over medium heat. Add 1 pound of diced chicken. Season it with salt and pepper. Cook the chicken for about 5–7 minutes. You want it browned and cooked through. Once done, remove the chicken and set it aside. Sautéing the vegetables In the same pot, add a diced onion, 2 diced carrots, and 2 diced celery stalks. Sauté these for about 5 minutes. Watch for them to soften but not brown. Next, add 3 minced garlic cloves. Sauté for an extra minute until you smell that great garlic aroma. Combining ingredients Pour in 4 cups of chicken broth and bring it to a boil. Once it boils, reduce the heat to a simmer. Stir in the potato gnocchi. Cook for about 3–4 minutes. The gnocchi will start to float, which means they are ready. Adding the gnocchi After the gnocchi floats, add the cooked chicken back into the pot. Mixing in the cream and spinach Next, pour in 1 cup of heavy cream and 2 cups of chopped fresh spinach. Stir well to combine everything. Cook for an additional 3–5 minutes. The spinach should wilt, and the soup will heat through. Seasoning for taste Finally, taste the soup and add more salt and pepper if needed. Your Creamy Chicken and Gnocchi Soup is almost ready to enjoy! For the full recipe, check the section above. Ensuring chicken is cooked through Cook the chicken until it reaches 165°F. This makes sure it is safe to eat. I recommend cutting the chicken into small pieces. This helps it cook faster and more evenly. Perfecting gnocchi texture Add gnocchi to boiling soup. Cook until they float to the top. This shows they are done. Don't overcook them, or they may become mushy. Enhancing flavors with seasonings Use fresh herbs for a bright taste. Italian seasoning works great in this recipe. You can also add a pinch of garlic powder or red pepper flakes for some heat. Best accompaniments for the soup This soup pairs well with crusty bread. You can also serve it with a fresh salad. Both add nice textures and flavors. Ideal serving temperature Serve the soup hot. This keeps it creamy and delicious. Let it cool for a few minutes before serving. It will be hot right off the stove. For more details, check out the Full Recipe. {{image_2}} You can easily switch proteins in this soup. Try using turkey or shrimp instead of chicken. Both options keep the soup tasty and fun. If you want a dairy-free version, use coconut milk or a nut-based cream. These options give the soup a nice flavor without the dairy. To add more vegetables, toss in some diced zucchini, bell peppers, or mushrooms. These veggies add color and extra good nutrients. Herbs and spices can really change the taste of your soup. Fresh basil, thyme, or rosemary can make it pop. Just add a little at a time and taste as you go. You can also use different broths to change the flavor. Vegetable broth or even a seafood broth can give your soup a unique twist. Experimenting with these options can lead to new favorites! To keep your creamy chicken and gnocchi soup fresh, cool it first. Once it’s cool, transfer it to an airtight container. This way, it won’t absorb other smells from the fridge. Use glass or plastic containers with tight lids for the best results. Label the container with the date so you know how long it has been stored. The soup stays good for about three to four days in the fridge. When you’re ready to enjoy your soup again, the best method is on the stovetop. Pour the soup into a pot and heat it over medium-low heat. Stir it often to keep it from sticking. If you want to use a microwave, place the soup in a microwave-safe bowl. Heat it in short bursts, stirring in between. This helps keep the soup from getting too hot in spots. To maintain its creamy texture, you may want to add a splash of broth or cream while reheating. Enjoy the comforting flavors just like the first time! Yes, you can freeze this soup! Just let it cool first. Store it in airtight containers. It stays good for about three months. When you are ready to eat, thaw it in the fridge overnight. Reheat on the stove until hot. This soup lasts about three to four days in the fridge. Make sure to keep it in a sealed container. If you notice any off-smells or changes in texture, it’s best to throw it away. Always give it a good stir before serving again. This soup pairs well with crusty bread or a fresh salad. A side of garlic bread is also a hit! You can even serve it with cheese on top for extra flavor. Enjoy your meal with family or friends for a cozy dinner! For the full recipe, check out the detailed instructions above. This blog post shared how to make a delicious Creamy Chicken and Gnocchi Soup. We covered ingredients like chicken, veggies, broth, and seasonings. You learned the steps to cook and combine these ingredients for the best flavor. I also gave tips on serving and storing leftovers. Remember, cooking can be fun and flexible. Don’t hesitate to adjust recipes based on your taste. Enjoy making this comforting soup with friends or family, and explore the variations to make it yours. Happy cooking!

Creamy Chicken and Gnocchi Soup Flavorful Comfort Meal

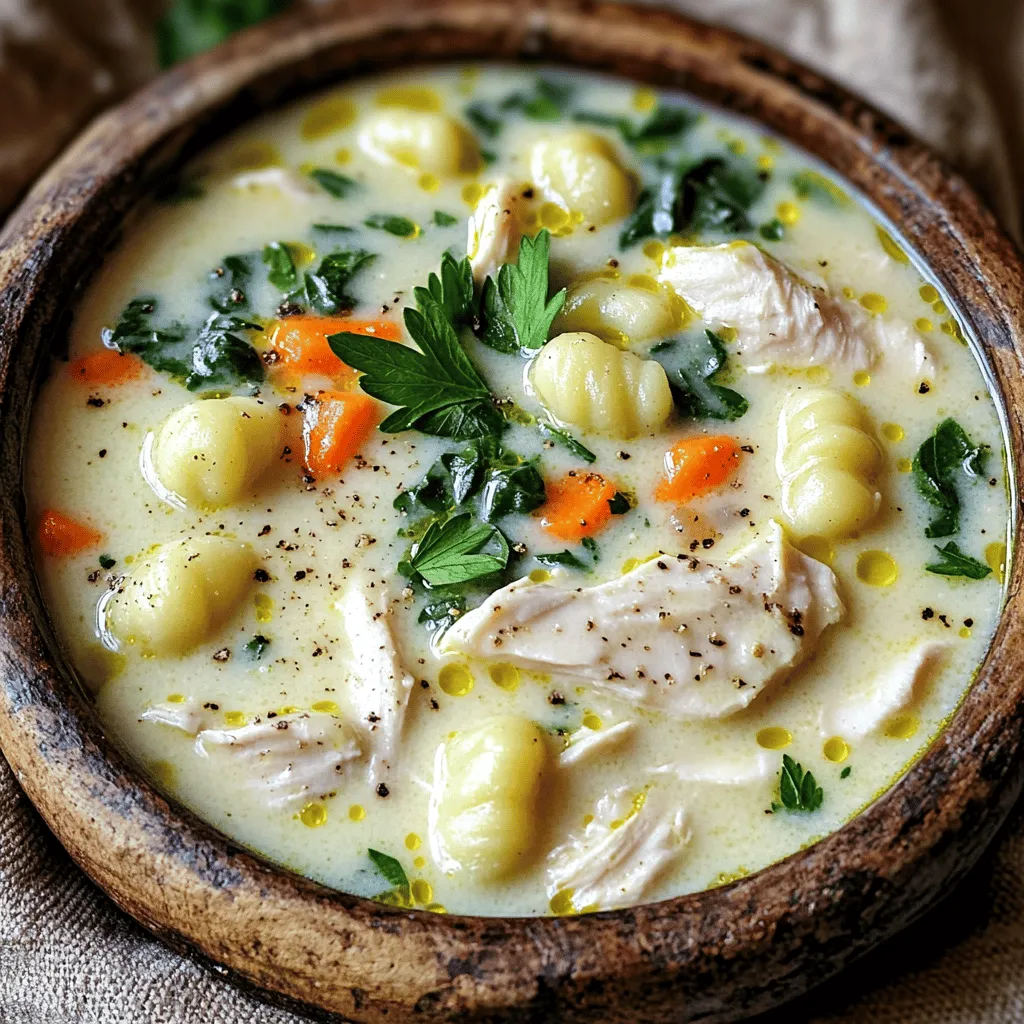
If you’re craving a warm, comforting meal, look no further than Creamy Chicken and Gnocchi Soup. This dish brings together

Here are the ingredients you need for loaded potato soup. Each item adds flavor and creaminess to the dish. - 6 medium russet potatoes, peeled and diced - 1 onion, chopped - 3 cloves garlic, minced - 4 cups vegetable broth - 1 cup heavy cream - 1/2 cup shredded cheddar cheese (plus extra for garnish) - 1/4 cup sour cream - 1 teaspoon dried thyme - 1/2 teaspoon paprika - Salt and pepper to taste - 4 slices crispy turkey bacon, chopped (optional) - 3 green onions, sliced (for garnish) These ingredients create a rich and hearty soup. The russet potatoes give it a nice texture. The heavy cream and cheddar cheese add depth and flavor. You can customize the ingredients. Try using different cheeses or adding more veggies. If you want a lighter version, use less cream. For the full recipe, check out the complete instructions. 1. First, heat a splash of olive oil in a large pot over medium heat. 2. Add the chopped onion to the pot. Sauté it for about 5 minutes until it turns translucent. 3. Next, stir in the minced garlic. Cook for another minute until you smell the garlic's aroma. 4. Now, add the peeled and diced potatoes to the pot. Mix it all together. 1. Pour in 4 cups of vegetable broth. Bring the mixture to a boil. 2. Once boiling, reduce the heat and let it simmer. Cook the potatoes until they are tender, around 15 to 20 minutes. 3. After the potatoes are soft, use a potato masher or an immersion blender. Mash the soup to your desired consistency, keeping some chunks for texture. 1. Stir in 1 cup of heavy cream and 1/2 cup of shredded cheddar cheese. Mix well until the cheese melts. 2. Add 1/4 cup of sour cream, 1 teaspoon of dried thyme, and 1/2 teaspoon of paprika. Season with salt and pepper to taste. 3. Taste the soup and adjust the seasoning if needed. If it’s too thick, add more vegetable broth. 4. Serve the soup hot, garnished with crispy turkey bacon, extra cheddar cheese, and sliced green onions. Check out the Full Recipe for more details! To get the best texture in your loaded potato soup, you have two great options: a potato masher or an immersion blender. If you want some chunks, a potato masher is perfect. It gives you control over how smooth or chunky your soup is. On the other hand, an immersion blender creates a super creamy soup. Just blend until you reach the texture you like. To achieve the right creaminess, start with the right amount of heavy cream. You can always add more if you want it creamier. If it gets too thick, just stir in a bit more vegetable broth. Cheese brings flavor and richness to the soup. I highly recommend using sharp cheddar for a great taste. It melts well and adds a nice bite. If you want to mix it up, consider gouda or pepper jack for a kick. If you need a dairy-free option, try using cashew cream or nutritional yeast. Both give a nice flavor and help you keep that creamy texture. Customizing your soup with herbs and spices can make a big difference. I love adding fresh chives or parsley for a fresh taste. You can also try adding a bit of garlic powder or onion powder for extra flavor. Balancing flavors is key. If your soup tastes too salty, add a splash of lemon juice. If it’s bland, try a bit more salt and pepper. Taste as you go to find what you like best. {{image_2}} You can make loaded potato soup even better with fun add-ins. For a twist, try adding vegetables like broccoli or carrots. They add color and nutrition. You can also mix in meats like ham or chicken for added flavor. Just chop them small and stir them in while cooking. If you need a gluten-free soup, you can easily make it. Just make sure to use gluten-free broth. For a vegan version, swap the cream and cheese for coconut milk and nutritional yeast. You can also use vegetable broth instead of chicken broth. These simple swaps keep the taste rich and creamy. This soup pairs well with crusty bread or a fresh salad. A side of garlic bread is always a hit too. For garnishing, get creative! Top the soup with a sprinkle of extra cheese or some crispy turkey bacon. Fresh herbs like parsley or chives add a nice touch. You can also drizzle a bit of olive oil for extra flavor. For the full recipe, check out the detailed instructions above. After you finish your loaded potato soup, cool it down. Place it in airtight containers. This helps keep the soup fresh. If you don’t have airtight containers, you can use plastic wrap. Make sure to cover the soup tightly. Store it in the fridge for up to three days. To reheat the soup, avoid the microwave if you can. The stovetop is better for keeping the texture. Pour the soup into a pot and heat it on low. Stir it often to prevent sticking. If you must use the microwave, heat it in short bursts. Stir it in between to ensure even warming. You can freeze loaded potato soup for later. First, cool it completely. Then, use freezer-safe containers or bags. Leave space at the top for expansion. Label the container with the date. It can stay fresh in the freezer for up to three months. To defrost, place it in the fridge overnight before reheating. To make your loaded potato soup thicker, you can use a few simple tricks. First, mash the potatoes more. This will break them down and add more creaminess. Second, add a slurry of cornstarch and water. Mix one tablespoon of cornstarch with two tablespoons of cold water. Stir this into the soup and cook until it thickens. Lastly, let the soup simmer longer. This will allow it to reduce and become denser. Yes, you can use different types of potatoes! While russet potatoes are great, you can also try Yukon Gold or red potatoes. Yukon Gold gives a creamy texture, while red potatoes keep some skin, adding nice color. Each type will change the taste slightly, but all will work well in this soup. If you want to skip heavy cream, there are good options. You can use half-and-half for a lighter touch. Another choice is whole milk mixed with a bit of butter. This will keep the soup rich. For a dairy-free option, try coconut cream or cashew cream. These will add creaminess without the dairy. You now have a great recipe for loaded potato soup. We covered the ingredients, cooking steps, and tips for a perfect dish. You can customize it with veggies or make it dairy-free. Storing your leftovers is easy, and reheating them is simple too. Experiment with flavors and enjoy each bowl. This dish will warm your kitchen and heart, making it perfect for family meals or gatherings. Enjoy your cooking journey!

Loaded Potato Soup Creamy Comfort Food Recipe

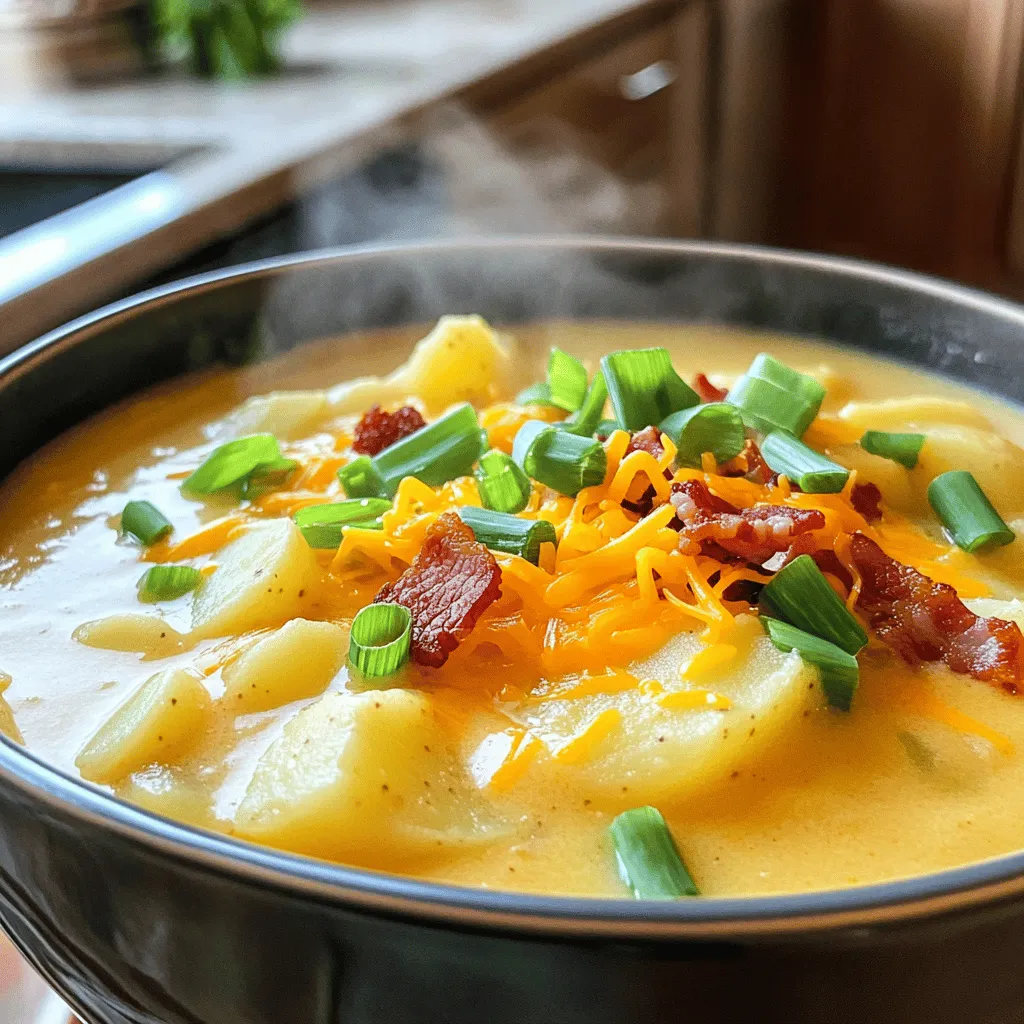
Warm, creamy, and loaded with flavor, this Loaded Potato Soup is the ultimate comfort food. Perfect for chilly nights or

- 2 cups rolled oats - 1 cup creamy peanut butter - 1/2 cup honey or maple syrup These main ingredients are the heart of the bars. Rolled oats give texture and fiber. Creamy peanut butter adds richness and healthy fat. Honey or maple syrup brings sweetness and binds everything together. - 1/2 cup cocoa powder - 1/2 cup chocolate chips (dark or semi-sweet) - 1/4 cup shredded coconut (unsweetened) Cocoa powder gives a deep chocolate flavor. Chocolate chips add bursts of sweetness. Unsweetened shredded coconut offers a fun chew and extra taste. - 1/4 teaspoon salt - 1 teaspoon vanilla extract Salt balances the sweetness. Vanilla extract adds warmth and depth. Together, these flavor enhancers lift the taste of the bars, making them simply irresistible. For the full recipe, check the [Full Recipe]. 1. First, grab a large mixing bowl. Add the rolled oats, cocoa powder, and shredded coconut. This mix gives your bars a great texture and flavor. 2. Next, take a microwave-safe bowl. Heat the creamy peanut butter and honey (or maple syrup) together for about 30 seconds. Stir until smooth and well mixed. The heat helps blend these ingredients nicely. 3. Now, pour the warm peanut butter mixture over the dry ingredients in your mixing bowl. This step is key for a tasty bar! 4. Stir everything together until the dry ingredients are coated well. You want to make sure each oat gets some love. 5. Once mixed, fold in half of the chocolate chips. Save the rest for later to top your bars. 6. Line an 8x8-inch baking dish with parchment paper. Leave some paper hanging over the sides. This helps you lift the bars out later. 7. Transfer the mixture into the prepared baking dish. Press it down firmly using a spatula or your hands. This helps the bars hold their shape. 8. Sprinkle the remaining chocolate chips on top. Gently press them in so they stick. 9. Place the dish in the refrigerator for at least 1 hour. This time helps the bars firm up before you slice them. For the full recipe, check out the details above! To get the best no-bake chocolate oat bars, even mixing is key. Start by combining the dry ingredients well. This ensures each bite has the right flavor. When you mix the wet ingredients, make sure they are warm. This helps them coat the dry mix evenly. Pressing the mixture firmly is also important. If you do not press it down, the bars may crumble. Use a spatula or your hands. Ensure you compact the mixture well in the baking dish. This step helps the bars hold their shape when sliced. For a fun twist, drizzle melted chocolate on top of the bars. You can also add a sprinkle of coconut for extra flavor. When gifting these treats, wrap them in clear cellophane. Tie them with a ribbon for a lovely presentation. It adds a personal touch that friends and family will appreciate. One common mistake is not compacting the mixture. Skipping this step can lead to crumbly bars. Always press the mixture down firmly in the dish. Another mistake is overheating the peanut butter. If you heat it too much, it can separate and become oily. Heat just enough to make it smooth. This keeps the texture creamy and delicious. Remember, small steps make a big difference in your no-bake chocolate oat bars. For the full recipe, check out the section above. {{image_2}} You can change the taste of your no-bake chocolate oat bars easily. Adding nuts or seeds gives a nice crunch. I love using almonds or sunflower seeds. They add protein and healthy fats. You can also swap peanut butter for other nut butters. Try almond or cashew butter for a different flavor. Each nut butter brings its own twist to the bars. If you need gluten-free options, use certified oats. These oats are safe for those with gluten issues. You can also make these bars vegan. Just replace honey with maple syrup. This simple swap keeps the bars sweet and tasty without animal products. Get creative with your bars by adding dried fruits. Raisins, cranberries, or chopped apricots work great. They add natural sweetness and chewiness. You can also mix in different types of chocolate. White chocolate or even flavored chocolate can give a fun twist. Another idea is to sprinkle in some spices, like cinnamon. This adds warmth and depth to the flavor. You can explore these variations to make your bars truly unique. Enjoy crafting your perfect no-bake chocolate oat bars! For the full recipe, check the link above. To keep your No-Bake Chocolate Oat Bars fresh, store them in the refrigerator. The cool air helps maintain their texture and flavor. Use an airtight container to protect them from moisture and odors. This way, they stay tasty for longer. These bars stay fresh for about a week when stored properly. If you notice any off smells or a change in texture, it might be time to toss them. Signs of spoilage include a dry or crumbly texture and an unusual color. Always check before enjoying another bar! If you want to keep your bars for longer, freezing works well. Wrap each bar in plastic wrap or foil. Place them in a freezer-safe bag or container. When you’re ready to eat, thaw them in the refrigerator overnight. This keeps the texture nice and chewy, just like fresh. Enjoy your delicious treats anytime! No-bake chocolate oat bars can last about one week in the fridge. Store them in an airtight container to keep them fresh. If you want to keep them longer, you can freeze them. They can stay good for up to three months in the freezer. Just thaw them in the fridge before you enjoy them. Yes, you can swap peanut butter with almond, cashew, or sunflower seed butter. Each nut butter will change the taste a bit. Almond butter adds a nutty flavor, while sunflower seed butter is great for nut allergies. Just keep in mind that the texture may vary slightly based on your choice. These bars are a tasty and healthy treat. They have oats, which are full of fiber. The peanut butter adds protein and healthy fats. You can make them even healthier by using less sweetener or adding nuts for extra crunch. If you add dried fruits, like raisins or cranberries, they can boost vitamins and minerals too. You now have a simple and tasty way to make no-bake chocolate oat bars. We went through the key ingredients, step-by-step instructions, helpful tips, and creative variations. You can customize these bars to fit your taste and needs. Remember to store them well for lasting freshness. Enjoy the process and make it your own!

No-Bake Chocolate Oat Bars Easy and Delicious Treat

Craving something sweet but don’t want to turn on the oven? I’ve got just the thing for you! These No-Bake

- 1 cup canned pumpkin puree - 1/2 cup vegetable oil - 1 cup granulated sugar - 1/2 cup brown sugar, packed - 3 large eggs - 2 cups all-purpose flour - 1 teaspoon baking soda - 1/2 teaspoon baking powder - 1 teaspoon ground cinnamon - 1/2 teaspoon ground nutmeg - 1/2 teaspoon ground ginger - 1/2 teaspoon salt - 1/4 teaspoon ground cloves - 1 cup chopped walnuts (optional) - 1/2 cup dark chocolate chips (optional) To make easy pumpkin bread, you need simple and fresh ingredients. Canned pumpkin puree makes it easy and tasty. You can also use fresh pumpkin if you prefer. Vegetable oil keeps the bread moist. For sweet taste, we mix granulated and brown sugars. Eggs help bind everything together. Next, we need all-purpose flour and some leavening agents like baking soda and baking powder. These help the bread rise. For spice, I add ground cinnamon, nutmeg, ginger, and cloves. Salt balances the flavors. You can customize your bread with nuts or chocolate. Walnuts add crunch, while dark chocolate chips bring sweetness. Both are optional but delicious. If you want to swap ingredients, I can help with that too. You can replace pumpkin puree with applesauce or mashed banana. For oil, use coconut oil or applesauce for a lighter option. You can also swap out sugars for honey or maple syrup. This recipe is flexible, so you can make it your own. Check out the Full Recipe for more details! To start, prepare your loaf pan. Grease a 9x5 inch loaf pan well. This helps the bread release easily after baking. Next, preheat your oven to 350°F (175°C). It’s important to have the oven hot when you bake the bread. Now, let’s mix the wet ingredients. In a large mixing bowl, combine the pumpkin puree, vegetable oil, granulated sugar, and brown sugar. Whisk until it is smooth. This step adds moisture and sweetness to the bread. After that, add the eggs one by one. Mix well after each egg to ensure they blend in fully. In another bowl, whisk together the dry ingredients. This includes the flour, baking soda, baking powder, cinnamon, nutmeg, ginger, salt, and cloves. Mixing these well helps distribute the leavening agents and spices evenly. Now, gradually add the dry mix to the wet mixture. Stir gently until just combined. Avoid overmixing; this helps keep the bread soft. Once mixed, it's time to pour the batter into the prepared loaf pan. Smooth the top with a spatula. Now, it’s time to bake! Place the loaf pan in the preheated oven. Bake for 60 to 70 minutes. You’ll know it's done when a toothpick inserted in the center comes out clean. The aroma will fill your kitchen, making it hard to wait! To make the best pumpkin bread, avoid overmixing your batter. Overmixing can lead to a dense loaf. Mix just until you see no dry flour. This keeps your bread light and fluffy. To check if your bread is done, use a toothpick. Insert it in the center of the loaf. If it comes out clean, your bread is ready. If it has batter on it, bake a little longer. You can serve pumpkin bread warm or at room temperature. I love to spread a little butter on top. A sprinkle of cinnamon adds a nice touch too. For drinks, pumpkin bread pairs well with hot tea or coffee. Try it with a pumpkin spice latte for a festive treat. If your bread is undercooked, bake it longer. Cover the top with foil if it browns too fast. This helps it cook evenly. If your bread is too dense, you may have overmixed the batter. Next time, mix just until combined. For extra flavor, try adding more spices or nuts. This can make your bread even better. {{image_2}} You can make this pumpkin bread even better with some simple tweaks. Adding spices like allspice or cardamom gives it extra warmth. Try mixing in fruits like cranberries or apples for a fresh twist. Nuts, such as walnuts or pecans, add crunch and flavor. These small changes can make your bread special. If you need gluten-free options, use gluten-free flour instead of all-purpose flour. This swap works well and keeps the taste great. For vegan modifications, replace eggs with flaxseed meal mixed with water. Use plant-based oil and a vegan sugar option to keep it entirely vegan. These changes help everyone enjoy the bread. You can turn your pumpkin bread into muffins for a fun bite-sized treat. Just pour the batter into muffin tins and adjust the baking time. Another idea is to add a cream cheese filling. Mix cream cheese with sugar and a splash of vanilla, then swirl it into the batter before baking. Both ideas keep the pumpkin flavor while adding a creative touch. To keep your pumpkin bread fresh, you can store it at room temperature. Place it in a sealed container or wrap it in plastic wrap. This keeps moisture in and stops the bread from getting stale. If your home is humid or warm, the fridge is a better choice. It can extend the bread's life but may change its texture. For the best taste, use a glass or plastic container with a tight lid. If you want to save your pumpkin bread for later, freezing works well. Wrap the bread tightly in plastic wrap, then add a layer of foil. This helps prevent freezer burn. It can last up to three months in the freezer. When you are ready to eat it, take it out and thaw it in the fridge overnight. To reheat, slice it and pop it in the toaster or microwave. Enjoy warm, and it will taste fresh again! Can I use fresh pumpkin instead of canned? Yes, you can use fresh pumpkin. Just cook and puree it first. This can add a richer flavor to your bread. Make sure to drain excess water to avoid a soggy texture. How long does pumpkin bread last? Pumpkin bread lasts about 3 to 5 days at room temperature. Keep it in an airtight container. For longer storage, refrigerate it for up to a week. Can I add chocolate chips without affecting the texture? Absolutely! Adding chocolate chips enhances the flavor without changing the bread's texture. Just fold them in gently at the end of mixing. What if my bread didn't rise? If your bread didn’t rise, check your baking soda and baking powder. They should be fresh. Also, ensure you mixed the ingredients well. Overmixing can prevent good rising too. How to tell when it's done baking? Insert a toothpick into the center of the bread. If it comes out clean or with a few crumbs, it's done. If it's wet, bake it a bit longer. Can I make it ahead of time? Yes, you can make pumpkin bread ahead of time. Bake it, then wrap it well. This keeps it fresh for a few days. Just warm it up before serving. Caloric breakdown per serving Each slice of pumpkin bread has about 200 calories. This can vary if you add nuts or chocolate. Benefits of the ingredients used Pumpkin is rich in vitamins A and C. It also has fiber, which helps with digestion. The spices add health benefits too, like anti-inflammatory properties. This pumpkin bread recipe offers a delicious treat that's easy to make. From gathering simple ingredients to following clear steps, you can bake with confidence. Consider the tips for perfecting your bread and explore creative twists to make it your own. Whether you enjoy it fresh or stored for later, this recipe meets your needs. Baking should be fun, so try different variations. Your pumpkin bread adventure starts here, and I can’t wait for you to enjoy it.

Easy Pumpkin Bread Simple and Tasty Recipe Guide

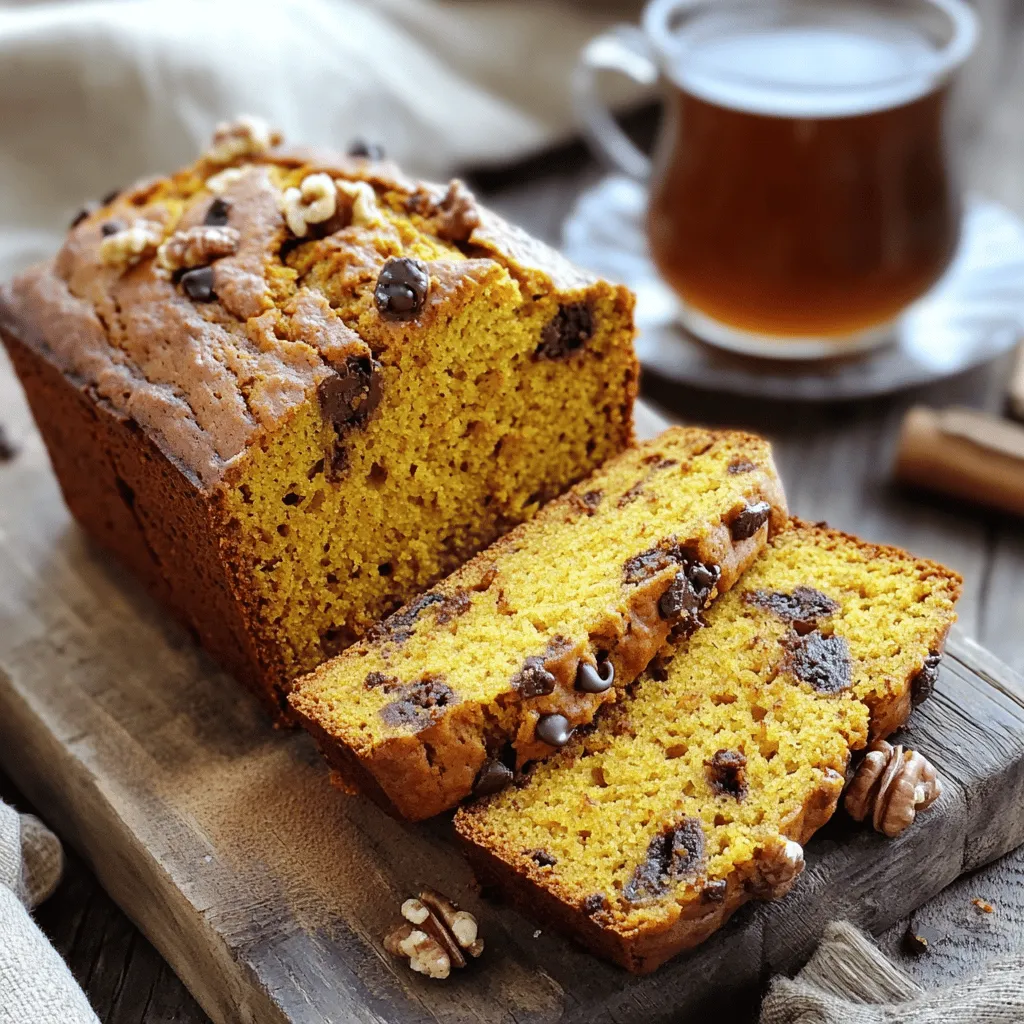
Looking for a simple and tasty pumpkin bread recipe? You’re in the right place! In this guide, I’ll walk you

For this dish, you need key ingredients that make it tasty and colorful. Here’s what you'll use: - 1 block (14 oz) firm tofu, pressed and cubed - 2 tablespoons cornstarch - 2 tablespoons vegetable oil - 1 red bell pepper, sliced - 1 yellow bell pepper, sliced - 1 cup snap peas, trimmed - 2 green onions, chopped - 3 cloves garlic, minced - 1 tablespoon fresh ginger, minced - 1/3 cup sweet chili sauce - 2 tablespoons soy sauce - 1 tablespoon sesame oil These ingredients work well together. The tofu gives protein. The sweet chili sauce adds a nice kick. You’ll need some basic items from your pantry. These are common and easy to find: - Cornstarch - Vegetable oil - Soy sauce - Sesame oil These staples help to enhance the flavors. They also help with texture and cooking. Garnishes add a beautiful touch. They make your dish look fresh and inviting. Here are some good choices: - Sesame seeds - Fresh cilantro These garnishes add color and a hint of flavor. They make your Sweet Chili Tofu Stir Fry stand out on the plate. For the full recipe, check the details above. Enjoy the cooking process! First, we need to prep the tofu. Start by pressing it to remove water. Wrap the block of tofu in a clean kitchen towel. Place a heavy object on top for about 15 minutes. This helps the tofu stay firm when you cook it. After that, cut the tofu into 1-inch cubes. Toss these cubes gently in cornstarch until they are well coated. This gives them a nice crunch. Now, heat a large skillet or wok over medium-high heat. Add 2 tablespoons of vegetable oil to the skillet. Once the oil is hot, carefully add the tofu cubes. Cook them for about 8 to 10 minutes. Turn them occasionally so they cook evenly. You want them golden and crispy on all sides. When done, remove the tofu and set it aside on a plate. In the same skillet, it's time for the veggies! Add the sliced red and yellow bell peppers, along with the snap peas. Stir-fry these for about 3 to 4 minutes. You want them to be bright and tender-crisp. Next, add the minced garlic and ginger. Stir-fry for another minute until you smell their great aroma. Now, return the cooked tofu to the skillet. Pour in 1/3 cup of sweet chili sauce and 2 tablespoons of soy sauce. Stir well so that everything is coated. Drizzle 1 tablespoon of sesame oil over the mix. Stir for another 1 to 2 minutes until everything is heated through. Finally, remove from heat and garnish with chopped green onions, sesame seeds, and fresh cilantro. Serve hot for a delicious meal! For the complete details, check out the Full Recipe. Tofu can be soft. To make it crispy, press it well. Here’s how: wrap the tofu in a clean towel. Place a heavy object on top for 15 minutes. This removes moisture. After pressing, cut the tofu into cubes. Coat each piece in cornstarch. This helps achieve that delightful crunch when frying. Use medium-high heat in your pan. Cook the tofu until golden on all sides, about 8-10 minutes. Choosing the right veggies is key. I love using bell peppers for color and crunch. Snap peas add a nice snap too. Other great options are broccoli, carrots, or bok choy. These veggies cook quickly, keeping their bright colors. Aim for a mix of textures and colors. This makes your dish appealing and tasty. Flavor is everything in cooking. Sweet chili sauce is the star here. It's sweet and slightly spicy. Soy sauce adds depth. For a hint of nuttiness, drizzle sesame oil at the end. You can also add garlic and ginger. These bring warmth and zest. Don’t forget to taste as you cook! Adjust the flavors to your liking. For more excitement, try adding a splash of lime juice or some chili flakes. For the complete method, check out the Full Recipe. {{image_2}} You can add protein to your Sweet Chili Tofu Stir Fry for more texture. Chicken, shrimp, or beef work well. Just cut the protein into small pieces. Cook them first, then add veggies and tofu. You can also use tempeh or seitan for a plant-based option. These choices make the dish filling and fun. Feel free to swap out vegetables in the stir fry. Broccoli, carrots, or mushrooms can bring new flavors. You can even add zucchini or eggplant for a different taste. Just make sure to cut them into small pieces for even cooking. This way, you can use what you have at home. It keeps the dish fresh and exciting. You can adjust the spice level of your stir fry. For a spicy kick, add red pepper flakes or sliced jalapeños. If you prefer it sweeter, add more sweet chili sauce. You can also mix in honey or maple syrup for added sweetness. Play with the flavors until it suits your taste. This way, you can create your perfect dish every time. To store leftover Sweet Chili Tofu Stir Fry, wait for it to cool. Place it in an airtight container. Keep it in the fridge. It will stay fresh for up to three days. I recommend using glass containers for best results. They help keep the flavors intact. To reheat your stir fry, use a skillet or microwave. If using a skillet, add a splash of water. Heat over medium heat until warm. This keeps the tofu from drying out. If you use a microwave, cover the bowl with a lid or damp paper towel. Heat in short bursts, stirring in between. You can freeze Sweet Chili Tofu Stir Fry, but texture may change. To freeze, place the cooled stir fry in a freezer-safe bag. Remove as much air as possible. It can last for up to two months in the freezer. When ready to eat, thaw it in the fridge overnight. Reheat in a skillet for the best taste. For more details, check out the Full Recipe. Yes, you can use different types of tofu. Firm or extra-firm tofu works best. Soft tofu may break apart during cooking. Silken tofu is not ideal for stir-fry. You can serve this dish with rice or quinoa. Steamed jasmine rice is a great option. Noodles also pair well. Add a side salad for extra crunch. This recipe is already vegan! All the ingredients are plant-based. Just ensure your sweet chili sauce is vegan. Some brands add fish sauce, so check the label. Avoid rushing the pressing of the tofu. This step is key for crispiness. Also, do not overcrowd the pan while cooking tofu. This can lead to steaming instead of frying. Lastly, adjust sauce amounts to your taste. Less sauce can keep the dish from being too wet. For a full recipe, check the details above. Sweet Chili Tofu Stir Fry is easy to make and full of flavor. We covered the main ingredients, like tofu and pantry staples, to create this dish. I shared tips for cooking crispy tofu and choosing the best veggies. You can even change it up with different proteins or spice levels. When storing leftovers, you can freeze or reheat them easily. Remember, cooking is fun and creative. Enjoy your Sweet Chili Tofu Stir Fry and share it with others!

Sweet Chili Tofu Stir Fry Flavorful and Simple Dish

Are you ready to spice up your dinner routine? In this article, I’ll show you how to make a delicious

Older posts
Newer posts
← Previous Page1 … Page71 Page72 Page73 … Page84 Next →

dsad

© 2026 easycookingbite • Built with GeneratePress

Our Policies

  • Copyright Policy
  • Cookie Policy
  • GDPR Policy
  • Privacy Policy
  • Disclaimer
  • Terms Of Use

More Information

  • Home
  • About
  • Contact
  • Appetizers
  • Dessert
  • Dinner
  • Drinks
©2026, easycookingbite About Back To Top