Skip to content
DisclaimerTerms Of UseGDPR PolicyCookie Policy

easycookingbite

  • Home
  • Drinks
  • Appetizers
  • Dinner
  • Dessert
  • About
  • Contact
  • Privacy Policy
DisclaimerTerms Of UseGDPR PolicyCookie Policy

NO-ING-IMG

- 2 cups all-purpose flour - 1 cup granulated sugar - 2 teaspoons baking powder - 1/2 teaspoon baking soda - 1/2 teaspoon salt - 1/2 cup unsalted butter, melted - 1 cup plain Greek yogurt - 2 large eggs - 1 teaspoon vanilla extract - Zest of 1 lemon - 1 1/2 cups fresh blueberries (or frozen) - 2 tablespoons coarse sugar for topping These ingredients make the best ever blueberry muffins. Each part plays a role. The flour gives structure, while sugar adds sweetness. Baking powder and baking soda help the muffins rise. Salt enhances flavor, and butter adds richness. Greek yogurt keeps them moist. Eggs bind everything together. Vanilla and lemon zest give a lovely aroma. The blueberries burst with flavor, making each bite special. Coarse sugar on top adds a nice crunch. These muffins are packed with nutrients. They provide energy from carbs and protein from yogurt and eggs. Each muffin has about 200 calories. You get fiber from flour and antioxidants from blueberries. If you need swaps, here are some ideas: - Use whole wheat flour for added fiber. - Swap Greek yogurt for applesauce for a lighter touch. - Replace eggs with flaxseed meal for a vegan option. - Use coconut oil instead of butter for a dairy-free choice. - Try honey instead of sugar for a natural sweetener. These substitutes keep the muffins tasty while catering to different diets. Now, you can enjoy this recipe no matter your needs! For the complete method, check the Full Recipe. 1. Preheat the oven to 375°F (190°C). 2. Prepare the muffin tin with liners or cooking spray. This keeps the muffins from sticking. 1. In a large bowl, combine the dry ingredients: flour, sugar, baking powder, baking soda, and salt. Whisk them together. 2. In another bowl, mix the wet ingredients: melted butter, Greek yogurt, eggs, vanilla extract, and lemon zest. Whisk this until smooth. 3. Gradually add the wet mixture to the dry ingredients. Fold gently until they are just combined. Do not overmix; a few lumps are okay. 4. Gently fold in the blueberries. This helps keep them intact and spread throughout the batter. 1. Fill each muffin cup about 3/4 full with the batter. 2. Sprinkle the coarse sugar on top of each muffin for a sweet crunch. 3. Bake in the oven for 20-25 minutes. Check for doneness by inserting a toothpick into the center. It should come out clean. 4. Let the muffins cool in the tin for 5 minutes. Then, transfer them to a wire rack to cool completely. For the full recipe, check the details above. Enjoy your baking! To get the best texture in your muffins, avoid overmixing the batter. When mixing, just combine the wet and dry ingredients until you see no dry spots. It's fine to have a few lumps. This keeps your muffins light and fluffy. Also, use room temperature ingredients. If your butter and eggs are cold, they won't mix well. Room temperature ingredients blend better and create a smoother batter. For perfect baking, use an oven thermometer. Oven temperatures can be off. A thermometer ensures your oven heats correctly. This helps your muffins rise nicely. Also, rotate the muffin tin halfway through baking. This helps them bake evenly. Hot spots in your oven can cook some muffins faster than others. When serving your muffins, they taste best warm or at room temperature. For a lovely touch, dust them with powdered sugar. Add a few fresh blueberries on top for color. You can also display them in a rustic basket lined with a cloth. This adds charm and makes your muffins look delightful. {{image_2}} You can take your blueberry muffins to a new level with some fun flavors. - Lemon Blueberry Muffins: Add a burst of citrus by mixing in more lemon zest or a splash of lemon juice. The fresh taste brightens the muffins and pairs well with blueberries. - Almond Blueberry Muffins: Swap in almond extract instead of vanilla for a nutty flavor. You can also add sliced almonds on top for extra crunch. If you need to change the recipe, there are great options. - Gluten-free flour options: You can use a gluten-free all-purpose blend. Make sure it has xanthan gum to help with texture. - Vegan substitutes for eggs and dairy: Replace eggs with flax eggs. Mix 1 tablespoon of ground flaxseed with 2.5 tablespoons of water and let it sit for a few minutes. For Greek yogurt, use dairy-free yogurt or applesauce. Different fruits and spices can change the mood of your muffins. - Adding other berries: Feel free to mix in raspberries or blackberries. They add a lovely tartness that complements the sweetness of the blueberries. - Incorporating spices: A pinch of cinnamon or nutmeg adds warmth. These spices work well, especially in fall or winter baking. Explore these variations to make the best ever blueberry muffins truly yours! For the complete recipe, check the [Full Recipe]. To keep your muffins fresh, store them at room temperature. Place them in a sealed container. This helps keep them soft and tasty. If you plan to eat them within a few days, this is the best way. For longer storage, consider the fridge or freezer. In the fridge, they stay fresh for about a week. Just make sure they are in an airtight container. The freezer is great for longer storage. Wrap each muffin in plastic wrap and then put them in a freezer bag. This way, they can last for up to three months. Muffins stored at room temperature last for about 2-3 days. If kept in the fridge, they can last up to a week. If you freeze them, they can be good for three months. Just remember, the sooner you eat them, the better they will taste! To enjoy your muffins warm, reheat them in the oven. Set it to 350°F (175°C). Place the muffins on a baking sheet for about 10 minutes. You can also use the microwave. Heat them for about 15-20 seconds. If you want a crispy top, stick with the oven method. Enjoy your muffins warm for the best taste! For the complete recipe, check out the Full Recipe. This recipe stands out for its perfect balance of flavor and texture. The muffins are soft and fluffy, thanks to the Greek yogurt. The fresh blueberries burst with juice, adding a sweet and tart kick. The lemon zest brightens the taste, making every bite delightful. Plus, the crunchy sugar topping adds a nice contrast. Together, these elements create a muffin that feels special yet easy to make. Yes, you can use frozen blueberries. They work well in this recipe. Just make sure to add them straight from the freezer. Do not thaw them first, as they may become mushy. Frozen berries can even help keep the batter cool, which is a bonus! You can make these muffins healthier with a few tweaks. Try using whole wheat flour instead of all-purpose flour. You can also reduce the sugar by half or use honey or maple syrup. Swapping Greek yogurt for a low-fat version can cut calories without losing creaminess. Adding oats or nuts boosts fiber and healthy fats too. Absolutely! Making mini muffins is a great idea. Just adjust your baking time. Bake them for about 12-15 minutes instead of the full 20-25 minutes. Check for doneness with a toothpick, and enjoy bite-sized treats! To check if your muffins are done, insert a toothpick into the center. If it comes out clean or with a few crumbs, they are ready. The tops should be golden brown, and the muffins should spring back when touched lightly. If they sink in the middle, they need a few more minutes. For the complete recipe for Best Ever Blueberry Muffins, check out the Full Recipe. This will guide you through every step to ensure your muffins turn out perfect! This blog post covered a simple yet delicious blueberry muffin recipe. We explored the key ingredients, step-by-step instructions, and helpful tips. You learned how to achieve the perfect muffin texture and even variations for different tastes. Plus, storage information ensures your muffins stay fresh. In summary, baking blueberry muffins is fun and rewarding. Follow these steps, and enjoy your tasty treats!

Best Ever Blueberry Muffins Simple and Delicious Recipe

Are you ready to create the best blueberry muffins ever? This simple and delicious recipe guarantees tender, fluffy treats packed

To make spicy buffalo cauliflower wings, gather these key ingredients: - 1 medium head of cauliflower, cut into bite-sized florets - 1 cup all-purpose flour (or chickpea flour for gluten-free) - 1 cup almond milk (or any non-dairy milk) - 1 teaspoon garlic powder - 1 teaspoon onion powder - 1 teaspoon smoked paprika - 1/2 teaspoon salt - 1/4 teaspoon black pepper - 1 cup hot buffalo sauce - 2 tablespoons melted vegan butter (optional for extra richness) - Fresh celery sticks, for serving - Ranch or blue cheese dressing, for dipping You can swap some ingredients to fit your needs: - Use chickpea flour for a gluten-free option or a lighter batter. - Substitute almond milk with any non-dairy milk like oat or soy milk. - If you want less heat, choose a mild buffalo sauce or mix in some honey. Enhance your wings with these tasty extras: - Add 1 teaspoon of cayenne pepper for extra heat. - Sprinkle some chopped green onions on top for freshness. - Serve with a side of carrot sticks along with celery for crunch. For the full recipe, check out the detailed instructions above. To start, gather all your ingredients. You need a medium head of cauliflower, flour, almond milk, and spices. I like to use garlic powder, onion powder, smoked paprika, salt, and black pepper. Make sure you have hot buffalo sauce and melted vegan butter ready too. 1. Preheat the Oven: Set your oven to 450°F (230°C). Line a baking sheet with parchment paper. This helps the wings crisp up and prevents sticking. 2. Prepare the Batter: In a mixing bowl, whisk together the flour and almond milk. Add the garlic powder, onion powder, smoked paprika, salt, and pepper. Mix until you get a smooth batter with no lumps. 3. Coat the Cauliflower: Take each cauliflower floret and dip it into the batter. Let any extra batter drip off. Place the coated florets on the baking sheet, leaving space between them. This ensures they bake evenly. 1. Bake the Cauliflower: Place the baking sheet in the oven. Bake for about 20 to 25 minutes. You want the cauliflower to turn golden and slightly crispy. 2. Prepare the Buffalo Sauce: While the cauliflower bakes, mix the hot buffalo sauce with melted vegan butter in a bowl. Stir it well to combine the flavors. 3. Glaze the Wings: After baking, take the cauliflower out of the oven. Toss the baked florets in the buffalo sauce mixture until they are well coated. 4. Final Bake: Put the coated cauliflower wings back in the oven. Bake for an additional 10 to 15 minutes. This will make them crispy and caramelized. Once they are done, remove the wings from the oven. Let them cool for a minute. Then, serve your spicy buffalo cauliflower wings with fresh celery sticks and your favorite dipping sauce. I love ranch or blue cheese dressing for a tasty touch. Enjoy this flavorful treat! For the complete recipe, check out the Full Recipe section. To make the best batter, start with your flour. I use all-purpose flour, but chickpea flour works too. Whisk it with almond milk until smooth. Add garlic powder, onion powder, smoked paprika, salt, and black pepper for flavor. Mix well to avoid lumps. A smooth batter sticks better to the cauliflower. Crispiness is key to great wings. Bake them at a high heat, around 450°F (230°C). Space the cauliflower evenly on the baking sheet. This helps them cook uniformly. After the first bake, coat the wings in buffalo sauce and bake again. This extra step gives them a crunchy outer layer. For serving, arrange the wings on a platter. Add fresh celery sticks for a refreshing crunch. A drizzle of extra buffalo sauce adds visual appeal. Offer ranch or blue cheese dressing for dipping. This combination makes a tasty, fun appetizer. Check the Full Recipe for more details! {{image_2}} You can easily make these wings gluten-free. Instead of all-purpose flour, use chickpea flour. Chickpea flour adds a nice nutty flavor and is packed with protein. Almond milk remains a great choice for a dairy-free option. This way, everyone can enjoy these spicy bites! Buffalo sauce is classic, but you can mix it up. Try a sweet chili sauce for a different kick. Teriyaki sauce gives a nice glaze with sweet and salty vibes. If you like it hot, add sriracha or a spicy garlic sauce. Each sauce brings a unique taste to your wings. Want more flavor? Try adding spices to the batter. You can include cumin or cayenne for heat. Fresh herbs like parsley or cilantro can brighten the dish. For a smoky touch, add liquid smoke to the buffalo sauce. These little tweaks make your wings stand out even more! For a full recipe, check out the Spicy Buffalo Cauliflower Wings 🥦 details above. After enjoying your spicy buffalo cauliflower wings, let them cool. Place any leftovers in an airtight container. Store the container in the fridge for up to three days. This keeps the wings fresh and tasty for your next snack or meal. To reheat your wings, use an oven for the best results. Preheat the oven to 350°F (175°C). Spread the wings on a baking sheet lined with parchment paper. Heat for about 10-15 minutes until they are warm and crispy again. You can also use an air fryer for quicker reheating. Just place them in the air fryer basket and cook at 350°F for 5-7 minutes. If you want to save your wings for later, freezing is a great option. First, let the wings cool completely. Lay them out in a single layer on a baking sheet and freeze for about an hour. Once frozen, transfer them to a freezer-safe bag. This method prevents them from sticking together. You can freeze them for up to three months. When ready to eat, thaw in the fridge overnight before reheating. You can make these wings without flour by using chickpea flour. Chickpea flour gives a similar texture and taste. Just mix it with the same amount of almond milk and spices. The process stays the same for coating the cauliflower. This option is gluten-free and also packed with protein. Feel free to experiment with different spices to suit your taste. Yes, meal prepping these wings is easy and fun. You can prepare the batter and coat the cauliflower ahead of time. Store the coated florets in the fridge for up to 24 hours. When you're ready to eat, bake them as directed. You can also make a big batch and store leftovers in the fridge for quick meals later. Just reheat them in the oven for the best crisp. These wings pair well with several sides. Fresh celery sticks add a nice crunch. You can also serve them with carrot sticks. For dipping, ranch or blue cheese dressing works great. If you want something more, consider a side salad or guacamole. These options balance the heat and add freshness to your meal. For the full recipe, check out the details above! This blog post has covered everything about Spicy Buffalo Cauliflower Wings. We discussed key ingredients, step-by-step instructions, and useful tips. You learned about variations and storage options too. With these insights, you can make a tasty dish that suits your needs. Don't be afraid to experiment with flavors or sauces. Enjoy your cooking journey and impress your friends with these delicious wings!

Spicy Buffalo Cauliflower Wings Crispy and Flavorful Treat

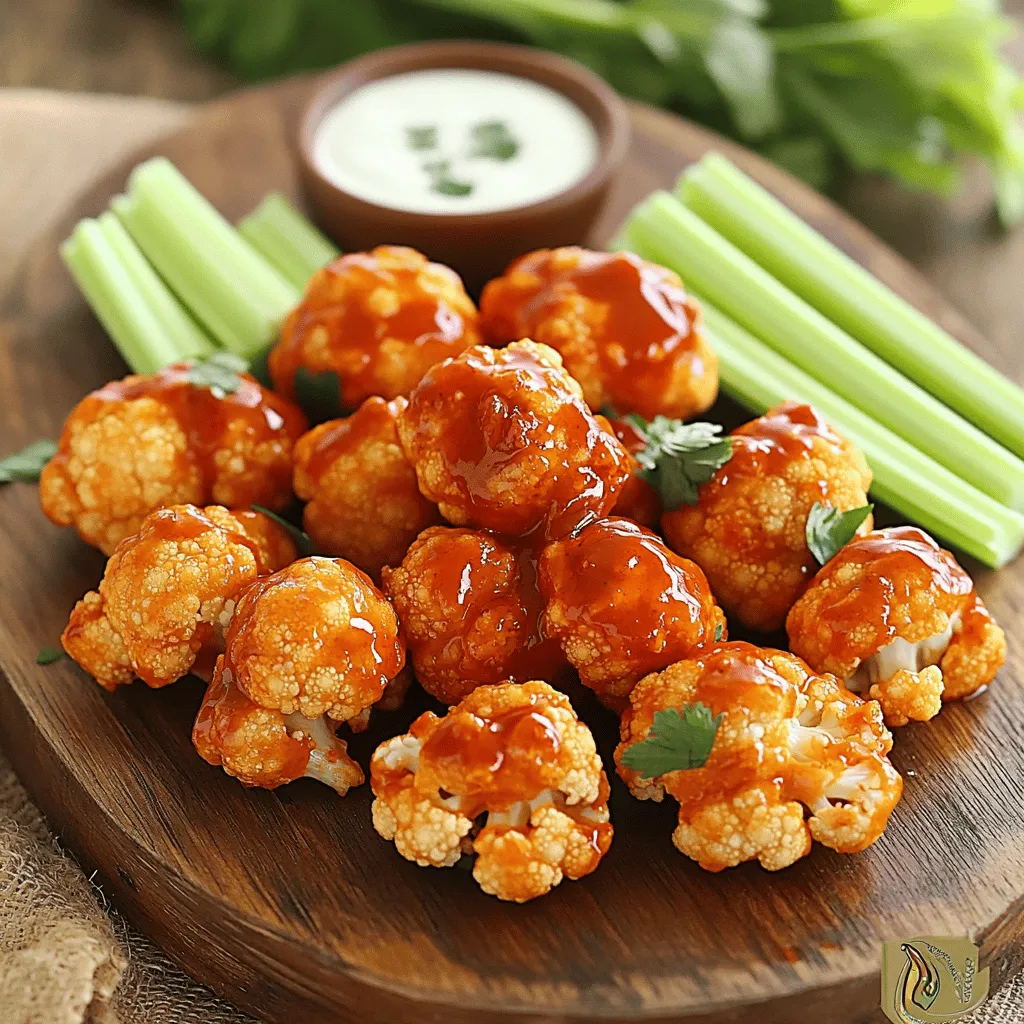
Craving a tasty snack that packs a punch? Look no further than my Spicy Buffalo Cauliflower Wings! They are crispy,

To make easy chicken enchiladas, gather these tasty items: - 2 cups shredded cooked chicken - 1 cup enchilada sauce (store-bought or homemade) - 1 cup grated cheese (cheddar or Mexican blend) - 8 small corn tortillas - 1/2 cup black beans, rinsed and drained - 1/2 cup corn (frozen or canned) - 1 small onion, finely chopped - 2 cloves garlic, minced - 1 teaspoon ground cumin - 1 teaspoon chili powder - Salt and pepper to taste - Fresh cilantro for garnish - Sour cream for serving (optional) This mix of flavors creates a delicious meal. The shredded chicken adds protein and texture. The enchilada sauce brings a kick of flavor. The cheese gives that gooey goodness we all love. Corn tortillas hold everything together and add a soft bite. Black beans and corn add fiber and sweetness. Onions and garlic give depth to the filling. Ground cumin and chili powder spice things up. Remember to season with salt and pepper to taste. Garnish with cilantro for a fresh touch and sour cream for creaminess. For the full recipe, check the details above. Set your oven to 375°F (190°C). Preheating is key. It ensures the enchiladas cook evenly. This step helps develop great flavors. In a large bowl, mix these ingredients well: - 2 cups shredded cooked chicken - 1/2 cup black beans, rinsed and drained - 1/2 cup corn (frozen or canned) - 1 cup enchilada sauce (reserve some for later) - 1 small onion, finely chopped - 2 cloves garlic, minced - 1 teaspoon ground cumin - 1 teaspoon chili powder - Salt and pepper to taste Make sure all the ingredients blend together. This gives each bite great taste. Warm the corn tortillas. You can use a dry skillet or microwave for about 20 seconds. This makes them soft and easy to roll. Take one tortilla and spoon about 2-3 tablespoons of the filling in the center. Roll it tightly and place it seam-side down in a baking dish. Repeat this for all tortillas. Pour the remaining enchilada sauce over the rolled enchiladas. Spread it evenly. Then, sprinkle the remaining cheese on top. You can use cheddar or a Mexican blend for extra flavor. Cover the baking dish with aluminum foil. Bake for 20 minutes. After that, remove the foil and bake for another 10 minutes. This helps the cheese melt and get bubbly. Once they are done, let them sit for a few minutes. This helps the flavors settle. Garnish with fresh cilantro. You can also add sour cream if you like. Enjoy your easy chicken enchiladas! For the full recipe, check the detailed instructions above. To make great enchiladas, avoid sogginess. Use just enough sauce to coat the tortillas. Too much sauce makes them mushy. Also, warm the tortillas before filling. This makes them soft and easy to roll. When it comes to cheese, cheddar is a classic choice. It melts well and gives a rich flavor. A Mexican blend adds a nice twist with its variety. You can mix both for a cheesy treat! You can save time with a few easy tricks. Chop your onion and garlic the night before. This way, you're ready to go. Another tip is to prep a big batch of filling. You can store it in the fridge for later use. If you want to make meals for the week, consider batch cooking. Make extra enchiladas and freeze them. They reheat well and taste just as good. Enchiladas pair well with many side dishes. Black beans and rice are popular options. A fresh green salad adds crunch and color. Toppings can add flair to your meal. Try adding diced avocado or fresh salsa. A sprinkle of lime juice also boosts flavor. You can make each plate unique with these fun toppings. {{image_2}} You can swap out the chicken for other meats. Ground beef is a great choice. It gives a hearty flavor. Cook it with spices before mixing. Turkey works too. It’s lean and still tasty. For a vegetarian dish, use black beans or lentils. They add protein and texture. You can also use sautéed vegetables like bell peppers and zucchini. Making your own sauce is easy. Blend tomatoes, onion, garlic, and spices for a fresh taste. You can also add chili peppers for heat. If you like it spicy, grab some hot sauce or chipotle peppers in adobo. They pack a punch! A creamy sauce made with sour cream or cream cheese is another option. It adds richness to your enchiladas. Choosing the right tortilla matters. Corn tortillas are traditional. They have a nice flavor. If you prefer flour tortillas, they work too. They are softer and easier to roll. For a low-carb choice, use lettuce leaves or cauliflower tortillas. They are light and still hold the filling well. Each option brings a different twist to your enchiladas. To store your enchiladas, let them cool first. Place them in an airtight container. This keeps them fresh and tasty. You can refrigerate them for up to 3 days. If you want them to last longer, freeze them. Wrap each enchilada in plastic wrap and then in foil. This prevents freezer burn and keeps them safe for up to 3 months. When you are ready to eat, you have two good options for reheating. You can use the oven or the microwave. - Oven Method: Preheat your oven to 350°F (175°C). Place the enchiladas in a baking dish. Cover with foil to keep them moist. Heat for about 20 minutes or until warm. - Microwave Method: Place one or two enchiladas on a microwave-safe plate. Cover with a damp paper towel. Heat on high for 1-2 minutes. Check to make sure they are hot all the way through. Using the oven keeps the texture nice, while the microwave is quicker. Leftovers can last in the fridge for about 3 days. After this, they may spoil. Check for changes in smell or color. If they look or smell off, it’s best to throw them away. For frozen enchiladas, they can be kept for 3 months. After that, they may lose flavor and texture. Always trust your senses when deciding if food is safe to eat. You can make enchiladas ahead in a few easy steps. First, prepare the filling as stated in the Full Recipe. Next, fill and roll the tortillas. Place them in a baking dish. Instead of baking right away, cover and chill them in the fridge. When you’re ready to eat, pour the sauce on top and bake. This method saves time and keeps your meal fresh. Yes, using rotisserie chicken is a great idea! It cuts down on prep time. The chicken is already cooked and seasoned, adding flavor to your enchiladas. Just shred the chicken and mix it with the other filling ingredients. This option is quick and very tasty. Chicken enchiladas pair well with several sides. Popular choices include: - Mexican rice - Refried beans - A fresh green salad - Guacamole or salsa - Corn on the cob These sides complement the flavors and round out the meal nicely. Absolutely! You can use gluten-free tortillas for this recipe. Many brands offer corn or almond flour tortillas that are gluten-free. Check the labels to ensure they are certified gluten-free. This way, everyone can enjoy the dish without worry. To add heat to your enchiladas, you have a few options. You can mix diced jalapeños or other hot peppers into the filling. Another method is to use a spicier enchilada sauce. You can also add extra chili powder to the filling. Adjust the spice level to your liking while cooking. You learned how to make easy and tasty chicken enchiladas in this guide. We covered the best ingredients, step-by-step instructions, and helpful tips for the perfect dish. Variations allow you to customize enchiladas to your taste. Storing leftovers is simple, and reheating keeps them delicious. With my advice, you can impress family and friends with great flavor. Enjoy every bite and make these enchiladas your own!

Easy Chicken Enchiladas Quick and Flavorful Recipe

Are you ready to create Easy Chicken Enchiladas that burst with flavor in every bite? This quick and tasty recipe

For the perfect mini peach galettes, you need these simple ingredients: - 1 ½ cups all-purpose flour - ½ teaspoon salt - 1 tablespoon granulated sugar - ½ cup unsalted butter, cold and cubed - 4-6 tablespoons ice water - 2 ripe peaches, sliced - 1 tablespoon lemon juice - 2 tablespoons brown sugar - 1 teaspoon cinnamon - 1 egg, beaten (for egg wash) - Granulated sugar for sprinkling Each ingredient plays a key role. The flour forms the base, while the butter keeps the crust flaky. Salt and sugar balance flavors. Peaches add sweetness, and the lemon juice brightens the taste. Brown sugar and cinnamon give warmth to the filling. Lastly, the egg wash makes the galettes shine. Gather these ingredients before you start. It makes the process smooth and fun. Plus, it’s a great way to prepare for a delightful treat. If you want the full recipe with detailed steps, check out the link to the [Full Recipe]. - In a mixing bowl, combine 1 ½ cups all-purpose flour, ½ teaspoon salt, and 1 tablespoon granulated sugar. - Cut in ½ cup cold, cubed unsalted butter. Use a pastry cutter or your fingers until the mix looks like coarse crumbs. - Add 4-6 tablespoons of ice water, one tablespoon at a time. Mix with a fork until the dough begins to hold together. - Prepare your peach filling by tossing 2 sliced ripe peaches with 1 tablespoon lemon juice, 2 tablespoons brown sugar, and 1 teaspoon cinnamon. Set aside. - On a floured surface, roll out the chilled dough until it’s about ¼ inch thick. Cut it into 4-6 equal circles. - Transfer the dough circles to a baking sheet. Spoon the peach mixture into the center of each circle, leaving a border. Fold the edges over the filling, creating a rustic look. - Preheat your oven to 375°F (190°C). Brush the edges of the galettes with 1 beaten egg. Sprinkle a little granulated sugar on top for sweetness and shine. - Bake for 25-30 minutes until golden and bubbly. Let them cool slightly before serving. Enjoy your mini peach galettes! For the full recipe, check the ingredients above. To make the best mini peach galettes, use cold ingredients. Cold butter helps create layers in your pastry. Your dough will flake better when it bakes. Mix the butter with the flour quickly. You want it to look like coarse crumbs. Avoid over-mixing; a few lumps are okay. Choosing the right peaches is key. Look for ripe, slightly soft peaches. They should smell sweet and fragrant. Adjust the sweetness to your taste. You can add more brown sugar if you like it sweeter. A pinch of cinnamon enhances the peach flavor too. Experiment with spices like nutmeg for a twist. Serve your galettes warm for the best taste. They look lovely on a rustic wooden board. Dust them with powdered sugar for a sweet touch. You can also add a dollop of whipped cream. Fresh mint leaves can brighten the plate. These small details make your dessert shine. For the full recipe, check out the details above. {{image_2}} You can use many fruits for your galettes. Try berries like blueberries, raspberries, or blackberries. Apples also work well, especially with a dash of cinnamon. For a tropical twist, use mangoes or pineapples. Each fruit brings its own taste, so mix and match to find your favorite. Adding nuts can give your galettes a nice crunch. Chopped almonds or walnuts pair well with peaches. You can also add a splash of vanilla extract for a warm flavor. If you want something fresh, try adding herbs like basil or mint. These can give your dessert a unique twist. If you need gluten-free options, swap the all-purpose flour for a gluten-free blend. Many brands make good substitutes that work in baking. For a vegan option, replace the butter with coconut oil or a vegan butter. Use plant-based milk for the egg wash, or skip it altogether. You can still create a tasty treat while meeting dietary needs. For the full recipe, click here to start your mini peach galettes journey! To keep your mini peach galettes fresh, store them in an airtight container. This helps prevent moisture loss and keeps the crust crisp. Place a paper towel inside the container. It soaks up excess moisture, keeping the galettes better for longer. They last about 2-3 days in the fridge. If you do not eat them quickly, freezing is a great option. You can freeze mini peach galettes before or after baking. To freeze before baking, assemble the galettes but do not brush with egg wash. Place them on a baking sheet and freeze until solid. Then, wrap them in plastic wrap and put them in a freezer bag. They can last up to three months this way. To freeze after baking, let them cool completely first. Then, wrap and store them similarly. When you want to reheat them, bake from frozen. For unbaked galettes, bake at 375°F (190°C) for about 30-35 minutes. For baked galettes, reheat them at the same temperature for 15-20 minutes. This restores their flaky texture. After storing, you want to bring back the crispness. If they feel soft, just pop them in the oven for a few minutes. This warms them and makes the crust crispy again. Serve them warm or at room temperature. A scoop of vanilla ice cream pairs well with these sweet treats. Enjoy your delicious mini peach galettes! For the full recipe, check earlier sections. You can prepare mini peach galettes in advance. Here are some tips: - Make the dough: Prepare the dough and wrap it tightly in plastic wrap. Chill it in the fridge. You can make it up to two days ahead. - Prepare the filling: Slice the peaches and mix them with lemon juice, brown sugar, and cinnamon. Store this in an airtight container in the fridge for up to two days. - Assemble before baking: You can roll out the dough and place the filling just before baking. This keeps the crust fresh and flaky. Yes, you can use frozen peaches! Here’s what you should know: - Thawing: Thaw the peaches in the fridge overnight. Drain any excess liquid to avoid a soggy galette. - Flavor: Frozen peaches may be softer than fresh ones. This can change the texture but not the taste. - Sweetness: Check the sweetness of frozen peaches. You may need less sugar if they are sweeter than fresh peaches. Reheating mini peach galettes is simple. Follow these techniques: - Oven method: Preheat your oven to 350°F (175°C). Place the galettes on a baking sheet and warm them for about 10-15 minutes. This keeps the crust crispy. - Microwave method: If you’re in a hurry, you can use the microwave. Heat for 20-30 seconds, but the crust may get soft. - Check temperature: Ensure they are warm throughout before serving. Enjoy your delightful mini peach galettes! For the full recipe, click here: [Full Recipe]. You now have a complete guide to making mini peach galettes. We covered ingredients, step-by-step instructions, tips for success, and fun variations. I shared how to store and reheat them too. Remember, using cold ingredients helps achieve a flaky crust. Experiment with different fruits and flavors to make it your own. Enjoy your baking journey, and don’t hesitate to share your successes! Your kitchen creations will surely impress family and friends. Happy baking!

Mini Peach Galettes Delightful and Easy Dessert Recipe

Ready for a dessert that’s as simple as it is yummy? Mini Peach Galettes are here to impress! With just

- 4 medium cucumbers, thinly sliced - 1 garlic clove, peeled and smashed - Fresh dill sprigs for garnish - 1 cup white vinegar - 1 cup water - 2 tablespoons sugar - 1 tablespoon salt - 1 teaspoon mustard seeds - 1 teaspoon dill seeds - 1/2 teaspoon red pepper flakes (optional) - Large glass jar or bowl - Medium saucepan - Mandoline or sharp knife Gather these ingredients for your crunchy treat. Fresh cucumbers are key to a crisp bite. The garlic and dill add great flavor. The pickling liquid combines vinegar, water, sugar, salt, and spices. This mix brings out the best in your cucumbers. You will need a large jar or bowl to hold the cucumbers. A medium saucepan helps to heat the pickling liquid. A mandoline or sharp knife will ensure your slices are thin and even. This simple recipe makes it easy for you to enjoy quick pickled cucumbers. You can find the full recipe here. - Wash and trim the cucumbers. - Slice cucumbers thinly using a mandoline or knife. Start by washing your cucumbers under cool water. Make sure to scrub off any dirt. Next, trim both ends of each cucumber. This step helps them absorb the pickling liquid better. I prefer to slice my cucumbers thin, about a quarter-inch thick. You can use a mandoline for even slices or a sharp knife. Thin slices give you that great crunch, which is key in quick pickles. Once sliced, place the cucumbers in a large glass jar or bowl. - Combine vinegar, water, sugar, salt, mustard seeds, dill seeds, garlic, and pepper flakes in a saucepan. - Heat and stir until dissolved, then bring to a simmer. Now, let’s make the pickling liquid. In a medium saucepan, mix one cup of white vinegar with one cup of water. Add two tablespoons of sugar and one tablespoon of salt. Toss in one teaspoon each of mustard seeds and dill seeds. You can add a smashed garlic clove and half a teaspoon of red pepper flakes if you like spice. Heat the mixture over medium heat. Stir until everything dissolves, then let it simmer for a few minutes. This step is crucial as it helps blend the flavors. - Pour hot liquid over cucumbers to submerge. - Cool to room temperature and refrigerate for at least 2 hours, preferably overnight. Once your pickling liquid is ready, carefully pour it over the sliced cucumbers. Make sure all the cucumbers are submerged. If they float, you can use a clean weight to press them down. Let the jar sit at room temperature for about 30 minutes. After that, seal it tightly. Store it in the fridge for at least two hours. For the best taste, let them sit overnight. The flavors will deepen, making your pickled cucumbers even more delicious. Enjoy these crunchy bites as a snack or a side dish! For the complete recipe, check the Full Recipe section. To make your quick pickled cucumbers even tastier, add herbs and spices. Try fresh dill, coriander, or thyme. You can also use a pinch of black pepper or mustard seeds for extra zing. For a sweet twist, add a slice of onion or some sliced jalapeños. To achieve the best crunch, choose firm cucumbers. Look for ones that are dark green and avoid those with soft spots. Slicing them thinly also helps, as it allows the pickling liquid to soak in better. You can serve pickled cucumbers in many ways. They make a great side dish with grilled meats or sandwiches. Try adding them to salads for a refreshing crunch. They also pair well with cheeses, like feta or goat cheese. For a fun snack, mix pickled cucumbers with cream cheese on crackers. You can also use them as a topping for tacos or burgers. If your pickles taste too salty, add a bit of sugar to balance the flavor. You can also dilute them with a bit of water to tone down the saltiness. If your cucumbers turn too soft, check your pickling time. Leaving them in the liquid too long can cause this. For a crunchier texture, try using smaller cucumbers or slicing them thicker. Remember to follow the Full Recipe for the best results! {{image_2}} You can change the taste of quick pickled cucumbers easily. If you like sweet, add more sugar. For a savory kick, cut back on the sugar. You can also play with spice levels. Adding red pepper flakes boosts heat. Start with a pinch and adjust to your taste. This way, your pickles can suit any meal or snack. You don't have to stick to cucumbers. Many veggies can be pickled using the same method. Carrots, radishes, and green beans work well. You can make a mixed vegetable pickle too. Just chop your favorite veggies and follow the same steps. This adds variety to your meals and snacks. Different cultures have unique ways to pickle cucumbers. In Asia, they might use rice vinegar and soy sauce for a tangy flavor. In Europe, dill and garlic are popular choices. Each region adds its twist with spices and vinegars. You can try these global flavors in your own kitchen. It’s a fun way to explore new tastes while making quick pickles. For a full recipe, check out the Full Recipe section! To keep your quick pickled cucumbers fresh, store them in the fridge. Use a glass jar with a tight lid. Make sure the cucumbers are fully submerged in the pickling liquid. This keeps them crisp and flavorful. Avoid using metal containers, as they can react with the vinegar. Always use clean utensils when taking cucumbers out. This prevents germs from getting into the jar. Quick pickled cucumbers last about 2 to 4 weeks in the fridge. They taste best when eaten within the first week. After that, the flavor may change. Look for signs of spoilage, like a bad smell or mold. If the cucumbers are slimy or discolored, it’s time to toss them. You can reuse leftover pickling liquid for new batches. Just strain it to remove any bits of cucumber. Then, add fresh cucumbers for another round of pickling. You can also use the liquid to pickle other veggies, like carrots or radishes. It adds great flavor to salads or sandwiches, too. For more ideas, check out the Full Recipe for tips on different veggies to try! Quick pickled cucumbers last about 1 to 2 weeks in the fridge. Store them in a sealed jar to keep them fresh. After this time, they may lose crunch and flavor. Always look for signs of spoilage, like off smells or mold. You can can cucumbers, but it's different from quick pickling. Canning involves sealing jars in a water bath to store them long-term. Quick pickling is for immediate use. Canned pickles last for months, while quick pickles are best eaten fresh. The best cucumbers for pickling are Kirby cucumbers. They have a thick skin and a crisp texture. Persian cucumbers are also great. They are smaller and sweeter. Avoid regular salad cucumbers as they can be too watery. This article covered how to make quick pickled cucumbers. We explored fresh ingredients, including cucumbers and spices. The process involved preparing the vegetables and making a flavorful pickling liquid. I shared tips for enhancing flavor and serving ideas. Pickling is simple and fun, and you can try many variations. Enjoy your pickles as a tasty side or snack. With practice, you'll master your own unique recipes. Happy pickling!

Quick Pickled Cucumbers Simple and Crunchy Delight

Want a crunchy, tangy snack that’s super easy to make? Quick pickled cucumbers are your answer! In just a few

- 4 cups all-purpose flour - 1 packet (2 ¼ teaspoons) instant yeast - ½ cup granulated sugar - 1 teaspoon salt - 1 cup whole milk, warmed - ⅓ cup unsalted butter, melted - 2 large eggs - 2 teaspoons vanilla extract - ½ cup brown sugar, packed - 2 tablespoons ground cinnamon - ⅓ cup unsalted butter, softened (for filling) - 1 cup powdered sugar (for icing) - 2 tablespoons milk (for icing) Selecting the best flour Use high-quality all-purpose flour to get the best texture. It helps the rolls rise well. Importance of fresh yeast Always check the expiration date on the yeast packet. Fresh yeast works better, giving you fluffier rolls. Substitutions for dietary restrictions If you need a gluten-free option, try a gluten-free flour blend. For vegan rolls, use plant-based milk and egg substitutes like flaxseed. To start, you need to mix the dry ingredients. In a large bowl, combine: - 4 cups all-purpose flour - 1 packet (2 ¼ teaspoons) instant yeast - ½ cup granulated sugar - 1 teaspoon salt Mix these well to ensure even distribution. Next, you will combine the wet ingredients. In another bowl, whisk together: - 1 cup whole milk, warmed - ⅓ cup unsalted butter, melted - 2 large eggs - 2 teaspoons vanilla extract Once smooth, pour this mixture into the dry ingredients. Stir until a shaggy dough forms. Now it’s time to knead the dough. On a floured surface, knead for about 5 to 7 minutes. You want the dough to be smooth and elastic. After kneading, place the dough in a greased bowl. Cover it with a clean towel and let it rise in a warm spot for about 1 hour. It should double in size. For the first rise, you can use simple techniques. Make sure your kitchen is warm. If it’s cool, place the bowl near a warm oven or on a sunny windowsill. This warmth helps the dough grow. Temperature and time are key. A warm environment speeds up the yeast action. If you let it rise too long, the dough may collapse. So, keep an eye on it and wait until it doubles. Once your dough has risen, punch it down gently. Roll it out into a rectangle, about 16 by 12 inches, on a floured surface. Now, add the filling. Spread ⅓ cup softened unsalted butter evenly over the dough. Then, sprinkle the brown sugar and cinnamon mixture on top. Next, start from the long edge and roll the dough tightly into a log. Pinch the seam to seal it well. Cut the log into 12 equal slices. Place these slices in a greased 9x13 inch baking pan. Make sure to leave space for them to rise. Cover the rolls with a towel and let them rise again for about 30 minutes. This second rise is important for fluffy rolls. Preheat your oven to 350°F (175°C). Bake the rolls for 20 to 25 minutes. You want them to be golden brown on top. To check doneness, look for a nice golden color. You can also tap the bottom of a roll. If it sounds hollow, it’s ready. Once baked, remove the rolls from the oven. Drizzle icing over them while they are still warm. This makes them extra special. To avoid a sticky dough, use enough flour when kneading. If the dough sticks to your hands, sprinkle a little flour on your hands. Keep working until the dough feels smooth and elastic. For perfect kneading, push the dough away with the heel of your hand. Fold it back toward you and give it a quarter turn. Repeat this process for about 5 to 7 minutes. This builds a strong gluten structure, making your rolls fluffy. To make the perfect icing consistency, start with powdered sugar and add milk slowly. Aim for a thick yet pourable texture. If it’s too runny, add more powdered sugar. For a thicker icing, add less milk. Try flavored icing by adding vanilla extract or even almond extract. You can also mix in cocoa powder for chocolate icing, or citrus zest for a fresh twist. If your dough doesn't rise, check the temperature of your environment. Yeast needs warmth to thrive. You can place the dough near a warm oven or in a sunny spot. If the yeast is old, it may not work. Always use fresh yeast for best results. If your rolls turn out overly dry, consider adding more butter during the filling step. You can also brush them with melted butter right after baking. This helps keep them moist and adds flavor. {{image_2}} To make gluten-free cinnamon rolls, you can use alternative flours. Choose a mix of almond flour and coconut flour. This mix gives a great texture. You can also use gluten-free all-purpose flour. Make sure it contains xanthan gum for best results. For vegan cinnamon rolls, substitute eggs with flaxseed meal. Mix one tablespoon of flaxseed with three tablespoons of water. Let it sit until thick. For dairy, use almond milk or oat milk. Replace butter with coconut oil or vegan butter. These swaps keep the flavor rich and tasty. You can add nuts or fruit to the filling. Walnuts or pecans give a nice crunch. Dried fruits like raisins or cranberries add sweetness. Try different spices for an alternative taste. Cardamom or nutmeg can change the flavor profile. Mixing in some cocoa powder can create a chocolate twist. For a full recipe, check out the heavenly cinnamon swirls above. To keep your cinnamon rolls fresh, store them in an airtight container. This method works well for up to three days at room temperature. If you live in a humid area, place a paper towel inside the container. The towel will absorb excess moisture and help maintain their softness. For long-term storage, freeze your cinnamon rolls. First, let them cool completely. Wrap each roll tightly in plastic wrap. Then, place the wrapped rolls in a freezer-safe bag. They can last up to three months in the freezer. When you're ready to enjoy, just take out the desired number of rolls. To reheat your cinnamon rolls, the oven is the best method. Preheat it to 350°F (175°C). Place the rolls in a baking dish and cover with aluminum foil. Heat for about 10 to 15 minutes until warm. This method helps keep them moist. You can also use the microwave for a quick reheat. Place one roll on a microwave-safe plate. Cover it with a damp paper towel. Heat for about 15-20 seconds. This method is fast but can dry out the rolls if heated too long. Enjoy your delicious cinnamon rolls warm! Yes, you can make cinnamon rolls the night before. To do this, prepare the dough and let it rise. Once it has doubled in size, shape the rolls and place them in the baking pan. Cover the pan tightly with plastic wrap and store it in the fridge. In the morning, remove the rolls from the fridge and let them rise for about 30 minutes before baking. This way, you can enjoy fresh rolls without the morning rush! You can tell when cinnamon rolls are done by checking their golden brown color. They should be firm to the touch but not hard. If you tap the top lightly, it should sound hollow. You can also use a toothpick. If it comes out clean with no dough sticking, your rolls are perfect! Serve cinnamon rolls warm for the best taste. Place them on a large platter. Drizzle icing over each roll for a sweet touch. You can add a sprinkle of cinnamon or some fresh berries for color. For a fun twist, set out a jug of extra icing for drizzling! Yes, you can freeze the dough for later use. After mixing and kneading, place the dough in a greased bowl. Cover it tightly with plastic wrap and then with aluminum foil. You can freeze it for up to 3 months. When ready to use, thaw it in the fridge overnight. Let it rise before shaping the rolls. If you don’t have powdered sugar, there are alternatives. You can use cream cheese mixed with a bit of milk and vanilla for a rich frosting. Another option is to make a glaze with honey or maple syrup. Just mix it with a little milk until you reach your desired consistency. These alternatives add unique flavors to your cinnamon rolls! Making cinnamon rolls can be fun and rewarding. You learned about the key ingredients, from flour to cinnamon, and their roles. I shared step-by-step instructions to help you succeed. Tips for dough, icing, and troubleshooting will guide you. Plus, you discovered tasty variations for different diets. Remember, baking is an art. Enjoy the process and share your rolls with friends or family! Happy baking!

Homemade Cinnamon Rolls Easy and Delightful Recipe

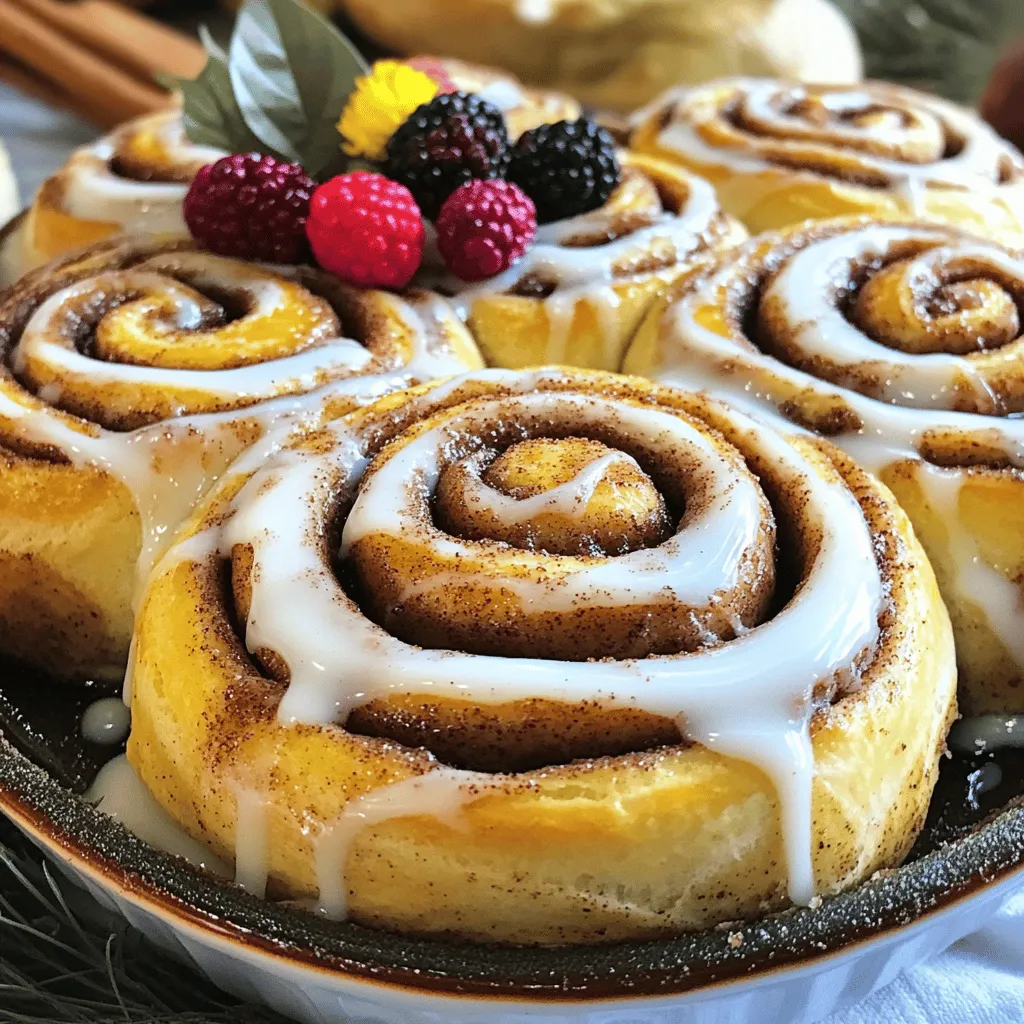
Homemade cinnamon rolls can be your new favorite treat! With just a few simple ingredients, you can create warm, gooey

To make the Savory Southwest Chicken Skillet, gather these ingredients: - 2 tablespoons olive oil - 1 pound boneless, skinless chicken breast, diced - 1 teaspoon smoked paprika - 1 teaspoon chili powder - ½ teaspoon cumin - ½ teaspoon garlic powder - ½ teaspoon onion powder - Salt and pepper to taste - 1 cup bell peppers (red, green, and yellow), sliced - 1 small red onion, sliced - 1 cup corn kernels (fresh or frozen) - 1 can (14.5 oz) diced tomatoes with green chilies - 1 cup black beans, drained and rinsed - 1 cup shredded cheese (cheddar or Mexican blend) - Fresh cilantro, chopped (for garnish) - Avocado slices (for serving) When choosing fresh ingredients, look for bright colors. For bell peppers, choose firm ones with no soft spots. The chicken should feel moist but not slippery. Opt for whole, canned tomatoes that are intact. Check the corn for a sweet smell and bright color if using fresh. Lastly, for herbs like cilantro, select bunches that smell fresh and look vibrant. If you have allergies, you can swap some ingredients. Use olive oil for canola or avocado oil. For dairy-free options, skip the cheese or use a plant-based substitute. If you're avoiding beans, try adding more veggies like zucchini or mushrooms. For a gluten-free meal, ensure your spices and canned goods contain no gluten. These substitutions keep the meal tasty while meeting your needs. You can find the full recipe above. To start, gather all your ingredients. This will make cooking easy and fun. Here’s what you need: - 2 tablespoons olive oil - 1 pound boneless, skinless chicken breast, diced - 1 teaspoon smoked paprika - 1 teaspoon chili powder - ½ teaspoon cumin - ½ teaspoon garlic powder - ½ teaspoon onion powder - Salt and pepper to taste - 1 cup bell peppers (red, green, and yellow), sliced - 1 small red onion, sliced - 1 cup corn kernels (fresh or frozen) - 1 can (14.5 oz) diced tomatoes with green chilies - 1 cup black beans, drained and rinsed - 1 cup shredded cheese (cheddar or Mexican blend) - Fresh cilantro, chopped (for garnish) - Avocado slices (for serving) First, heat your olive oil in a large skillet over medium-high heat. This helps to get that nice flavor going. Next, add the diced chicken and season it with smoked paprika, chili powder, cumin, garlic powder, onion powder, salt, and pepper. Cook this for about 5 to 7 minutes. You want the chicken to be cooked through and nice and brown. Now, stir in the sliced bell peppers and red onion. Sauté these for another 3 to 4 minutes. You want the veggies to be tender but still colorful. Then, add in the corn, diced tomatoes (with their juices), and black beans. Mix everything well and let it simmer for about 5 minutes. This is when all those flavors come together. Finally, sprinkle the shredded cheese on top of the chicken and veggies. Cover the skillet and cook for another 2 to 3 minutes. You want the cheese to melt and get bubbly. Remove from heat and garnish with fresh cilantro. Serve warm with avocado slices on the side. You can find the Full Recipe for more details. When cooking, I like to use high heat. This helps to brown the chicken. Browning adds depth to the taste. Also, using fresh spices can really lift the dish. Don’t be shy with the spices; they make the meal pop! If you want more flavor, try marinating the chicken for an hour before cooking. A simple mix of olive oil, lime juice, and spices works well. To get juicy chicken, cut it into even pieces. This helps it cook evenly. Always check the chicken with a meat thermometer. It should reach 165°F to be safe. If you overcook it, the chicken can get dry. Let the chicken rest for a few minutes before serving. This keeps the juices in. Remember, practice makes perfect! To save time, prep your ingredients first. Chop your veggies and meat ahead. You can even do this a day before. Store them in the fridge, ready to go. This helps you cook faster when it's time to eat. Also, use pre-diced chicken from the store if you're in a hurry. It cuts down on prep time. If you like heat, add more chili powder. For a smoky flavor, increase the smoked paprika. Don't be shy to taste while cooking. This way, you can find the right balance for your palate. If you want a milder dish, reduce the spices. You can also add a squeeze of lime juice at the end for extra brightness. Serve your Southwest Chicken Skillet on a bed of rice or with warm tortillas. This adds more texture and makes it more filling. Top it with avocado slices for creaminess. You can also add a dollop of sour cream or Greek yogurt for a tangy touch. Fresh cilantro not only looks great but adds more flavor. For a side, consider a simple green salad to round out the meal. For the full recipe, check out the detailed instructions above. {{image_2}} If you want a meatless dish, swap the chicken for firm tofu or chickpeas. Tofu gives a nice texture and absorbs flavors well. Simply dice the tofu and cook it just like the chicken. Chickpeas can be added directly to the skillet, adding protein and fiber. This twist keeps the dish hearty and satisfying. For a seafood twist, add shrimp instead of chicken. Cook the shrimp for around 3-4 minutes until pink. If you prefer beef, use ground beef or thinly sliced steak. Sauté the beef until browned, then follow the same steps in the recipe. Both options give the dish a new flavor profile. Seasonal veggies can boost flavor and nutrition. In the spring, toss in asparagus or zucchini. In the fall, add sweet potatoes or butternut squash. Each season brings fresh produce, allowing you to adjust the skillet to your taste. Feel free to mix and match your favorite vegetables. This keeps the dish exciting and fresh. To keep your Southwest Chicken Skillet fresh, let it cool first. Store it in an airtight container. Make sure to separate any toppings, like avocado or cheese, to keep them fresh. Place the container in the fridge. Use the leftovers within three days for the best taste. When you’re ready to enjoy your leftovers, reheat them on the stove. Use a medium heat setting. Add a splash of water to keep it moist. Stir it often until it’s hot. You can also use a microwave. Heat in short bursts, stirring in between, to ensure even heating. If you want to save it for later, freezing is a great option. First, cool the dish completely. Then, place it in a freezer-safe container. Make sure to seal it well. This dish can last up to three months in the freezer. To enjoy, thaw it in the fridge overnight before reheating. Southwest Chicken Skillet draws inspiration from the bold flavors of the American Southwest. This region features a mix of Native American, Mexican, and cowboy cooking styles. You find spices like chili powder, cumin, and smoked paprika, which create a warm and hearty taste. The use of fresh veggies, beans, and cheese adds a colorful, vibrant touch to this dish. Yes, you can prepare Southwest Chicken Skillet ahead of time. Cook it fully and let it cool. Store it in an airtight container. It keeps well in the fridge for up to three days. When ready to eat, heat it on the stove or microwave until warm. This method saves time and gives you a quick meal later. To serve more people, simply double the recipe. Use a larger skillet or pot. Make sure to adjust cooking times as you add more food. Cook the chicken in batches if your skillet is not big enough. This way, it cooks evenly and stays juicy. You can also serve extra sides to fill hungry bellies. Pair Southwest Chicken Skillet with simple sides. Rice or quinoa works great. You can also serve it with a fresh salad. Cornbread or tortilla chips add a nice crunch. For a healthy touch, try avocado slices or a dollop of sour cream. These options balance the meal well and enhance the flavor. This blog post explored the Southwest Chicken Skillet, from fresh ingredient choices to tasty cooking tips. I shared methods for perfect chicken, time-saving hacks, and exciting variations to try. Remember, good meals start with high-quality ingredients. Use the tips on storage and reheating to enjoy leftovers. With these insights, you can confidently create your own delicious skillet dish. I hope you feel inspired to get cooking!

Savory Southwest Chicken Skillet Quick and Easy Meal

Looking for a quick and tasty meal? This Savory Southwest Chicken Skillet is here to save your dinner time! Packed

- 1 can (21 oz) apple pie filling - 1 cup caramel sauce (store-bought or homemade) - 1 box (15.25 oz) yellow cake mix - 1/2 cup unsalted butter, melted - 1 teaspoon ground cinnamon - 1/2 cup chopped pecans (optional) - Vanilla ice cream (for serving, optional) The main ingredients for a caramel apple dump cake are simple and easy to find. First, we start with a can of apple pie filling. This gives our cake a sweet and fruity base. Next, we add caramel sauce. You can use store-bought or make your own if you want to impress your friends. The yellow cake mix is key to giving the dessert its fluffy texture. The butter adds richness and helps create a crunchy top. A sprinkle of ground cinnamon adds warmth and spice. If you love nuts, you can toss in chopped pecans for a nice crunch. Finally, vanilla ice cream makes a great topping when you serve it. - Creative toppings for enhancement - Alternate cake mix flavors If you want to get creative, you can add toppings. Think about crushed cookies or extra caramel drizzle. You can also switch the cake mix flavor. Try chocolate cake mix for a twist. The options are endless, and that makes this dessert even more fun! You can find the full recipe to guide you through these tasty choices. First, preheat your oven to 350°F (175°C). Next, grab a 9x13 inch baking dish and lightly grease it. This will help the cake not stick. Now, spread the apple pie filling evenly across the bottom of the dish. It should cover the base well. Then, drizzle half of the caramel sauce over the apple filling. Make sure to cover as much as you can. This adds a rich flavor. In a bowl, mix the yellow cake mix with the ground cinnamon. This will give the cake a warm spice flavor. After mixing, sprinkle the cake mix evenly over the caramel apple layer. Now, pour the melted butter over the top of the cake mix. Do not stir it; the butter will create a crust while baking. If you want, sprinkle chopped pecans over the butter layer for a nice crunch. Bake the cake in the preheated oven for 40-45 minutes. It is ready when the top is golden brown and the edges bubble. Once the cake is done, take it out and let it cool for a few minutes. This helps with cutting and serving. For a special touch, drizzle the remaining caramel sauce over each portion when serving. If you like, add a scoop of vanilla ice cream on the side. This makes the dessert even more delightful. For the full recipe, check out the details provided above. To ensure even baking, spread the apple pie filling flat. This helps it cook well. Cover the filling with caramel sauce carefully. The cake mix needs to be even too. When pouring melted butter, do not mix it in. This creates a nice crust as it bakes. For a crispy topping, check it near the end. If it's not golden, bake a bit longer. You can change ingredients for special diets. Use gluten-free cake mix if you need it. You can also swap the apple pie filling with other fruits. Try cherry or peach for a fun twist. For added flavor, mix in some nuts or chocolate chips. You can also use cinnamon or nutmeg for a spiced taste. Serve this cake in a nice dish. A clear glass dish shows the layers well. Drizzle extra caramel sauce over each slice for flair. Adding a scoop of vanilla ice cream makes it special too. Whipped cream on top adds a nice touch. This dessert looks great and tastes even better. For the full recipe, check the details above. {{image_2}} You can make this dessert even more fun by adding chocolate chips. Just sprinkle them on top of the cake mix layer. The chocolate pairs well with the caramel and apples. You can also drizzle some melted chocolate on top before serving. It adds a sweet touch. Try using different fruit fillings, too. You can swap the apple pie filling for cherry, peach, or even mixed berries. Each fruit gives a new taste and keeps things exciting. If you need a gluten-free option, look for a gluten-free cake mix. It works just like regular cake mix. You won’t lose any flavor or fun! For vegan options, substitute the butter with a plant-based alternative. You can also use vegan ice cream for serving. This way, everyone can enjoy the dessert. Adding seasonal spices can elevate your dump cake. Try mixing in nutmeg or pumpkin spice for a fall twist. It makes the house smell wonderful, too! During the holidays, think about toppings that fit the season. Crushed candy canes or festive sprinkles can make your dessert look extra special. You can even add whipped cream for a festive touch. To keep your caramel apple dump cake fresh, store it in an airtight container. Place a piece of plastic wrap over the cake if you do not have a container. This helps keep moisture in and air out. You can store it in the fridge for up to 5 days. If you want to keep it longer, freeze it. Wrap the cake well in plastic wrap and then in foil. It will stay fresh for about 3 months in the freezer. When you are ready to enjoy your leftover cake, preheat your oven to 350°F (175°C). Place the cake in an oven-safe dish and cover it with foil to prevent it from drying out. Heat for about 15-20 minutes. If you want a quick method, you can use a microwave. Heat a slice on high for 30-60 seconds. For a tasty touch, add a scoop of vanilla ice cream on top when serving! Caramel Apple Dump Cake is a warm, sweet dessert. It layers apple pie filling, caramel, and cake mix. You can bake it easily in one dish. The flavors are rich and comforting. People often enjoy it during fall or holidays. Common ingredients include: - 1 can (21 oz) apple pie filling - 1 cup caramel sauce - 1 box (15.25 oz) yellow cake mix - 1/2 cup unsalted butter, melted - 1 teaspoon ground cinnamon - 1/2 cup chopped pecans (optional) Yes, you can use homemade caramel sauce. Making your own gives it a fresh taste. To make it, melt sugar on low heat until it turns golden. Then slowly stir in butter and cream. Be careful not to burn it. When using homemade caramel, let it cool before drizzling. This way, it will not melt your cake mix too much. You can prep the Caramel Apple Dump Cake in advance. Prepare the layers but do not bake it. Cover the dish tightly with plastic wrap. Store it in the fridge for up to 24 hours. For long-term storage, freeze the unbaked cake. Wrap it well in foil or plastic. It can last up to three months. When you are ready, bake it straight from the freezer, adding a few extra minutes to the baking time. Many enjoy pairing the dump cake with vanilla ice cream. The cold ice cream contrasts the warm cake perfectly. Whipped cream is also a popular choice. For extra flavor, consider adding a sprinkle of cinnamon or nuts on top. You can also drizzle more caramel sauce before serving. This adds a lovely touch and enhances the sweetness. This blog post covered how to make a delicious Caramel Apple Dump Cake. We discussed key ingredients, step-by-step instructions, and helpful tips for perfecting your bake. You also learned about storage, reheating, and various flavor variations. Now, it's time to try this simple and tasty treat. You can impress your friends and family with your baking skills. Remember to have fun and get creative! Enjoy making your own Caramel Apple Dump Cake!

Caramel Apple Dump Cake Delightful and Easy Dessert

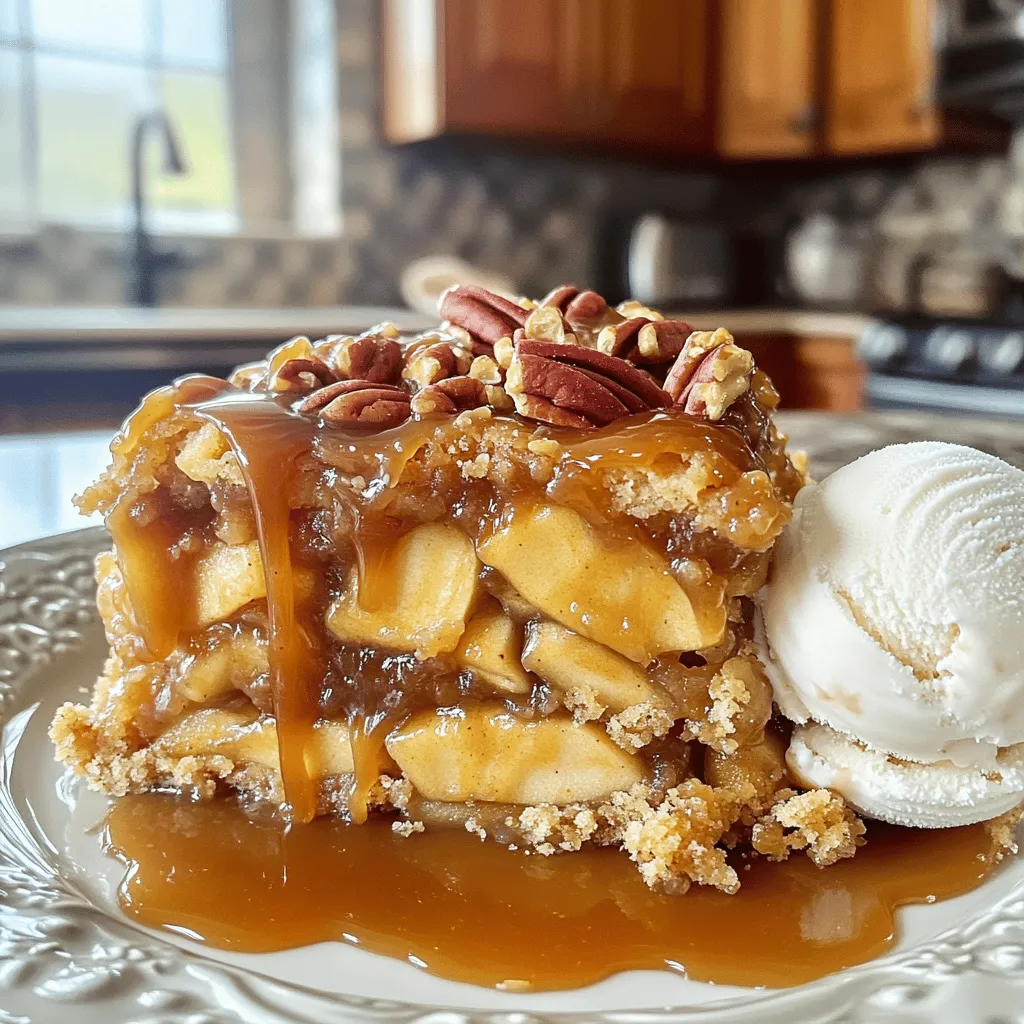
Are you ready for a sweet treat that is both simple and satisfying? The Caramel Apple Dump Cake is your

To make my simple mango salsa, you need these fresh ingredients: - 2 ripe mangoes, peeled and diced - 1 small red bell pepper, finely chopped - 1/2 red onion, finely chopped - 1 jalapeño pepper, deseeded and minced - 1/4 cup fresh cilantro, chopped These fresh ingredients create a bright and tasty salsa. The ripe mangoes give a sweet base. The red bell pepper adds crunch and color. Red onion brings a mild bite. The jalapeño adds a touch of heat, while cilantro gives a fresh zing. You will also need these condiments: - 2 tablespoons lime juice - Salt and pepper to taste The lime juice adds a tangy flavor that brightens the salsa. Salt and pepper enhance all the other flavors. Adjust these to your taste for the best result. Feel free to add some optional ingredients for variety: - Additional spices like cumin or paprika - Other fruit options such as pineapple or peach These add-ons can change the taste profile. For example, pineapple adds more sweetness, while spices can add depth. Experiment to find your favorite mix. For the full recipe, check out the Tropical Mango Tango Salsa. Enjoy creating this fresh and flavorful delight! Start by peeling the mangoes. Use a sharp knife to cut off the skin. Once peeled, slice the mangoes into small cubes. Aim for bite-sized pieces, so they mix well. Next, chop the vegetables. Dice the red bell pepper finely. Make sure the pieces are small, like the mango. Then, chop the red onion. Keep it small to avoid overpowering the salsa. Finally, mince the jalapeño pepper. Be careful to remove the seeds to control the heat. Now, it's time to combine the ingredients. In a large bowl, add the diced mangoes, chopped red bell pepper, and red onion. Stir in the minced jalapeño pepper next. Ensure everything is mixed evenly. Add the chopped cilantro for that fresh taste. Then, squeeze the lime juice over the mixture. Gently toss everything together until well combined. To enhance the flavor, season with salt and pepper. Start with a small pinch and taste. Adjust the seasoning as needed. Let the salsa sit for about 10 minutes. This allows the flavors to meld beautifully. You want all the tastes to mix and create a fresh and flavorful delight. Enjoy your simple mango salsa! For the full recipe, check the details above. Choosing ripe mangoes is key for great flavor. Look for mangoes that feel slightly soft when you press them gently. They should also have a sweet smell near the stem. If they are hard, they are not ready. Fresh cilantro adds a bright taste to your salsa. When selecting cilantro, look for bright green leaves without any wilting or yellowing. Fresh cilantro should smell fresh and earthy. You can chop the stems too; they add flavor. Mango salsa pairs well with many dishes. Serve it with tortilla chips for a fresh snack. It also works great as a topping for grilled fish or chicken. The salsa adds a burst of flavor to any meal. For presentation, use a colorful bowl to show off the vibrant colors. Garnish with extra cilantro leaves for a nice touch. You can also serve it in small cups for a fun party snack. Want some heat? Add more jalapeño for a spicier kick. You can also try mixing in diced habanero peppers for a bolder flavor. Consider adding tropical fruits like pineapple or kiwi. These fruits add sweetness and a fun twist. You can mix and match to create your perfect flavor! {{image_2}} You can easily make mango salsa for everyone. It’s gluten-free because it has no wheat or grains. This makes it safe for those with gluten issues. If you want a vegan-friendly option, you’re in luck! All the ingredients are plant-based. This salsa fits right in with a vegan diet. Adding spices can really change the taste. For a warm note, try adding cumin. It gives a nice depth. If you want more heat, paprika can add a smoky twist. You can also use fresh herbs. Swap cilantro for basil or mint for a new flavor. Each herb brings its own unique taste. Want to make your salsa richer? Add avocado! It gives a creamy texture and balances the sweetness of mango. You can also mix in other fruits. Pineapple adds a tropical flair, while peach brings a juicy sweetness. These additions can make your mango salsa even more delightful. For the full recipe, check out the Tropical Mango Tango Salsa. To keep your mango salsa fresh, store it in the refrigerator. Place it in an airtight container. This helps keep the flavors bright and the ingredients crisp. A glass jar or plastic container works well. Make sure the lid seals tightly to avoid air exposure. You can freeze mango salsa for longer storage. Use a freezer-safe container or a heavy-duty freezer bag. Leave some space at the top since the salsa will expand when frozen. Thaw it in the fridge overnight before using. Stir well after thawing to mix the ingredients. Check for signs of spoilage. If the salsa smells sour or has a strange color, it’s time to toss it. Typically, fresh mango salsa lasts about 3 to 5 days in the fridge. For the best taste, eat it within this timeframe. Enjoy your mango salsa while it's fresh for the best flavor! How do I make mango salsa spicier? To spice up your mango salsa, add more jalapeño. You can leave in some seeds for extra heat. If you like, try adding hot sauce or diced serrano peppers. Each of these will kick up the flavor! Can I use frozen mangoes for this recipe? Yes, you can use frozen mangoes. Just thaw them first and drain excess water. Fresh mangoes taste best, but frozen works in a pinch. The flavor remains sweet and tropical. What dishes pair well with mango salsa? Mango salsa goes great with grilled chicken, fish, or shrimp. It also brightens up tacos and nachos. You can even serve it with chips for a tasty snack! How long does homemade mango salsa last? Homemade mango salsa lasts about three days in the fridge. Store it in a tight container to keep it fresh. After a few days, the flavors may fade a bit. Can I make mango salsa ahead of time? Yes, you can make mango salsa a day in advance. This allows the flavors to meld nicely. Just store it in the fridge and stir before serving. What can I substitute for jalapeño? If you want less heat, use a green bell pepper instead. You can also try a mild poblano pepper. Each option adds flavor without the spice. Is it necessary to use red onion? Red onion adds a nice crunch and sweetness. If you don’t have it, use green onions or white onions. They work well but may change the color and taste slightly. You learned how to make delicious mango salsa with fresh ingredients and simple steps. We discussed selecting ripe mangoes, chopping veggies, and mixing flavors to enhance your dish. Remember to get creative with add-ons and variations to suit your taste. Don’t forget about storage tips to keep your salsa fresh. Enjoy experimenting with this recipe; it’s perfect for many meals. With these insights, you're well on your way to impressing your friends and family with your homemade mango salsa.

Simple Mango Salsa Fresh and Flavorful Delight

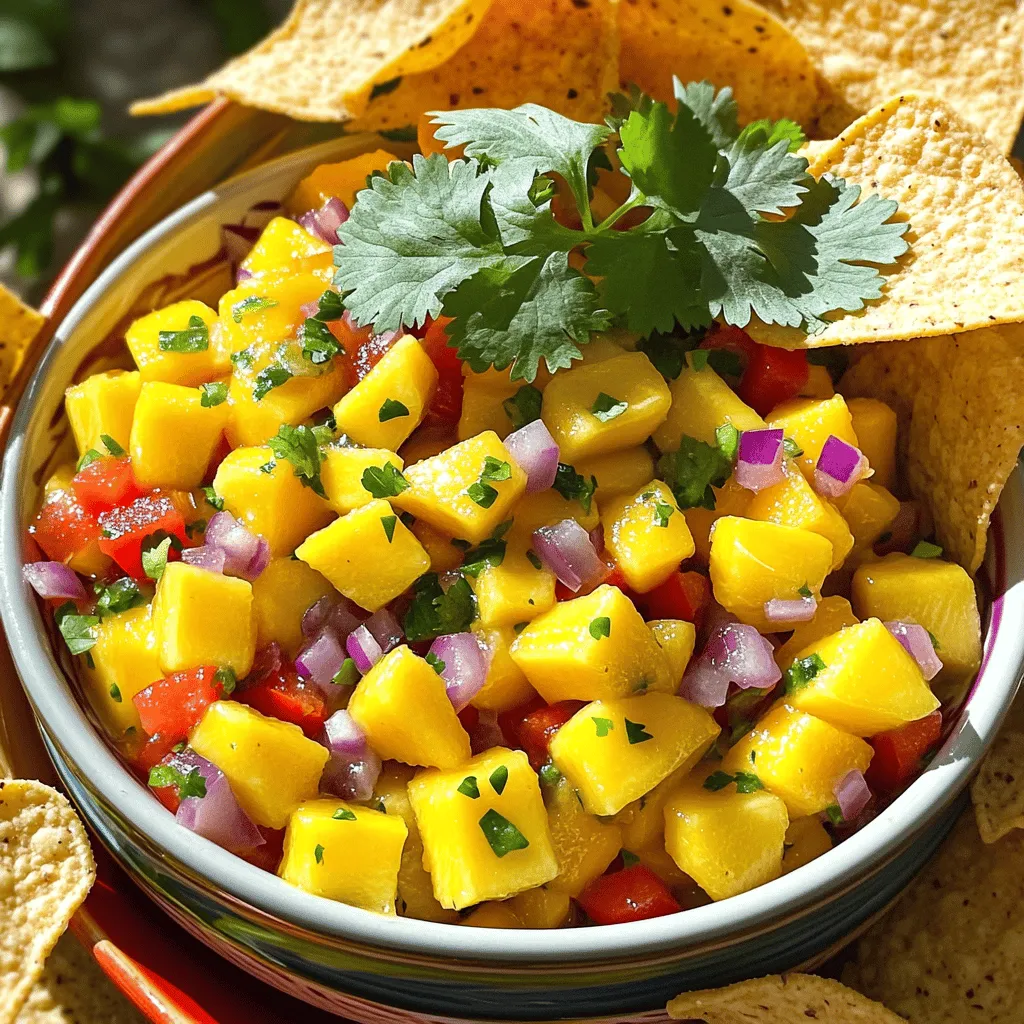
Are you ready to elevate your meals with a burst of flavor? My Simple Mango Salsa is a fresh and

- 1 cup quinoa - 1 can (15 oz) black beans, drained and rinsed - 1 cup corn kernels (fresh or frozen) - 1 bell pepper (red or yellow), diced - 1 cup cherry tomatoes, halved - 1 avocado, diced - Juice of 2 limes - 2 tablespoons olive oil - 1 teaspoon cumin - 1 teaspoon chili powder The main ingredients in this Tex Mex quinoa salad make it a powerhouse of nutrition. Quinoa is a complete protein, meaning it has all nine essential amino acids. It cooks up fluffy and adds a nutty flavor. Black beans bring fiber and protein, while corn adds sweetness and crunch. We use fresh vegetables to make the salad vibrant and full of flavor. Bell peppers add a crisp texture and bright color. Cherry tomatoes contribute juiciness and a pop of sweetness. Avocado brings creaminess and healthy fats that help keep you full. For the dressing, lime juice adds tang, while olive oil gives richness. Cumin and chili powder bring warmth and depth. This dressing ties all the flavors together beautifully. You can find the full recipe to make this delicious salad and enjoy its delightful flavors. To start, rinse 1 cup of quinoa under cold water. This helps remove any bitter taste. Next, in a medium saucepan, combine the rinsed quinoa with 2 cups of vegetable broth or water. Bring this mixture to a boil over medium-high heat. Once it boils, reduce the heat to low. Cover the pot and let it simmer for about 15 to 20 minutes. The quinoa should become fluffy, and the liquid will absorb. When done, remove it from the heat and let it cool slightly. While the quinoa cools, chop and combine your fresh vegetables. Dice 1 bell pepper and halve 1 cup of cherry tomatoes. You can also chop 1 avocado and finely chop 1/4 cup of red onion. Add these veggies into a large mixing bowl. Then, open a can of black beans, drain, and rinse them. Add 1 can (15 oz) of black beans and 1 cup of corn kernels, either fresh or frozen, to the bowl with the vegetables. Mix everything together well. In a small bowl, whisk together the dressing ingredients. Squeeze the juice of 2 limes into the bowl. Add 2 tablespoons of olive oil, 1 teaspoon of cumin, and 1 teaspoon of chili powder. Season with salt and pepper to taste. Whisk this mixture until well combined. The dressing adds a bright, zesty flavor to your salad. Now it’s time to bring everything together. Fluff the cooled quinoa with a fork and add it to the large mixing bowl with the veggies and beans. Pour the dressing over the salad mixture. Gently toss all the ingredients together until everything is well combined. Taste the salad and adjust the seasoning if needed. You can add more salt, pepper, or lime juice for extra flavor. Serve immediately or refrigerate it for 30 minutes to let the flavors meld together. For the full recipe, refer to the main ingredients and steps above. To make sure your quinoa is not mushy, rinse it well. This clears off the saponins, which can make quinoa bitter. Use a fine mesh strainer for best results. Cook quinoa in vegetable broth for extra flavor. - Temperature: Start with medium-high heat to boil. - Cooking time: Reduce heat to low and cover for 15-20 minutes. Keep an eye on it so it doesn’t overcook. After cooking, let it sit covered for 5 minutes. Then fluff it with a fork. Adjusting the seasoning can make a big difference. If you want a kick, add more chili powder. You can also try fresh jalapeños for some heat. - Tips: Taste as you go. This helps you find the right balance. - Adding heat: A pinch of cayenne can spice it up too. Try adding lime zest for a bright touch. An attractive salad makes it more fun to eat. Serve it in a large bowl to show off those colorful ingredients. - Serving suggestions: Layer the salad for a beautiful look. - Garnishing techniques: Top with extra cilantro and lime wedges. This adds freshness and color. For a crunchy touch, sprinkle some tortilla strips on top. For the full recipe, check the provided link. {{image_2}} You can easily change some ingredients in the Tex Mex quinoa salad. For a different flavor, try using other beans or grains. Instead of black beans, you could use pinto beans or chickpeas. If you want to switch the quinoa, try brown rice or farro. Both provide great texture and taste. Seasonal produce options can also add freshness. In summer, use ripe tomatoes and fresh corn. In fall, consider adding roasted sweet potatoes or butternut squash. These swaps keep the salad vibrant and exciting. This salad is naturally vegan and gluten-free. To ensure it fits your needs, check all labels. Some dressings may contain hidden gluten or dairy. You can make a simple dressing with olive oil and lime juice. This keeps it tasty and safe for all diets. If you want a creamier dressing, try a dairy-free option. You can blend avocado with lime juice and olive oil. This makes a rich dressing that is still healthy and delicious. If you want to enhance flavors, consider adding cheese alternatives. Nutritional yeast gives a cheesy flavor without dairy. You can also add vegan cheese shreds for a fun twist. More herbs and spices can elevate your salad. Fresh cilantro and diced jalapeños add a kick. You might also try adding smoked paprika or garlic powder to the mix. These simple enhancements can create a unique taste in your Tex Mex quinoa salad. For the full recipe, check out the [Full Recipe]. To keep your Tex Mex quinoa salad fresh, follow these tips. First, place any leftovers in an airtight container. This helps prevent moisture loss and keeps the flavors strong. Store the salad in the fridge. It will last for about 3 to 5 days. Always check for any odd smells or colors before eating. If you want to save the salad for later, freezing works well. Start by placing the salad in a freezer-safe container. Leave some space at the top, as the salad will expand when frozen. You can freeze it for up to 3 months. When you're ready to eat it, thaw the salad overnight in the fridge. After thawing, check the texture. If it's too wet, drain some liquid. Toss it gently to mix everything again. Your Tex Mex quinoa salad will still taste great! For the full recipe, refer back to the detailed instructions provided. Tex Mex Quinoa Salad is a vibrant dish packed with flavor and nutrients. It combines quinoa with black beans, corn, fresh veggies, and spices. Here’s what you’ll find in this colorful salad: - 1 cup quinoa, rinsed - 1 can (15 oz) black beans, drained and rinsed - 1 cup corn kernels (fresh or frozen) - 1 bell pepper (red or yellow), diced - 1 cup cherry tomatoes, halved - 1 avocado, diced - 1/4 cup red onion, finely chopped - 1/4 cup fresh cilantro, chopped - Juice of 2 limes - 2 tablespoons olive oil - 1 teaspoon cumin - 1 teaspoon chili powder - Salt and pepper to taste This dish is easy to make and is perfect for lunch or dinner. Yes, you can meal prep this salad! It holds well in the fridge. To prepare in advance, follow these tips: - Cook the quinoa and let it cool. - Chop and store the veggies separately. - Mix the salad just before eating to keep it fresh. - Use airtight containers to store portions. By prepping ahead, you save time and enjoy a healthy meal all week. There are many ways to customize this salad. Here are some popular changes: - Swap black beans for kidney or pinto beans. - Use quinoa blends for varied textures. - Add jalapeños for some heat. - Try adding different veggies like cucumbers or zucchini. These swaps keep the salad exciting and fresh every time you make it. Yes, this salad fits many dietary needs. Here’s how: - Vegan: All ingredients are plant-based. - Gluten-free: Quinoa is naturally gluten-free. - Low-carb: Reduce quinoa and add more veggies for a lower carb count. This salad is versatile and can cater to various diets without losing flavor. If you want to boost the protein, consider these options: - Add grilled chicken or shrimp for a meat option. - Mix in tofu or tempeh for a plant-based boost. - Include nuts or seeds like pumpkin seeds or sunflower seeds. These additions make the salad even more filling and nutritious. Absolutely! You can swap quinoa for other grains. Here are some alternatives: - Brown rice for a heartier texture. - Farro for a nutty flavor. - Bulgur for a quick-cooking option. Feel free to experiment with grains to find your favorite combination. Check out the Full Recipe for more details on making this delicious salad! This Tex Mex Quinoa Salad blends wholesome ingredients like quinoa, beans, and fresh veggies. You learned how to cook the quinoa, prep the salad, and create a zesty dressing. I shared tips for perfecting the flavor and presented variations to suit your taste. In closing, this salad is versatile and easy to make. It's filling, healthy, and great for meal prep. Enjoy trying different flavors and ingredients. Your kitchen adventures await!

Nutritious Tex Mex Quinoa Salad Easy and Flavorful Dish

Looking for a fresh and easy dish? This Nutritious Tex Mex Quinoa Salad is here to please your tastebuds! Packed

Older posts
Newer posts
← Previous Page1 … Page74 Page75 Page76 … Page84 Next →

dsad

© 2026 easycookingbite • Built with GeneratePress

Our Policies

  • Copyright Policy
  • Cookie Policy
  • GDPR Policy
  • Privacy Policy
  • Disclaimer
  • Terms Of Use

More Information

  • Home
  • About
  • Contact
  • Appetizers
  • Dessert
  • Dinner
  • Drinks
©2026, easycookingbite About Back To Top