Skip to content
DisclaimerTerms Of UseGDPR PolicyCookie Policy

easycookingbite

  • Home
  • Drinks
  • Appetizers
  • Dinner
  • Dessert
  • About
  • Contact
  • Privacy Policy
DisclaimerTerms Of UseGDPR PolicyCookie Policy

NO-ING-IMG

To make a Classic Cobb Salad, you need the following ingredients: - 4 cups romaine lettuce, chopped - 1 cup cherry tomatoes, halved - 1 avocado, diced - 1 cup cooked chicken breast, diced - 4 boiled eggs, quartered - ½ cup blue cheese, crumbled - 4 slices of crispy turkey bacon, chopped - ¼ cup red onion, thinly sliced - ¼ cup olive oil - 2 tablespoons red wine vinegar (or apple cider vinegar) - 1 teaspoon Dijon mustard - Salt and pepper to taste You can swap some ingredients if you want to try new flavors or if you run out. Here are a few ideas: - Use spinach instead of romaine lettuce for a different texture. - Swap cherry tomatoes for diced bell peppers for added crunch. - If you don’t like blue cheese, try feta cheese or goat cheese instead. - Use grilled tofu or chickpeas if you want a vegetarian protein option. A Classic Cobb Salad is not just tasty; it also offers great nutrition. Here’s a breakdown of the benefits: - Calories: About 400 per serving. - Protein: Around 30 grams, mainly from chicken and eggs. - Fat: Approximately 25 grams, with healthy fats from avocado and olive oil. - Fiber: About 8 grams, thanks to the veggies. This salad provides a balance of protein, healthy fats, and fiber, making it a satisfying meal. For the full recipe, check out Crispy Cobb Salad Delight 🥗🥚. First, gather all your ingredients. You need fresh romaine lettuce, ripe cherry tomatoes, and a creamy avocado. Chop the romaine into bite-sized pieces. Next, slice the cherry tomatoes in half. Dicing the avocado into cubes gives a nice texture. If you have raw chicken, cook it and then chop it into small pieces. For the eggs, boil them until hard, then cut them into quarters. Finally, chop the crispy turkey bacon, and slice the red onion very thin. This mix of colors and textures makes the salad exciting. Now let’s make the dressing. In a small bowl, combine ¼ cup of olive oil, 2 tablespoons of red wine vinegar, and 1 teaspoon of Dijon mustard. This mix gives the salad a nice zing. Whisk these ingredients together until they blend well. Add salt and pepper to taste. You can adjust the vinegar based on your flavor preference. If you like it tangy, add a bit more. This dressing is key to making the salad shine. It’s time to put everything together. Start with a large bowl or a platter. Lay down the chopped romaine as your base. Then, create rows of the other ingredients on top. Place the diced chicken, halved cherry tomatoes, and diced avocado in neat lines. Next, add the quartered eggs, crumbled blue cheese, chopped turkey bacon, and thin slices of red onion. This colorful layout looks great. Before you serve, drizzle the dressing over the salad or keep it on the side for guests. Toss gently if you like, but keeping it layered makes it pretty. Enjoy this fresh and flavorful dish! You can find the Full Recipe for more details. To make a great Cobb salad, chop your ingredients carefully. Start with the romaine lettuce. Use a sharp knife to cut it into bite-sized pieces. This gives your salad a nice crunch. Next, halve the cherry tomatoes. This step helps bring out their juicy flavor. For the avocado, slice it in half and remove the pit. Then, scoop it out and dice it. Keep the pieces large enough to see in the salad. For crisp bacon, I suggest using turkey bacon. It cooks fast and stays crisp. Start by heating a skillet over medium heat. Add the bacon slices and cook until they turn golden. Flip them often to get even cooking. Once done, place the bacon on paper towels to absorb excess grease. This keeps your bacon light and crispy for the salad. Fresh ingredients make the best Cobb salad. Always buy fresh produce. Check for bright colors and firm textures. Store your ingredients properly. Keep lettuce in a cool, dark place to avoid wilting. Place tomatoes on the counter, not in the fridge. Avocados should stay at room temperature until they ripen. A great tip is to prepare ingredients just before serving. This way, they stay crisp and vibrant. You can find the complete recipe for this delightful salad in the Full Recipe section. {{image_2}} You can make a tasty vegetarian Cobb salad. Swap the chicken and bacon for roasted chickpeas or grilled tofu. Both add great texture and protein. Use extra veggies like bell peppers or cucumbers for crunch. You can also add nuts for a fun twist. The classic dressing is always good, but you can try different ones, too. A lemon vinaigrette adds a fresh zing. Or, try a creamy avocado dressing for a rich twist. You can even mix in yogurt or buttermilk for creaminess. Each dressing brings out new flavors in the salad. If you want to change the protein, there are many great options. Grilled shrimp or salmon can add a seafood flair. You can also use hard-boiled eggs for a protein boost. For a plant-based option, try lentils or black beans. These swaps keep the salad delicious and satisfying. For a full recipe, check out the Crispy Cobb Salad Delight 🥗🥚. To store leftover Cobb salad, place it in an airtight container. Make sure to separate the dressing. This keeps the salad fresh and crunchy. If you mix the dressing in, the greens may become soggy. Store in the fridge and eat within 2 days for the best taste. Store homemade dressing in a jar with a tight lid. Use it within one week for the best flavor. If you add fresh herbs, use it sooner. They can lose their taste quickly. Keep the dressing in the fridge to stay fresh and safe. Most salad ingredients last about 3 to 5 days in the fridge. Here’s a quick guide: - Romaine lettuce: 3 to 7 days - Cherry tomatoes: 5 to 7 days - Avocado: 1 to 2 days after cutting - Cooked chicken: 3 to 4 days - Boiled eggs: 1 week - Blue cheese: 1 to 2 weeks after opening - Turkey bacon: 1 week after cooking For the freshest salad, use the ingredients as soon as you can. This keeps your Cobb salad crisp and tasty. You can follow the Full Recipe to create this classic dish with fresh ingredients. A Classic Cobb Salad is a hearty dish packed with flavor and texture. It has layers of fresh ingredients, making each bite a delight. Typically, it includes romaine lettuce, cherry tomatoes, avocado, cooked chicken, boiled eggs, blue cheese, and crispy bacon. The salad is known for its colorful presentation and is perfect for any meal. You can find the full recipe in the article. Yes, you can make a Cobb Salad in advance. I recommend preparing the ingredients separately. Store them in airtight containers in the fridge. This keeps them fresh and prevents sogginess. When ready to serve, simply assemble the salad. Drizzle the dressing just before serving to keep everything crisp. A Classic Cobb Salad is nutritious and balanced. It offers protein from chicken and eggs, healthy fats from avocado, and fiber from lettuce and tomatoes. Blue cheese adds flavor, while bacon gives a crunch. This salad is low in carbs and high in vitamins. Eating it can help you feel full and satisfied. You can serve a Cobb Salad with various sides. A warm, crusty bread pairs well for a complete meal. You could also offer a light soup, like tomato or vegetable. If you want more crunch, add some crispy potato chips. A refreshing drink, like iced tea or lemonade, completes the meal nicely. This blog post covered all you need for a great Classic Cobb Salad. We explored the key ingredients, steps to prepare, and tips for the best results. I shared tasty variations and how to store leftovers safely. Finally, remember that salads can be fun and simple. Enjoy creating your Cobb Salad, and don’t hesitate to try new things! Make it your own, and share it with friends and family. Happy eating!

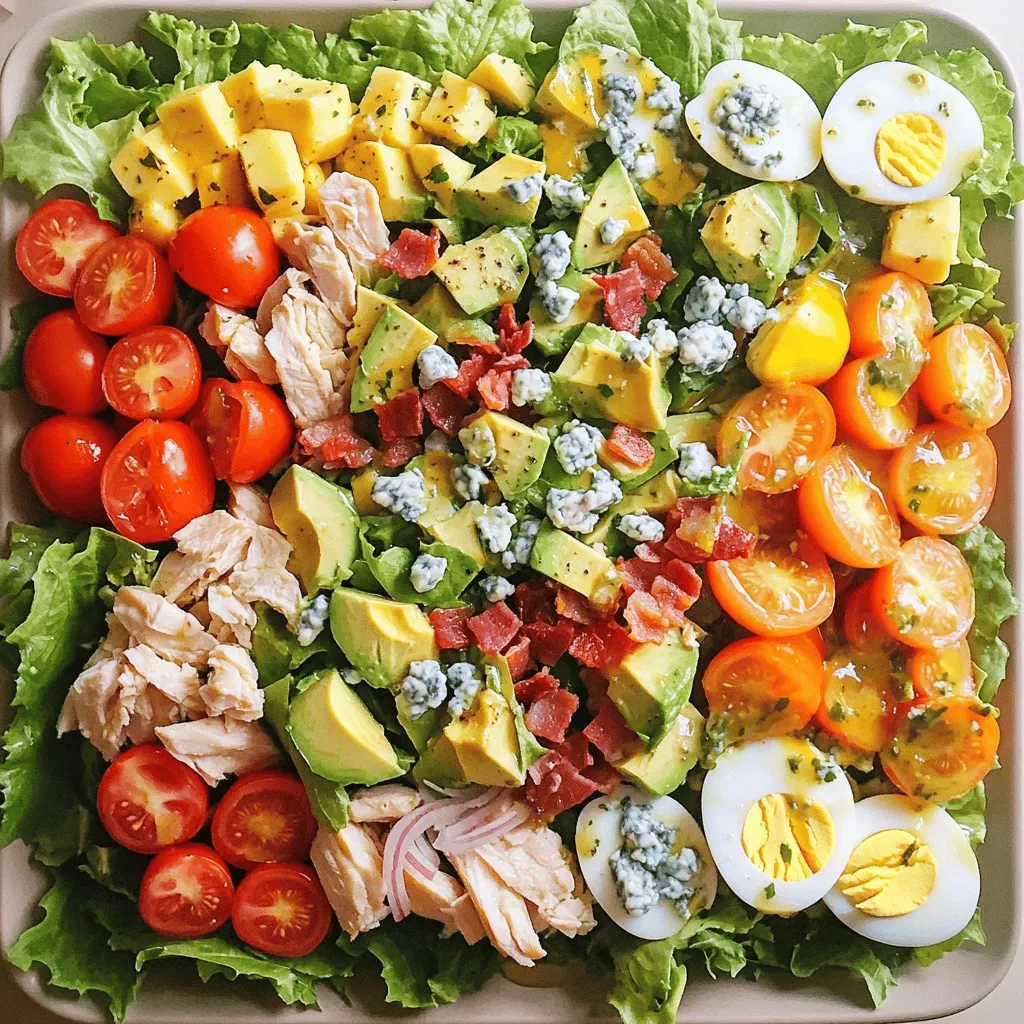
Classic Cobb Salad Fresh and Flavorful Classic Dish

Are you craving a fresh and flavorful dish? Let me introduce you to the Classic Cobb Salad! This vibrant salad

To make Coconut Mango Chia Pudding, gather these ingredients: - 1 cup coconut milk (canned or carton) - 1 cup ripe mango, pureed (plus extra for topping) - 1/4 cup chia seeds - 2 tablespoons maple syrup (or honey) - 1 teaspoon vanilla extract - Pinch of salt - Toasted coconut flakes (for garnish) - Fresh mint leaves (for garnish) You can change some ingredients based on your taste or needs. Here are some options: - Coconut Milk: Use almond milk or oat milk if you prefer a different flavor. - Mango: Swap mango with pureed banana or peach for a twist. - Maple Syrup: Honey or agave syrup works great as sweeteners. - Chia Seeds: Use ground flaxseeds for a similar texture. Each ingredient in this pudding offers great health perks: - Coconut Milk: Rich in healthy fats, coconut milk helps keep you full longer. - Chia Seeds: Packed with fiber, protein, and omega-3 fatty acids, they aid digestion. - Mango: This fruity delight is high in vitamins A and C, boosting your immune system. - Maple Syrup: A natural sweetener, it has antioxidants that support health. Using these ingredients, you not only create a tasty dish but also nourish your body. For the full recipe, check out the detailed instructions to make this delightful treat. To start, gather your ingredients. You will need coconut milk, ripe mango, chia seeds, maple syrup, vanilla extract, and a pinch of salt. In a mixing bowl, combine the coconut milk, mango puree, maple syrup, vanilla, and salt. Whisk until smooth. Next, add the chia seeds. Stir them in well to spread them evenly. This mix will become your pudding. Once you have mixed everything, cover the bowl with plastic wrap. Place it in the fridge for at least four hours. For the best results, chill it overnight. This time allows the chia seeds to soak up the liquid. They will swell and create a thick, creamy texture. If you want a smooth pudding, make sure to whisk well. Stir after the chilling time too. This helps break up any clumps of chia seeds. If you find it too thick, add a bit more coconut milk. This will help you achieve the texture you love. Enjoy your Coconut Mango Chia Pudding! For detailed steps, check out the Full Recipe. To make a smooth mango puree, choose ripe mangoes. A ripe mango feels soft when you gently squeeze it. Cut the mango, remove the pit, and scoop out the flesh. Place the flesh in a blender or food processor. Blend until smooth and creamy. You can add a splash of coconut milk to help it blend. Taste and adjust sweetness if needed. This puree brings a fresh, sweet flavor to the pudding. If you have leftovers, store them in an airtight container. This keeps the pudding fresh and tasty. Place it in the fridge and eat within three days. The chia seeds will continue to soak up liquid, thickening the pudding. If it gets too thick, stir in a bit of coconut milk before serving. For a stunning presentation, serve the pudding in clear cups or glasses. This shows off the beautiful layers of coconut and mango. Add a drizzle of mango puree on top just before serving. Sprinkle toasted coconut flakes and fresh mint leaves for color. You can also layer different flavors or toppings to make it more fun. Enjoy your beautiful and tasty Coconut Mango Chia Pudding! For the full recipe, check the previous section. {{image_2}} This recipe is already vegan and gluten-free! Use coconut milk and maple syrup, and you have a perfect treat. Chia seeds are naturally gluten-free and safe for everyone. You can enjoy this pudding without any worry. Want to add more taste? Try a splash of vanilla or lime juice. Vanilla gives a warm flavor, while lime adds a zesty kick. You can mix them into the coconut milk before adding chia seeds. These small changes can make a big difference! You can switch up the fruit too! Berries like strawberries or blueberries pair well. Pineapple is another great choice for a tropical twist. Simply chop the fruit and mix it in or layer it on top when you serve. It makes each bite exciting! For the complete recipe, check out [Full Recipe]. Enjoy experimenting with these variations! To keep your coconut mango chia pudding fresh, store it in airtight containers. Glass jars work great for this. Make sure to seal them tightly to avoid any air or moisture getting in. If you use plastic containers, ensure they are safe for food storage. Keep the pudding in the fridge until you're ready to eat. This pudding lasts for about 3 to 5 days in the fridge. If you want to reheat it, you can gently warm it on the stove. Add a splash of coconut milk to keep it creamy. Stir while heating to ensure it warms evenly. However, many enjoy it cold, so you might not need to reheat it at all. You can freeze coconut mango chia pudding for later use. Use freezer-safe containers or zip-top bags. Pour the pudding in, but leave some space at the top for expansion. It can last for up to 2 months in the freezer. When you're ready to eat, thaw it in the fridge overnight. After thawing, stir well to mix the texture back together. Enjoy this delicious treat whenever you want! For the full recipe, check out the earlier section. Coconut Mango Chia Pudding lasts about 4 to 5 days in the fridge. Keep it in a sealed container to stay fresh. The chia seeds will keep absorbing liquid, so the pudding may thicken over time. If it gets too thick, just stir in a bit of coconut milk to loosen it. Yes, you can use other types of milk. Almond milk, oat milk, or soy milk work well. Each option gives a different flavor, but they will still taste great. Just make sure to choose unsweetened milk if you want to control the sweetness. This way, the mango and maple syrup can shine through. Absolutely! This recipe is perfect for meal prep. You can make a batch and store it in the fridge for quick breakfasts or snacks. Just portion it into small jars or containers. This makes it easy to grab on busy mornings. Plus, it stays tasty for several days, which is a big win. For the full recipe, check the section above. This article covered how to make Coconut Mango Chia Pudding from start to finish. You learned about key ingredients, step-by-step instructions, and helpful tips for perfecting your dish. We also explored delicious variations, storage methods, and answered common questions. Creating this pudding is easy and fun. You can customize it to fit your needs or preferences. Enjoy making it and sharing it with friends and family. This healthy treat will impress everyone. Dive into your cooking and savor each bite!

Coconut Mango Chia Pudding Nutritious and Easy Recipe

Dive into the tropical flavors of Coconut Mango Chia Pudding! This easy recipe packs a punch of nutrition and taste.

- 4 large bell peppers (any color) - 1 cup cooked quinoa - 1 can (15 oz) black beans, drained and rinsed - 1 cup corn kernels (fresh or frozen) - 1 cup diced tomatoes (canned or fresh) - 1 teaspoon cumin - 1 teaspoon smoked paprika - ½ teaspoon chili powder - 1 cup shredded cheese (cheddar or pepper jack) - 2 tablespoons olive oil - Salt and pepper to taste - Fresh cilantro, for garnish These ingredients come together to create a tasty and filling dish. Quinoa offers protein and fiber, while black beans add texture. Bell peppers provide a great vessel for all this goodness. - Ground meat (beef, turkey, or chicken) - Zucchini or spinach for added veggies - Different types of beans (kidney or pinto) - Various cheese options (mozzarella or feta) - Hot sauce or salsa for a kick Feel free to mix and match these ingredients! Adding ground meat can make the dish heartier. Extra veggies boost nutrition and color. Each serving of stuffed bell pepper boats contains: - Calories: Approximately 350 - Protein: 15 grams - Carbohydrates: 50 grams - Fat: 10 grams - Fiber: 12 grams These peppers are a balanced meal. They pack protein, fiber, and healthy fats. You can enjoy this dish guilt-free, knowing it's both delicious and nutritious. For the full recipe, check out the earlier section. First, gather all your ingredients. You need bell peppers, quinoa, black beans, corn, tomatoes, spices, cheese, olive oil, salt, and pepper. 1. Preheat your oven to 375°F (190°C). This step is key for a nice bake. 2. Prepare the peppers. Cut the tops off your bell peppers. Remove seeds and membranes. This forms the boat shape. 3. Oil the inside. Drizzle a bit of olive oil inside each pepper. This adds flavor and helps with cooking. 4. Make the filling. In a bowl, mix cooked quinoa, black beans, corn, diced tomatoes, cumin, smoked paprika, chili powder, salt, and pepper. Stir until it's all combined and colorful. 1. Fill the peppers. Spoon the filling into each pepper. Press gently to pack it in. 2. Add cheese. Sprinkle half of the shredded cheese over the filling in each pepper. Top with the rest of the cheese. 3. Bake covered. Place the peppers upright in a baking dish. Cover the dish with aluminum foil. Bake for 25 minutes. 4. Bake uncovered. Remove the foil and bake for another 10 minutes. You want the peppers soft and cheese bubbly. 5. Cool and serve. After baking, let them cool for a few minutes. Garnish with fresh cilantro before serving. Watching a video can help you see each step. Look for videos that show the cutting, filling, and baking of stuffed bell peppers. You can find great resources on cooking channels or recipe websites. These guides can make the process even clearer and more fun. For the full recipe, check your favorite cooking platform. To make the best stuffed peppers, start with firm, fresh bell peppers. Choose large ones for easy filling. Cut off the tops carefully to make boats. Remove all seeds and membranes. This helps the peppers cook evenly. Lightly oil the inside to add flavor and keep them moist. Baking at 375°F (190°C) works well. Cover your dish with foil for the first half of cooking. This helps steam the peppers and keeps them tender. Remove the foil later to brown the cheese. For a nice presentation, let the peppers sit for a few minutes before serving. To boost flavor, try adding fresh herbs like basil or parsley. You can also mix in diced onions or garlic for depth. If you like heat, add more chili powder or some diced jalapeños. For a smoky taste, use smoked cheese or add more smoked paprika. Don't forget to taste your filling before stuffing. Adjust salt and pepper as needed. A squeeze of lime juice can brighten the dish. Consider adding a dash of hot sauce for an extra kick. Sometimes, peppers may not cook evenly. This can happen if they are uneven in size. To fix this, choose peppers of similar size. If the filling is too dry, add a splash of broth or extra tomatoes. If your cheese doesn't melt well, cover the dish with foil again for a few minutes. This helps trap heat and moisture. If the peppers are too tough, they may need longer cooking time. Just bake them a bit more until they are tender. For more detailed instructions and variations, check out the Full Recipe. {{image_2}} You can make stuffed bell peppers with many different fillings. If you want meat, ground beef or turkey works great. Just cook the meat first, then mix it with the other ingredients. For a vegetarian option, use extra beans or lentils. If you prefer vegan, skip the cheese and add more veggies, like mushrooms or zucchini. You can even stuff them with rice instead of quinoa. Cheese adds a creamy touch, but there are many options. You can use dairy-free cheese for a vegan choice. Feta or goat cheese can add a nice tang if you like strong flavors. You might also try cream cheese for a rich twist. For extra toppings, consider crushed tortilla chips or breadcrumbs. These add crunch and texture, making your meal even more enjoyable. Seasonal veggies can spice up your stuffed peppers. In summer, add fresh basil and diced zucchini. In fall, try pumpkin puree and sage for a cozy taste. For a regional twist, make a Mexican version by using taco seasoning and adding black olives or avocado. An Italian version could include marinara sauce and Italian herbs. These variations keep your meals fun and exciting. Check out the Full Recipe for more ideas and tips! After enjoying your stuffed bell pepper boats, store any leftovers in an airtight container. Place the container in the fridge. They should last for about three to four days. To keep the flavors fresh, separate the peppers from any extra sauce or toppings. This prevents sogginess and helps maintain texture. When you're ready to enjoy your leftovers, preheat the oven to 350°F (175°C). Place the stuffed peppers in a baking dish. Cover them with foil to retain moisture. Heat them for about 15 to 20 minutes. If you prefer, you can also use the microwave. Heat on medium power for about 2 to 3 minutes, checking halfway through. You can freeze stuffed bell pepper boats for later meals. First, let them cool completely. Wrap each pepper in plastic wrap and then in foil. This helps prevent freezer burn. They can last up to three months in the freezer. When you’re ready to eat, thaw them overnight in the fridge. Reheat them in the oven or microwave as mentioned above. Enjoy a tasty meal that’s ready in no time! The best bell pepper colors for stuffing are red, yellow, and green. Each color has a unique taste. Red peppers are the sweetest. Yellow peppers have a mild flavor. Green peppers taste more bitter. I often use a mix for color and taste. Yes, you can make the filling ahead of time. Prepare it and store it in the fridge. Just remember to fill the peppers before baking. This helps keep them fresh. You can also freeze the filling for later use. Just thaw it before stuffing the peppers. You know the stuffed peppers are done when they are tender. The cheese should be bubbly and golden brown. Check with a fork for softness. If it goes in easily, they are ready. Let them cool a bit before serving. Enjoy your meal! For the full recipe, check out the details above. We covered the key parts of making delicious stuffed bell pepper boats. You learned what ingredients to use and how to prepare them. I shared helpful steps and cooking tips. You can also try different fillings and variations for your taste. Storing leftovers properly ensures you enjoy them later. Remember, cooking can be fun and easy! Explore your options and make this dish your own. Enjoy every bite and share with friends!

Stuffed Bell Pepper Boats Savory and Simple Dinner

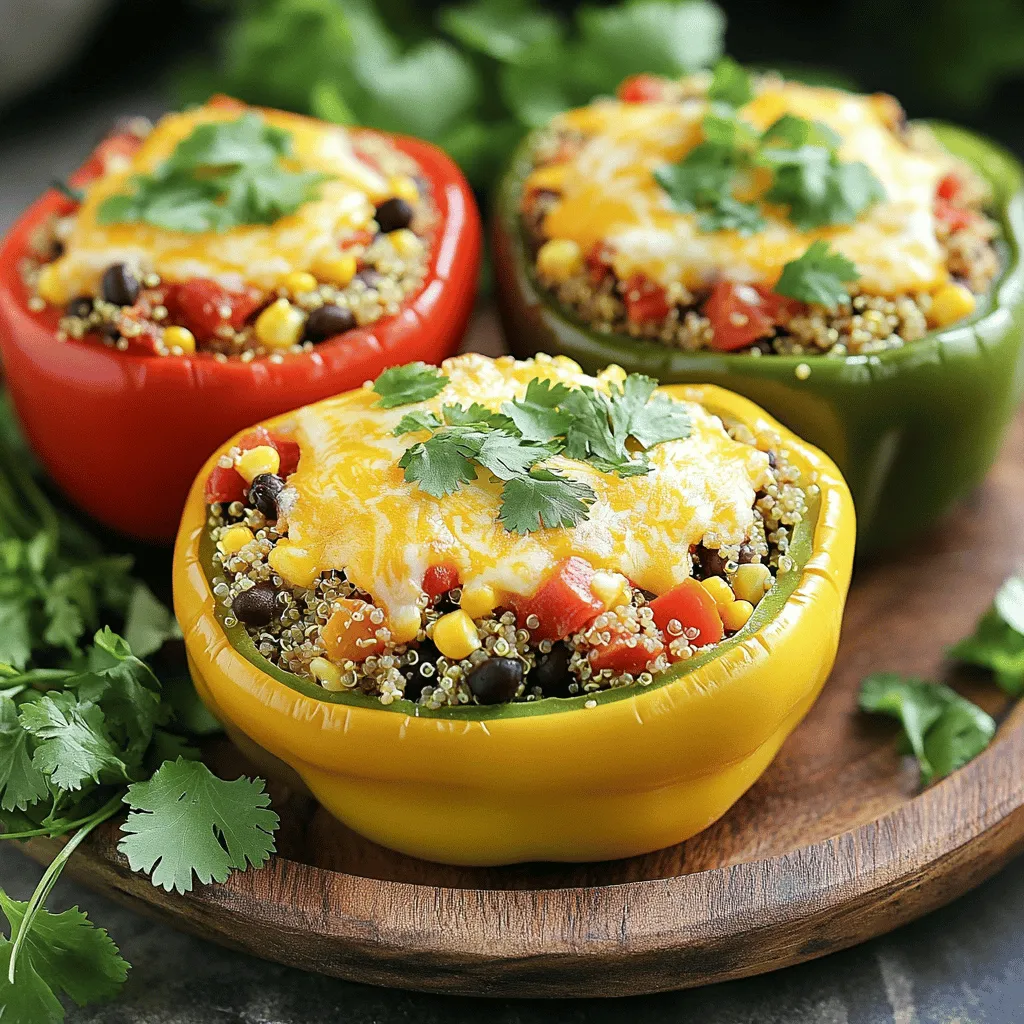
Looking for a quick and tasty dinner? Stuffed Bell Pepper Boats are your answer! They combine fresh peppers and delicious

- 1 pound Italian chicken sausage, sliced - 2 bell peppers (one red, one yellow), sliced - 1 zucchini, sliced into half-moons - 1 red onion, cut into wedges - 1 cup cherry tomatoes, halved - 3 tablespoons olive oil - 1 teaspoon garlic powder - 1 teaspoon dried oregano - 1 teaspoon smoked paprika - Salt and pepper to taste - Fresh parsley, chopped for garnish When making a satisfying sheet pan sausage and veggies dinner, you need fresh ingredients. The main star is the Italian chicken sausage; its flavor brings everything together. You can use any type of sausage you like, but chicken keeps it light. Next, bell peppers add color and crunch. I prefer using red and yellow for a vibrant look. Zucchini is a great choice too. The half-moons cook nicely and soak up all the flavors. The red onion gives a sweet touch that balances the meal. Don’t forget those cherry tomatoes! They burst with juice and sweetness when roasted. For seasonings, olive oil is key. It helps the sausage and veggies brown well. Garlic powder adds depth, while oregano brings an earthy note. Smoked paprika gives a hint of warmth. Finally, salt and pepper enhance all the flavors. To finish, sprinkle fresh parsley on top. It adds a pop of green and freshness. This colorful dish is not only tasty but also easy to make. For the full recipe, check out the details above! - Preheat the oven to 400°F (200°C). - Line a large baking sheet with parchment paper. Preheating the oven is key to getting the right texture. The parchment paper helps with easy cleanup. It also stops the food from sticking. This step saves time later. - In a large bowl, mix sausage and vegetables. - Drizzle olive oil and seasonings, then toss to coat. I like to use a big bowl for this step. It gives me enough room to mix well. Start with the sausage, then add the sliced bell peppers, zucchini, red onion, and cherry tomatoes. Drizzle the olive oil over everything. Next, sprinkle the garlic powder, oregano, smoked paprika, salt, and pepper. Toss it all together until every piece is coated. This ensures even flavor in each bite. - Spread the mixture on the baking sheet. - Bake for 25-30 minutes, stirring halfway. Now, spread the sausage and veggies on the baking sheet. Make sure they are in a single layer. This helps them cook evenly. Bake in the oven for 25 to 30 minutes. Halfway through, stir the mixture. This step helps everything cook well. You want the sausage to be fully cooked and the veggies to be tender. If you want to see the full recipe, check the details above. To know when the sausage is fully cooked, check its color. It should be a nice golden brown. Use a meat thermometer; the sausage should reach 165°F (74°C). For vegetables, look for a deep, rich color. They should be tender with some crispy edges. This shows they are perfectly caramelized. Fresh herbs like basil or thyme can boost the taste. You can also use spices like red pepper flakes for heat. If you want more spice, add extra red pepper flakes or a pinch of cayenne. Always taste as you go to find your perfect mix. This dish pairs well with simple sides like rice or crusty bread. A green salad adds a fresh crunch. For dips, try a tangy yogurt sauce or a zesty vinaigrette. These add extra flavor and contrast to the meal. Enjoy exploring different options! {{image_2}} You can change the sausage type to fit your taste. Try pork sausage for a rich flavor. Turkey sausage offers a leaner option. If you prefer plant-based meals, use vegan sausage. Each type brings a unique taste that adds to the dish. Feel free to swap in your favorite vegetables. Seasonal veggies work great here. You might like broccoli, carrots, or asparagus. Each choice alters the dish's flavor and texture. Mix and match to find your ideal combo. Adding a splash of balsamic vinegar or lemon juice can brighten the dish. These acids enhance the flavors without overpowering them. Just a little can make a big difference. Experiment with different amounts to find your perfect balance. For the full recipe, check out the details above. Store the leftovers in an airtight container. This keeps the meal fresh. The dish lasts about three to four days in the fridge. It tastes great when you reheat it. Just pop it in the microwave or oven. To freeze this dish, let it cool completely. Then, place it in a freezer-safe bag. Make sure to remove as much air as possible. Label the bag with the date. To reheat, thaw it overnight in the fridge. Heat it in the oven at 350°F (175°C) for about 20-25 minutes. This way, you keep the texture and flavor. For meal prep, make a larger batch. You can store portions in separate containers. This makes it easy to grab a quick meal. When reheating, add a splash of water to keep it moist. Enjoy your tasty, healthy meal anytime! For the full recipe, check out the details above. You can use an air fryer or stovetop to make this dish. For the air fryer, preheat it to 400°F (200°C). Place the sausage and veggies in the basket in a single layer. Cook for about 20 minutes, shaking halfway through. On the stovetop, heat a large skillet over medium heat. Add the sausage first, cooking until browned. Then add the veggies and cook until tender. Yes, you can use frozen vegetables. Just remember to adjust your cooking time. Frozen veggies may need an extra 5 to 10 minutes. Keep an eye on the dish. You want the vegetables to be tender but not mushy. You can enhance the flavor with more spices or herbs. Try adding thyme, rosemary, or even some red pepper flakes for heat. Lemon zest can brighten the dish. Mix and match to find your favorite combination. To check if the sausage is done, use a meat thermometer. The internal temperature should reach 165°F (74°C). You can also cut a piece open. The meat should be no longer pink, and the juices should run clear. We explored how to make a delicious sheet pan sausage and veggies dish. You learned about the fresh ingredients, simple steps for prep and cooking, and storage tips to keep your meal fresh. Remember, you can swap proteins and veggies to suit your taste. This meal is versatile and easy to make. Follow the steps, get creative, and enjoy a tasty, healthy dish that you can share with family and friends. With these tips, you'll have a fun, stress-free cooking experience!

Satisfying Sheet Pan Sausage and Veggies Dinner

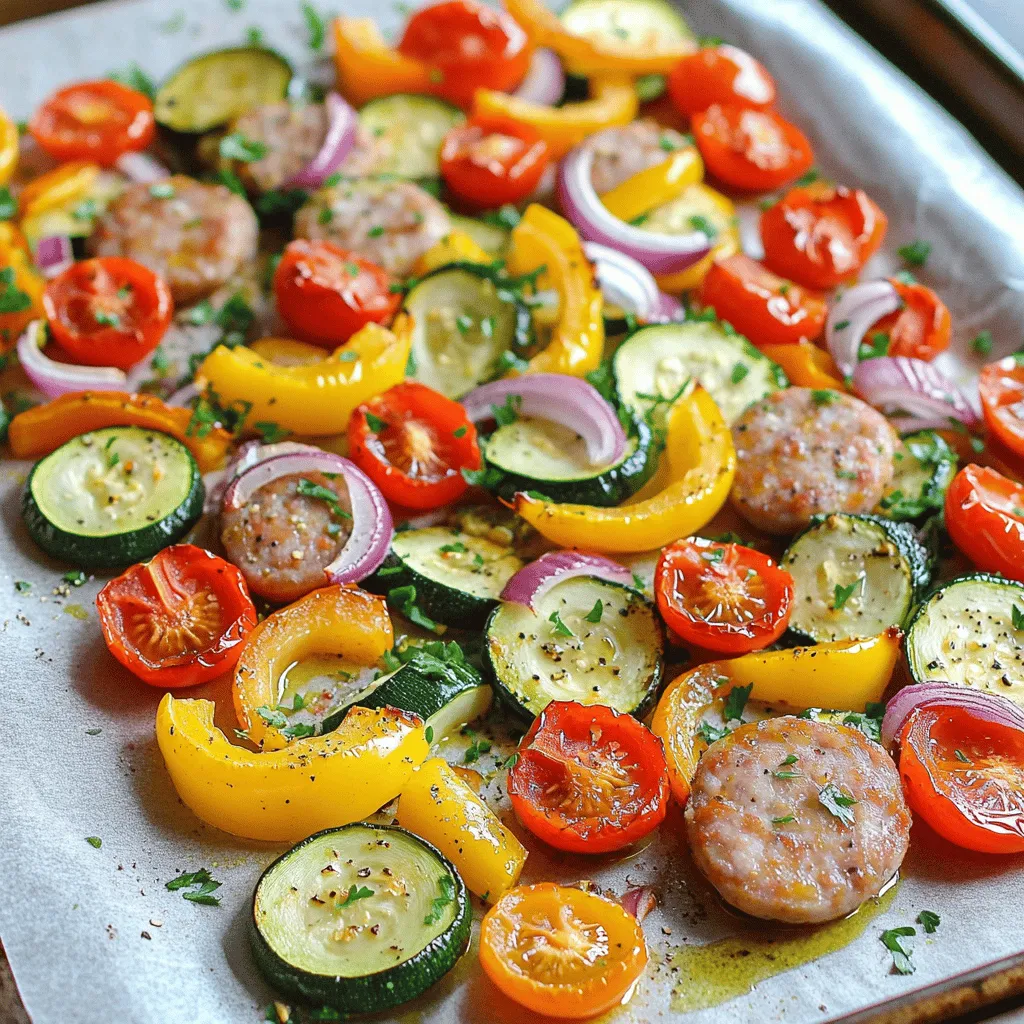
Looking for a quick and tasty dinner? You’re in the right place! My Satisfying Sheet Pan Sausage and Veggies recipe

To make air fryer falafel, you need simple, fresh items. Here’s what you need: - 1 cup dried chickpeas, soaked overnight - 1 small onion, roughly chopped - 3 cloves garlic, minced - 1/4 cup fresh parsley, chopped - 1/4 cup fresh cilantro, chopped - 1 teaspoon ground cumin - 1 teaspoon ground coriander - 1/2 teaspoon baking powder - Salt and pepper, to taste - 2 tablespoons olive oil These ingredients create a hearty base for the falafel. Soaking the chickpeas overnight helps them soften and blend well. Seasonings bring your falafel to life. The cumin and coriander give it warmth and depth. I like to add fresh herbs like parsley and cilantro. They add brightness and flavor. Make sure you mix in salt and pepper to taste. You can also try adding a pinch of cayenne for heat or lemon zest for brightness. Dipping sauces can elevate your falafel meal. Two popular options are tahini sauce or yogurt. Tahini sauce is creamy and nutty. Yogurt adds a cool, tart flavor. You can also mix yogurt with herbs for extra taste. Serve your falafel with these sauces for a tasty treat! {{ingredient_image_1}} Start by draining and rinsing your soaked chickpeas. Use dried chickpeas soaked overnight for the best taste. This helps them soften and makes them easier to blend. A good soak will also help create a nice texture. If you skip soaking, your falafel may turn out too hard. Next, place the drained chickpeas in a food processor. Add the chopped onion, minced garlic, parsley, cilantro, cumin, coriander, baking powder, salt, and pepper. Pulse the mixture until it is crumbly. You want it to hold together but not be a paste. Scrape down the sides of the bowl as needed. If it feels dry, add a tiny bit of water. Once done, scoop out the mix with a tablespoon. Form small balls or patties with your hands. Now, preheat your air fryer to 375°F (190°C) for about 5 minutes. Lightly brush or spray the falafel with olive oil. Place them in a single layer in the air fryer basket. You may need to work in batches. Air fry for 12-15 minutes. Flip the falafel halfway through. They should be golden brown and crispy when done. Let them cool for a few minutes before serving. Enjoy your delicious air-fried falafel! To get the best texture for your falafel, start with dried chickpeas. Soak them overnight. This step makes them soft and easier to blend. When you mix the falafel, aim for a crumbly texture. It should hold together but not be mushy. If it feels too dry, add a tiny bit of water. If it's too wet, add a bit of flour to help it firm up. Herbs and spices make falafel pop. Fresh parsley and cilantro give it a bright taste. Don’t skip the cumin and coriander; they add depth. Feel free to tweak the herbs. You can add mint or dill for a twist. If you like heat, add a pinch of cayenne pepper or red pepper flakes. Mix and taste as you go! Sometimes, falafel can fall apart while cooking. If this happens, your mix might be too wet. Adding more chickpeas or a bit of flour can help. If your falafel is not crispy, make sure you oil them well before cooking. Check the air fryer temperature; it should be set to 375°F. Lastly, don’t overcrowd the air fryer basket. This ensures even cooking and crispiness. Pro Tips Soak Chickpeas Properly: Make sure to soak the chickpeas overnight to achieve the right texture. This softens them for easy blending and helps create a crispy falafel. Don’t Overprocess: Pulse the mixture until it's crumbly, not pureed. This texture is crucial for the falafel to hold its shape while cooking. Preheat Your Air Fryer: Always preheat your air fryer before adding the falafel. This ensures even cooking and helps achieve that golden crispy exterior. Batch Cooking Tips: If making a large batch, keep the falafel warm in a low oven while you cook the remaining batches in the air fryer. {{image_2}} You can bake falafel, but air frying makes them crispier. In the air fryer, they cook evenly and use less oil. Baked falafel may taste softer and less crunchy. If you want a lighter dish, try baking. Just set the oven to 375°F and bake for about 20-25 minutes. Flip them halfway to cook them evenly. You can change the taste of falafel easily. For a spicy kick, add red pepper flakes or cayenne pepper. If you love herbs, mix in dill or mint. Garlic lovers can add more cloves for a bold flavor. Experiment with different spices like smoked paprika or sumac. Each twist gives a new life to the classic recipe. When serving, think about color and taste. Place falafel on a platter with fresh herbs and lemon wedges. This adds a nice touch. Serve with tahini sauce or yogurt for dipping. You can also add a side of pita bread and fresh veggies. Create a falafel wrap with lettuce, tomatoes, and cucumbers for a tasty meal. You can store leftover falafel in an airtight container. Keep them in the fridge for up to three days. This helps keep them fresh and tasty. To reheat falafel, use the air fryer. Set it to 350°F (175°C) for about 5-7 minutes. This method keeps them crispy. You can also use a skillet on medium heat for a few minutes. To freeze falafel, place them in a single layer on a baking sheet. Freeze for about an hour until firm. Then, transfer them to a freezer bag. They can stay frozen for up to three months. When ready to eat, air fry straight from the freezer. Cook for about 12-15 minutes at 375°F (190°C). Yes, you can use canned chickpeas. Canned chickpeas save time. Make sure to drain and rinse them well. This removes excess sodium. The texture may be softer, but they will still taste good. Soak dried chickpeas for at least 8 hours. I usually soak them overnight. This helps them soften for blending. Dried chickpeas will hold their shape better when cooked. Yes, falafel is healthier in the air fryer. It uses less oil than frying. Air frying keeps the falafel crispy and tasty. You still get a great flavor with fewer calories. Serve falafel with tahini sauce or yogurt for dipping. A fresh salad or pita bread also works well. Add fresh herbs and lemon wedges for a pop of flavor. Enjoy your meal! You learned how to make tasty air fryer falafel. We covered the main ingredients, cooking steps, and tips to get it right. You can change flavors and even store leftovers. Don't forget that air fryer falafel is quick, easy, and healthier than fried. When you try this recipe, I hope you enjoy every bite and share it with others. Now go and make your own delicious falafel!

Air Fryer Falafel Flavorful and Easy Recipe Guide

Craving a tasty, healthy snack? This Air Fryer Falafel recipe is perfect for you! I’ll guide you through every step,

To make this classic beef chili, you need some key ingredients to create that hearty flavor. Here’s what you will need: - 1 lb ground beef - 1 medium onion, chopped - 3 cloves garlic, minced - 1 bell pepper (red or green), chopped - 1 can (15 oz) kidney beans, drained and rinsed - 1 can (15 oz) black beans, drained and rinsed - 1 can (28 oz) crushed tomatoes - 2 tablespoons chili powder - 1 tablespoon ground cumin - 1 teaspoon smoked paprika - 1 teaspoon oregano - Salt and pepper to taste - 2 tablespoons olive oil These ingredients come together to form a rich and flavorful dish. The ground beef gives the chili its base, while the beans add texture and protein. The vegetables bring freshness and sweetness. The spices add warmth and depth. Feel free to explore variations using these ingredients! While the chili is great on its own, toppings can make it even better. Here are some delicious options to consider: - Shredded cheese - Sour cream - Chopped green onions - Avocado These toppings give you a chance to customize each bowl. They add creaminess, crunch, and extra flavor. You can mix and match based on what you like best. For more details on how to prepare this dish, check out the Full Recipe. Prepping Vegetables Start by gathering all your veggies. You need one medium onion, three cloves of garlic, and one bell pepper. Chop the onion and bell pepper into small pieces. Mince the garlic finely. This helps the flavors mix well. Browning the Ground Beef Next, heat two tablespoons of olive oil in a large pot over medium heat. Add the chopped onion and bell pepper to the pot. Cook them for about five minutes, or until they soften. Then, add the minced garlic and cook for one more minute. Now, add one pound of ground beef, breaking it apart with a wooden spoon. Cook it for five to seven minutes until it turns brown. If there is extra fat, drain it out. Combining Ingredients Once the beef is browned, sprinkle two tablespoons of chili powder, one tablespoon of ground cumin, one teaspoon of smoked paprika, and one teaspoon of oregano over the meat. Stir everything well to coat the beef with the spices. Then, pour in one can of crushed tomatoes and add two cans of beans—one can of kidney beans and one can of black beans. Mix it all together until well combined. Simmering for Flavor After mixing, reduce the heat to low. Let the chili simmer uncovered for 30 to 40 minutes. Stir it occasionally to prevent sticking. This step is key. It lets the flavors blend together perfectly. Adjusting Seasoning After simmering, taste your chili. You can add salt and pepper as needed. If you want a spicier kick, add hot sauce or a pinch of cayenne pepper. Presentation Tips When you serve your chili, use bowls. Top each serving with shredded cheese, a dollop of sour cream, and chopped green onions or diced avocado. These toppings add freshness and color. For crunch, serve tortilla chips on the side. Enjoy your hearty classic beef chili! For the full recipe, check out the section above. For even cooking, use a heavy pot. I prefer a Dutch oven for its heat retention. Brown the beef in batches if your pot is small. This lets the meat sear nicely. Stir often to avoid sticking. Keep an eye on the heat; too high will burn the spices. Common mistakes include not draining excess fat. This can make your chili greasy. Another mistake is not letting it simmer long enough. A good simmer blends flavors well. It should bubble gently for at least 30 minutes. To boost flavor, use fresh spices. Store-bought spices may lose potency over time. Toast them in the pot for a minute before adding other ingredients. This will release their oils and deepen the flavor. For heat, add chili powder slowly. You can always add more, but you can’t take it out. A pinch of cayenne or chopped jalapeños works well too. Taste often and adjust as needed. I recommend using a Dutch oven for chili. It distributes heat evenly and is perfect for slow cooking. Look for one with a tight lid to keep moisture in. Other useful tools include a wooden spoon for stirring. A sharp knife makes chopping quicker and safer. A can opener is key for those beans and tomatoes. Having the right tools makes cooking easier and more fun! {{image_2}} You can make beef chili healthier in a few ways. First, try using lean beef or turkey. This option cuts fat while keeping the flavor. Ground turkey gives a lighter taste but still packs protein. For those who prefer no meat, there are great vegetarian or vegan options. You can use lentils or mushrooms as a base. They both add texture and flavor. You can also mix in beans like chickpeas or black beans. These will keep your chili hearty. Chili has many styles depending on where you are. Southwestern-style chili often includes corn and green chilies. These add sweetness and spice. You might also find it topped with avocado or tortilla strips, giving it a fresh crunch. Texas-style chili is different. It usually has no beans and focuses on beef and spices. This style uses a lot of chili powder and sometimes even smoked meats. It’s rich and full of bold flavors. You can also play with beans in your chili. Besides kidney and black beans, you could add pinto beans or even cannellini beans. Each type brings a unique taste and texture. Adjusting the spice level is easy, too. If you like it hot, add jalapeños or cayenne pepper. For a milder dish, skip the heat and focus on herbs. You can also try adding a touch of cocoa powder or coffee. This makes the chili richer and deeper in flavor. For the full recipe, check out the [Full Recipe]. To keep your chili fresh, use an airtight container. Glass or plastic containers work well. Make sure the chili cools before sealing. Store it in the fridge for up to 3-4 days. For longer storage, freeze it. Use freezer-safe bags or containers for best results. When reheating in the microwave, use a microwave-safe bowl. Cover it loosely to prevent splatters. Heat in short bursts, stirring every minute. This helps heat evenly. For stovetop reheating, place the chili in a pot. Heat over medium-low heat, stirring often. Add a splash of water if it seems too thick. How long does chili last? In the fridge, it lasts 3-4 days. In the freezer, it can last up to 4-6 months. Signs of spoilage include a sour smell or mold. If you see these signs, toss it out. Enjoy your Classic Beef Chili while it’s fresh for the best taste! For the full recipe, see [Full Recipe]. To spice up your chili, add hot sauce or fresh peppers. You can use jalapeños for a kick. Sliced serrano peppers also work well. Just chop them finely and add them when cooking. For more heat, mix in cayenne pepper too. Start with a little and taste as you go. Adjust until it’s just right for you. Yes! You can swap many ingredients in chili. Use turkey instead of beef for a leaner option. If you don’t have kidney beans, black beans work great too. You can even use lentils for a different texture. No bell pepper? Try zucchini or corn instead. Get creative and use what you have! Chili pairs well with many sides. Serve it with cornbread for a sweet contrast. Rice is another classic option that soaks up the sauce. You can also enjoy it with tortilla chips for crunch. A simple salad adds freshness. Don’t forget toppings like cheese and sour cream for extra flavor. Yes, you can freeze chili! Let it cool completely before freezing. Use airtight containers or freezer bags for best results. Label them with the date for easy tracking. To thaw, place it in the fridge overnight. You can also use the microwave for a quick thaw. Just heat it on low, stirring often. To thicken your chili, use a few simple methods. You can mash some beans against the pot’s side. This adds creaminess and thickens the sauce. Another method is to let it simmer longer, which reduces extra liquid. If you want a quick fix, mix in cornstarch or flour with a little water. Stir it in and cook until thickened. For full details, check out the Full Recipe for Classic Beef Chili! In this blog post, I shared essential ingredients and steps to make classic beef chili. You learned tips for cooking, variations for different diets, and how to store leftovers properly. With these insights, you can create your own delicious chili that suits your taste. Remember, cooking is about experimenting and enjoying the process. I hope you feel inspired to make your perfect chili and share it with others. Happy cooking!

Classic Beef Chili Hearty Flavorful Comfort Dish

Looking for a cozy dish that packs a punch? Classic Beef Chili is your answer. This hearty, flavorful comfort dish

For a tasty Beef and Broccoli Stir Fry, you need key ingredients. Here’s what you will use: - 1 lb flank steak, thinly sliced against the grain - 2 cups broccoli florets - 1 red bell pepper, sliced - 3 cloves garlic, minced - 1 tablespoon ginger, minced - 1/4 cup soy sauce (low sodium preferred) - 2 tablespoons oyster sauce - 1 tablespoon cornstarch - 2 tablespoons vegetable oil (divided) - 1 tablespoon sesame oil - 1 teaspoon crushed red pepper flakes (optional) - Cooked jasmine rice or noodles for serving - Sesame seeds for garnish - Green onions, chopped for garnish You likely have some of the pantry staples at home. Here are the essentials: - Soy sauce - Oyster sauce - Cornstarch - Vegetable oil - Sesame oil These items enhance the flavor of your dish. They are easy to find and affordable. Feel free to make this dish your own! Here are optional ingredients to try: - Other vegetables like carrots or snap peas - Different types of sauces, such as teriyaki or hoisin - More spices like black pepper or garlic powder These options let you tailor the stir fry to your taste. You can mix and match to create something unique! For the full recipe, check the link above. Start with the flank steak. Slice it thin against the grain. This helps it stay tender. In a medium bowl, mix the beef with soy sauce, oyster sauce, and cornstarch. Toss everything well to coat. Let it marinate for about 15-20 minutes. This step adds flavor and tenderness to the beef. Next, let’s cook the broccoli. Bring a pot of water to a boil. Add the broccoli florets and blanch them for just 2 minutes. This keeps the color bright and the crunch intact. After blanching, quickly place the broccoli in an ice bath. This shocks the veggies and helps them stay green. Drain the broccoli and set it aside. Now it’s time to cook the beef. Heat 1 tablespoon of vegetable oil in a large skillet or wok. Use medium-high heat for the best results. Add the marinated beef and cook for about 3-4 minutes. You want it browned and just cooked through. Once done, remove the beef and set it aside. In the same skillet, add the remaining tablespoon of vegetable oil. Toss in minced garlic, ginger, and sliced red bell pepper. Stir-fry for 1-2 minutes until fragrant. The pepper should be tender-crisp at this point. Return the cooked beef to the skillet. Add the blanched broccoli and mix well. Drizzle sesame oil over everything. If you like some heat, sprinkle crushed red pepper flakes. Stir-fry for another 2-3 minutes until everything is heated through. Taste and adjust the seasonings if needed. Serve the stir fry hot over jasmine rice or noodles. For that final touch, garnish with sesame seeds and chopped green onions. Enjoy this full recipe for a quick and flavorful meal! To make a great beef and broccoli stir fry, start with fresh ingredients. Use flank steak for a tender bite. Slice it thinly against the grain. This helps the beef stay juicy and flavorful. Marinate the meat in soy sauce and oyster sauce for 15-20 minutes. This adds depth to your dish. Blanch the broccoli for just two minutes. This keeps it bright and crisp. Cook the beef quickly over high heat. This gives it a nice sear and locks in moisture. One common mistake is overcooking the beef. It should be browned but not dry. If you cook too long, it will become tough. Another mistake is not using enough oil. The oil helps prevent sticking and adds flavor. Avoid overcrowding the pan. If the pan is too full, your beef will steam instead of sauté. Lastly, don’t skip the garnishes. Sesame seeds and green onions add a nice touch and extra taste. Using the right tools can make cooking easier. A large skillet or wok is essential for stir frying. It allows for quick cooking and even heat. A sharp knife is key for slicing the beef thinly. A cutting board with a non-slip surface makes prep safer. Use measuring spoons for accurate sauce portions. Having a spatula helps with tossing and mixing ingredients. These tools will speed up your cooking and improve your dish. If you want to see the full recipe, you can check it out for more details. {{image_2}} You can change the beef and broccoli stir fry by adding more veggies. Carrots, snap peas, or bell peppers work well. Slice them thin. This makes them cook fast. You can even toss in mushrooms for a tasty touch. The more colors, the better it looks and tastes! Not a beef fan? You can use chicken, shrimp, or tofu. Chicken breast works great if you slice it thin. Shrimp cooks fast and adds a nice flavor. Tofu is perfect for a veggie twist. Just make sure to press it first. This removes excess water and helps it soak in flavors. You can play with flavors by trying new sauces. Add hoisin sauce for a sweet kick. Try garlic or chili sauce for heat. Experiment with fresh herbs like basil or cilantro. Each change makes the dish unique. You can keep it fun and fresh every time you cook! For the full recipe, click [Full Recipe]. To keep your Beef and Broccoli Stir Fry fresh, cool it quickly. Place leftovers in a shallow dish. Cover it with plastic wrap or a lid. Store in the fridge for up to three days. Make sure the stir fry is at room temperature before sealing. This helps prevent condensation. When you are ready to eat leftovers, reheat them on the stove. Use a non-stick pan for easy cooking. Add a splash of water or broth to keep things moist. Heat on medium until hot. Stir often to avoid burning. The microwave works too, but stir halfway through to heat evenly. If you want to store your stir fry longer, freezing is a great option. Use an airtight container or freezer bag. Portion out servings for easy meals later. Squeeze out as much air as possible before sealing. This helps prevent freezer burn. Beef and Broccoli can last up to three months in the freezer. When ready to eat, thaw it overnight in the fridge before reheating. To make Beef and Broccoli Stir Fry, start with flank steak. Cut it thin. Mix soy sauce, oyster sauce, and cornstarch in a bowl. Add the steak and let it soak. Next, boil water and blanch broccoli for two minutes. After that, heat oil in a skillet. Cook the beef until brown, then remove it. In the same pan, add garlic, ginger, and bell pepper. Stir-fry for a few minutes. Add the beef back along with broccoli. Drizzle with sesame oil and mix. Serve it hot over rice or noodles. For the full recipe, check the detailed steps above. Yes, you can use frozen broccoli. Just make sure to thaw it first. You can also blanch it briefly in hot water. This keeps the color bright and the texture nice. Frozen broccoli works well and saves time. It is a good choice if fresh broccoli isn’t available. Serve Beef and Broccoli Stir Fry with jasmine rice or noodles. Both pair well with the savory sauce. You can also add a side of egg rolls or spring rolls for crunch. Another option is to serve a simple salad for freshness. This adds color and texture to your meal. In this post, I covered how to make beef and broccoli stir fry. We explored ingredients, step-by-step instructions, and helpful tips. I shared ways to customize the dish with different veggies and proteins. I also highlighted storage and reheating methods to keep your leftovers fresh. With these tips, you can create a delicious stir fry every time. Enjoy experimenting with flavors and make this dish your own. Happy cooking!

Beef and Broccoli Stir Fry Quick and Flavorful Meal

Looking for a tasty, quick meal that’s easy to make? Beef and Broccoli Stir Fry is your answer. Packed with

To make tasty beef enchiladas, you need some simple ingredients. Here’s what you'll gather: - 1 pound ground beef - 1 small onion, diced - 2 cloves garlic, minced - 1 teaspoon chili powder - 1 teaspoon cumin - 1 can (15 oz) black beans, rinsed and drained - 1 cup corn kernels (fresh or frozen) - 1 cup shredded cheese (cheddar or Mexican blend) - 8 medium flour tortillas - 2 cups enchilada sauce (store-bought or homemade) - 1/2 cup sour cream - Fresh cilantro, for garnish - Salt and pepper, to taste These ingredients create a rich flavor in every bite. The beef, beans, and corn combine nicely to give a hearty filling. The spices add warmth without being too spicy. You can make your enchiladas even better with a few toppings. Here are some ideas: - Avocado slices - Sliced jalapeños - Diced tomatoes - Shredded lettuce - Extra cheese - Lime wedges These toppings will add freshness and crunch. Customize your dish to match your taste! You’ll need some basic tools to prepare your enchiladas. Here’s what I recommend: - Large skillet - 9x13 inch baking dish - Cutting board - Knife - Spoon or spatula - Aluminum foil Having the right equipment makes cooking easier. This setup helps you cook the beef and bake the enchiladas perfectly. For the full recipe, be sure to check out the details! To start, gather your ingredients. Heat a large skillet over medium heat. Add the ground beef and cook it until it turns brown. This takes about 5-7 minutes. Drain any fat from the pan. Next, add the diced onion and minced garlic. Sauté them until the onion is soft and clear, which takes about 3-4 minutes. Now, it's time to add flavor. Stir in the chili powder, cumin, salt, and pepper. Cook this mix for about 2 minutes. This allows the spices to release their flavors. Add the black beans and corn to the skillet. Stir well and cook for another 2-3 minutes until everything is warm. Once your beef filling is ready, it’s time to assemble. Spread about 1/2 cup of enchilada sauce on the bottom of a 9x13 inch baking dish. Lay out your flour tortillas on a clean surface. Spoon around 1/4 cup of the beef filling onto each tortilla. Sprinkle some cheese on top. Now, roll each tortilla tightly and place them seam-side down in the baking dish. Repeat this until all the tortillas are filled. Next, pour the remaining enchilada sauce over the rolled enchiladas. Make sure they are well covered. Finally, sprinkle the remaining cheese on top. Preheat your oven to 375°F (190°C). Cover the baking dish with foil. Bake for 20 minutes. After that, remove the foil and bake for another 10 minutes. The cheese should be bubbling and golden. Let the enchiladas cool for a few minutes before serving. Top each plate with a dollop of sour cream and some fresh cilantro for a nice touch. Enjoy your tasty meal! For the complete recipe, check out the Full Recipe. To make the best beef enchiladas, focus on fresh ingredients. Use good-quality ground beef and fresh veggies. Sauté onions and garlic well to bring out their flavors. Season the meat mix well with spices. This builds depth in taste. Make sure to roll the tortillas tightly. This keeps the filling inside during baking. Use a good amount of enchilada sauce to keep things moist. This will prevent dry spots in your dish. If you're short on time, consider these tips. You can use store-bought enchilada sauce and tortillas. This saves prep time. You can also prepare the beef filling a day ahead. Just store it in the fridge. When you're ready to cook, assemble and bake. Another shortcut is to use a slow cooker. Cook the beef filling on low for a few hours. This gives you tender meat without much fuss. Avoid overcooking the beef. It should be browned but not dry. Don't skip the garlic and onion; they add much-needed flavor. If you don't use enough sauce, your enchiladas may turn out dry. Don't forget to cover the baking dish with foil at first. This helps the cheese melt and keeps the dish moist. Lastly, let the enchiladas cool a bit before serving. This allows the flavors to settle and makes them easier to serve. For the full recipe, check out the section above. {{image_2}} You can make beef enchiladas vegetarian by swapping the beef for veggies. Use mushrooms, zucchini, or bell peppers for great flavor. You can also add beans for protein. Black beans or pinto beans work well. Don’t forget to use your favorite cheese to keep it cheesy and delicious! If you want to try different proteins, ground turkey or chicken are great options. You can also use shredded rotisserie chicken for a quick meal. For a twist, try shredded pork or even fish. Each protein brings its own flavor, so pick what you love most. To change the spice level, add more chili powder or jalapeños. If you want it milder, use less chili powder. You can also use green enchilada sauce for a different taste. Remember, the heat builds up as you cook, so start small and taste as you go. To store leftover enchiladas, let them cool first. Place them in an airtight container. You can keep them in the fridge for up to three days. Be sure to cover them well to prevent drying out. If you want to keep them longer, freezing is a great option. To freeze enchiladas, wrap each one tightly in plastic wrap. Then, place them in a freezer-safe bag or container. They can last up to three months in the freezer. When you're ready to eat them, just thaw them in the fridge overnight before reheating. To reheat enchiladas, preheat the oven to 350°F (175°C). Place the enchiladas in a baking dish. Add a little extra enchilada sauce on top to keep them moist. Cover with foil and bake for about 20 minutes. Remove the foil for the last five minutes to warm the cheese. Enjoy your easy beef enchiladas just as if they were fresh! For the full recipe, check out the instructions above. Beef enchiladas stand out due to their rich filling made with seasoned ground beef. The choice of meat adds depth and flavor. Other enchiladas might use chicken, cheese, or beans. The beef also pairs well with the spices used in the dish. This combination creates a hearty meal that feels filling and satisfying. Using tortilla chips will change the dish significantly. Chips won't hold the beef filling well like tortillas do. If you want a crispy texture, consider making a layered dish instead. Simply layer chips, beef, sauce, and cheese in a baking dish. Then bake it until it's warm and bubbly. Making enchilada sauce at home is simple and rewarding. You will need: - 2 tablespoons olive oil - 2 tablespoons chili powder - 1 teaspoon cumin - 1 teaspoon garlic powder - 1 can (15 oz) tomato sauce - 1 cup vegetable broth - Salt and pepper to taste 1. Heat the olive oil in a saucepan over medium heat. 2. Add chili powder, cumin, and garlic powder. Stir for about 30 seconds. 3. Pour in the tomato sauce and broth, mixing well. 4. Simmer for 10-15 minutes until the sauce thickens. 5. Season to taste with salt and pepper. This sauce is perfect for your beef enchiladas. You can also find a full recipe for beef enchiladas in our earlier section. Enjoy! Beef enchiladas are simple and tasty. We explored the main and optional ingredients, the tools you need, and easy steps to cook them. I shared tips to improve your enchiladas and avoid common mistakes. You also saw variations for different diets and how to store leftovers. With all this, you can create great enchiladas that everyone will love. Enjoy your cooking and take your time. Good meals bring good times!

Easy Beef Enchiladas Flavorful and Quick Recipe

Looking for a tasty dinner idea? You’ll love these Easy Beef Enchiladas! Packed with flavor and ready in no time,

To create a tasty bowl of spicy chicken ramen, you need a few key ingredients: - 2 boneless, skinless chicken thighs - 4 cups chicken broth - 2 packs of instant ramen noodles (discard the seasoning packets) - 1 tablespoon sesame oil - 2 garlic cloves, minced - 1-inch piece of ginger, grated - 1 tablespoon red chili paste (or to taste) These ingredients form the base of your ramen. The chicken thighs add rich flavor, while the broth creates a warm, comforting soup. Instant ramen noodles cook quickly and easily. Sesame oil gives a nutty aroma, and garlic, ginger, and chili paste bring depth and heat. You can also add some optional ingredients to make your ramen even better: - 2 soft-boiled eggs - 1 tablespoon miso paste - 1 small carrot, julienned - 3 green onions, chopped - 1 cup baby spinach - Toasted sesame seeds for garnish - Sriracha for extra heat (optional) Soft-boiled eggs add creaminess and richness. Miso paste deepens the umami flavor. Fresh vegetables like carrots, green onions, and spinach not only add color but also nutrients. Garnishes like sesame seeds and Sriracha give a nice finish and extra spice. For the full recipe, check out [Full Recipe]. - Marinate the chicken thighs Start by mixing 1 tablespoon of soy sauce with half of the red chili paste. Place the chicken thighs in this mix and let them sit for about 15 minutes. This helps to infuse the chicken with flavor. - Sauté garlic and ginger In a large pot, heat 1 tablespoon of sesame oil over medium heat. Add minced garlic and grated ginger. Sauté for about 1 minute until the aroma fills the kitchen. This step builds a great base for your ramen. - Brown the chicken Add the marinated chicken thighs to the pot. Cook them for about 5 minutes, turning them until both sides are brown. This locks in the juices and adds depth to the flavor. - Simmer with broth and miso Pour in 4 cups of chicken broth. Bring it to a gentle simmer. Stir in 1 tablespoon of miso paste and the rest of the red chili paste. Let it cook for 15-20 minutes, until the chicken is tender and cooked through. - Cook ramen noodles and vegetables Remove the chicken thighs and shred them with two forks. Return to the pot, add 2 packs of instant ramen noodles, and cook them according to package instructions, usually about 3 minutes. In the last minute, add the julienned carrot, chopped green onions, and baby spinach. This will keep the vegetables crisp and fresh. - Assemble in bowls with garnishes Divide the noodles into bowls. Top with the shredded chicken and soft-boiled eggs if you like. Ladle the broth and veggies over everything. Finish with a sprinkle of toasted sesame seeds and a drizzle of Sriracha for extra heat. Enjoy your flavorful and satisfying meal! For the full recipe, check out the details above. To make the best spicy chicken ramen, you can adjust the spice level. If you want it milder, use less chili paste. For more heat, add extra chili paste or Sriracha. The goal is to find a balance that suits your taste. The quality of your broth is key. A rich, homemade chicken broth gives the best flavor. If you use store-bought broth, look for low-sodium options. This way, you can control the salt in your dish. Shredding chicken efficiently can save time. After cooking, let the chicken cool for a few minutes. Use two forks to shred it quickly. This gives you tender pieces that blend well with the noodles. Timing your veggies is important for the right texture. Add the carrots, green onions, and spinach at the end. This keeps them crisp and bright. Just a minute in the broth will do! Bowl arrangement adds to the meal's appeal. Place the noodles at the bottom, then top with chicken and veggies. Ladle the broth over everything to blend the flavors. For garnishes, get creative! A sprinkle of sesame seeds adds crunch. A drizzle of Sriracha around the edges makes it pop. You can also add a slice of green onion for color. This makes your ramen look as good as it tastes! {{image_2}} You can easily switch the chicken with tofu. Use firm tofu for a good texture. Just cube it and marinate like you would chicken. For the broth, consider using vegetable broth instead of chicken broth. This allows the flavors to stay rich while keeping it vegetarian. If you love heat, try different chili pastes. Gochujang adds a sweet and spicy kick. You can also add toppings like kimchi for more flavor. The tangy taste of kimchi pairs well with ramen. Don't forget to sprinkle some green onions for extra crunch. For a gluten-free meal, use zucchini noodles or rice noodles instead of traditional ramen. Both options are tasty and work well with the broth. Ensure all your ingredients are gluten-free. This way, everyone can enjoy a warm bowl of spicy chicken ramen. Want to see the complete recipe? Check out the Full Recipe for more details! To keep your spicy chicken ramen fresh, cool it down first. Place it in the fridge within two hours after cooking. Use airtight containers to store it. This helps keep the flavors locked in. I recommend glass or BPA-free plastic containers for best results. Reheat ramen on the stove for the best taste. Pour the broth and noodles into a pot. Heat on low until warm. Stir gently to avoid breaking the noodles. You can also use a microwave, but this can change the texture. If using a microwave, heat in short bursts, stirring in between. You can freeze your ramen for up to three months. Freeze the broth and noodles separately to keep them fresh. For the broth, let it cool and pour it into freezer bags. For noodles, place them in a separate airtight container. When ready to eat, thaw the broth in the fridge overnight. Reheat and add the noodles at the end. This keeps everything tasting great. For this spicy chicken ramen, I recommend using instant ramen. Instant ramen cooks quickly and absorbs flavors nicely. Fresh noodles can also work well, but they may take longer to cook. Some good brands for instant ramen are Nissin and Maruchan. These brands offer tasty options that make meal prep easier. Yes, you can prepare parts of this recipe ahead. Marinate the chicken thighs and chop the veggies in advance. Store the marinated chicken in the fridge for up to a day. You can also cook the broth and noodles separately, then store them. When ready to eat, heat the broth and add the noodles and veggies. This method keeps the ramen fresh and tasty. To reduce heat, use less chili paste or skip it altogether. You can replace it with a milder sauce, like sweet chili sauce. If you want more spice, add extra chili paste or some crushed red pepper. Sriracha is another great way to kick up the heat. Just drizzle it on top before serving. This blog post covered how to make spicy chicken ramen. We explored essential ingredients and optional add-ons that enhance flavor. You learned step-by-step instructions, cooking tips, and variations to suit your needs. In conclusion, making spicy chicken ramen is easy and fun. You can customize it to match your taste. Enjoy your ramen journey and impress your friends with your new skills!

Spicy Chicken Ramen Flavorful and Satisfying Meal

Are you ready for a bowl of Spicy Chicken Ramen that warms your soul? This flavorful and satisfying meal is

To make easy chicken gyros, gather these simple ingredients: - 1 lb (450g) boneless, skinless chicken thighs - 2 tablespoons olive oil - 2 cloves garlic, minced - 1 tablespoon dried oregano - 1 teaspoon paprika - 1 teaspoon cumin - Salt and pepper to taste - 4 whole wheat pita breads - 1 cup plain Greek yogurt - 1 tablespoon lemon juice - 1 cucumber, diced - 1 cup cherry tomatoes, halved - ¼ red onion, thinly sliced - Fresh parsley, chopped (for garnish) You can swap some ingredients if needed: - Chicken thighs can be replaced with chicken breasts for a leaner option. - Olive oil can be substituted with avocado oil for a different flavor. - If you lack Greek yogurt, try sour cream or a dairy-free yogurt. - Fresh herbs, like dill, can replace parsley for a fresh twist. Freshness matters in flavor. Here are tips to ensure quality: - Choose chicken that is pink and firm. Avoid any chicken with a gray hue. - Select bright, firm cucumbers and ripe cherry tomatoes for the best taste. - Fresh garlic should feel firm and not sprout. - Buy whole wheat pita bread that is soft and flexible, not hard or stale. These tips will help you create the best chicken gyros. Enjoy making this dish! Start by making the marinade. In a large bowl, mix together olive oil, minced garlic, dried oregano, paprika, cumin, salt, and pepper. This mix brings out the flavors. Next, add the chicken thighs. Make sure they are well-coated in the marinade. Cover the bowl and place it in the fridge. Let it marinate for at least 30 minutes. If you have time, two hours deepens the flavor. Preheat your grill or grill pan to medium-high heat. When hot, place the marinated chicken thighs on the grill. Cook each side for about 6 to 7 minutes. Check that they reach an internal temperature of 165°F (75°C). This ensures they are fully cooked. Once done, remove the chicken and let it rest for a few minutes. Then slice the chicken into thin strips. Warm the pita breads on the grill for about a minute. This makes them soft and easy to fold. To assemble, take a pita and add a good amount of sliced chicken. Then, layer on diced cucumber, halved cherry tomatoes, and thinly sliced red onion. Drizzle some tzatziki sauce over the top. Finish with fresh parsley for a pop of color. Roll up the pita around the fillings, and your chicken gyros are ready to enjoy! For the full recipe, check the earlier section. To make your chicken gyros burst with flavor, focus on the marinade. Start with olive oil, garlic, oregano, paprika, and cumin. These spices work together to give a rich taste. Let the chicken sit in the marinade for at least 30 minutes. For the best flavor, marinate it for up to 2 hours. Cooking time can change based on your heat source. If you use a grill, aim for 6–7 minutes per side. Make sure the chicken reaches 165°F (75°C) inside. If you cook in a pan, it might take a bit longer. Always check to ensure the chicken is fully cooked. Creating tzatziki sauce is simple and key to your gyros. Combine Greek yogurt and lemon juice in a bowl. Add diced cucumber and a pinch of salt. Mix well for a fresh taste. You can chill it in the fridge for a bit. This helps the flavors blend nicely. For extra zing, add minced garlic or fresh dill. {{image_2}} If you want to change the protein, try lamb or beef. Both meats add rich flavor. You can also use shrimp or fish for a lighter option. For fish, use firm types like salmon or cod. Just make sure they cook fast, around 4–5 minutes per side. For a meat-free meal, use marinated tofu or tempeh. Both soak up flavors well and grill nicely. Grilled halloumi cheese is another tasty choice. Just slice it thick and grill until golden. You can also use roasted vegetables like zucchini and bell peppers for a fresh twist. Add spices to your marinade for extra kick. Try chili powder or cayenne for heat. Fresh herbs like mint or dill can brighten your dish. You can also mix in feta cheese with your veggies for a salty bite. For crunch, add lettuce or sliced radishes. Each choice will make your gyros special. To keep your leftover gyros fresh, wrap them tightly in plastic wrap. You can also use airtight containers. Store them in the fridge for up to three days. Make sure to keep the tzatziki sauce separate. This prevents the pita from getting soggy. When you are ready to enjoy your leftover gyros, take them out of the fridge. Remove the tzatziki sauce and set it aside. You can reheat the chicken in a skillet over medium heat. Heat it for about five minutes, stirring often. You can also warm your pita in the skillet for about one minute. This will make it soft again. If you want to freeze your chicken gyros, wrap them well in foil or freezer bags. They can stay in the freezer for up to three months. To thaw, place them in the fridge overnight. Once thawed, you can reheat them as mentioned above. Enjoying gyros later is a great way to save time! For the full recipe, check out the Easy Chicken Gyros section. You can still make chicken gyros without a grill. Use a stovetop pan instead. Heat the pan over medium-high heat and add a bit of olive oil. Cook the marinated chicken thighs for about 6–7 minutes on each side. Make sure the chicken is cooked through and reaches 165°F. This method gives you tasty gyros without needing a grill. Yes, you can use chicken breasts. Chicken breasts are leaner than thighs. However, they might be less juicy. To keep them moist, marinate them for a longer time. You can also cut the breasts into smaller pieces for even cooking. Thighs offer more flavor, but breasts will work in a pinch. Chicken gyros go well with many sides. Some great options include: - Greek salad - Roasted vegetables - Rice pilaf - Fries or sweet potato fries - Hummus and pita chips These sides add color and flavor to your meal. They also complement the spices in the gyros well. For the complete recipe, including ingredients and instructions, check out the Easy Chicken Gyros section above. You learned about the key ingredients for gyros and how to prepare them. We discussed many substitution options and how to keep your ingredients fresh. I shared step-by-step grilling tips and ways to assemble the perfect gyros. With these tips and tricks, you can enhance flavor and store leftovers properly. Remember, you can swap proteins and try vegetarian styles for variety. Making delicious gyros is easy, and now you have the know-how to impress your friends and family. Enjoy your cooking!

Easy Chicken Gyros Flavorful and Simple Recipe Guide

Are you ready to spice up your weeknight dinner? In this guide, I’ll show you how to make easy chicken

Older posts
Newer posts
← Previous Page1 … Page77 Page78 Page79 … Page84 Next →

dsad

© 2026 easycookingbite • Built with GeneratePress

Our Policies

  • Copyright Policy
  • Cookie Policy
  • GDPR Policy
  • Privacy Policy
  • Disclaimer
  • Terms Of Use

More Information

  • Home
  • About
  • Contact
  • Appetizers
  • Dessert
  • Dinner
  • Drinks
©2026, easycookingbite About Back To Top