Skip to content
DisclaimerTerms Of UseGDPR PolicyCookie Policy

easycookingbite

  • Home
  • Drinks
  • Appetizers
  • Dinner
  • Dessert
  • About
  • Contact
  • Privacy Policy
DisclaimerTerms Of UseGDPR PolicyCookie Policy

NO-ING-IMG

Chicken and Marinade Ingredients - 2 boneless, skinless chicken breasts - 2 tablespoons olive oil - 2 teaspoons dried oregano - 1 teaspoon garlic powder - Salt and pepper to taste Quinoa and Vegetable Ingredients - 1 cup quinoa, rinsed - 2 cups vegetable broth - 1 cup cherry tomatoes, halved - 1 cucumber, diced - 1 cup Kalamata olives, pitted and sliced - 1/2 red onion, thinly sliced Garnish and Dressing Ingredients - 1 cup feta cheese, crumbled - 1/4 cup fresh parsley, chopped - Juice of 1 lemon This complete list gives you everything you need to make healthy Greek chicken bowls. Each ingredient brings its own flavor and nutrition. The chicken is lean, while the quinoa adds protein. The veggies add crunch and color, making your bowl both tasty and pretty. Don't forget the feta; it adds a creamy touch that balances the dish. You can find the full recipe to guide you through the cooking process. Enjoy making these bowls! Marinating the Chicken Start by mixing olive oil, oregano, garlic powder, salt, and pepper in a bowl. This mix gives the chicken great flavor. Coat the chicken breasts with this marinade. Let them sit for about 15 minutes. This step is key for juicy chicken. Cooking the Quinoa While the chicken marinates, you can cook the quinoa. In a saucepan, bring vegetable broth to a boil. Add the rinsed quinoa and lower the heat. Cover the pot and let it simmer for about 15 minutes. Once the liquid is gone, fluff the quinoa with a fork. This will make it light and fluffy. Grilling the Chicken Heat your grill or grill pan over medium heat. Place the marinated chicken on the grill. Cook for about 6-7 minutes on each side. The chicken should be cooked through and juices should run clear. Once done, take the chicken off and let it rest. This helps keep it tender. Layering Components in Bowls Grab four large bowls. Start by adding the cooked quinoa as the base. Then, slice the grilled chicken and place it on top of the quinoa. Next, add halved cherry tomatoes, diced cucumber, sliced olives, and red onion. Sprinkle crumbled feta cheese over it all. This mix creates a colorful dish. Final Touches and Serving Finally, chop fresh parsley and sprinkle it on top. Squeeze lemon juice over each bowl for a fresh taste. Serve these Healthy Greek Chicken Bowls right away. They look great and taste even better! For the complete recipe, check out the Full Recipe section. Achieving Perfectly Grilled Chicken To get juicy, tender chicken, start with good quality meat. Marinate your chicken for at least 15 minutes. Use olive oil, oregano, garlic powder, salt, and pepper. This mix adds flavor and moisture. Preheat your grill or grill pan to medium heat. Grill the chicken for 6-7 minutes on each side. Look for clear juices to know it's done. Let it rest before slicing to keep the juices inside. Tips for Cooking Quinoa Rinsing quinoa helps remove its bitter coating. Use vegetable broth instead of water for more flavor. Bring the broth to a boil before adding quinoa. Cover and lower the heat to simmer. Cook it for about 15 minutes until the liquid is gone. Fluff with a fork for a light texture. This makes your bowls taste great and keeps the quinoa fluffy. Best Pairings for Greek Chicken Bowls These bowls shine with fresh veggies and toppings. Use cherry tomatoes, cucumbers, and Kalamata olives for crunch. Feta cheese adds creaminess and a salty bite. Fresh parsley gives a pop of color and taste. You can also add sliced red onion for extra flavor. Drizzle lemon juice over the top for brightness. Making it a Complete Meal To make this a full meal, add a side salad or some pita bread. You can serve tzatziki sauce for dipping. This adds a cool, creamy element. These bowls are great for lunch or dinner and keep well for meal prep. Enjoy the vibrant flavors and healthy ingredients in every bite! {{image_2}} Alternative Proteins You can swap chicken for other meats. Try turkey or pork for a twist. Fish is another great choice. Grilled salmon adds a fresh taste. If you want something different, use shrimp. They cook quickly and taste great with this dish. Vegetarian Options For a veggie-friendly bowl, replace chicken with chickpeas or tofu. Both add protein and texture. You can also use lentils for a hearty option. They soak up flavors well and keep you full. Adding Spices and Herbs To boost flavor, add more spices. Try smoked paprika for a smoky touch. Cumin gives a warm, earthy flavor. Fresh herbs like dill or mint can brighten up your dish. Just a sprinkle can make your bowl pop! Different Dressings to Try The right dressing can change your bowl completely. For a creamy touch, try tzatziki sauce. It’s cool and refreshing. A lemon-herb vinaigrette brings a tangy twist. You can even mix olive oil with balsamic vinegar for a sweet-sour kick. To keep your Healthy Greek Chicken Bowls fresh, proper storage is key. - Refrigeration Guidelines: Place leftovers in an airtight container. They will stay good for about 3 to 4 days in the fridge. Make sure to let the food cool down before sealing it. This prevents moisture buildup. - Freezing Options: If you want to keep them longer, you can freeze the bowls. Separate the chicken and veggies from the quinoa. Use freezer-safe bags or containers. Write the date on the bags. They can last up to 3 months in the freezer. Reheating your bowls correctly helps keep them tasty. - Best Methods for Reheating: The best way to reheat is using the microwave. Place your bowl in the microwave for 1 to 2 minutes. Stir halfway through for even heating. You can also use a skillet. Heat over medium-low heat, stirring until warmed through. Avoid overheating, as this can make the chicken dry. Don’t forget to check the Full Recipe to enjoy this meal fresh! What makes this recipe healthy? This recipe is healthy because it uses lean chicken and fresh veggies. Quinoa adds protein and fiber. The olive oil provides good fats. Feta cheese gives flavor without too many calories. Overall, it’s balanced and nutritious. Can I meal prep these bowls? Yes, you can meal prep these bowls! Cook the chicken and quinoa ahead of time. Store them in separate containers. Add fresh veggies just before eating to keep them crisp. This way, you have a quick and healthy meal ready to go. How can I make this recipe dairy-free? To make this recipe dairy-free, simply skip the feta cheese. You can add avocado for creaminess instead. Another option is to use a dairy-free cheese alternative. These swaps keep the flavor while making it dairy-friendly. What sides pair well with Greek Chicken Bowls? Great sides for Greek Chicken Bowls include a simple Greek salad. You can also serve warm pita bread or tzatziki sauce on the side. Roasted vegetables are another tasty option. They enhance the meal while keeping it healthy. Can I use other grains instead of quinoa? Absolutely! You can use brown rice, farro, or couscous. Each grain brings its unique texture and taste. Just be sure to adjust the cooking time according to the grain you choose. This lets you customize your bowl with ease. For the full recipe, check out Greek Chicken Delight Bowls. This blog post covered all you need to create tasty Greek chicken bowls. We explored ingredients, preparation steps, and tips for grilling. I shared ways to make your meal unique with variations and storage ideas. Remember, you can always switch up ingredients and flavors to match your taste. Meal prepping these bowls makes healthy eating easy all week. With this guide, you can enjoy a delicious dish that's good for you. Prepare to impress with your yummy Greek chicken bowls!

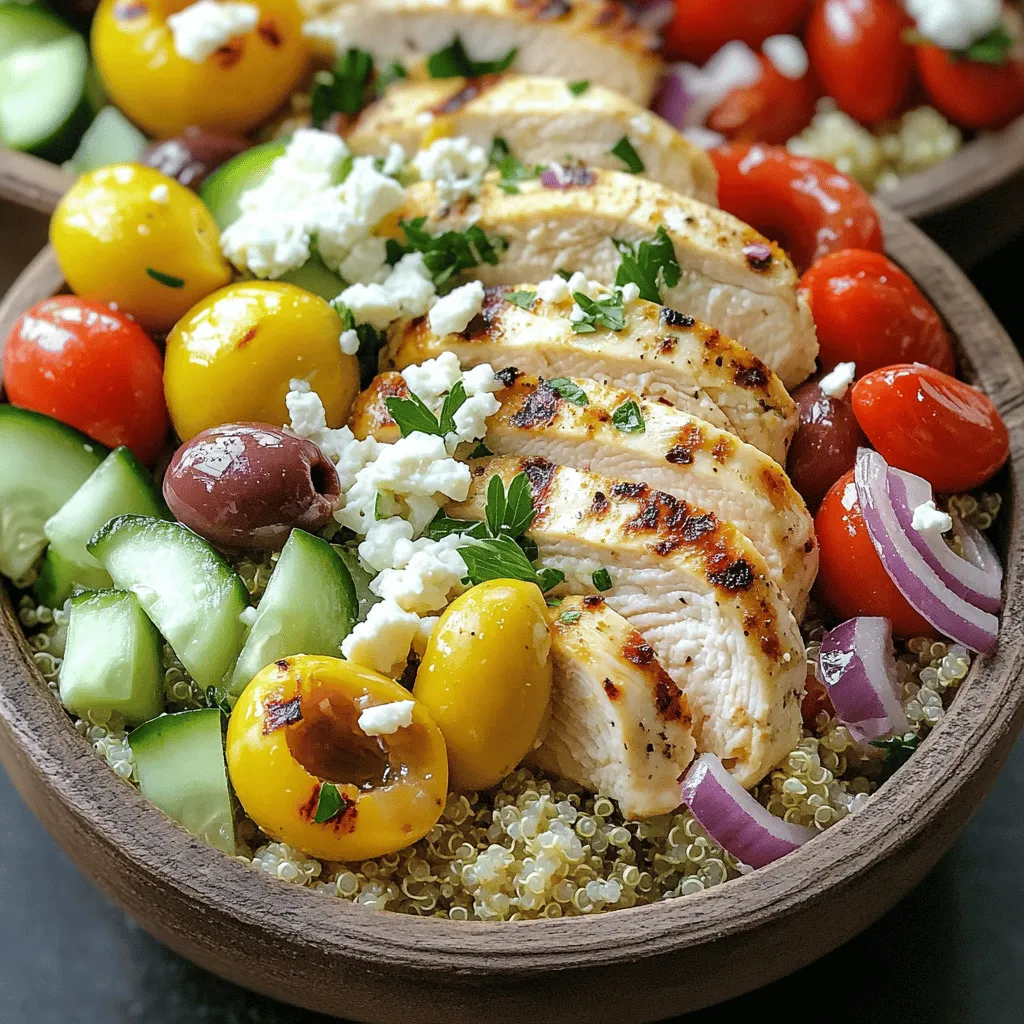
Healthy Greek Chicken Bowls Packed with Flavorful Freshness

Looking for a meal that’s healthy, easy, and full of tasty Greek flavors? You’re in the right place! My Healthy

To create these tasty Thai peanut chicken lettuce wraps, you need: - 1 lb ground chicken - 1 tablespoon vegetable oil - 3 cloves garlic, minced - 1 tablespoon fresh ginger, grated - 1 red bell pepper, diced - 1 carrot, shredded - 1 cup green onions, sliced - ½ cup roasted peanuts, chopped - ¼ cup fresh cilantro, chopped - 3 tablespoons soy sauce - 2 tablespoons peanut butter - 1 tablespoon lime juice - 1 tablespoon honey - 1 teaspoon sriracha (optional, for heat) - 12 large lettuce leaves (butter or romaine) These ingredients work together to bring out bold flavors and fresh textures. In addition to the main ingredients, having some kitchen staples helps. You'll need: - A large skillet for cooking - A spatula for stirring - A small bowl for mixing the sauce These tools make your cooking smooth and fun. To make your wraps pop, consider adding: - Extra chopped peanuts for crunch - More cilantro for freshness - Lime wedges for a zesty kick These toppings enhance the taste and look of your dish, making it even more appealing. For the complete cooking process, check out the Full Recipe. First, gather all your ingredients. This makes cooking easier and quicker. You will need: - 1 lb ground chicken - 1 tablespoon vegetable oil - 3 cloves garlic, minced - 1 tablespoon fresh ginger, grated - 1 red bell pepper, diced - 1 carrot, shredded - 1 cup green onions, sliced - ½ cup roasted peanuts, chopped - ¼ cup fresh cilantro, chopped - 3 tablespoons soy sauce - 2 tablespoons peanut butter - 1 tablespoon lime juice - 1 tablespoon honey - 1 teaspoon sriracha (optional) - 12 large lettuce leaves Wash and chop the vegetables. This makes them ready to cook. Heat the vegetable oil in a large skillet over medium heat. Add the minced garlic and grated ginger. Sauté for about 1 minute. You want to smell that great aroma! Next, add the ground chicken to the skillet. Break it apart with a spatula. Cook it until it turns brown and is fully cooked. This will take about 5 to 7 minutes. Now, stir in the diced red bell pepper, shredded carrot, and half of the green onions. Cook this for another 3 to 4 minutes. The veggies should be tender but still crisp. In a small bowl, whisk together the soy sauce, peanut butter, lime juice, honey, and sriracha (if using). Pour this sauce over the chicken mixture. Stir well to combine. Heat it through for another 2 to 3 minutes. Remove the skillet from heat. Stir in the chopped roasted peanuts and fresh cilantro. This adds great flavor and crunch! To serve, spoon a generous amount of the chicken mixture onto each lettuce leaf. Top it with the remaining green onions. For a beautiful presentation, arrange the filled lettuce wraps on a platter. Add more chopped peanuts and cilantro on top. Serve with lime wedges on the side. This adds a fresh squeeze before eating. Enjoy your Thai Peanut Chicken Lettuce Wraps! To cook chicken well, use medium heat. This helps the meat cook evenly. Break the ground chicken apart with a spatula. This ensures it cooks all the way through. Cook until it turns brown, about 5 to 7 minutes. Stir often to prevent sticking. If you want extra flavor, add garlic and ginger at the start. This step fills your kitchen with a nice aroma. To boost the taste, think about adding spices. Try a pinch of salt and pepper. You can also add a dash of paprika for a smoky flavor. If you like heat, use red pepper flakes or sriracha. Mix these spices into your sauce. This will make each bite exciting and tasty. Make your dish look great by arranging the wraps nicely. Lay the filled lettuce leaves on a colorful platter. Sprinkle chopped peanuts and cilantro on top for color. Add lime wedges on the side for a fresh touch. This small detail makes the meal more inviting. Your guests will love the look as much as the taste! For the complete recipe, check out the Full Recipe. {{image_2}} You can make these wraps vegetarian or vegan easily. Swap the ground chicken for cooked lentils or chopped mushrooms. Both options give a nice texture. Use tofu for a protein boost. Just sauté it until golden. For the sauce, replace honey with maple syrup for vegan wraps. These simple swaps will keep your wraps tasty and satisfying. You can adjust this recipe for specific diets. If you need gluten-free wraps, use tamari instead of soy sauce. Check the peanut butter label to ensure it’s gluten-free, too. For nut allergies, use sunflower seed butter. You can also skip the nuts altogether or use seeds. This way, everyone can enjoy these wraps without worry. While butter or romaine lettuce works best, you can try other greens. Iceberg lettuce offers a nice crunch. Green leaf lettuce adds a soft texture. You can even use collard greens for a sturdy wrap. Each type gives a unique taste and feel. Experiment to find your favorite! To keep your Thai Peanut Chicken Lettuce Wraps fresh, first let them cool. Place the chicken mixture in an airtight container. Store it in the fridge for up to three days. Keep the lettuce leaves separate to avoid sogginess. This way, you can enjoy crisp wraps later. When you're ready to eat, reheat the chicken mixture in a pan over low heat. Stir gently until it's warm. You can also use the microwave if you're short on time. Just heat in short bursts, stirring between each burst. This keeps the flavor intact. If you want to save the wraps for later, freezing works great. Place the chicken mixture in a freezer-safe container. It can last up to three months. Thaw it in the fridge overnight before reheating. I recommend avoiding freezing the lettuce leaves, as they do not thaw well. For the full recipe, just check out the recipe section! Yes, you can prepare the filling ahead of time. Cook the chicken mixture and store it in an airtight container. Keep it in the fridge for up to three days. When ready to eat, warm it in a skillet. Serve it fresh in lettuce leaves for best taste. You can use ground turkey, pork, or beef. If you prefer a meat-free option, try crumbled tofu or tempeh. Both options work well with the sauce and flavors in this recipe. The spice level depends on your use of sriracha. If you like it mild, skip the sriracha. For more heat, add more sriracha to taste. You can always adjust the spiciness to fit your preference. For the complete recipe, check out the Full Recipe section. It includes all the tasty details and steps to make this dish come alive. Enjoy the fun of cooking! Thai Peanut Chicken Lettuce Wraps are fun and easy to make. We covered key ingredients and cooking steps. I shared tips for the best flavors and how to present your dish. You can also customize it for different diets. Plus, I explained how to store and reheat leftovers. Now you have all the know-how to create a tasty meal. Enjoy making these wraps and impressing your friends!

Thai Peanut Chicken Lettuce Wraps Quick and Simple Meal

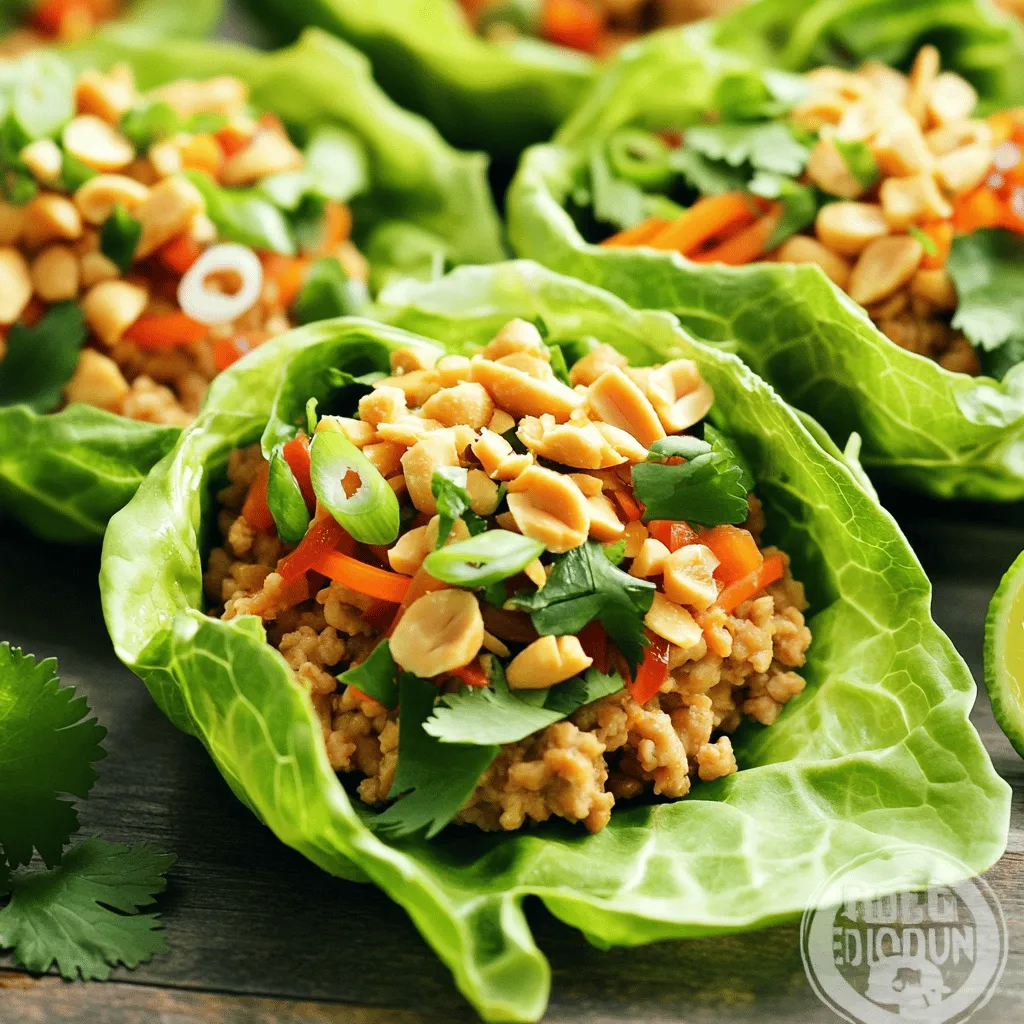
Are you craving a quick and tasty meal? Thai Peanut Chicken Lettuce Wraps are your answer! This simple dish is

- 2 cups brown rice, rinsed - 1 lb chicken thighs, boneless and skinless - 1 medium onion, finely chopped - 3 cloves garlic, minced - 1 bell pepper, diced (any color) - 1 can (15 oz) diced tomatoes, undrained - 2 ½ cups chicken broth - 1 teaspoon smoked paprika - 1 teaspoon cumin - ½ teaspoon chili powder - Salt and pepper to taste - 1 cup frozen peas - 2 tablespoons olive oil - Fresh cilantro, chopped (for garnish) Gather these ingredients before you start. Each one plays a key role in making this dish tasty. The brown rice adds a nutty flavor and great texture. Chicken thighs keep the meal juicy and tender. Fresh veggies like onion, garlic, and bell pepper give a fresh taste. The spices bring warmth and depth to the dish. The canned tomatoes add moisture and a slight sweetness. Frozen peas are a simple way to add color and nutrition. Olive oil helps with cooking and adds flavor. Finally, cilantro brightens the dish when you serve it. You can find the full recipe [here](#). Enjoy cooking! - Set the Instant Pot to 'Sauté' and heat 2 tablespoons of olive oil. - Add 1 medium onion, finely chopped, and 3 cloves of minced garlic. Sauté for 2-3 minutes. - Next, add 1 diced bell pepper and sauté for another 2 minutes. Stir it often. - Season 1 lb of boneless, skinless chicken thighs with smoked paprika, cumin, chili powder, salt, and pepper. - Push the veggies to the sides of the pot. Sear the chicken for 2-3 minutes on each side. - Add 2 cups of rinsed brown rice, 1 can of diced tomatoes (with juices), and 2 ½ cups of chicken broth. Stir well to mix everything. - Close the lid of the Instant Pot. Set to 'Manual' high pressure for 22 minutes. - After cooking, let the pressure release naturally for 10 minutes. Carefully switch the valve to 'Venting' for any leftover pressure. - Remove the chicken thighs. Shred them with two forks and return to the pot. Stir in 1 cup of frozen peas and let it sit for 5 minutes. - Taste and adjust seasoning if needed. For the full recipe, check out Instant Pot Zesty Chicken & Rice Delight. - Importance of rinsing rice: Rinsing rice removes excess starch. This helps keep your rice fluffy and prevents it from getting sticky. You want each grain to stand out. - Achieving perfect chicken texture: Use boneless chicken thighs for moist meat. They cook well and won’t dry out. Searing the chicken adds flavor and a nice texture. - Natural pressure release benefits: Allowing the pot to release pressure naturally helps keep the chicken tender. It also gives the flavors more time to blend together. Wait about 10 minutes before opening the lid. - Best garnishes for flavor enhancement: Fresh cilantro adds a bright taste to your dish. You can also use lime wedges for a zesty kick. A sprinkle of cheese can add creaminess, too. - Pairing options for complete meals: Serve with a simple salad or crusty bread. These sides balance the meal and add crunch. You can also pair it with a light soup for a cozy dinner. - Overcooking rice: Using too much liquid or cooking too long can make rice mushy. Stick to the recipe for the right balance. - Not seasoning enough: Don’t skip the spices! Seasoning adds depth to your dish. Taste before serving and adjust as needed for the best flavor. For the full recipe of this comforting dish, check the [Full Recipe]. {{image_2}} You can switch up your chicken cuts in this recipe. Chicken thighs offer great flavor, but you can also use chicken breasts. If you prefer leaner meat, breasts work well. Just remember that breasts may cook faster, so check for doneness. Adding more veggies can boost nutrition and taste. Try diced carrots, zucchini, or spinach. These additions not only add color but also provide vitamins. Just chop them small so they cook evenly with the rice. Spice blends can change the taste of your dish. You can use Italian herbs like oregano and basil for a Mediterranean twist. For a kick, add crushed red pepper flakes or curry powder. These spices will take your meal to a new level. You can also try different sauces or liquids. Swap chicken broth for vegetable broth for a lighter option. A splash of soy sauce can add a savory depth. If you want creaminess, mix in coconut milk instead of broth. These choices will keep your meal exciting! For the full recipe, check out Instant Pot Zesty Chicken & Rice Delight. After cooking, let your chicken and rice cool down. Place it in a clean, airtight container. This helps keep it fresh. You can store it in the fridge for up to four days. Always check for any off-smells before eating. If it smells fine, it should be good to eat! To freeze, use a freezer-safe container. Make sure to leave some space at the top. This allows for expansion when freezing. You can freeze the dish for up to three months. When ready to eat, thaw it in the fridge overnight. For reheating, place it in a pot on low heat. Stir often to warm it evenly. You can also use the microwave. Just cover it and heat in short bursts, stirring in between. To make Instant Pot Chicken and Rice, start by sautéing onions and garlic in olive oil. Add diced bell pepper and cook for a couple more minutes. Season chicken thighs with smoked paprika, cumin, and chili powder. Sear them in the pot until golden brown. Next, add rinsed brown rice and canned tomatoes with their juice. Pour in chicken broth and stir. Close the lid, set it to 'Manual' for 22 minutes, and let it cook. Afterward, let the pressure release naturally for 10 minutes. Shred the chicken, mix in frozen peas, and adjust the seasoning. This method keeps the rice fluffy and the chicken tender. Yes, you can use white rice instead of brown rice. White rice cooks faster than brown rice. If you use white rice, reduce the cooking time to about 10-12 minutes on high pressure. Make sure to adjust the broth quantity slightly, too. White rice will give you a softer texture, while brown rice offers a nuttier flavor. The total cooking time for this recipe is about 45 minutes. This includes 10 minutes for prep, 22 minutes for high-pressure cooking, and about 10 minutes for natural pressure release. The rest is for shredding chicken and warming the peas. This time is quick for a meal that tastes so good. Yes, you can add other vegetables to enhance the dish. Vegetables like carrots, green beans, or corn work well. Just chop them into small pieces and add them with the rice. Keep in mind that different veggies may change the cooking time slightly. You want everything to cook evenly and be tender. While canned tomatoes add great flavor, they are not strictly necessary. You can use fresh tomatoes if you prefer. Just chop them finely and add them to the pot. If you skip tomatoes altogether, consider adding more broth for moisture. This change can affect the dish's overall taste, so adjust your spices accordingly. This blog post covered all you need for Instant Pot Chicken and Rice. We explored ingredients, cooking steps, and essential tips to make it perfect. Remember to rinse your rice and season well. You can customize the dish with different veggies or spices. Store leftovers properly for the best taste later. Enjoy experimenting with this recipe. It’s simple, delicious, and great for any meal. Get cooking and have fun with it!

Instant Pot Chicken and Rice Simple Comfort Meal

Are you ready for a warm, comforting meal? Instant Pot Chicken and Rice is the perfect recipe. It’s simple, delicious,

To make a tasty cilantro lime rice, you need a few key items: - 1 cup long-grain white rice - 2 cups vegetable broth or water - 1/4 cup fresh cilantro, chopped - Zest of 1 lime - Juice of 1 lime - 1 tablespoon olive oil - 1 clove garlic, minced - 1/2 teaspoon cumin - Salt to taste These ingredients come together to create a bright and fresh flavor. The rice acts as the base, while lime and cilantro give it a zesty kick. You can boost the taste of your cilantro lime rice with some optional items. Consider these: - 1/4 cup diced red onion - 1/4 cup corn, frozen or fresh - 1/2 jalapeño, finely chopped These add-ins can enhance texture and flavor. Diced onion gives a sweet crunch, while corn adds sweetness. If you like heat, jalapeño will spice things up. Each serving of cilantro lime rice has: - Calories: 200 - Protein: 4g - Carbohydrates: 42g - Fat: 4g - Fiber: 1g - Vitamin C: 7% of daily value This dish offers a good balance of carbs and a bit of protein. It’s a healthy side that pairs well with many meals. Enjoy this vibrant and nutritious dish at your next gathering! For the complete instructions, check the Full Recipe. Start by rinsing the rice in cold water. Use a fine mesh strainer for this. Rinse until the water runs clear. This step helps remove extra starch. Less starch means fluffier rice. Trust me, it makes a big difference! In a medium saucepan, heat olive oil over medium heat. Add minced garlic and sauté for about 30 seconds. You want it fragrant but not burnt. Next, add the rinsed rice and sauté for another 2 minutes. This lightly toasts the rice for extra flavor. Now, pour in vegetable broth or water, and sprinkle in cumin and salt. Bring this mixture to a boil. Then, reduce the heat to low and cover the pot. Let it simmer for 15 to 18 minutes, until the rice is tender. Once done, remove the pot from heat and let it sit for 5 minutes. Garlic adds a warm, rich note to the rice. Cumin gives a bit of earthiness. Both together create a lovely base flavor. Once your rice has rested, it’s time for the fun part! Fluff the rice with a fork. Gently mix in chopped cilantro, lime zest, and lime juice. This brightens up the dish and gives it a fresh taste. Always taste your rice! You might want to add more salt or a splash more lime juice. Adjust according to your palate. Finally, fluff the rice again with a fork. This ensures all the flavors are mixed well. Your cilantro lime rice is now ready to serve warm! You can find the full recipe above. Enjoy! To get fluffy cilantro lime rice, rinse the rice first. Use cold water and a fine mesh strainer. Rinsing removes extra starch. This step helps the rice cook evenly. Next, toast the rice in the pan. Cook it with olive oil and garlic for two minutes. This adds flavor and helps the grains stay separate. One common mistake is not rinsing the rice. This leads to gummy rice. Also, avoid cooking on high heat. This can burn the rice. Always use a lid when simmering. This keeps steam inside for even cooking. Finally, let the rice sit after cooking. This helps it become fluffy and absorb flavors. You can make your cilantro lime rice unique. Add beans for protein. Black beans work well and add color. For spice lovers, mix in chopped jalapeños. You can also switch the lime for lemon. This gives a fresh twist. Finally, try adding different herbs. Mint or parsley can also be delicious. For a complete guide, check the Full Recipe for Cilantro Lime Rice Fiesta . {{image_2}} You can use various rice types for your cilantro lime rice. Long-grain rice works great, but jasmine or basmati rice adds a unique touch. These rice types have lovely aromas and flavors. For a healthier option, try brown rice. It may take longer to cook, but it adds a nutty taste. Adding protein can turn your cilantro lime rice into a complete meal. Chicken, shrimp, or tofu are excellent choices. Cook the protein separately and mix it in after the rice is done. You can also stir in black beans or chickpeas for a hearty vegetarian option. This keeps the dish filling and nutritious. If you love spice, add some heat to your rice. Try mixing in diced jalapeños or serrano peppers while cooking. You can also sprinkle in some red pepper flakes or cayenne pepper. Adjust the spice level based on your taste. This adds a new layer of flavor that pairs well with the lime and cilantro. To keep your cilantro lime rice fresh, store it in an airtight container. Make sure to cool the rice to room temperature before sealing it. This helps prevent excess moisture. You can keep it in the fridge for up to four days. Label your container with the date for easy reference. When you're ready to enjoy your leftover rice, heat it on the stove or in the microwave. If using the stove, add a splash of water to prevent sticking. Stir it often until it's hot. If using a microwave, cover the bowl with a lid or damp paper towel. Heat it in short bursts, checking often. This helps it warm evenly. You can freeze cilantro lime rice for later use. Place cooled rice in freezer-safe bags or containers. Press out as much air as you can before sealing. Frozen rice can last up to three months. When you want to use it, thaw it in the fridge overnight. Reheat it as described above for a quick meal. Enjoy your tasty side dish anytime! Yes, you can make this rice ahead of time. Just cook it and let it cool. Store it in an airtight container in the fridge. It keeps well for up to three days. When ready to serve, simply reheat it. Cilantro lime rice pairs well with many dishes. You can serve it with grilled chicken, fish tacos, or veggie stir-fry. It also goes great with beans or a fresh salad. This rice adds a burst of flavor to any meal. This recipe is easily vegan. Just use vegetable broth instead of chicken broth. All other ingredients are already plant-based. Enjoy this zesty rice without any animal products! To reheat leftover rice, add a splash of water to it in a pot. Cover it with a lid and heat on low. This method helps steam the rice, keeping it moist. You can also use the microwave. Just cover it with a damp paper towel. Yes, if you’re not a fan of cilantro, you can skip it. You can add fresh parsley or green onions instead for some flavor. Lemon zest can also brighten the dish. Feel free to customize it to your taste! For the full recipe, check out the Cilantro Lime Rice Fiesta . You’ll find all the steps to create this tasty side dish! Cilantro lime rice is simple and delicious. We covered key ingredients, cooking steps, and storage tips. I shared ways to customize your rice and avoid common mistakes. Now you can enjoy fluffy, flavorful rice with ease. Remember to experiment with different rice types or add protein for variety. This dish pairs well with many meals, so get creative! Stay confident in your cooking skills and make it your own.

Cilantro Lime Rice Flavorful Side Dish Recipe

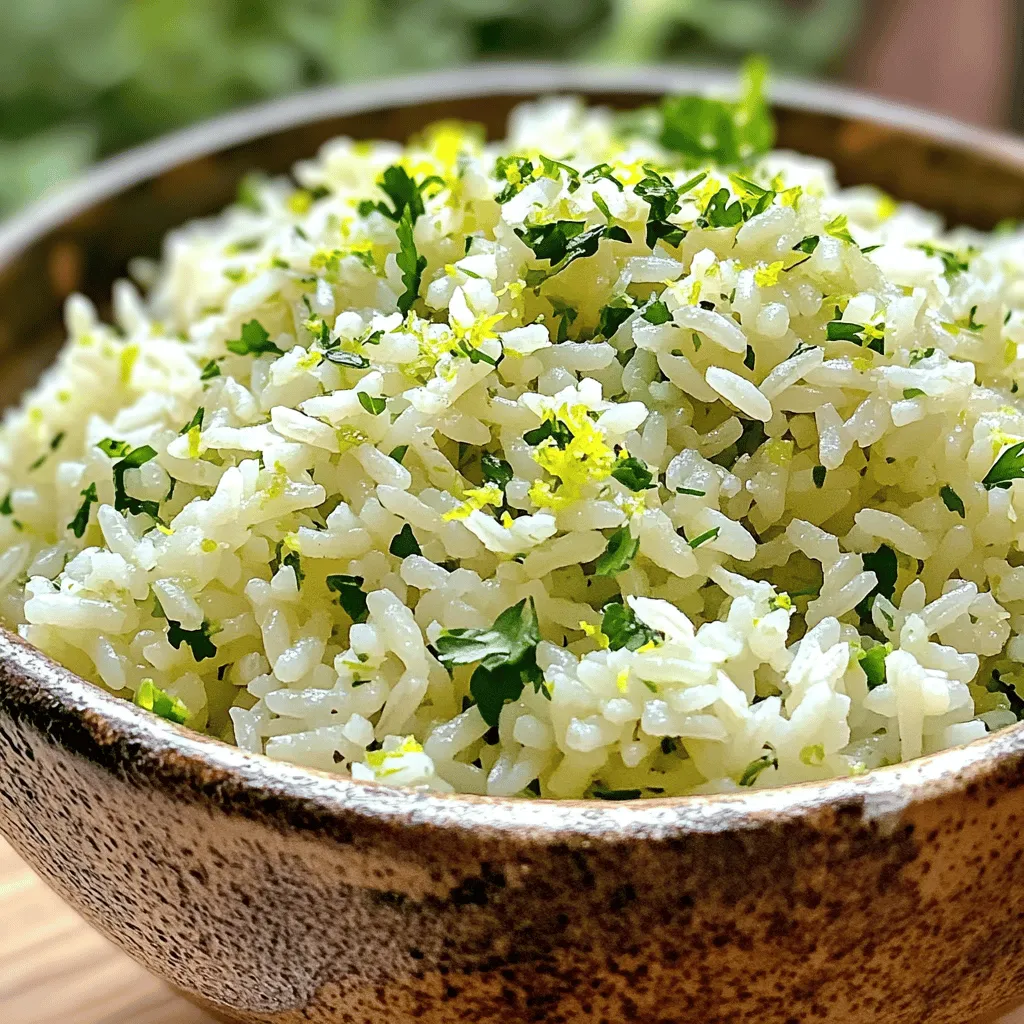
Looking to add a burst of flavor to your meals? Cilantro Lime Rice is a bright and zesty side dish

- 2 cups cooked and shredded chicken - 1 cup corn kernels (fresh or frozen) - 1/2 cup mayonnaise - 1/4 cup sour cream - 1/2 teaspoon chili powder - 1/4 teaspoon cayenne pepper (adjust to taste) - Juice of 1 lime - Salt and pepper to taste These ingredients create a tasty mix for the tacos. The chicken gives a nice base. The corn adds sweetness and texture. Mayonnaise and sour cream make the dish creamy. The spices, like chili powder and cayenne pepper, add heat and flavor. Lime juice brings freshness. - 1/2 cup crumbled feta cheese - 2 tablespoons fresh cilantro, chopped - 1 avocado, sliced Adding toppings can boost the taste. Feta cheese adds saltiness. Fresh cilantro brings a bright flavor. Avocado slices add creaminess. You can mix and match toppings based on your taste. For the full recipe, check out the complete guide. Enjoy making these tacos! To make the street corn dressing, grab a bowl. Combine 1/2 cup mayonnaise, 1/4 cup sour cream, 1/2 teaspoon chili powder, and 1/4 teaspoon cayenne pepper. Mix well until smooth. Squeeze in the juice of one lime. Taste it and season with salt and pepper. Adjust as needed until it feels just right. Heat a skillet over medium-high heat. Add 1 cup of corn kernels. If you use fresh corn, cut it off the cob. If you use frozen corn, make sure it’s thawed and dry. Cook for about 5 minutes until the corn gets nice char marks. This gives it a great flavor. In a big mixing bowl, toss together 2 cups of cooked and shredded chicken and the charred corn. Pour in half of your creamy dressing. Stir it all together until the chicken is evenly coated in the dressing. You want every bite to be packed with flavor. Next, take a separate skillet and warm your corn tortillas. Heat them for about 30 seconds on each side. This makes them soft and easy to fold. If you want to keep them warm, wrap them in a clean kitchen towel. Now it’s time to put it all together. On each warmed tortilla, add a good scoop of the chicken and corn mix. Sprinkle crumbled feta cheese, chopped cilantro, and avocado slices on top. Drizzle the remaining dressing over everything for that extra kick. Serve these tacos right away for the best taste. They go well with simple sides like chips and salsa or a fresh salad. These tacos are perfect for casual gatherings or any fun meal at home. Enjoy the flavors and impress your friends! Choosing the right chicken makes a big difference. I prefer using cooked and shredded rotisserie chicken. It saves time and adds great flavor. If you want to cook it yourself, grill or bake it with simple spices. To achieve the best flavor, marinate the chicken. Use lime juice, salt, and a little chili powder. Let it sit for at least 30 minutes. This adds depth to each bite. Experiment with spices and herbs to make your tacos unique. Try adding smoked paprika for a smoky flavor. You can also add garlic powder for an extra kick. Recommended add-ins include black beans or diced jalapeños. These ingredients boost flavor and add texture. Consider topping your tacos with pickled onions for a tangy crunch. The best tools for taco preparation are simple. You need a large skillet or grill. A skillet allows you to cook corn and chicken evenly. If you use a grill, you can get a nice char on the corn, which adds flavor. For warming tortillas, a non-stick skillet works well. Heat them for 30 seconds on each side. This method makes them soft and easy to fold. You can also wrap them in foil and warm them in the oven. If you want the full details on making these tacos, check out the Full Recipe. {{image_2}} For a vegetarian option, you can easily swap out the chicken. You can use grilled vegetables like zucchini, bell peppers, and mushrooms. These veggies add great flavor and texture. Try marinating the vegetables in lime juice and spices for extra taste. Grilling gives them a nice char that mimics the smoky flavor of the taco. You can change the flavor of your tacos by using different seasonings. Instead of chili powder, try a Southwest seasoning blend. This will give your dish a different kick. Adding fruits like mango or pineapple can also add a sweet twist. These fruits balance the spices and give a refreshing touch. You can serve your tacos in two main ways: street-style or plated. Street-style tacos are simple and fun. Just fold them and enjoy. Plated options allow for more garnishing. You can stack them high and add extra toppings for a beautiful presentation. Fresh cilantro, lime wedges, or crumbled cheese work great for garnishing. To keep your chicken and corn mixture fresh, place it in an airtight container. Make sure to cool it down before sealing it. This will help avoid extra moisture. The mixture will last in the fridge for about 3 to 4 days. If you want to enjoy it later, consider freezing it. For the best taste, reheat the mixture in a skillet over medium heat. Stir it gently to keep the flavors intact. You can also microwave it in short bursts, stirring in between. To avoid soggy tortillas, reheat them separately on a hot skillet for about 30 seconds on each side. Yes, you can freeze the taco filling! To freeze, let the mixture cool completely. Then, place it in a freezer-safe bag or container. Squeeze out as much air as possible. When you're ready to eat, thaw it in the fridge overnight. Reheat it in a skillet or microwave before serving. For this recipe, cooked and shredded chicken works best. You can use rotisserie chicken for quick prep. Grilling chicken breasts adds a nice smoky flavor. Just be sure to cook it fully to keep it safe to eat. Yes, you can make these tacos gluten-free! Look for corn tortillas that are labeled gluten-free. Many brands provide good options made from corn or other gluten-free grains. Ensure to check the packaging for certifications. To add heat, use more cayenne pepper in the dressing. You can also mix in some chopped jalapeños. Another option is to add a hot sauce of your choice to the chicken mixture. Adjust the spice level based on your taste. Pair these tacos with a fresh salad for a light meal. Mexican rice and black beans are great sides. For drinks, try serving them with a cold beer or a refreshing agua fresca. This recipe makes about 4 to 6 servings. Each serving includes two tacos, depending on how hungry you are. Adjust the amounts if you have more guests to feed! To find these tacos, check local food trucks or Mexican restaurants. Many places offer street corn chicken tacos on their menus. Using apps like Yelp can help you locate nearby spots that serve this tasty dish. You can create delicious Street Corn Chicken Tacos with simple ingredients and steps. We covered the main ingredients, optional toppings, and how to prepare the dressing and corn. You learned about cooking, assembling, and serving your tacos. Remember, you can customize them with spices and toppings. Store any leftovers properly, and enjoy them later. Get creative with variations to suit your taste. These tacos can be a hit at any meal. Dive into this tasty dish and enjoy every bite!

Street Corn Chicken Tacos Flavorful and Easy Recipe

Craving something fresh, fun, and full of flavor? These Street Corn Chicken Tacos are your answer! With juicy shredded chicken

- Chicken breasts and marinades You need two boneless, skinless chicken breasts. A good marinade makes the chicken tasty. I use chipotle sauce, smoked paprika, and cumin. These spices add a nice kick. Olive oil helps the spices stick well to the chicken. - Rice, beans, and vegetables For the base, I like using brown rice. It’s healthy and filling. You can also add black beans for protein. A cup of corn gives a sweet crunch. Fresh cherry tomatoes add color and flavor. - Toppings and garnishes Toppings make the bowl fun and tasty. I love using diced avocado for creaminess. Shredded lettuce adds freshness. Chopped cilantro gives a bright taste. You can also sprinkle shredded cheese on top. Don't forget a dollop of sour cream if you like! To see how to mix these flavors, check the Full Recipe. Marinating the chicken Start by mixing the chipotle sauce, smoked paprika, cumin, olive oil, salt, and pepper in a bowl. This mixture gives the chicken a great kick. Place the chicken breasts in the bowl and coat them well. Marinate for at least 30 minutes. For more flavor, try to marinate longer. Cooking the chicken Preheat your grill or skillet over medium heat. Cook the marinated chicken for about 6-7 minutes on each side. You want the chicken to reach an internal temperature of 165°F. After cooking, let the chicken rest for 5 minutes. This helps keep it juicy. Slice the chicken into strips. Preparing the rice and bean mixture In a separate bowl, combine the cooked brown rice, black beans, and corn. Squeeze in the lime juice and mix well. Season with salt and pepper to taste. This mix adds texture and flavor to the bowl. Layering ingredients Begin by placing a base of the rice and bean mixture in each bowl. Next, add the sliced chicken on top. Then, add a generous handful of shredded lettuce, halved cherry tomatoes, and diced avocado. Final touches before serving Sprinkle chopped cilantro and shredded cheese over the top. If you like, add a dollop of sour cream. These final touches make the bowl more colorful and tasty. Enjoy your Chipotle Chicken Burrito Bowl! For the full recipe, check out the detailed steps. To make the chicken shine, start with a good marinade. Mix chipotle sauce, smoked paprika, cumin, olive oil, salt, and pepper. Let the chicken soak in this mix for at least 30 minutes. If you have more time, marinate it for up to 4 hours. This helps the flavors seep in deeply. When cooking, use a grill or skillet over medium heat. Cook each chicken breast for 6-7 minutes on each side. You want an internal temperature of 165°F. Let the chicken rest for 5 minutes after cooking. This keeps it juicy when you slice it. Adding spices can elevate your dish. Try using garlic powder, onion powder, or chili powder. Fresh herbs like cilantro can add brightness. You can also add lime zest for a citrus boost. Customization is key. Want it spicier? Add more chipotle sauce or diced jalapeños. Not a fan of black beans? Swap them for pinto beans or kidney beans. With these tips, you can make a bowl that fits your taste. For the Full Recipe, check the earlier section. {{image_2}} You can switch up the proteins in your burrito bowl. Try using shrimp, steak, or tofu for a new twist. These options can add different flavors and textures. If you want a vegetarian or vegan meal, replace the chicken with black beans or grilled veggies. You can also use quinoa instead of rice for a healthy grain option. These swaps keep the dish tasty and satisfying. The toppings can make your burrito bowl unique. Add diced red onion, jalapeños, or roasted peppers for extra flavor. You can even mix in some pico de gallo or salsa for a fresh kick. Think about how spicy you want your meal. If you prefer mild, skip the chipotle sauce. You can use a milder salsa instead. For those who enjoy heat, add extra chipotle sauce or hot sauce. This way, you can make each bowl just right for your taste buds. For the full recipe, check out the Chipotle Chicken Burrito Bowl. To keep your Chipotle Chicken Burrito Bowl fresh, place it in an airtight container. This helps prevent air and moisture from ruining the food. Before you store it, let it cool down to room temperature. It is safe to refrigerate the bowl for up to three days. If you want to keep it longer, consider freezing it. When frozen, it lasts for up to three months. When you’re ready to enjoy your leftovers, reheating is key. The microwave is quick and easy. Place your bowl in a microwave-safe dish. Heat it for 1-2 minutes, stirring halfway through. This helps it warm evenly. If you want a crispy texture, use the oven. Preheat it to 350°F (175°C). Spread the bowl on a baking sheet and heat for about 10-15 minutes. Avoid sogginess by not covering the bowl when reheating. This keeps the toppings fresh and crunchy. Always check the temperature before eating. It should reach 165°F (74°C) to be safe. A Chipotle Chicken Burrito Bowl is a tasty meal that combines seasoned chicken, rice, beans, and fresh veggies. You build it in a bowl, allowing for easy eating. This dish is full of flavor and offers a great mix of textures. Yes, you can make this recipe gluten-free. Use gluten-free sauces and check that your rice and beans are free from gluten. Many brands offer gluten-free options, so always read labels. A Chipotle Chicken Burrito Bowl has about 500-600 calories per serving. This can change based on your toppings and portion sizes. For a lighter meal, you can skip cheese or sour cream. Several side dishes pair well with this bowl. Some tasty options include: - Tortilla chips with salsa - Guacamole - A simple green salad - Grilled vegetables These sides enhance your meal and add more flavor. Yes, you can freeze the burrito bowl. Store it in an airtight container. It stays fresh for up to three months. When ready to eat, thaw in the fridge overnight and reheat. Avoid freezing toppings like lettuce and avocado, as they do not freeze well. For the full recipe, check out the detailed instructions above. In this article, I explained how to make a delicious Chipotle Chicken Burrito Bowl. We covered key ingredients, step-by-step instructions, and tips for perfecting your dish. You learned about storage and different variations to suit your taste. With these simple steps and ideas, you can create a meal that is full of flavor. Now, you can enjoy this tasty dish at home anytime. Put your own spin on it and share it with friends and family. Happy cooking!

Chipotle Chicken Burrito Bowl Flavorful and Easy Meal

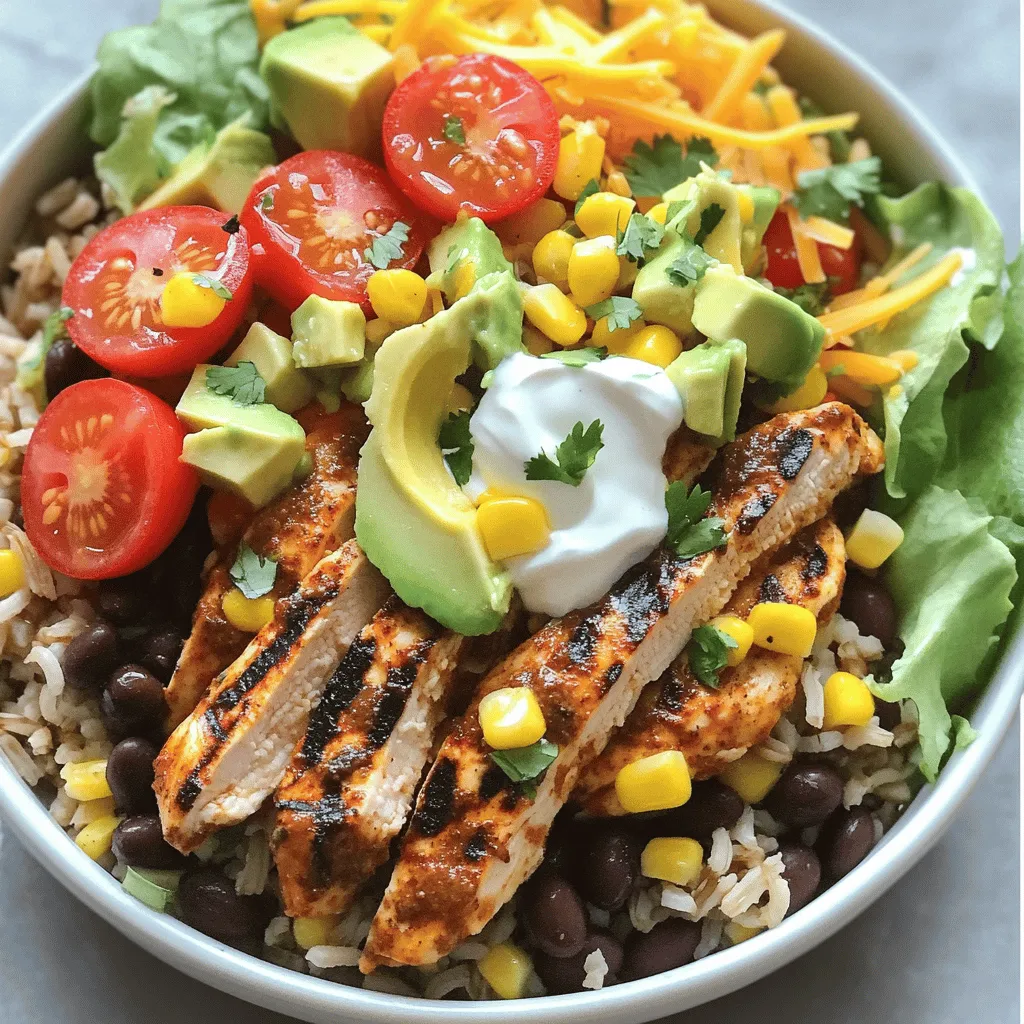
Ready to create a tasty and easy meal? A Chipotle Chicken Burrito Bowl is perfect for any day. I’ll share

To make Buffalo Cauliflower Bites, you need a few simple ingredients. Here’s what you'll need: - 1 large head of cauliflower - 1 cup all-purpose flour (or gluten-free flour) - 1 cup almond milk (or any non-dairy milk) - Spices: garlic powder, onion powder, smoked paprika, salt, black pepper - 1 cup buffalo hot sauce - 2 tablespoons coconut oil - Fresh parsley (for garnish) Each ingredient plays a key role in making these bites tasty and healthy. The cauliflower gives a great texture, while the flour and almond milk create a light batter. The spices bring a burst of flavor that pairs perfectly with the hot sauce. Using coconut oil helps the sauce stick and adds a nice richness. This recipe is flexible. You can swap in gluten-free flour or any non-dairy milk to fit your needs. The full recipe provides all the details you need to create this delicious snack. Enjoy experimenting with these ingredients! First, preheat your oven to 450°F (230°C). This high heat makes the cauliflower crispy. While the oven heats, prepare your baking sheet by lining it with parchment paper. This helps the bites cook evenly and makes cleanup easy. Next, you’ll make the batter. In a large mixing bowl, combine the dry and wet ingredients. Add 1 cup of all-purpose flour (or gluten-free flour) to the bowl. Pour in 1 cup of almond milk (or any non-dairy milk). Then, mix in 1 teaspoon each of garlic powder, onion powder, and smoked paprika. Add 1/2 teaspoon of salt and 1/4 teaspoon of black pepper. Whisk everything together until the batter is smooth and creamy. Now, it’s time to coat the cauliflower. Take your large head of cauliflower and cut it into bite-sized florets. Toss the florets in the batter until each piece is well coated. Make sure they are evenly covered for the best flavor. Then, arrange the coated cauliflower bites on your prepared baking sheet in a single layer. Keep space between each piece so they can crisp up nicely. For the initial baking, place the baking sheet in the preheated oven. Bake the cauliflower bites for 20 to 25 minutes. Flip them halfway through to ensure they cook evenly. While the cauliflower is baking, mix 1 cup of buffalo hot sauce with 2 tablespoons of melted coconut oil in a separate bowl. Once the cauliflower is golden and crispy, take it out of the oven. Toss the hot bites in the buffalo sauce mixture until they are fully coated. Return the coated cauliflower bites to the baking sheet. Bake them again for 10 more minutes to set the sauce. Now, your Buffalo Cauliflower Bites are almost ready to enjoy! For the full recipe, you can refer to the detailed instructions above and get ready to serve a tasty, healthy snack. Baking gives your Buffalo Cauliflower Bites a great crunch. Avoid frying; it adds extra fat. When you bake, use high heat. This helps the cauliflower get crispy all over. Flipping the bites halfway through cooking is key. This ensures every side turns golden and crunchy. Pair your bites with tasty dips. Ranch dressing works well. Blue cheese is a classic choice too. You can also serve them with celery sticks for a fresh crunch. Try adding a side of carrot sticks for color. If you need gluten-free options, swap the all-purpose flour. Use gluten-free flour instead. For a dairy-free recipe, stick with almond milk or any non-dairy milk. These swaps keep the dish light and tasty. You can still enjoy full flavor with these simple changes. For the complete recipe, check out the [Full Recipe]. {{image_2}} You can change the flavor of your Buffalo cauliflower bites easily. Try different spice blends like Cajun or lemon pepper. These will give your bites a unique twist. You can also make them sweet and spicy. Just add some honey to the buffalo sauce. This adds a nice balance of flavors. Want to change how you cook these bites? The air fryer is a great option. It makes the bites crispy without extra oil. Preheat the air fryer to 400°F (204°C). Cook the bites for about 15 minutes, flipping halfway through. You can also grill them for a smoky flavor. Just toss the coated cauliflower on a medium grill. Cook for about 10-12 minutes, turning often. Buffalo cauliflower bites are easy to adapt for special diets. For vegan options, use almond milk and gluten-free flour. This keeps the recipe plant-based and friendly for all. If you follow a keto diet, swap the flour with almond flour. This lowers the carbs and keeps it tasty. You can enjoy these bites while sticking to your diet. For the full recipe, check out the complete details. To keep your Buffalo Cauliflower Bites fresh, store them in the fridge. Place them in an airtight container. They can last for up to three days. Make sure they cool down before sealing the container. This helps prevent sogginess. If you want to save them for longer, try freezing them. First, let the bites cool completely. Then, spread them out on a baking sheet. Freeze them for about an hour. After that, transfer them to a freezer-safe bag or container. They can last for up to two months in the freezer. To keep your bites crispy, the oven is your best friend. Preheat your oven to 375°F (190°C). Place the cauliflower bites on a baking sheet. Bake them for about 10-15 minutes. This makes them hot and crispy again. If you're in a hurry, you can use a microwave. However, this method can make them a bit soft. Heat them in short bursts of 30 seconds. Check to see if they are warm enough. If you want a quick snack, this works, but the oven method is best for crispiness. To amp up the heat, add more buffalo sauce. You can also mix in cayenne pepper for extra kick. Start with a little. Taste as you go. This way, you find your perfect level of spice. Yes, you can! Prep the cauliflower and batter a day before. Keep them in the fridge. When you’re ready, just bake them fresh. This saves time and keeps them tasty. You have several tasty options. Classic ranch or blue cheese dressing works great. For a twist, try a yogurt dip or even avocado sauce. These flavors complement the spicy cauliflower well. You can swap the flour for almond flour or chickpea flour. Use less buffalo sauce or a lighter version. Also, try air frying instead of baking for fewer calories. These simple swaps keep the flavor while cutting calories. This recipe is very flexible. It’s vegan since it uses almond milk. You can make it gluten-free by using gluten-free flour. For keto, swap the flour for a low-carb option. Everyone can enjoy these delicious bites! This blog post covered a simple recipe for Buffalo Cauliflower Bites. You learned about the ingredients, step-by-step instructions, and tips for perfect results. I shared flavor variations and storage info to enhance your cooking experience. You can enjoy this dish while adapting it to different diets. Remember, cooking should be fun and creative. Try out these tips to make your Buffalo Cauliflower the best it can be! Enjoy making and sharing these bites with friends and family.

Buffalo Cauliflower Bites Tasty and Healthy Snack

Are you craving a snack that’s both tasty and healthy? Buffalo cauliflower bites are a delicious choice! These bites pack

When making homemade chili cheese fries, you need some great ingredients. Here’s what you will use: - 4 large russet potatoes - 1 tablespoon olive oil - Salt and pepper, to taste - 2 cups shredded cheddar cheese - 1 cup canned chili (or homemade chili) - 1/2 cup diced onions (red or white) - 1/4 cup sliced jalapeños (optional) - 1/4 cup sour cream (for topping) - Fresh cilantro, chopped (for garnish) Each ingredient plays a big part in your dish. The russet potatoes create a perfect base. Olive oil helps them get crispy. Salt and pepper bring out all the flavors. Cheddar cheese melts beautifully on top. The chili adds warmth and richness. Onions and jalapeños give it a nice crunch. Sour cream cools it down, while cilantro adds freshness. For the complete process, check out the Full Recipe. It guides you step by step. Enjoy your cooking! - Preheat your oven to 425°F (220°C). - Wash, peel, and cut the potatoes into wedges or fries. To start, get your oven nice and hot. This helps the fries crisp up well. I like to use russet potatoes because they are starchy and perfect for fries. After washing and peeling, cut them into thick wedges or classic fry shapes. This way, they will bake evenly and become golden brown. - Drizzle olive oil and season with salt and pepper. - Bake for 25-30 minutes, turning halfway through. Next, toss the potato pieces in a big bowl. Drizzle with olive oil and sprinkle in salt and pepper. Make sure each piece gets coated. Spread them out on a baking sheet lined with parchment paper. Bake them for 25 to 30 minutes. Turn them halfway, so they cook evenly and turn crispy. - Warm the canned or homemade chili. - Sprinkle cheese over fries and return to oven. While the fries bake, it’s time for the chili. Heat your chili in a small pot. If you made your own, ensure it’s warm. When the fries are ready, take them out and sprinkle shredded cheddar cheese on top. Put them back in the oven for 5 to 7 minutes. This melts the cheese and makes it gooey and delicious. - Drizzle chili over cheesy fries. - Add garnishes like onions, jalapeños, and sour cream. Once the cheese is melted, take the fries out of the oven. Now, drizzle warm chili over the cheesy fries. You can get creative with toppings. Add diced onions, sliced jalapeños, and a dollop of sour cream. Fresh cilantro on top adds a nice touch too. Enjoy your tasty creation! For the complete process, check the Full Recipe. To make great fries, cut your russet potatoes into even wedges. This helps them cook evenly. Aim for pieces about half an inch thick. Seasoning matters. Use olive oil, salt, and pepper. This adds flavor and helps them crisp up. Toss the fries well to coat them fully. For the best flavor, use sharp cheddar cheese. It melts well and adds a nice taste. If you want a creamier texture, mix in some Monterey Jack cheese. To avoid greasy fries, do not use too much oil. A light drizzle is all you need. It keeps the fries crispy without making them soggy. To enhance your chili, add spices like cumin or chili powder. This adds depth and warmth to the flavor. You can also mix in diced tomatoes or beans for extra texture. Using canned chili is quick and easy. It saves time but may lack freshness. Homemade chili tastes better but takes longer to prepare. Both options can be delicious, so choose based on your needs. For the full recipe, check out the complete list and instructions. Enjoy your cooking! {{image_2}} You can make your chili cheese fries a bit healthier! Try using sweet potatoes instead of russet potatoes. They add a nice sweetness and are packed with nutrients. If you want to cut down on oil, use a spray or brush instead of pouring it. For cheese lovers, there are many vegan cheese options. Look for brands that melt well. They can add creamy flavor without dairy. Want to kick up the flavor? Add spices or seasonings to the chili. A pinch of cumin or smoked paprika can make a big difference. You can also try adding toppings that go beyond cheese and onions. Guacamole, bacon bits, or even diced tomatoes can take your dish to the next level. These extras boost flavor and add texture. Serving chili cheese fries can be fun! Pair them with a cold drink like soda or iced tea for a tasty combo. You can also serve them in a bowl for a cozy feel. For a twist, present them nacho-style! Layer chili and cheese on tortilla chips instead of fries. These creative ideas make your meal more exciting. To keep your chili cheese fries fresh, use airtight containers. Glass or plastic containers work well. Make sure they seal tightly. Store your chili cheese fries in the fridge for up to three days. This way, they stay tasty and safe to eat. When reheating, aim for the oven. Preheat it to 350°F (175°C). Spread the fries on a baking sheet. This method helps keep the fries crispy. Avoid the microwave, as it can make the fries soggy. If you must use a microwave, heat them on a plate for a short time. To avoid sogginess, place a paper towel under the fries when microwaving. This will soak up extra moisture. Reheat your chili in a saucepan on low heat. Stir it often to keep it smooth. Enjoy your chili cheese fries just like they were fresh from the oven! For the full recipe, check out the complete chili cheese fries instructions. You can use sweet potatoes for a sweeter taste. They add a nice color too. Yukon Gold potatoes are a great choice. They are creamy and buttery. For a crunchier texture, try using frozen fries. These are quick and easy. Yes, you can prepare some parts in advance. First, bake the fries and let them cool. Store them in the fridge for up to two days. When ready, reheat them in the oven. Heat the chili separately, then assemble when you are ready to eat. You can add sliced jalapeños for heat. If you like, try hot sauce on top. You can mix in some chili powder or cayenne pepper into the chili. This adds a nice kick without changing the flavor too much. For the complete guide to making chili cheese fries, check the full recipe. It has all the steps and tips you need to make this tasty dish. In this blog post, we explored the fun of making chili cheese fries. You learned how to prepare crispy fries, layer with cheese and chili, and add tasty toppings. We discussed tips for perfect fries and flavor variations to suit your taste. Remember, this dish is all about creativity and personal flair. Use fresh ingredients and enjoy experimenting with flavors. Now, gather your ingredients and start cooking these delicious chili cheese fries! They’ll surely be a hit.

Homemade Chili Cheese Fries Tasty and Easy Delight

Are you ready to elevate your snack game? Homemade Chili Cheese Fries are a delicious way to combine crispy fries

To make the best crispy buttermilk chicken tenders, you need a few key ingredients. Here’s what you will need: - 1 pound chicken tenderloins - 1 cup buttermilk - 1 teaspoon garlic powder - 1 teaspoon onion powder - 1 teaspoon smoked paprika - 1 teaspoon salt - 1/2 teaspoon black pepper - 1 cup all-purpose flour - 1/2 teaspoon baking powder - 1/2 teaspoon cayenne pepper (optional, for heat) - Vegetable oil, for frying Each ingredient plays a big role in the flavor and texture of the dish. The buttermilk tenderizes the chicken and adds a tangy taste. Garlic and onion powder bring depth to the flavor profile. Smoked paprika gives a nice smoky touch, while cayenne pepper adds heat if you like it spicy. All-purpose flour forms the crispy coating. Baking powder helps make it lighter and fluffier. The vegetable oil is crucial for frying, ensuring a golden and crispy finish. For the full recipe, you can check out the details on how to use these ingredients perfectly. Trust me, when you gather these items, you set yourself up for a delicious meal! To start, you need to make the buttermilk marinade. In a large bowl, mix together: - 1 cup buttermilk - 1 teaspoon garlic powder - 1 teaspoon onion powder - 1 teaspoon smoked paprika - 1 teaspoon salt - 1/2 teaspoon black pepper Stir this mix well. It should be smooth and well-blended. Now, add the chicken tenderloins. Make sure they are fully submerged in the marinade. Cover the bowl and place it in the refrigerator. Let the chicken marinate for at least 1 hour. For more flavor, you can marinate it overnight. Next, you will prepare the coating. In another bowl, whisk together: - 1 cup all-purpose flour - 1/2 teaspoon baking powder - 1/2 teaspoon cayenne pepper (optional, for heat) - A pinch of salt Once the flour mix is ready, take the marinated chicken out of the fridge. Allow any excess buttermilk to drip off. Dredge each tenderloin in the flour mixture. Press lightly to ensure a good coating. Set the coated chicken aside on a wire rack. This helps keep the coating crisp. Now it’s time to fry the chicken. Heat about 1 inch of vegetable oil in a large skillet. Aim for medium-high heat until it reaches 350°F (175°C). Carefully add the coated chicken tenders to the hot oil. Be sure not to overcrowd the pan. Fry each side for about 4-5 minutes until they turn golden brown. The chicken should be cooked through, reaching an internal temperature of 165°F (74°C). Once cooked, take the tenders out of the oil. Place them on a plate lined with paper towels. This will help drain any extra oil. Now, you can enjoy your crispy buttermilk chicken tenders hot with your favorite dipping sauce. For the full recipe, check out the complete instructions. The marinade is key for juicy chicken. I suggest marinating the chicken for at least one hour. However, for the best flavor, let it sit overnight. Buttermilk is important here. It has acids that tenderize the meat. This gives the chicken a nice, soft texture. It also adds a rich flavor that pairs well with spices. To get that golden brown color, use a mix of flour and spices. A little baking powder helps make the crust light and crunchy. When frying, do not overcrowd the pan. If you add too many pieces, the oil cools down. This leads to soggy tenders instead of crispy ones. Always fry in batches if needed. These chicken tenders shine with the right dipping sauce. Try ranch, honey mustard, or spicy mayo. For sides, you can pair them with fries, coleslaw, or a fresh salad. These sides balance the meal and add nice textures. You can find the full recipe in the main article. {{image_2}} To make spicy buttermilk chicken tenders, add cayenne or hot sauce to your marinade. This will give your tenders a nice kick. You can also use unique spice blends. Try mixing chili powder, cumin, and smoked paprika for a flavorful twist. Adjust the heat based on your taste. If you prefer baking, you can still enjoy crispy tenders. First, preheat your oven to 400°F (200°C). Follow the same marinating and coating steps. Instead of frying, place the tenders on a baking sheet lined with parchment paper. Bake for 20-25 minutes, turning halfway through. This method cuts down on oil but still gives great flavor. For a gluten-free version, swap the all-purpose flour with a gluten-free blend. Look for a mix that includes rice flour or almond flour for a good texture. To keep your tenders crispy, add cornstarch to the mix. This will help maintain that crunchy bite you crave. When you finish your crispy buttermilk chicken tenders, store them right. Place the cooled tenders in an airtight container. This keeps them fresh and tasty. Make sure to separate layers with parchment paper to avoid sticking. You can keep these in the fridge for about 3 to 4 days. If you want them to last longer, consider freezing them. Reheating is key to enjoying your chicken tenders again. The best method is using the oven. Preheat it to 375°F (190°C). Place the tenders on a baking sheet. Bake for about 10-15 minutes until they are crispy and hot. If you must use the microwave, be careful. The microwave can make the tenders soft. Place the chicken on a microwave-safe plate. Heat them for short intervals, about 30 seconds. Check often to avoid overcooking. Keeping your chicken tenders crispy is all about the right method. The oven is your best friend here. Enjoy your meal again with great taste! You can find the full recipe for crispy buttermilk chicken tenders in the article. You should marinate chicken in buttermilk for at least 1 hour. For deeper flavor, I recommend marinating overnight. The longer you marinate, the more tender and juicy the chicken will be. Yes, you can freeze crispy buttermilk chicken tenders. First, let them cool completely. Then, place them in a single layer on a baking sheet. Freeze until solid, then transfer to a freezer bag. When ready to eat, thaw in the fridge overnight and reheat in the oven to keep them crispy. To achieve extra crispy chicken tenders, use a double-dredging method. First, coat the chicken in buttermilk. Then, dredge it in the flour mixture. For even more crunch, dip it back into the buttermilk and coat it again in the flour. This creates a thicker crust. Crispy buttermilk chicken tenders pair well with many sides. Some popular choices include: - French fries - Coleslaw - Macaroni and cheese - Fresh salad - Baked beans Feel free to mix and match your favorite sides for a fun meal! For the full recipe, check out the Crispy Buttermilk Chicken Tenders section. In this post, we covered how to make crispy buttermilk chicken tenders. We discussed ingredients, marinating, coating, and frying. I shared tips for achieving that perfect crunch and suggested tasty sides to pair. You can even explore variations like spicy versions or gluten-free options. Storing and reheating tips ensure your tenders stay tasty. Enjoy experimenting with these recipes and make mealtime fun!

Crispy Buttermilk Chicken Tenders Simple and Tasty

Are you ready to make mouth-watering Crispy Buttermilk Chicken Tenders? This simple recipe will allow you to create tender, juicy

- 1 pound flank steak, thinly sliced against the grain - 2 tablespoons cornstarch - 2 tablespoons vegetable oil - 4 green onions, chopped (whites separated from greens) - 3 cloves garlic, minced - 1-inch piece ginger, grated - 1/2 cup soy sauce (low sodium, if desired) - 1/4 cup brown sugar - 1 tablespoon rice vinegar - 1 teaspoon sesame oil - 1/2 teaspoon red pepper flakes (optional) To make easy Mongolian beef, you start with flank steak. It’s tender and flavorful. Slicing it against the grain helps it stay soft. Cornstarch gives the beef a nice sear. It helps lock in flavor too. You’ll also need vegetable oil for cooking. Next, we have the green onions, garlic, and ginger. These add a fresh taste to the dish. Chop the green onion whites finely. Keep the greens for later. Minced garlic and grated ginger give this dish a punch. Now, for the sauce! It’s simple but so tasty. Soy sauce adds umami. Brown sugar gives sweetness. Rice vinegar adds a bit of tang. Sesame oil brings a nutty aroma. The red pepper flakes? They add heat, if you like it spicy! That’s it for the ingredients! For the full recipe, check out the detailed steps to make this delicious meal. - Toss sliced flank steak with cornstarch. - Heat vegetable oil in a skillet over medium-high heat. To start, you want to coat the flank steak with cornstarch. This step is key. It helps make the beef tender and gives it a nice crust. I like to use a bowl for this. Just add the sliced steak and mix it well. Next, heat your skillet. Use medium-high heat and add the vegetable oil. Wait until the oil shimmers. That tells you it is hot and ready for the meat. - Sear flank steak until browned on both sides. - Remove beef from skillet and set aside. Once the oil is hot, add the flank steak. Spread it in a single layer. If your skillet is small, do this in batches. Sear the steak for about 2-3 minutes. You want it browned on both sides. This gives it a nice flavor and texture. After the beef is browned, remove it from the skillet. Set it aside on a plate. This step keeps it juicy while you make the sauce. - Sauté green onion whites, garlic, and ginger. - Prepare sauce mixture and bring to a simmer. Now it's time to make the sauce. In the same skillet, add the white parts of the green onions, minced garlic, and grated ginger. Sauté these for about 30 seconds. You want to release their flavors. In a small bowl, mix together soy sauce, brown sugar, rice vinegar, sesame oil, and red pepper flakes if you like heat. Pour this mixture into the skillet. Bring it to a simmer. This sauce will add depth to your dish. After that, you can return the seared beef to the skillet. Toss everything together to coat the beef in sauce. Cook for another 2-3 minutes. The sauce should thicken slightly, and the beef will heat through. For the final touch, stir in the green onion greens just before serving. This adds color and a fresh taste to your dish. Serve your easy Mongolian beef over rice for a satisfying meal. For the full recipe, check out the recipe card above. To get the perfect sear on the beef, use a hot skillet. The heat helps lock in the juices. Thin slices allow for quick cooking. When you add the beef, do it in a single layer. This step makes sure each piece gets that nice brown color. If you add too much, the beef will steam instead of sear. Cooking in batches is key. It keeps the temperature high. If the pan cools, you lose that great sear. It might take a bit longer, but it makes a big difference in taste and texture. You can swap flank steak for other cuts. Sirloin or ribeye will work well too. Just make sure to slice against the grain for tenderness. If you want a vegan or vegetarian version, try using tofu or seitan. Both options soak up the sauce nicely and add protein. Mongolian beef pairs great with rice. White or brown rice is perfect for soaking up sauce. You can also serve it with steamed veggies for a colorful plate. For garnishing, add more chopped green onions on top. This adds a fresh touch and makes the dish look nice. You can also sprinkle sesame seeds for extra flavor and crunch. {{image_2}} Mongolian beef can change from place to place. In some regions, cooks add a mix of vegetables like bell peppers or broccoli. This adds color and flavor. Restaurant versions often include more sauce for extra taste. Some places might use a sweeter sauce, while others keep it savory. These small twists can make a big difference in how the dish tastes. You can make gluten-free Mongolian beef easily. Just swap regular soy sauce for a gluten-free option. Many brands now offer tasty gluten-free soy sauce. If you want a low-carb version, skip the rice. Instead, serve the beef over steamed veggies or cauliflower rice. This keeps the meal light and healthy. You can change the heat level in your dish. Red pepper flakes are a simple way to add spice. Start with a little and taste. You can always add more if you like it hot! Want to try something new? Add garlic powder or a dash of black pepper for a different flavor. Each choice can give your Mongolian beef a fresh twist. To keep your Mongolian beef fresh, store it in an airtight container. This helps lock in flavor. You can place the beef in the fridge for up to three days. If you want it to last longer, try freezing it. Frozen Mongolian beef can stay good for about three months. Just remember to thaw it in the fridge before reheating. When reheating, use gentle heat to avoid drying out the beef. The best method is to use a skillet. Just add a splash of water or broth to keep it moist. Heat on low until warm. You can also use the microwave, but cover the dish. This keeps the steam in and prevents dryness. If you want to freeze leftovers, separate portions into freezer bags. This makes it easy to grab a quick meal later. Preparing ingredients in advance can save time. Slice the flank steak and chop the green onions ahead of time. Store these in the fridge. This way, you can cook Mongolian beef quickly on busy nights. You can also use leftover beef for quick meals. Toss it in a salad or mix it with noodles. The flavors will still shine through, making for a tasty dish. For more details, check the Full Recipe. Mongolian beef is a popular dish that has roots in Chinese cuisine. It features tender beef, usually flank steak, stir-fried with bold flavors. The main ingredients include soy sauce, ginger, garlic, and green onions. The dish is sweet and savory, making it a favorite for many. It’s often served over rice, which soaks up the rich sauce. Yes, you can make Mongolian beef ahead of time. To do this, follow these tips: - Cook the beef: Prepare the dish as usual, but do not add the green onion greens. - Store it properly: Place the beef in an airtight container. It will stay fresh in the fridge for up to three days. - Reheat before serving: When ready to eat, heat the beef in a skillet. Add the green onion greens at this stage for freshness. Mongolian beef pairs well with several sides. Here are some great options: - Rice: Serve with white or brown rice to soak up the sauce. - Vegetables: Steamed broccoli or sautéed bok choy add color and nutrition. - Noodles: Try it with lo mein or rice noodles for a different twist. - Salad: A crisp cucumber salad can balance the savory flavors. For the complete recipe, check out the Full Recipe section! In this blog post, we explored the key ingredients and recipes for easy Mongolian beef. We covered everything from selecting the best flank steak to making a flavorful sauce. I shared tips for cooking, ingredient substitutions, and serving ideas. Mongolian beef is simple to make and delicious. With a few tweaks, you can tailor it to your taste. Enjoy delicious meals with this quick recipe and make it your own!

Easy Mongolian Beef Flavorful and Quick Dinner Recipe

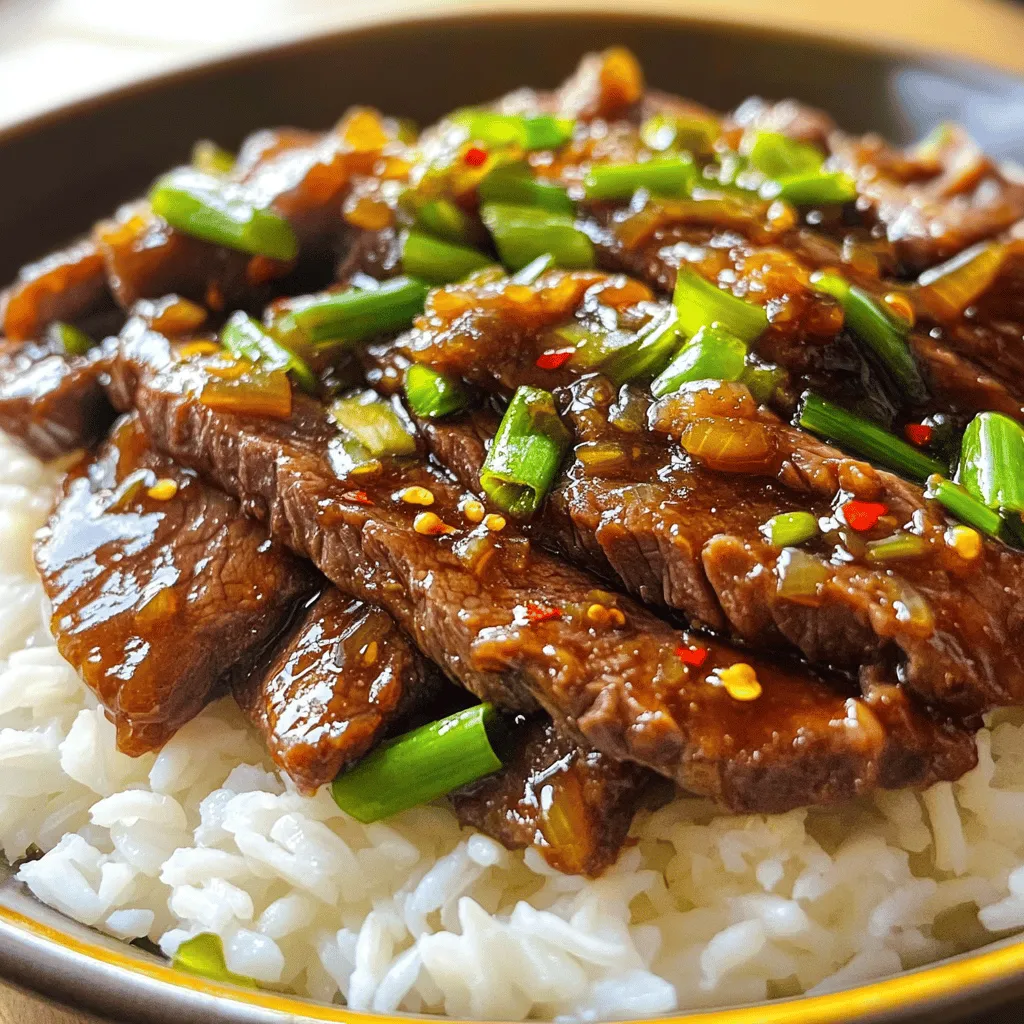
Are you looking for a quick dinner that packs intense flavor? This Easy Mongolian Beef recipe will delight your taste

Older posts
Newer posts
← Previous Page1 … Page78 Page79 Page80 … Page84 Next →

dsad

© 2026 easycookingbite • Built with GeneratePress

Our Policies

  • Copyright Policy
  • Cookie Policy
  • GDPR Policy
  • Privacy Policy
  • Disclaimer
  • Terms Of Use

More Information

  • Home
  • About
  • Contact
  • Appetizers
  • Dessert
  • Dinner
  • Drinks
©2026, easycookingbite About Back To Top