Skip to content
DisclaimerTerms Of UseGDPR PolicyCookie Policy

easycookingbite

  • Home
  • Drinks
  • Appetizers
  • Dinner
  • Dessert
  • About
  • Contact
  • Privacy Policy
DisclaimerTerms Of UseGDPR PolicyCookie Policy

NO-ING-IMG

- 1 medium head of cauliflower, cut into bite-sized florets - 1 cup all-purpose flour (or chickpea flour for a gluten-free option) - 1 teaspoon garlic powder - 1 teaspoon onion powder - 1 teaspoon paprika - 1 teaspoon salt - 1 cup water (adjust for consistency) - 1 cup buffalo sauce (store-bought or homemade) - 2 tablespoons melted vegan butter or regular butter - Fresh parsley, chopped (for garnish) - Celery sticks (for serving, optional) - Blue cheese or ranch dressing (for dipping, optional) I love using fresh cauliflower for this recipe. It gives the bites a great texture. The flour helps coat the cauliflower and makes it crispy. You can use all-purpose flour or try chickpea flour if you need a gluten-free option. The garlic and onion powders add nice flavor. Paprika gives a warm color and a slight smokiness. Don’t forget the salt! It brings out all the flavors. For the batter, just mix the flour with water until it's thick but pourable. You can adjust the water to get the right consistency. Buffalo sauce is the star here. You can buy it or make your own. I like to mix it with melted butter for richness. Garnish with fresh parsley for color and serve with celery sticks and your favorite dipping sauce. Blue cheese or ranch is perfect for dipping! - Calories per serving: Approximately 150 - Macronutrient breakdown: - Carbohydrates: 20g - Fats: 5g - Proteins: 4g - For gluten-free, use chickpea flour instead of all-purpose flour. - For vegan options, use vegan butter and skip the dairy dressings. This section gives you all the info you need to gather your ingredients and make these tasty bites! - Preheat the Oven: Set your oven to 450°F (230°C). This high heat helps make the bites crispy. Line a baking sheet with parchment paper to prevent sticking. - Prepare the Cauliflower: Wash the cauliflower well. Cut it into bite-sized florets, making sure they are roughly the same size. This way, they will cook evenly. - Combine dry ingredients: In a medium bowl, mix 1 cup of flour, 1 teaspoon garlic powder, 1 teaspoon onion powder, 1 teaspoon paprika, and 1 teaspoon salt. These spices add great flavor to the bites. - Adjust consistency with water: Gradually add 1 cup of water to the dry mix. Whisk until you get a smooth batter. It should be thick but still pourable. If it’s too thick, add a bit more water. - Coat the cauliflower and arrange on baking sheet: Dip each cauliflower floret into the batter, making sure it’s well-coated. Place them on your prepared baking sheet. Leave some space around each piece to allow for even roasting. - Baking time and flipping protocol: Bake in the preheated oven for 20-25 minutes. Halfway through, flip the florets to ensure they brown evenly. - Final sauce coating and additional baking: While they bake, mix melted butter and buffalo sauce in a bowl. After the initial bake, toss the cauliflower bites in this sauce until well-coated. Return them to the oven for an extra 10 minutes to make them extra crispy. For the complete recipe, check the section labeled Full Recipe. Enjoy your cooking! To get that perfect crunch, bake at 450°F (230°C). High heat helps the batter crisp up nicely. Before baking, make sure the cauliflower florets are not crowded on the baking sheet. This allows hot air to flow freely and helps with crispness. Want to spice things up? Try adding cayenne pepper or chili powder to the batter. For a fresh twist, add chopped herbs like cilantro or dill. You can also sprinkle some nutritional yeast on top for a cheesy flavor. You can prepare the cauliflower ahead of time. Just coat it in the batter and store it in the fridge. When ready to bake, take it out and pop it in the oven. If you have leftovers, reheat them in an oven at 350°F (175°C) for about 10-15 minutes. This will help keep them crispy. For the full recipe, check the section above. {{image_2}} You can change the heat of your buffalo cauliflower bites. For a mild flavor, use a light buffalo sauce. If you want more heat, choose a medium or hot sauce. You can also mix sauces for a fun twist. Try adding a bit of cayenne pepper for extra kick. Switch things up with different sauces. Sweet chili sauce gives a nice sweetness. BBQ sauce adds a smoky touch. Garlic Parmesan brings a rich, savory flavor. For vegan options, use plant-based butter and a vegan sauce. If you follow a keto diet, swap the flour for almond flour. Plating can make a big difference. Serve your bites on a colorful platter with celery sticks. Add some fresh parsley for a pop of color. You can pair these bites with sides like carrot sticks or a fresh salad. They also work great for parties or game days. Try serving them with blue cheese or ranch dressing for dipping. After enjoying your Buffalo Cauliflower Bites, let them cool. Place leftovers in an airtight container. Store the container in the fridge. They stay fresh for about three days. When you're ready to eat, reheat them in the oven for crispiness. Avoid using the microwave, as it can make them soggy. You can freeze Buffalo Cauliflower Bites too! First, let them cool completely. Arrange them in a single layer on a baking sheet. Freeze until solid, then transfer to a freezer bag. Seal tightly, removing as much air as possible. They can stay in the freezer for up to three months. When you're ready to enjoy them, bake directly from frozen. Just add a few extra minutes to the baking time. In the fridge, Buffalo Cauliflower Bites last about three days. In the freezer, they can last for three months. If you notice any odd smell or change in color, it's best to toss them out. Always check for signs of spoilage before consuming leftovers. To make these bites gluten-free, simply swap all-purpose flour for chickpea flour. Chickpea flour works well and adds a nice nutty taste. You can also use gluten-free all-purpose flour blends. Just ensure the sauce you use is gluten-free too. Yes, you can prepare the cauliflower ahead of time. After you coat the florets in the batter, store them in the fridge for up to a day. Just remember to bake them fresh when you’re ready. This keeps them crispy and tasty. There are many great sauces for dipping. Blue cheese and ranch dressings are classic choices. If you want something lighter, try a yogurt-based dip. You could also make a spicy avocado sauce for a twist. Buffalo Cauliflower Bites are a healthier option than traditional buffalo wings. They offer fiber from the cauliflower and use less fat. However, they do have some sodium from the buffalo sauce. Enjoy them in moderation as part of a balanced diet. Absolutely! Air frying is a great option. It cooks the cauliflower quickly and keeps them crispy. Set your air fryer to 400°F (200°C) and cook for about 15-20 minutes. Shake the basket halfway through for even cooking. These buffalo cauliflower bites are easy to make and packed with flavor. You learned the key ingredients, how to prepare and bake them, and tips for crispiness. Remember, you can customize spice levels and try different dipping sauces. These bites can fit many diets with simple swaps like gluten-free flour. Enjoy making them for gatherings or a tasty snack. With these instructions, you'll impress friends and family with your cooking skills. Happy cooking!

Buffalo Cauliflower Bites Tasty and Simple Recipe

Are you ready to spice up your snack game? Buffalo Cauliflower Bites are the perfect blend of crunch and heat,

To make the best Garlic Parmesan Roasted Potatoes, you need fresh ingredients. Start with 2 pounds of baby potatoes. These small potatoes cook evenly and taste great. Use 4 cloves of garlic, minced finely to bring out the flavor. Fresh herbs like thyme and rosemary add depth, so grab 1 teaspoon of each. You will also need some pantry staples. Use 1/4 cup of olive oil for roasting. This oil helps the potatoes crisp up nicely. You will need salt and pepper to taste. A teaspoon of paprika adds a bit of color and flavor to the dish. Garnishing makes the dish look nice. You can add fresh parsley, chopped, for a pop of color. If you want more flavor, consider adding a squeeze of lemon juice or a dash of chili flakes. These are optional but can make a big difference. For the full recipe, check the earlier mention. Start by washing the baby potatoes. Cut them in half. This gives them a nice shape. Place the halved potatoes in a large bowl. Add 1/4 cup of olive oil. Next, add 4 cloves of minced garlic. Don't skip the garlic; it adds great flavor! Toss in 1 teaspoon each of dried thyme and dried rosemary. For some warmth, include 1 teaspoon of paprika. Season with salt and pepper to taste. Mix everything well until the potatoes are fully coated. Preheat your oven to 425°F (220°C). While the oven heats up, line a baking sheet with parchment paper. This makes cleanup easy. Spread the seasoned potatoes on the baking sheet in a single layer. Make sure they aren’t crowded; this helps them roast nicely. Roast the potatoes for 25 minutes. Halfway through, give them a turn. This helps them cook evenly and get crispy. After 25 minutes, take the baking sheet out of the oven. Now, sprinkle 1/2 cup of grated Parmesan cheese over the potatoes. The cheese will melt and add a lovely crust. Return the baking sheet to the oven for another 10-15 minutes. Keep an eye on them! They should turn golden brown and crispy. Once done, let them cool for a few minutes. Finally, garnish with fresh chopped parsley before serving. Try this Full Recipe for a delightful dish! To get your potatoes crispy, start with dry potatoes. After washing, pat them dry with a towel. A hot oven helps, so preheat it to 425°F (220°C). Spread the potatoes in a single layer on your baking sheet. This allows the heat to circulate around each potato piece. Flip them halfway through roasting for even browning. Adding the Parmesan near the end gives it time to melt without burning. Use high-quality extra virgin olive oil for the best taste. It adds a rich flavor and enhances the roasted flavor of the potatoes. Light olive oils work too, but they lack the robust taste. If you want a twist, try flavored olive oils, like garlic or herb-infused. These can elevate your dish and add extra depth. For the best garlic flavor, use fresh cloves. Minced garlic releases oils that infuse the potatoes beautifully. You can roast the garlic with the potatoes for a milder taste. When it comes to Parmesan, always choose block cheese and grate it yourself. Pre-grated cheese often lacks flavor and can be drier. Add the cheese in the last 10-15 minutes of cooking for a perfect crust. Check out the Full Recipe for detailed instructions and enjoy making these tasty Garlic Parmesan Roasted Potatoes! {{image_2}} You can change the flavor with different seasonings. Try adding Italian seasoning for a taste twist. You can also use chili powder for heat. A touch of lemon zest adds bright flavor too. For a smoky kick, consider smoked paprika. Experimenting with spices brings new life to the dish. If you want to save time, use an air fryer. Set it to 400°F and cook for about 20 minutes. Shake the basket halfway for even cooking. The Instant Pot is great for quick meals too. Cook the potatoes on high for 8 minutes with a cup of water. After, crisp them in a hot oven for a few minutes. Adding crispy bacon gives a savory crunch. Just chop fresh bacon and mix it in before roasting. Fresh herbs like rosemary or thyme boost the flavor. Toss them in right before serving for a fresh taste. You can even add cheese varieties like cheddar for a different twist. Each of these enhancements makes your Garlic Parmesan Roasted Potatoes special. Check the [Full Recipe] for the base you can adapt! After you enjoy your Garlic Parmesan Roasted Potatoes, store any leftovers in an airtight container. Keep them in the fridge. They stay fresh for up to three days. Let the potatoes cool before sealing the container. This helps prevent moisture buildup, which can make them soggy. To reheat, use your oven for the best taste. Preheat your oven to 350°F (175°C). Spread the potatoes on a baking sheet. Bake for about 10-15 minutes. This method keeps them crispy. You can also use a microwave, but the potatoes may become soft. If you choose the microwave, heat in short bursts for about 1-2 minutes. You can freeze these potatoes, but they may lose some crunch. To freeze, let the potatoes cool completely. Place them in a single layer on a baking sheet and freeze for 1-2 hours. Once frozen, transfer them to a freezer bag. They can stay in the freezer for up to three months. When ready to eat, thaw in the fridge overnight before reheating. For the best taste, refer to the Full Recipe for cooking instructions. Yes, you can use many types of potatoes. Red potatoes, Yukon Gold, or fingerlings work well. Each type gives a unique taste and texture. Choose what you like best. Just ensure they are cut into even pieces for even cooking. To make this recipe dairy-free, skip the Parmesan cheese. You can replace it with nutritional yeast for a cheesy flavor. Alternatively, use a dairy-free cheese option. Both swaps keep the dish tasty without dairy. These roasted potatoes pair well with many dishes. Serve them with grilled chicken or fish for a complete meal. They also work great with salads or roasted veggies. You can even serve them alongside your favorite dipping sauce for a fun twist. For the full recipe, check out the details above! You learned about making Garlic Parmesan Roasted Potatoes in this guide. We covered key ingredients, step-by-step instructions, and helpful tips for crispiness. You discovered tasty variations and how to store leftovers. In closing, this dish is easy to enjoy with family and friends. Now, you can create a delicious side anytime. Happy cooking!

Garlic Parmesan Roasted Potatoes Simple and Tasty Dish

Looking for a delicious side dish that’s simple to make? Garlic Parmesan Roasted Potatoes are a perfect choice! They’re crispy,

- 2 cups all-purpose flour - 1 cup granulated sugar - 1 tablespoon baking powder - 1/2 teaspoon baking soda - 1/2 teaspoon salt - 1/2 cup unsalted butter, melted and cooled - 1 large egg - 1 teaspoon vanilla extract - 1 cup buttermilk (or substitute with milk + lemon juice) - 1 1/2 cups fresh blueberries (or frozen) - Zest of 1 lemon (for flavor enhancement) Gathering the right ingredients is key to making classic blueberry muffins. Here’s what you need to create these tender and flavorful treats. First, you need all-purpose flour, which gives muffins their structure. Granulated sugar adds sweetness. Baking powder and baking soda help the muffins rise. Salt brings out all the flavors. Next, we use unsalted butter. It adds richness and moisture. You will also need one large egg, which binds everything together. Vanilla extract enhances the overall taste. Buttermilk is essential for that soft texture. If you don’t have buttermilk, mix milk with lemon juice. Finally, the star ingredient: blueberries! Fresh ones taste best, but frozen work too. Don’t forget the lemon zest. It brightens the flavor and makes your muffins pop! - Alternatives for buttermilk: You can use regular milk mixed with lemon juice. It mimics the tanginess of buttermilk. - Gluten-free flour options: Substitute all-purpose flour with a gluten-free blend for those with gluten sensitivities. - Dairy-free butter alternatives: Use coconut oil or vegan butter if you want dairy-free muffins. These substitutions ensure everyone can enjoy these delightful muffins! For the full recipe, check out the detailed instructions. 1. Preheat the oven: Start by preheating your oven to 375°F (190°C). This step ensures even baking for your muffins. 2. Mixing dry ingredients: In a large bowl, combine the dry ingredients. Whisk together 2 cups of all-purpose flour, 1 cup of granulated sugar, 1 tablespoon of baking powder, 1/2 teaspoon of baking soda, and 1/2 teaspoon of salt. Make sure they blend well. 3. Combining wet ingredients: In another bowl, mix the wet ingredients. Combine 1/2 cup of melted and cooled unsalted butter, 1 large egg, 1 teaspoon of vanilla extract, and 1 cup of buttermilk. If you don’t have buttermilk, mix 1 cup of milk with 1 tablespoon of lemon juice. Add the zest of 1 lemon for a fresh taste. 1. Pouring batter into muffin tin: Pour the wet mixture into the dry mixture. Stir gently until just combined. It's okay if there are a few lumps. Next, fold in 1 1/2 cups of blueberries. Be gentle so you don’t crush them. Divide the batter evenly into a lined muffin tin, filling each cup about two-thirds full. 2. Baking time and temperature: Place the muffin tin in the oven and bake for 18 to 22 minutes. The muffins are done when a toothpick inserted in the center comes out clean or with a few crumbs. 3. Tips for checking doneness: To check if your muffins are ready, look for a golden-brown top. They should spring back when lightly touched. If you’re unsure, the toothpick test is the best way to guarantee they’re baked through. You can find the full recipe above for more details. Enjoy baking these classic blueberry muffins! To make great blueberry muffins, focus on texture. First, avoid overmixing. When mixing the wet and dry ingredients, stir gently. Small lumps are just fine. Overmixing makes the muffins tough. Next, use accurate measurements. Too much flour can make muffins dry. Use a kitchen scale for precise results. If you don’t have one, spoon flour into a measuring cup and level it off. This helps keep your muffins light and fluffy. You can boost flavor with spices. Try adding a pinch of cinnamon or nutmeg. These spices pair well with blueberries and add warmth. Also, consider different extracts. Almond extract gives a nutty flavor. Lemon extract brightens the muffins. Just a teaspoon can make a big difference. Experiment to find your favorite combo! Serving matters. Present muffins warm for the best taste. Dust them lightly with powdered sugar. This adds a nice touch. You can also add garnishes. Serve muffins alongside fresh blueberries. A drizzle of honey or maple syrup enhances the look and taste. For a fancy touch, place muffins on a cute plate. For the full recipe, check out the details above. Happy baking! {{image_2}} You can switch up the classic blueberry muffin recipe easily. One fun option is lemon blueberry muffins. Just add lemon zest and a bit of lemon juice to the batter. This adds a bright and fresh taste. Another tasty choice is chocolate chip blueberry muffins. Simply fold in some chocolate chips with the blueberries. The mix of flavors is so delightful. If you follow a vegan diet, you can make vegan blueberry muffins. Use plant-based milk instead of buttermilk. Replace the egg with a flaxseed meal or applesauce. This way, you can enjoy muffins without animal products. For those who want to cut sugar, try low-sugar blueberry muffins. Use a sugar alternative like stevia or monk fruit sweetener for a healthier twist. Seasonal fruits can make your muffins even better. In summer, add fresh peaches or strawberries. These fruits pair well with blueberries and add a new taste. In fall, consider adding diced apples or pears. Each season brings new flavors to explore, making every batch unique and fun. To keep your blueberry muffins fresh, store them in an airtight container. This helps seal in moisture. Place a piece of bread in the container to help keep them soft. You can store muffins at room temperature for up to two days. For longer storage, refrigeration is an option. However, it may dry them out. If you want to freeze muffins, wrap each one in plastic wrap. Then, place them in a freezer bag. This will keep them safe for about three months. Blueberry muffins last about two days at room temperature. If stored in the fridge, they can last up to a week. Check for signs of spoilage. Look for mold or an off smell. If the muffins feel dry or hard, they are likely past their prime. Always trust your senses. If something seems off, it’s best to toss them. For a delicious treat, enjoy your muffins fresh or warmed up with a pat of butter! Can I use frozen blueberries? Yes, you can use frozen blueberries. Just toss them in flour before adding to the batter. This helps prevent them from sinking. Frozen berries work well in muffins and keep the batter cool. Why are my muffins dense? Dense muffins happen for a few reasons. Overmixing the batter can create too much gluten. Also, if you add too much flour or not enough leavening agent, that can cause density. Always measure flour correctly. How to make muffins moist? To keep muffins moist, use buttermilk or yogurt. These ingredients add creaminess. Also, don't overbake them. Pull the muffins out when a toothpick has a few moist crumbs. Can I substitute the egg in this recipe? Yes, you can. Use a flaxseed meal or applesauce as an egg substitute. Mix 1 tablespoon of flaxseed with 2.5 tablespoons of water. Let it sit until thickened. What type of flour is best for muffins? All-purpose flour works best for blueberry muffins. It gives a good balance of texture and rise. You can also try whole wheat flour for a different flavor and added nutrients. Should I line the muffin tin? Yes, lining the muffin tin helps muffins release easily. You can use paper liners or grease the tin with butter or non-stick spray. This ensures a clean removal. What is the best way to fold in blueberries? Gently fold in blueberries using a spatula. Start from the bottom and lift the batter over the berries. This keeps the berries whole and prevents them from breaking. For the full recipe, please refer to the instructions above. This blog post covered how to make blueberry muffins from scratch. We explored ingredients, substitutes, and step-by-step instructions to create the perfect muffin. You learned helpful tips for texture and flavor enhancement. Variations allowed for creativity while storage info ensures freshness. Remember, making great muffins is about fun and experimenting. Enjoy baking and tasting your delicious treats!

Classic Blueberry Muffins Tender and Flavorful Treat

There’s nothing quite like the scent of fresh blueberry muffins wafting through your kitchen. In this guide, I’ll share my

Here is the full recipe ingredient list for your Sheet Pan Garlic Butter Shrimp: - 1 pound large shrimp, peeled and deveined - 4 tablespoons unsalted butter, melted - 4 cloves garlic, minced - 1 teaspoon paprika - 1 teaspoon dried oregano - 1 teaspoon lemon zest - 2 cups cherry tomatoes, halved - 1 cup bell peppers, sliced (red, yellow, or green) - 1 teaspoon salt - ½ teaspoon black pepper - 2 tablespoons fresh parsley, chopped (for garnish) - Lemon wedges (for serving) Each ingredient plays a key role in making this dish taste amazing. The shrimp bring a sweet, briny flavor, while the garlic and butter create a rich base. The spices add warmth and depth. Cherry tomatoes and bell peppers add freshness and color. You can easily find these ingredients at your local store. Remember, fresh shrimp will always give you the best taste. - Preheat the oven to 425°F (220°C). - In a large bowl, mix melted butter, minced garlic, paprika, oregano, lemon zest, salt, and pepper. - Add the shrimp to the bowl and toss until they are well coated. - Line a baking sheet with parchment paper. - Spread the shrimp on one side of the sheet. - On the other side, place halved cherry tomatoes and sliced bell peppers. - Roast everything in the oven for 10-12 minutes until the shrimp are pink and the veggies are tender. - Remove the baking sheet from the oven and garnish with chopped parsley. - Serve with lemon wedges to add a bright flavor. You can find the complete cooking steps in the Full Recipe. Choosing the right shrimp size is key. I recommend using large shrimp. They cook well and are easy to handle. Smaller shrimp can overcook faster. For marinating, let the shrimp sit in the garlic butter mix for at least 15 minutes. This allows the flavors to soak in. To add extra heat, sprinkle in some cayenne pepper or red pepper flakes. This step is simple, and it amps up the flavor. For herbs, fresh parsley or basil can brighten the dish. Fresh herbs often taste better than dried ones. Just remember to add them at the end for the best flavor. To ensure even cooking, spread the shrimp and veggies in a single layer. This helps them roast evenly. Overcooked shrimp can turn rubbery. Keep an eye on them as they roast. They are done when they turn pink and opaque. If you follow these tips, your dish will shine! {{image_2}} You can swap in other veggies to change the flavor. Zucchini and asparagus work great. They cook well and add a fresh taste. Seasonal veggies like broccoli or snap peas are also good choices. You can mix and match based on what you like or what is fresh. Experiment with different seasonings for new flavors. Try adding red pepper flakes for heat. Fresh herbs like basil or cilantro can brighten the dish. You can also use olive oil instead of butter if you want a lighter option. This keeps the dish rich in taste without the dairy. Pair the shrimp with grains for a complete meal. Quinoa or rice makes a nice base. They soak up all the tasty garlic butter. A side salad adds crunch and freshness. A simple green salad or a cucumber salad works well here. You can even serve with crusty bread to mop up the sauce. For the full recipe, check out the details above! After making sheet pan garlic butter shrimp, you may have some leftovers. Here’s how to store them: - Refrigerating leftovers: Place the shrimp and veggies in an airtight container. They can last in the fridge for 2 to 3 days. Make sure to let them cool first. This helps keep the texture nice. - Freezing options for meal prep: If you want to save it longer, freezing is a great option. Use a freezer-safe container or a zip-top bag. It can stay fresh for up to 3 months. Just remember to label the bag with the date. When it’s time to enjoy your leftovers, you can easily reheat them: - Recommended reheating methods: The oven is best for reheating. Preheat it to 350°F (175°C). Place the shrimp and veggies on a baking sheet. Heat for about 10 minutes. This keeps everything juicy. - Timing for reheating shrimp effectively: If you use a microwave, put the shrimp in a microwave-safe dish. Heat in short bursts of 30 seconds. Stir in between until it's warm. Be careful not to overcook the shrimp. It can get rubbery if heated too long. You should cook shrimp in the oven for 10 to 12 minutes. At 425°F (220°C), this time ensures the shrimp cook well. They turn pink and opaque, and the veggies become tender. Cooking too long makes shrimp tough and chewy. So, keep an eye on them! Yes, you can use frozen shrimp. Just thaw them first. Place them in a bowl of cold water for about 15 to 20 minutes. This method is quick and easy. After thawing, pat them dry with paper towels. This helps the garlic butter stick better. I love serving this dish with a fresh salad or rice. A light green salad adds crunch. You can also serve it with quinoa for a healthy twist. Garlic bread pairs well too! It soaks up the tasty garlic butter sauce. Look for a few signs to know if shrimp is cooked. First, check the color. It should be pink and opaque. Second, the shrimp should curl into a C shape. If they curl too tight, they might be overcooked. Perfectly cooked shrimp are juicy and tender. This recipe for sheet pan garlic butter shrimp is quick, easy, and full of flavor. You learned about the perfect ingredient list, step-by-step preparation, and storage tips. Remember, selecting fresh shrimp and seasoning well makes a big difference. Don't hesitate to try different veggies or spices to suit your taste. Enjoy this tasty dish alone or with friends. With some simple techniques, you can impress anyone at your table.

Sheet Pan Garlic Butter Shrimp Quick and Tasty Meal

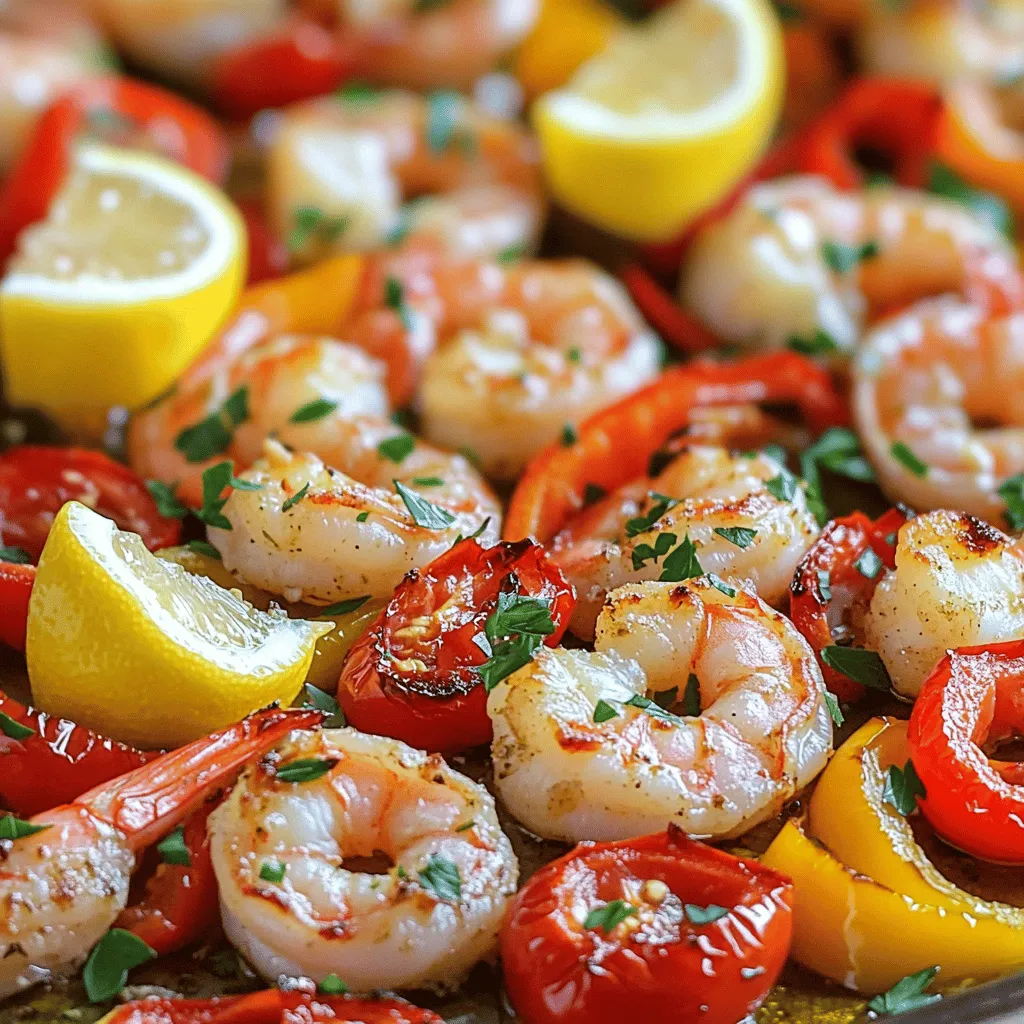
Looking for a quick and tasty meal? This Sheet Pan Garlic Butter Shrimp recipe has you covered! In just 30

For this easy strawberry shortcake, you need fresh strawberries. They are the star here. I use: - 2 cups fresh strawberries, hulled and sliced - 1/4 cup granulated sugar (for strawberries) Let the sugar sit with the strawberries to sweeten them. This makes them juicy and delicious. Next, let’s gather the shortcake ingredients. These will create a soft, sweet base. You will need: - 1 1/2 cups all-purpose flour - 2 tablespoons baking powder - 1/2 teaspoon salt - 1/4 cup granulated sugar (for shortcake) - 1/4 cup unsalted butter, cold and cubed - 3/4 cup heavy cream, plus extra for brushing - 1 teaspoon vanilla extract These ingredients mix to form a light and fluffy shortcake. Toppings can make your shortcake even better. I love to add: - Whipped cream (for serving) You can also try other toppings like chocolate sauce or nuts. Adding these makes each bite special. For the complete recipe, check out the Full Recipe link. Start by washing the strawberries. Remove the green tops and slice them. Place the sliced strawberries in a medium bowl. Add 1/4 cup of granulated sugar. Toss them gently to coat. Let the strawberries sit for about 30 minutes. This helps them release their sweet juice. Preheat your oven to 425°F (220°C). In a large bowl, mix the flour, baking powder, salt, and 1/4 cup of sugar. Use a whisk to blend them well. Next, add the cold, cubed butter to the bowl. Use a pastry cutter or your fingers to mix until it looks like coarse crumbs. Pour in 3/4 cup of heavy cream and the vanilla extract. Stir just until the dough comes together. Don’t overmix, as this can make your shortcake tough. Turn the dough onto a floured surface. Pat it into a rectangle that is about 1 inch thick. Use a biscuit cutter or a glass to cut out rounds. Place the shortcakes on a baking sheet lined with parchment paper. Brush the tops with a bit of extra heavy cream for a nice golden color. Bake for 12-15 minutes. They should be lightly golden on top. Let the shortcakes cool on a wire rack for a few minutes. Once the shortcakes are cool, slice them in half horizontally. Take the bottom half and spoon on a generous amount of the macerated strawberries. Top it with whipped cream. Place the other half of the shortcake on top. Serve immediately, adding extra strawberries and whipped cream on the side if you like. Enjoy your Easy Strawberry Shortcake, a delightful and simple treat! For the complete recipe, please refer to the Full Recipe section. When picking strawberries, look for bright red ones. They should feel firm and smell sweet. Avoid any that are dull or soft. Fresh, ripe strawberries taste best in this dessert. If you can, buy them from a local farmer's market. The flavor will be vibrant, making your shortcake shine. The key to great shortcake is not overmixing. Mix the dough just until it comes together. This keeps the cake light and fluffy. Cold butter is also important. It helps create layers in the shortcake. Remember to pat the dough gently into shape. This helps keep it airy. Serve your shortcake warm for the best taste. Add whipped cream on top for extra creaminess. You can also sprinkle some extra strawberries around the plate. This makes your dessert look pretty. For a twist, try adding a drizzle of chocolate sauce. It adds a nice touch to the sweet flavor. You can find the full recipe above for all these tasty details. {{image_2}} You can add a twist to the classic shortcake by including chocolate. Start by mixing cocoa powder into the shortcake dough. Use about 1/4 cup of cocoa powder with the flour. This adds a rich chocolate flavor. Top with your sweetened strawberries and whipped cream. The chocolate pairs nicely with the juicy berries. It's a fun and tasty change! If you need a gluten-free version, swap the all-purpose flour for a gluten-free blend. Look for a blend that has xanthan gum for the best texture. Follow the same steps in the recipe. The shortcakes might be slightly denser but still taste great. Enjoy the same fun flavors without the gluten! To make a vegan shortcake, substitute the butter with coconut oil or a vegan butter. Replace heavy cream with almond or coconut milk. You can also use a plant-based whipped cream. This keeps the dessert light and fluffy while being dairy-free. The result is a delicious vegan treat everyone can enjoy! For more ideas, check out the Full Recipe. After enjoying your Easy Strawberry Shortcake, you might have some left. To store it, place the assembled shortcake in an airtight container. Keep it in the fridge, where it can last for 1-2 days. The whipped cream may lose some fluffiness, but the flavor stays great. You can freeze shortcake and strawberries separately for longer storage. For shortcake, let it cool completely. Wrap each piece in plastic wrap and place them in a freezer bag. They can last up to 3 months. For strawberries, slice them and toss with a bit of sugar. Place them in a freezer-safe bag. They will last about 6 months frozen. To keep everything fresh, always store shortcake and strawberries in separate containers. This prevents sogginess. If you're preparing ahead, only assemble the shortcake right before serving. This way, you’ll enjoy the best texture and flavor. When ready to eat, add the whipped cream just before serving to keep it light and airy. For more detailed steps, check the Full Recipe. Yes, you can use frozen strawberries. Thaw them before using. Drain excess liquid to avoid sogginess. Frozen berries may be softer, but they still taste great. For best results, let them sit in sugar for a while. This helps bring out their sweet flavor. You can prepare the shortcake in advance. First, make the dough and cut out rounds. Then, freeze them on a baking sheet. Once frozen, move them to a bag. Bake them fresh when you need them. This keeps them fluffy and light. Serve your strawberry shortcake with whipped cream. You can add extra strawberries for color and flavor. A scoop of vanilla ice cream pairs well, too. For a fun twist, try a drizzle of chocolate sauce. The flavors combine for a sweet treat! For the full recipe, visit the Easy Strawberry Shortcake section. In this blog post, we explored how to make strawberry shortcake step by step. We covered the ingredients needed, from fresh strawberries to shortcake and optional toppings. You learned how to prepare strawberries, make the dough, and assemble the dessert. I also shared tips for picking the best strawberries and achieving the right texture. Finally, we looked at delicious variations and storage tips. Enjoying strawberry shortcake can be simple and fun, so dive in and create your own treat. Your sweet journey begins now!

Easy Strawberry Shortcake Delightful and Simple Treat

Are you ready for a sweet summer treat? This Easy Strawberry Shortcake is delightful and simple to make. With fresh

- 1 lb boneless, skinless chicken thighs, cut into bite-sized pieces - 2 tablespoons sesame oil - 3 tablespoons gochujang (Korean chili paste) - 1 tablespoon soy sauce - 2 teaspoons honey - 3 garlic cloves, minced - 1-inch piece of ginger, grated - 1 cup jasmine rice - 2 cups chicken broth - 1 cup broccoli florets - 1 carrot, julienned - 1 red bell pepper, sliced - 2 green onions, thinly sliced - Sesame seeds, for garnish - Salt and pepper to taste The chicken is the star of this dish. I prefer thighs for their rich flavor and tenderness. Gochujang adds a spicy kick that defines the recipe. The sesame oil gives a nutty aroma that is hard to resist. Fresh garlic and ginger boost the flavor further. Jasmine rice makes a perfect base for these bold tastes. The mix of colorful vegetables adds both nutrition and crunch. - Tofu or tempeh for a vegetarian option - Shrimp or beef for alternative proteins - Sliced avocado for creaminess - Kimchi for extra zing - Fried egg for a rich topping These optional ingredients let you customize your bowl. If you want a vegetarian dish, try tofu or tempeh. If you love seafood, shrimp can be a great choice. Adding avocado can bring a creamy texture. Kimchi gives a nice sour touch. A fried egg on top can add richness and flavor. - Large mixing bowl - Measuring spoons and cups - Sharp knife and cutting board - Large skillet or wok - Medium-sized pot for rice - Wooden spoon or spatula Having the right tools makes cooking easier. A mixing bowl helps you marinate the chicken well. A good knife cuts the veggies perfectly. A skillet or wok allows for even cooking. The medium pot is essential for fluffy rice. A spatula helps you stir without damaging your pans. For the full recipe, check out the detailed cooking instructions. To start, you need a tasty marinade. In a bowl, mix gochujang, soy sauce, honey, sesame oil, minced garlic, and grated ginger. This combo gives the chicken a spicy kick. Cut your chicken thighs into bite-sized pieces. Toss them in the marinade and season with salt and pepper. Make sure each piece is well-coated. Let the chicken marinate for at least 30 minutes. This step adds depth to your dish. Next, rinse your jasmine rice. Do this under cold water until the water runs clear. This helps remove excess starch. In a medium pot, add the rinsed rice and chicken broth. Bring it to a boil, then lower the heat. Cover and let it simmer for about 15 minutes. For fluffy rice, avoid lifting the lid. After cooking, let it sit covered for another 5 minutes. Fluff it with a fork before serving. While the rice cooks, sauté your veggies. Heat a drizzle of sesame oil in a large skillet over medium-high heat. Add broccoli, julienned carrot, and sliced red bell pepper. Stir-fry them for about 5-7 minutes. You want them tender but still crisp. This keeps the texture nice and bright. Now, it’s time to cook the marinated chicken. Heat a separate skillet to medium-high. Add the chicken pieces and stir-fry for about 7-10 minutes. Cook until the chicken is fully done and caramelized. Stir occasionally to avoid burning. The caramelization adds flavor and makes your dish appealing. It’s time to put everything together. First, fluff the jasmine rice with a fork. Divide it into serving bowls. Top the rice with the sautéed vegetables and spicy chicken. Layering makes your bowl look more inviting. You can also use different colors to enhance the look. Finally, let’s add some garnishes. Thinly slice green onions and sprinkle them on top. Add sesame seeds for an extra crunch. Garnishing not only makes your dish pretty but also adds flavor. A well-presented bowl is more enjoyable to eat. Enjoy crafting your Spicy Korean Chicken Bowls! For the complete recipe, check out the Full Recipe section above. Using fresh ingredients makes a big difference. Fresh chicken, crisp veggies, and spices unlock the best taste. I always choose bright, colorful produce. It adds flavor and looks good in the bowl. Adding spices and herbs can boost your dish. Besides gochujang, try garlic or ginger. They bring depth to the flavors. A pinch of sesame seeds adds a nice crunch too. Proper pan heat is key for great results. Always preheat your pan before cooking. This helps the chicken sear nicely and keeps it juicy. A hot pan also cooks vegetables quickly, keeping them crisp. Cooking in batches can improve texture. If your pan is too crowded, it steams the food instead of browning it. Cook the chicken and veggies separately. This way, each ingredient gets the right attention. Prepping ingredients in advance saves time. Cut your chicken and veggies before you start cooking. You can even marinate the chicken a day ahead. This way, you're ready to go when it's time to cook. Utilizing leftovers is a smart strategy too. If you have extra chicken or rice, use them for lunches. Mix them with new sauces or veggies. This keeps meals fun and fresh without extra effort. For the complete recipe, check out the [Full Recipe]. {{image_2}} You can change the chicken in this recipe. Tofu or tempeh works well for a vegetarian option. Both absorb flavors nicely. For meat lovers, try beef or shrimp. Each protein brings a new taste to your bowl. The sauce is key to flavor in Spicy Korean Chicken Bowls. You can play with different chili pastes. Some may prefer a milder or sweeter taste. Homemade sauces can also shine. Mix soy sauce with honey and garlic for a tasty twist. Seasonal vegetables can add variety. Try zucchini, snap peas, or asparagus when they are fresh. Other quick-cooking options like mushrooms or baby corn work great too. Mixing veggies keeps your meals colorful and fun. Store your spicy Korean chicken bowls in airtight containers. Glass or plastic containers work well. Keep them in the fridge. You can store leftovers for up to three days for best quality. To freeze, let the chicken and veggies cool completely. Use freezer-safe bags or containers. Remove as much air as possible. This helps prevent freezer burn. They can last up to three months. When ready to eat, thaw in the fridge overnight. Reheat on the stove or microwave until hot. These bowls pair great with a fresh side salad or steamed dumplings. For meal prep, you can keep each component separate. This way, everything stays fresh longer. When ready to eat, just assemble the bowls again. Enjoy your delicious meal! For the complete recipe, refer to the Full Recipe. To lower the heat, you can adjust the gochujang. Use less of it in your marinade. You can also add other flavors to balance the spice. A bit more honey can sweeten the dish. Adding more vegetables can also help tone down the heat. Yes, you can use frozen vegetables. They are easy and save time. However, fresh veggies often taste better. Frozen veggies can lose some crunch when cooked. If you choose frozen, stir-fry them for a shorter time. This keeps them crisp. Jasmine rice is a great choice for these bowls. It has a nice fragrance and texture. You can also use short-grain rice for a stickier option. Brown rice is a healthy alternative, but it takes longer to cook. Quinoa is another option if you want something different. Yes, you can make this dish gluten-free. Use gluten-free soy sauce instead of regular soy sauce. Make sure the gochujang you use is gluten-free, too. Most brands offer gluten-free options now. Check the label to be sure. The chicken should reach an internal temperature of 165°F. Use a meat thermometer to check. The meat should not be pink inside. The juices should run clear when you cut it. You can serve your bowls with pickled vegetables for an extra kick. Kimchi adds a nice touch, too. A simple salad can balance the meal. You might enjoy a side of steamed dumplings as well. These sides will make your meal even more filling. This blog post covered the essentials for making Spicy Korean Chicken Bowls. We discussed key ingredients, preparation steps, and tools needed. I shared tips on enhancing flavors and variations to keep your meals exciting. Proper storage methods were also highlighted to keep your food fresh. In conclusion, cooking should be fun and satisfying. Enjoy experimenting with flavors and ingredients. This dish offers many ways to make it your own. Happy cooking!

Spicy Korean Chicken Bowls Flavorful and Easy Recipe

Are you ready to spice up your dinner routine? My Spicy Korean Chicken Bowls are both flavorful and easy to

- 8 ounces rotini pasta - 4 slices of turkey bacon (or plant-based bacon) - 1 cup cherry tomatoes, halved - 1 cup romaine lettuce, chopped - ½ cup crumbled feta cheese - ⅓ cup mayonnaise - 2 tablespoons Greek yogurt - 1 tablespoon apple cider vinegar - 1 teaspoon garlic powder - Salt and pepper to taste - Fresh basil leaves - Additional toppings (optional) When I think about a summer side dish, this BLT Pasta Salad is my go-to. It bursts with fresh flavors and is easy to prepare. I love the way rotini pasta holds the dressing and other ingredients. The pasta gives a nice bite, making it a fun addition to any meal. I often use turkey bacon for a lighter twist, but plant-based bacon works just as well. The crispy bacon adds a lovely crunch. Cherry tomatoes bring a sweet pop, while romaine lettuce adds a fresh crunch. Feta cheese brings in a creamy tang that pairs well with the other flavors. The dressing is simple yet tasty. I mix mayonnaise and Greek yogurt for creaminess and a bit of tang. Apple cider vinegar adds a nice zing, while garlic powder gives it depth. Garnishing with fresh basil leaves adds a fragrant touch. You can also get creative with toppings if you like. This salad is perfect for summer picnics or barbecues. For the full recipe, check out the details above. Start by boiling 8 ounces of rotini pasta. Follow the package instructions carefully. Cook until it's al dente, which means it should still be firm. Drain the pasta well after cooking. Rinse it under cold water to stop the cooking process. This step is very important. Rinsing keeps the pasta from becoming mushy. It also helps cool it down. Set the cooled pasta aside in a large bowl. While the pasta cooks, heat a skillet over medium heat. Add 4 slices of turkey bacon to the skillet. Cook the bacon until it gets crispy. This should take about 5-7 minutes. Once done, take it off the heat. Let it cool for a few minutes on a paper towel. This helps absorb extra grease. After cooling, chop the bacon into small pieces. You want bite-sized chunks for your salad. In the large bowl with cooked pasta, add the chopped turkey bacon. Next, toss in 1 cup of halved cherry tomatoes and 1 cup of chopped romaine lettuce. These fresh ingredients add color and crunch. In a small bowl, mix the dressing. Combine ⅓ cup mayonnaise, 2 tablespoons Greek yogurt, 1 tablespoon apple cider vinegar, and 1 teaspoon garlic powder. Add salt and pepper to taste. Whisk it all together until smooth. Pour the dressing over the salad and toss gently. Make sure everything is coated well. Finally, fold in ½ cup of crumbled feta cheese. This gives the salad a creamy texture. Adjust seasoning with salt and pepper if needed. For the best flavor, cover the salad and refrigerate for at least 30 minutes. This allows the flavors to meld. Before serving, add fresh basil leaves for a bright touch. You can find the Full Recipe for detailed steps. You can make this BLT Pasta Salad your own. If you want a vegan option, swap turkey bacon for plant-based bacon. You can also use gluten-free pasta. This way, everyone can enjoy it. Add spices like paprika or herbs like dill to change the flavor. You can also try adding lemon zest for a fresh kick. This salad pairs well with grilled chicken or fish. You can also serve it with crusty bread. Enjoy it chilled for a refreshing taste. If you prefer, it can be served at room temperature, too. Both ways work great for summer picnics or potlucks. To keep the salad fresh, always use ripe tomatoes and crisp lettuce. Buy these ingredients just before you make the salad. This will help keep flavors bright. Make the salad an hour before serving so the flavors blend well. If you let it sit too long, the veggies may wilt. Enjoy the best taste by serving it soon after mixing. {{image_2}} You can switch up the protein in your BLT pasta salad. Chicken, shrimp, or tofu work well. - Chicken: Use grilled or rotisserie chicken for a hearty bite. - Shrimp: Cook shrimp quickly in a pan. Toss them in for a seafood twist. - Tofu: For a plant-based option, use firm tofu. Marinate it for extra flavor. These choices keep the salad fresh and exciting. You can mix and match to find your favorite! The dressing changes the whole salad. You can try yogurt-based or traditional dressings. - Yogurt-based: This option is lighter. It adds creaminess without too many calories. - Traditional: A classic mayonnaise dressing gives a rich flavor. You can also make dressings at home or buy them from the store. Homemade dressings let you control the taste. Store-bought options save time but check the ingredients. Adding local ingredients makes your salad special. You can use what’s fresh in your area. - Local Ingredients: Try seasonal veggies or herbs from your garden. - Flavor Inspirations: Look to other cuisines. A dash of pesto or some spicy salsa can change the vibe. These small changes let you explore flavors from around the world. Your BLT pasta salad can be unique to you! For the full recipe, be sure to check it out. To keep your BLT Pasta Salad fresh, use an airtight container. Glass containers work best. They prevent odors and keep the salad crisp. When storing, cover the salad tightly. This helps avoid drying out the ingredients. Refrigerate the salad right after making it. It is best to chill it for at least 30 minutes. This helps the flavors blend well. If you have leftovers, store them in the fridge. Your BLT Pasta Salad stays fresh for about 3 days in the fridge. After that, the veggies may get soggy. Always check for signs of spoilage. Look for any off smells or changes in color. If the salad looks slimy or smells bad, throw it away. I don’t recommend freezing BLT Pasta Salad. The pasta and veggies can become mushy when thawed. If you must freeze it, pack it tightly in a freezer-safe container. To thaw, place it in the fridge overnight. For best taste, enjoy it fresh. If you want to prepare in advance, try making the pasta and dressing separately. This keeps the salad fresh until serving. You can find the Full Recipe to guide your cooking! To make this BLT Pasta Salad vegetarian, swap turkey bacon for plant-based bacon. You can also use roasted chickpeas for added protein and crunch. If you want more flavor, consider adding smoked paprika or liquid smoke to mimic the taste of bacon. This way, you still get that savory kick without meat. Leftover pasta salad is great for many meals. You can use it as a filling for wraps or sandwiches. Toss it into a fresh green salad for added texture. You can even serve it cold as a side dish to grilled meats or fish. If you want a warm option, heat it gently in a pan and serve it as a pasta dish. Yes, you can prepare this salad ahead of time! Just make sure to store it in an airtight container in the fridge. It tastes even better after a few hours or overnight. The flavors blend well, making it a perfect dish for parties or potlucks. Just add the fresh basil just before serving for a pop of color. This recipe is perfect for meal prep! You can portion it into individual containers for grab-and-go lunches. Just keep the dressing on the side until you’re ready to eat. This helps keep the pasta and veggies fresh and crisp. Store your meal prep containers in the fridge for up to four days. This blog post shared a quick and tasty recipe for BLT Pasta Salad. We covered the key ingredients, such as rotini pasta, turkey bacon, and fresh veggies. You learned how to cook the pasta, prepare the bacon, and mix it all together. I also provided tips on customizing your salad and suggested storage methods. Enjoy making this salad and share it with friends. It’s perfect for any meal and easy to adapt. Have fun experimenting with flavors and making it your own!

BLT Pasta Salad Flavorful and Fresh Summer Side

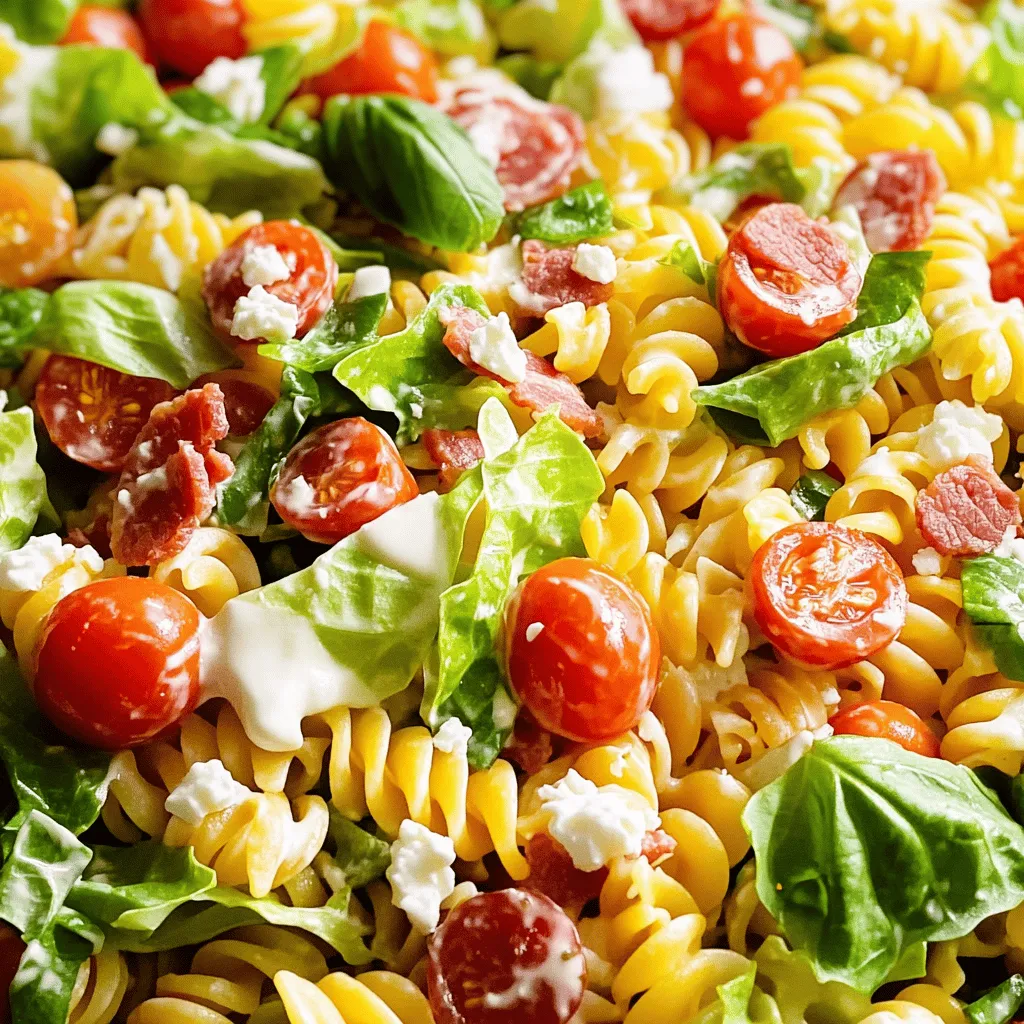
Looking for a bright and tasty summer side dish? This BLT Pasta Salad blends fresh flavors and comforts of a

- 1 cup all-purpose flour - 1/2 cup granulated sugar - 1/4 cup unsalted butter, melted - 1 teaspoon baking powder - 1/2 teaspoon cinnamon - 1/4 teaspoon salt - 1 large egg - 8 oz cream cheese, softened - 1/2 cup powdered sugar - 1 teaspoon vanilla extract - 2 tablespoons sugar (for cinnamon sugar coating) - 1 teaspoon ground cinnamon (for cinnamon sugar coating) To make churro cheesecake bars, you need just a few key ingredients. Each one plays a special role in creating that dreamy taste and texture. The main ingredients include flour, sugar, and butter. They form the tasty base of the bars. You’ll also need cream cheese, which adds a rich and creamy layer. The egg helps bind everything together, making the bars nice and firm. Cinnamon is essential for that churro flavor. It gives the bars warmth and spice. Don’t forget the baking powder! It helps the bars rise during baking. - Chocolate chips - Nuts (e.g., pecans or walnuts) - Fruit (e.g., berries or caramel sauce) You can customize your churro cheesecake bars! Adding chocolate chips or nuts can add extra crunch and flavor. Fresh fruit or caramel sauce can give a refreshing twist. These choices let you make the recipe your own. Feel free to get creative! For the full recipe, check out the link provided. - Preheat the oven to 350°F (175°C). - In a mixing bowl, mix these dry ingredients: - 1 cup all-purpose flour - 1/2 cup granulated sugar - 1 teaspoon baking powder - 1/2 teaspoon cinnamon - 1/4 teaspoon salt - Pour in the melted butter and add 1 large egg. Mix until a dough forms. It may feel crumbly, but that is okay. - In a clean bowl, beat 8 oz cream cheese until smooth. - Add 1/2 cup powdered sugar and 1 teaspoon vanilla extract. Mix until well combined. - Press about 2/3 of the dough into the bottom of the greased 8x8 inch baking pan. - Spread the cheesecake filling evenly over the dough. - Crumble the remaining dough on top of the cheesecake. - Bake in the preheated oven for 30-35 minutes. Look for a golden top and a set cheesecake. - While baking, mix 2 tablespoons of sugar with 1 teaspoon of ground cinnamon. - After baking, sprinkle the cinnamon sugar on top while the bars are warm. - Let the bars cool in the pan. Slice them into squares once cool. This method ensures tasty churro cheesecake bars that are easy to share. For more details, check the Full Recipe. To get a smooth and creamy cheesecake layer, first, ensure your cream cheese is softened well. If it’s cold, it can be lumpy. Leave it out for about an hour before you start mixing. Next, mix your dough just enough to combine. Overmixing can make it tough, and we want soft, chewy bars. When you’re ready to serve, dust the bars with powdered sugar for a sweet touch. Use a fine sieve to sprinkle it evenly. For cutting, use a sharp knife and rinse it in hot water between cuts. This keeps the slices neat and pretty. Serve on a decorative platter and add a dollop of whipped cream for extra flair. Sometimes, the bars might turn out too dry. If that happens, drizzle a bit of milk or cream over the top. This can help add moisture back in. If you see cracks in the cheesecake layer, don’t worry! A smooth layer of whipped cream on top can hide them well. It adds flavor and makes your bars look great. {{image_2}} You can change the flavor of churro cheesecake bars easily. One fun idea is to make chocolate chip churro cheesecake bars. Just add 1 cup of chocolate chips to the cheesecake filling. The chocolate adds a rich taste that pairs well with the cinnamon. Another great twist is the pumpkin spice variation for fall. Use 1 cup of pumpkin puree and add 1 teaspoon of pumpkin spice to the filling. This gives the bars a warm, cozy flavor perfect for autumn. If you need gluten-free options, use almond or coconut flour instead of all-purpose flour. This keeps the texture nice and light. Just remember, you may need to adjust the amount slightly, as these flours can behave differently. For vegan alternatives, replace the cream cheese with cashew cream. To make cashew cream, blend soaked cashews with a bit of water until smooth. This keeps the bars creamy and delicious without dairy. You can make these bars festive with seasonal toppings. Add colorful sprinkles for holidays to create a fun look. It makes serving these treats even more exciting. For a fresh burst of flavor, try fruit toppings. Fresh berries or sliced bananas add a nice contrast to the sweet bars. You can also drizzle some caramel or chocolate sauce for an extra treat. For the full recipe, check the section above. To keep your churro cheesecake bars fresh, place them in an airtight container. Make sure they are completely cool before sealing them. This step helps avoid extra moisture. You can store them in the fridge for up to five days. If you want a sweet treat later, this is the way to go. Freezing these bars is easy and keeps them tasty. Start by cutting them into squares. Then, wrap each piece tightly in plastic wrap. Place the wrapped bars in a freezer bag or container. This helps prevent freezer burn. You can freeze them for up to three months. To thaw, take them out and leave them in the fridge overnight. This slow thawing keeps their texture right. If you are in a hurry, you can leave them at room temperature for about an hour. Enjoy your bars with a rich flavor and soft texture when ready to eat! For the complete recipe, check out the Full Recipe section. Churro cheesecake bars last about five days in the fridge. Store them in an airtight container. For longer storage, you can freeze them. Wrap each bar well in plastic wrap, then place them in a freezer bag. Churro cheesecake bars can stay fresh in the freezer for up to three months. Yes, you can make these bars ahead of time. I recommend preparing them a day before you plan to serve. After baking, let the bars cool completely. Store them in the fridge, covered, for the best taste. This way, the flavors blend nicely, and you save time on the day of serving. Pair churro cheesecake bars with a cold glass of milk or coffee. They also go well with hot chocolate for a cozy touch. If you want more dessert ideas, try serving them with a scoop of vanilla ice cream or a dollop of whipped cream. You could add fresh fruit too, like berries, for a burst of color and flavor. Churro cheesecake bars are a fun treat with a simple recipe. We covered key ingredients, preparation steps, and tips for the best results. Remember, small changes can make a big difference, like adding nuts or chocolate chips. Enjoy making these bars for friends and family. They’ll love the flavor and unique twist. Whether for parties or cozy nights in, churro cheesecake bars are sure to impress!

Churro Cheesecake Bars Tasty and Easy Treat

Get ready for a sweet treat! Churro Cheesecake Bars combine two favorites: churros and cheesecake. This easy recipe is perfect

To craft a tasty no bake key lime pie, gather these key items: - 1 ½ cups graham cracker crumbs - ½ cup unsweetened shredded coconut - ⅓ cup sugar - ½ cup unsalted butter, melted - 2 (14 oz) cans sweetened condensed milk - ¾ cup fresh key lime juice (about 15-20 key limes) - 1 tablespoon lime zest (plus extra for garnish) - 1 cup heavy whipping cream - 2 tablespoons powdered sugar - Key lime slices for garnish These ingredients work together to create a creamy and delicious pie. The graham cracker crumbs form a crunchy base. The sweetened condensed milk and key lime juice give it a tangy zing. You can add a twist to your pie with these options: - Fresh mint leaves for garnish - Extra lime zest for a stronger flavor - A dash of vanilla extract for depth - Toasted coconut for added crunch These optional ingredients can enhance your pie's taste. Feel free to mix and match based on your preferences. Using fresh key limes is key to a great pie. They are juicier and more fragrant than regular limes. When picking limes, choose those that feel heavy for their size. This often means they have more juice. Always check the dates on your sweetened condensed milk, too. Fresh ingredients equal great flavor! You can find the full recipe [here](#). To make the crust, grab a large bowl. Mix together the graham cracker crumbs, shredded coconut, sugar, and melted butter. Stir until it looks like wet sand. This mixture should stick together when pressed. Next, take a 9-inch pie dish and firmly press this mixture into the bottom and sides. Make sure it is even and compact. Now, chill the crust in the fridge for at least 30 minutes. This helps it set properly. In a large mixing bowl, combine the sweetened condensed milk, fresh key lime juice, and lime zest. Use a whisk to mix until everything is smooth and well combined. The key lime juice gives the pie its bright flavor. Make sure to use fresh juice for the best taste. In a separate bowl, whip the heavy cream with an electric mixer. Start on medium speed until soft peaks form. Slowly add the powdered sugar while continuing to whip. Keep going until you see stiff peaks. This means the cream is ready. Now, gently fold the whipped cream into the lime mixture. Be careful not to deflate the cream; you want to keep it light and fluffy. Pour the creamy lime filling into your chilled graham cracker crust. Smooth out the top with a spatula. Once it looks nice, cover the pie and refrigerate for at least 4 hours. This will help it firm up. After chilling, the pie will be ready for slicing. You can garnish it with extra lime zest and key lime slices for a lovely touch. Enjoy your delightful no-bake pie! If you want the detailed process, check the Full Recipe. To get great whipped cream, start with cold tools. Chill your mixing bowl and beaters. Use heavy cream for the best texture. Whip the cream on medium speed until soft peaks form. Then, add powdered sugar slowly. Keep whipping until you see stiff peaks. This step gives your pie a nice, fluffy feel. A soggy crust can ruin your pie. To avoid this, chill your crust before adding the filling. Use melted butter to bind the crumbs well. Press the mixture tightly into the pie dish. Bake the crust for 10 minutes at 350°F if you want extra crunch. Let it cool before adding the lime filling. To boost the key lime flavor, use fresh juice. Freshly squeezed juice makes a big difference. Try adding more lime zest for a bolder taste. You can also add a pinch of salt to balance the flavors. If you like it sweeter, adjust the sugar to your taste. These tips will help you create a pie that pops with flavor. If you want the full recipe, click here. {{image_2}} To add a tropical twist, try the coconut-key lime variation. Simply mix ½ cup of unsweetened shredded coconut into your crust. You can also fold in ½ cup of shredded coconut into the filling. This extra coconut enhances the pie's texture and flavor. It makes every bite feel like a sunny beach day. For those who avoid gluten, making a gluten-free key lime pie is easy. Use gluten-free graham crackers for the crust. There are many brands that make tasty gluten-free options. You can crush them and follow the same steps for the crust. This way, everyone can enjoy this delightful dessert. Fruits make this pie even more special. You can add fresh fruit on top after chilling. Slices of strawberries, kiwi, or blueberries work great. They add color and taste. You can also make a fruit compote by cooking down your favorite fruit. Drizzle this over the pie before serving for a lovely touch. Want to explore more? Check out the Full Recipe for all the details! To keep your no bake key lime pie fresh, store it in the fridge. Use an airtight container or cover it with plastic wrap. This prevents drying out and keeps flavors intact. Make sure the pie is fully set before covering it. If you don’t have a container, use a plate on top. This also protects it from any strong smells in the fridge. When stored properly, the pie lasts about 3 to 4 days in the fridge. I recommend enjoying it within this time for the best taste and texture. After day four, the crust may become soggy. If you notice any change in smell or color, it’s best to toss it. You can freeze the pie if you have leftovers. First, let it set in the fridge for a few hours. Then, slice it into portions. Wrap each piece tightly in plastic wrap. Place the wrapped slices in a freezer-safe bag or container. This way, you can enjoy it later! It lasts about 1 to 2 months in the freezer. To eat, thaw it in the fridge for a few hours or overnight. Enjoy every bite of your delightful key lime pie again! For the full recipe, check the earlier section. Key limes are smaller and rounder than regular limes. They have a thinner skin and a more intense flavor. Their juice is sweeter and more aromatic. This unique taste makes Key limes perfect for desserts like pie. Yes, you can use bottled key lime juice. However, fresh juice offers better flavor. Bottled juice may lack the bright taste that fresh Key limes provide. If you want the best results, I recommend using fresh juice. To make your key lime pie firmer, add more lime juice and zest. You can also chill it for longer. If you want a thicker filling, consider adding a bit of gelatin to the mixture. Absolutely! You can make this pie a day or two ahead. Just store it in the fridge. This will allow the flavors to blend and the filling to set better. You can serve this pie with whipped cream on top. Add some lime slices or zest for decoration. Fresh berries also make a great topping. They add color and a sweet contrast to the tart pie. You can find the full recipe for this delightful No Bake Key Lime Pie in the recipe section above. You learned how to make a tasty No Bake Key Lime Pie. We covered essential and optional ingredients, along with tips for the best results. You also explored variations and storage ideas to keep it fresh. Remember, using quality ingredients makes a big difference. Try customizing your pie to match your taste. Enjoy sharing this sweet treat with friends and family!

No Bake Key Lime Pie Delightful and Easy Recipe

Craving something sweet and zesty? Let’s dive into the world of No Bake Key Lime Pie! This dessert is creamy,

- 8 oz rice noodles - 1 red bell pepper, thinly sliced - 1 cup shredded carrots - 1 cup cucumber, julienned - 1 cup red cabbage, shredded - 1/2 cup fresh cilantro, chopped - 1/4 cup green onions, sliced - 1/2 cup roasted peanuts, roughly chopped In this salad, rice noodles serve as the base. They soak up the flavors well. Fresh veggies add crunch and color. Red bell pepper gives sweetness. Carrots add a nice pop of orange. Cucumber refreshes every bite. Red cabbage brings a lovely crunch. Fresh herbs like cilantro brighten the dish. Green onions add a mild onion flavor. Roasted peanuts give a delicious crunch and nuttiness. - 1/4 cup peanut butter (creamy) - 2 tablespoons soy sauce - 1 tablespoon sesame oil - 1 tablespoon honey or maple syrup - 2 tablespoons lime juice - 1 teaspoon sriracha (adjust for heat preference) - 1-2 tablespoons warm water (to thin dressing as needed) The dressing makes the salad shine. Peanut butter is rich and creamy. Soy sauce adds a savory touch. Sesame oil brings a nutty flavor. Honey or maple syrup balances the salt. Lime juice adds tang. Sriracha gives a kick; adjust it for heat. Warm water helps reach the perfect texture. You can find the full recipe with measurements and instructions. To start, you will need to cook the rice noodles. Follow the package instructions closely. Usually, you boil water and add the noodles. Cook them until they are soft but still firm. Then, drain the noodles. Next, rinse the noodles under cold water. This step is key. Rinsing helps to prevent the noodles from sticking together. Once rinsed, set them aside while you prepare the dressing and salad. For the dressing, gather these ingredients: - 1/4 cup peanut butter (creamy) - 2 tablespoons soy sauce - 1 tablespoon sesame oil - 1 tablespoon honey or maple syrup - 2 tablespoons lime juice - 1 teaspoon sriracha (adjust for heat preference) - 1-2 tablespoons warm water (to thin dressing as needed) In a mixing bowl, whisk together the peanut butter, soy sauce, sesame oil, honey or maple syrup, lime juice, and sriracha. You can use a fork or a small whisk. If the dressing is too thick, add warm water one tablespoon at a time. Mix well until you reach your desired consistency. You want it smooth but not too runny. Now, it’s time to bring it all together! In a large serving bowl, combine the cooked noodles and chopped vegetables: - 1 red bell pepper, thinly sliced - 1 cup shredded carrots - 1 cup cucumber, julienned - 1 cup red cabbage, shredded - 1/2 cup fresh cilantro, chopped - 1/4 cup green onions, sliced Gently mix all the ingredients. This step ensures that every bite has a bit of everything. Next, pour the peanut dressing over the noodles and vegetables. Toss the salad gently. You want to make sure everything gets a nice coating of that delicious dressing. For a final touch, you can top the salad with chopped roasted peanuts. This adds an extra crunch, making it even more enjoyable. If needed, adjust the seasoning with more soy sauce or lime juice. Now you are ready to enjoy your fresh and flavorful Thai peanut noodle salad! To get the most authentic taste, choose high-quality peanut butter. Look for the kind that contains only peanuts and salt. This gives a rich and natural flavor. Next, balance your dressing. Use fresh lime juice for brightness and sriracha for a kick. Adjust these to match your taste. A little tartness and spice make all the difference. Prep your vegetables in advance. Slice your bell peppers, shred your carrots, and julienne your cucumber. You can store these in the fridge until you’re ready to use them. Also, store your noodles separately. This keeps them from clumping together. Rinse them under cold water after cooking. This helps keep them light and fluffy. For a great presentation, serve the salad in a large bowl or platter. Garnish with extra cilantro and peanuts on top. This adds color and texture. You can also add lime wedges on the side. They look nice and give a fresh burst of flavor. For those who love crunch, try adding crispy shallots or sesame seeds as a garnish. Enjoy this fresh and colorful dish! {{image_2}} You can easily boost the protein in your Thai Peanut Noodle Salad. Grilled chicken, shrimp, or tofu add great flavor and texture. If you want a vegetarian option, tofu works well. You can pan-fry it for a crispy edge. For an easy method, use pre-cooked shrimp. Just toss them in with the other ingredients. Feel free to mix in other vegetables too. Snap peas, carrots, or bell peppers add crunch and color. You can also use seasonal veggies like zucchini or radishes. This keeps the salad fresh and exciting. Look for what’s in season at your local market. Each season brings new flavors to explore. If you want a lower-calorie dressing, try using less peanut butter. You can mix in more lime juice or vinegar for tang. For a vegan version, swap honey with maple syrup or agave nectar. These options still keep it sweet while making it plant-based. Adjust the sriracha to make it milder or spicier based on your taste. For the full recipe, check out the detailed steps earlier in the article. Your Thai peanut noodle salad can stay fresh in the fridge for about three to five days. To keep it tasty, store it in an airtight container. This helps lock in flavors and prevents it from drying out. If you add the dressing right away, it may get soggy. Instead, keep the dressing separate until you’re ready to eat. Freezing this salad is not ideal, but you can do it. However, some ingredients won't hold up well. If you choose to freeze it, make sure to use a freezer-safe container. This will help avoid freezer burn. When you want to eat it, thaw it in the fridge overnight. Avoid refreezing after thawing, as it can change the texture. Enjoy it fresh for the best flavor! To make this salad vegan, swap a few key ingredients. Use maple syrup instead of honey. This keeps the sweetness but makes it plant-based. You can also replace the soy sauce with tamari for a gluten-free option. If you want a creamier dressing, you can use almond or cashew butter instead of peanut butter. Lastly, check your rice noodles. Some brands are vegan, while others may have egg. Look for 100% rice noodles. Yes, you can make the salad ahead of time. Prepare it up to a day in advance. Store the salad and dressing separately. This keeps the noodles and veggies crisp. When you are ready to eat, mix them together. If you want to store it longer, keep the salad in the fridge for up to three days. It may lose some crunch but will still taste great. You can serve this salad with many side dishes. Grilled chicken or shrimp pairs well for added protein. You can also enjoy it with spring rolls for a light meal. For a fresh touch, serve with lime wedges. These add brightness to the flavors. Another great option is a light soup, like miso or vegetable broth. These sides will round out your meal perfectly. Enjoy your culinary adventure with this Thai Peanut Noodle Salad! Thai peanut noodle salad is fresh, flavorful, and easy to make. We covered key ingredients, the dressing, and step-by-step instructions. You learned how to add proteins and other vegetables for variety. Remember to store it correctly to keep it fresh. This salad is versatile, quick, and perfect for busy days. Enjoy making it your own, and share it with friends and family. With these tips, you’ll create a dish everyone will love. Now, get cooking and relish each bite!

Thai Peanut Noodle Salad Fresh and Flavorful Recipe

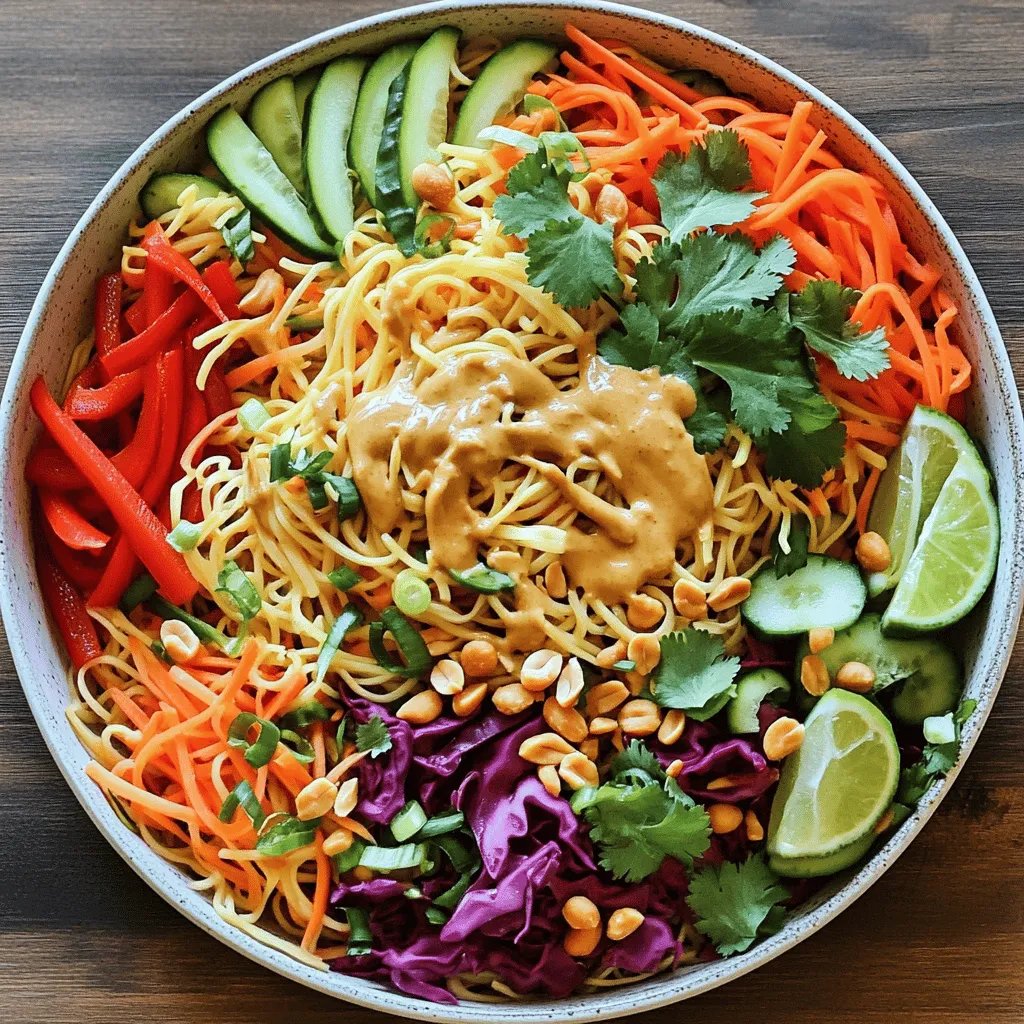
Are you ready to dive into a bowl of vibrant flavors? My Thai Peanut Noodle Salad is the perfect dish

Older posts
Newer posts
← Previous Page1 … Page81 Page82 Page83 Page84 Next →

dsad

© 2026 easycookingbite • Built with GeneratePress

Our Policies

  • Copyright Policy
  • Cookie Policy
  • GDPR Policy
  • Privacy Policy
  • Disclaimer
  • Terms Of Use

More Information

  • Home
  • About
  • Contact
  • Appetizers
  • Dessert
  • Dinner
  • Drinks
©2026, easycookingbite About Back To Top