Are you ready to make your own healthy snacks? In this blog post, I’ll share an easy homemade granola bar recipe that you can customize to fit your taste. You’ll learn what ingredients you need, how to prepare them, and even tips to get the perfect texture. Whether you want chewy or crunchy bars, I’ve got you covered. Let’s dive in and create tasty treats that satisfy your cravings!
Ingredients
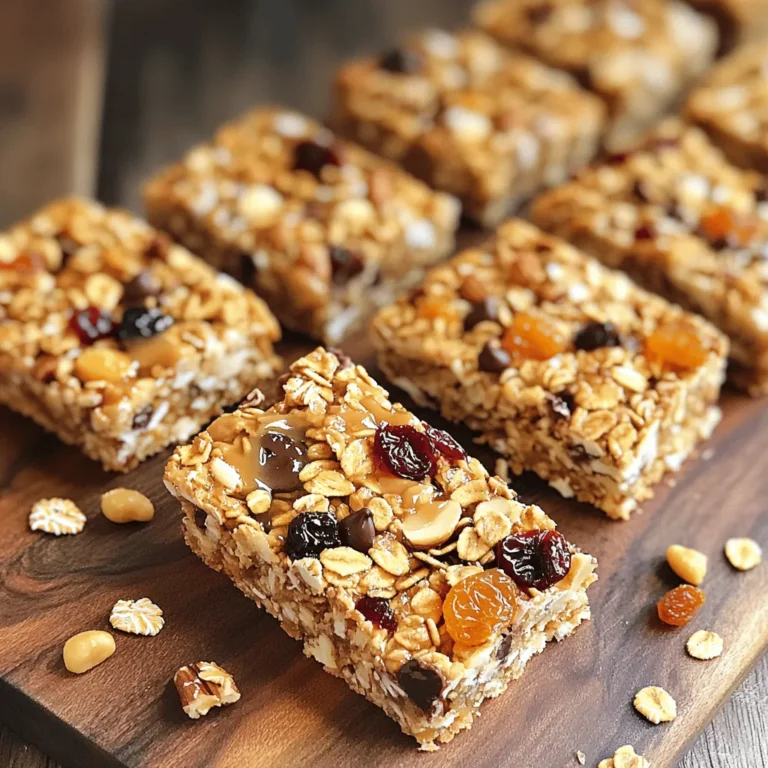
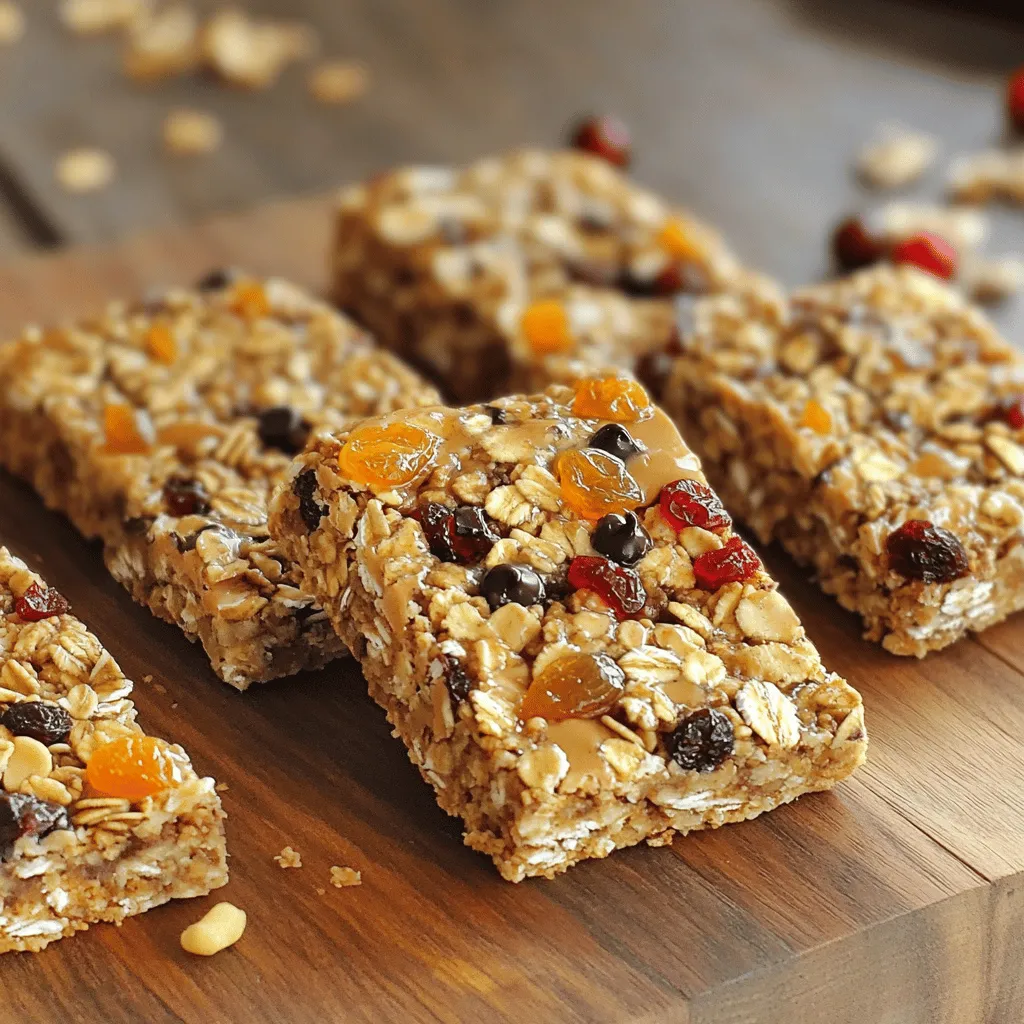
List of Ingredients
To make these tasty granola bars, gather the following items:
– 2 cups rolled oats
– 1 cup mixed nuts (almonds, cashews, walnuts, roughly chopped)
– 1/2 cup honey or maple syrup
– 1/4 cup peanut butter or almond butter
– 1/2 cup dried fruits (cranberries, apricots, or raisins)
– 1/4 cup mini dark chocolate chips (optional for a touch of sweetness)
– 1/2 teaspoon vanilla extract
– 1/4 teaspoon sea salt
– 1/4 teaspoon cinnamon
Equipment Needed
You will need a few tools to make this recipe:
– An 8×8 inch baking dish
– Parchment paper
– Mixing bowls
– A spatula
– A microwave-safe bowl
Substitutions for Common Ingredients
You can easily swap some ingredients. Here are a few ideas:
– Use agave syrup instead of honey or maple syrup.
– Sunflower seed butter is a great option in place of peanut butter.
– For nut-free bars, skip the nuts and add seeds like pumpkin or sunflower seeds.
– You can replace dried fruits with chocolate chips or seeds for different flavors.
Feel free to mix and match based on what you like! These swaps keep your homemade granola bars fun and tasty.
Step-by-Step Instructions
Prepping the Baking Dish
Start by preheating your oven to 350°F (175°C). Grab an 8×8 inch baking dish. Line the dish with parchment paper. Leave some paper hanging over the sides. This helps you lift the bars out later.
Mixing Dry Ingredients
In a large bowl, add 2 cups of rolled oats. Toss in 1 cup of mixed nuts. I like almonds, cashews, and walnuts. Add 1/4 teaspoon of sea salt and 1/4 teaspoon of cinnamon. Mix these dry ingredients well. This blend gives your bars flavor and crunch.
Combining Wet Ingredients
Next, take a microwave-safe bowl. Add 1/2 cup of honey or maple syrup and 1/4 cup of peanut butter or almond butter. Heat these together for about 30 seconds. Stir until the mixture is smooth. Then, add 1/2 teaspoon of vanilla extract. This adds a lovely scent and flavor.
Assembling and Baking the Granola Bars
Pour the wet mixture over the dry ingredients. Mix everything until the dry ingredients are well-coated. Fold in 1/2 cup of dried fruits and 1/4 cup of mini dark chocolate chips, if you want some sweetness. Transfer this mixture to the lined baking dish. Press it down firmly using the back of a spatula or your damp hands. Bake for 20 to 25 minutes until the edges turn golden. Let the bars cool completely in the dish. Once cool, lift them out using the parchment paper. Cut them into bars or squares.Store the bars in an airtight container at room temperature for about a week.
Tips & Tricks
Ensuring Proper Texture
To get the best texture in your granola bars, stick to the right mix. Use rolled oats for chewiness. Chopped nuts add crunch. The honey or maple syrup acts as glue, holding everything together.
How to Make Bars Chewier or Crunchier
Want chewier bars? Add more nut butter or honey. This keeps them soft. For crunchier bars, bake them a bit longer. You can also use less nut butter. The choice is yours!
Tips for Pressing the Mixture
Pressing the mixture is key. Use damp hands or a spatula to pack it down. Make sure it is even across the dish. A tight press helps the bars stay together. If they’re loose, they may crumble when cut.
Variations
Nut-Free Granola Bar Options
If you or someone you know has nut allergies, don’t worry! You can still make tasty granola bars. Replace the mixed nuts with seeds like pumpkin or sunflower seeds. These seeds add crunch and good nutrients. You could also use puffed rice or oats for extra texture. This nut-free version keeps the bars safe and delicious.
Flavor Variations (Chocolate, Coconut)
Want to mix things up? You can add fun flavors! For a chocolate twist, stir in mini chocolate chips. They melt and add a sweet touch. If you love coconut, add shredded coconut. This gives your bars a tropical flavor. You can even blend the two! Try half chocolate and half coconut for a fun treat.
Protein-Packed Additions
Need more protein in your snack? Add protein powder to the mix. A scoop of vanilla or chocolate protein powder works well. You can also use additional nut or seed butters. This gives the bars a creamy texture and boosts protein. Another option is to include hemp seeds or chia seeds. They are small but pack a protein punch!
Storage Info
Best Practices for Short-Term Storage
After you bake your granola bars, let them cool completely. Once cool, cut them into bars or squares. Place them in an airtight container. This keeps them fresh for up to one week. You can store them at room temperature. If your kitchen is warm, the fridge is a good option.
Tips for Freezing Granola Bars
Freezing is a great way to keep granola bars longer. Wrap each bar in plastic wrap. Then, place them in a freezer-safe bag. This helps keep out air and moisture. You can freeze them for up to three months. When you want a bar, take one out and let it thaw. You can enjoy it cold or heat it for a few seconds in the microwave.
How to Tell if They’ve Gone Bad
Check your granola bars for signs of spoilage. If they smell off or look moldy, it’s best to toss them. If they feel very hard or crumbly, they may not taste good anymore. Always trust your nose and eyes. Fresh bars should be chewy and smell yummy.
FAQs
How long do homemade granola bars last?
Homemade granola bars last about one week at room temperature. If you store them in the fridge, they can stay fresh for two weeks. Use an airtight container to keep them safe from air. This helps maintain their taste and texture.
Can I use other sweeteners instead of honey?
Yes, you can use maple syrup or agave syrup. Both options add sweetness and work well in the recipe. If you are vegan, these sweeteners are great choices. Just remember that the flavor might change a bit based on what you choose.
What are the benefits of homemade granola bars?
Making your own granola bars has many benefits. You control the ingredients, which means no hidden sugars or additives. Homemade bars are often healthier than store-bought ones. They can also fit your taste and dietary needs. Plus, they are easy to make and fun to customize.
How do I customize the ingredients for dietary restrictions?
To customize for dietary needs, swap out nuts for seeds if you have a nut allergy. Use gluten-free oats for a gluten-free option. You can also choose different sweeteners or add protein powder. Dried fruits can be replaced with seeds or fresh fruits. This makes the bars fit your diet perfectly.
Making homemade granola bars is easy and fun. We covered the basic ingredients, equipment, and how to substitute items. I shared detailed steps for mixing and baking, plus tips for texture and flavor. You can try many variations, from nut-free options to protein-packed bars. Remember to store them well for freshness. Homemade granola bars are tasty and offer many health benefits. Enjoy creating your own unique snacks!

