Indulge in the sweet and creamy bliss of No Bake Chocolate Peanut Butter Fudge. With just a few simple ingredients, you can whip up this decadent treat in no time! Whether you’re a busy parent or a novice cook, this easy recipe is perfect for you. Dive into my guide for essential tips, tricks, and variations to make it your own. Let’s get started on this delightful journey!
Ingredients
Complete Ingredients List
To make this no bake chocolate peanut butter fudge, you will need:
– 1 cup creamy peanut butter
– 1 cup powdered sugar
– 1 cup semi-sweet chocolate chips
– 1/4 cup coconut oil
– 1 teaspoon vanilla extract
– 1/4 teaspoon sea salt
– Optional: chopped nuts or sprinkles for topping
Tips for Choosing Ingredients
When picking your ingredients, focus on quality. Choose a creamy peanut butter that you love. Check that it has no added sugar or oils for the best taste. For the chocolate chips, look for semi-sweet ones. They should melt well and add a rich flavor. If you can, opt for organic ingredients. This choice can enhance the taste and make your fudge even better.
Substitutions for Common Allergens
If you have allergies, you can still enjoy this fudge. Use sunbutter in place of peanut butter. This works well for nut allergies and keeps the creamy texture. For powdered sugar, you can try a sugar-free version if you want to cut back on sugar. If you can’t use coconut oil, look for a light olive oil or vegetable oil. Always check labels for allergens when shopping.
Step-by-Step Instructions
Preparation Overview
Making No Bake Chocolate Peanut Butter Fudge is easy and quick. You only need about 15 minutes to mix the ingredients. Then, let it chill for at least 2 hours. This fudge is rich and creamy. It’s a perfect treat for any occasion!
Detailed Cooking Steps
1. Mix Peanut Butter and Sugar: In a medium bowl, add 1 cup of creamy peanut butter and 1 cup of powdered sugar. Stir them together until the mix is smooth.
2. Melt Chocolate and Oil: In a microwave-safe bowl, place 1 cup of semi-sweet chocolate chips and 1/4 cup of coconut oil. Heat them in the microwave. Do this in 30-second bursts. Stir between each time until the chocolate is melted.
3. Add Flavor: Once the chocolate mix is smooth, add 1 teaspoon of vanilla extract and 1/4 teaspoon of sea salt. Stir until combined.
4. Combine Mixtures: Gently fold the chocolate mixture into the peanut butter mixture. Keep stirring until both are fully mixed and the color is uniform.
5. Prepare the Baking Dish: Line an 8×8 inch square baking dish with parchment paper. Leave some paper hanging over the sides. This helps you lift the fudge out later.
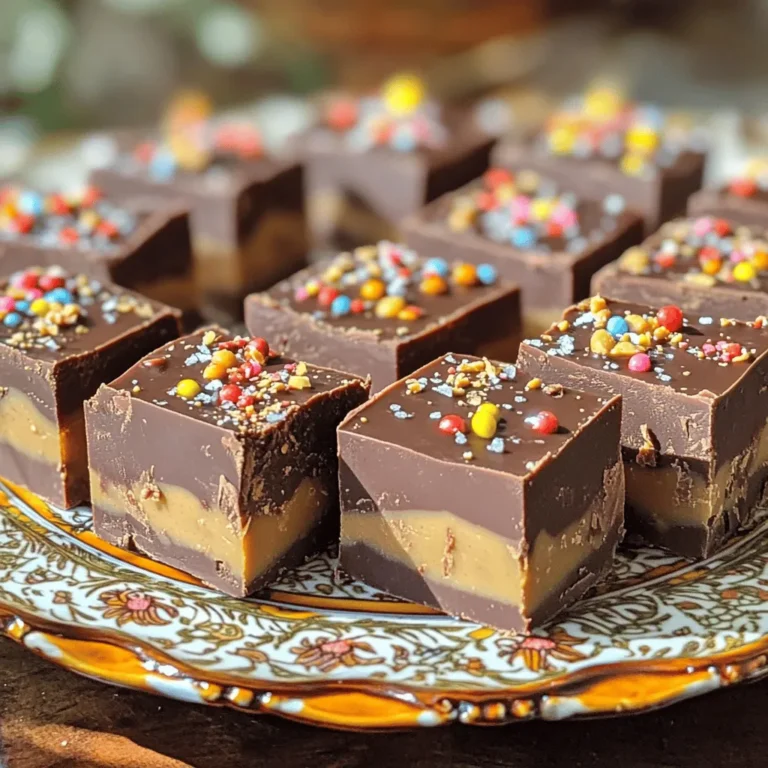
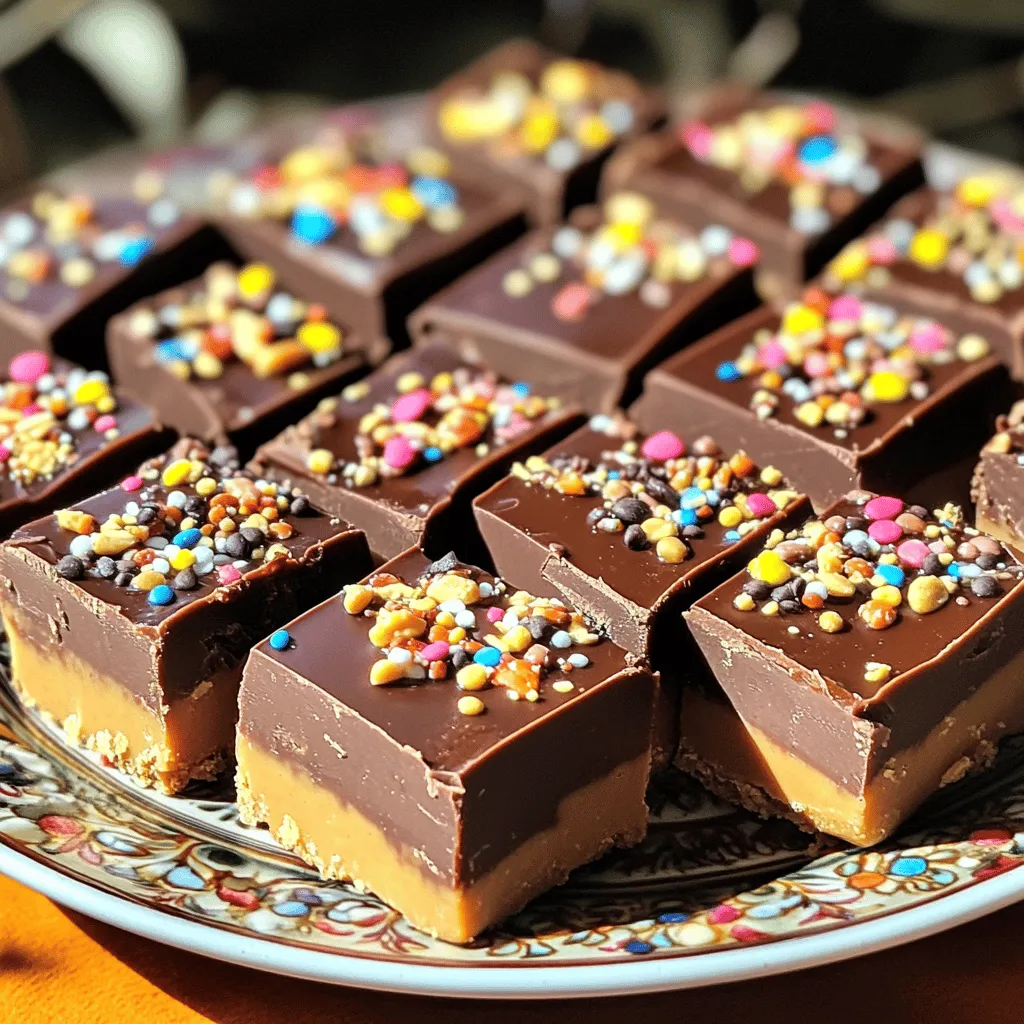
6. Pour and Spread: Pour the fudge mix into the lined dish. Use a spatula to spread it evenly. If you want, add chopped nuts or colorful sprinkles on top for decoration.
7. Chill: Put the dish in the refrigerator. Let it chill for at least 2 hours, or until it is set.
8. Cut and Serve: Once the fudge is firm, lift it out using the parchment paper. Cut the fudge into squares.
Visual Guide or Video Tutorial Links
For a visual guide, check out online videos that show how to make no bake fudge. Seeing the steps can make it even easier!
Tips & Tricks
Common Mistakes to Avoid
When making no bake chocolate peanut butter fudge, some mistakes can happen. One common error is not mixing the peanut butter and powdered sugar enough. If you skip this step, your fudge can end up grainy. Another mistake is overheating the chocolate. Always melt it in short bursts. This helps keep the chocolate smooth. Also, don’t forget to line your baking dish with parchment paper. This makes it easy to lift the fudge out later.
How to Achieve the Perfect Texture
For smooth and creamy fudge, ensure all ingredients are at room temperature. I recommend mixing the peanut butter with the powdered sugar until it is well combined. When melting the chocolate, add coconut oil to keep it silky. The sea salt will enhance the flavors, making every bite delightful. After pouring the fudge into the dish, spread it evenly. This helps it set correctly in the fridge.
Serving Suggestions for Best Presentation
Presentation matters when serving fudge. Cut the fudge into squares for easy serving. I love to place them on a decorative plate. For a touch of flair, drizzle melted chocolate or peanut butter on top. You can also add colorful sprinkles or chopped nuts for texture. This adds visual appeal and makes it fun for guests!
Variations
Flavor Variations
You can change the taste of your fudge easily. Try adding extracts like almond or mint. A teaspoon of espresso powder can give a rich depth. You can also mix in spices like cinnamon for warmth. These small changes can make a big impact on your fudge.
Healthier Alternatives
If you want a healthier fudge, you can use sugar-free ingredients. Try sugar-free powdered sugar or a natural sweetener. You can also replace the chocolate chips with dark chocolate that has less sugar. This keeps the fudge tasty while cutting down on sugar.
Custom Toppings and Mix-ins
Toppings can make your fudge fun and unique. Chopped nuts add crunch, while colorful sprinkles can brighten it up. You can also use mini marshmallows or dried fruits like cranberries. Get creative with what you have on hand!
Storage Info
Best Practices for Storing Fudge
To keep your no bake chocolate peanut butter fudge fresh, store it in an airtight container. This helps prevent it from drying out or absorbing other smells. If you’re stacking fudge, place parchment paper between layers. This keeps it neat and easy to separate. Keep the fudge in the fridge to maintain its firmness. A cool temperature is key for preserving the texture.
Freezing and Thawing Instructions
You can freeze this fudge for longer storage. Cut it into squares before freezing. Wrap each piece tightly in plastic wrap, then place them in a freezer-safe bag. When you’re ready to enjoy, simply remove the fudge from the freezer. Let it thaw in the fridge for a few hours. Avoid thawing at room temperature, which can change its texture.
Shelf Life of No Bake Fudge
When stored properly, this fudge lasts up to two weeks in the fridge. If frozen, it can last up to three months. Always check for any changes in smell or texture before eating. Fudge that looks or smells off should be discarded. Enjoying this sweet treat while it’s fresh will give you the best taste!
FAQs
Can I use crunchy peanut butter instead of creamy?
Yes, you can use crunchy peanut butter. This choice adds texture to the fudge. The chunks of peanuts will give each bite a delightful crunch. Just remember, the fudge may be a bit thicker. Mix it well to ensure the chocolate blends in smoothly.
How do I make fudge without coconut oil?
You can use butter instead of coconut oil. Melt the butter with the chocolate chips. It will create a rich and creamy fudge. You can also try using vegetable oil if you prefer a lighter taste. Adjust the amount to match the original recipe.
What can I do if my fudge is too soft?
If your fudge is too soft, chill it longer. Place it in the fridge for an extra hour. You can also add more powdered sugar. This will help thicken the fudge and improve the texture. If all else fails, you can freeze it for a firmer treat.
This article covers all you need to know about making fudge. We explored ingredients, preparation steps, and tips for the best results. You learned how to avoid common mistakes and how to store your fudge properly. Remember, you can customize flavors and toppings to suit your taste.
In the end, making fudge is about fun and creativity. Get into the kitchen, try new variations, and enjoy your sweet creations! Making fudge is a great way to share joy with friends and family.

