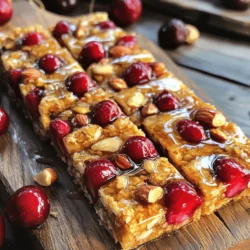
Cherry Nut Energy Bars
Fuel your day with these delicious Cherry Nut Energy Bars! Packed with the goodness of cherries, mixed nuts, and natural sweeteners, this easy recipe comes together in just one hour. Perfect for snacking or a post-workout boost, these bars are not only tasty but also nutritious. Ready to whip up a batch?