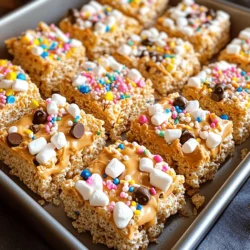
Chewy Rice Krispies Treats
Indulge in the chewy goodness of Rice Krispies Treats with this simple and tasty recipe perfect for all ages! Learn how to achieve that perfect chewy texture and explore fun customization options like colorful sprinkles or chocolate drizzles. From classic flavors to seasonal twists, there's something for everyone. Click through to discover step-by-step instructions and make your own delightful treats today!