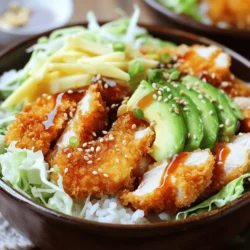
Japanese Katsu Bowls
Craving a tasty and easy meal? Japanese Katsu Bowls are the perfect solution! This delightful dish features crispy breaded chicken served over fluffy rice and topped with flavorful ingredients. In this post, you’ll discover simple steps to create your own katsu bowls, including essential tips and delicious variations for every taste.