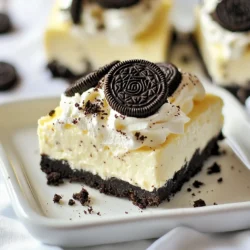
No-Bake Oreo Cheesecake Bars
Delicious and easy-to-make cheesecake bars with a creamy filling and Oreo crust.
Ingredients
- 24 cookies Oreo cookies, crushed
- 4 tablespoons unsalted butter, melted
- 2 cups cream cheese, softened
- 1 cup powdered sugar
- 1 teaspoon vanilla extract
- 1 cup heavy whipping cream
- 10 cookies Oreo cookies, chopped (for mixing in)
- to taste cookies Extra Oreo cookies for garnish
Instructions
- Prepare the crust: In a medium-sized bowl, combine the crushed Oreo cookies with melted butter. Mix until the crumbs are well coated. Press the mixture evenly into the bottom of a 9x9 inch baking dish to form the crust. Set aside to chill in the refrigerator while preparing the filling.
- Make the cheesecake filling: In a large mixing bowl, beat the softened cream cheese with an electric mixer until smooth and creamy. Gradually add the powdered sugar and continue to mix until well incorporated. Add the vanilla extract and mix again until combined.
- Whip the cream: In another bowl, whip the heavy whipping cream until stiff peaks form. Gently fold the whipped cream into the cream cheese mixture until fully blended.
- Incorporate chopped Oreos: Fold in the 10 chopped Oreo cookies into the cheesecake filling, ensuring even distribution.
- Assemble the bars: Remove the crust from the refrigerator and spread the cheesecake filling over the crust, smoothing it out with a spatula.
- Chill: Cover the baking dish with plastic wrap and refrigerate for at least 4 hours, or until firm.
- Serve: Once set, use a sharp knife to cut into bars. For garnish, crumble extra Oreo cookies on top before serving if desired.
Notes
Chill for at least 4 hours for best results.