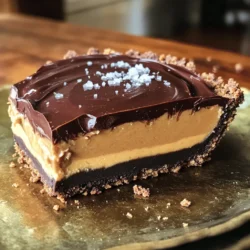
Vegan Peanut Butter Cup Pie
Indulge in a creamy Vegan Peanut Butter Cup Pie that's sure to satisfy your sweet tooth! This easy recipe combines almond flour, cocoa, and peanut butter for a luscious dessert everyone will love. With simple ingredients and straightforward steps, you can whip up this decadent pie in no time. Perfect for special occasions or a fun family treat. Click through to explore this delightful recipe and get ready to impress your guests!